Not being able to use your preferred controls in games may be pretty distracting. Many gamers are used to playing Minecraft with a controller, and Java Edition not supporting gamepads may be an unpleasant surprise. Thankfully, there’s a way around it.
In this guide, you’ll see how to add controller support to Minecraft Java Edition on Windows 10/11, Mac, and Linux computers. Additionally, you’ll see the most common reasons your controller doesn’t connect and share instructions on adding controller support to Minecraft Bedrock.
Using a Third-Party Mod to Add Controller Support to Minecraft Java
As mentioned above, Minecraft Java Edition doesn’t have native controller support. Thus, you must install a third-party mod to use it in the game. One of the most popular mods for this purpose is Controllable by MRCRAYFISH. Below, you’ll find the instructions for setting up controller support using Controllable on different operating systems.
Note: Currently, as of Dec. 22, 2023, the latest version of Controllable (v0.23) supports Minecraft Java v1.20.1 with no updates yet for Minecraft Java 1.20.04. Be sure you use version MC Java v1.20.1 if you want to use Controllable.
Adding Controller Support to Minecraft Java on Windows 10/11
Adding controller support to Minecraft Java on Windows 10/11 depends on what controller you want to use, such as PS4, PS5, Xbox One, Xbox Series X, Nintendo Switch, etc.
Controllable supports the following controllers:
- Sony PS5 Dualsense (USB or Bluetooth)
- Sony PS4 Dualshock (USB or Bluetooth)
- Xbox Series X Controller (USB, Bluetooth, or Wireless Adapter)
- Xbox One Controller (USB or Wireless Adapter)
- Nintendo Switch Pro Controller (Bluetooth only)
- Nintendo Switch JoyCons (Bluetooth only)
- SteamDeck
- Generic XInput Controllers
For PlayStation 4 and 5 controllers, you need the “DS4Windows“ third-party app. You need to use an app since Windows directly supports specific Xbox controllers, not others like PlayStation 4/5 and Nintendo Switch.
For Xbox One controllers, you need the “Xbox One Wireless Adapter.”
For Xbox Series X and S controllers, they work out of the box.
For Nintendo Switch Pro controllers and JoyCons, you must install “BetterJoy“ to convert them to XInput, which the Controllable software requires.
To install a controller in Minecraft Java on Windows, do the following:
- Visit the “Controllable website“ and click the “Files” tab to view your download options.
- Find your Minecraft Java version within the list, then find the latest Controllable release for that version. Remember that the last known Controllable release only supports up to Minecraft Java 1.20.1.
- Click the “Download” icon to save the file to your device. DO NOT open the file yet.
- Copy or move the file to the Desktop.
- Visit the “Minecraft Forge website“ and ensure you select the correct Minecraft Java version on the far left.
- If one exists, click the “Installer” link in the Download Recommended box. Otherwise, you’ll be using the Beta version with potential bugs.
- Click the “Skip” button in the top-right section of the Minecraft Forge Website when it appears. This action skips the advertisement.
- Choose your preferred download location in the file browser (Desktop), then click the “Save” button.
- Confirm you have both the Controllable and Forge install files on your Desktop.
- Ensure you have the latest Oracle Java JRE version.
- If you’ve just updated Minecraft Java, launch the game without any mods and play using the keyboard and mouse for one to two minutes, then you can exit.
- Ensure that Minecraft Java and the Minecraft Launcher are entirely closed.
- Open your file browser and launch the “Forge” jar file.
- In the Forge installation window, select “Install client,” then click “OK.”
- Once you get the successful installation popup, click “OK” to close the Forge installation.
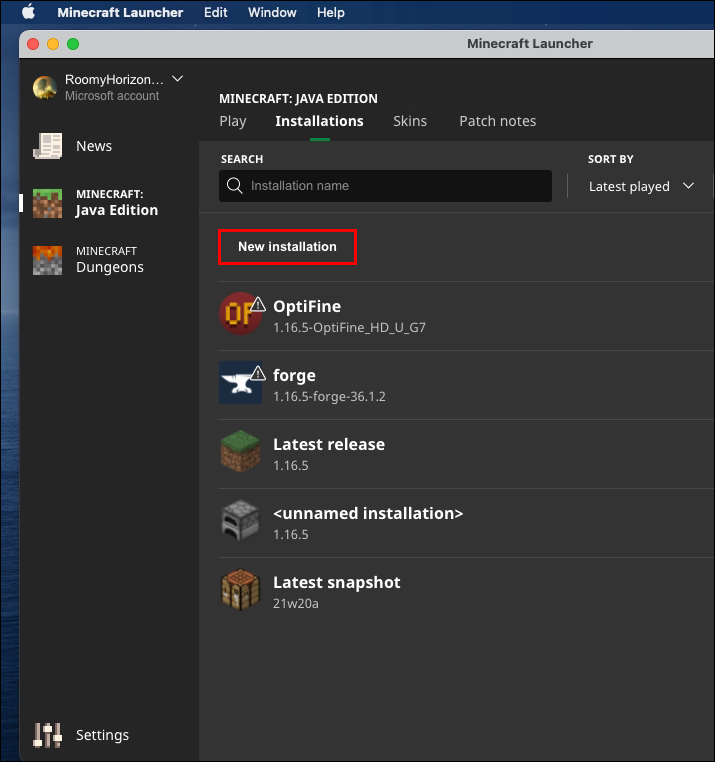
- Open the “Minecraft Launcher” and ensure “Forge” is selected. If Forge isn’t listed, click the “Installations” tab at the top, then add a check to the “Modded” box under Versions.
- Select the “Play” tab at the top, which will not be selected if you were in the Installations tab from the previous step.
- Click the big, green “Play” button towards the bottom, and then select “Play” again in the modified notification window.
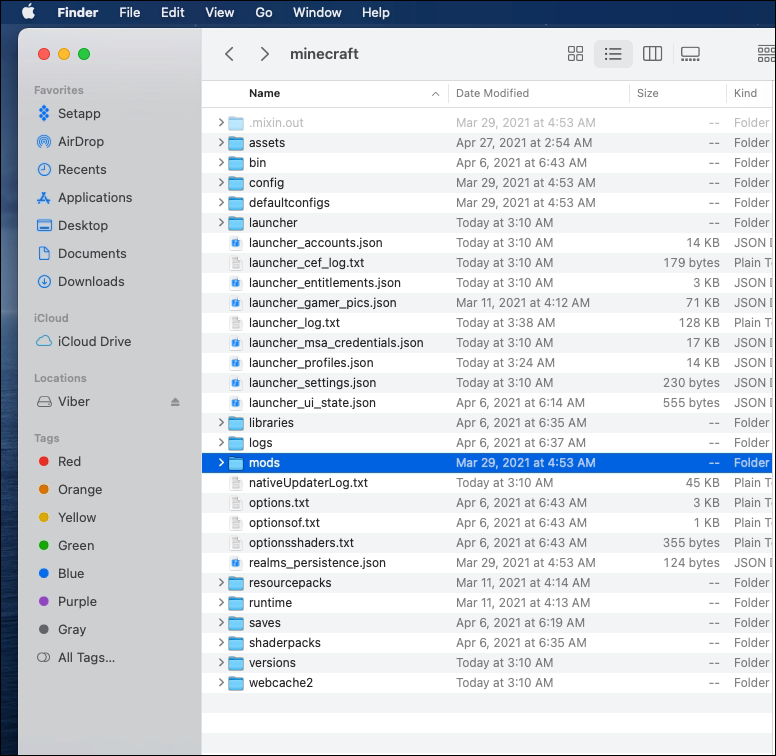
- Click on “Mods” in Minecraft Launcher.
- Choose the “Open Mods Folder” option.
- Copy the “Controllable” mod and paste it into the “Mods” folder that appears.
- Close “Minecraft Java” and relaunch it to refresh the mods list. Controllable should be shown on the left side within the list of mods.
Adding Controller Support in Minecraft on a Mac
To use a controller in Minecraft Java on Mac, follow the instructions below:
- Visit the “Controllable installation page” and click “Download.”

- Wait while the file uploads, then double-click it to run the installation process.
- Cut or copy and paste the Controllable file to your Minecraft “mods” folder by typing “~/Library/Application Support/Minecraft/mods” into the Spotlight search window. If not there, create it.

- Open “Minecraft Launcher.”
- Next, click “Launch Options” followed by “Add New.”
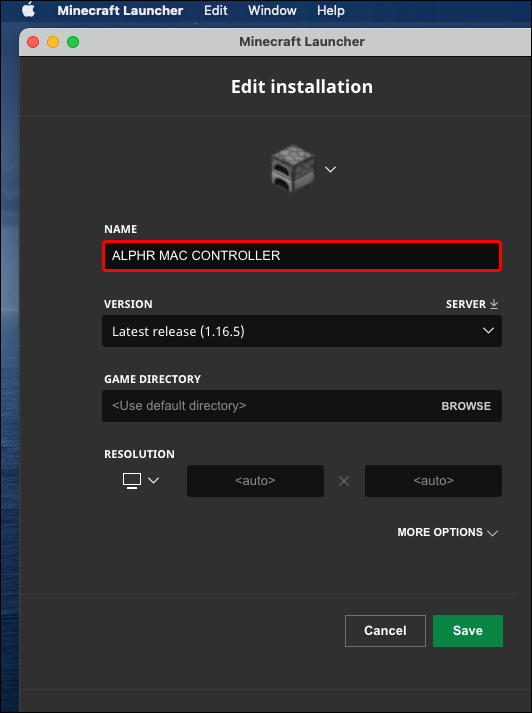
- Fill in the name of your new launch option (e.g., Controllable). Select the “Minecraft version” you’re using for controller support.
- Click the “arrow” icon in the GAME DIRECTORY section, select the “Controllable” file, then click “Open.”
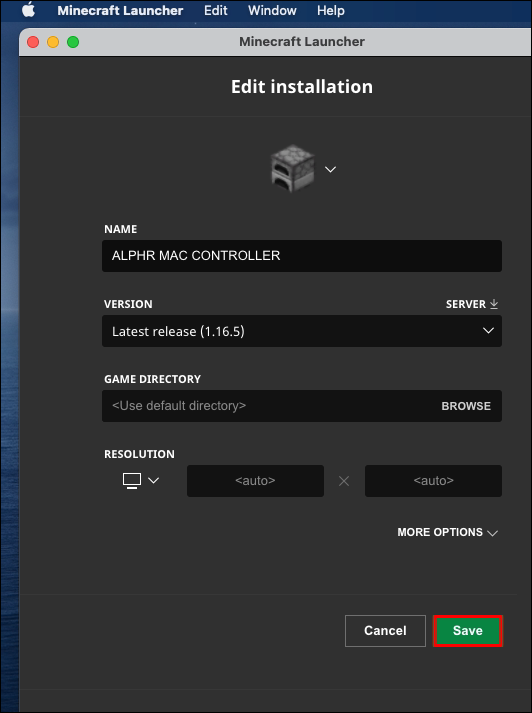
- Click “Save” and navigate back to the main menu.
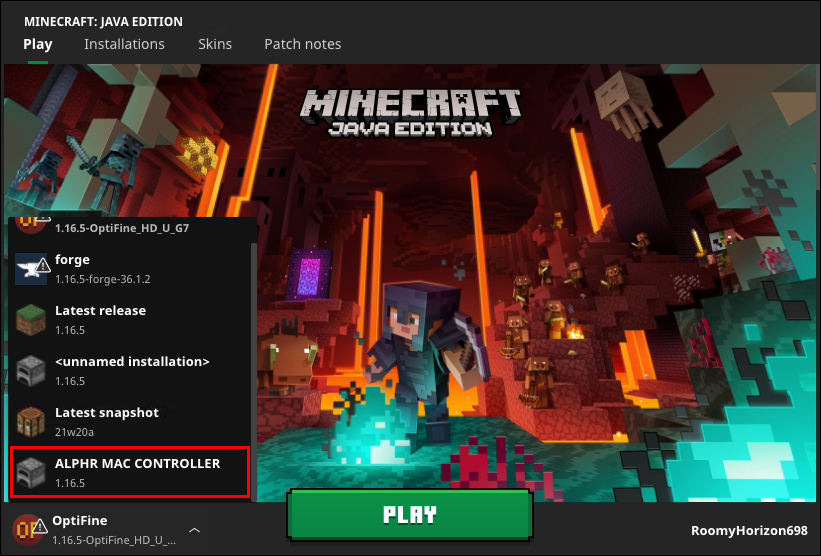
- Click the “upward arrowhead” to the left of the Play button, select the Controllable version, then click the “Play” button.

Adding Controller Support to Minecraft on Linux
Follow the steps below to set up controller support for Minecraft Java on Linux:
- Visit the “Controllable installation page“ and click “Download.”
- Wait for the file to upload and double-click it to run the installation process.
- Copy or move the “Controllable” file to your Minecraft “mods” folder. To find it, type “~/.minecraft” into the “search box” and open or create the “mods” folder.
- Open “Minecraft Launcher,” click “Launch Options,” then select “Add New.”
- Fill in the name of your new launch option (e.g., “Controllable”). Select the correct Minecraft version that will need controller support.
- Click the “arrow icon” next to Game Directory, choose your Controllable file, then click “Open.”
- Click “Save” and navigate back to the main menu.
- Click the “upward arrowhead” to the left of the Play button and select the Controllable version, then click “Play.”
Minecraft Java Controller Support FAQs
Why won’t my controller connect?
If your controller doesn’t connect to your computer, or Minecraft in particular, ensure you didn’t make one of the following mistakes:
· Java: You’re trying to set up a controller for Java Edition through a Steam app shortcut. Java Edition doesn’t have controller support directly, so ensure you’ve installed the required mods.
· Bedrock: You didn’t set up the preferred controls (use Steps 12-13 below in the Minecraft Bedrock FAQ).
· Bedrock: You chose “Activate a Product on Steam” instead of “Add a Non-Steam Game” at the 6th step of the controller FAQ instructions for Minecraft Bedrock below. Repeat the process and select the right option.
· Java/Bedrock: You have Bluetooth issues. Try connecting the controller using a cable.
If none of the abovementioned reasons and solutions work for you, your controller drivers are probably outdated. To update controller drivers on a Windows PC, follow the steps below:
1. Right-click the “Windows Start Menu” and select “Device Manager” or type “devmgmt.msc” in the search box.

2. Once the Device Manager opens, expand the “Xbox Peripherals” section and right-click the name of your controller.
3. From the dropdown menu, select “Update driver.” 
4. Click “Search Automatically” and follow the on-screen instructions to install the newest drivers.
Note: No native controller drivers are available for Mac OS. You’ll have to find the latest drivers for your controller online and install them. The instructions may differ and are beyond the scope of this article.
How do I add controller support to Minecraft Bedrock?
Minecraft Bedrock doesn’t require any third-party mods to use a controller. The setup can be done via Steam. Follow the instructions below:
1. Visit the “official Steam website“ and click the “Install Steam” button in the top right section. 
2. Run the installation file and follow the on-screen instructions.
3. Once Steam is installed, open the application and create an account or log in to an existing one.
4. In the Steam app, click the “Library” tab.

5. Click “Add a Game” at the bottom-left corner of your screen.
6. From the menu, select “Add a Non-Steam Game.” This will open your computer file library.
7. Double-click the “Minecraft Bedrock Edition” launcher file in your Library. The game should now be added.
8. Click the “Big Picture Mode” button at the bottom-right of your Steam Library. It looks like a rectangle with two arrows pointing in opposite directions.
9. Plug in your controller. A cable is required, but you can connect via Bluetooth once everything is set up.
10. Navigate to Steam Settings, then select “Controller Settings.”
11. Tick the “checkbox” for your controller type and return to your Steam Library.
12. Open “Minecraft settings” from the Steam Library and click “Manage Shortcut.” It’s located under the Minecraft picture.
13. Click “Controller Options“ to edit the preferred controls.
Adding Controller Support to Minecraft Java
With the help of the Controllable mod, you should now be able to use your gamepad in Minecraft Java Edition. If the Controllable mod doesn’t work on your device, consider searching for another one. Be cautious when downloading third-party software to protect yourself from viruses and malware. Use an antivirus and a VPN to scan any files before installation. This will let you enjoy Minecraft with your favorite controller without causing harm to your PC, although some viruses and malware go undetected. All you need to do is ensure the source is safe and secure before doing anything.
Disclaimer: Some pages on this site may include an affiliate link. This does not effect our editorial in any way.