SharePoint Online is a popular collaborative platform used by over 200 million users. Its purpose is essentially to manage digitized documents. The SharePoint group’s feature provides administrators with a shortcut to granting multiple users the same permission levels to content and sites. If you need to know how to add users to a SharePoint group, we’ve outlined the steps in this article.
We also discuss how to add external members to a group, how to troubleshoot – should you have problems adding external members. Plus, we’ll cover some other group management tips for using SharePoint Online via Windows and macOS.
How to Add Group Members on SharePoint?
The following steps require group creation and management permissions. To add members to a group using Windows 10:
- Launch SharePoint Online then access your project or site.
- Click on “Share.”
- Alternatively, if the “Members” option is visible, select it then “Add members.”

- Type the names or email addresses of the users you wish to add to the group in the “Enter names, email addresses, or Everyone” text field.
- The names will appear in the confirmation box below; click on a user to add to the box.
- Repeat steps 3 and 4 until all the users you wish to add have been added.
- If you wish to include a note with the invitation, select “Include a personal message with this invitation.”
- Then select “Share.”

To add members to a group using macOS:
- Launch SharePoint Online then access your project or site.
- Click on “Share.”
- Alternatively, if the “Members” option is visible, select it then “Add members.”
- Type the names or email addresses of the users you wish to add to the group in the “Enter names, email addresses or Everyone” text field.
- The names will appear in the confirmation box below; click on a user to add to the box.
- Repeat steps 3 and 4 until all the users you wish to add have been added.
- If you wish to include a note with the invitation, select “Include a personal message with this invitation.”
- Then select “Share.”
How to Remove Group Members on SharePoint?
To remove group members via Windows 10:
- Launch SharePoint Online then access your project or site.
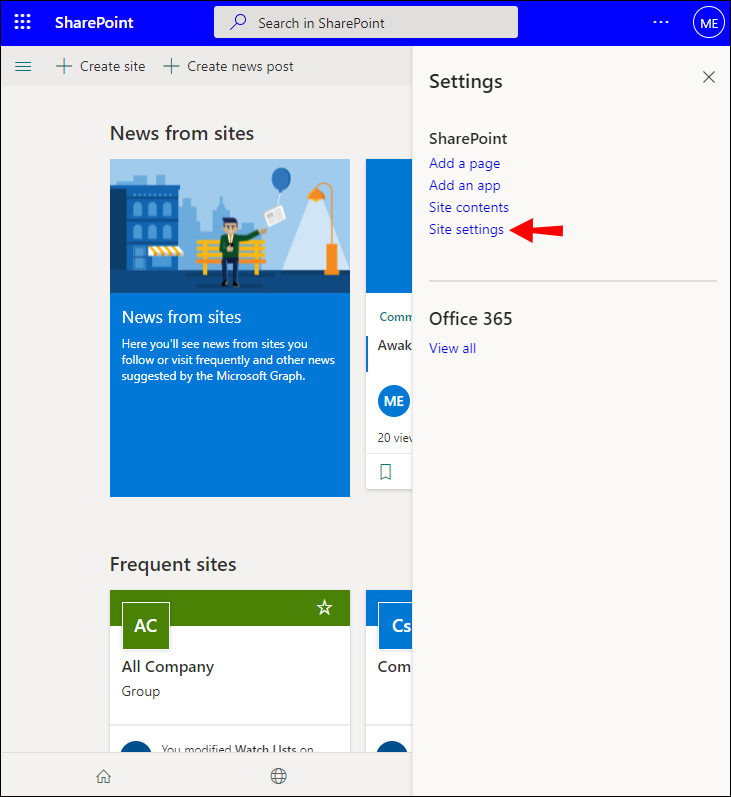
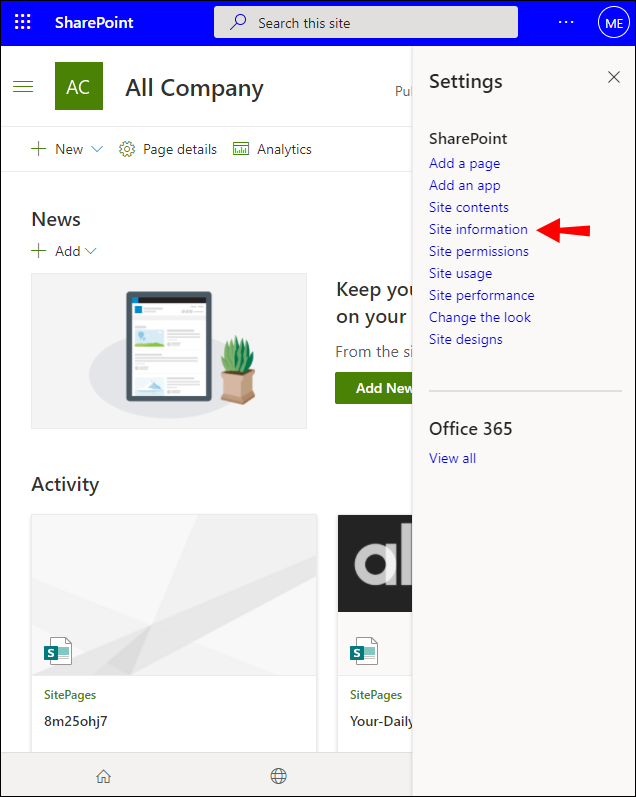
- Select “Settings” > “Site settings.”
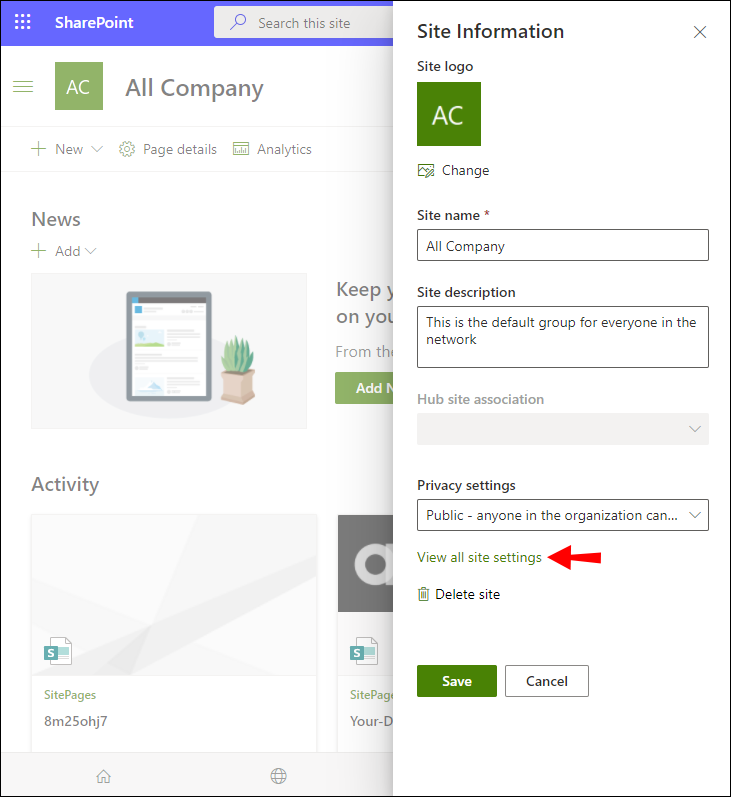
- Select the “Site information” option if it is available instead of “Site settings.”
- Click on “View all site settings.”
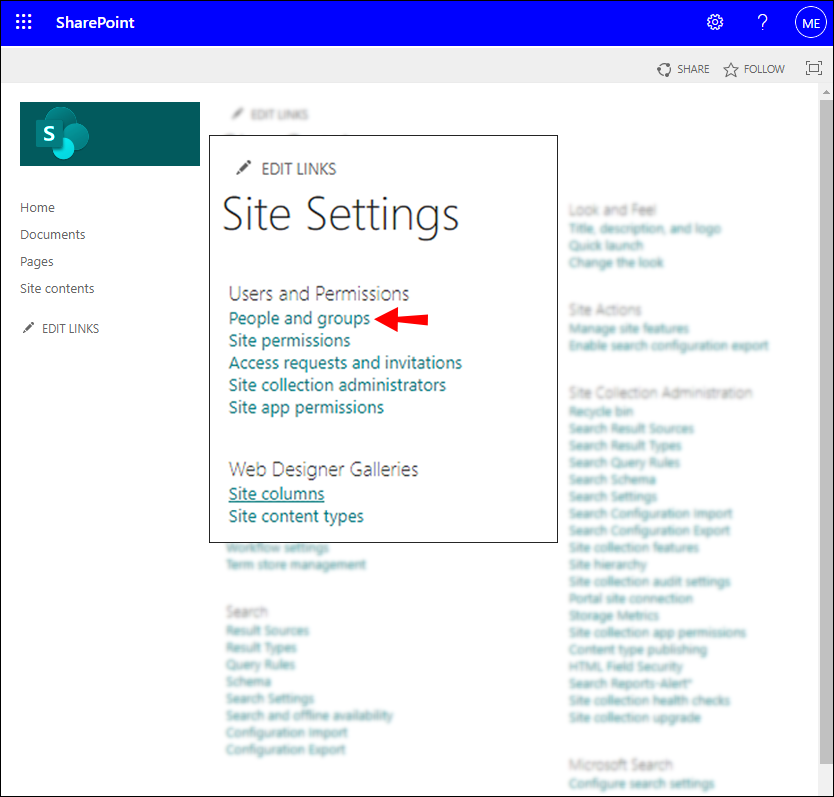
- From “Users and Permissions” on the “Site Settings” page, select “People and Groups.”
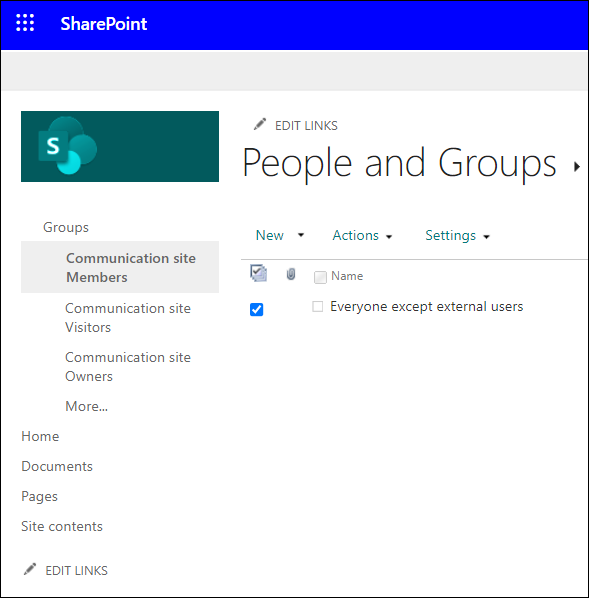
- From “Quick Launch,” click on the group name you wish to remove the users from.
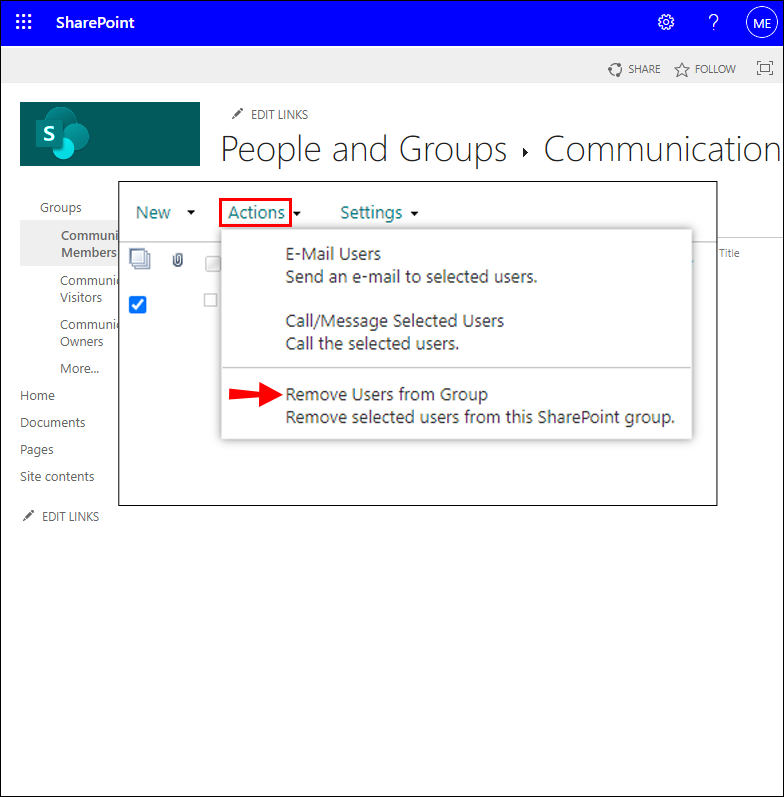
- Check the checkboxes beside the members you want to remove.
- Then hit “Actions” > “Remove Users from Group.”
- Then “OK” to confirm.


To remove group members via macOS:
- Launch SharePoint Online then access your project or site.
- Select “Settings” > “Site settings.”
- Select the “Site information” option if it is available instead of “Site settings.”
- Click on “View all site settings.”
- From “Users and Permissions” on the “Site Settings” page, select “People and Groups.”
- From “Quick Launch,” click on the group name you wish to remove the users from.
- Check the checkboxes beside the members you want to remove.
- Then hit “Actions” > “Remove Users from Group.”
- Then “OK” to confirm.
How to Change Group Permissions on SharePoint?
To change the permissions for a group via Windows 10:
- Launch SharePoint Online then access your project or site.
- Select “Settings” > “Site settings.”
- Select “Site information” if it is available instead of “Site settings.”
- Click on “View all site settings.”
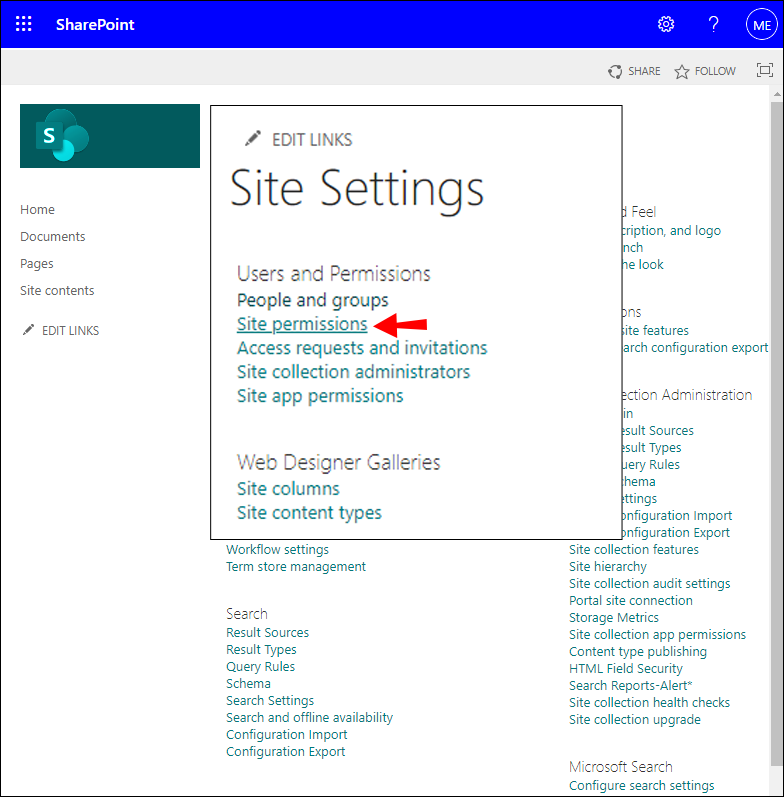
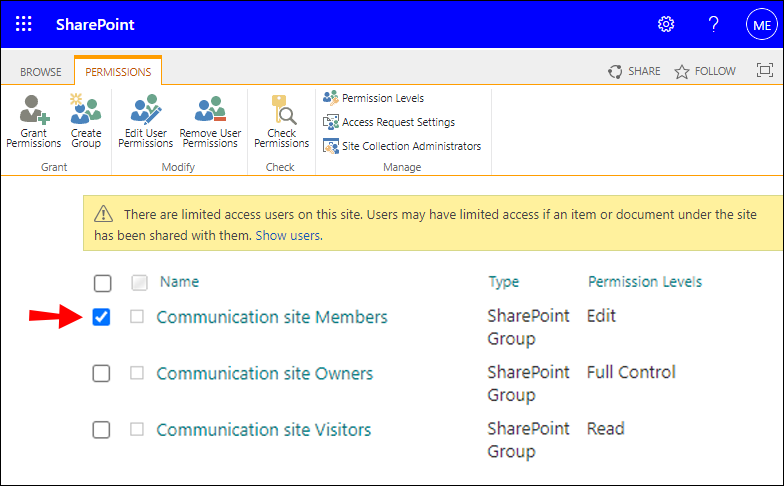
- From “Users and Permissions” on the “Site Settings” page, select “Site Permissions.”
- Check the check box for the group whose permission you want to change.
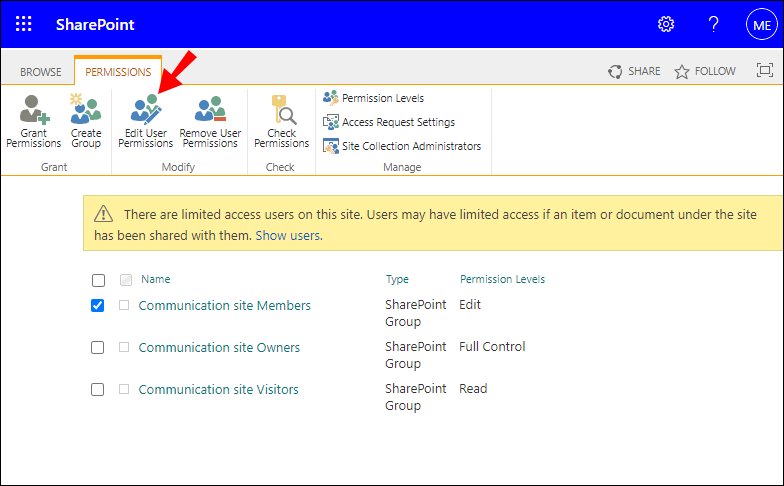
- From the “Permissions” tab, select “Edit User Permissions.”
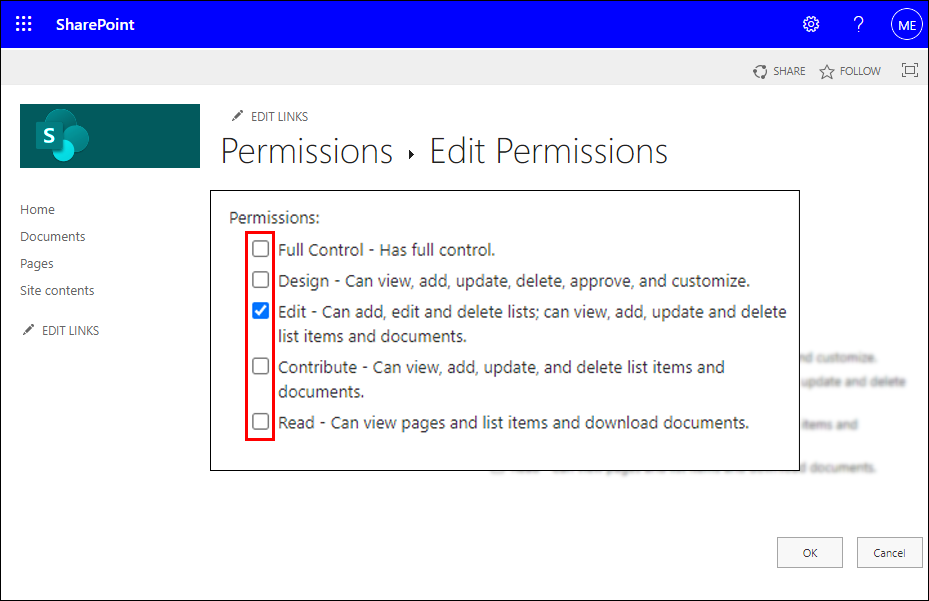
- Check the necessary checkboxes for the new permission level.
To change the permissions for a group via macOS:
- Launch SharePoint Online then access your project or site.
- Select “Settings” > “Site settings.”
- Select “Site information” if it is available instead of “Site settings.”
- Click on “View all site settings.”
- From “Users and Permissions” on the “Site Settings” page, select “Site Permissions.”
- Check the check box for the group whose permission you want to change.
- From the “Permissions” tab, select “Edit User Permissions.”
- Check the necessary checkboxes for the new permission level.
Additional FAQs
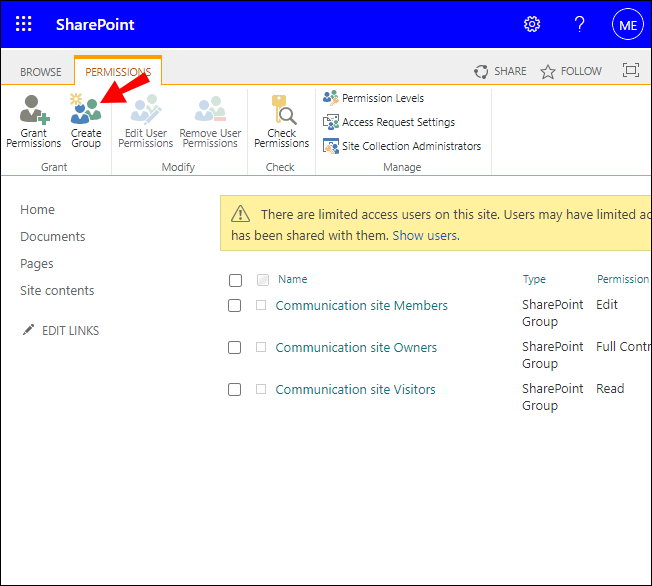
How Do I Create a Group on SharePoint?
To create a SharePoint group via desktop:
1. Launch SharePoint Online then access your project or site.
2. Select “Settings” > “Site permissions.”

3. Select “Advanced Permissions Settings.”
4. Select “Create Group” from the “Permissions” tab.
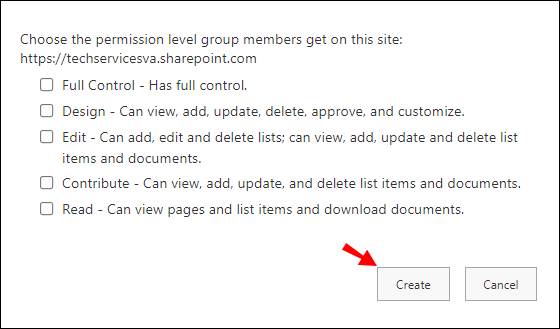
5. In the “Name” and “About me” text fields, enter the name and description for the SharePoint group.
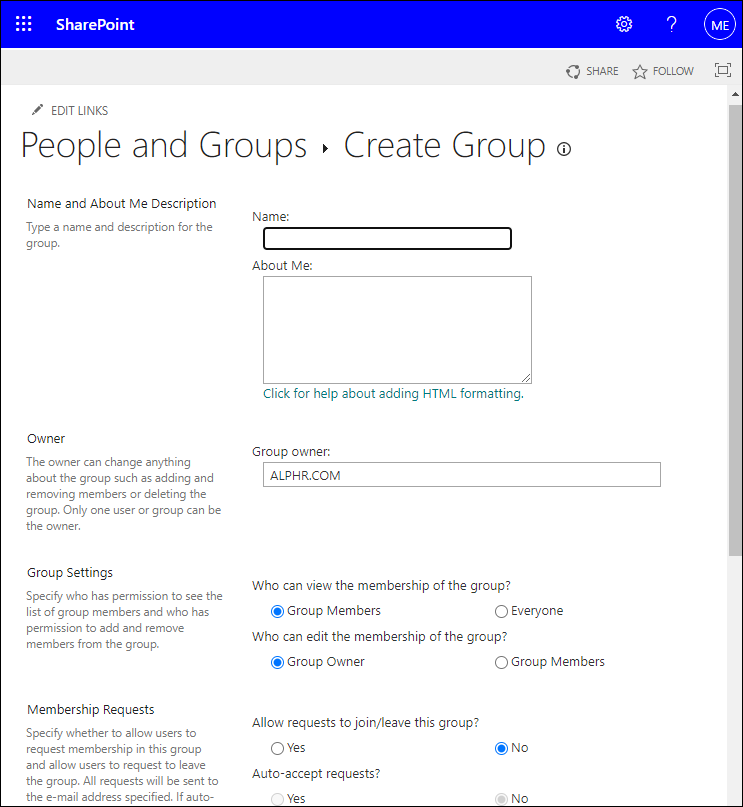
6. State a single owner of this security group in the “Owner” text field.
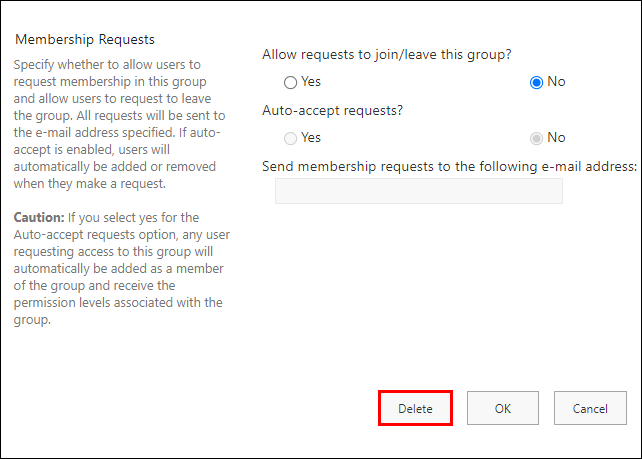
7. Specify who can view and edit the membership details of the group from the “Group Settings” section.
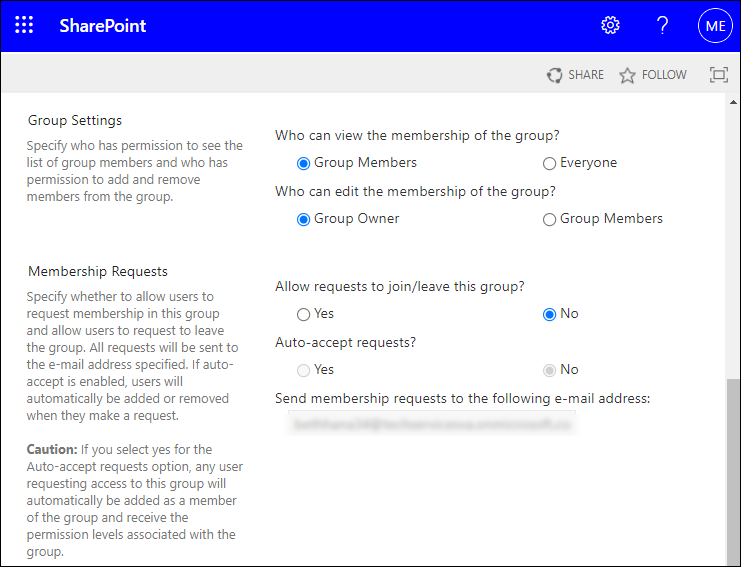
8. From “Membership Requests,” choose the settings for requests to leave or join the group; you can specify the email address for requests.
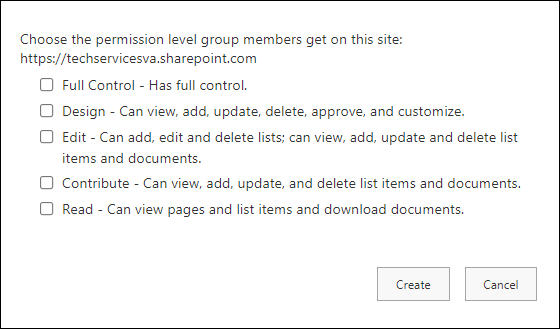
9. Select a permission level from the “Give Group Permissions to this Site” section.
10. Then select “Create.”
How Do I Delete a SharePoint Group?
1. Launch SharePoint Online then access your project or site.
2. Select the “Settings” gear icon then “Site settings.” Select “Site information” if “Site settings” is not displayed.
3. Then select “View all site settings.” On some pages, you might need to select “Site contents” > “Site settings.”
4. Under “Users and Permissions” select “People and Groups.”
5. Now select the name of the SharePoint group you wish to delete.
6. Select “Settings” > “Group Settings.”
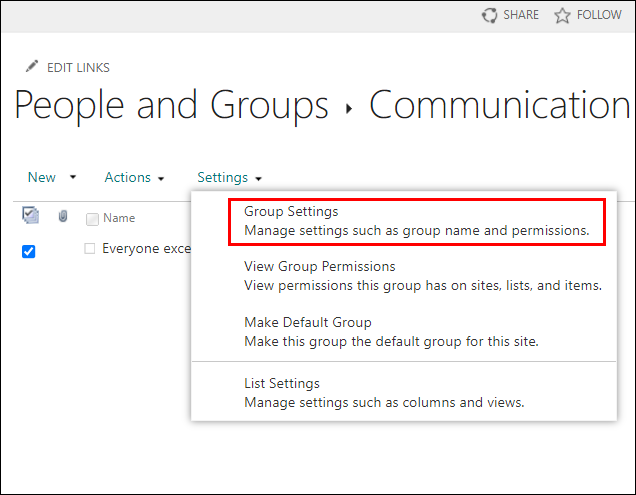
7. Scroll down to the bottom of the page to select “Delete.”
8. Then “OK” in the confirmation window.
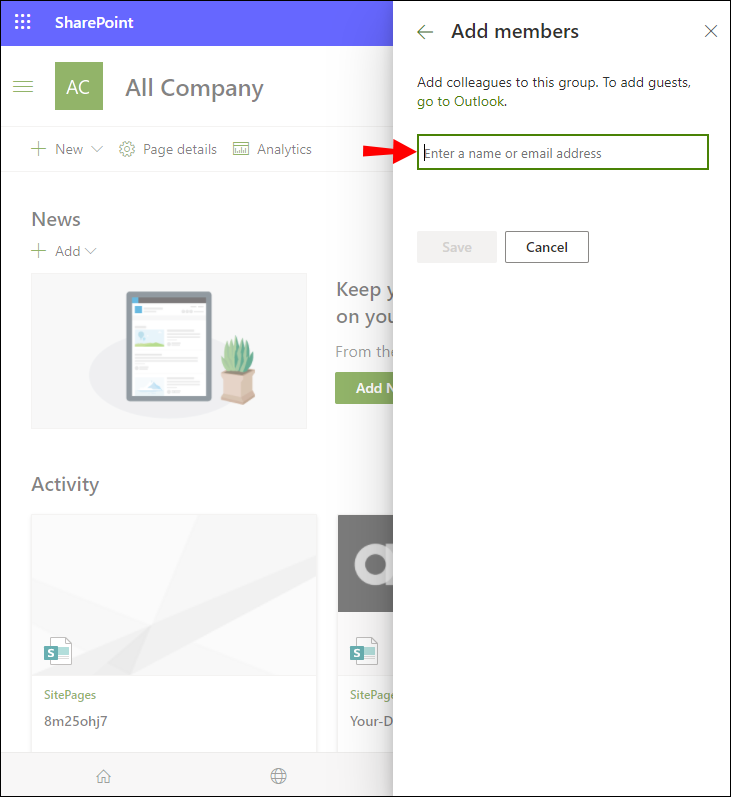
How Do I Add External Members to a SharePoint Group?
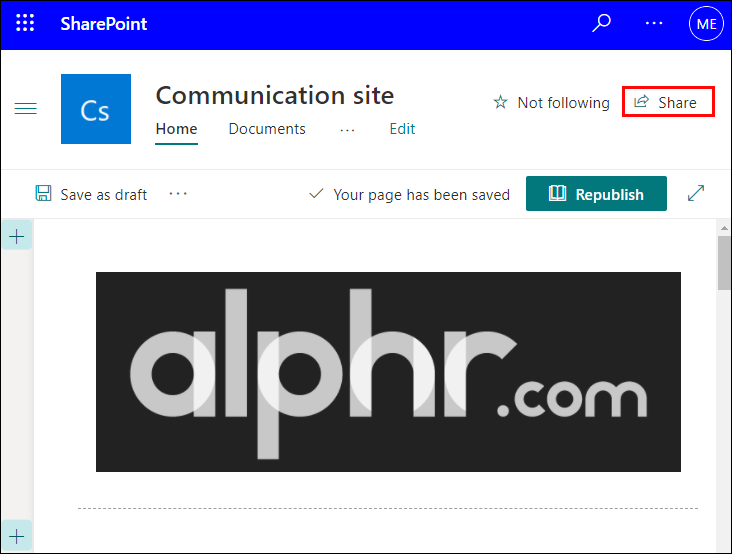
1. Launch SharePoint Online then access your project or site.
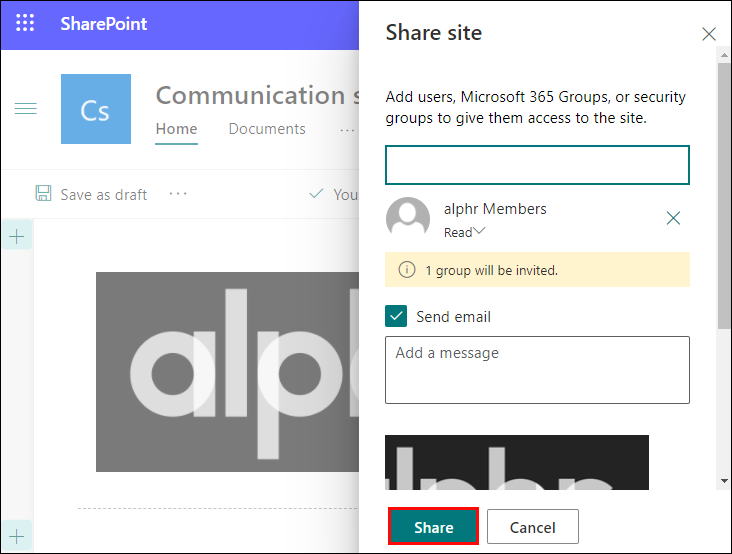
2. Click on the “Share” button from the top-right corner.
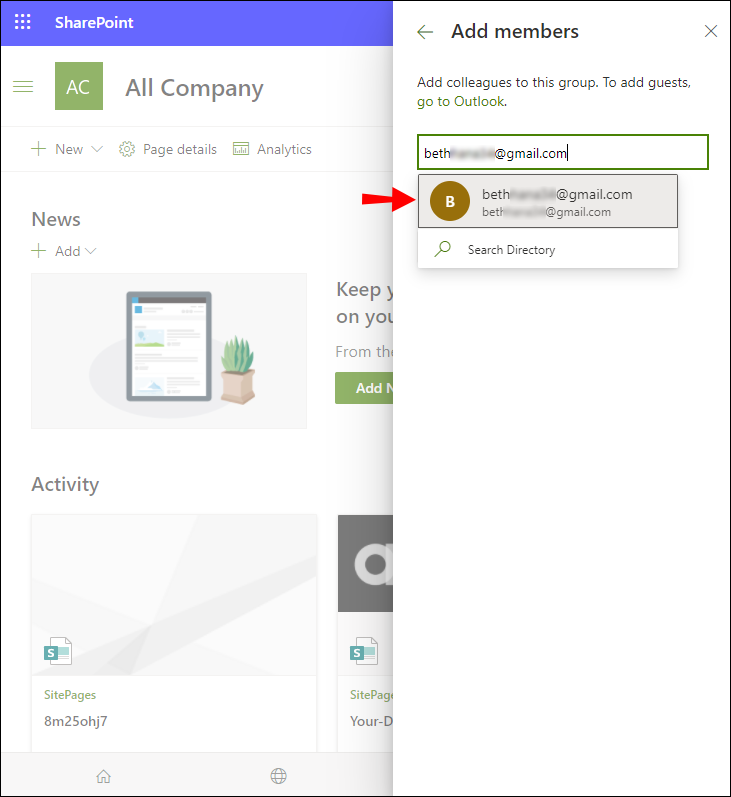
3. From the pop-up window, via the “Invite people” default tab, type the names or email addresses of the users you wish to add to the group; make sure the “Send an email invitation” check box is enabled.
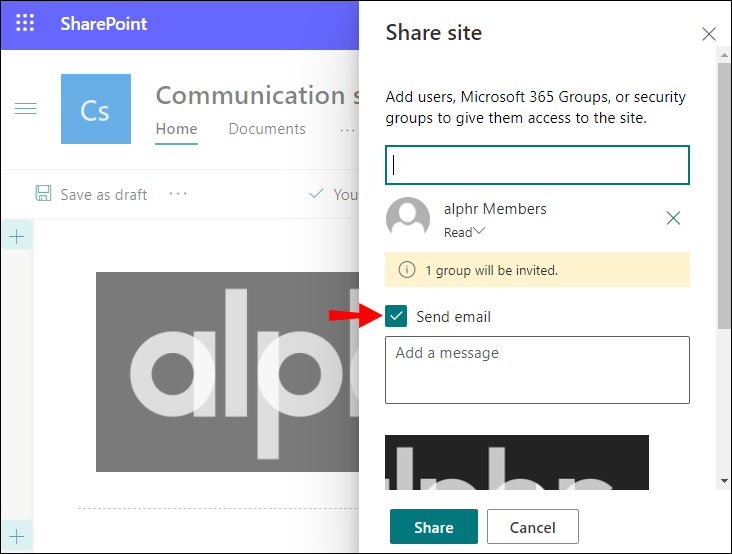
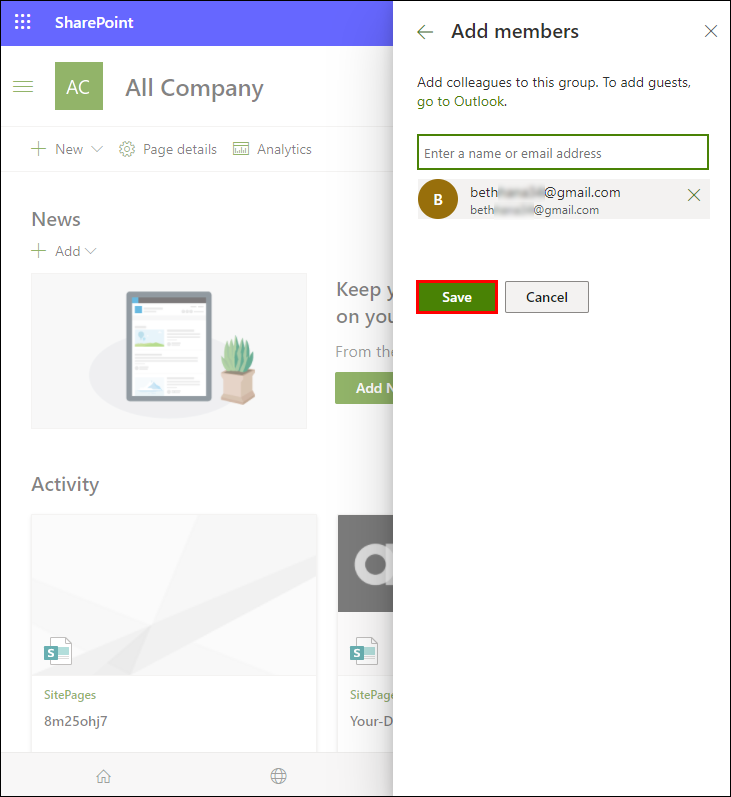
4. To ensure your external members don’t have full permissions, double-check which group and the permission levels are granted. By default, SharePoint sets the “Members” group with “Contribute” permissions.

5. Once complete, hit the “Share” button.
Why Can’t I Add Members to a Group on SharePoint?
If you’re receiving error messages when trying to add external users to a group, or permissions for the user do not work as expected, try the following:
Try Clearing Your Web Browser Cache
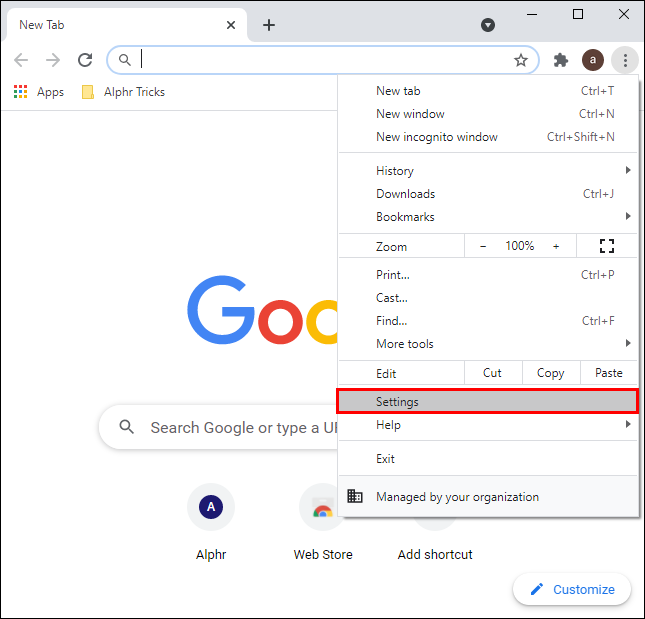
A browser cache storing bad data could be conflicting with SharePoint Online and causing errors. To clear Chrome’s web browser cache:
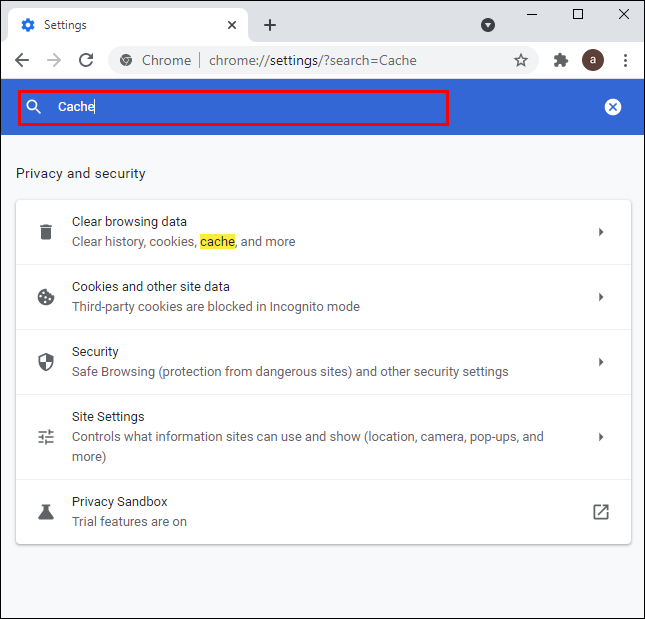
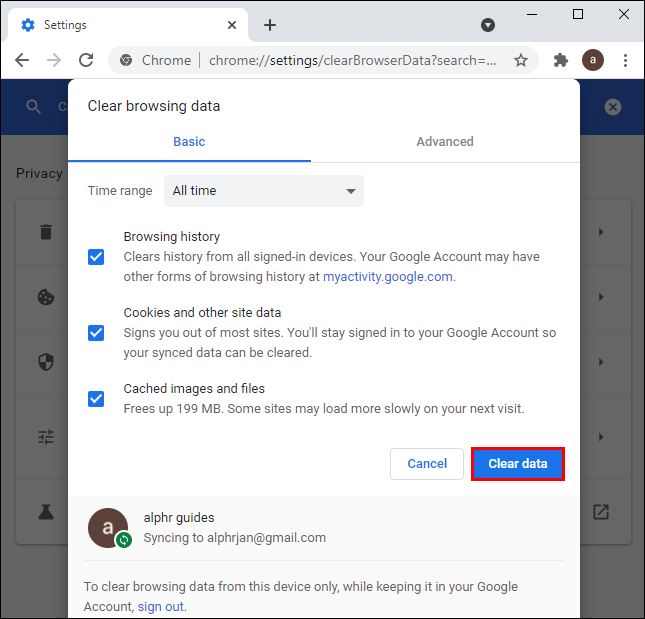
1. Launch Chrome and click on the three-dotted menu icon then “Settings.”
2. Enter “Cache” into the search bar.
3. Select “Clear browsing data.”
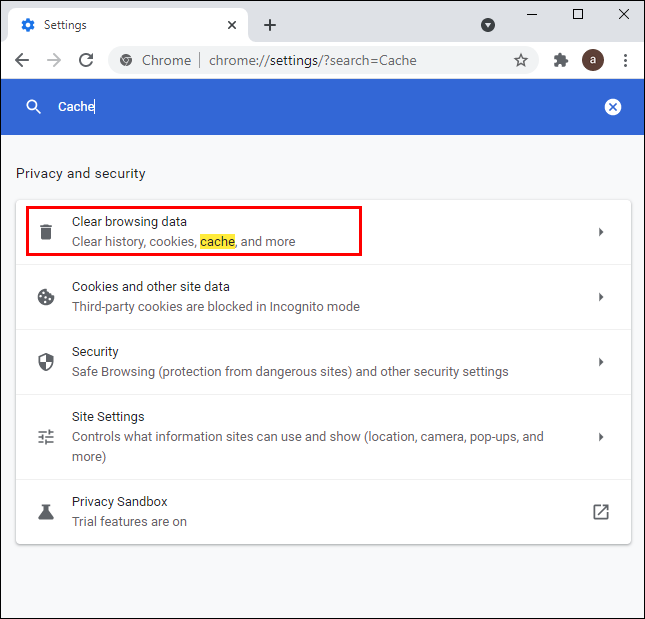
4. From the basic tab, enable “Cached images and files” and “Cookies and other site data”
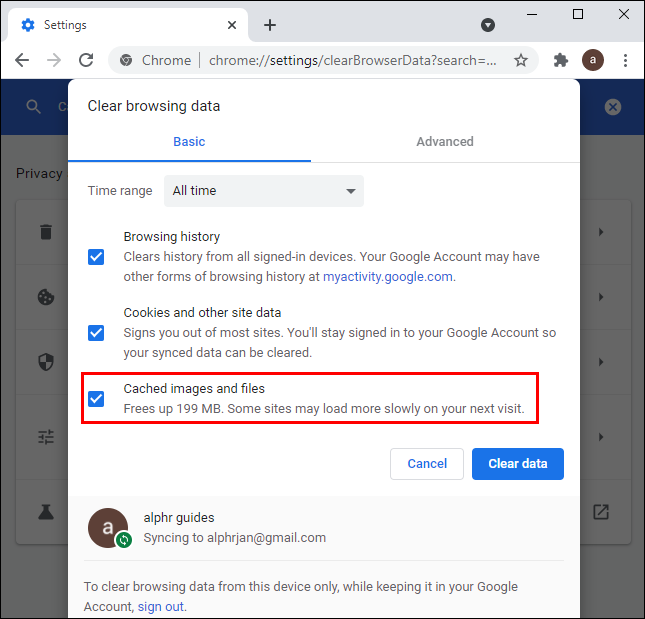
5. Then select the “Clear data” button.
Try Allowing External Content Type Access to Everyone/All Users
To allow external content types access to Everyone or All Users, do the following:
1. Launch SharePoint Online and navigate to the “SharePoint admin center.”
2. Select “secure store.”
3. Click on the “Target Application ID” then “Edit.”
4. From the “Members” section, include the “Everyone” group then scroll down the page to click on “OK.”
5. Navigate back to the “SharePoint admin center” and click on “bcs.”
6. From the “bcs” options, select “Manage BDC Models and External Content Types.”
· Ensure “View” is set to “External Content Types.”
7. Click on the “BDC Model” used for external content then “Set Metadata Store Permissions.”
8. From the “set Metadata Store permissions” dialog box, for the permissions, include “Everyone” then hit “Add.”
9. Click on the “Everyone” group from the listed existing accounts for the “Metadata Store.” Ensure the “Execute” option is enabled.
10. Scroll down the dialog box to enable the following:
· “Propagate permissions to all BDC Models”
· “External Systems and External Content Types in the BDC Metadata Store”
11. Now hit “OK.”
Ensure External Sharing Is Enabled
External sharing may have been disabled on SharePoint, Site, and Office 365. Try re-enabling it to resolve the problem:
1. Launch “Microsoft Online Administration Center.”
2. Underneath “SharePoint Online” click on the “Manage” link.
3. From the left pane of the “Administration center window,” select “Manage Site Collections.”
4. Select “Settings” via the “Administration center dashboard,” then click on “Manage External Users” from the menu.
5. Click on the “Allow” button then “Save” to save the changes.
Granting SharePoint Group Permissions Simultaneously
SharePoint groups offer a quick and effective way to allow multiple people access to content and sites. Group members can be internal or external to an organization. SharePoint Online is integrated with the Microsoft Office suite and has been one of the favored collaborative platforms since 2001.
Now that we’ve shown you how to add members to SharePoint groups and some basic group management tips, we’d like to know whether the group members were able to use their permissions as expected? Did you experience any problems – if so, how did you resolve them? Tell us what you think about SharePoint Online in general in the comments section below.
Disclaimer: Some pages on this site may include an affiliate link. This does not effect our editorial in any way.


