Released over a decade ago, Spigot, or SpigotMC, is a large community dedicated to helping Minecraft enthusiasts create unique servers. The Spigot software is a modified server with performance optimizations and multiple configuration options
Although Spigot is often used to configure internal server values, there’s a lot more an administrator can do to create a unique gaming experience. That’s why adding and removing permissions are among the most commonly used software features.
What You Need to Add Permissions
You can add permissions to your Spigot Minecraft server in many ways. However, the LuckPerms permission plugin is perhaps the easiest way to go about it.
This plugin is compatible with various servers, including CraftBukkit, Spigot, BungeeCord, and others.
LuckPerms enables admins to create groups of players and assign or remove various permissions to customize the playing experience.
One of the main reasons to choose LuckPerms over other plugins is its popularity. Unlike others, this plugin receives frequent updates. Therefore, it has fewer compatibility issues.
Here’s what you need to do to use LuckPerms:
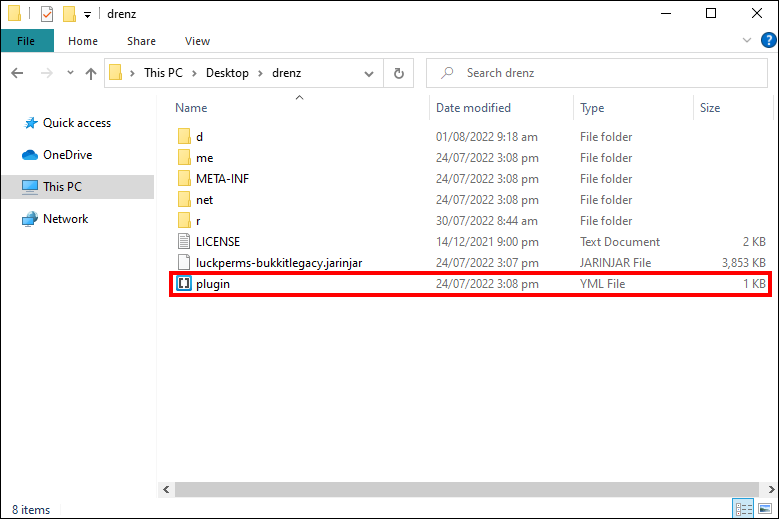
- Download the .jar file from the LuckPerms website.

- Copy the file in your Spigot server’s plugin directory.

Using LuckPerms to Add Permissions
LuckPerms makes things very easy on admins because it comes with a web editor feature.
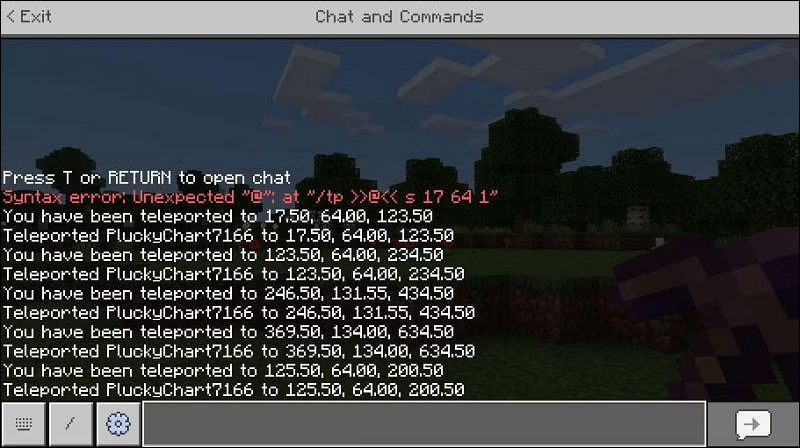
- Bring up the command console in Minecraft.
- Type “
LP editor.” - Input the generated hyperlink in your browser.

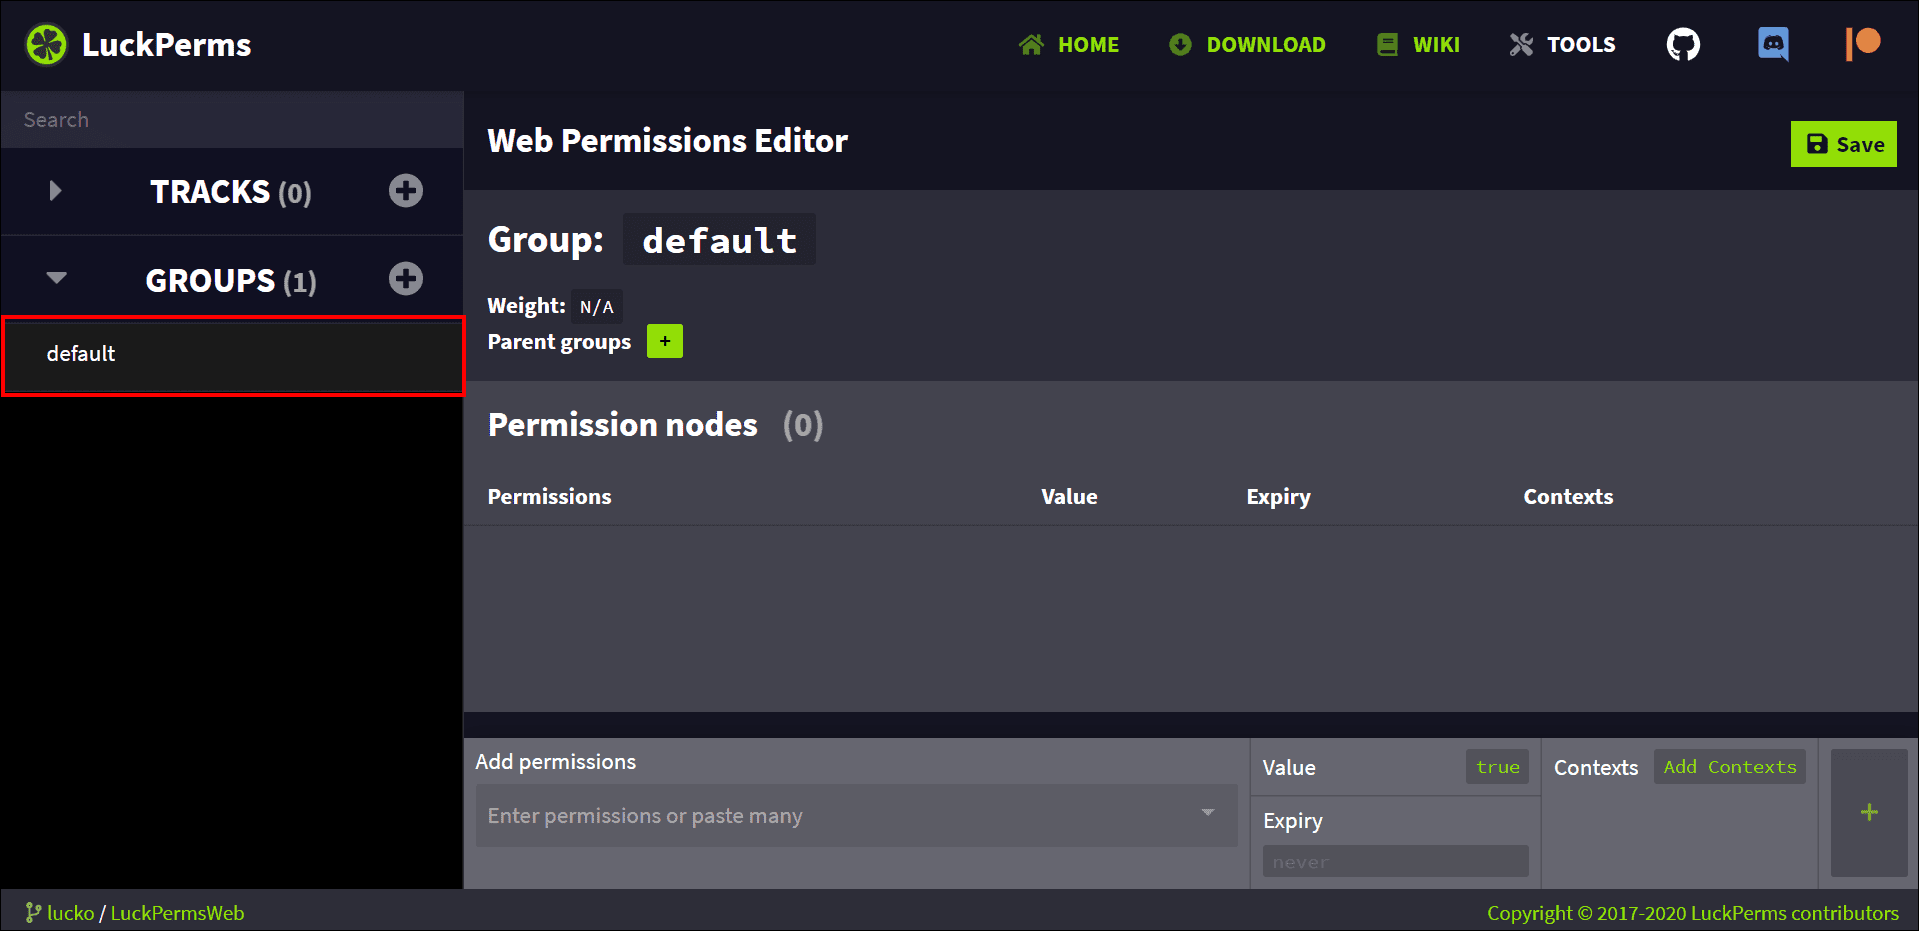
Your server should already have one default group created. Here’s how you can make a new group with custom permissions:
- Click on the “Group” tab.
- Select the “default” group, reserved for new players.
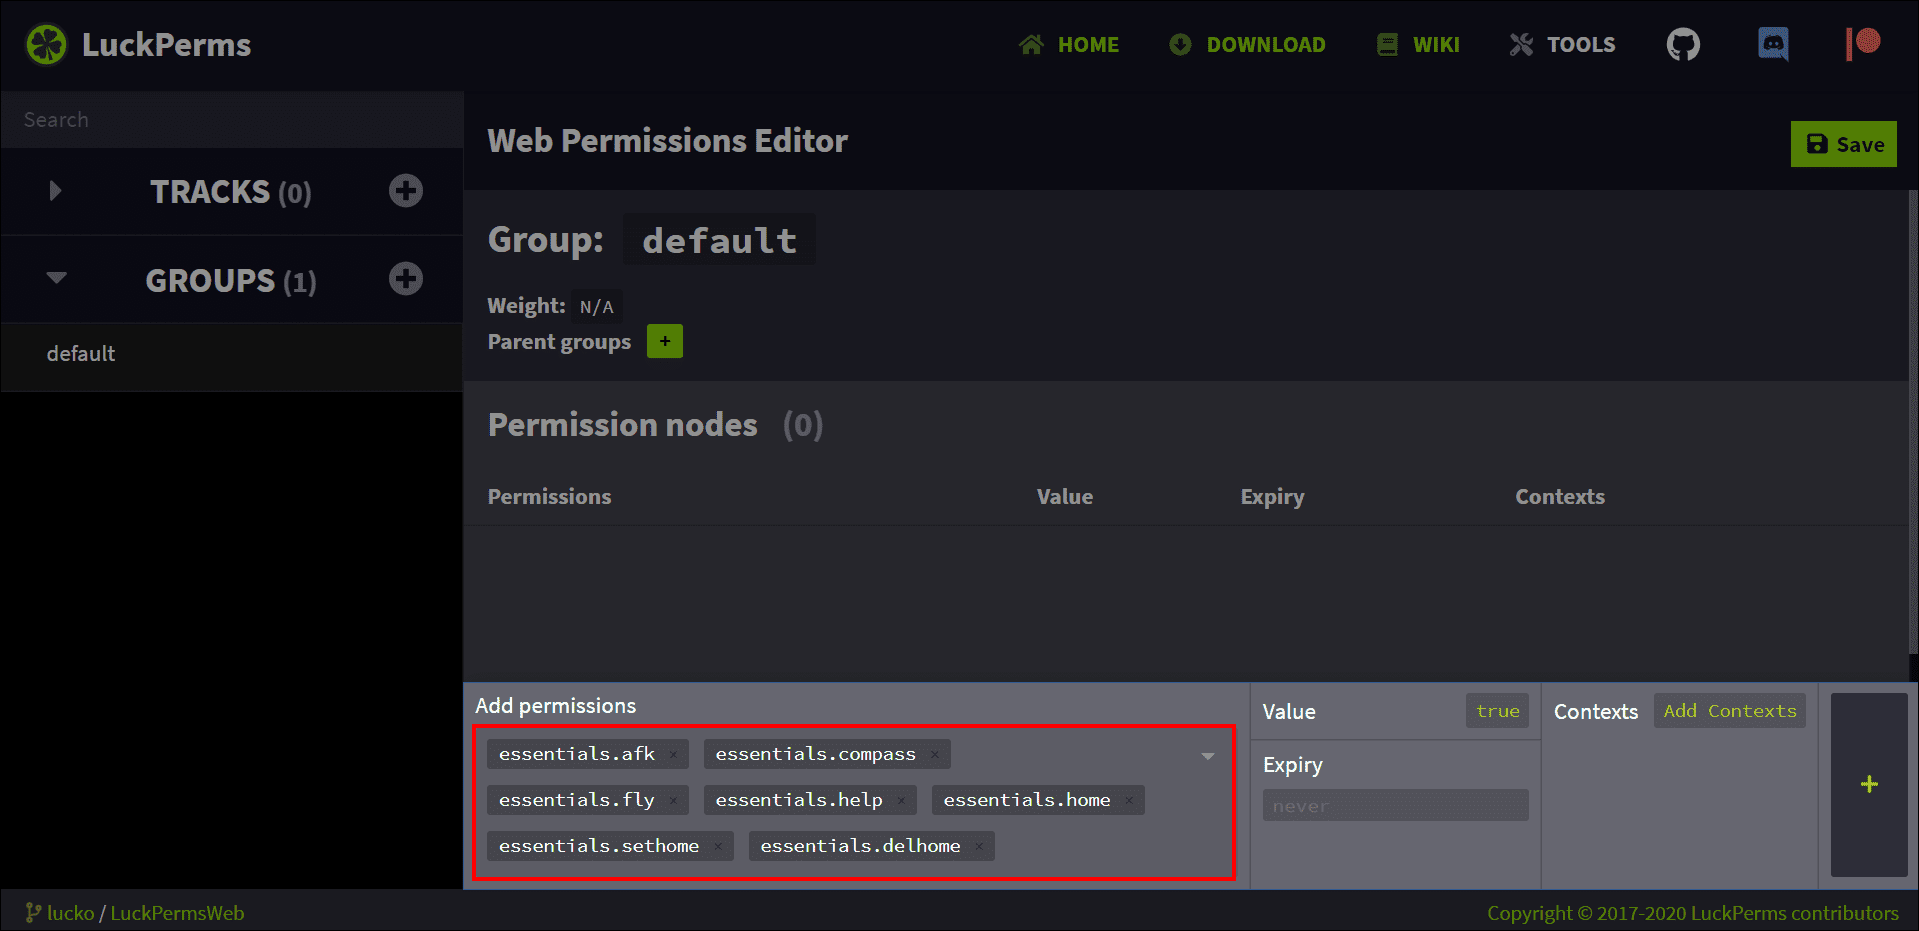
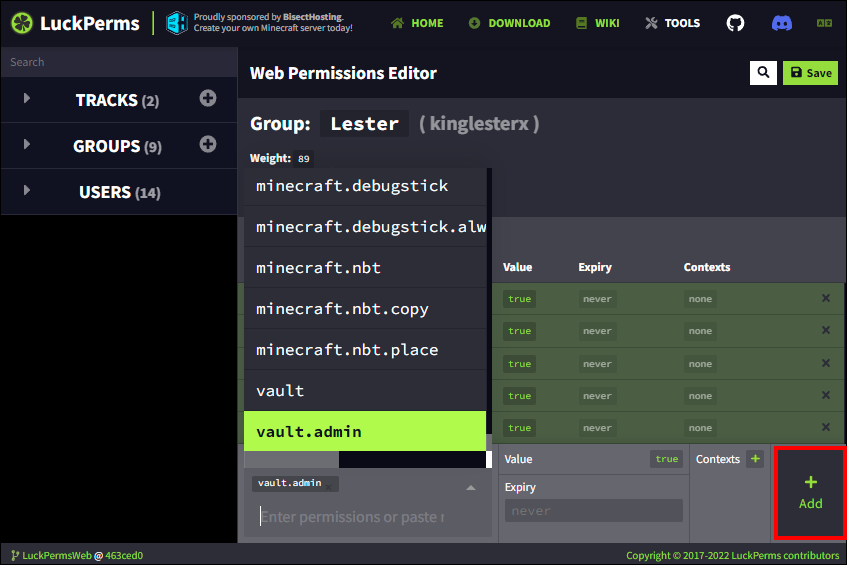
- Click on the “Add permissions” field at the bottom of the editor screen.
- Scroll through the list or type a specific permission.
For example, you can use the “essentials.sethome” permission to allow new players from the “default” group to set a home on the server. - Add as many permissions as you want.
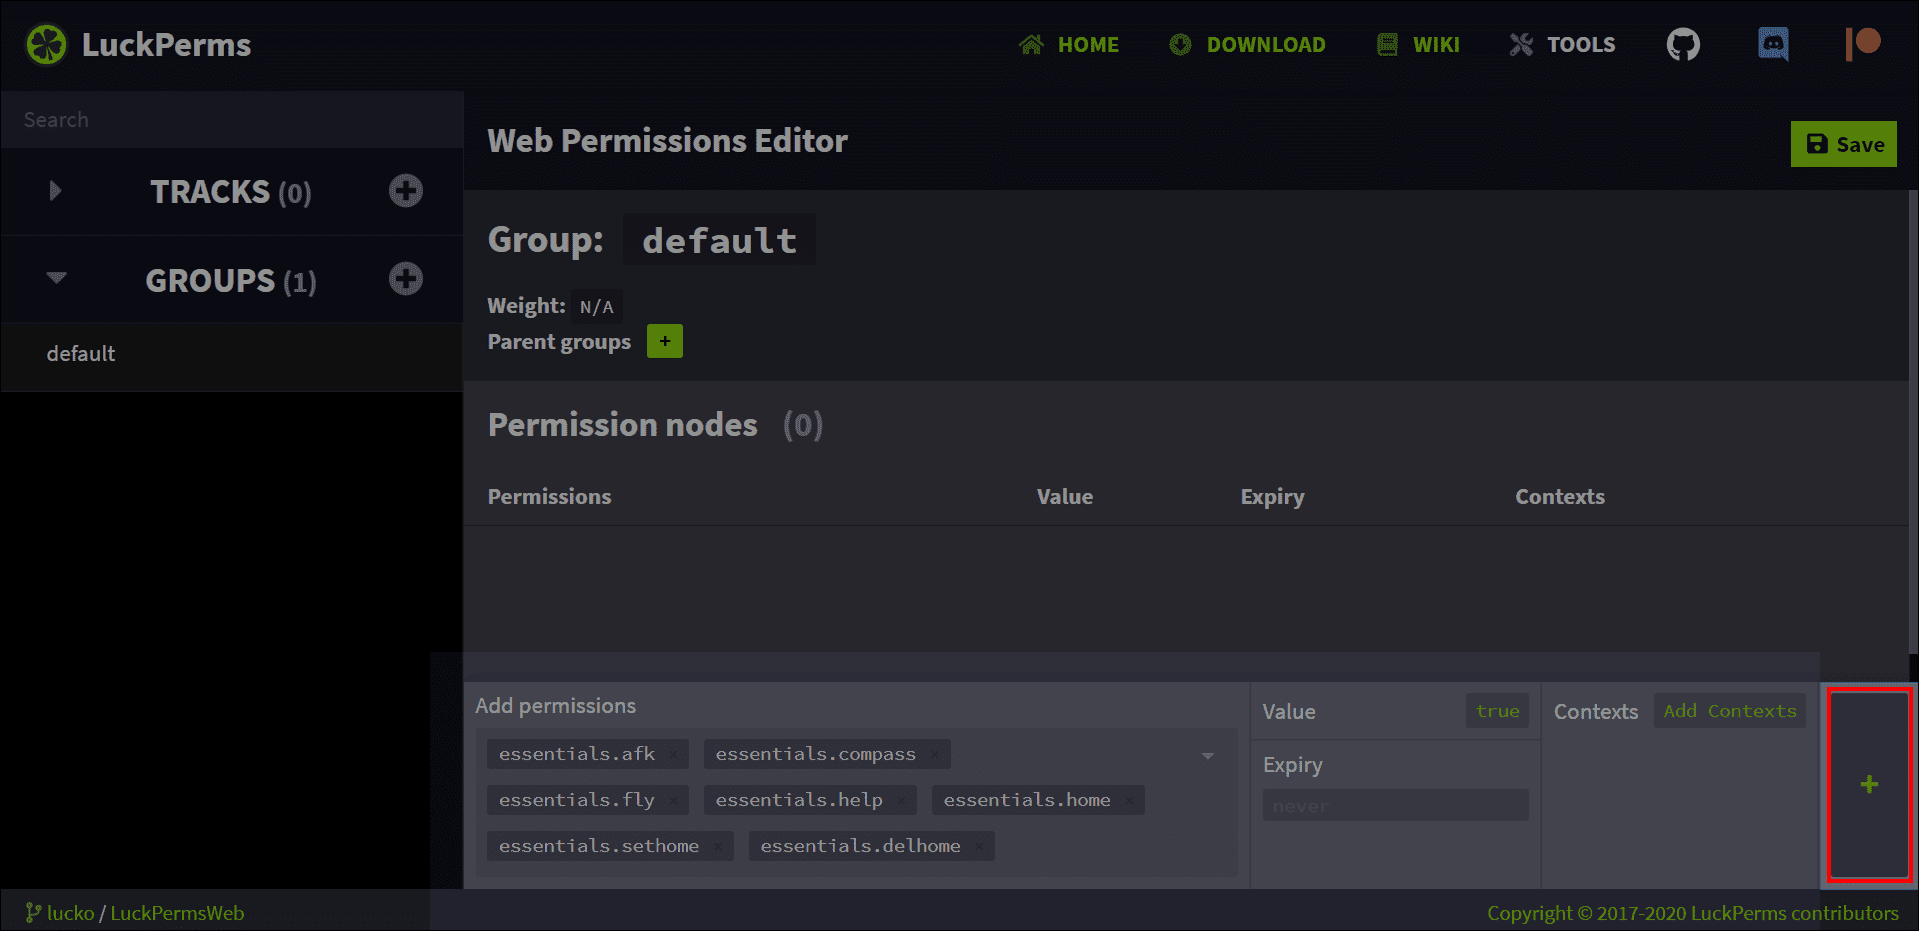
- When finished, click the green “Add” button in the bottom-right corner.
- Go back to the “Add permissions” field.
- Type and add “
meta.default.true.” - Type and add “
weight.1.”


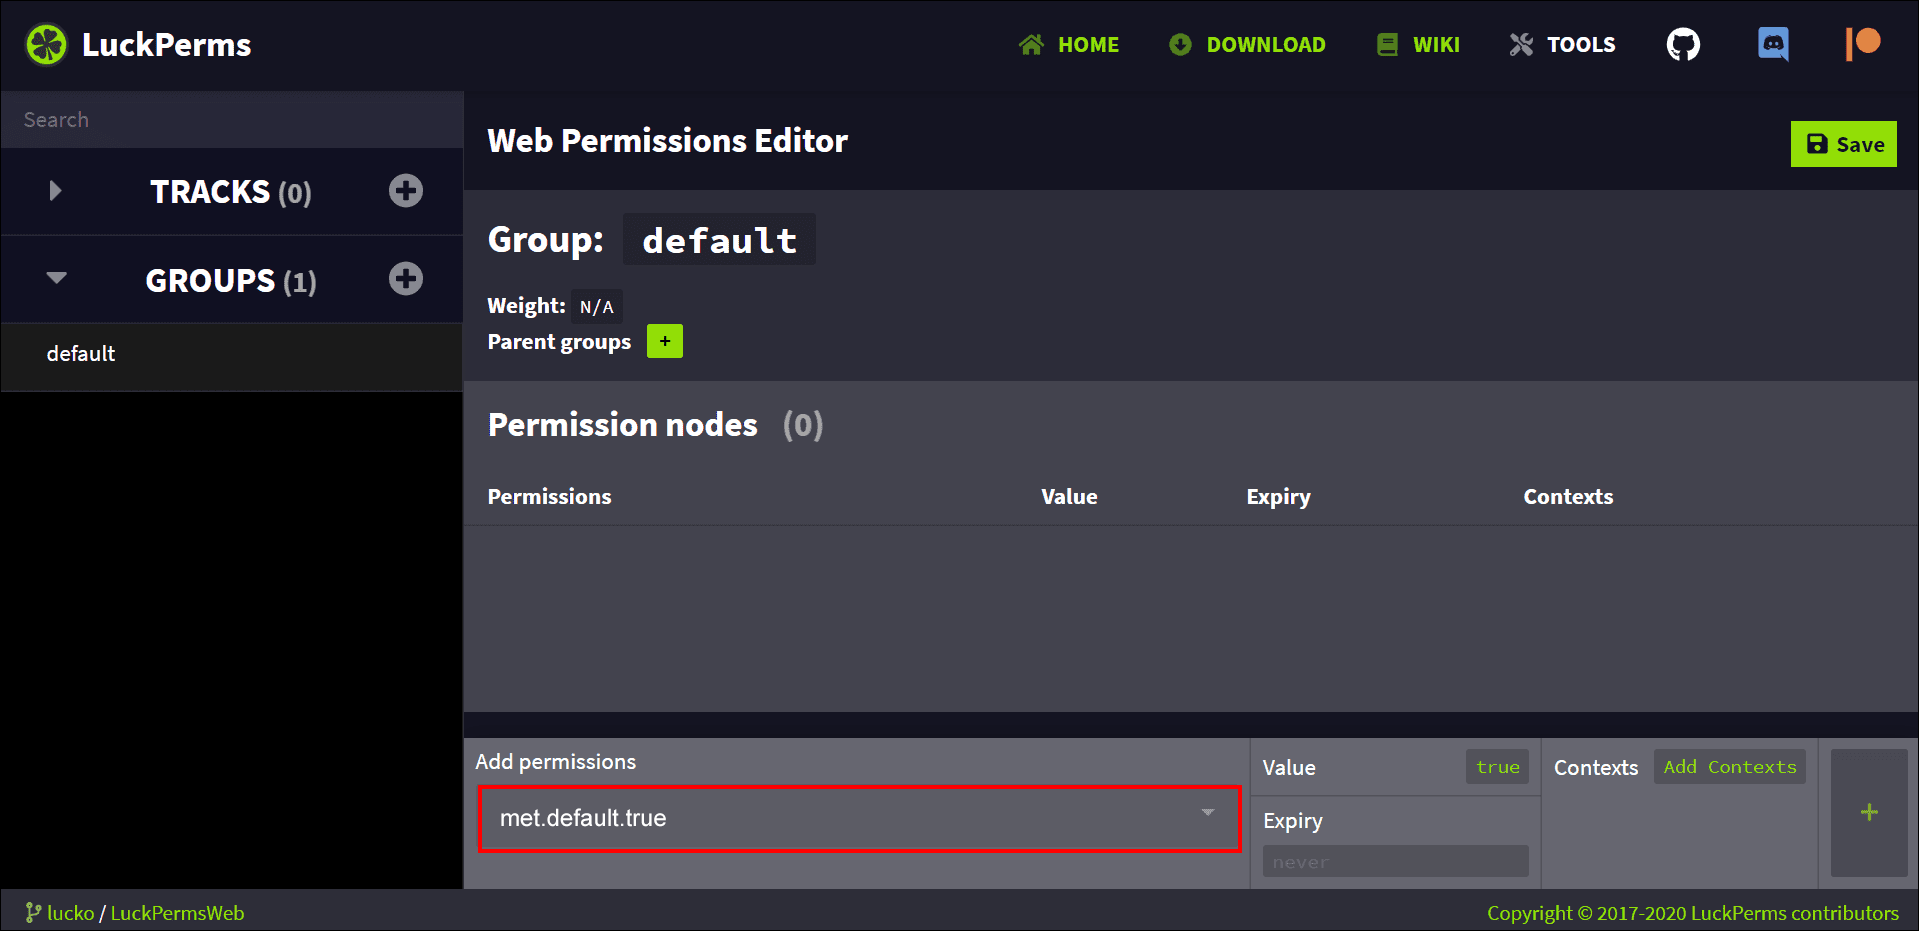

Adding the “meta.default.true” permission ensures that newcomers on the server will be placed automatically in the “default” group until you decide to change that.
The “weight.1” command sets the group’s weight or rank. The lower the number, the lower the group rank. This will make it easy to move players or assign new sets of permissions moving forward.
Customizing Groups
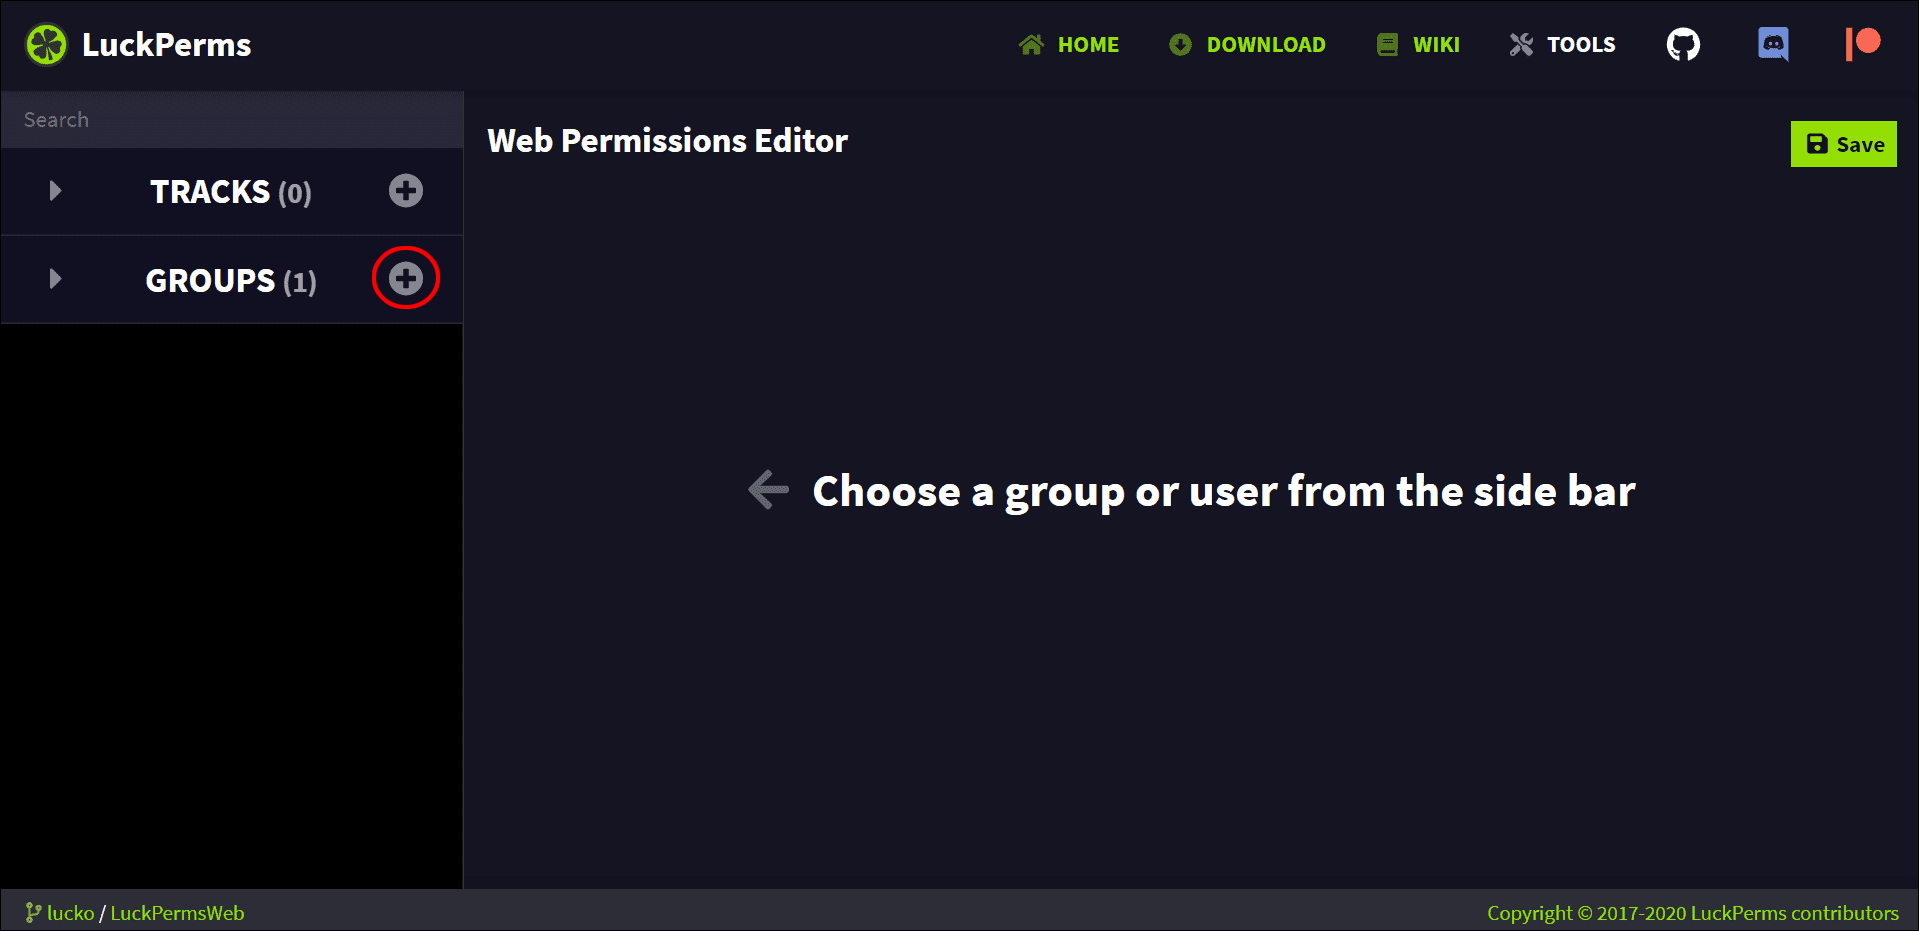
Here’s how to add a new group for different permissions:
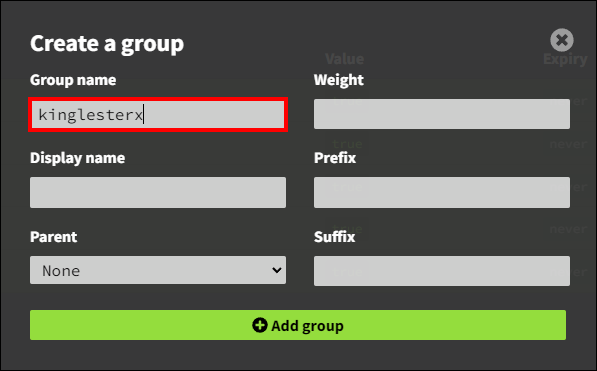
- Click on the plus icon next to the “Group” tab.
- Name the group.
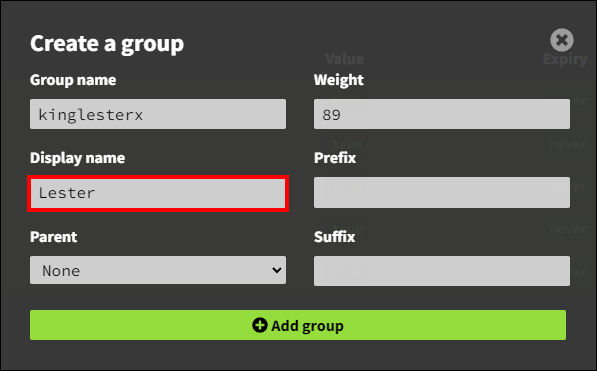
- Set the weight.
- Pick a display name.
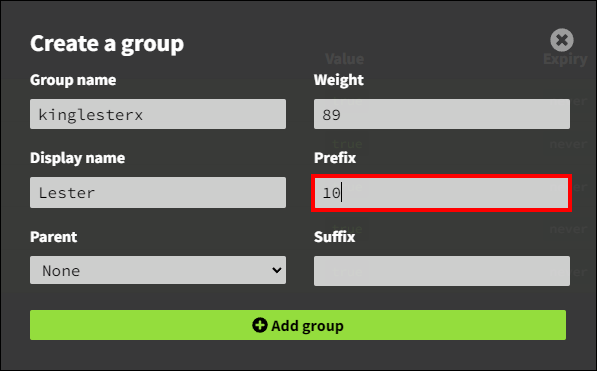
- Add a prefix, with an optional color code.
- Add a parent group, if necessary.


Assuming you’ve set a prefix and weight for your “default” group and used it as a parent for your new group, the latter will inherit all the basic permissions.
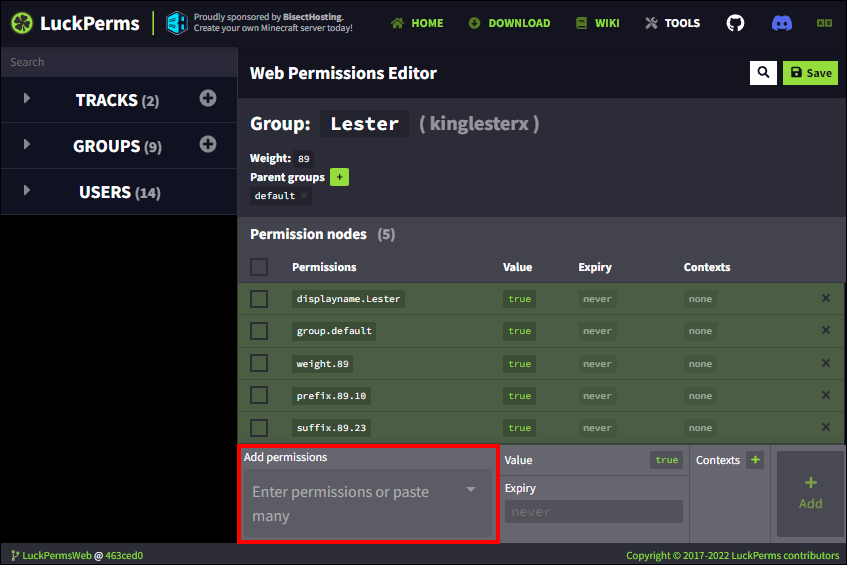
Now, you can simply do the following to add more permissions:
- Click the “Add permissions” field.
- Type or find and select the desired permissions.
- Click the “Add” button.

This method is helpful if you want to keep your editor interface clean and use fewer steps to add new permissions.
You can create new groups based on the previous group and add more special commands while giving them a higher weight than the previous group as a parent.
For example, it’s a great way to build permission lists for regular users, VIP players, moderators, and admins, as each group tends to have more and more permissions as they increase in rank.
Bonus tip
Create an owner group if you want to give yourself all the permissions. Give yourself the highest weight or rank, and simply add the “*” symbol in the “Add permissions” bar. This will enable the use of all permissions for users linked to the owner group.
How to Add Your Groups With New Permissions to Your Server
Here’s how you can add your new group breakdown and permissions allocation to your server:
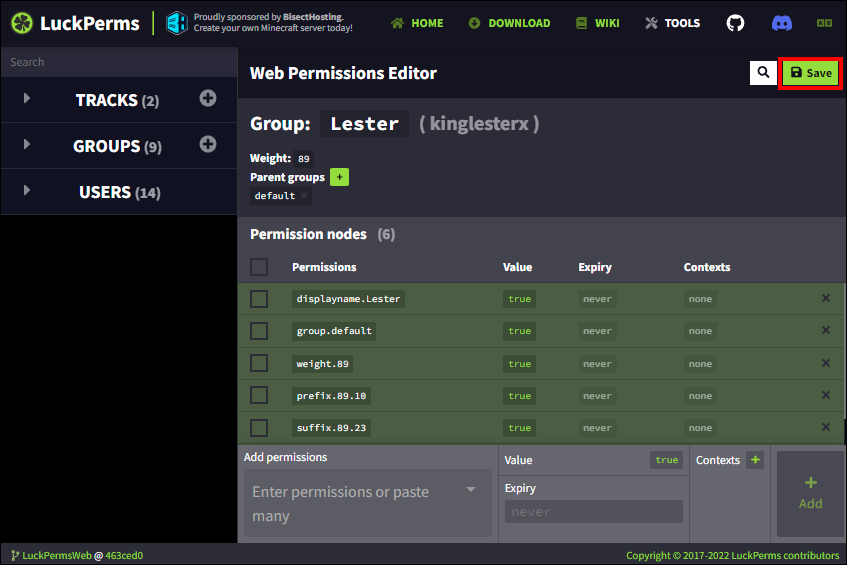
- Click the “Save” button in your web editor.
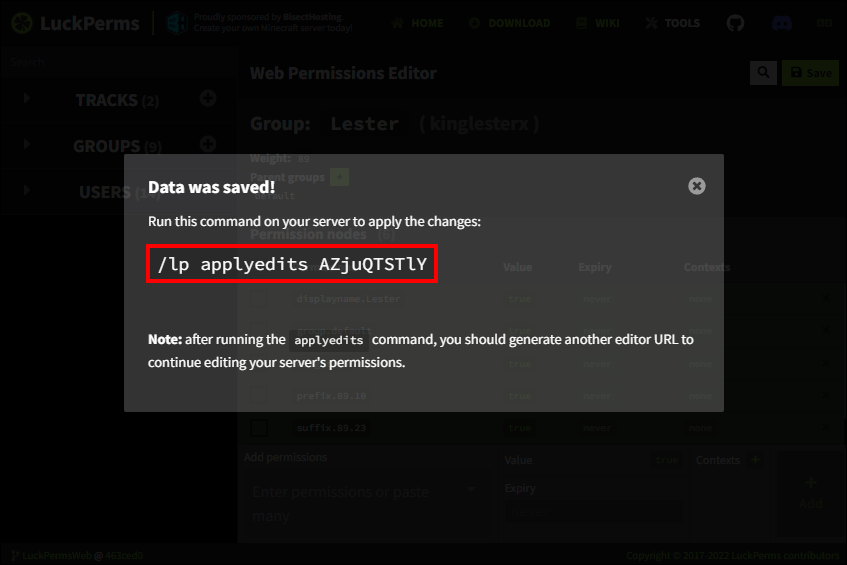
- Copy the custom “
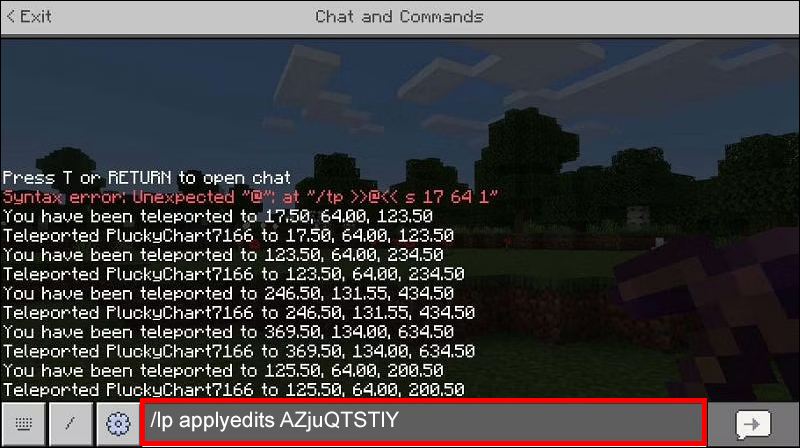
/LP applyedits [code]” command. - Return to your server and bring up the console.
- Paste the command and hit “Enter.”
Use the following command to assign players to specific groups: “/LP user [username] parent set [group name].”
Endless Customization
Spigot servers make up one of the best things that came to Minecraft over the years. And using an easy-to-use plugin like LuckPerms will enable you to create a highly personalized gaming experience while also keeping close tabs on what happens on your server.
If you have other questions or would like to share your experience with Spigot servers and the LuckPerms plugin, please let us know in the comments section below.
Disclaimer: Some pages on this site may include an affiliate link. This does not effect our editorial in any way.