Amazon Photos is an excellent solution for those who want to have a backup of their photos and videos on the cloud. With your files online, you can delete them on your local device to free up some space. By default, you have to manually upload the photos to the cloud, which can become tedious, especially if you have thousands of files. Your best option is to adjust the app’s settings so the files can be autosaved whenever there is a new addition to your gallery.
This article will show how to use autosave on the Amazon Photos app so you won’t have to go through the hassle of manually uploading the files to the app. Keep reading to find out more.
How to Turn On AutoSave to Amazon Photos
The Amazon Photos app makes it easy to back up files to the cloud. Once you have your files on the cloud, you can delete them from your device’s storage to free up some space. You can also share them with family and friends – the app can act as excellent virtual storage for your memories. For extra convenience, you can adjust the settings so your pictures are backed up automatically. This will save you time and ensure that all your files are backed up. It avoids the possibility of forgetting to upload some files when you’re taking the manual route.
The process of activating autosave on Amazon Photos is straightforward. Here’s a breakdown of how to go about the process on different devices.
How to Turn On Amazon Photos Autosave on an iPhone
Follow these steps to turn on Amazon Photos autosave on an iPhone.
- Open the Amazon Photos app.
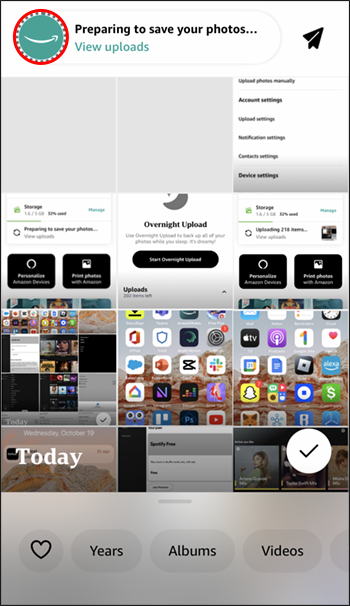
- Tap the smiley icon in the top-left corner of the screen.

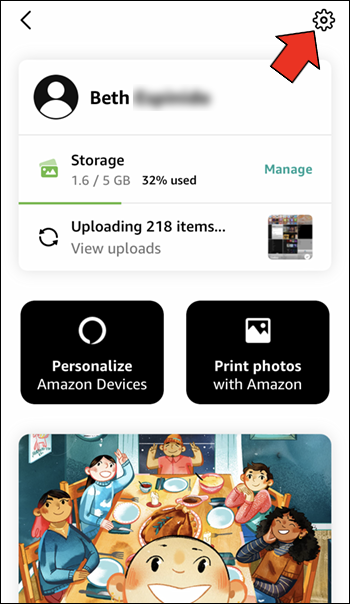
- Go to “Settings” icon in the top-right corner of the screen.
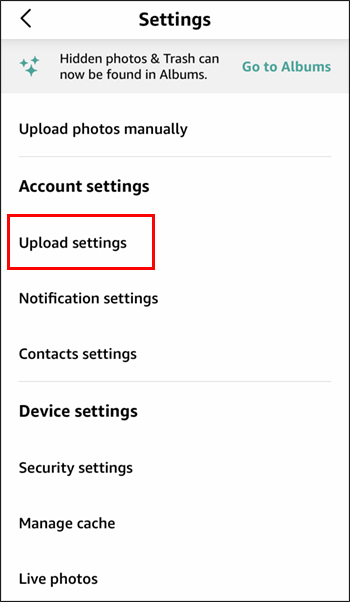
- Expand the “Upload settings” menu.
- Turn on the toggle switch for the “Save Photos” option.
- You can also turn the toggle switch for the “Save Videos” option to allow videos to be automatically saved whenever you’re connected to the internet.
By default, your photos and videos will be autosaved if you’re connected to a Wi-Fi connection. If you want to use cellular data to autosave your file, turn on the toggle switch to “Auto-save using cellular data.”
Note that you must open the Amazon Photos app for the photos and videos to be autosaved.
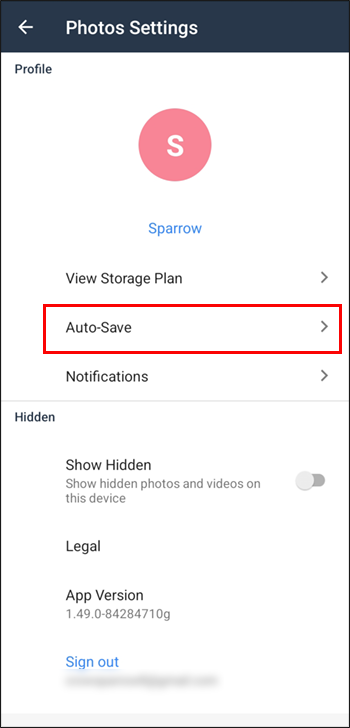
How to Turn On Amazon Photos Autosave on an Android
To turn on Amazon Photos Autosave on an Android, follow these steps.
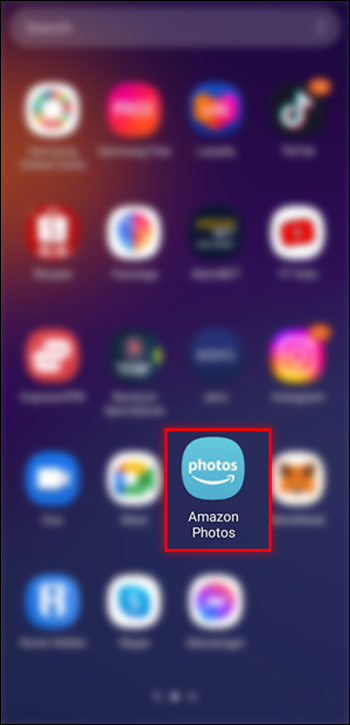
- Launch the Amazon Photos app.
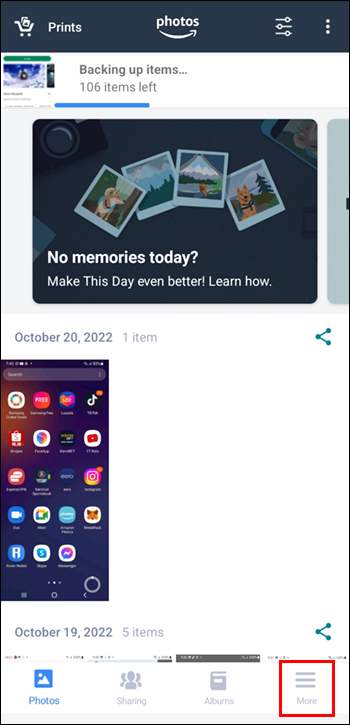
- Click on the three lines in the bottom-right corner of the screen.
- Go to “Settings.”
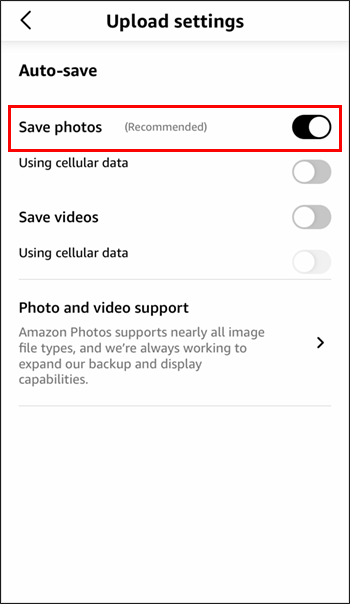
- Expand the “Auto-Save” menu.
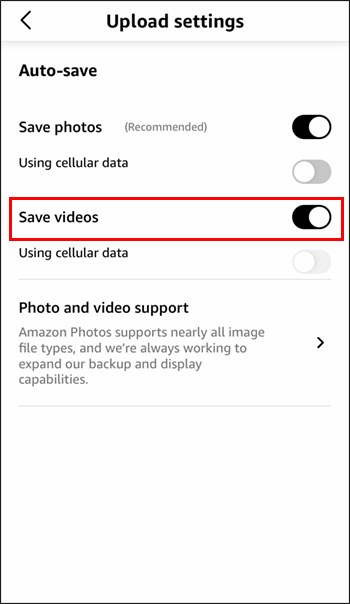
- Turn on the “Photos” toggle switch. If you want to autosave videos, turn on the “Video” toggle switch.


With the above option enabled, your photos should now be automatically backed up on Amazon whenever you’ve got a Wi-Fi connection.
Amazon Photos automatically saves your photos when you’re connected to the Wi-Fi. If you want the app to autosave photos when using your cellular data, turn on the “Auto-save using cellular data” toggle option.
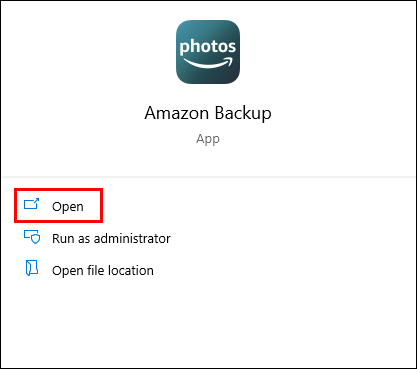
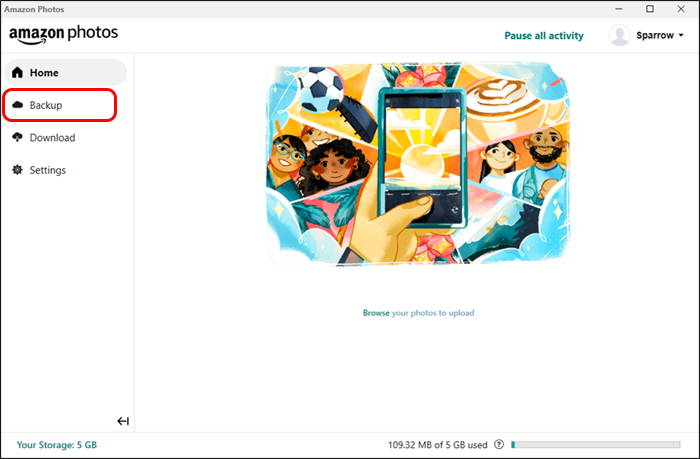
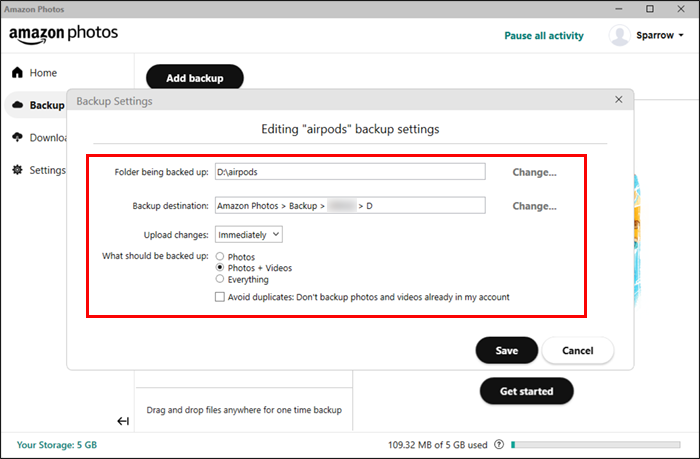
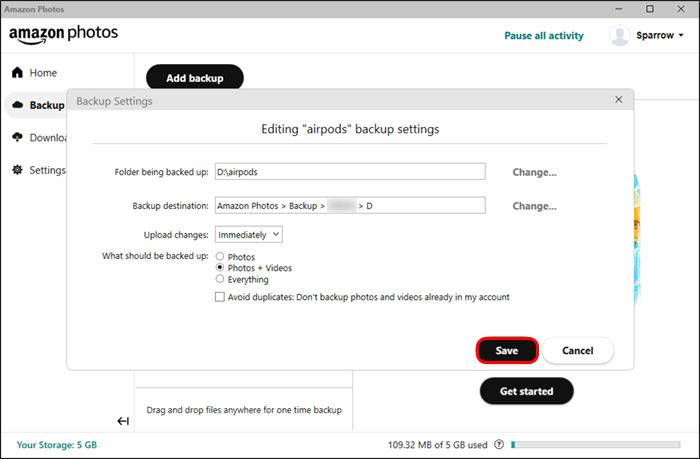
How to Turn On Auto Backup on Amazon Photos Desktop App
To turn on auto backup on the Amazon Photos desktop app, follow the steps below.
- Launch the Amazon Photos desktop app.
- Navigate to the “Backup” tab.
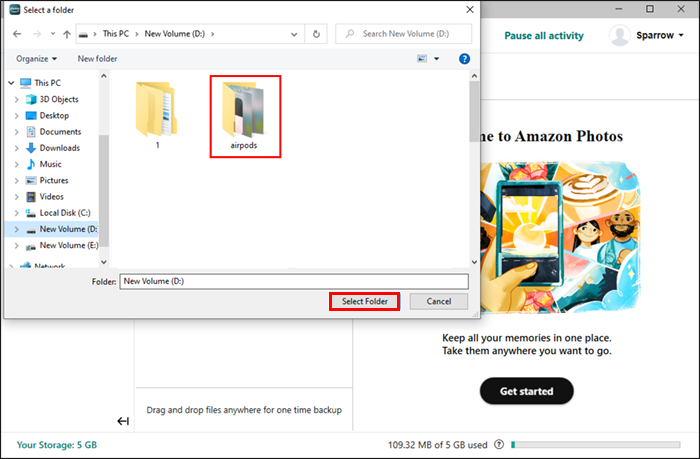
- Click on “Add a folder to backup.”
- Choose the folder you’d like to auto-backup.
- From the provided presets, set preferences for the backup – for example, type of files, recurrence, etc.
- Click the “Save” button to complete the process.

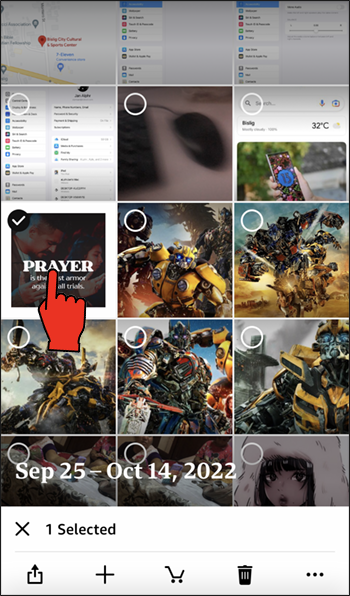
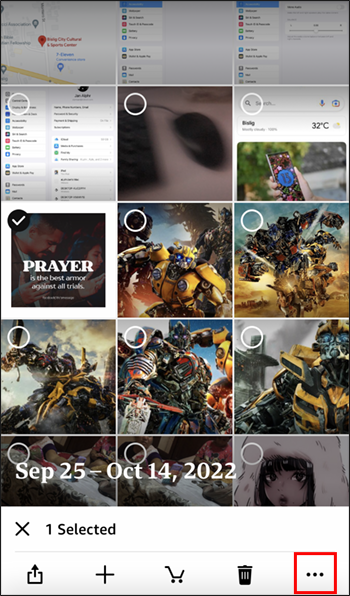
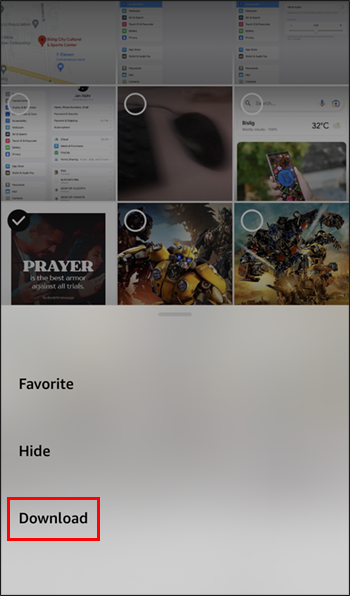
How to Download Backed-Up Photos and Videos on the Amazon Photos App
To download your Amazon Photos backups, follow these steps.
- Launch the Amazon Photos app.
- Long-press the photos you want to select until a checkmark appears.
- Press the three dots in the bottom-right corner of the screen.
- From the options, select “Download.”
- Once the download is complete, you can open the gallery to view the photos.
Please note that if the files are already on your device, the download option might be unavailable. Also, you can’t download an entire album at once. You have to navigate to the album that has the files you want to download and select the specific files you’d like to download. If you accidentally picked a file, press the checkmark icon on it to deselect it.
Device Links
s="wp-block-heading">FAQ
Is Amazon Photos free?
Amazon Photos is free for anyone with an Amazon account. Free accounts are limited to 5 GB of storage. Once this storage is exceeded, you’ll have to subscribe to Amazon Prime if you still want to use the app to back up photos and videos.
There is no storage limit for Amazon Prime members that want to store photos. However, videos are still pegged to the 5 GB storage limit.
What happens to the media I have backed up on Amazon Photos if I cancel my subscription to Amazon Prime?
If you cancel Amazon Prime, your storage limit will be reduced to 5 GB. If the files you have backed up on the app exceed 5 GB, you’ll still have access to them, but they will be deleted after 180 days. So it’s best to download these photos before the end of the 180 days.
Can I use Amazon Photos for my photography business?
Amazon Photos is for personal use only. Using the application for business-related activities is against the Terms of Service.
How do I share the photos I have backed up on the Amazon Photos app with my family and friends?
Sharing your backups with your friends and family is relatively easy. Simply follow the steps below.
1. Open the Amazon Photos app.
2. Navigate to the “Sharing” tab.
3. Tap the “Create a new group” widget.
4. Select the photos you want to share and click the “Next” button.
5. Choose the contacts you want to share the photos with and tap on “Share.”
6. Press the “Send” button when the sharing message pops up.
7. Your recipients will receive a message with a link that allows them to view the files you just shared.
How do I create an album in Amazon Photos?
To create an album of photos in the Amazon Photos app, follow these steps.
1. Open the Amazon Photos app.
2. Go to the “Album” tab and press the “CREATE NEW ALBUM” button.
3. Give the album a name and click “Next.”
4. Select the photos you want to go into the album and click the “CREATE” button.
The app allows you to adjust the album long after you have created it. For instance, you can rename it, add and remove photos, set a slideshow for viewing, and delete it.
Let the Autosave Feature Do All the Work for You
As you can see, turning on the autosave feature on Amazon Photos is relatively easy. Simply open the app, go to the menu, select Settings, and turn on the toggle switch for “Auto-Save.” If you’re worried about the app using your data to save the files, you can specify that you want your videos to be autosaved via Wi-Fi.
If you’re on a computer, you can use the Amazon Photos desktop app to specify the folder you want to automatically back up whenever there are new changes.
Regardless of the device you’re using, we’re confident you can now turn on Amazon Photos autosave and have the feature do this overly mundane task for you.
Have you tried using Amazon Photos to back up your photos and images to the cloud? How has the experience been so far? Please let us know in the comments section below.
Disclaimer: Some pages on this site may include an affiliate link. This does not effect our editorial in any way.