Device Links
Backing up your iPhone’s data is important, and there are a variety of ways to do it. One option is to back up your device to an external hard drive. This can be a helpful way to store your data in the event of a device failure or lost/stolen phone.
In this article, we will walk you through the process of backing up your iPhone to an external hard drive. We will also discuss some of the benefits of this backup method.
Backing up the iPhone to an External Hard Drive
Anyone who has lost their iPhone can attest that the device can contain a wealth of important data. From photos and videos to work documents and personal correspondence, an iPhone can be a repository for our most precious memories and sensitive information. That’s why it’s so important to back up your iPhone data regularly.
While iCloud offers a convenient way to keep your data backed up and accessible anywhere in the cloud, there are also several advantages to backing up your data to an external hard drive.
First, it provides a physical backup of your data if your iCloud account is hacked or otherwise compromised. Second, backing up your data to an external hard drive gives you more control over where and how your data is stored.
And finally, backing up your data to an external hard drive can be faster and more reliable than backing up to iCloud, particularly if you have a large amount of data to back up.
Let’s now see how you can back up your data to an external hard drive using different tools or devices.
Backup iPhone to External Hard Drive Mac
As devices from the same family, iPhones and Mac computers are designed to work well together. Since both devices use the same operating system (iOS), you can seamlessly share files between your iPhone and Mac. In addition, Apple offers several features that allow users to sync their devices, such as iCloud and Continuity.
As if that’s not enough, a Mac can help you back up your iPhone to an external hard drive. This can be a great way to free up space on your iPhone or even store important files in a safe, hack-proof drive.
You can back up your iPhone to an external hard drive in two main steps:
Step 1: Back Up Your iPhone to Mac
First, you need to back up your data to the Mac computer. Here are the steps needed:
- Connect both the iPhone and external hard drive to the Mac computer.

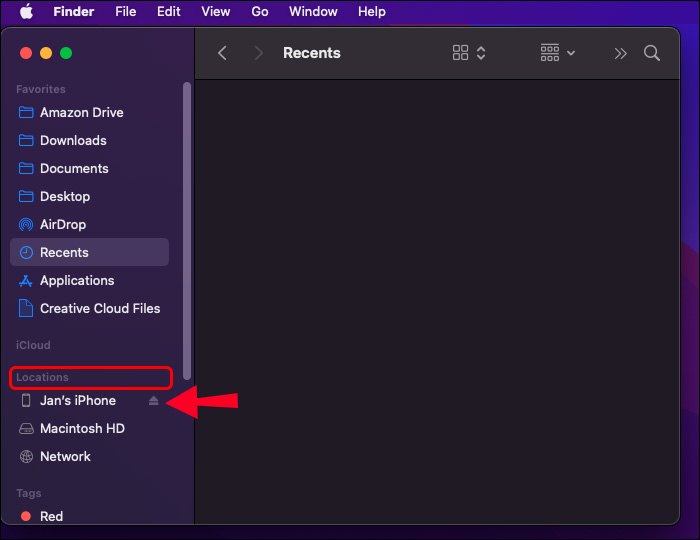
- Open Finder on your Mac by pressing Option+Command+Space.

- Select “Location” from the left panel and then choose your iPhone.
- Hit “Trust” button.
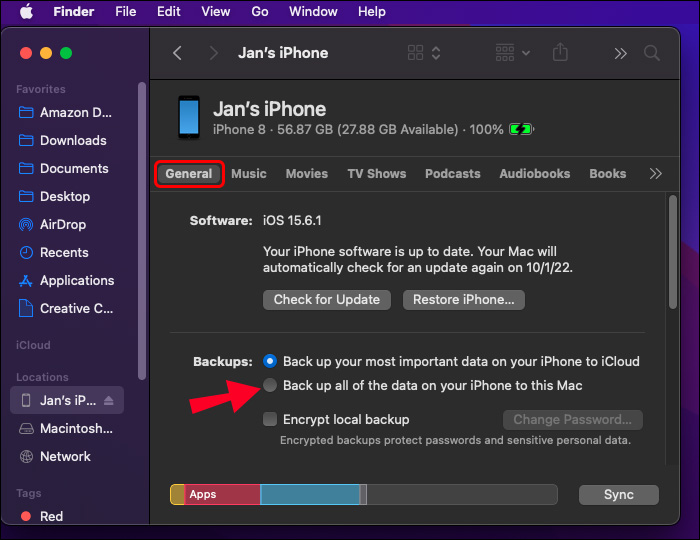
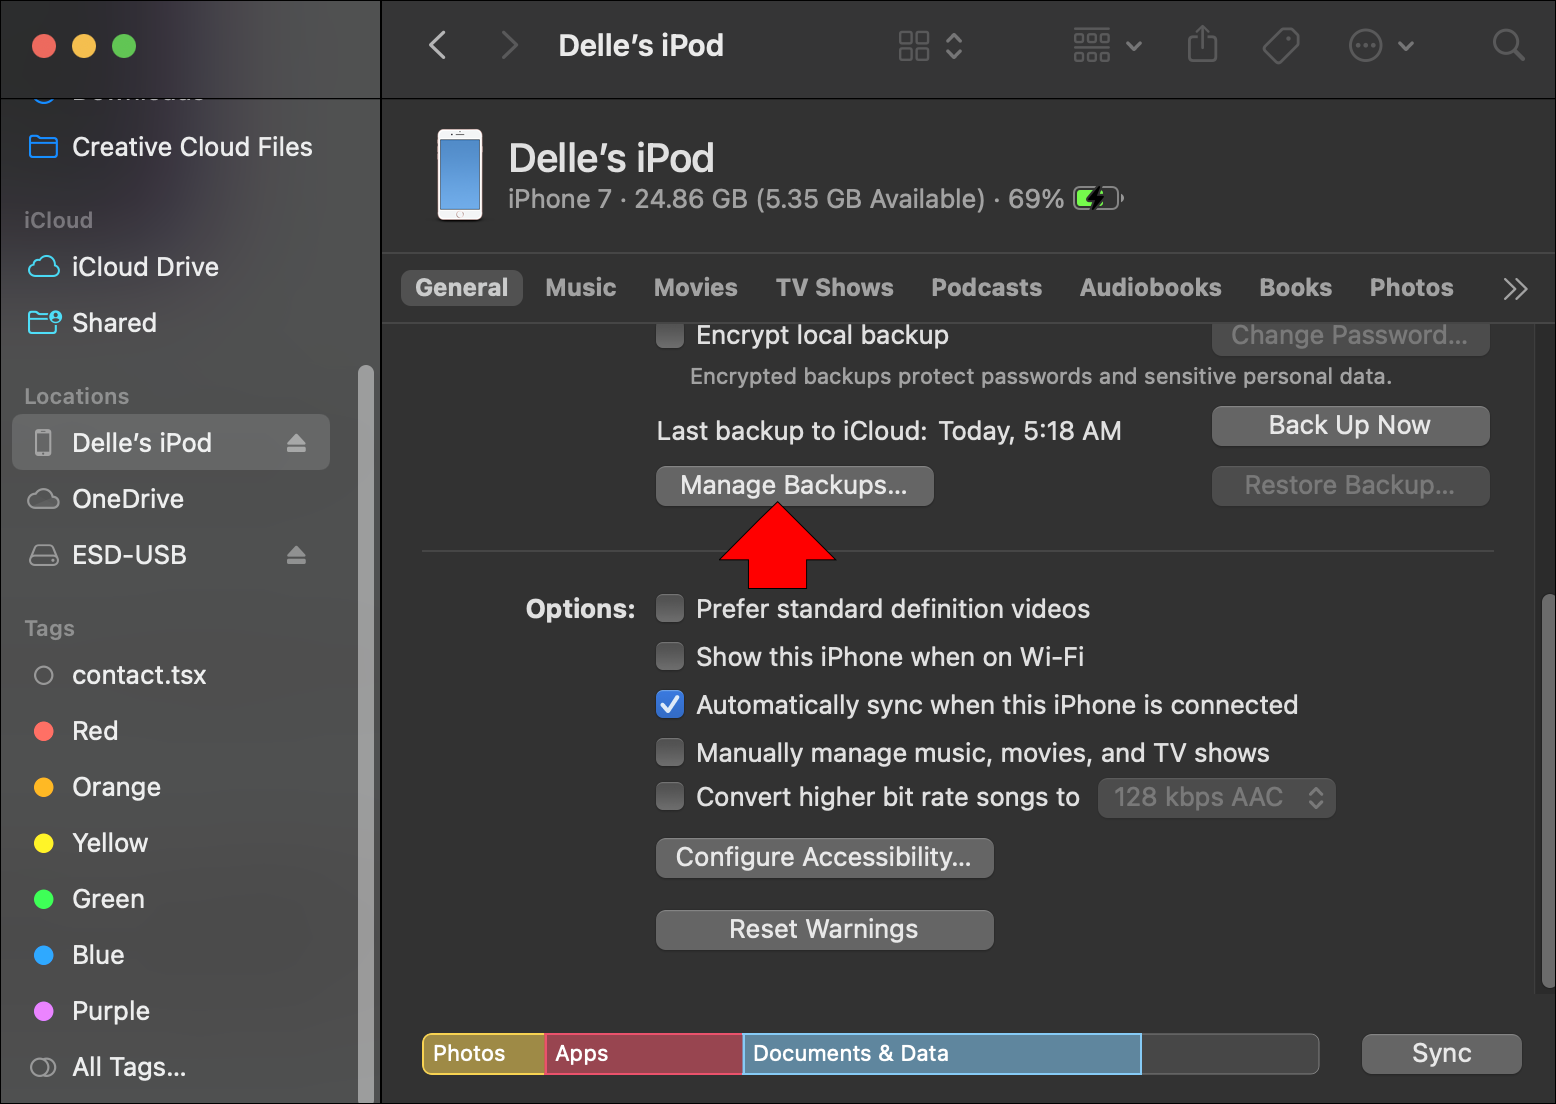
- On the “General” tab, select “Back up all the data on your iPhone to this Mac.”
- Click “Apply” button.


Step 2: Transfer the iPhone Backup to Hard Drive
Finally, you can move the newly created backup from your Mac to the external hard drive. Here are the steps:
- Click on the “Manage Backups” button.
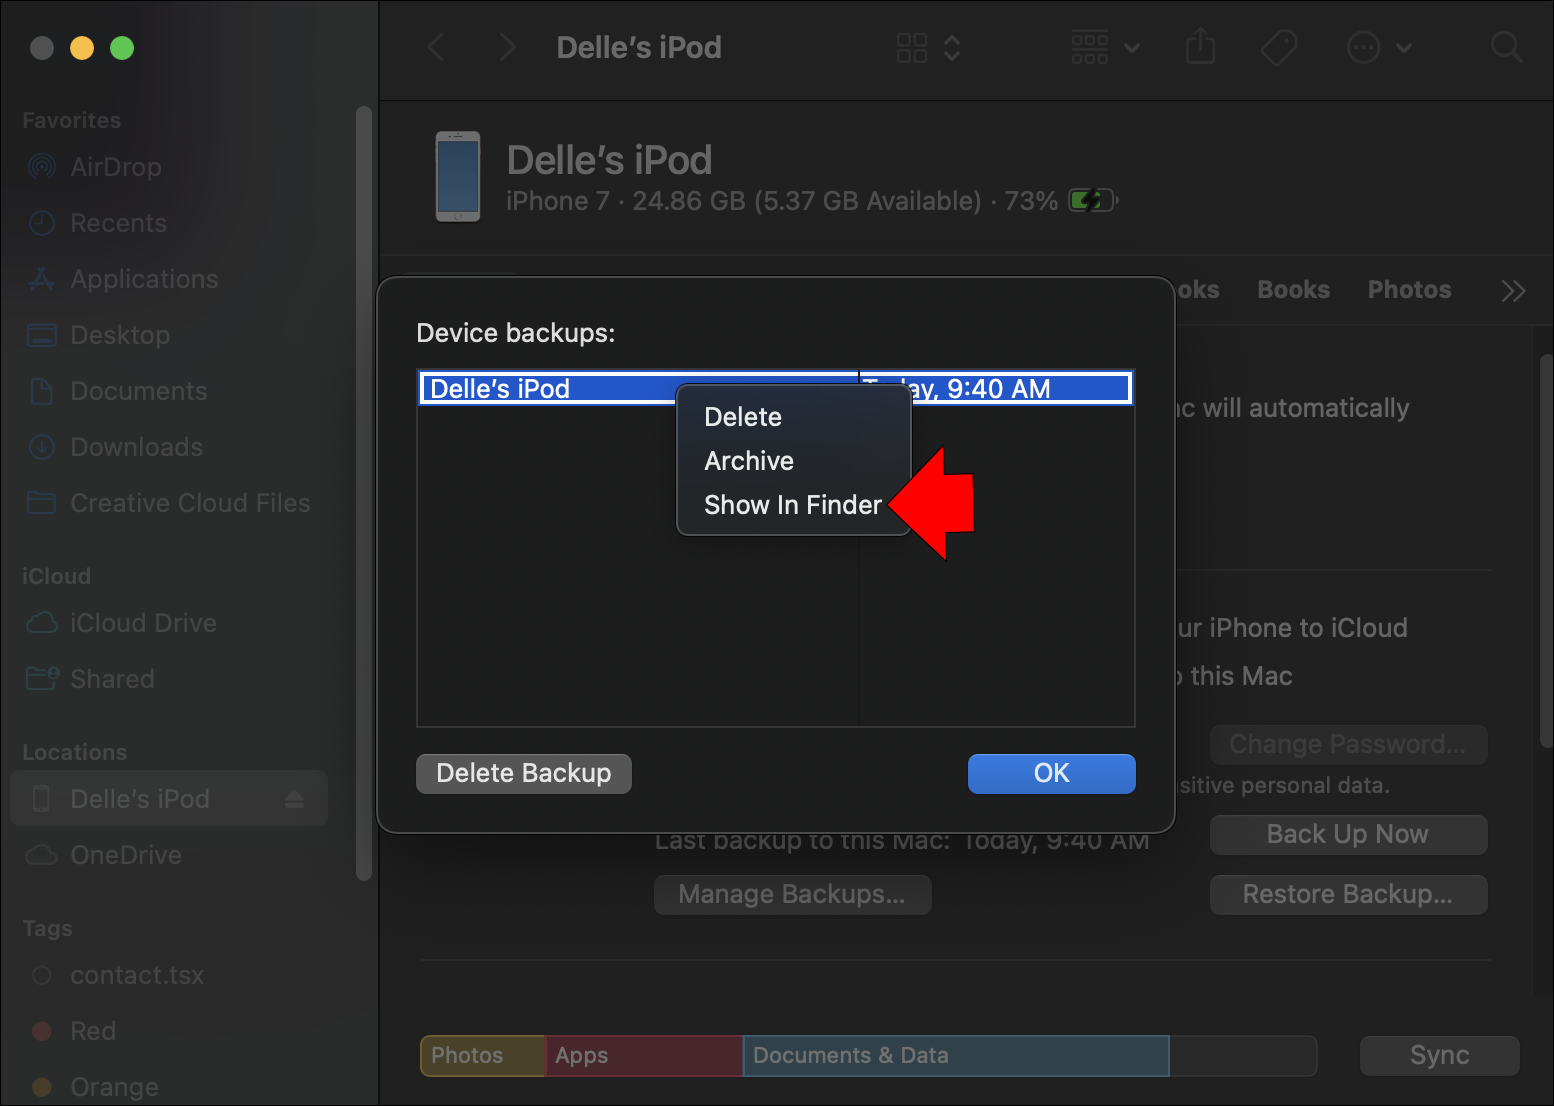
- Control-click on the backup created and select the “Show in Finder” option from the dropdown list.
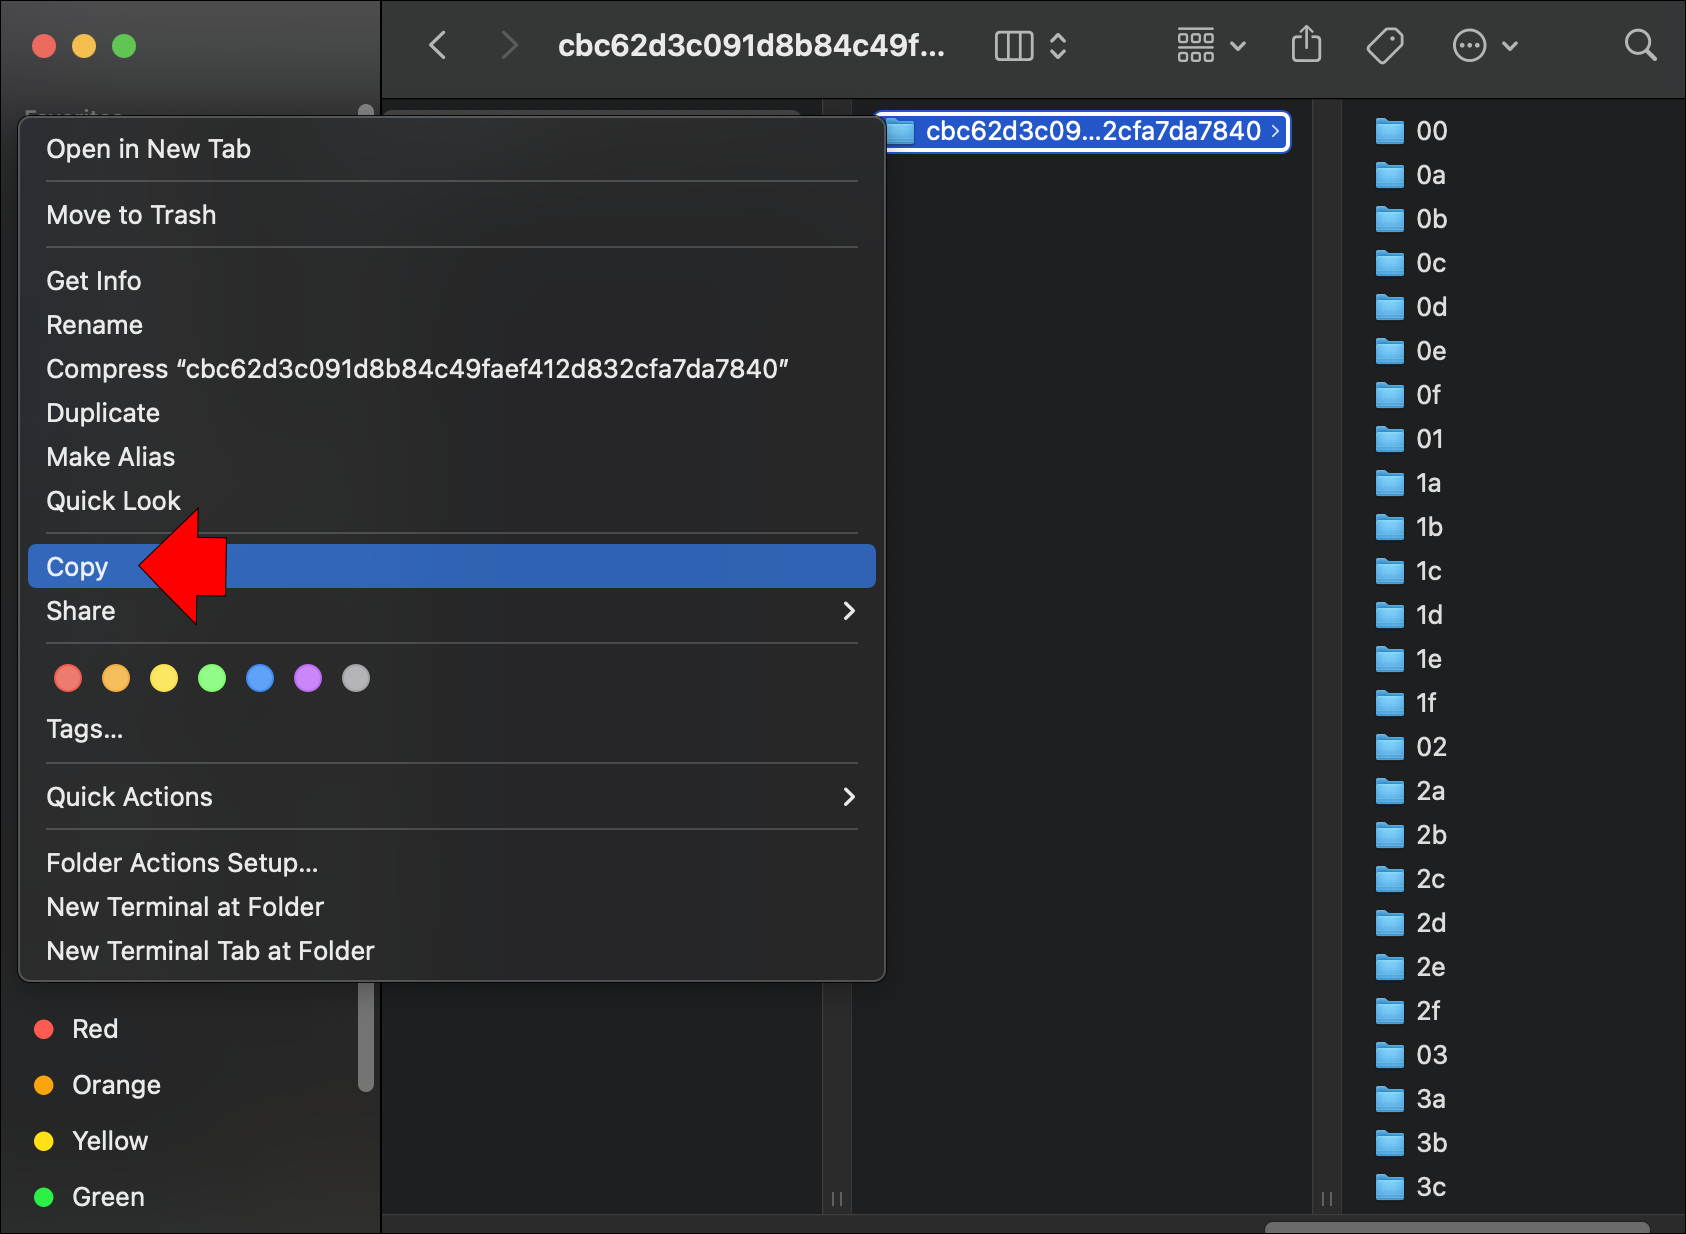
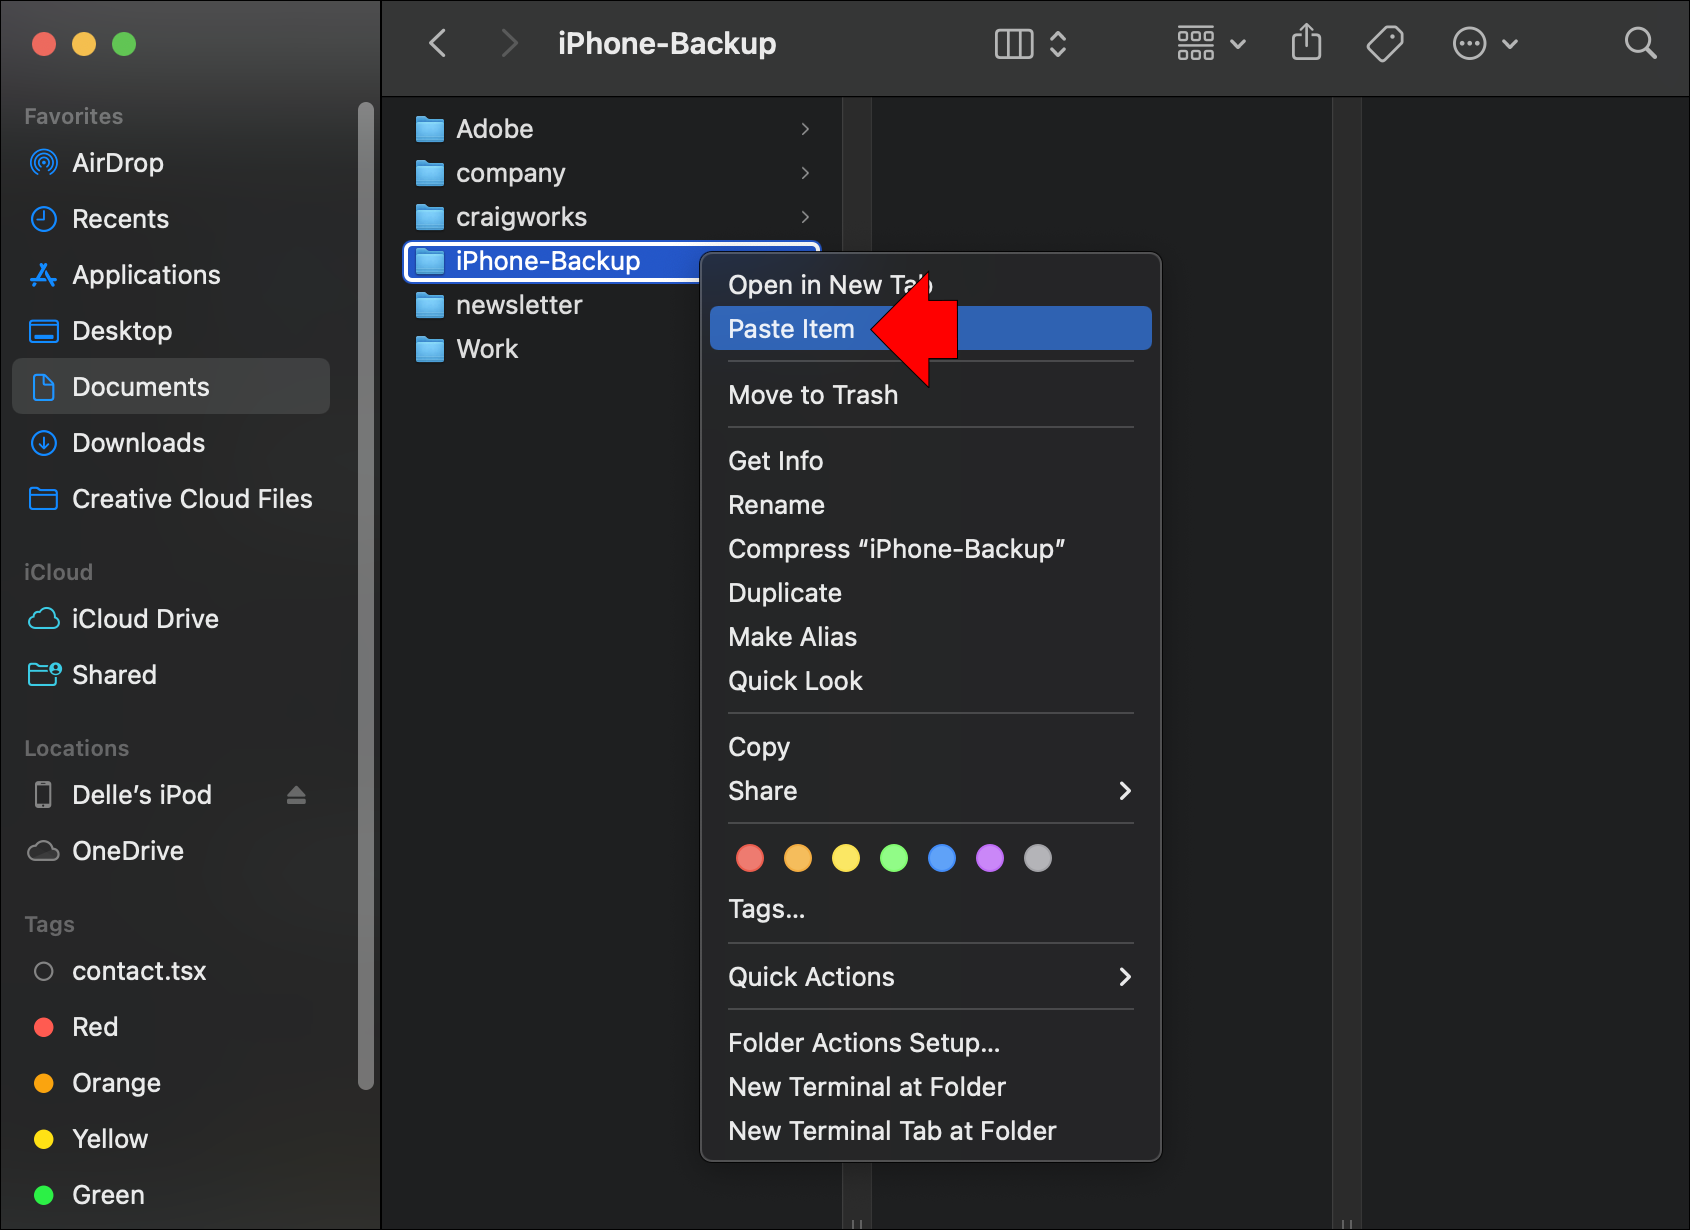
- Control-click on the backup folder and select the “Copy” option.
- Select the external hard drive from the left panel and then click on “Paste.”


And that’s it. You’ve just created a copy of your iPhone files on the external hard drive. If you upgrade to a new iPhone, you can restore your backup to transfer all your data to the new device. The backup can also be useful if you need to factory reset your phone or if something goes wrong and you need to start from scratch.
However, the method above only works on iOS 13 and macOS Catalina or later versions. If your iPhone and Mac are running on any of the earlier versions of the iOS and macOS, you can still back up your iPhone to the external hard drive, but you will need to use iTunes.
Back-Up an iPhone to an External Hard Drive Using iTunes
As the official backup software for iPhones, iTunes can back up many local data types, including messages, photos, contacts, call logs, iPhone settings, Keychain data, and local app files.
While iCloud is also capable of backing up this data, it requires an internet connection and may incur charges depending on your iCloud storage plan. In contrast, iTunes backups are stored locally on your computer and are free to create. Furthermore, iTunes backups include a wider range of data types than iCloud backups.
For example, while iCloud backups only include purchased music, movies, and TV shows, iTunes backups also include any music, movies, and TV shows that you have added to your iPhone from external sources such as CDs or downloaded files. Consequently, if you are looking for a comprehensive backup solution for your iPhone, iTunes is the recommended software.
Here’s how to use iTunes to back up your iPhone to an external hard drive:
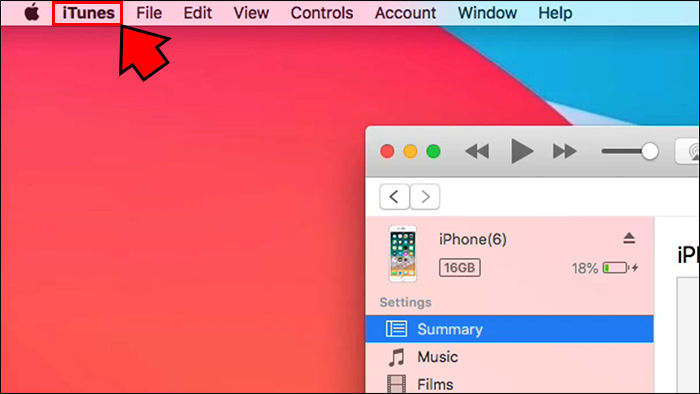
- Open the iTunes app on your Mac.
- Connect your iPhone to the external hard drive via a USB cable.
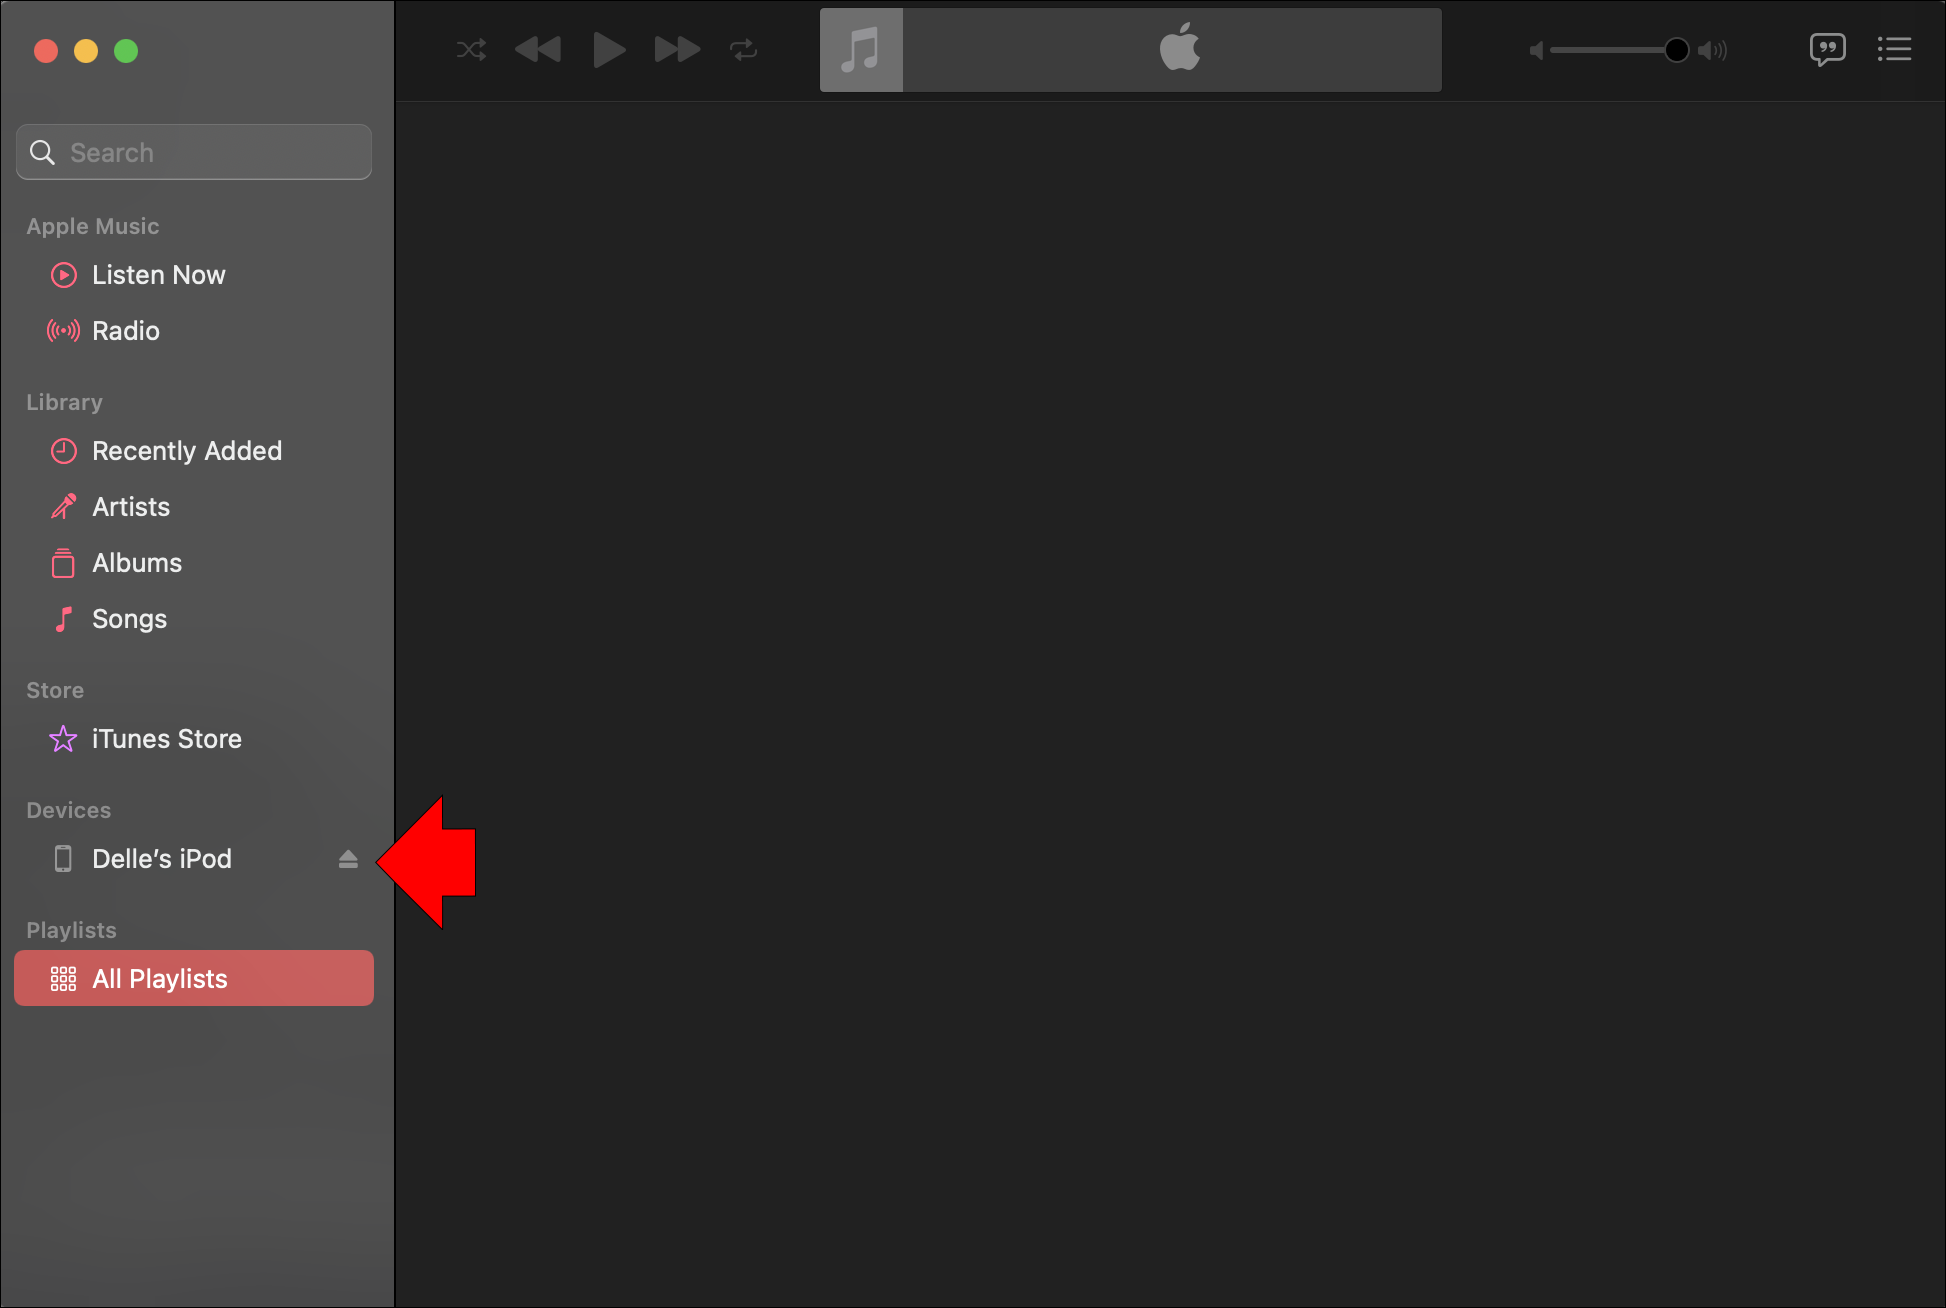
- In the iTunes app, click on the “Device” icon in the buttom left corner.
- Under the “Automatically Back Up” menu, select “This Computer.”
- Click on the “Back Up Now” button located on the right side of the screen. This should initiate the backup process from your iPhone to the computer.
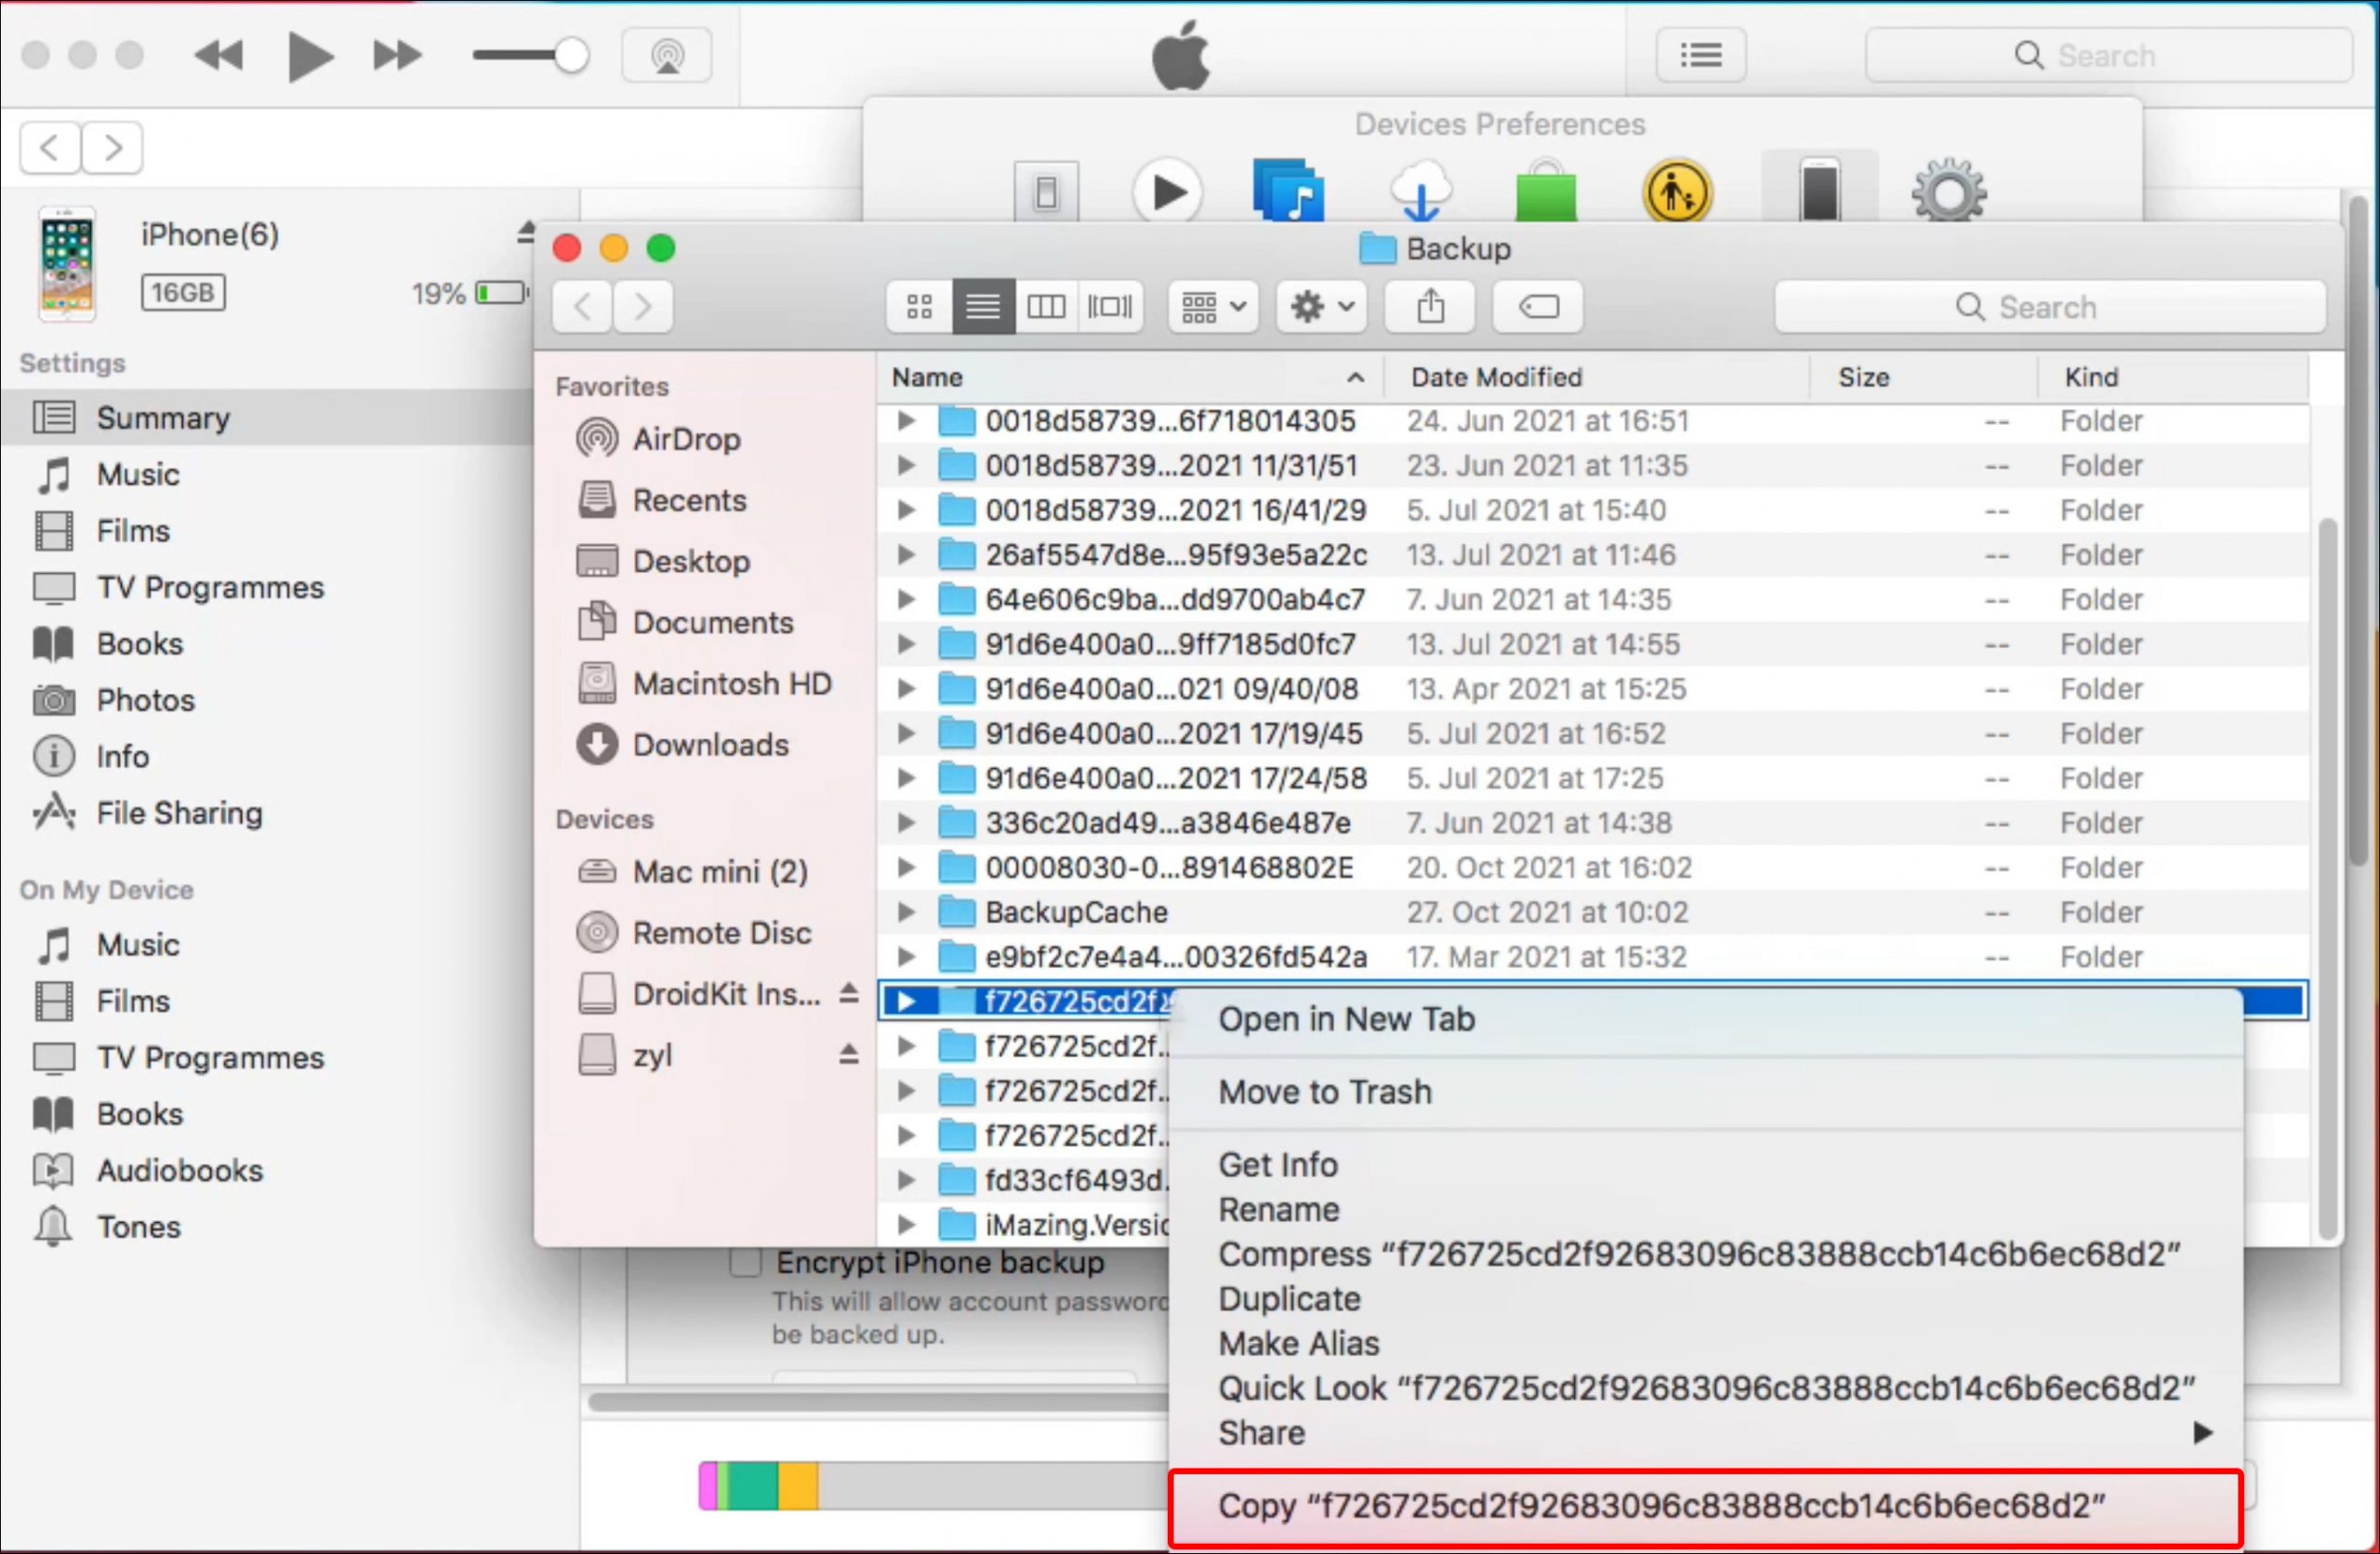
- After completing the backup process, head to the iTunes tab and select “Preferences.”
- Click on the “Devices” tab and locate the backup just created.
- Control-click on the backup and select “Show in Finder” from the dropdown list.
- Copy the backup folder, open the external hard drive, and create a destination folder.
- Paste the backup in the destination folder created.

Back-Up the iPhone to an External Hard Drive on a Windows PC
Are you looking for an easy way to back up your iPhone data to an external hard drive? Windows makes it easy to do with just a few clicks:
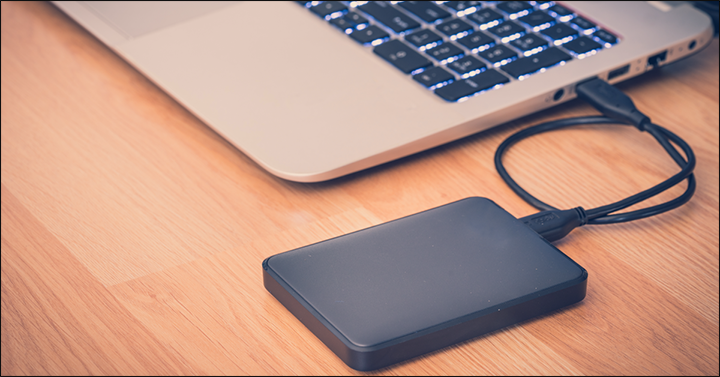
- Plug the external hard drive into your computer.
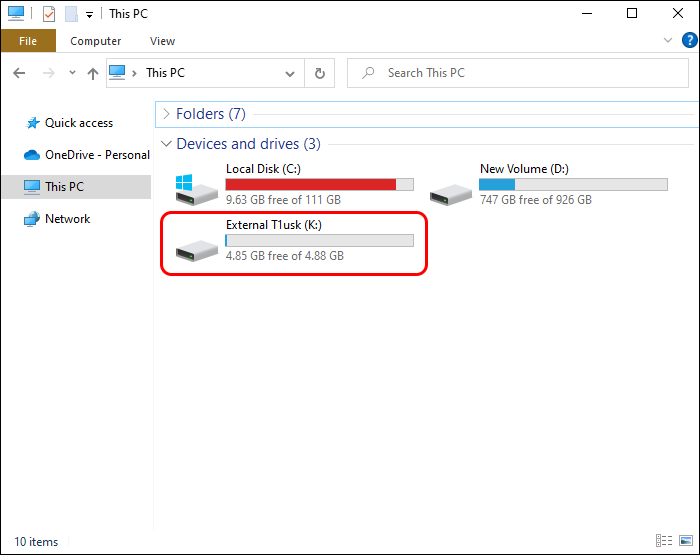
- Open File Explorer and locate the external hard drive.
- Click on the external hard drive and then click on the “New Folder” button in the top toolbar.
- Name the new folder “iPhone Backup.”
- Open the iTunes app on your Mac.
- Connect your iPhone to the external hard drive via a USB cable.
- On the iTunes app, click on the “Device” icon in the top left corner.
- Under the “Automatically Back Up” menu, select “This Computer.”
- Click on the “Back Up Now” button to initiate the backup process from your iPhone to the computer.
- After completing the backup process, type “%appdata%\Apple Computer\MobileSync\Backup” in Windows File Explorer. This should take you directly to the folder that contains the backup newly created and any other backups you may have created in the past.
- Locate the newly created backup folder using the “Date Modified” column.
- Right-click on the folder and select “Copy.”
- Open the iPhone Backup folder, right-click and select “Paste.”


Back Up the iPhone to an External Hard Drive Without a Computer
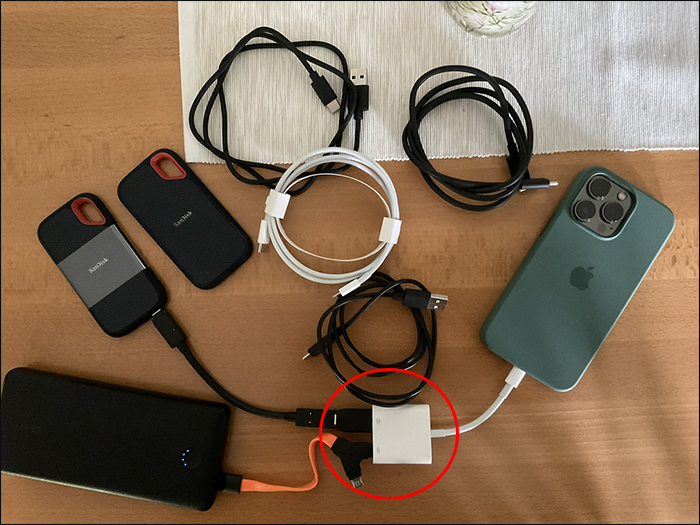
What if you don’t have a computer? Can you still back up your iPhone to an external hard drive? The answer is yes, thanks to USB-to-lightning adapters.
A USB-to-lightning adapter is an electrical adapter that allows for a physical connection between devices that use the USB and Lightning standards.
The adapter typically consists of two connectors: a lightning connector on one end and a USB connector on the other. The lightning connector is designed to fit into the port on an Apple device, while the USB connector is designed to fit into a standard external hard drive. In most cases, the adapter also includes a small plastic casing that helps to protect the connectors from damage.
To back up your iPhone to an external hard drive using a USB-to-lighting adapter:
- Connect your iPhone and the hard drive using the adapter. You should receive a notification as soon as your iPhone detects the hard drive.
- Open your iPhone and select the files you’d like to back up. These can be videos, photos, or documents.
- Tap the “Share” icon and select the external hard drive as the destination.


Back Up the iPhone to an External Hard Drive via a Wireless Connection
Most external hard drives today are designed for use with a USB cable. But did you know you can wirelessly back up your iPhone to a hard drive? To do this, you need a wireless hard drive.
Wireless hard drives function just like traditional external hard drives, with one key exception: they connect to your computer via Wi-Fi instead of a physical cable. This means that you can put the drive anywhere in your home or office and still be able to access it from your iPhone. So long as the drive is within range of your Wi-Fi router, you’ll be able to connect to it and transfer files.
One potential downside of wireless hard drives is that the transfer process may be slightly slower than wired models since data needs to travel through the air rather than through a physical connection. However, the difference in transfer time is typically quite small, and most users won’t notice any significant slowdown.
Overall, wireless hard drives offer the same convenience and reliability as traditional external hard drives, making them an excellent option for backing up important data.
Some of the most popular manufacturers of wireless hard drives include Seagate, GNARBOX, and Western Digital.
Secure Your Files
Backing up your iPhone data to an external hard drive has many benefits. By doing so, you can ensure that your important files are safe and secure in the event of a device crash or theft. Additionally, transferring your data to an external drive can free up space on your phone’s internal storage, making it run more efficiently.
Have you tried to back up your iPhone to an external hard drive using any of the methods discussed in this article?
Feel free to share your experience in the comments section below.
Disclaimer: Some pages on this site may include an affiliate link. This does not effect our editorial in any way.