Do you want to share a travel itinerary with a friend? Sending them each location along the way may not be the best way to do it or provide all the information you want to share with them.
Fortunately, Google Maps now allows you to create and share custom maps. You can mark points of interest, add places, draw routes, and even change the style of your map. Does this sound like what you’re looking for? Read on to learn how to create a shared Google Map.
How to Create a Shared Google Map
Every Google user has access to a Google Maps feature called Google My Maps. This app allows you to create as many custom maps as you like and access them easily through your Google Maps app. Custom maps are also shareable and can be worked on collaboratively. Here’s how to create a new custom map.
- Open your browser and make sure you’re logged into your Google account.
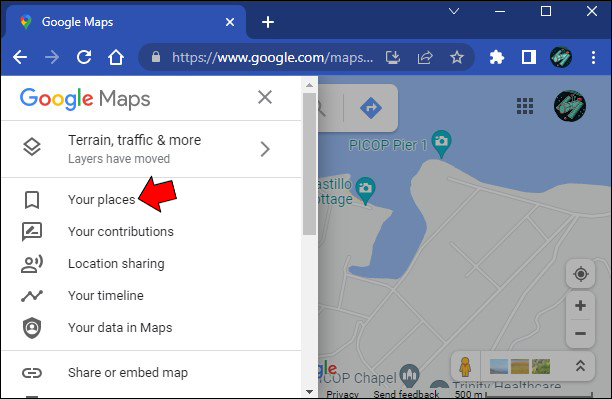
- Go to Google Maps and click the hamburger menu next to the search bar.

- Click “Your Places” in the menu.
- Select the “Maps” tab at the top.


You can see all your previously created custom maps here. To enter the editor, press “Create Map” at the bottom of the page. Of course, you can also select any of the existing maps and hit “Open in My Maps.” You’ll be taken to Google My Maps, where you can begin customizing.
- Give a title to your map by clicking “Untitled map” at the top. You must name your map before you’ll be able to share it.
- Add the places you want to your map. Click a marker to save and press “Add to map” on its info card.
- You can also create your own pins by pressing the “Add marker” icon under the search bar and placing it on the map.
- You can also create your own pins by pressing the “Add marker” icon under the search bar and placing it on the map.
- Customize your places by using the options on their info card whenever they are selected.
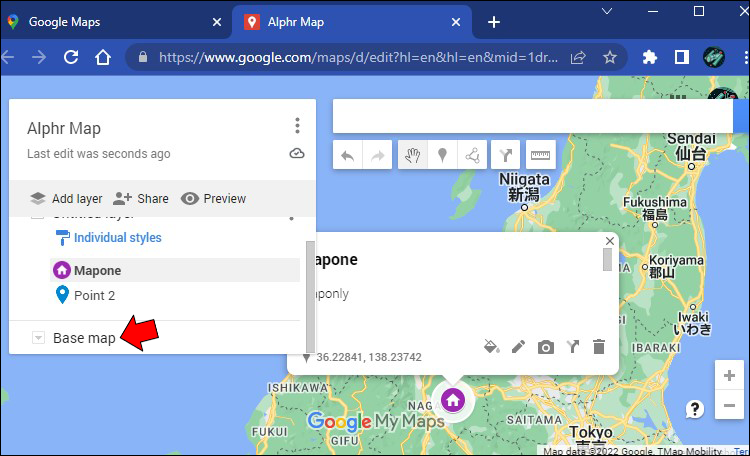
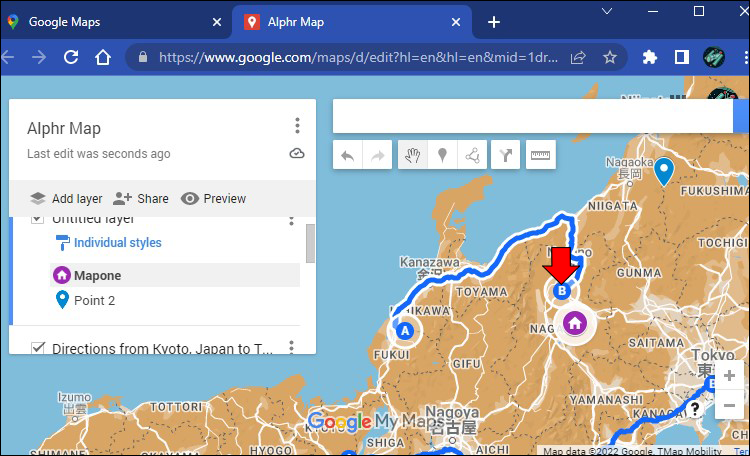
- Different elements will occupy different layers on your map. You can disable layers you don’t need by unchecking them in the left-side panel.
- Change the default look of your map by clicking “Base map” at the bottom of the panel.


There are many other ways to customize your Google Map in the My Maps app. You can draw lines or shapes, create routes, or even measure distances using the tools at the top.
Your map is automatically saved to the cloud as you’re editing it. Once you’re done, you can preview the result and if you’re satisfied, move on to sharing it.
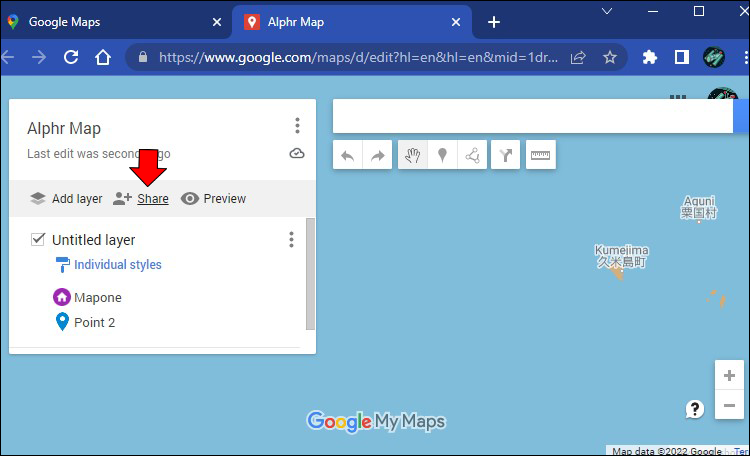
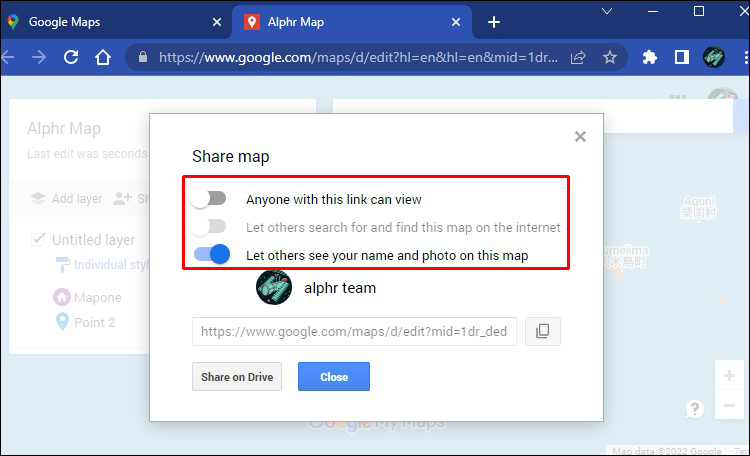
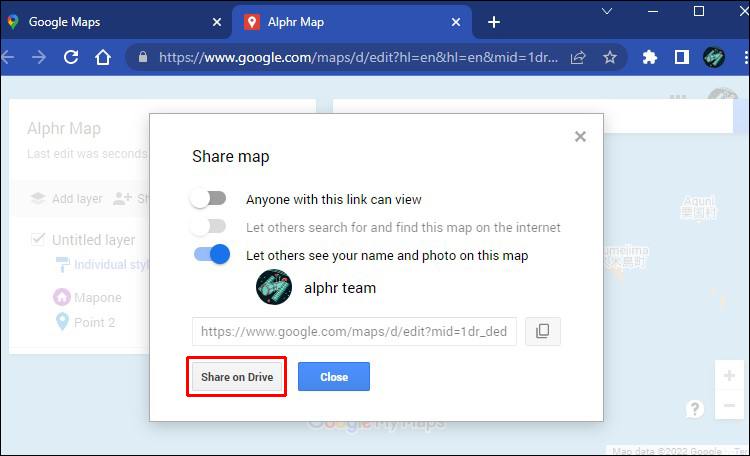
- Click the “Share” button on the left-side panel.
- Adjust your sharing preferences.
- Copy the shareable link or send your map to specific people or groups using the “Share on Drive” option.
Link sharing isn’t the only way to make your map public. You can also embed your creation in your website, export the map to use in other apps, or even print the map. Find these options by clicking the three-dot menu in the top right corner of your Google My Maps editing panel.
How to Create and Share a Route in Google Maps
Once you know how to create custom Google Maps, adding a route and sharing it will be easy. Follow the instructions above to create a new Google My Map. Once you’re on the editor page, follow the steps below to create a route on your map.
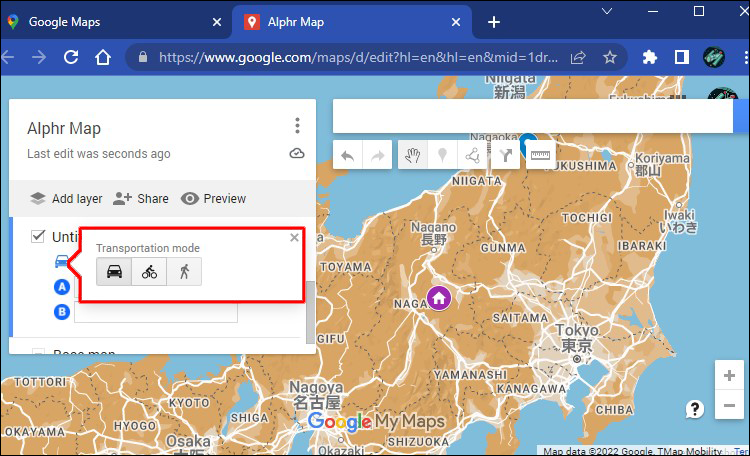
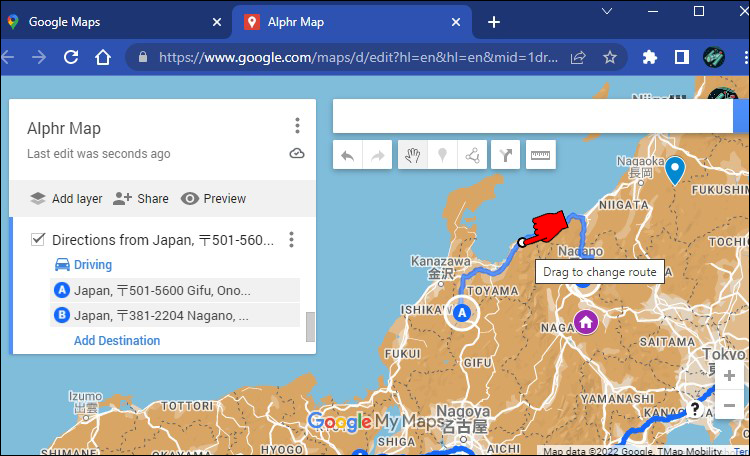
- Click the “Directions” tool at the top.
- Select the transportation mode for your route in the left-side panel.
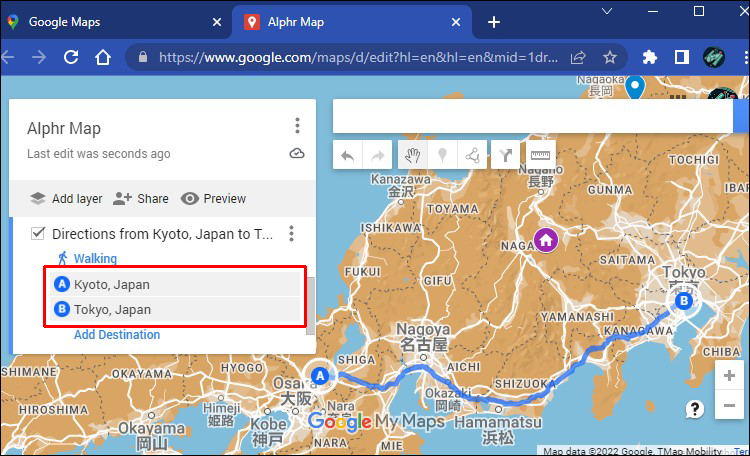
- Define your route’s starting and end points under “A” and “B.” The map will draw the best route for you.
- Drag the line to edit the route.
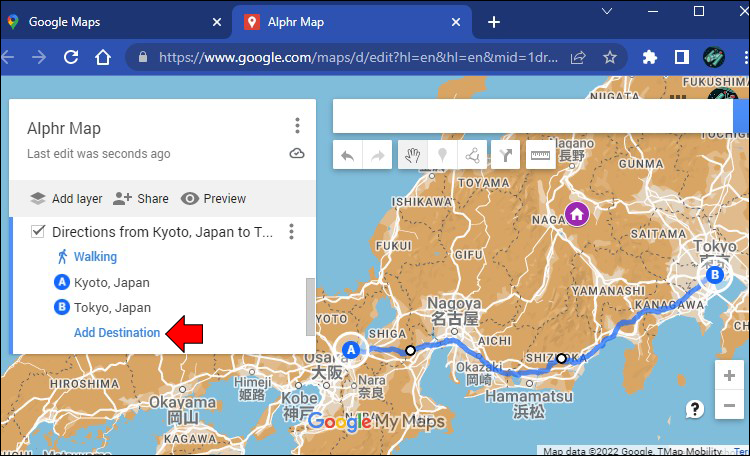
- Add more destinations by selecting this option in the panel and typing their address. You can change the order of your destinations by dragging them on the list.


You can also draw routes manually in Google My Maps.
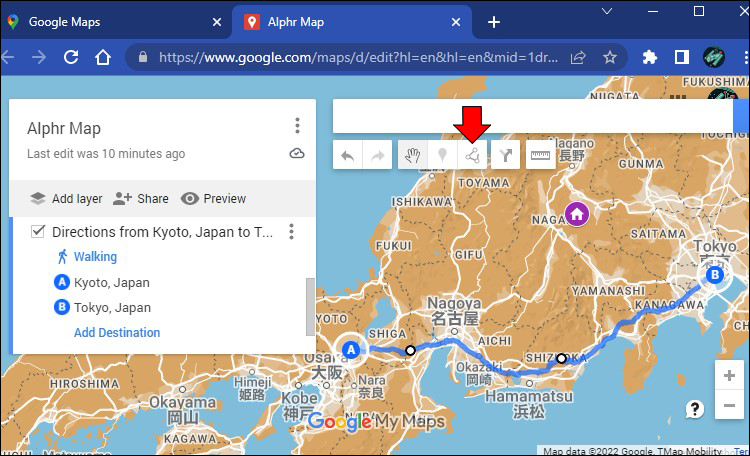
- Find the “Draw a line” tool under the search bar.
- Select the type of route you want to create.
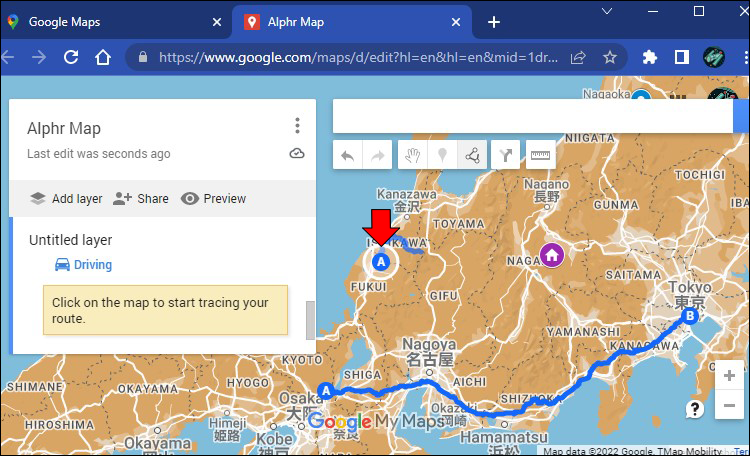
- Click the starting point of your route. It will be marked with the letter “A.”
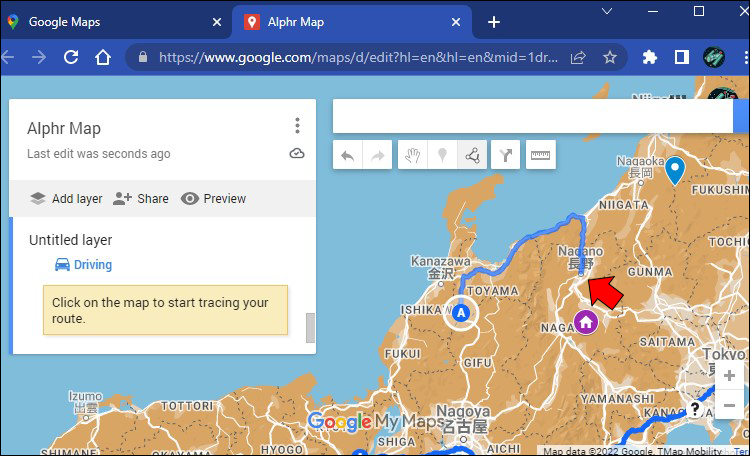
- Next, start drawing the route. Click any spots you want to include.
- Double-click the destination of your route to stop drawing. It will be marked with the letter “B.”
- Edit your route if necessary by dragging the blue line on the map.

Once your route is done, you can share your custom map.
- Click the “Share” button under your map’s title.
- Adjust your sharing preferences.
- Copy the shareable link or click “Share on Drive” to send your map to specific people or groups.
Create Custom Maps With Ease
If you’ve been wondering how to create a shared Google Map, this guide gave you the answers. Add custom places and routes to your map and send it to individual users or groups to communicate effectively.
Have you known about these Google Maps features before? Are you excited to create your own custom maps? Let us know in the comments section below.
Disclaimer: Some pages on this site may include an affiliate link. This does not effect our editorial in any way.