Whether you use Mojave or Catalina, Mac OS X usually handles display resolution and scaling quite well automatically. Still, those using external displays (particularly third-party displays) may wish to select their resolution manually. Follow along in this article to learn how it’s done.
Setting Custom Resolutions for External Displays in Mac OS X
Here’s how you can override OS X’s automatic and limited suggestions and choose any supported resolution for your external monitor, a Philips FTV HDTV in this example.
- To change the resolution of your Mac’s display, head to System Preferences > Displays. If you have more than one screen connected to your Mac, a new Display Preferences window will appear for each one. Select the window residing on the display you wish to modify.
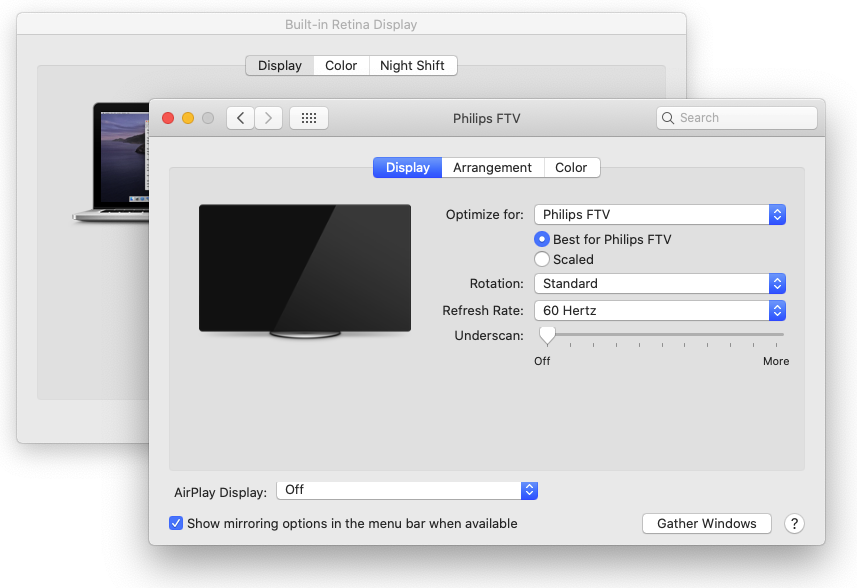
- By default, in recent versions of OS X, you’ll see a “default” recommended resolution for your external display. If you prefer a different screen size, OS X gives you four other options. The exact resolutions will vary depending on the specifications of your external display. Click on Scaled to view the display choices.

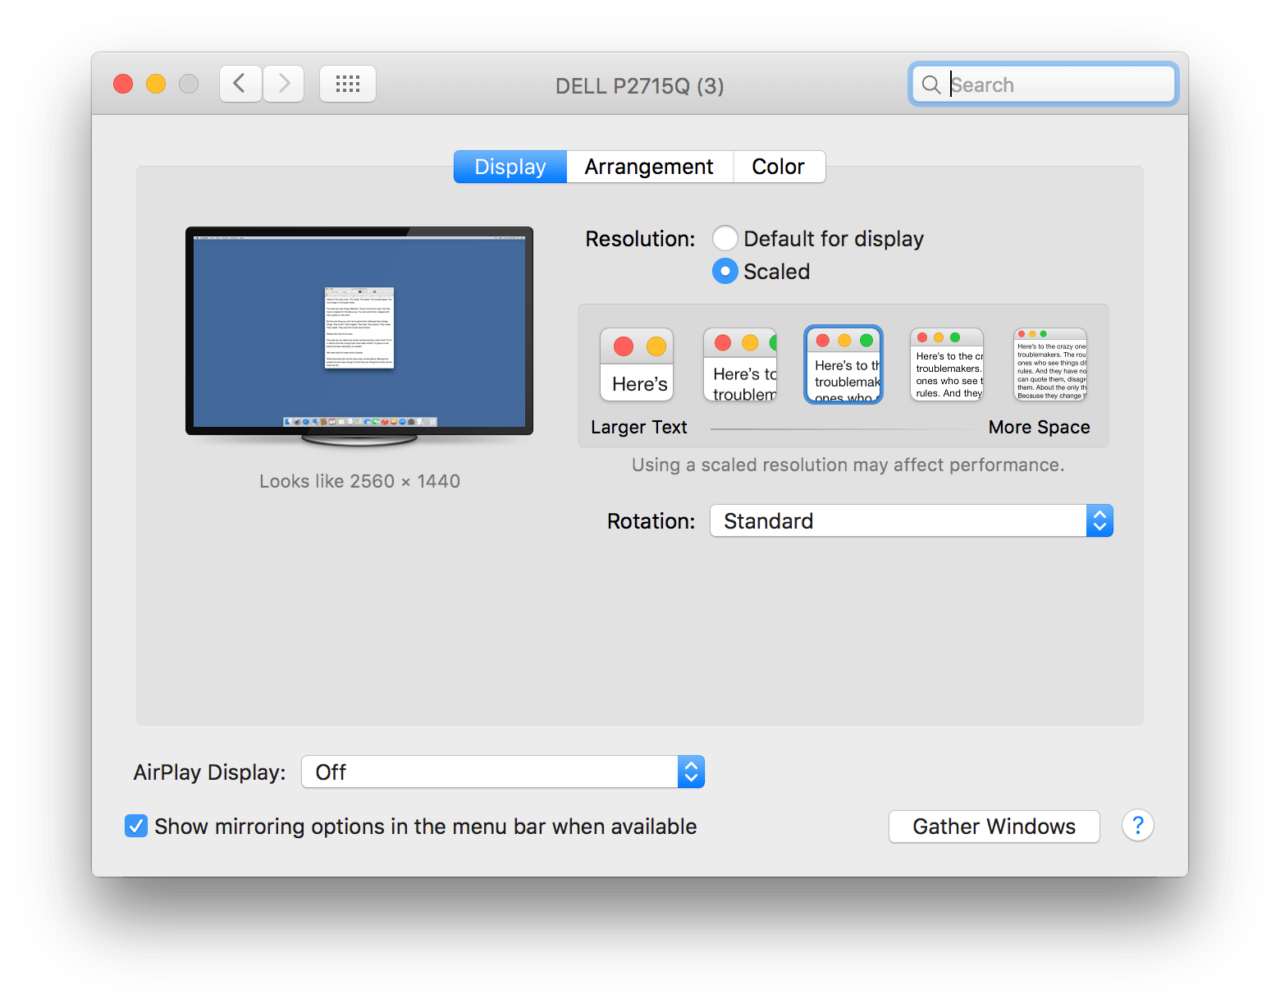
An actual PC monitor usually displays a “Looks like #### x ####” resolution underneath the TV image in the options window.
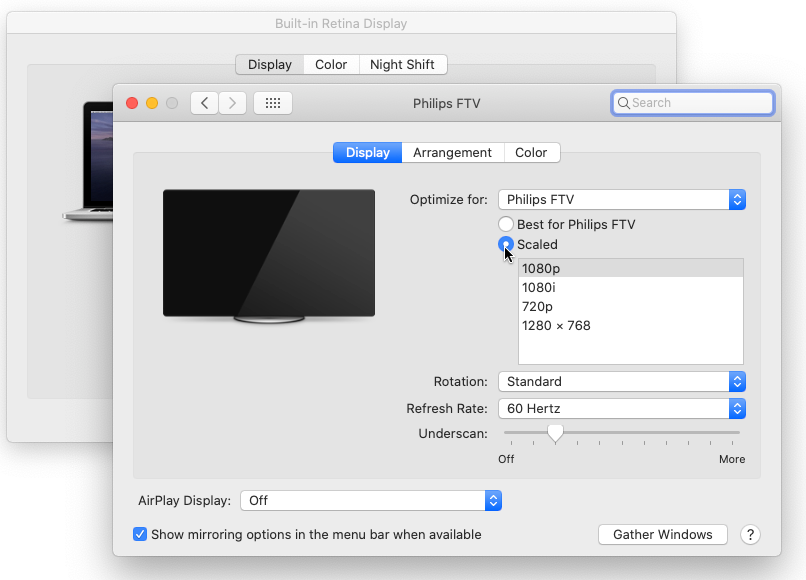
On the Phillips HDTV, OS X suggests a “default” resolution of a Retina-scaled 1080p equivalent, and we have the choice to set other resolutions (“scaled”) including 1280 x 768, 720P, 1080i, and 1080p.
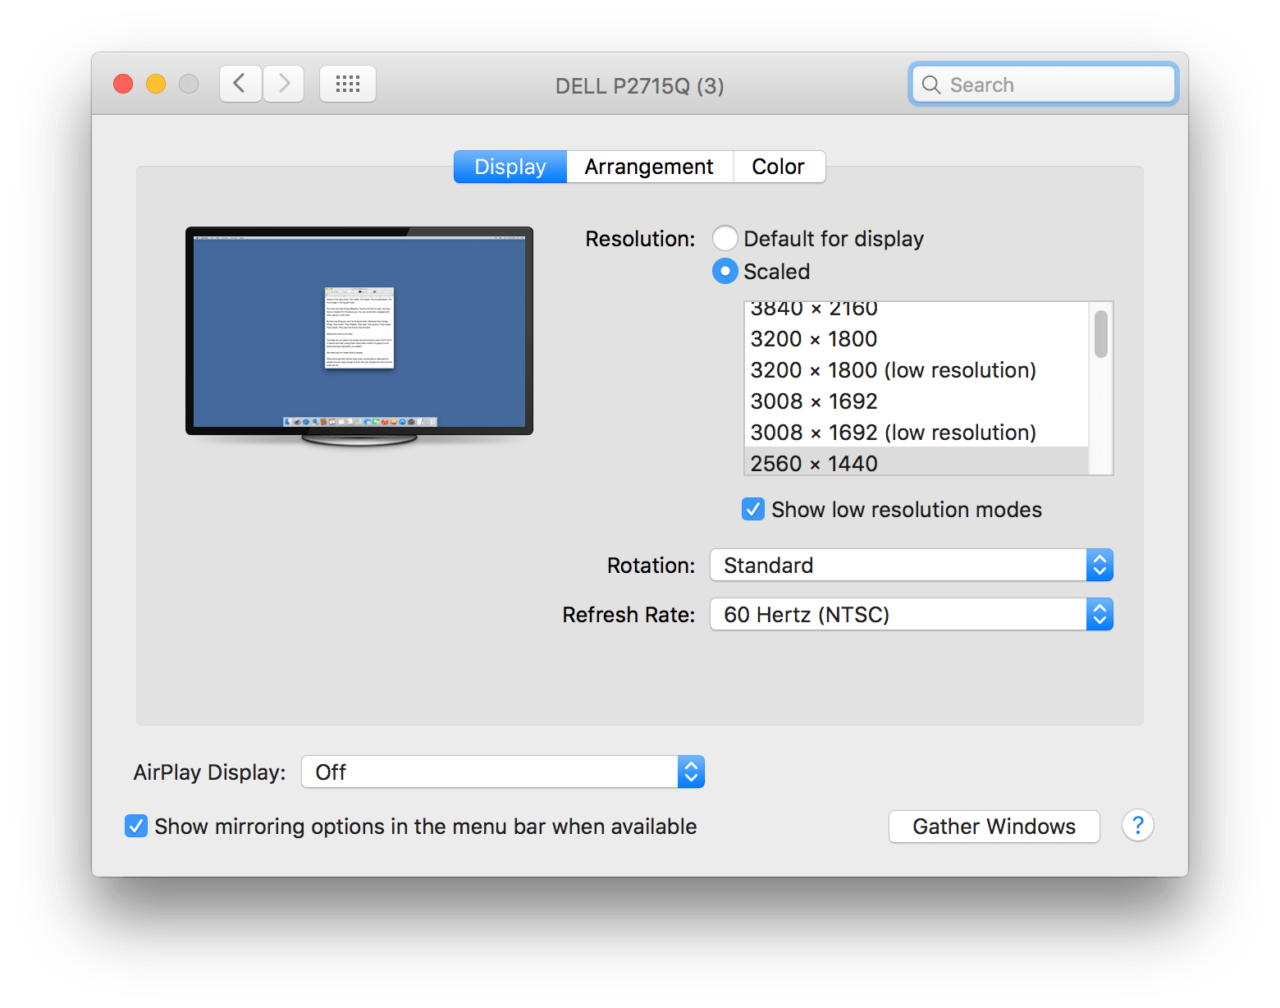
While adequate for the majority of users, these five resolution choices (default and scaled) are missing several “in-between” display options, as well as “low resolution” modes, such as a true 2560×1440 that must be upscaled by the monitor and may be necessary for testing or software compatibility purposes.
Thankfully, these resolutions are still accessible, and here’s how to access them.
- Press and hold the Option key on your keyboard, and then click the Scaled option again.
- Once you’ve found your desired resolution, click its entry in the list to switch your display.
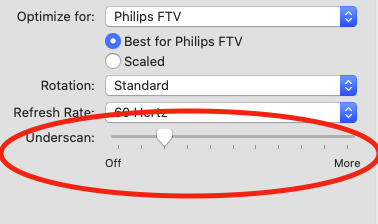
- If you like a particular setting that fills the screen but cuts off the edges, slide the Underscan slider until it properly fits your display area. The Phillips TV above required this step because the top and bottom areas were not viewable.
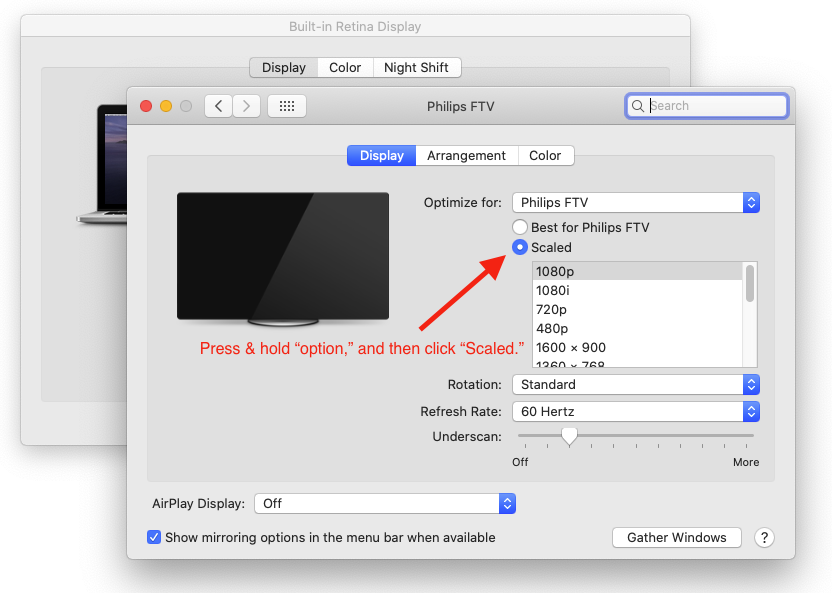
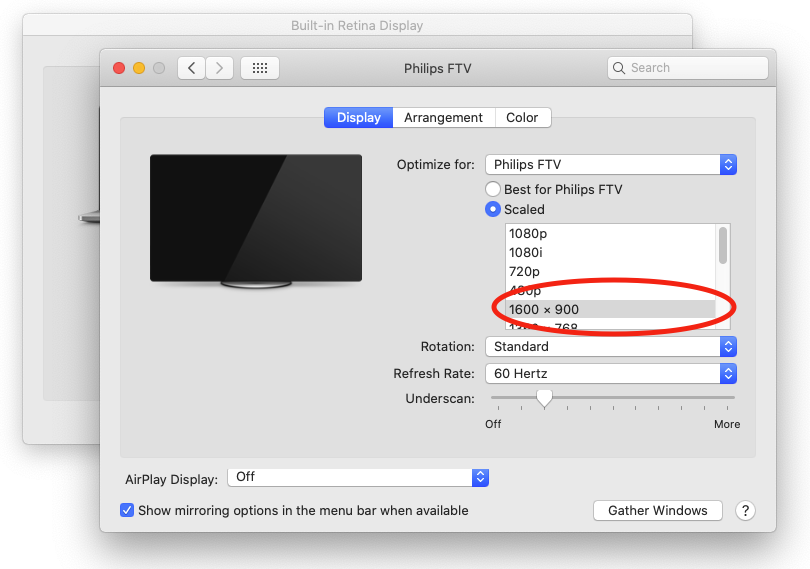
When using the above steps, the row of five recommended resolutions gets replaced by a complete list of ALL supported resolutions. Those using a 4K display can also click Show low-resolution modes to access the aforementioned low-rez options that will get upscaled via the device. If your Mac is connected to an HDTV, this list may also include alternate refresh rates and display modes if supported by the hardware. Everything you see is based on the TV or monitor model.
Mac OS X’s cool thing is the previews you get when choosing a resolution using the Built-in Retina Display option, which is found under the Optimize for section.

When you hover over the resolution thumbnails within the scaled settings, the system lets you see what a window will look like under that particular setting.

While your resolution choices will survive reboots, the “all compatible” resolution list described above isn’t always visible. OS X will revert to the default view after you close and reopen System Preferences. Just remember to click Scaled while holding the Option key, and you’ll see all compatible resolutions again.
External Display Resolution Customized
Customizing your external display in Mac OS X is an easy process once you know where to adjust the settings for it. If the default options don’t work for your external display, then you’ll most likely need to use the low-resolution modes.
Disclaimer: Some pages on this site may include an affiliate link. This does not effect our editorial in any way.


