An Apple iPhone is one of the world’s most powerful personal devices. However, many iPhone users don’t get the full benefits of their smartphones. For example, iPhones keep detailed location history data that can be useful in many ways.
This article will teach you where to find your iPhone location history and the best ways to use its features.
Finding My iPhone Location History
Location history is a Google-based iPhone setting that requires activation. The feature provides personalized maps based on where you’ve been. The saved data provides you with several benefits, including traffic updates, help to find your iPhone, and tailored advertising.
Your device tracks your location history if:
- You have signed in to your Google account.
- The Location History feature is enabled.
- Location Reporting is activated
Location services use GPS, Bluetooth, cell towers, and Wi-Fi hotspots to track your whereabouts. You can see where your device has been by viewing the history of apps with tracking permission.
These are the steps to find your iPhone location history:
- Open Settings on your device.
- Tap the Privacy option.

- Choose Location Services.
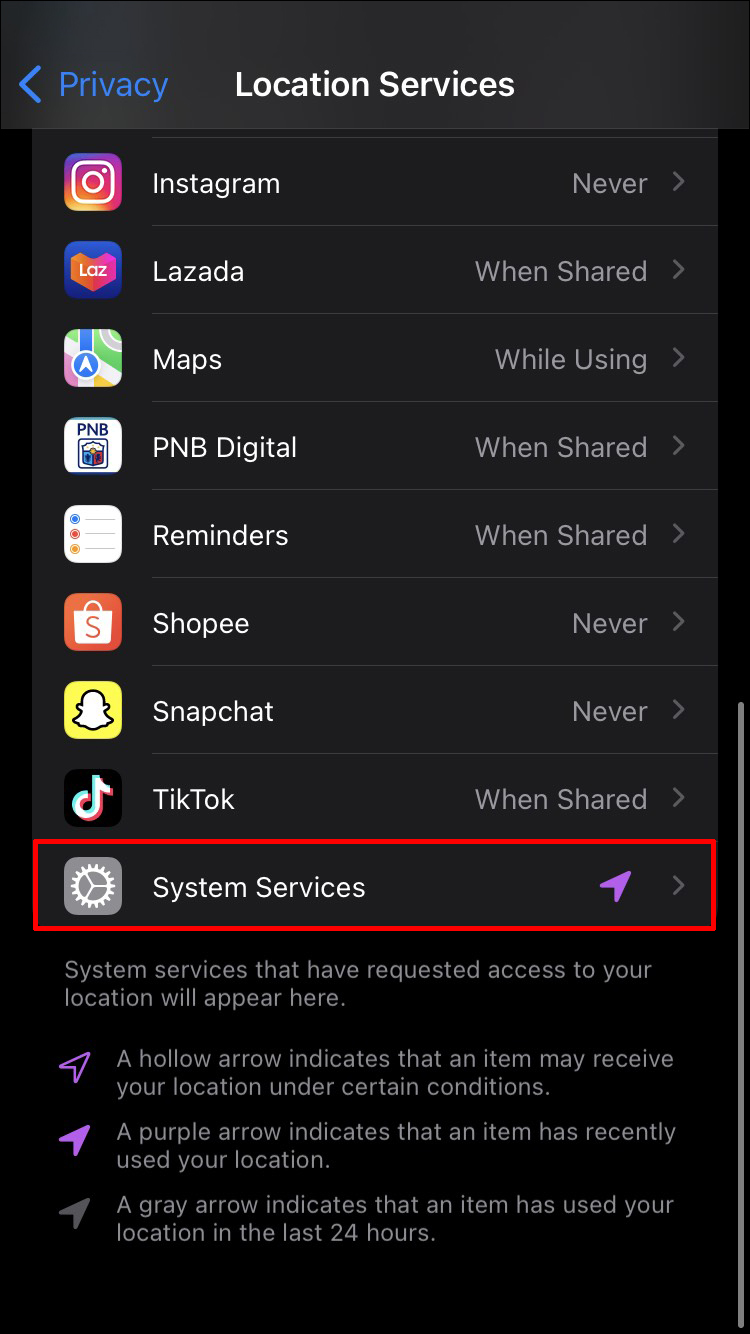
- Select System Services at the bottom.
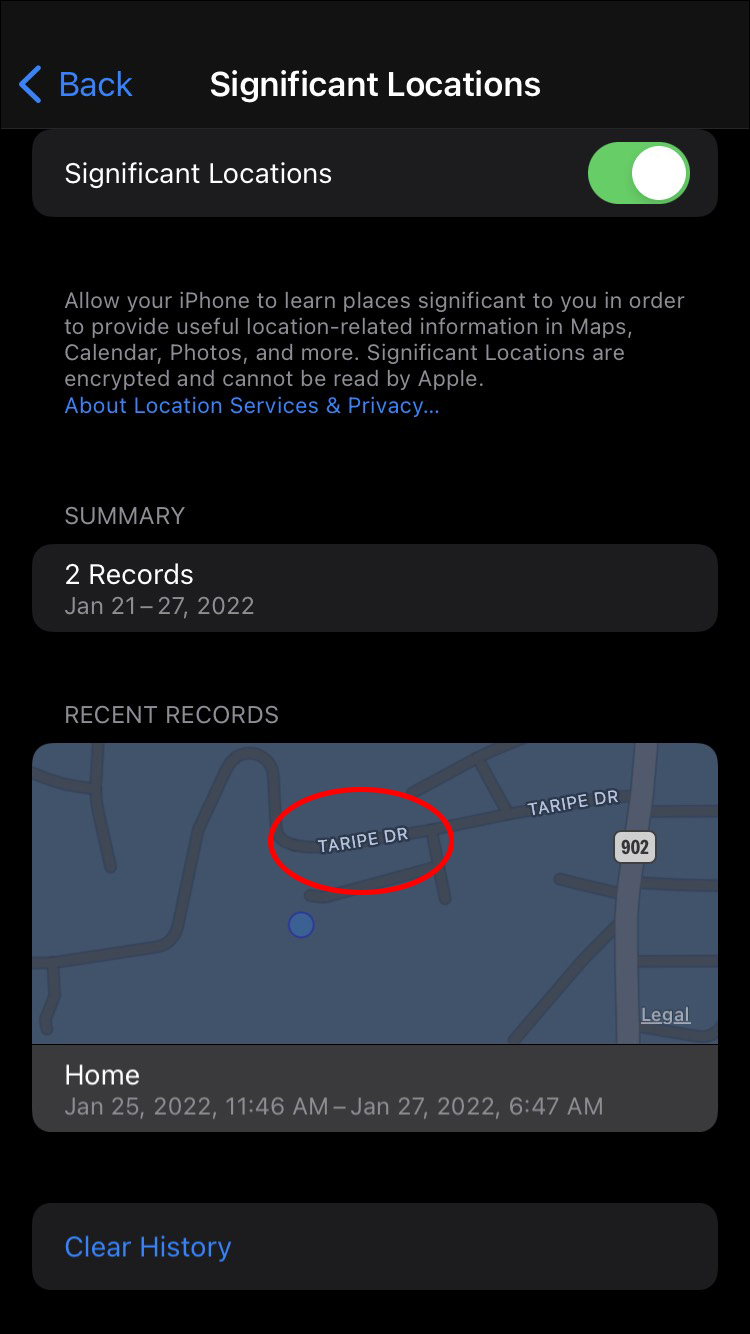
- Within System Services, locate and tap on Significant Locations.
- Select History.


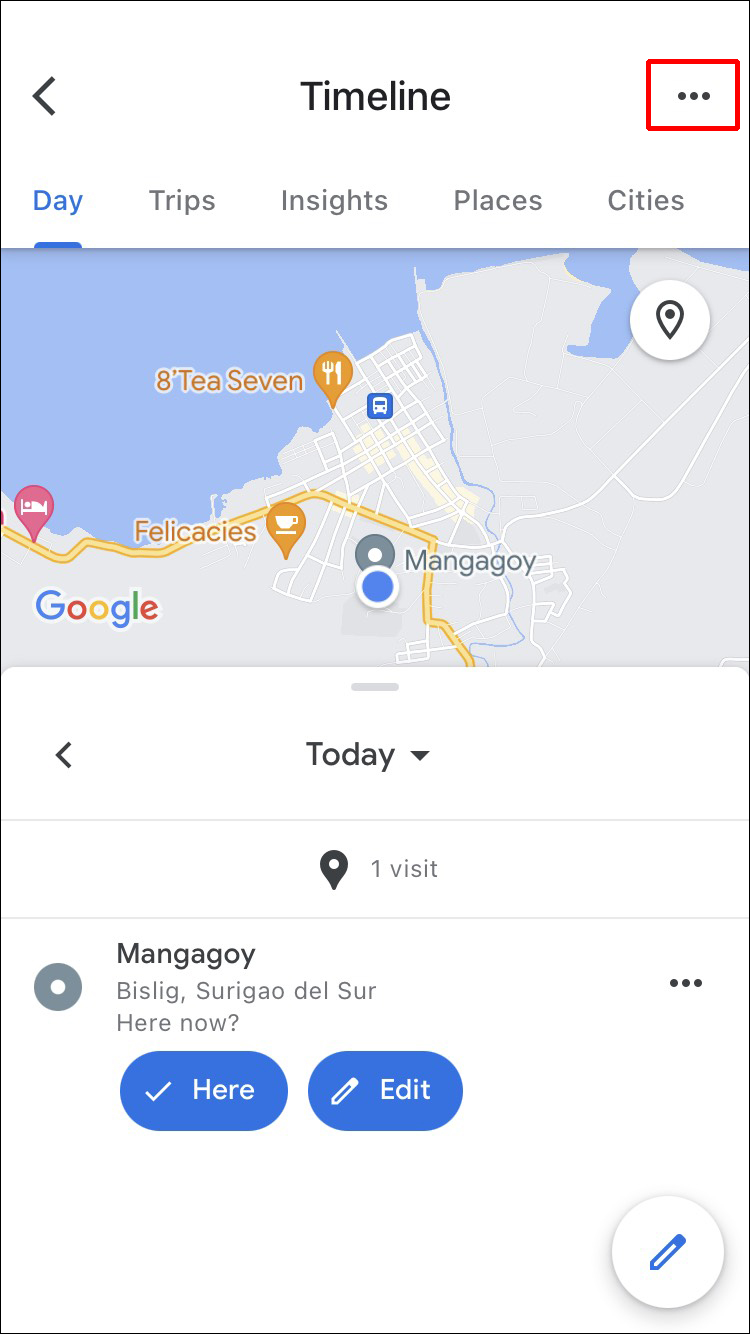
The location logs display timestamps of your arrival and departure. Tap on the name of the city you want to view. Your visited cities are displayed instead of street names if you’ve previously labeled locations on your device.
Location Services Icons
In your settings, go to Location Services to find the tracking permissions for each app you have installed. Applications are added to categories as they request your data. You can view the tracking data for each application.
You will see an arrow next to the apps that have accessed your location. The color of the arrow icon indicates when the app tracked you by location. The colors are as follows:
- A purple arrow indicates the app recently accessed location data.
- A gray arrow indicates an app accessed your data in the last 24 hours.
- An outlined Location Services icon indicates that the place you visited used a geofence.
Geofences are virtual perimeters that surround a location. Apps that use geofencing send you notifications when you enter or leave a geofence area.
How to Delete Your Location History
According to Apple, only your device saves the location data. The purpose is to provide personalized services such as predictive traffic flow routing. Apple does not receive the data without your permission. You can delete the location history on your iPhone to remove the entries.
Clear the location history as follows:
- Select the Settings option.
- Tap on Privacy.
- Open Location Services.
- Tap System Services.
- Within System Services, locate and tap on Significant Locations.
- Now, select Clear History at the bottom of the screen.
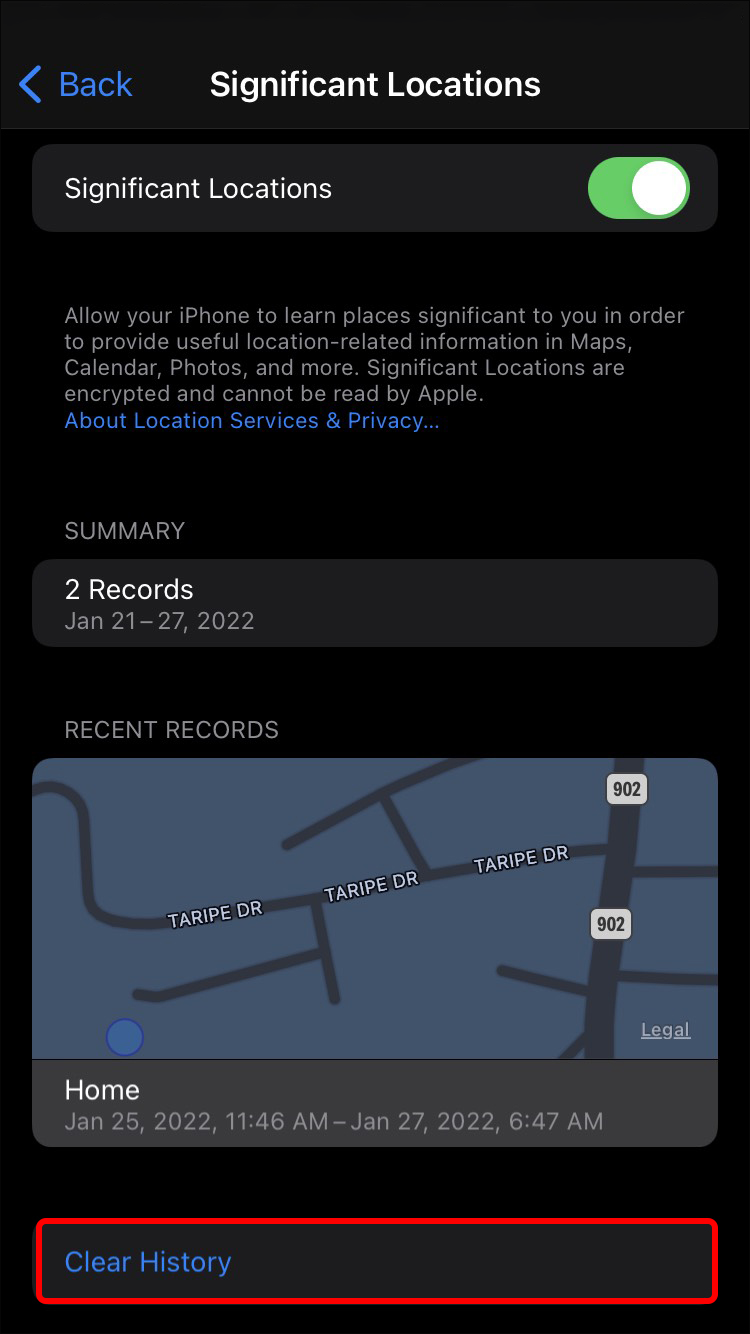
You can also choose to turn off iPhone location history tracking. Uncheck the Significant Locations toggle button to stop location tracking on your device.
Deleting Your Location History Automatically
You can enable settings to delete your location history automatically. The options with this feature let you delete location history older than 3, 18, or 36 months.
To activate automatic history deletion:
- Open Google Maps.
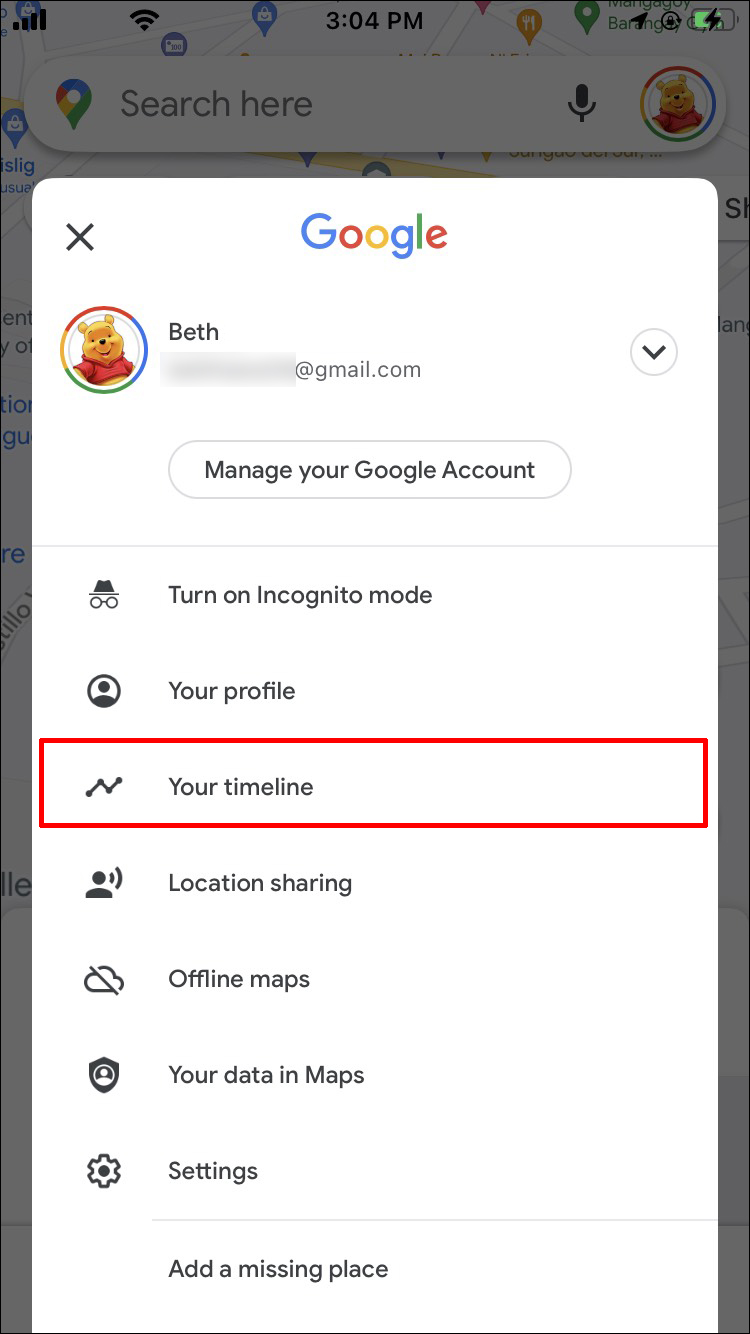
- Tap your profile picture (or icon).
- Click on Your timeline (graph icon).
- Open the More menu.
- Choose Settings.
- Tap Location settings.
- Select Automatically delete Location History.


Choose the timeframe for automatic history deletion. You can go back and remove these changes at any time.
Some personalized Google features are lost or impaired when you delete location history, such as:
- Real-time data about traffic patterns
- History-based recommendations
- Google Photo albums created from places you’ve visited
Frequently Visited Places
Your iPhone can provide detailed information about the places you regularly visit. You can view the location, when you arrived and left, and your activities. Apple devices store this data to provide iPhone users with personalized services. This includes relevant Suri suggestions of places in the area that may interest you.
Follow these steps to see data about places you regularly visit:
- Open the Settings on your device.
- Select Privacy at the bottom of the screen.
- Tap Location Services.
- Scroll down and open System Services.
- Open Significant Locations.
- Enter your Apple passcode (the device will use Face ID if it is activated).
- Select a location in the History option.

The information is only accessible to you or someone that has your passcode or other Apple log-on credentials. Apple encrypts the data, so it cannot be viewed by the corporation or any other entities.
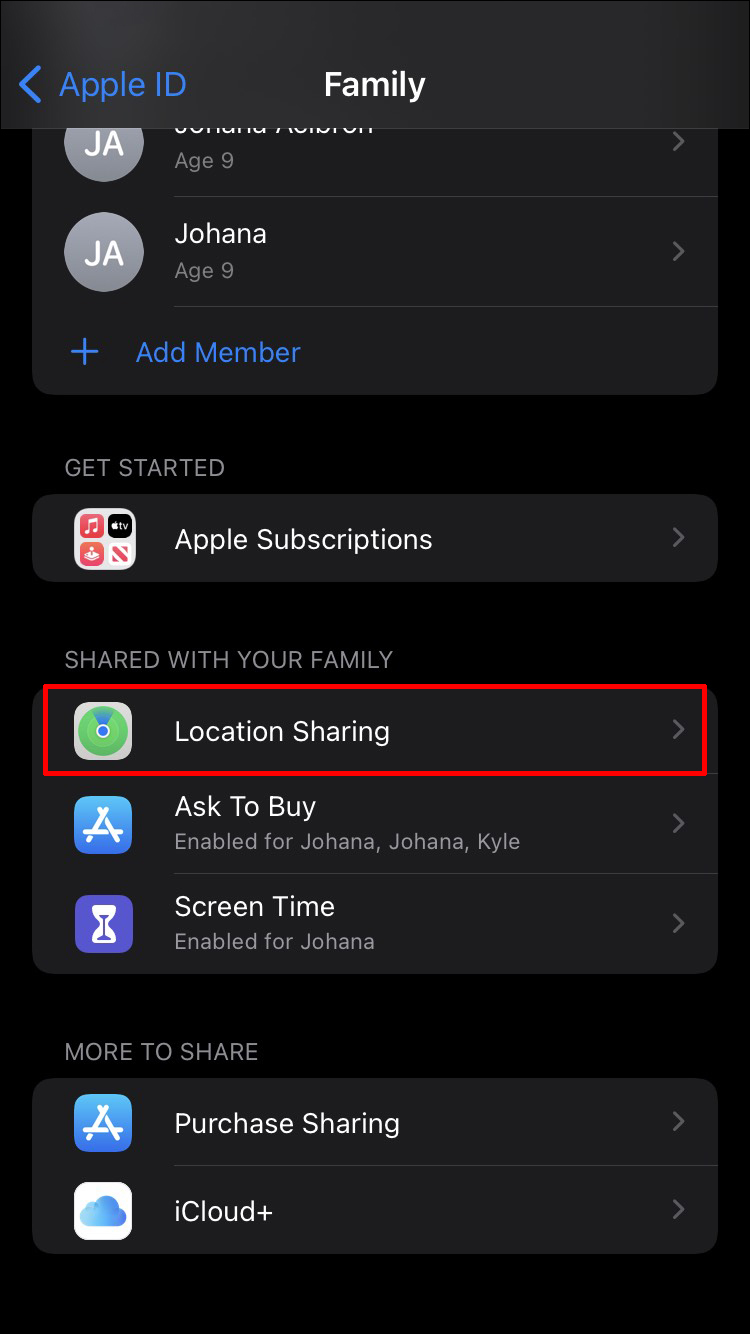
Using Location Services for Family Sharing
You can use Location Services to enable Family Sharing on your iPhone without sharing your account. This feature gives the people you know immediate access to your location. It is available on all of your iOS devices.
Follow these steps to set up Family Sharing:
- Access the Settings option on your device.
- Go to Family Sharing.
- Tap Location Sharing.
- Turn on the Share My Location feature.
- Tap the names of the family members you want to see your location.
- Select Share My Location.


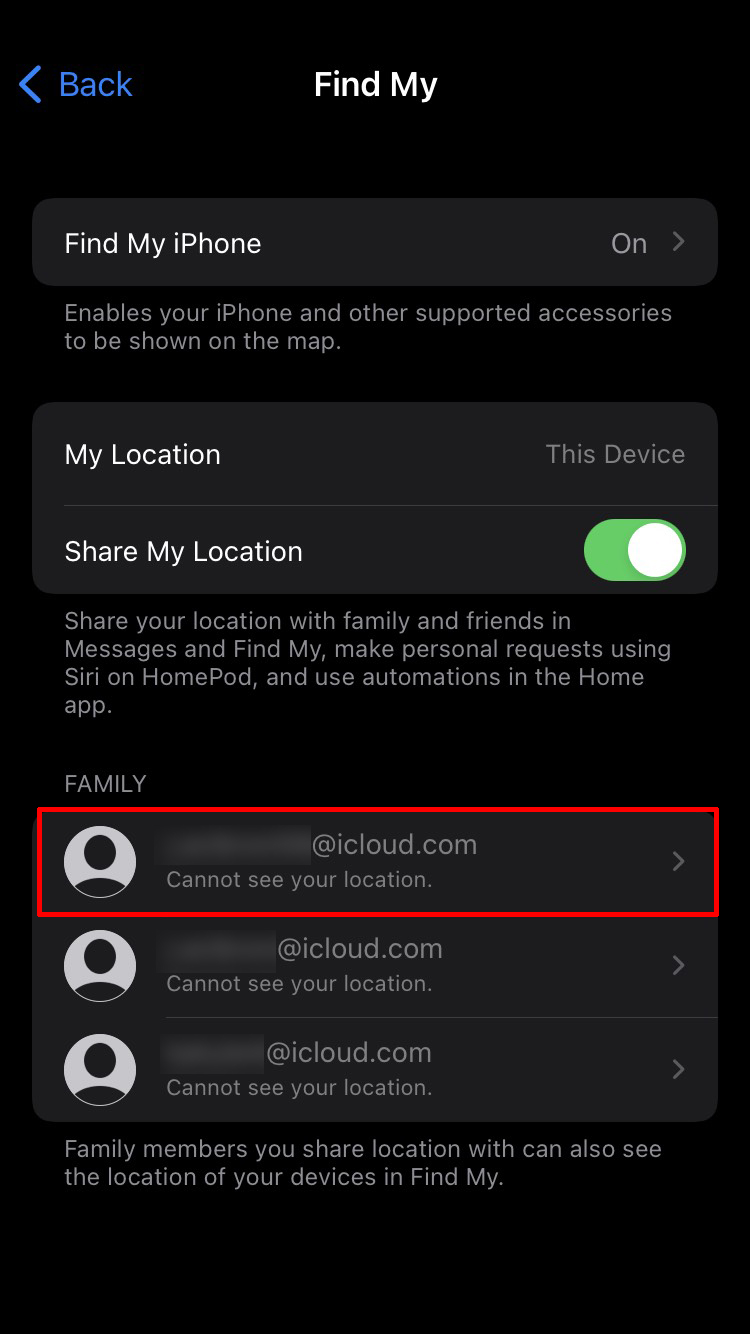

Repeat steps five and six for each person you want to know your location. They will receive a message that you have shared your location. The message includes the option for the recipient to share their location with you.
Family Sharing gives people access to your subscriptions, purchases, and other information. A few simple steps reverse the Family Sharing feature. Stop sharing your location with a family member by tapping their name. Choose Stop Sharing My Location to save your preference.
Locating a Missing Device
Use the iPhone Location Services feature to find a missing device that belongs to you or a family member. However, you must download the Find My app before the iPhone is lost. The Find My app also sends a notification if you accidentally leave your phone.
Download the latest Find My app to prepare ahead of time. Then follow these steps to add devices to the app:
- Go to Settings.
- Select Find My and enter your Apple ID, if requested.
- Tap Find My iPhone to turn on the app.

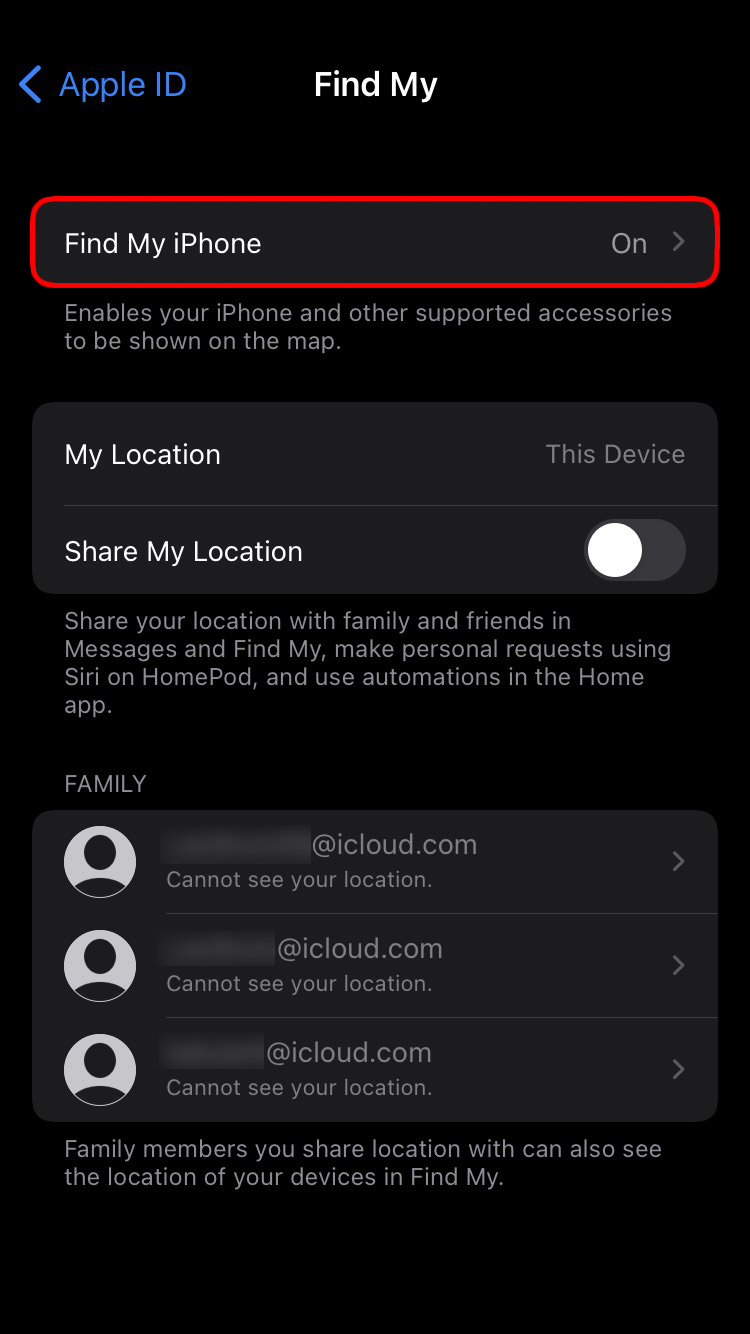
Perform the same steps for each device you want to include. You can set up notification sounds upon finding the device. You can also see the distance between you and your device.
Why is my Location History Unavailable
Some iPhone users cannot view the places they have visited. Several reasons result in the unavailability of Location History, such as:
- The user doesn’t meet age requirements.
- Location History isn’t available in their region.
- Google account services are disabled by a group administrator.
- Location Services is turned off.
Money Well Spent
The modern features of Apple technology justify the popularity and expense of the iPhone. Location History is one of the device’s most convenient options. Take advantage of the many benefits of this feature by using it to see where you’ve been and get relevant travel information. Family Sharing can be used as an added security measure in case of a mishap when you’re away from home.
Explore the options available for using your iPhone location history to take your device to its full potential.
Do you have location services turned on? Let us know how you use the location services in your iPhone in the comments section below.
Disclaimer: Some pages on this site may include an affiliate link. This does not effect our editorial in any way.


