DBAN, short for Darik’s Boot and Nuke, is a free program that allows the user to quickly and effectively delete all files on a hard drive. This goes for every single file, including the entire operating system.
In this article, you’ll learn how to perform a complete system deletion using DBAN. It will guide you through all the involved steps, from downloading the program to wiping a hard drive clean.
How to Use DBAN via USB
As mentioned, DBAN wipes everything clean from your hard drive – including the operating system. This means that you need an external device to use it. Most commonly, this is going to be a USB flash drive.
Although you probably have a multi-gigabyte flash drive, the minimum recommended capacity is 32MB with 11MB of free space.
First of all, you’re going to need an app for creating a bootable flash drive. There are various options available but we recommend Rufus. Make sure that the Rufus app is on your flash drive. Then, go to DBAN’s official website and download the DBAN ISO file to your device’s desktop. Now, here’s a step-by-step guide on making the USB bootable for DBAN purposes.
- Go to your flash drive and run the Rufus app that you’ve downloaded.
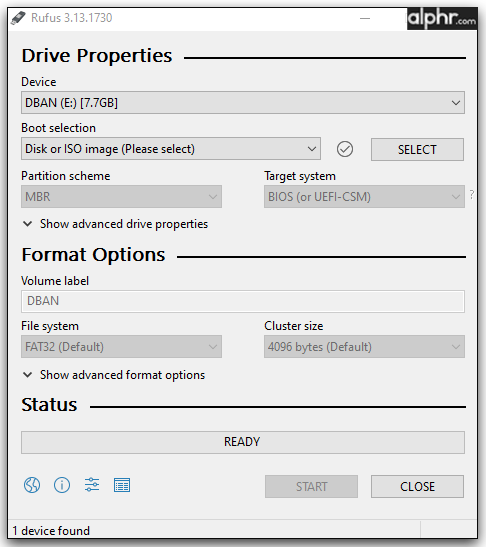
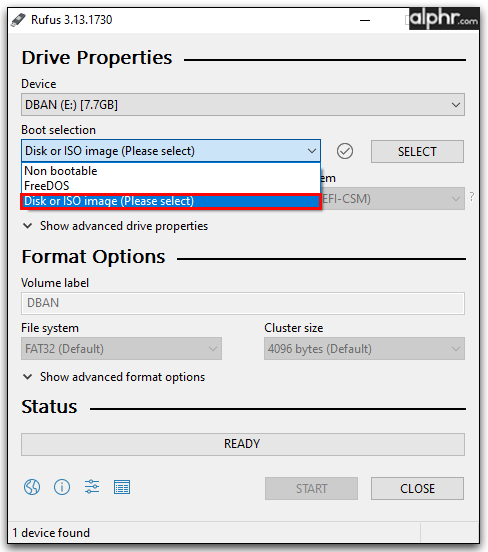
- The app will find the USB automatically. Click the menu next to Boot and select ISO image or Disk.

- A pop-up menu will show, where you’ll be able to select the DBAN ISO file on your desktop.
- Select Open. Then, select START.
- When a warning message appears, informing you that this process will delete all data on your USB drive, select OK.


There you have it; you’ve successfully created a bootable USB drive for your DBAN deletion.
But what if you don’t want to perform the DBAN disk wipe using a USB drive?
How to Use DBAN Without USB
The only viable alternative to using a USB for DBAN drive wiping is burning it to a CD. Unfortunately, you can’t do this like you would burning regular files to a CD. A good program for this, which we can recommend, is Free ISO Burner. It’s a third-party app but it’s lightweight and very straightforward. Here’s how to turn a disk into a bootable DBAN drive.
- Download the Free ISO Burner app and run it (it’s a standalone program, so no need to install it).
- Insert a blank CD/DVD/BD into your drive.
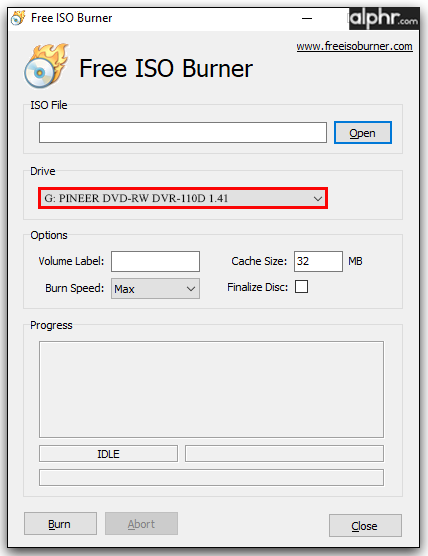
- Run the ISO Burner.
- Under Drive, select the one assigned to the empty disk you’ve inserted.
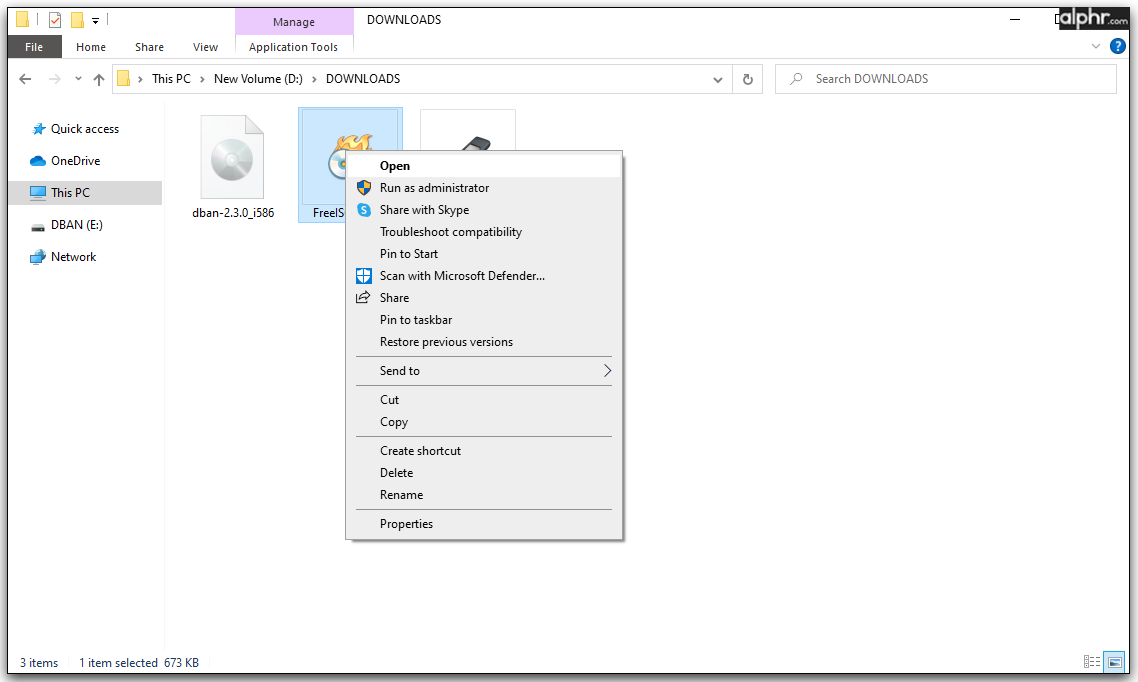
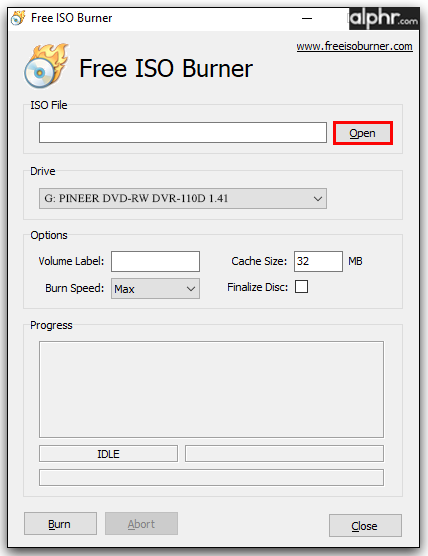
- Next to ISO File, click Open.
- Find the DBAN ISO file (download it just as explained in the USB section above).
- Select Burn.


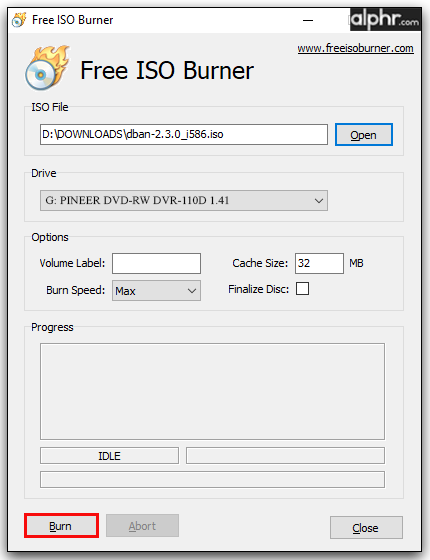
That’s it; now your CD is DBAN bootable.
Note that you can turn any external hard drive into a bootable DBAN drive. Additionally, you can use DBAN to wipe an external drive or any other drive attached to your computer clean.
How to Use DBAN on Windows
Now that you have all the necessary equipment for performing a DBAN disk wipe, you’ll be working in BIOS. Here’s how to boot from your USB/CD DBAN drive on Windows.
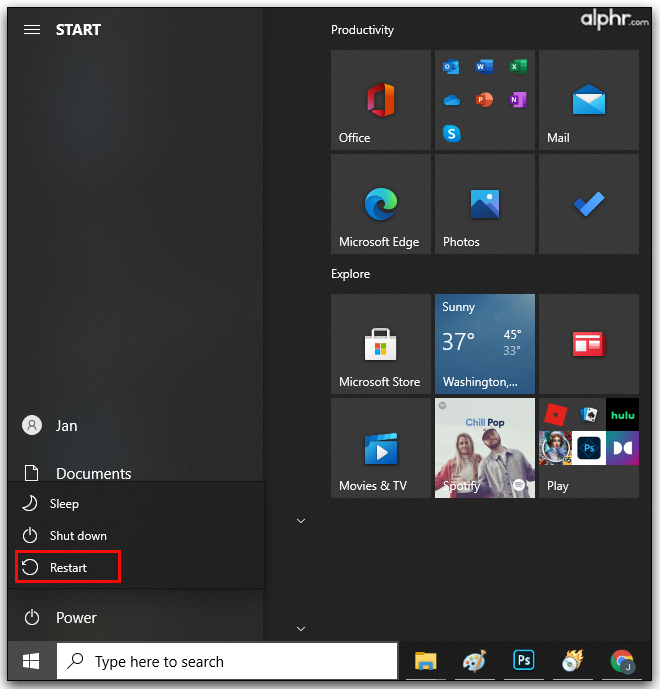
- Restart your computer by clicking the Start menu icon, pressing the power button, and selecting Restart.
- Most likely, pressing the F10 key will allow you to choose which drive to use for booting. This can vary from computer to computer, though, so keep an eye out for any BIOS instructions when your computer is starting up.
Once DBAN runs in your BIOS, you’ll see a blue screen with a list of command options. Pressing the F2 key on your keyboard will take you to an informational page about the DBAN software. The F4 key will take you to the full DBAN disclaimer (RAID).
There are two methods of using DBAN. The first involves pressing F3, at which point you’ll be taken to a screen that will help you quickly erase every plugged-in drive. The second option gives you more flexibility in this department. To proceed with the more specific DBAN option (recommended), hit Enter.
There are several methods that DBAN uses to wipe your hard drive(s) clean. Here’s a list of commands that you have available in the F3 Quick mode:
- dod – The DoD 5220.22-M wipe method, which uses 7 passes when cleaning your drive(s).
- dodshort – Works in the same way as the above except only three passes.
- ops2 – An old Canadian method for data wiping. The only difference, compared to DoD, is that it uses a single verification step.
- gutmann – A total of 35 passes. Mostly useless for modern hard drives.
- prng – Also known as the Random Data method, it’s very effective on modern drives.
- quick – Also known as Write Zero, this method involves writing zeros, as opposed to, for example, the Random Data method’s random characters.
Both DBAN and most experts recommend the dodshort command. Another command that uses the same method is autonuke. So, if you ever hear anybody talking about “autonuking” a drive, they’re talking about the dodshort command.
The interactive mode, on the other hand, gives you more options. For example, it allows you to choose which hard drives you’d like to wipe. Use J and K on your keyboard to move up/down on the list and Enter/Space to make changes. At the bottom of the screen, you’ll see a few keyboard shortcuts. P leads you to the PRNG method settings screen. M lets you choose which wipe method to use.
How to Use DBAN on Mac
DBAN is a very effective tool for Windows computers, but can you use it on macOS systems? Unfortunately, DBAN doesn’t work on Apple devices. Luckily, every Mac comes with its own drive wipe software. Here’s how to wipe your macOS device clean.
- Turn the device on and simultaneously hold down the Option, Command, and R keys on the keyboard. This will run Recovery Mode.
- Go to the Utilities window and run Disk Utility.
- Select the drive that you want to erase on the left-hand sidebar.
- Click Format and select macOS Extended.
- Close the Disk Utility window and select Reinstall macOS.
- Follow the instructions.
There you have it, your macOS drive of choice is wiped clean.
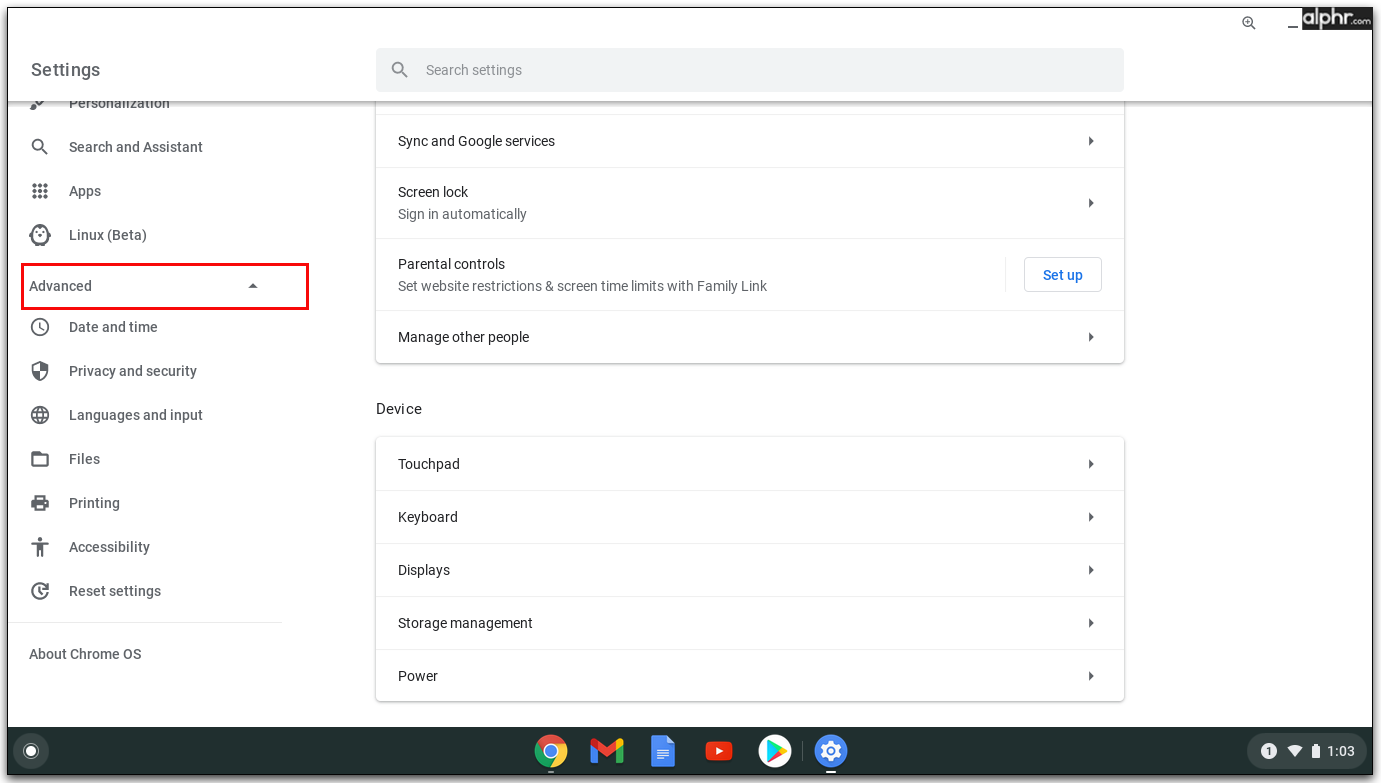
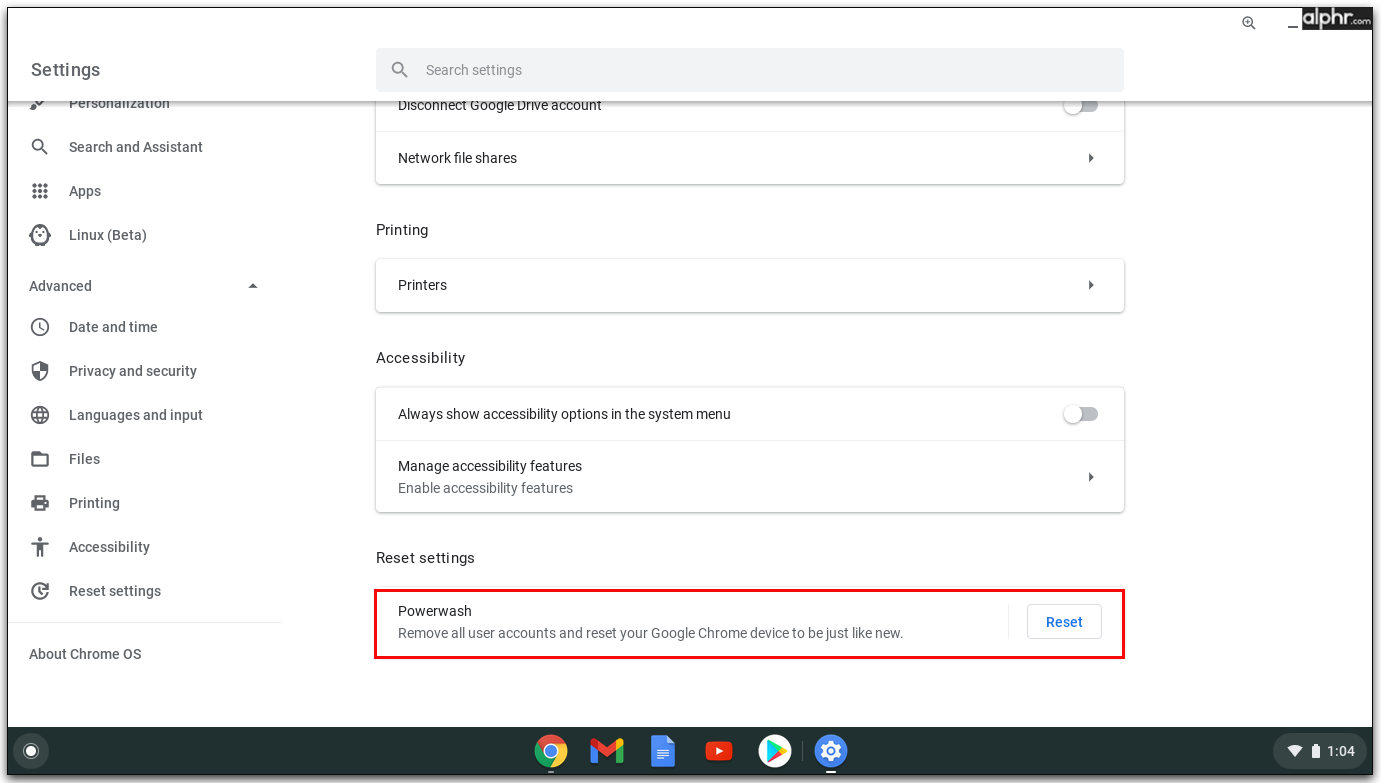
How to Use DBAN on Chromebook
DBAN isn’t available for Chrome OS devices, either. Thankfully, drive wiping is even easier on Chromebooks (compared to Mac computers). Start by deleting any items that you have downloaded. Remove all the accounts, as well. Then, do the following.
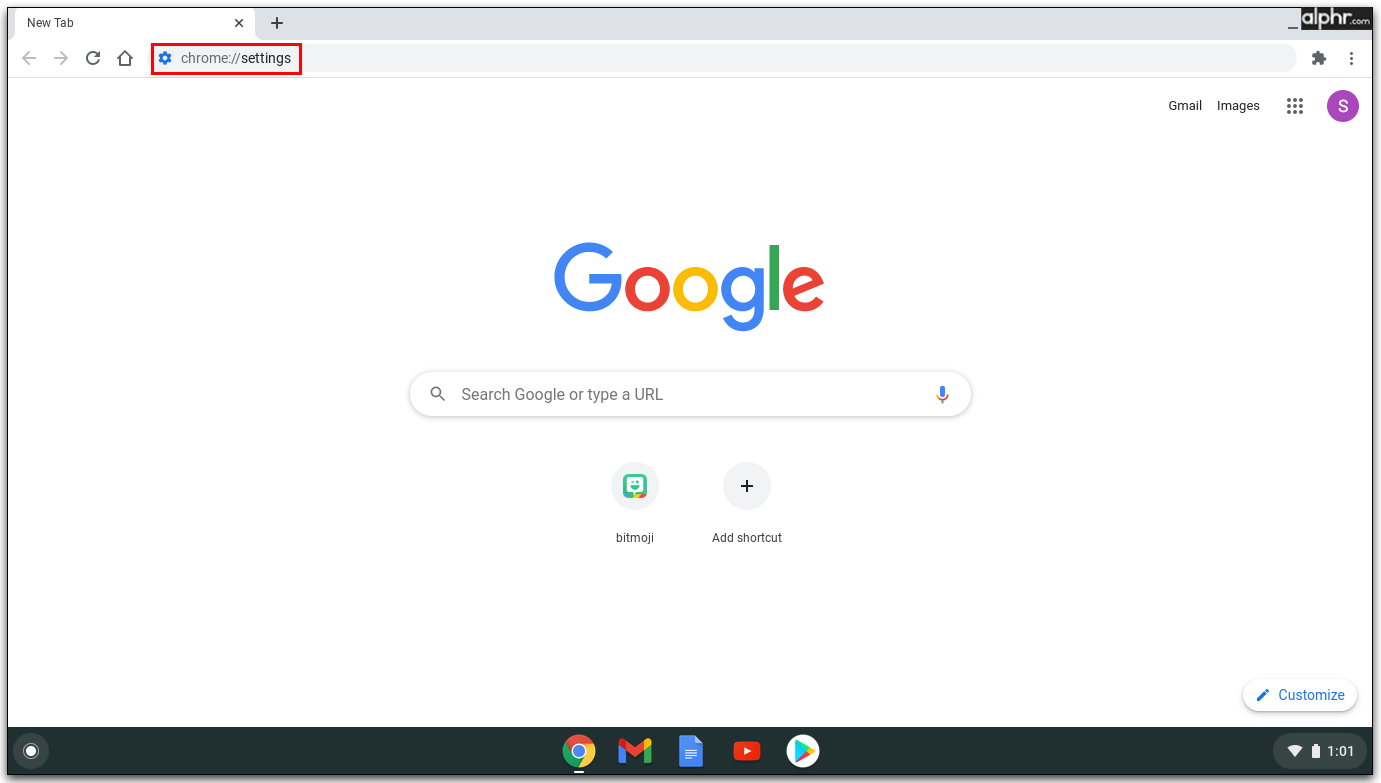
- Open Google Chrome and type in ”chrome://settings.”
- Navigate to Settings and select Show advanced settings.
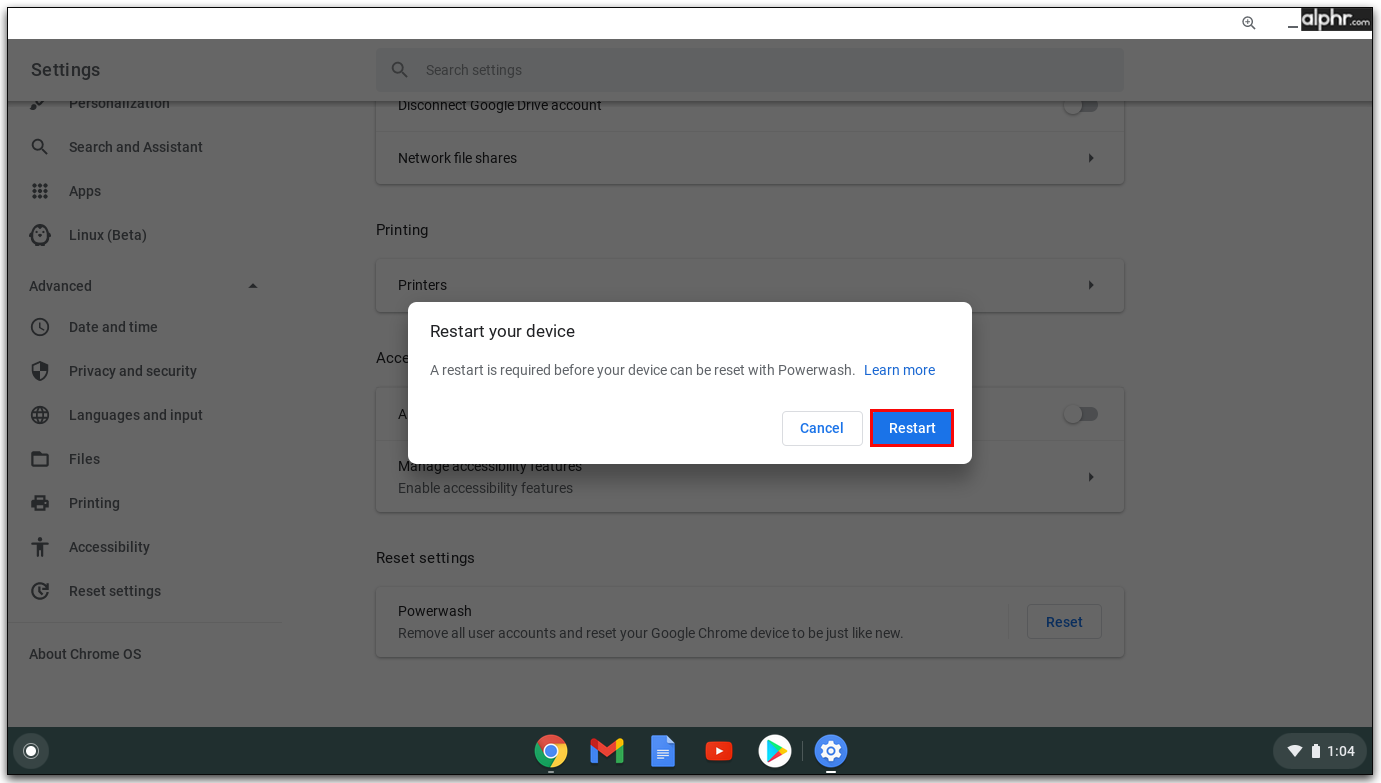
- Scroll down until you reach Powerwash under ”Reset Settings.”
- Click the ”Reset” button and confirm.
Additional FAQs
Can I run DBAN from Windows?
DBAN is a tool specifically made for cleaning desktop and laptop computers. Still, the program works from BIOS, not from Windows. Not only that, but DBAN will delete all information from your hard drive, which includes the Windows OS. So, to answer this question, no, you can’t run DBAN from Windows.
Is DBAN safe to use with my laptop?
As long as you are 100% sure that you want all the information on a particular disk deleted, DBAN is absolutely safe to use on laptop and desktop devices alike. Make sure, though, that you’ve backed up everything that you need. The entire point behind using a software tool such as DBAN is to irreversibly delete everything on a particular drive.
Can I use DBAN with an SSD?
The DBAN tool will detect an SSD drive like any other drive on a computer. DBAN is perfectly capable of wiping such a drive clean. However, given the fact that SSD drives are much more sensitive than the HDD alternatives, a DBAN wipe might end up shortening the life of an SSD. So, if you plan on never using the SSD in question again, go ahead and perform a wipe. If not, well, make sure that you understand the risks involved.
How long does it take for DBAN to work?
This depends on your computer’s processor, the HDD type, and, of course, its size – the larger the capacity, the longer it is to wipe. Typically, it takes roughly 1-3 hours for DBAN to wipe a 1TB hard drive. However, if your computer is really old and its processor is slow, it might take longer than this. If you need to quickly delete the data and ensure that it’s unrecoverable, you can also use a physical method of hard drive destruction.
Wiping Things Clean Using DBAN
Although DBAN is a software aimed at wiping hard drives (Windows), there are similar methods that can be used on other devices like Mac computers and Chromebooks. Either way, follow the guidelines of this tutorial carefully and wipe your hard drive(s) clean.
Have you managed to do what you wanted? Which method did you use? Share with the community in the comments section below.
Disclaimer: Some pages on this site may include an affiliate link. This does not effect our editorial in any way.


