With storage space ranging from 16GB to 1TB, the iPad offers a great way to view and store photos and videos. But before long, your photo collection can grow exponentially and become too much for even that much space, particularly if you also have a lot of apps.
If you want to know how to delete photos from your iPad and increase your storage space, we’ll show you the various ways to do it in this article. For instance, did you know the Photo app categorizes photos by photo content including people’s faces? We’ll show you how to delete your photos by faces and places and take you through some of the other cool features the Photo app has to offer to manage your photos.
How to Delete All Photos from an iPad
Before we get to how to delete all your iPad photos, there are a few things to note:
- Once you delete photos they’ll move to your “Recently Deleted” album, then delete permanently after 30 days.
- If you enable iCloud Photos and delete a photo via your iPad, it will be deleted from your other iCloud enabled devices.
Before deleting your photos, consider making a backup of them or those you wish to keep.
To delete all photos from your iPad:
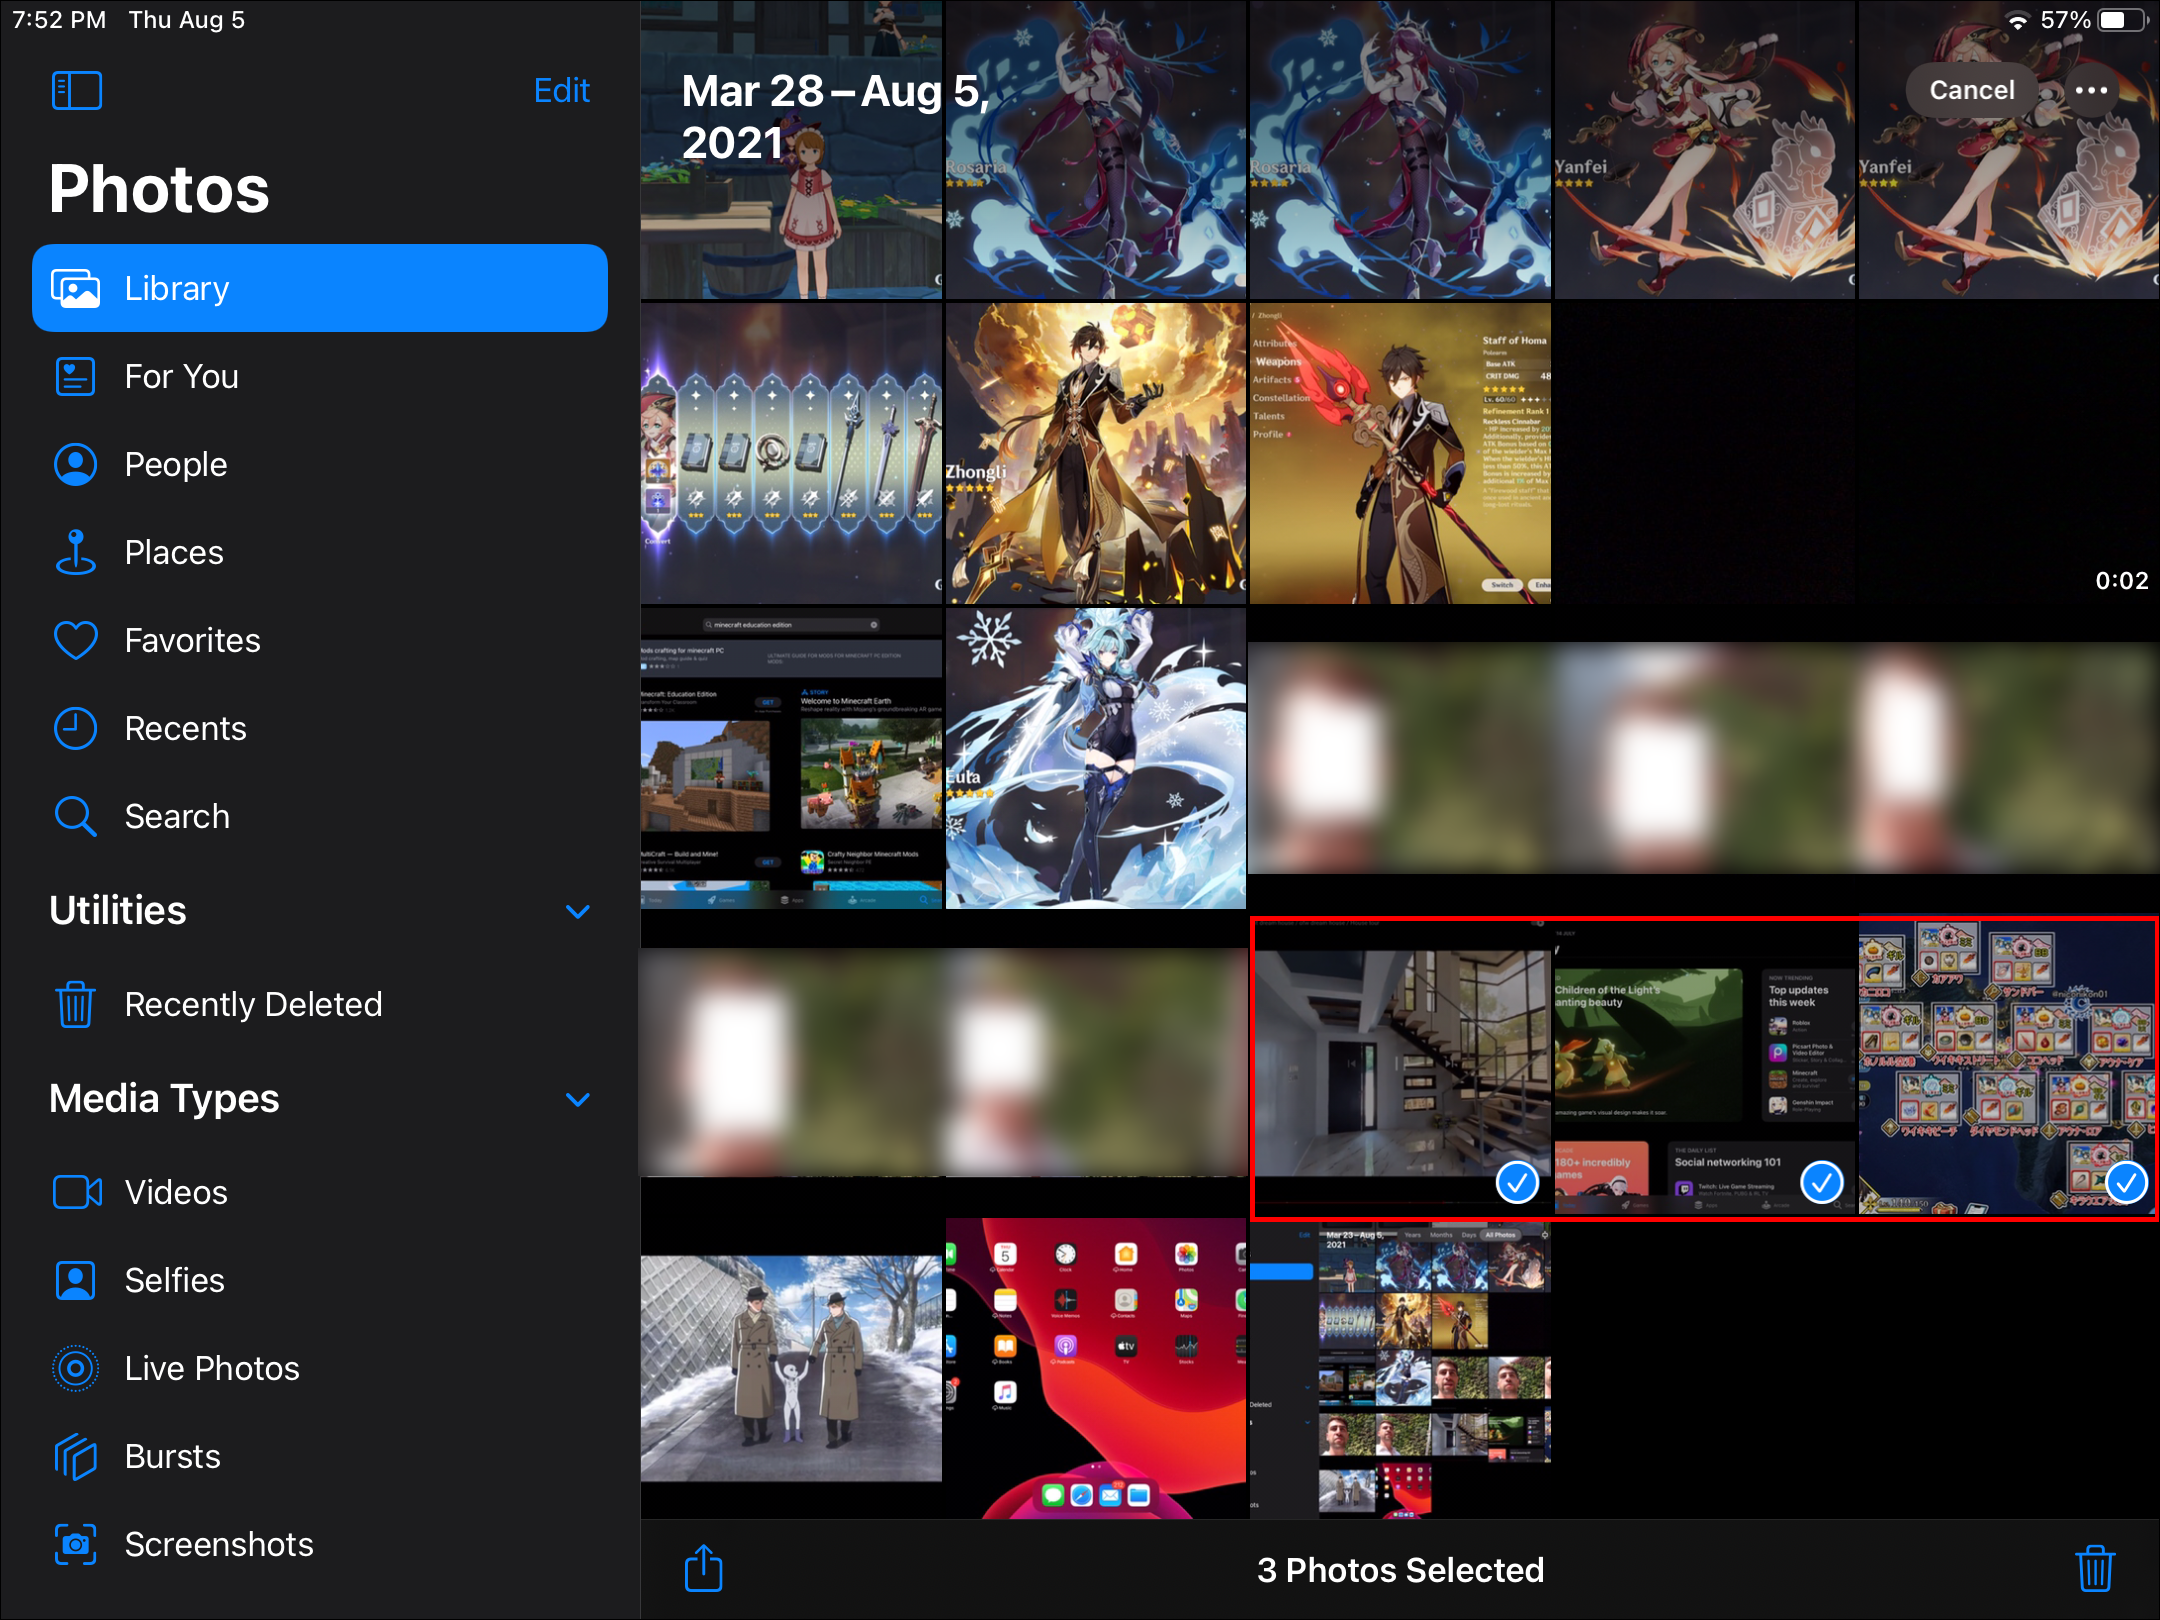
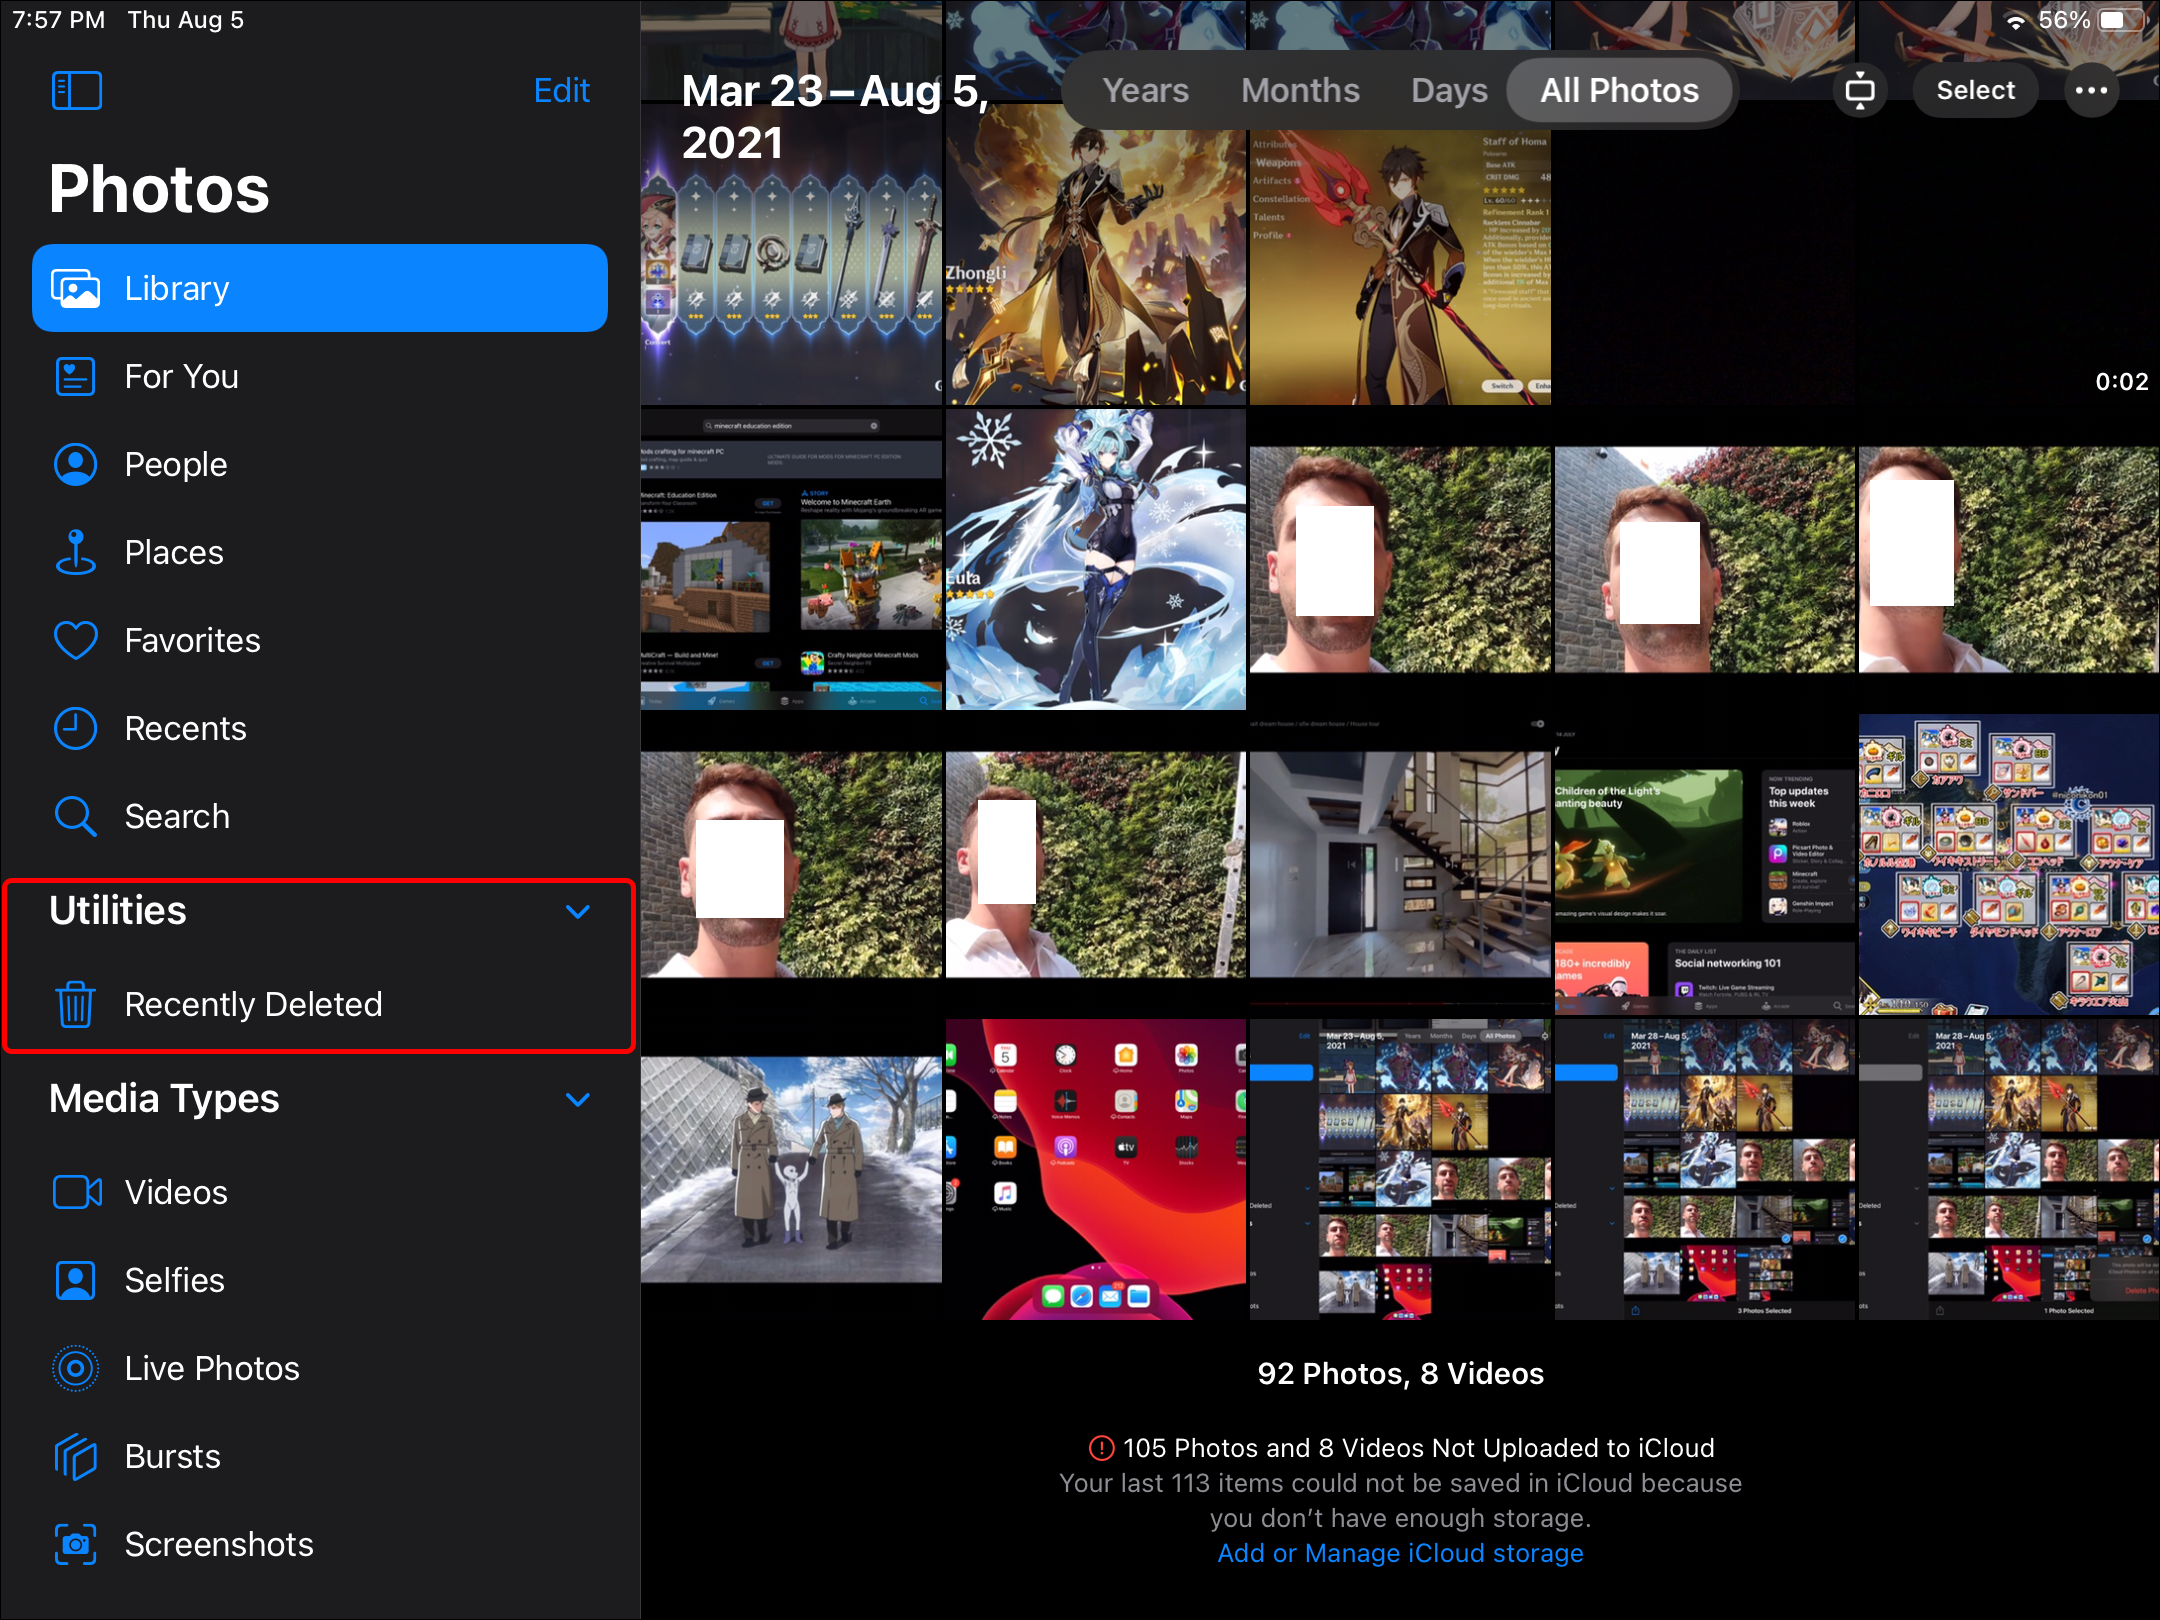
- Launch Photos.
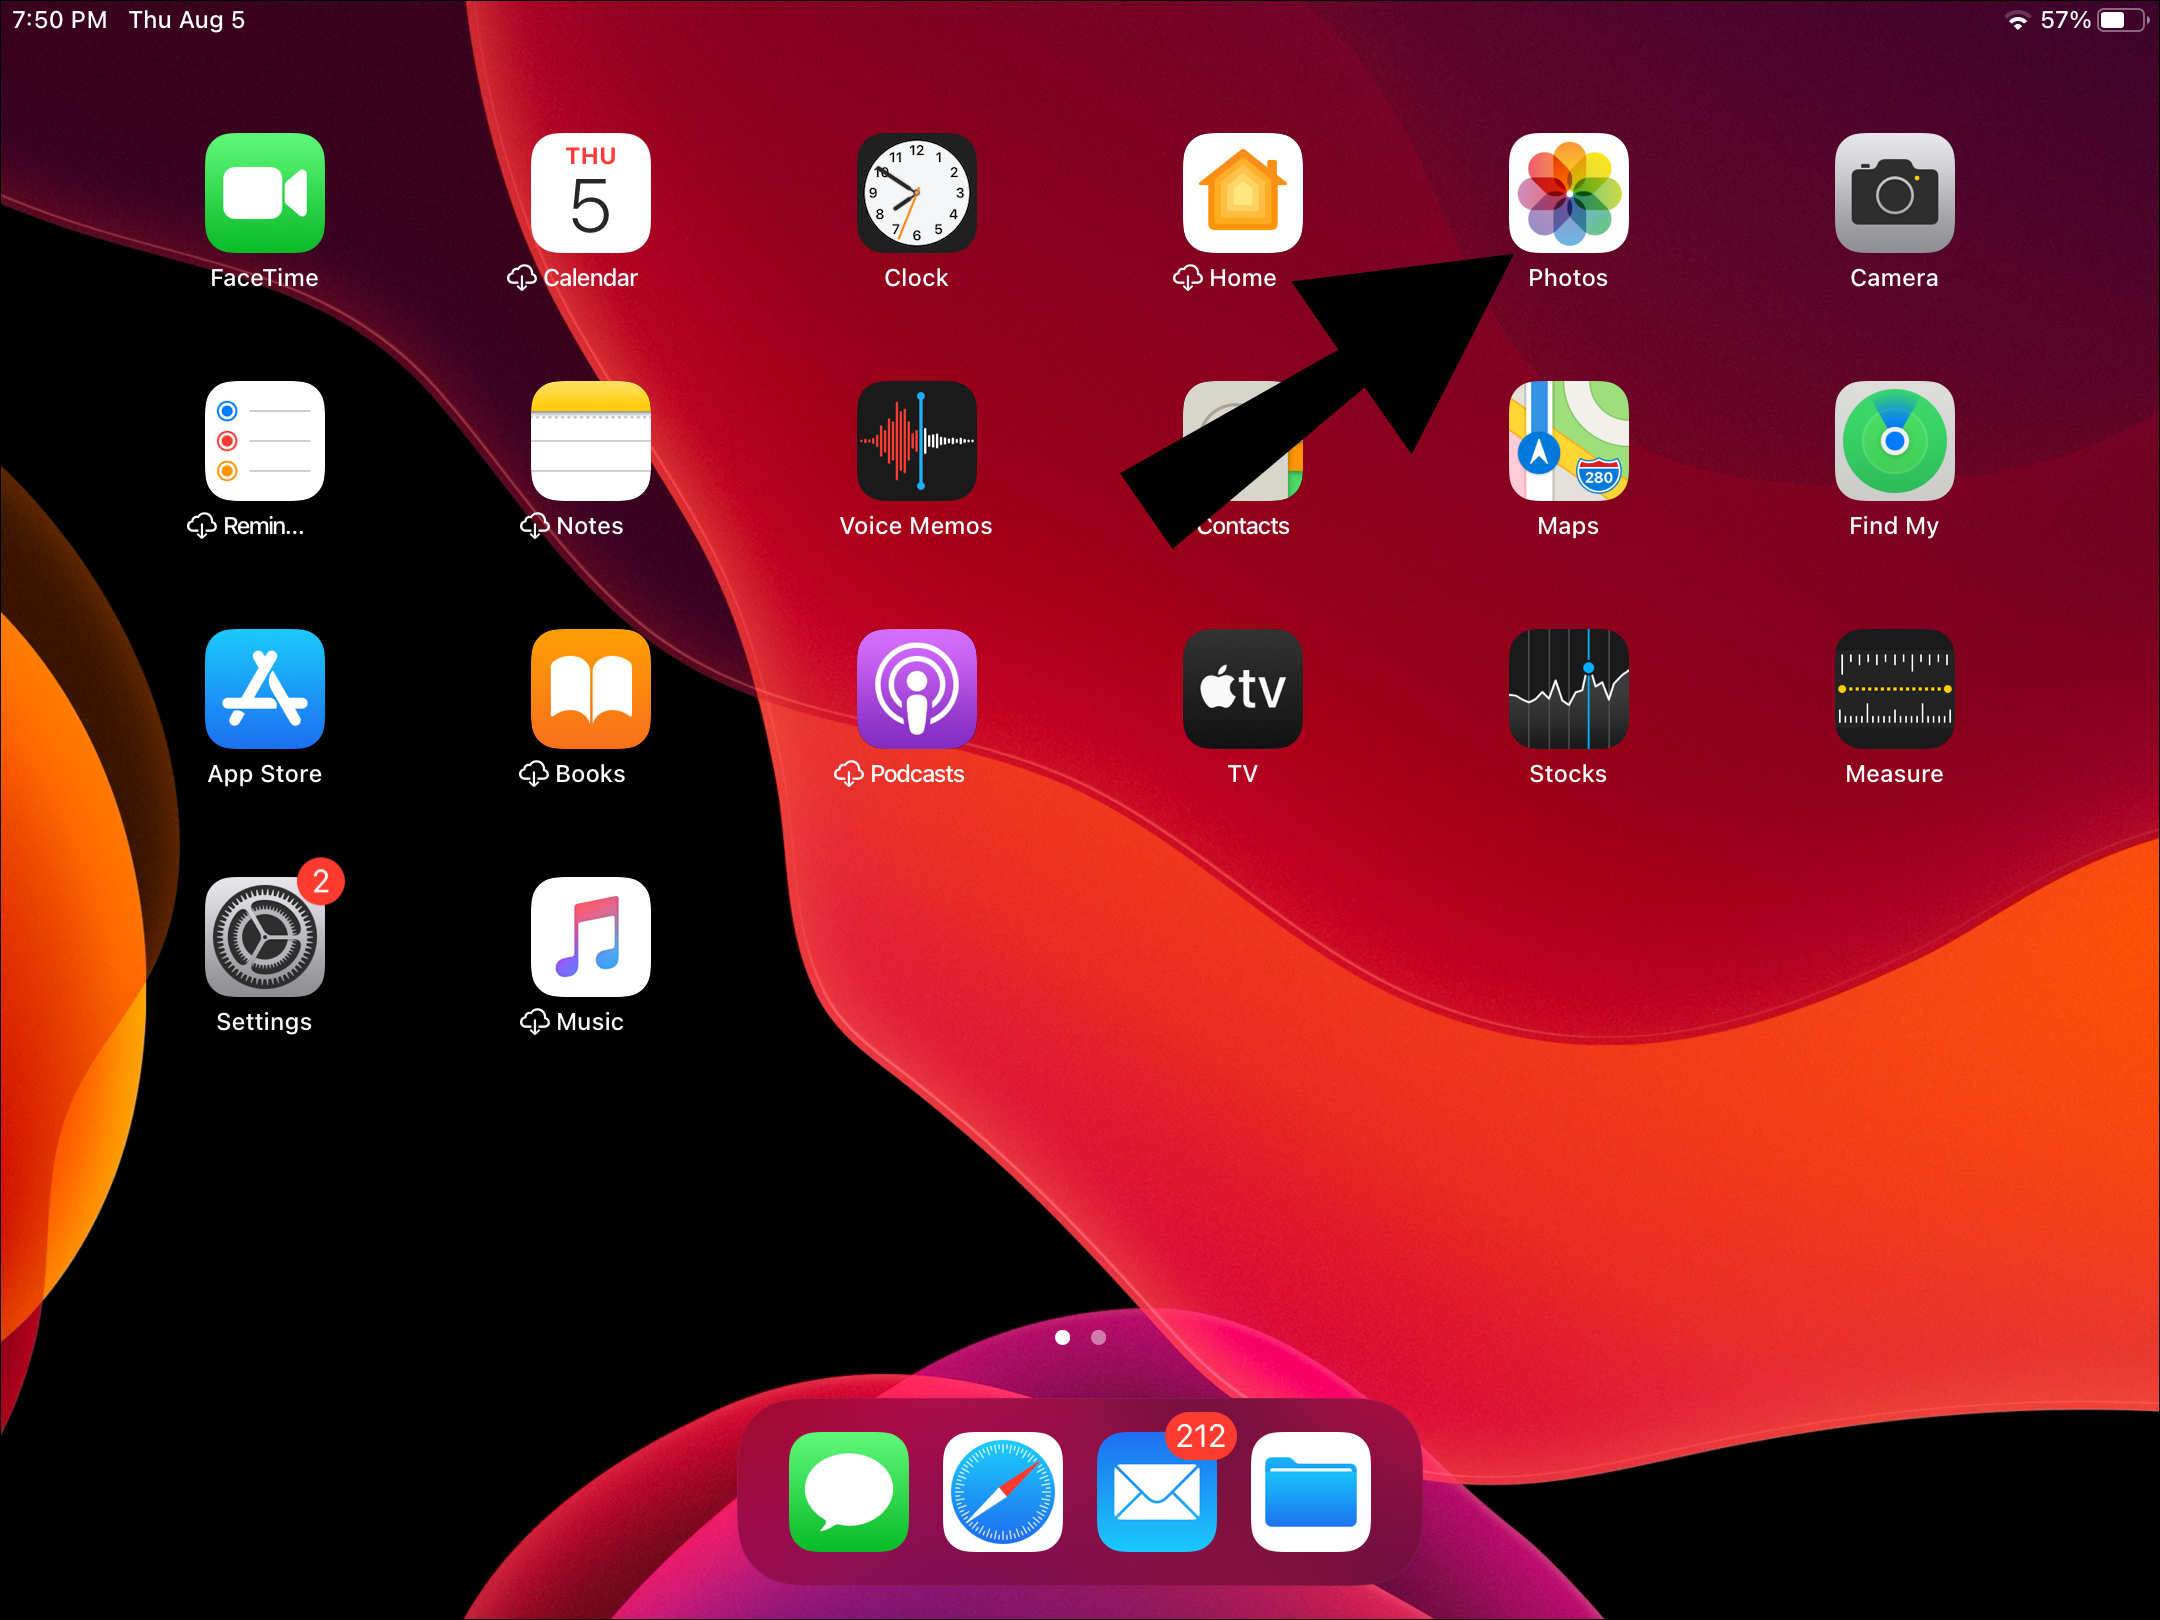
- Select “All Photos,” then “Select.”

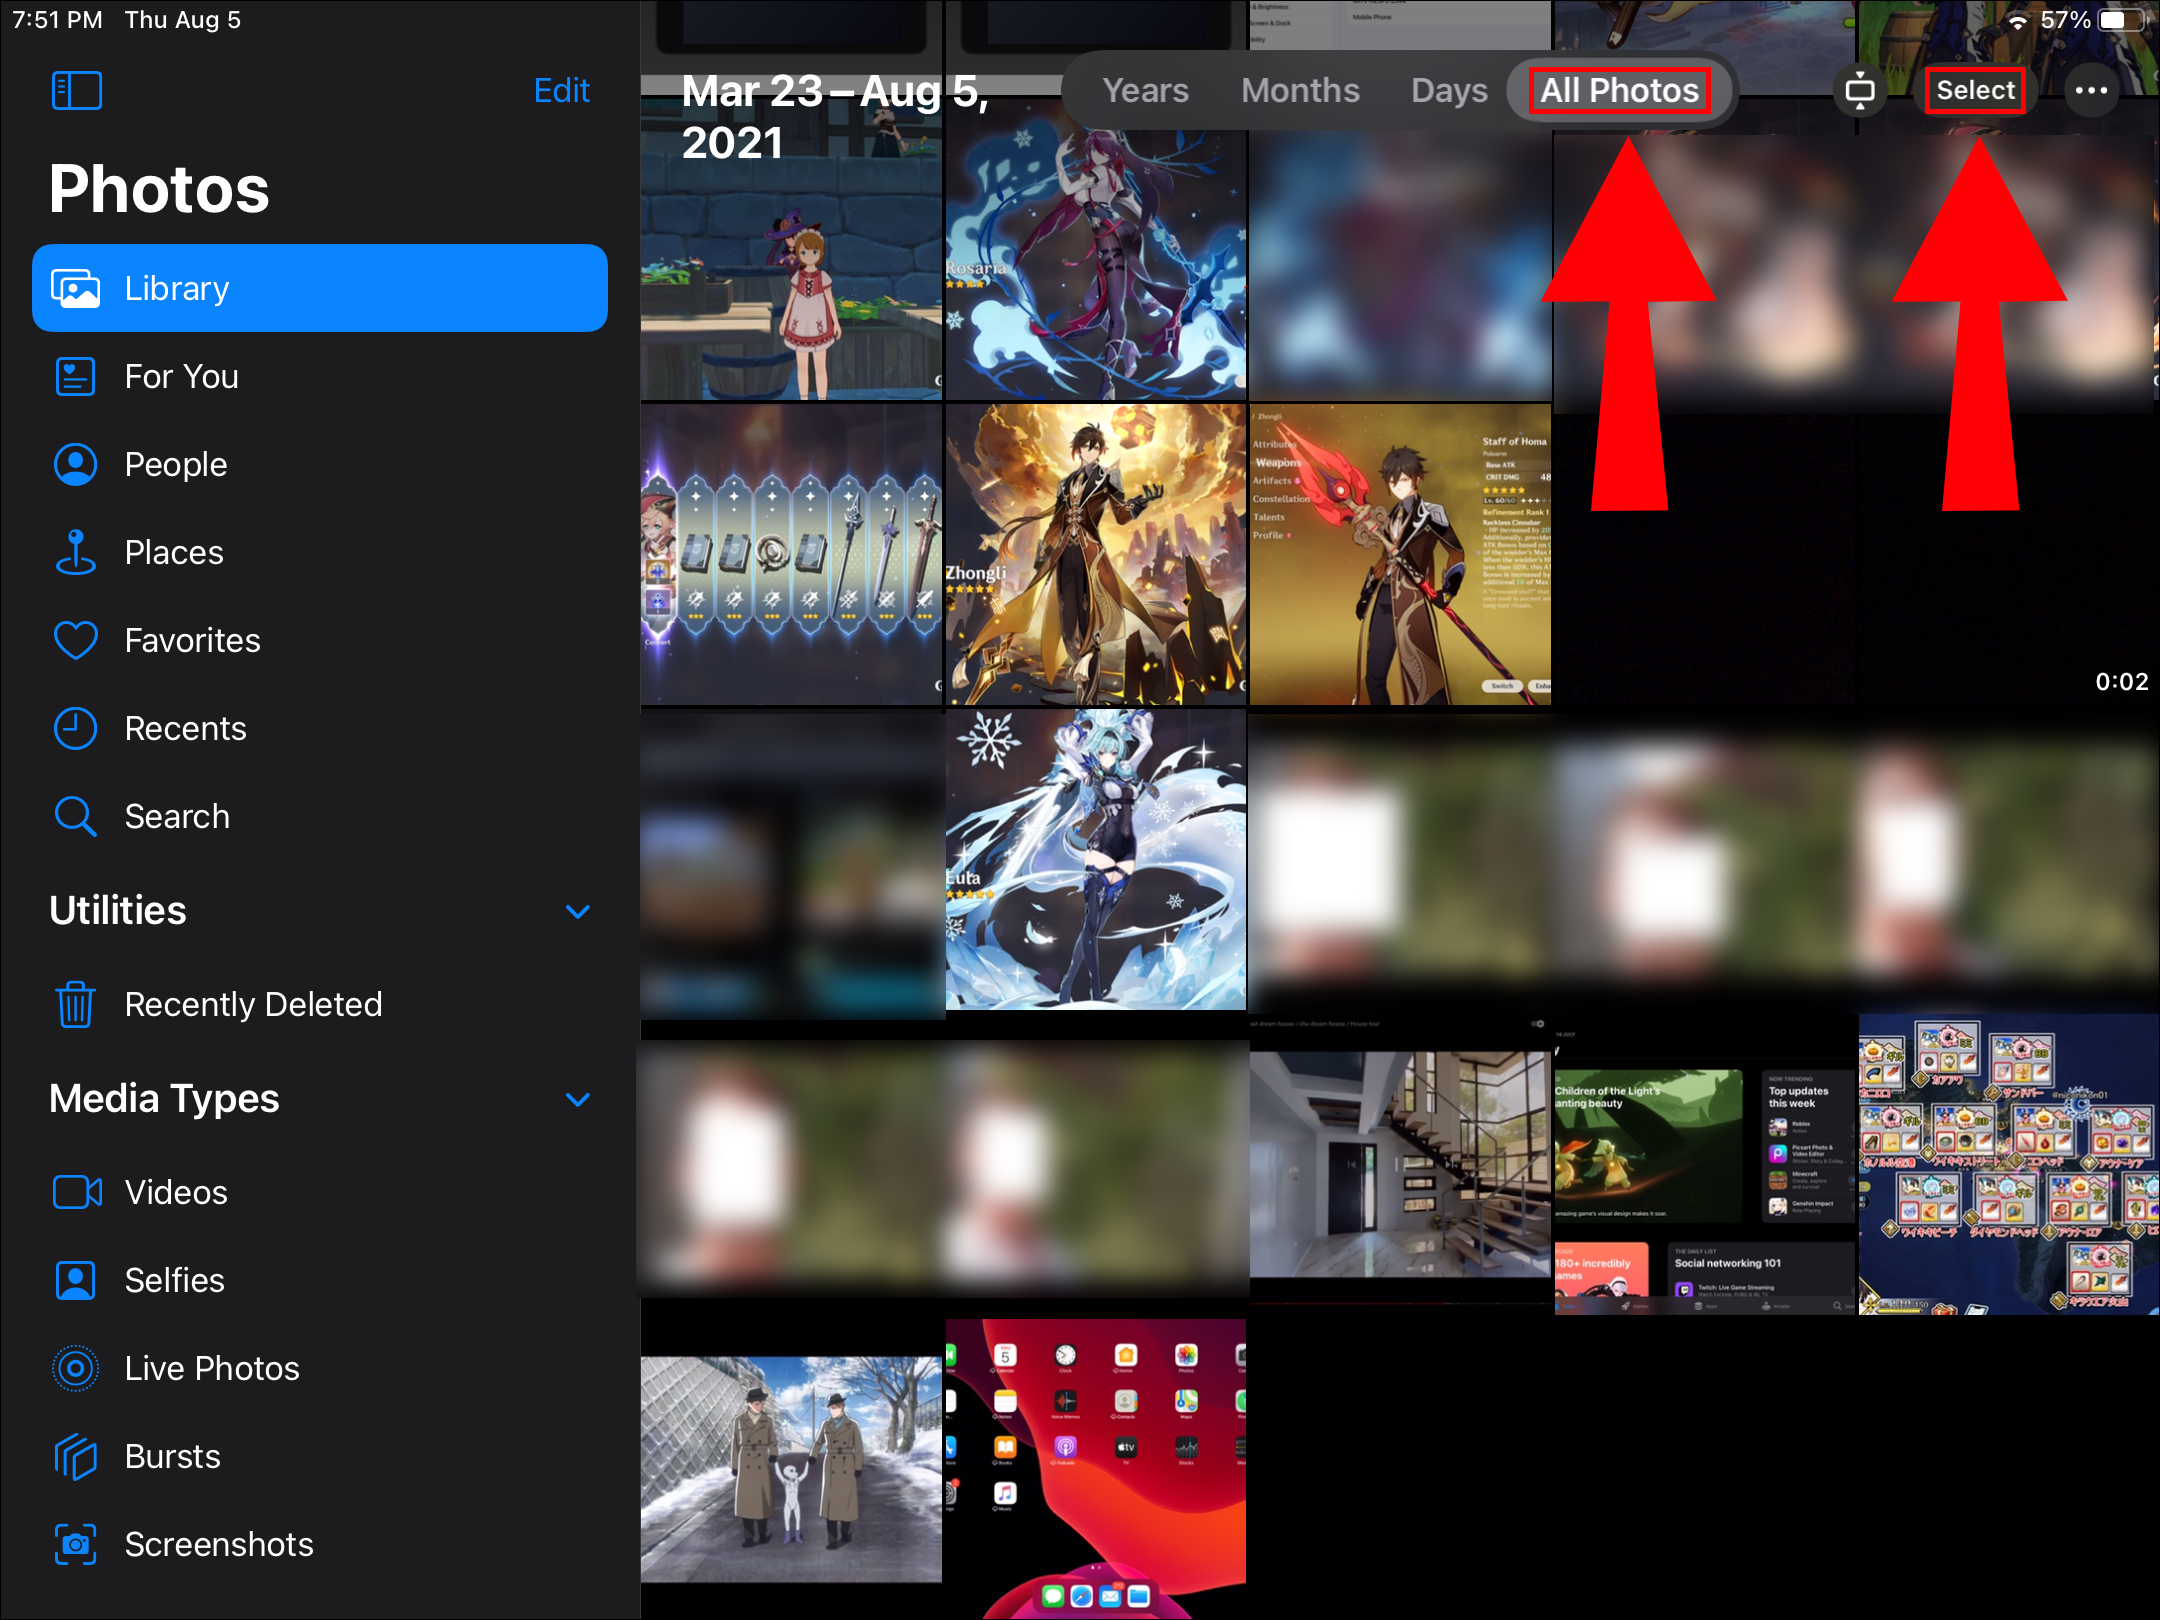
- Tap on multiple photos or glide your finger across multiple photos to select them.
- Tap on the Trash bin icon.
- Confirm to delete the photos.


Is It Possible to Delete All Photos at Once on iPad?
You can delete all photos in one go once they’ve been moved into your “Recently Deleted” album. Before that you have the option to select multiple photos for deleting at a time:
- In the Photos app, select “All Photos,” then “Select.”
- Tap on multiple photos or glide your finger across multiple photos to select them.
- Tap on the Trash bin icon.
- Confirm to delete the selected photos.
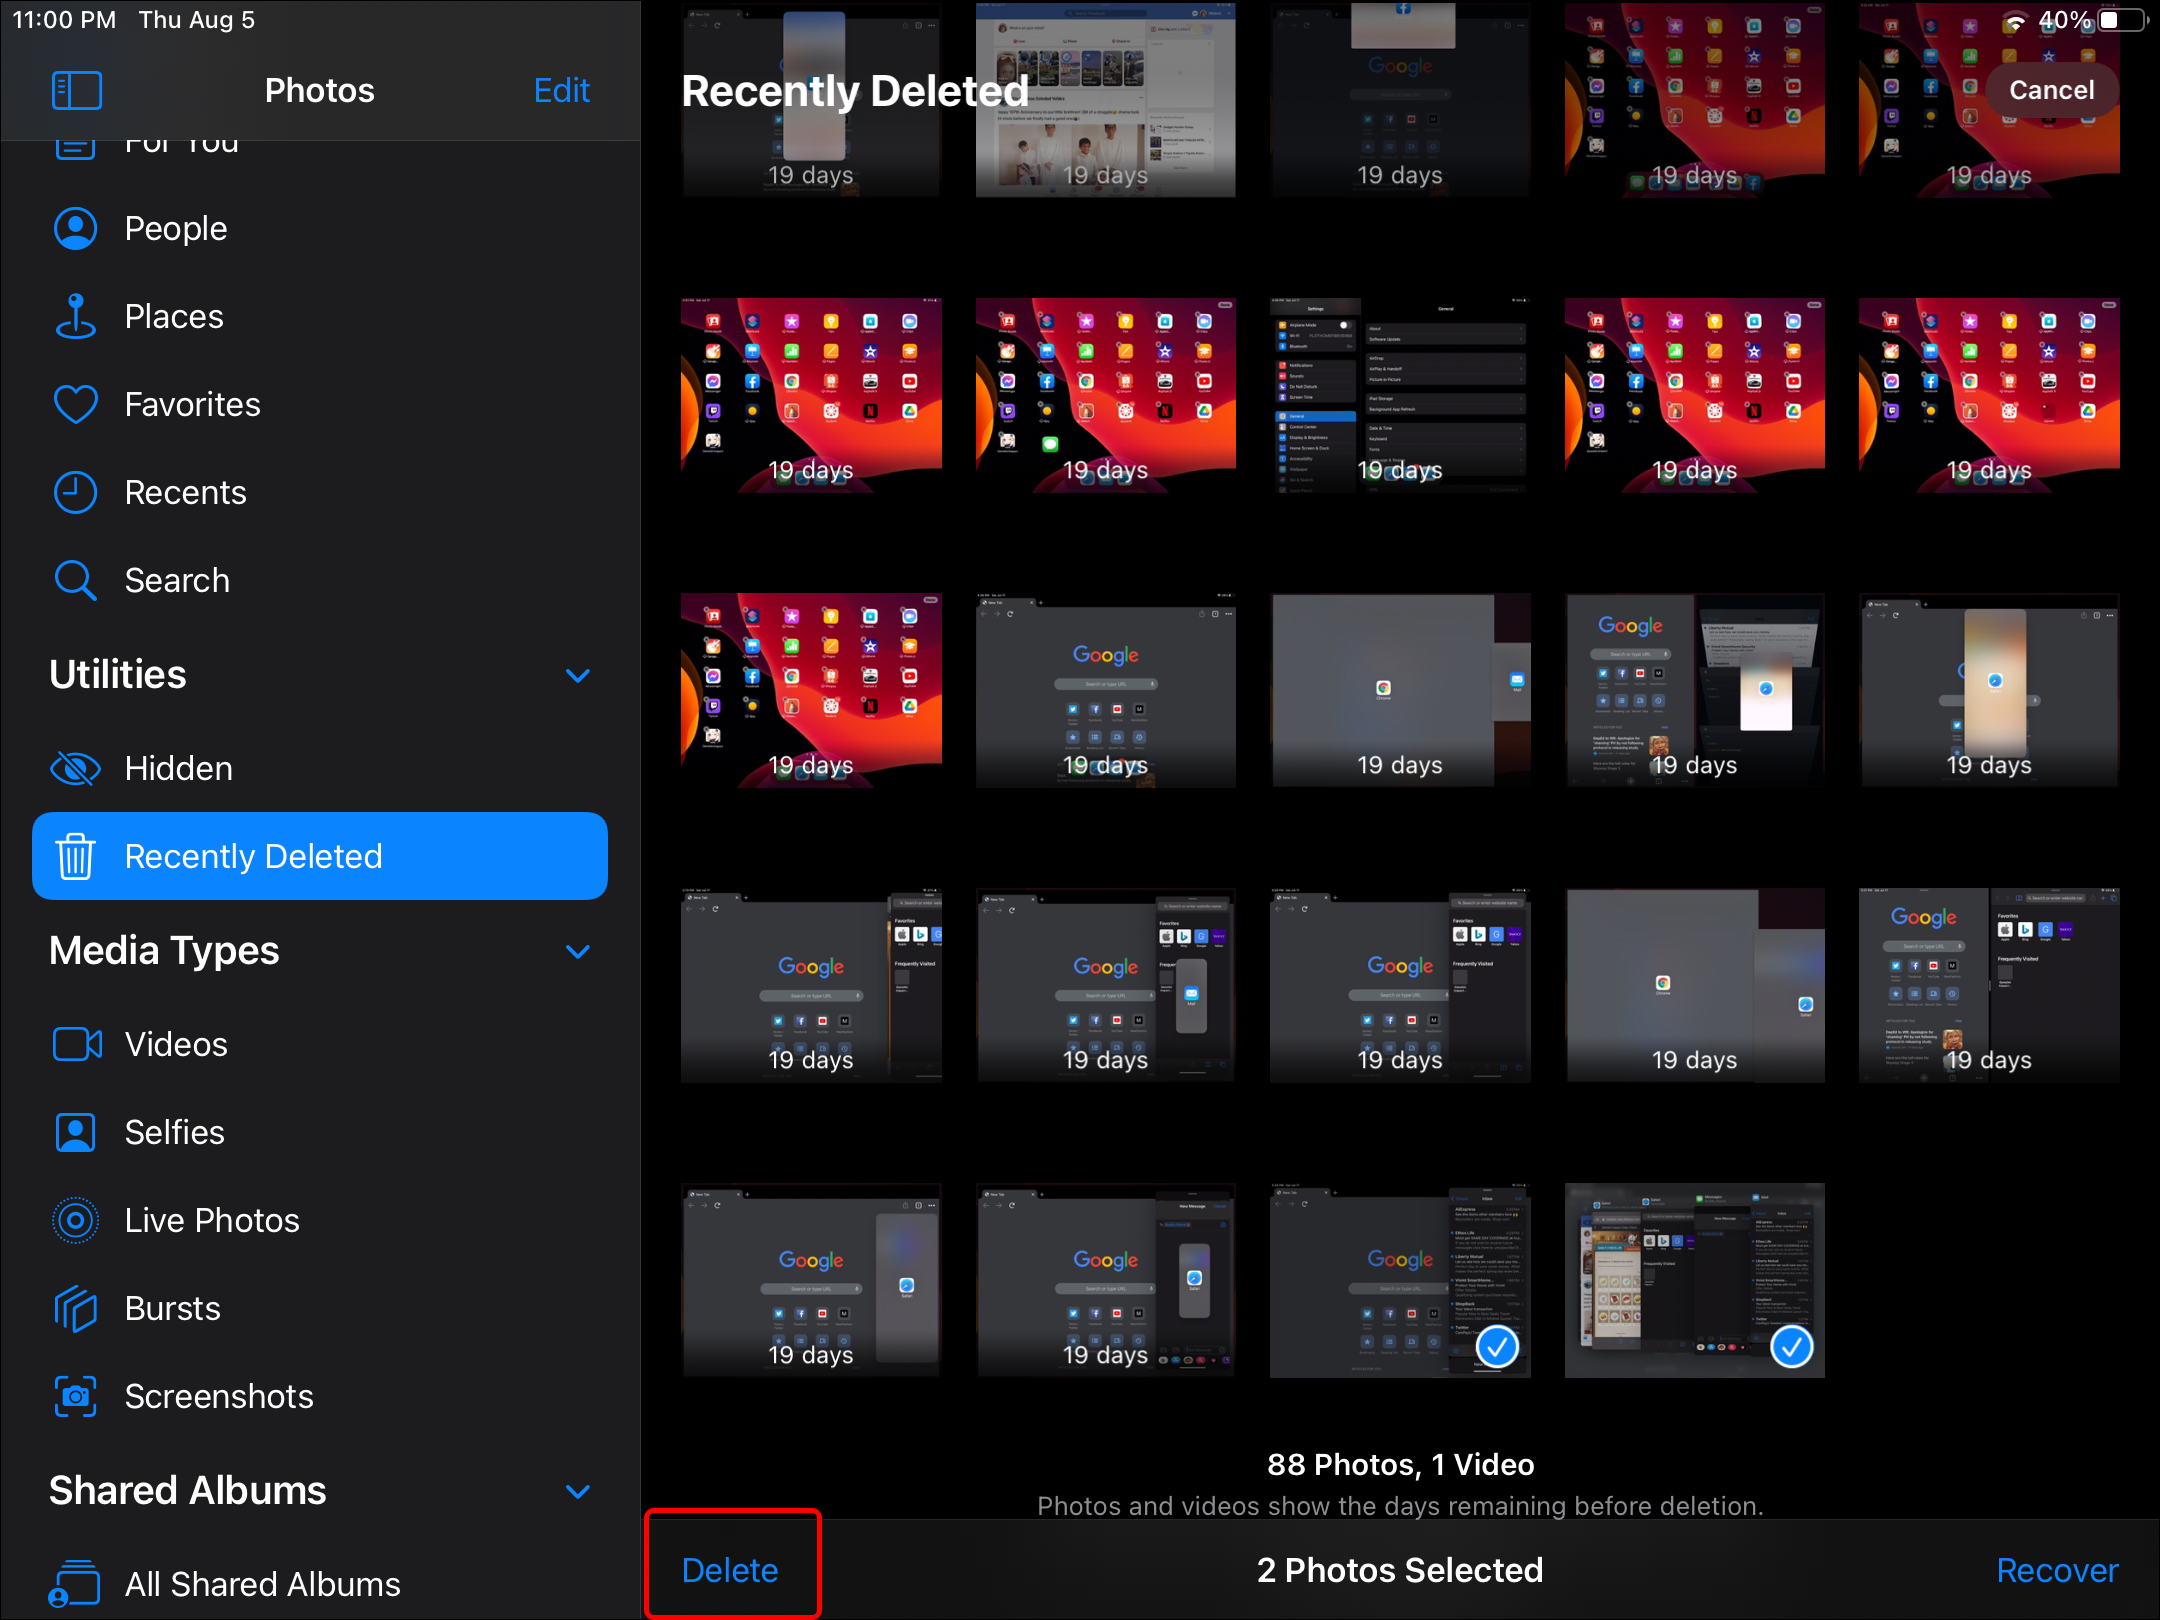
Then to delete all from “Recently Deleted”:
- Select the “Albums” tab.
- Choose the “Recently Deleted” album option, then “Select.”
- Select the “Photos” you wish to delete or select “Delete All.”
- Tap on “Delete” again to verify.

Navigation in Photo Apps
To navigate between days, months, and years on your iPad:
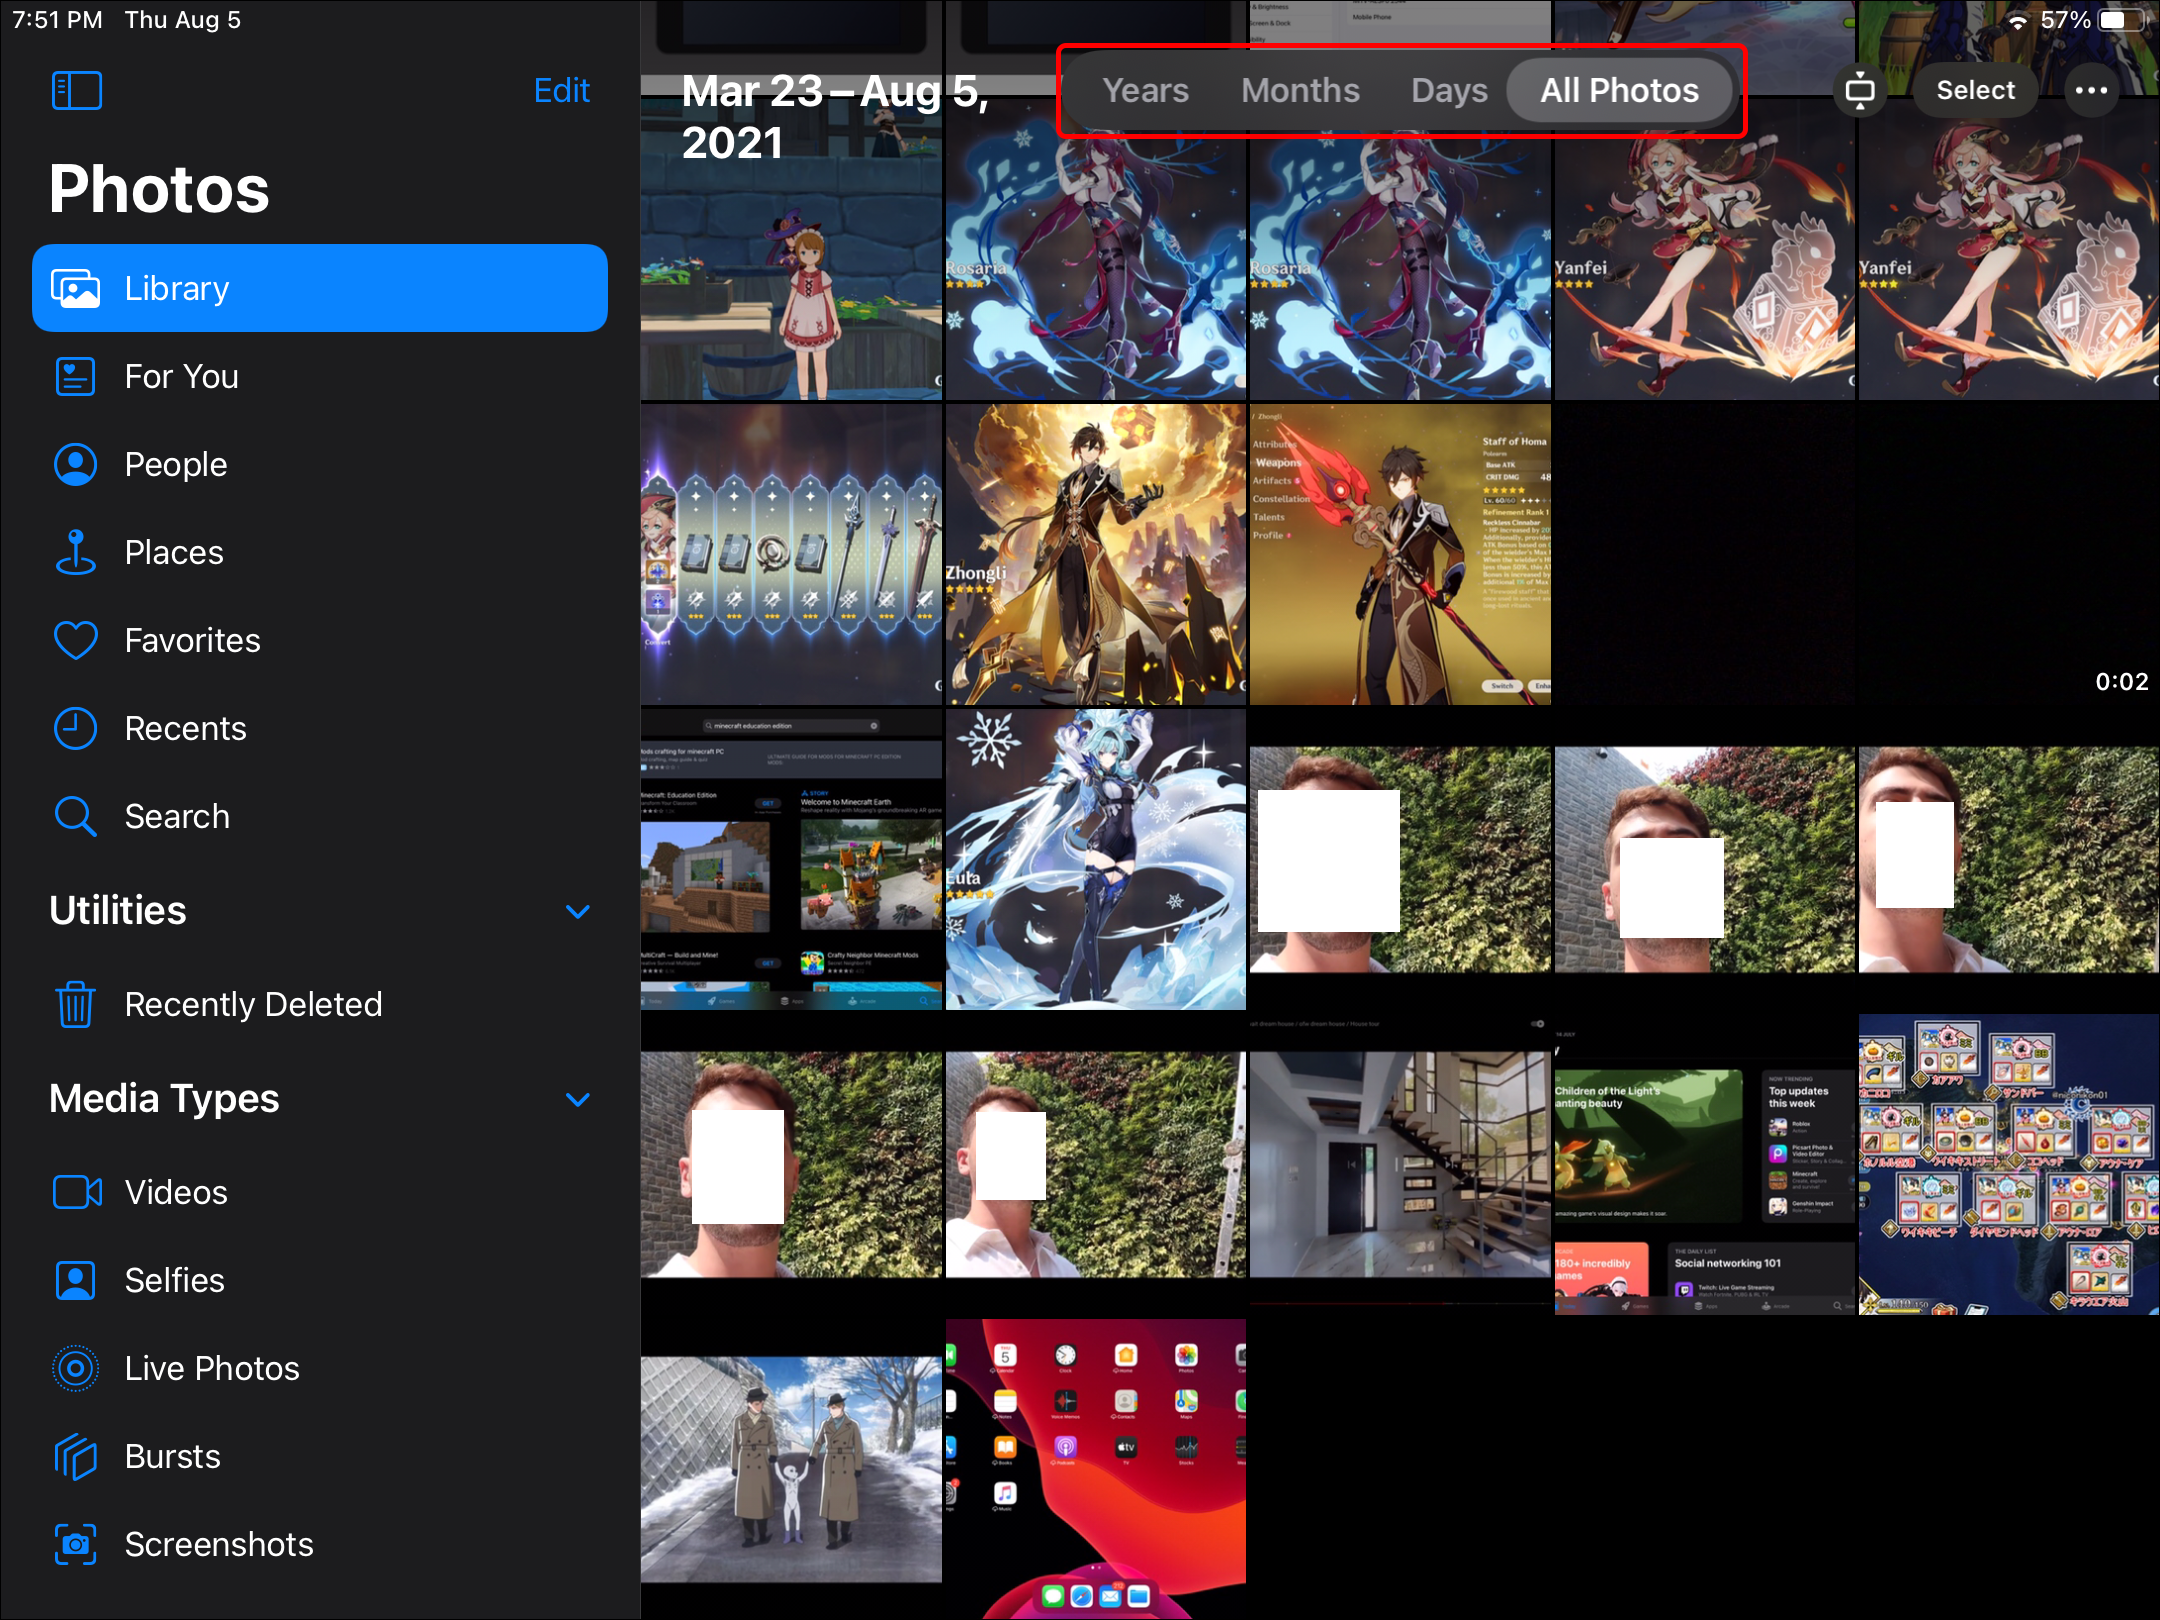
- Launch Photos.
- At the bottom left, select the “Library” tab.
- Select the timeline view you wish to see, e.g., “Days,” “Months,” “Years,” or “All Photos.”
- If you select “Years” it will drill down into “Months.”
- If you select “Months” it will drill down into “Days.”
- Selecting a photo will show you all pictures taken on that day.
- Exit a view by selecting any of the “Days,” “Months,” or “Years” options in the menu bar above the Photo tabs.
To view picture locations via a map:
- In Photos, tap on the “Library” tab.
- Choose either the “Days” or “Months” view tab via the button that is displayed on the collection thumbnail.
- Select “Show Map.”
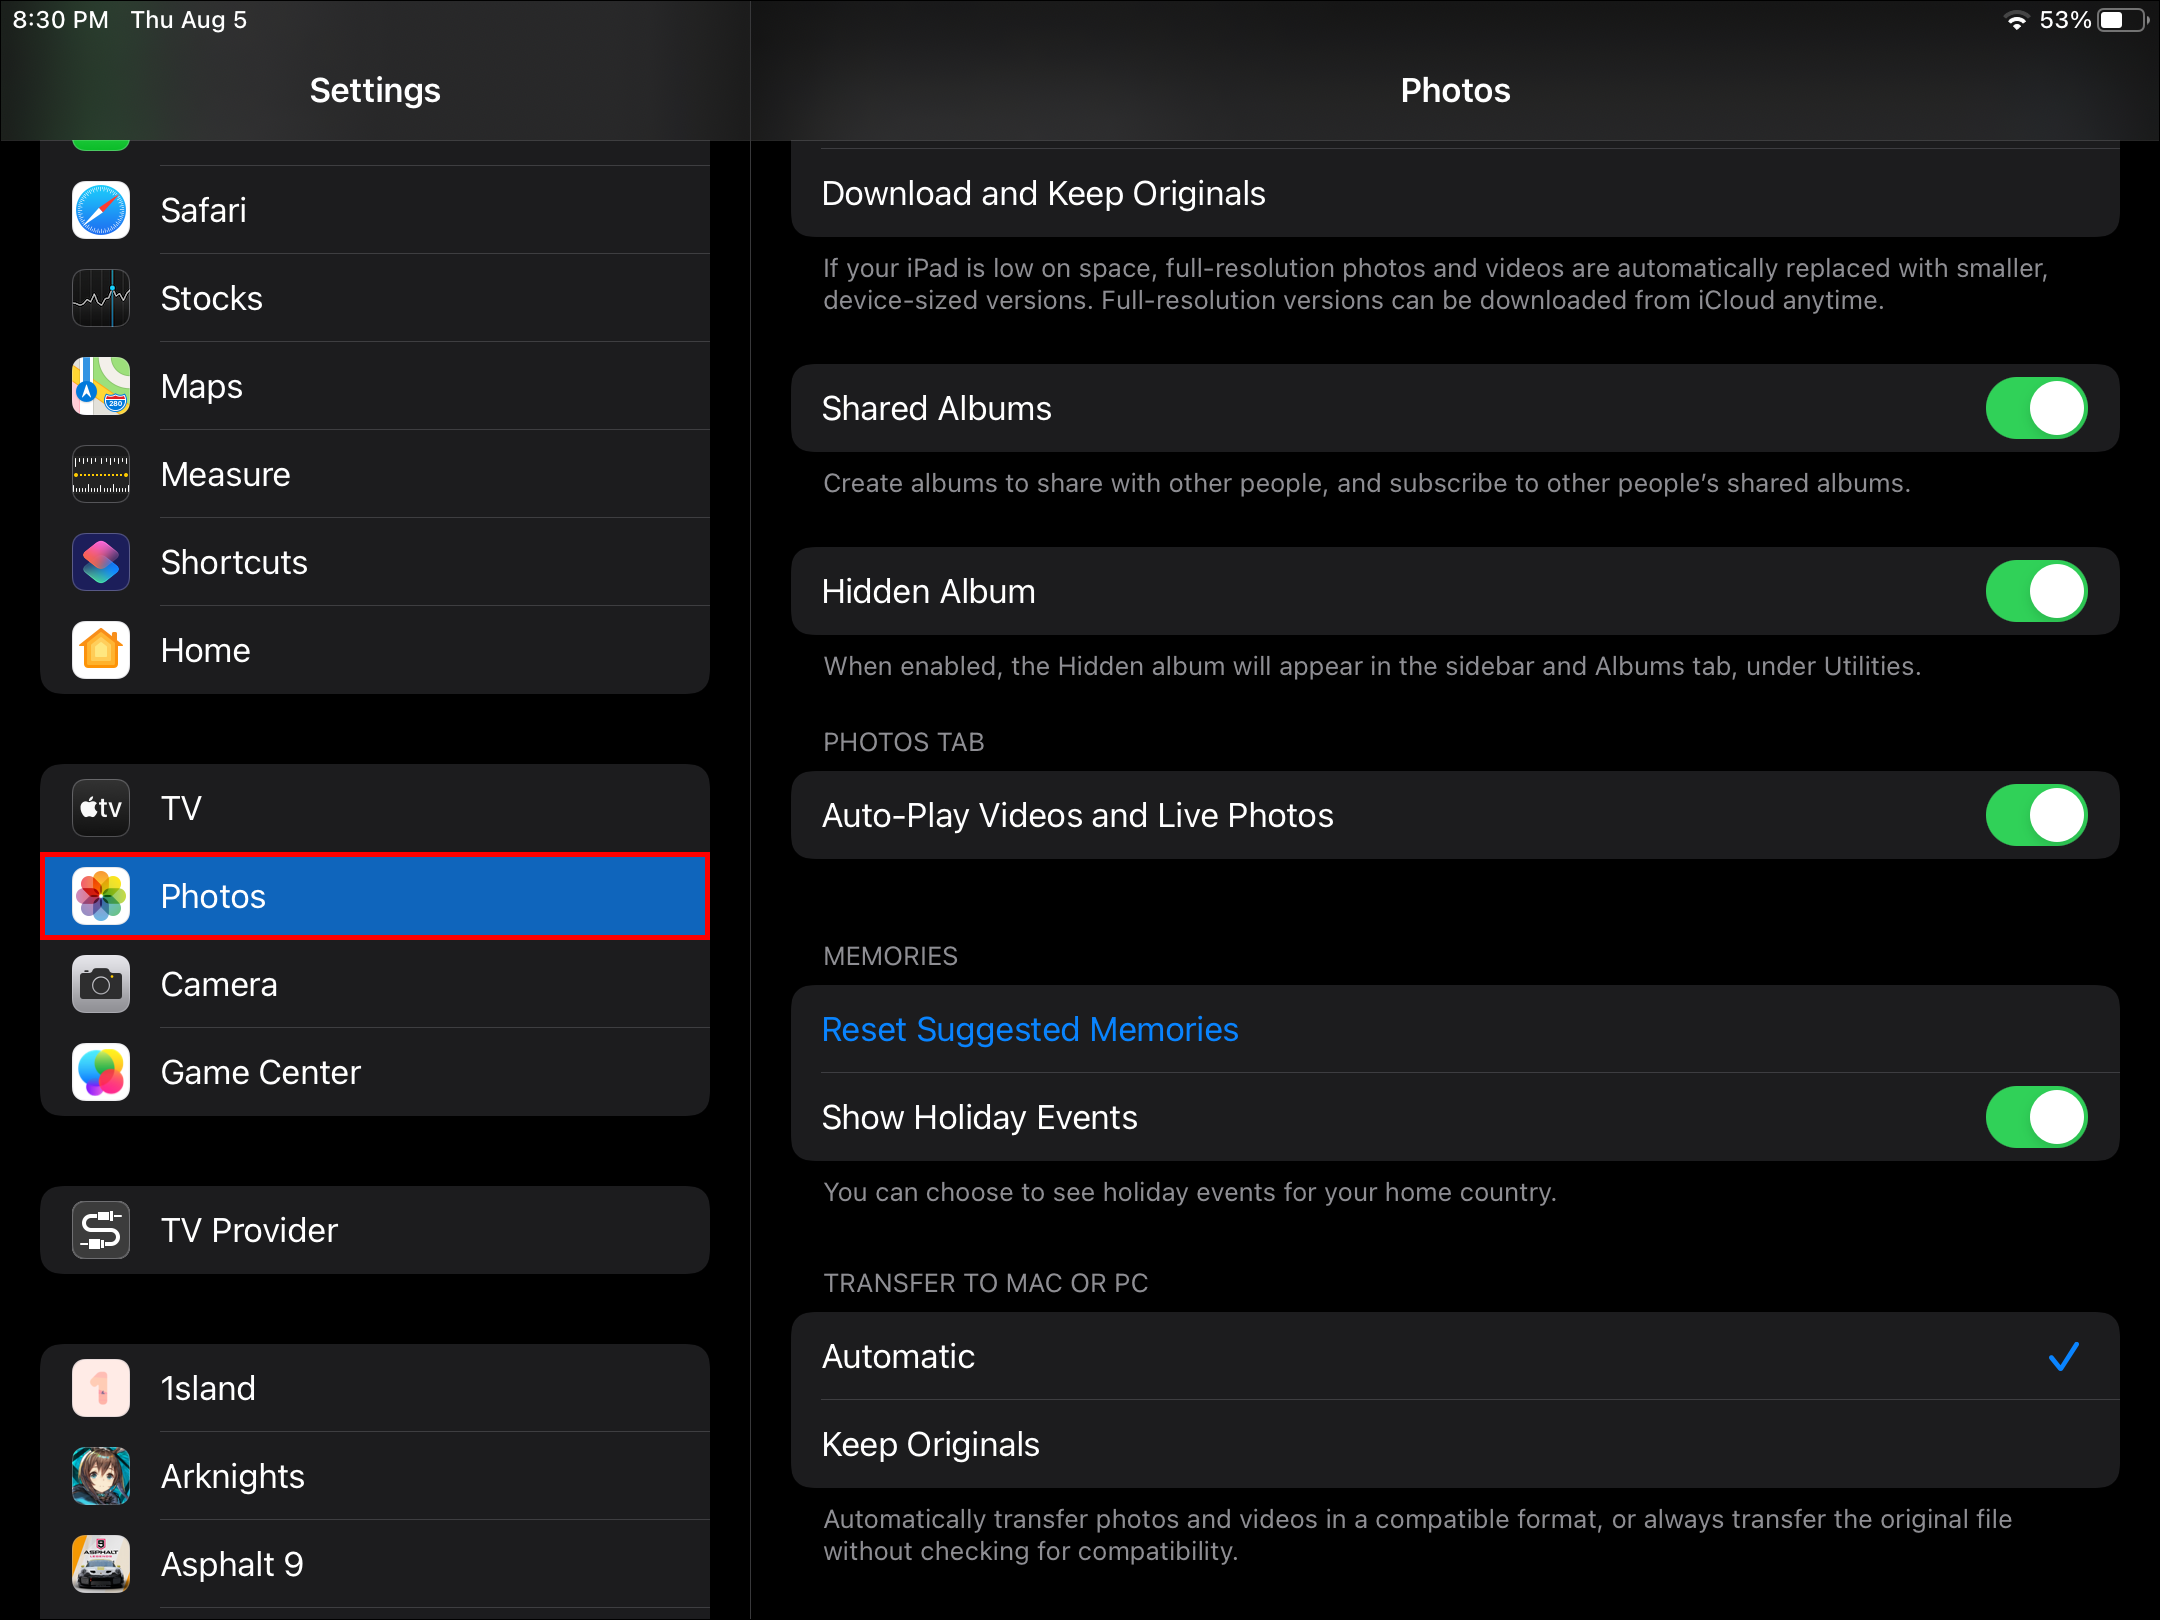
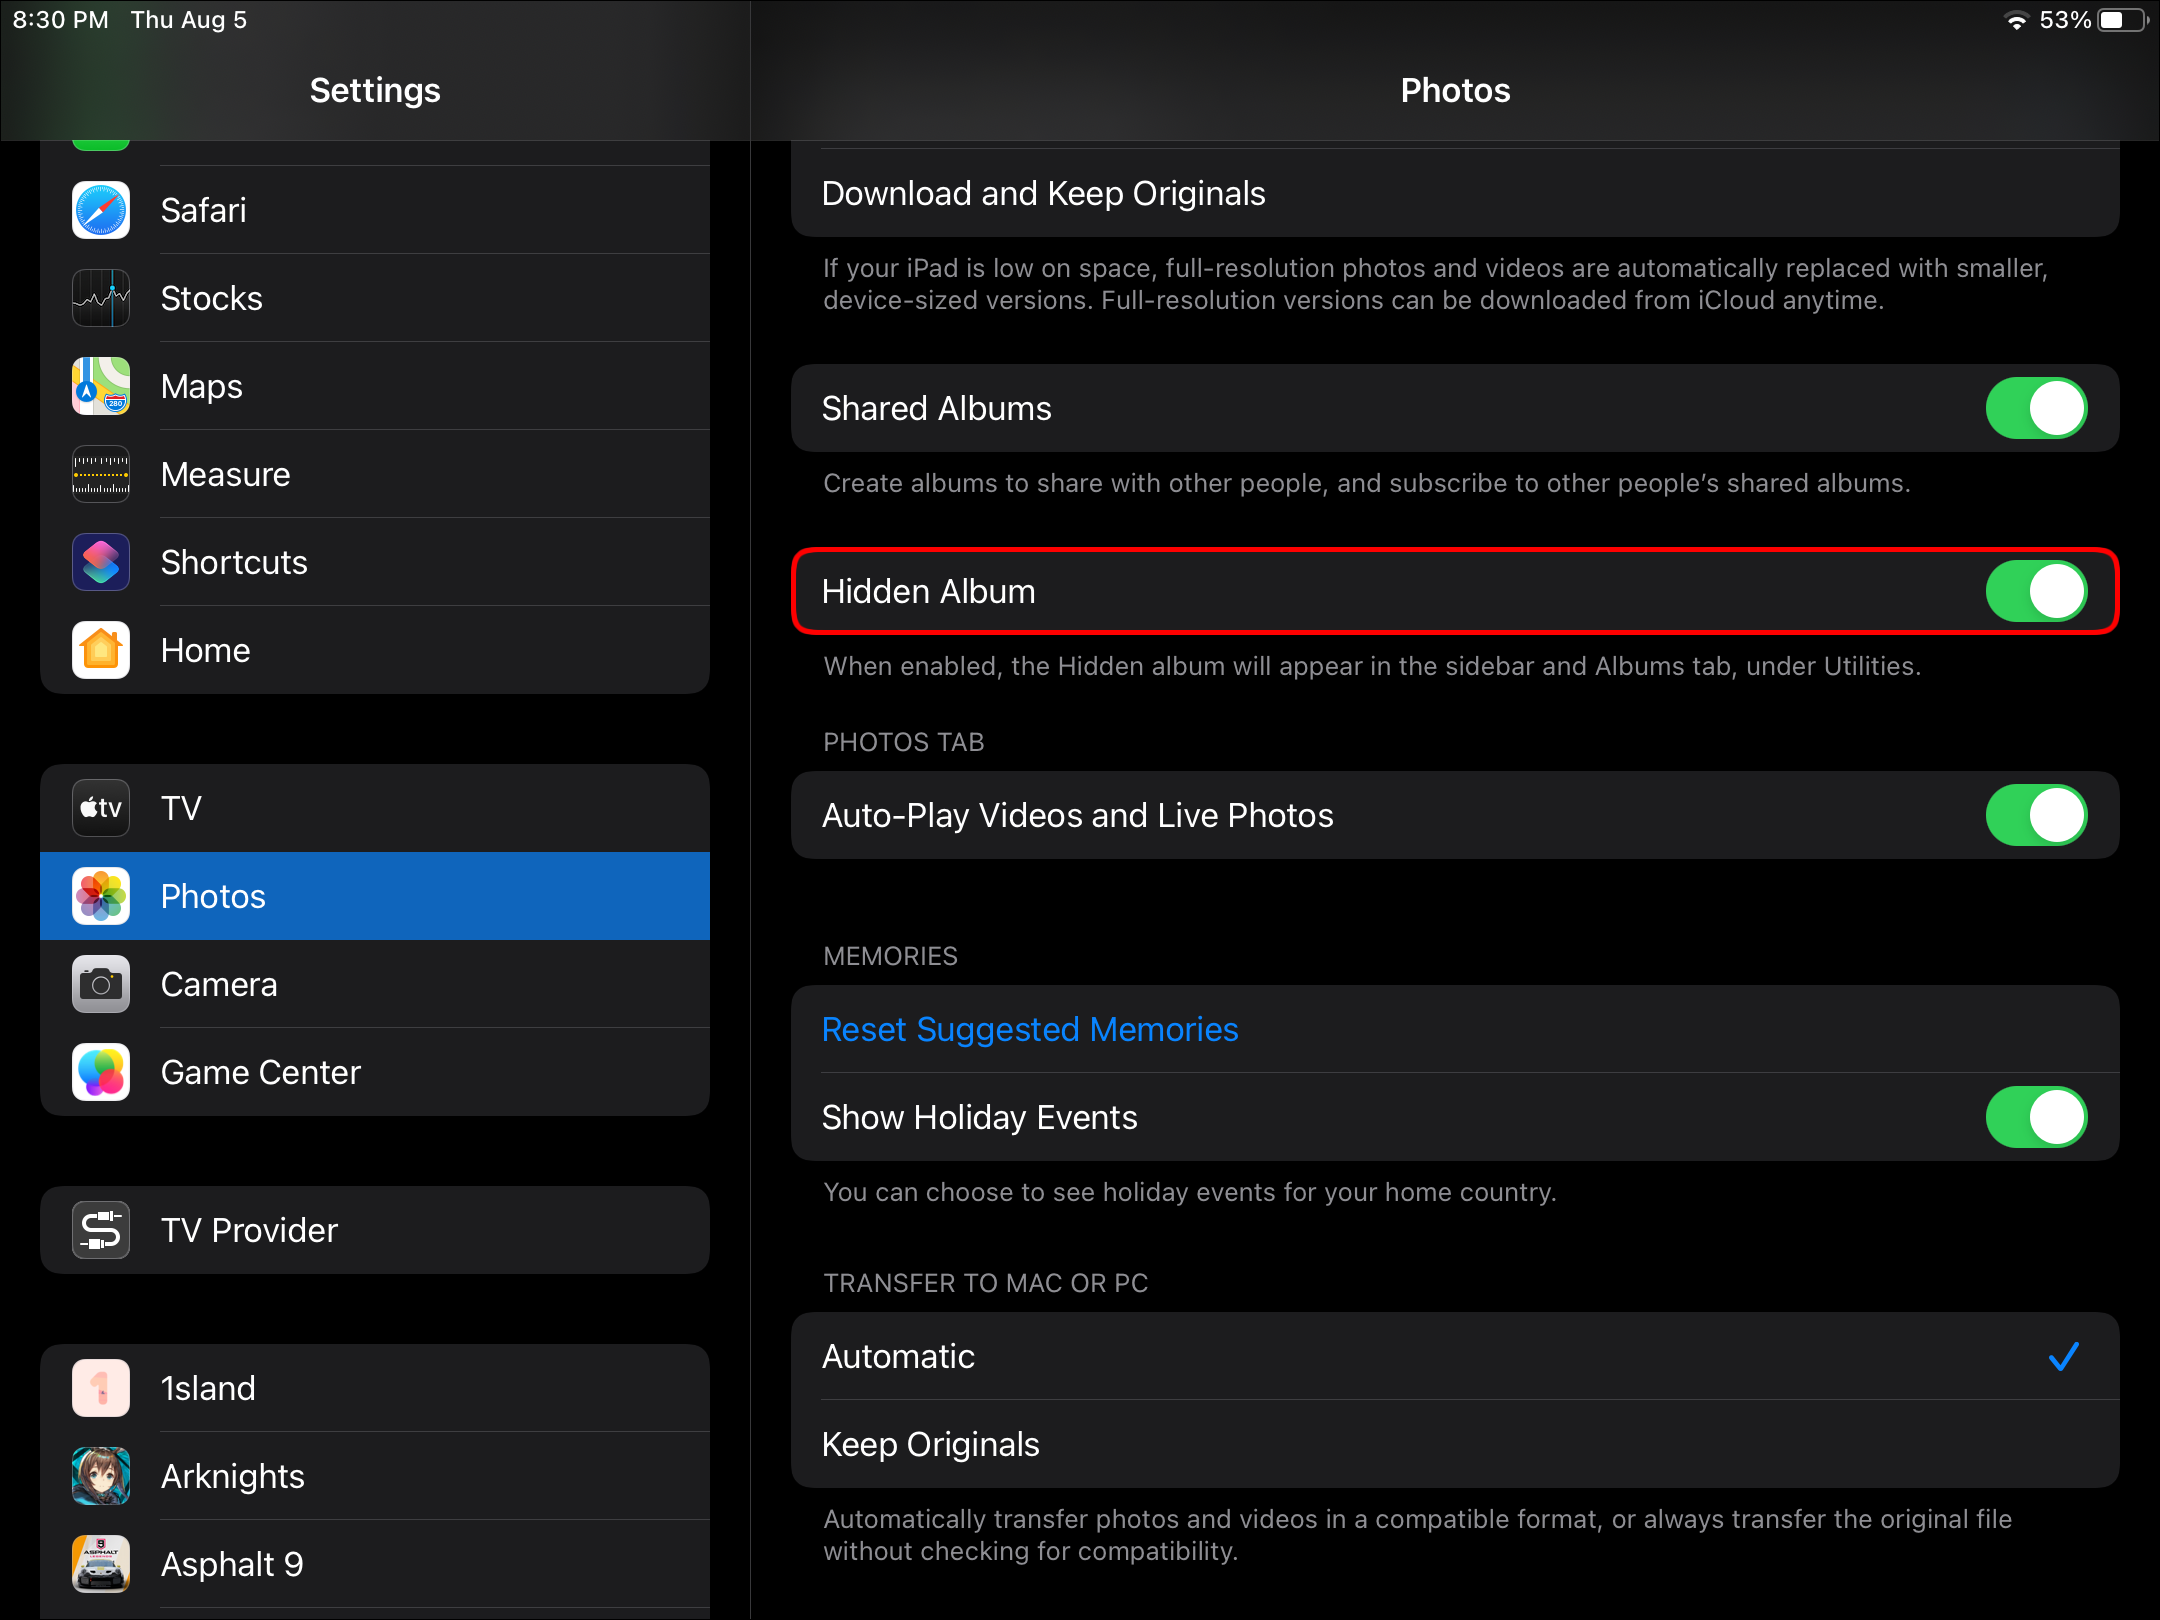
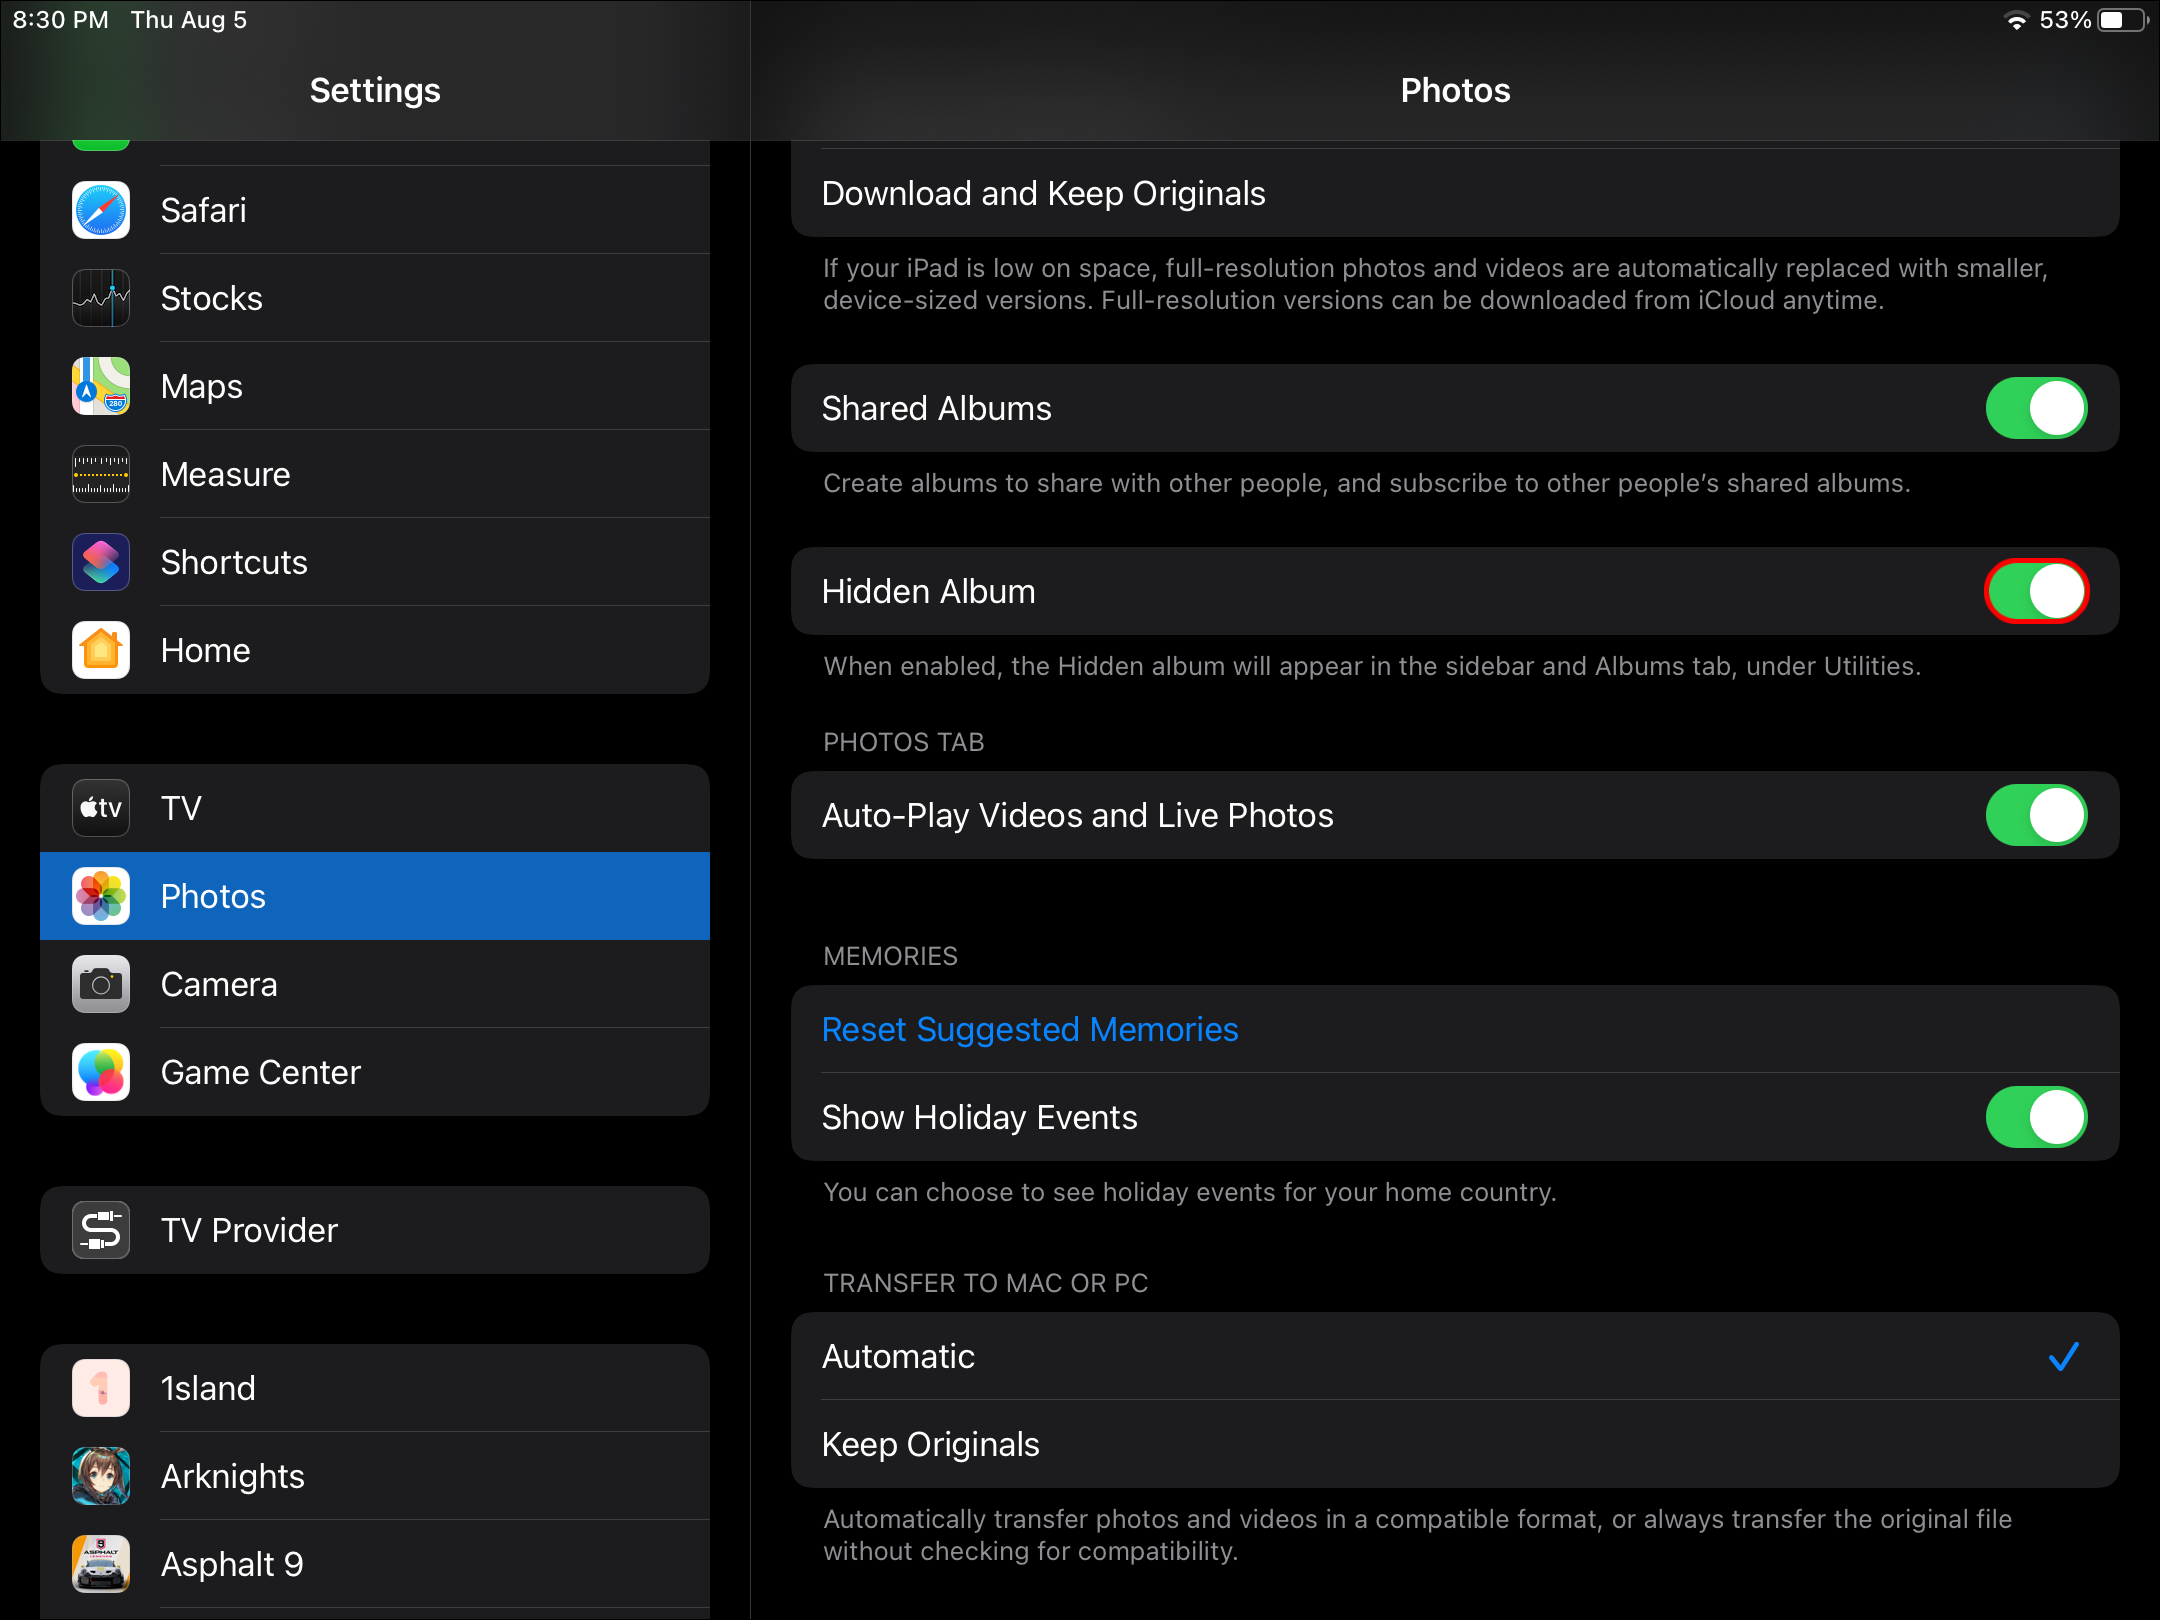
To show or hide your “Hidden Album:”
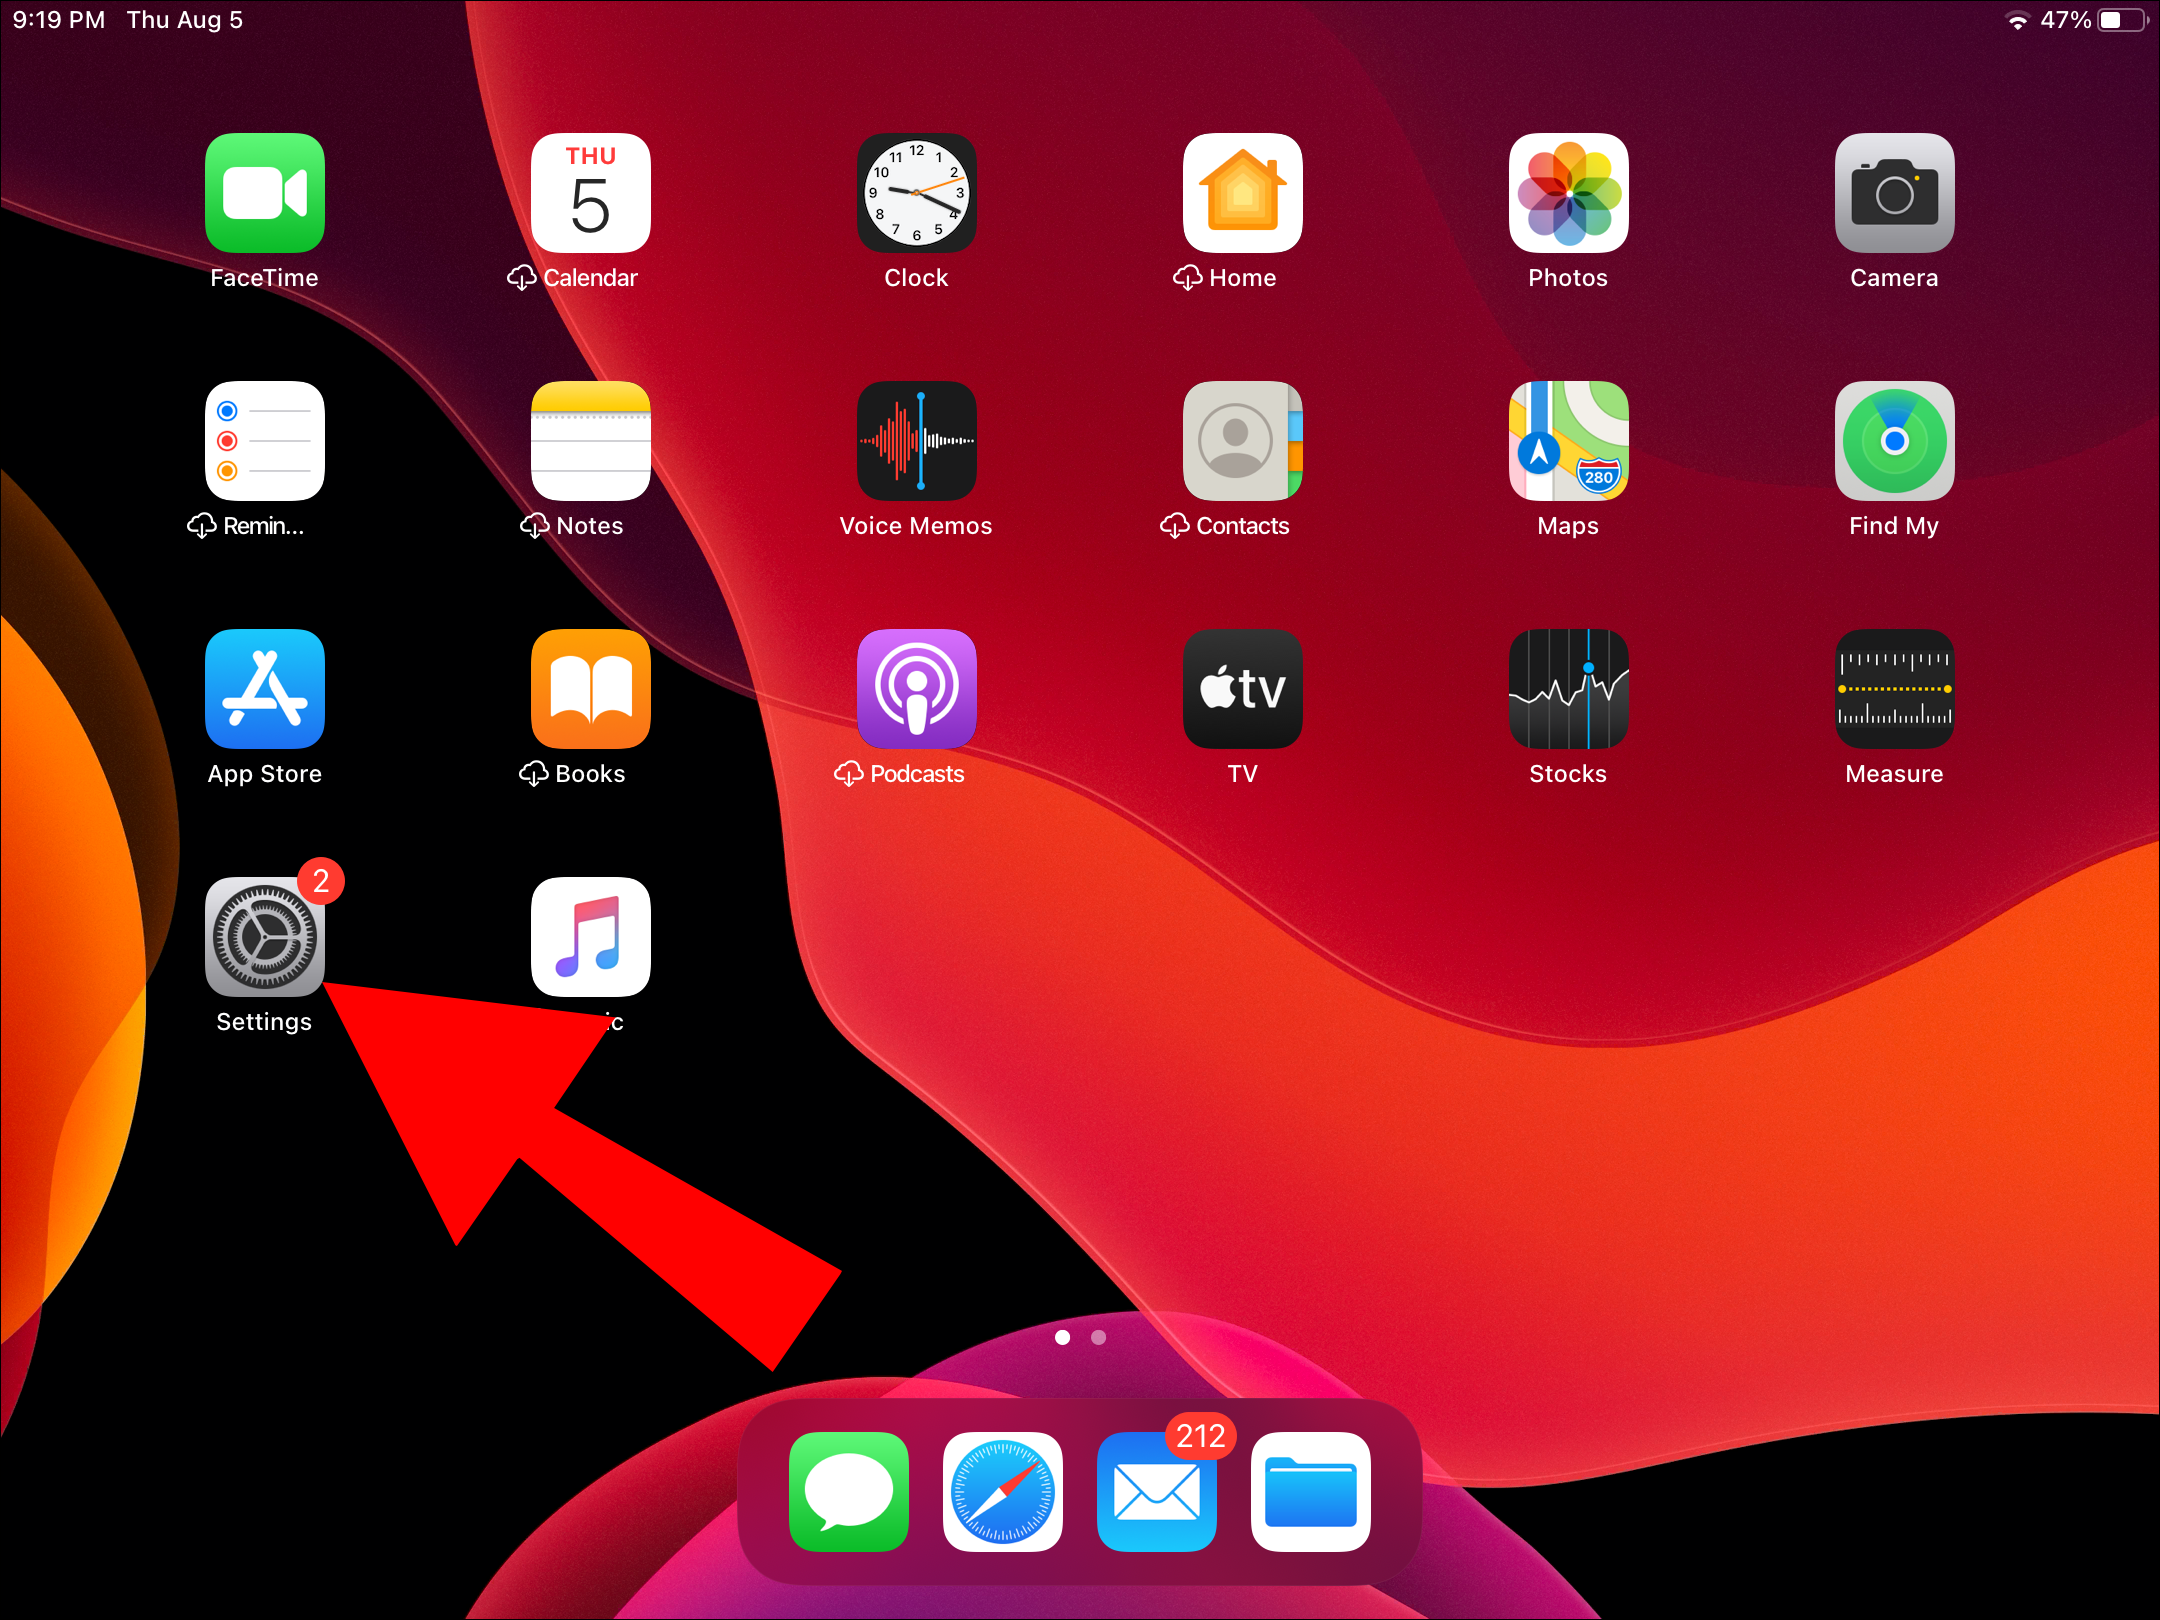
- On your iPad, launch the “Settings” app.
- Scroll down a little and select “Photos.”
- Locate “Hidden Album.”
- Use the Toggle switch to hide or show it.
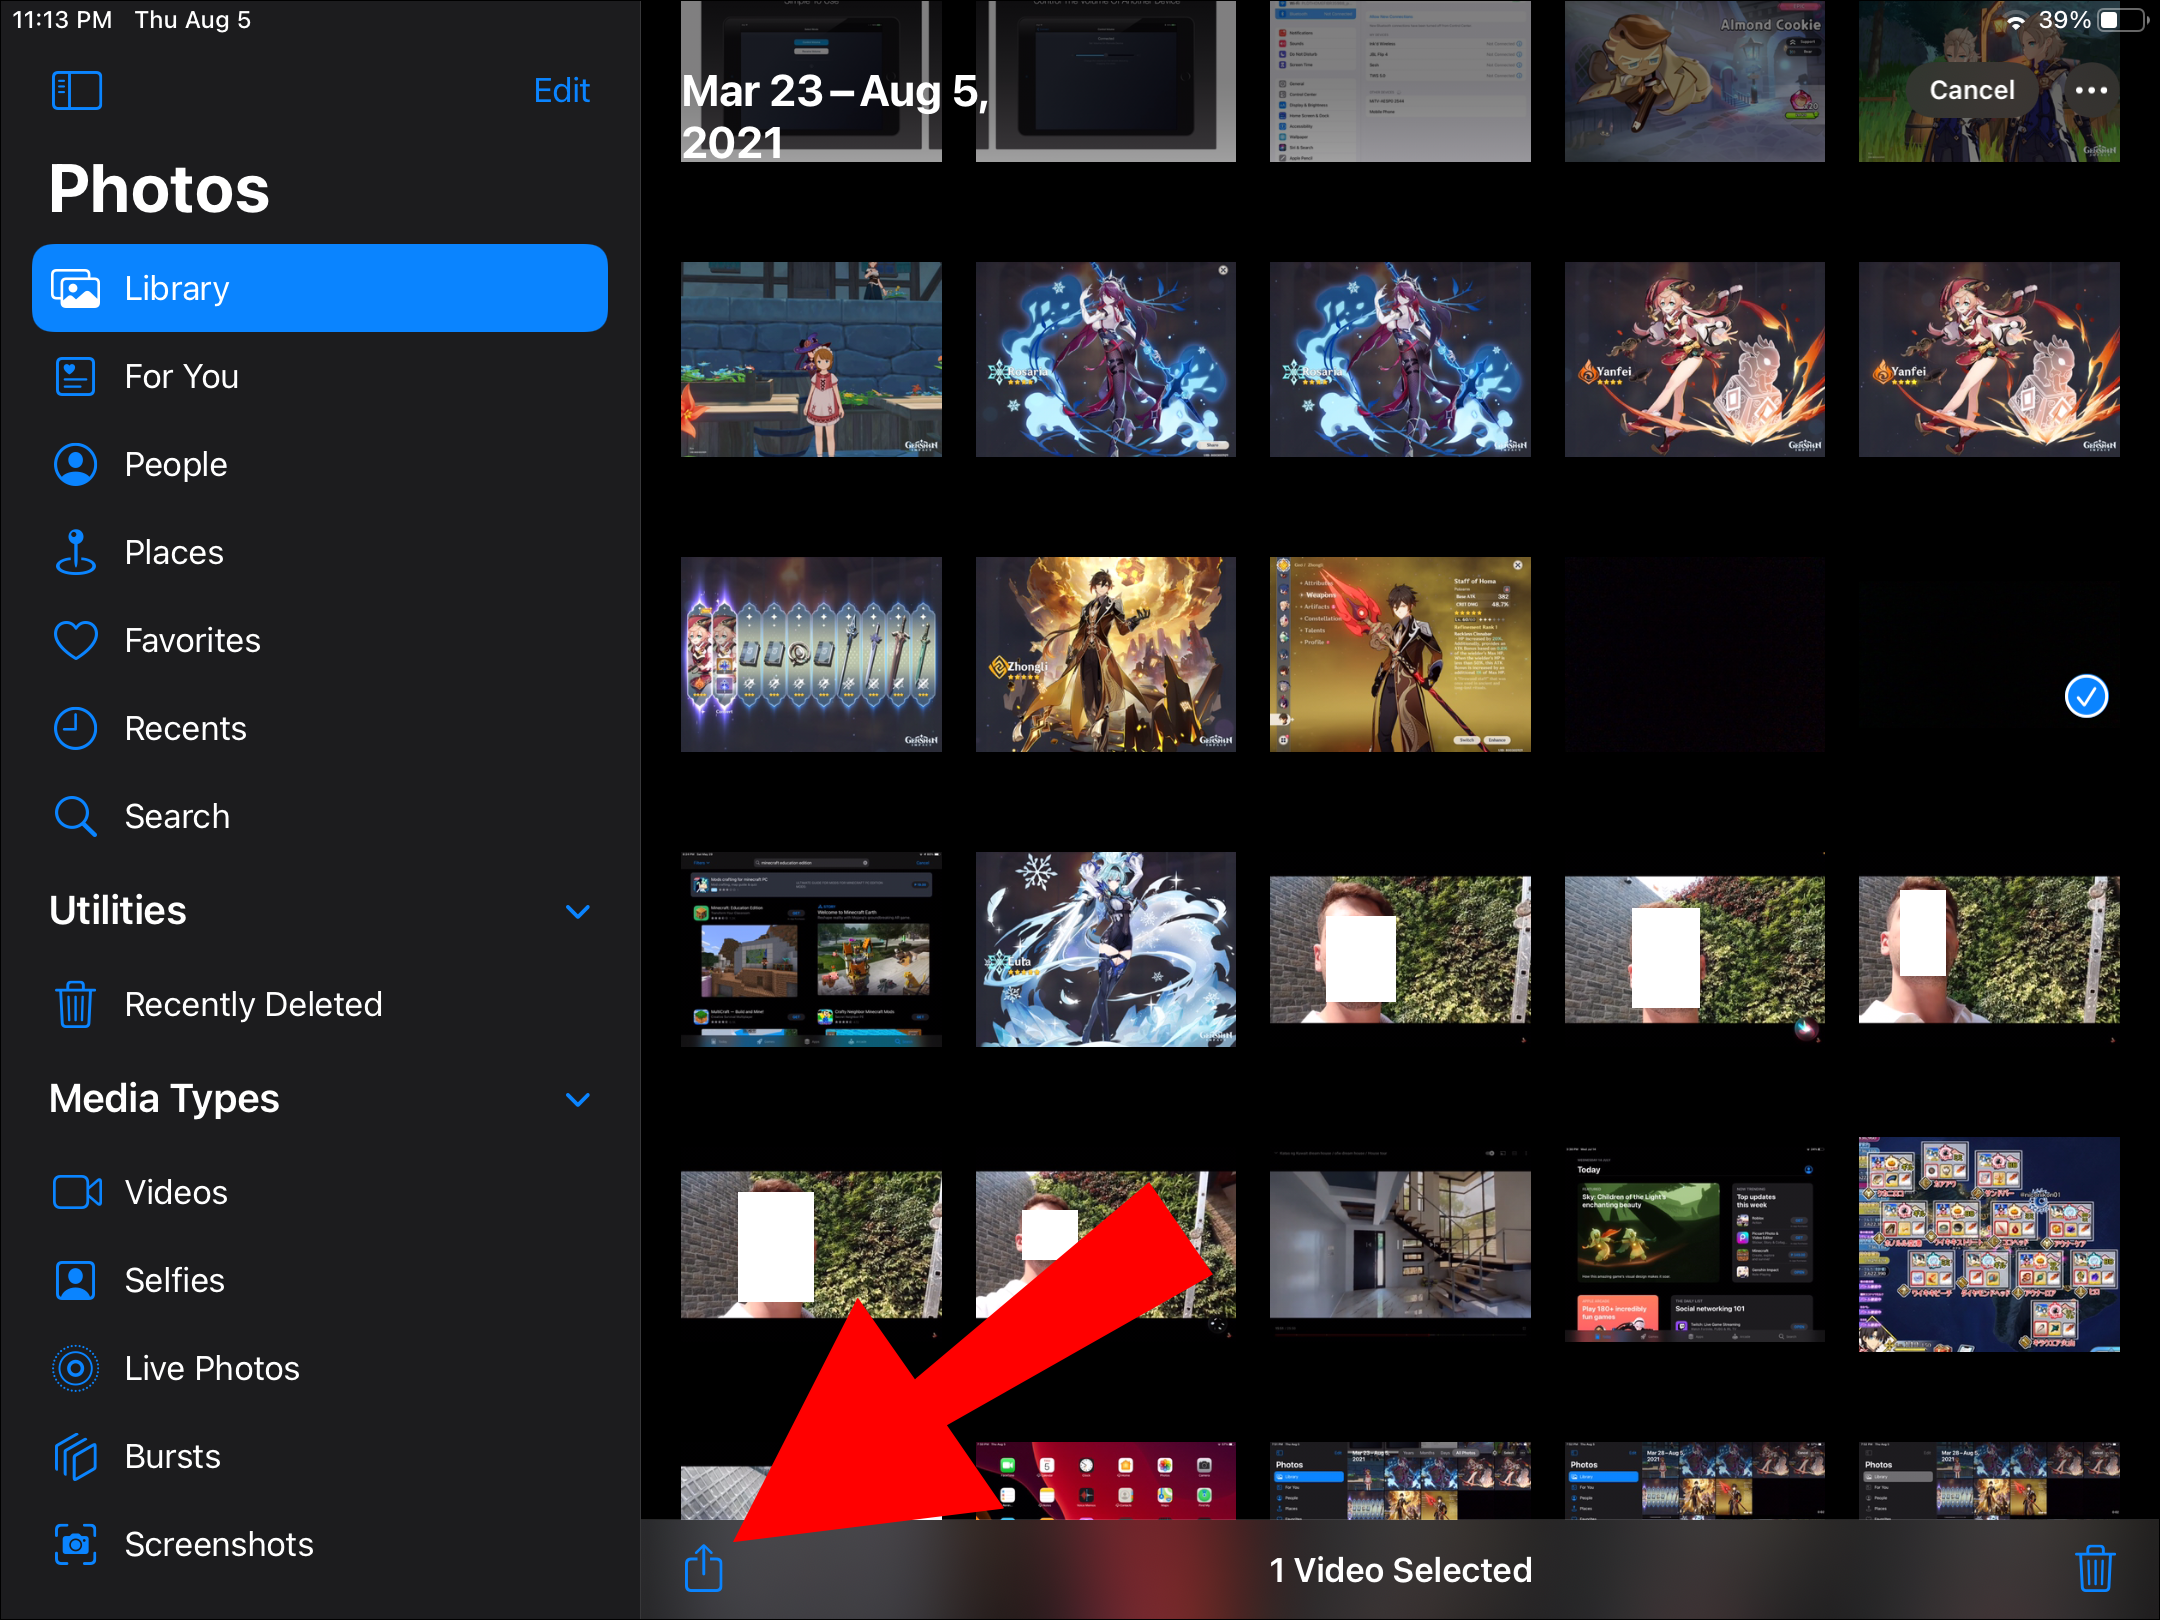
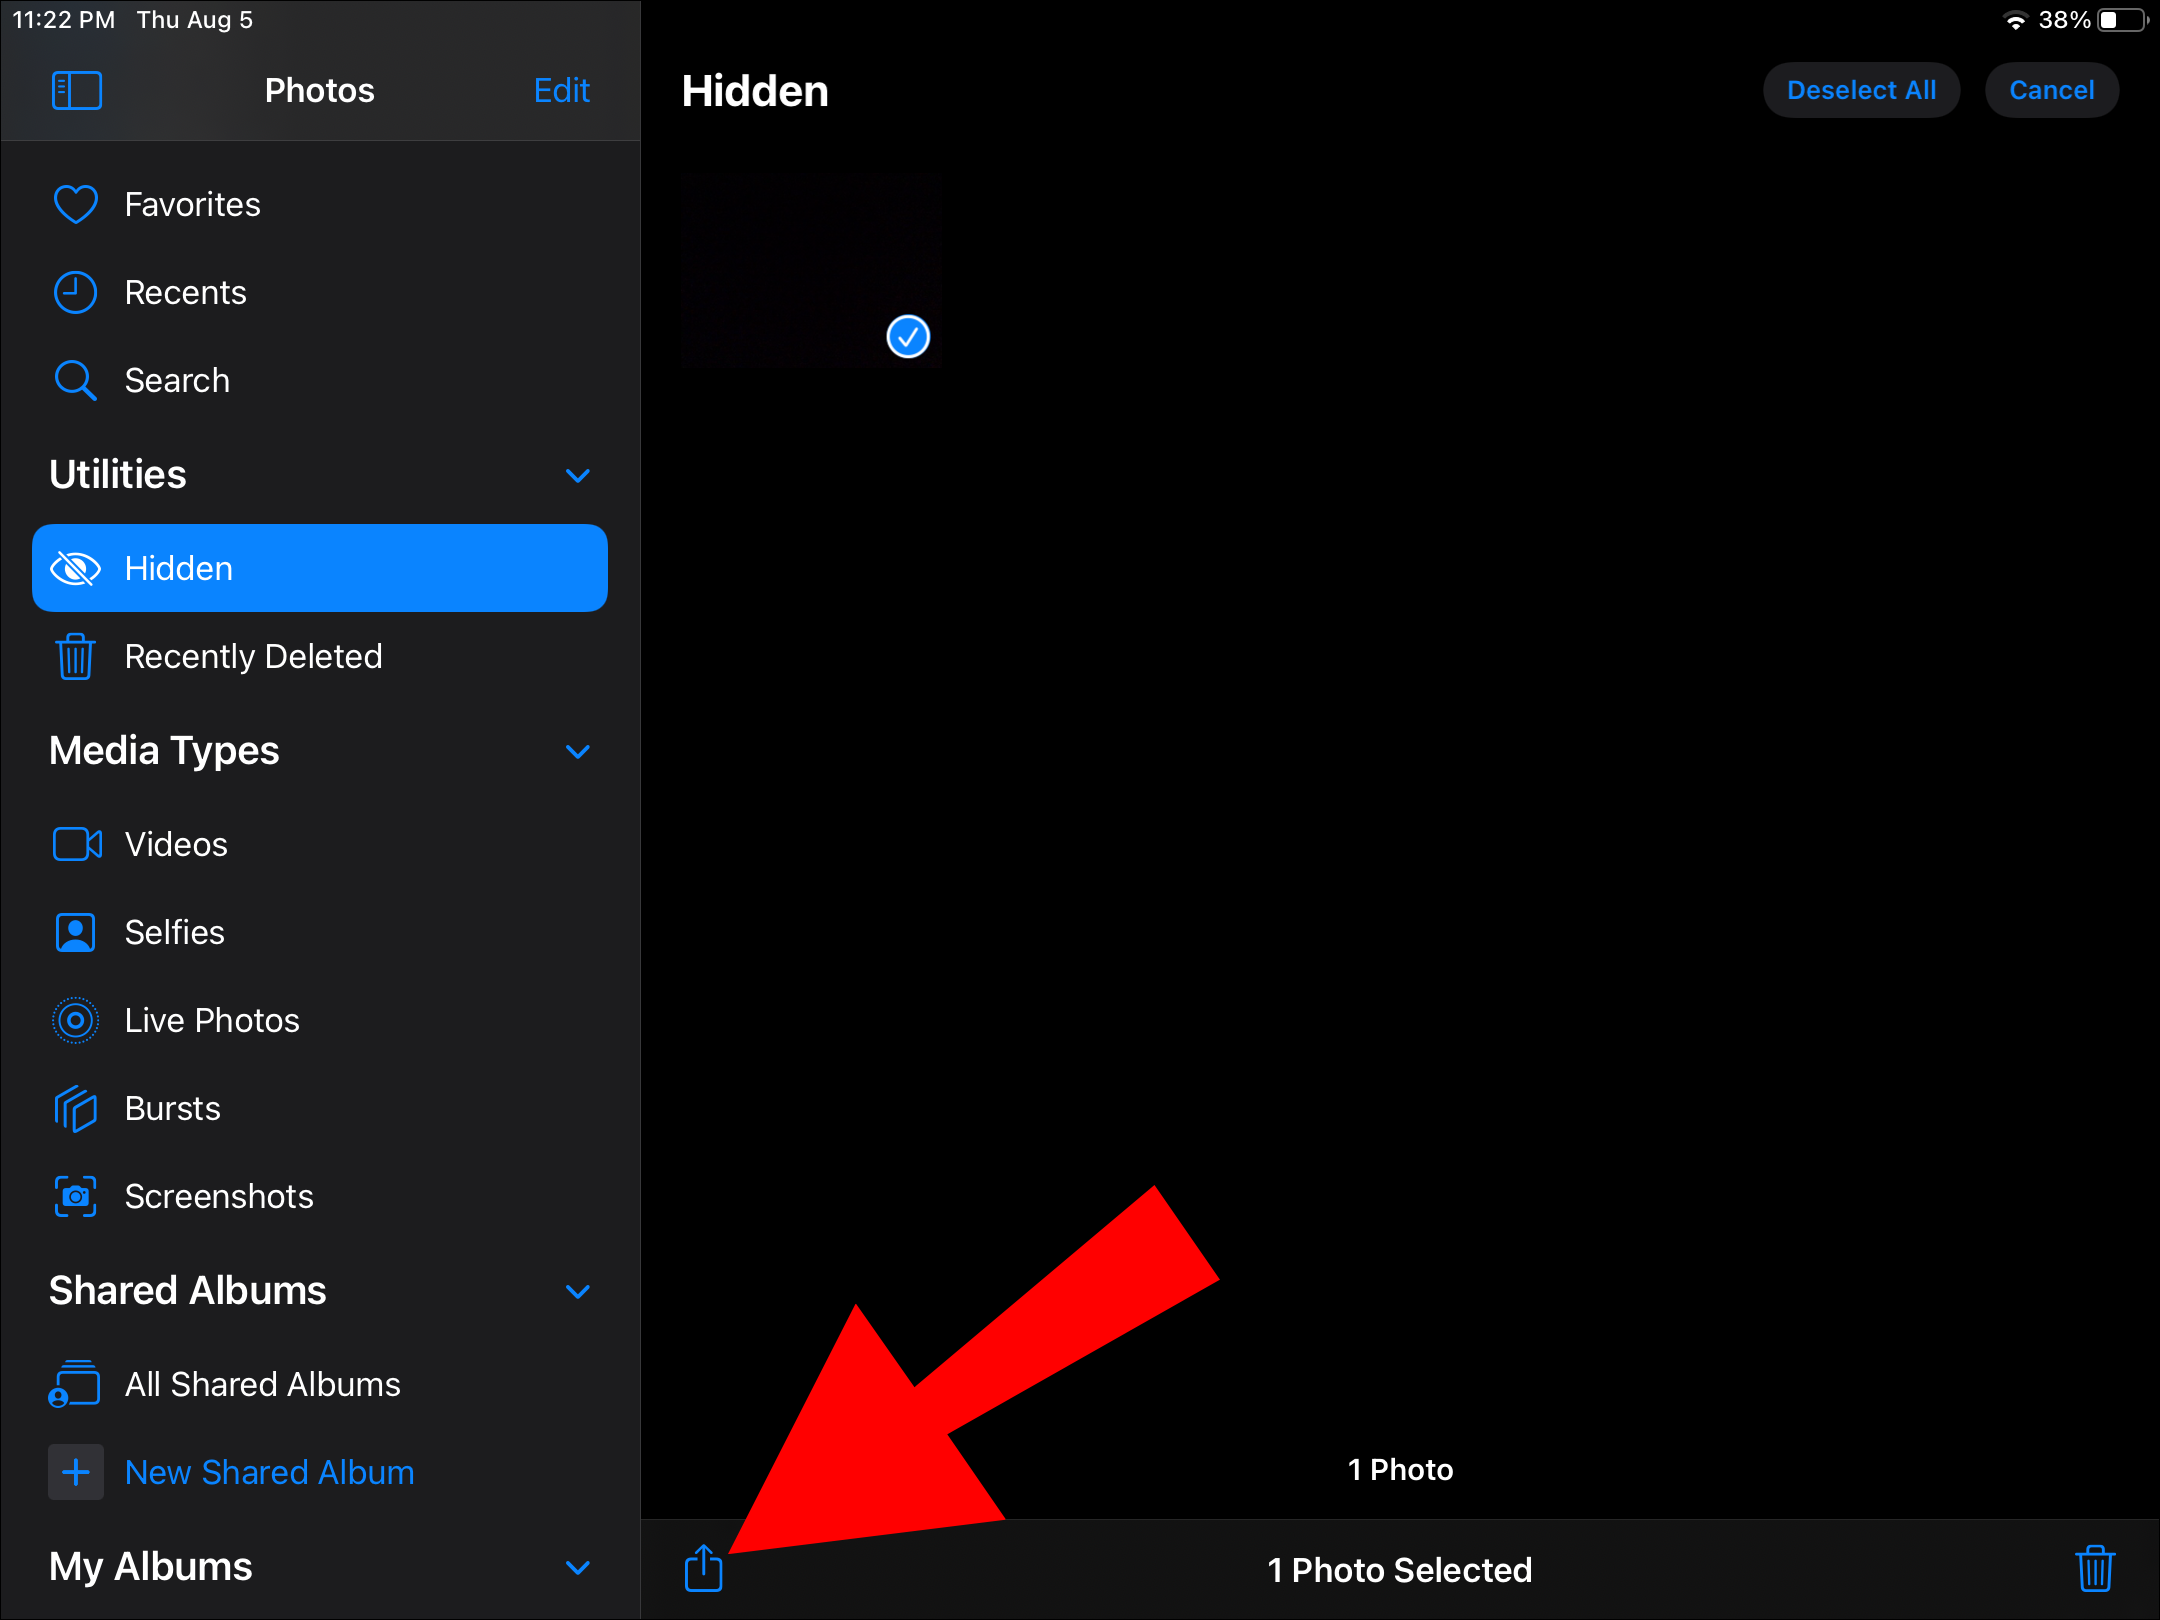
To hide pictures:
- Launch Photos.
- Go to either the “Days,” “All Photos,” or regular “Albums” view.
- Choose the “Select” button.
- Tap on the images you wish to hide, or view your pictures individually and hide them as you go through them.
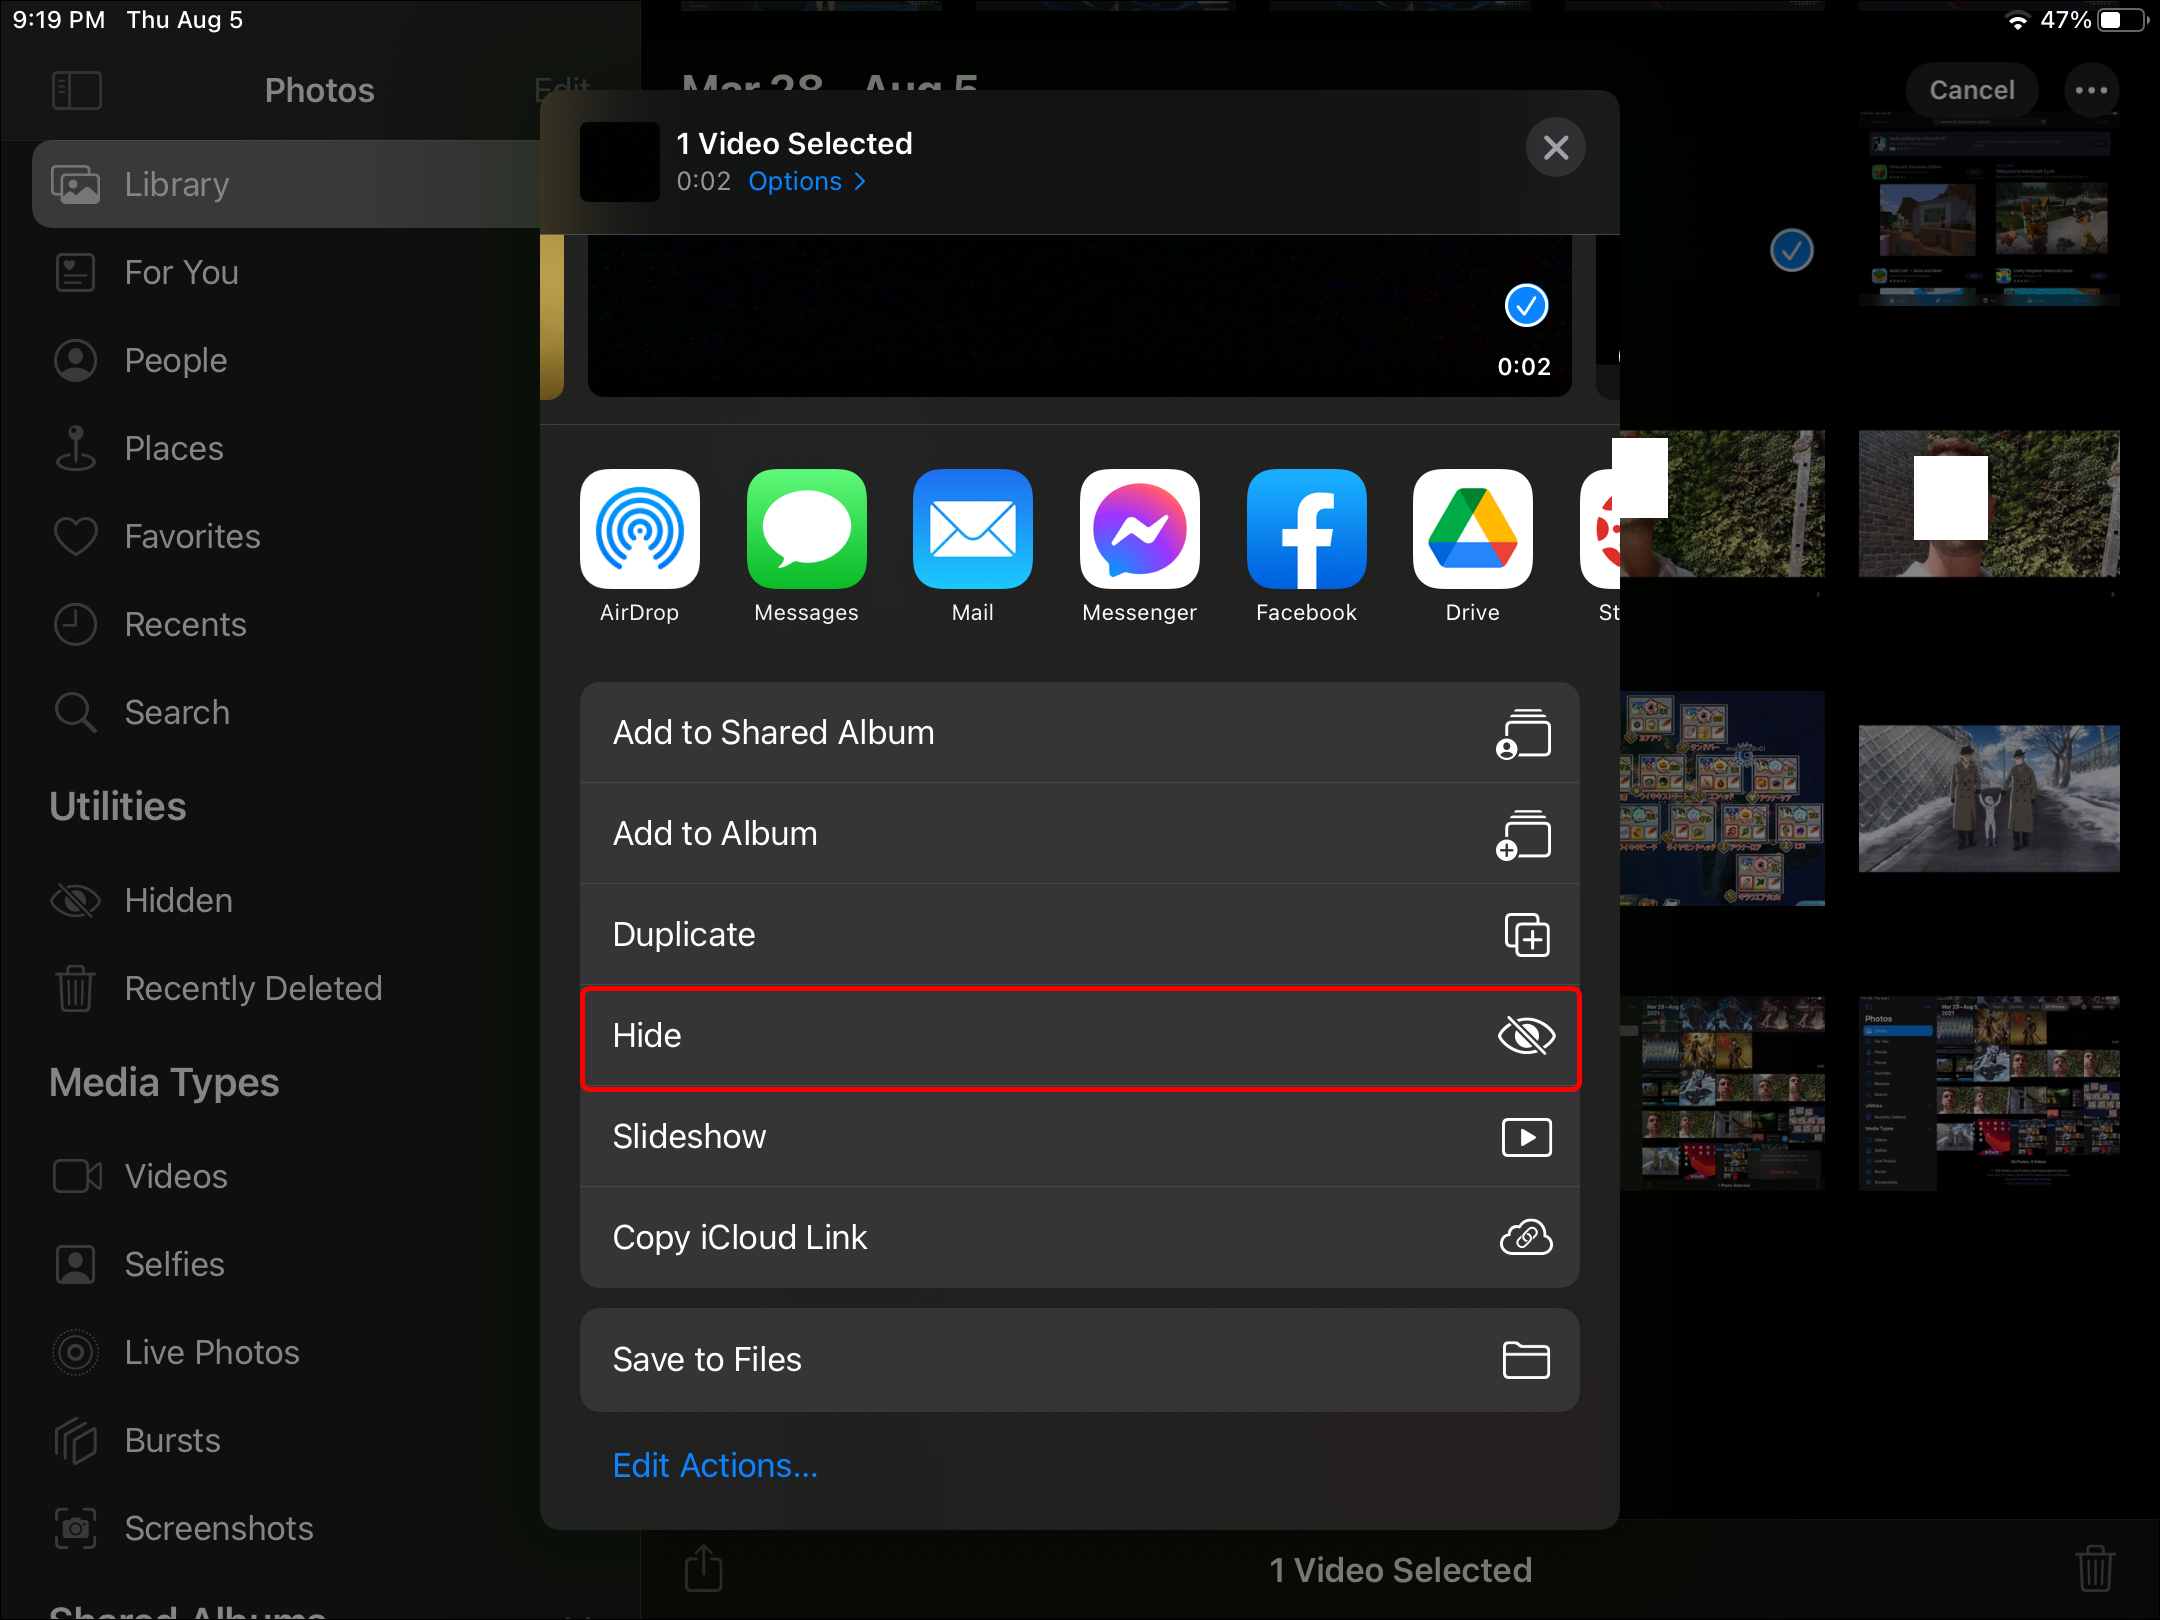
- Select the “Share” button.
- Towards the bottom of the “Share Sheet,” select “Hide.”
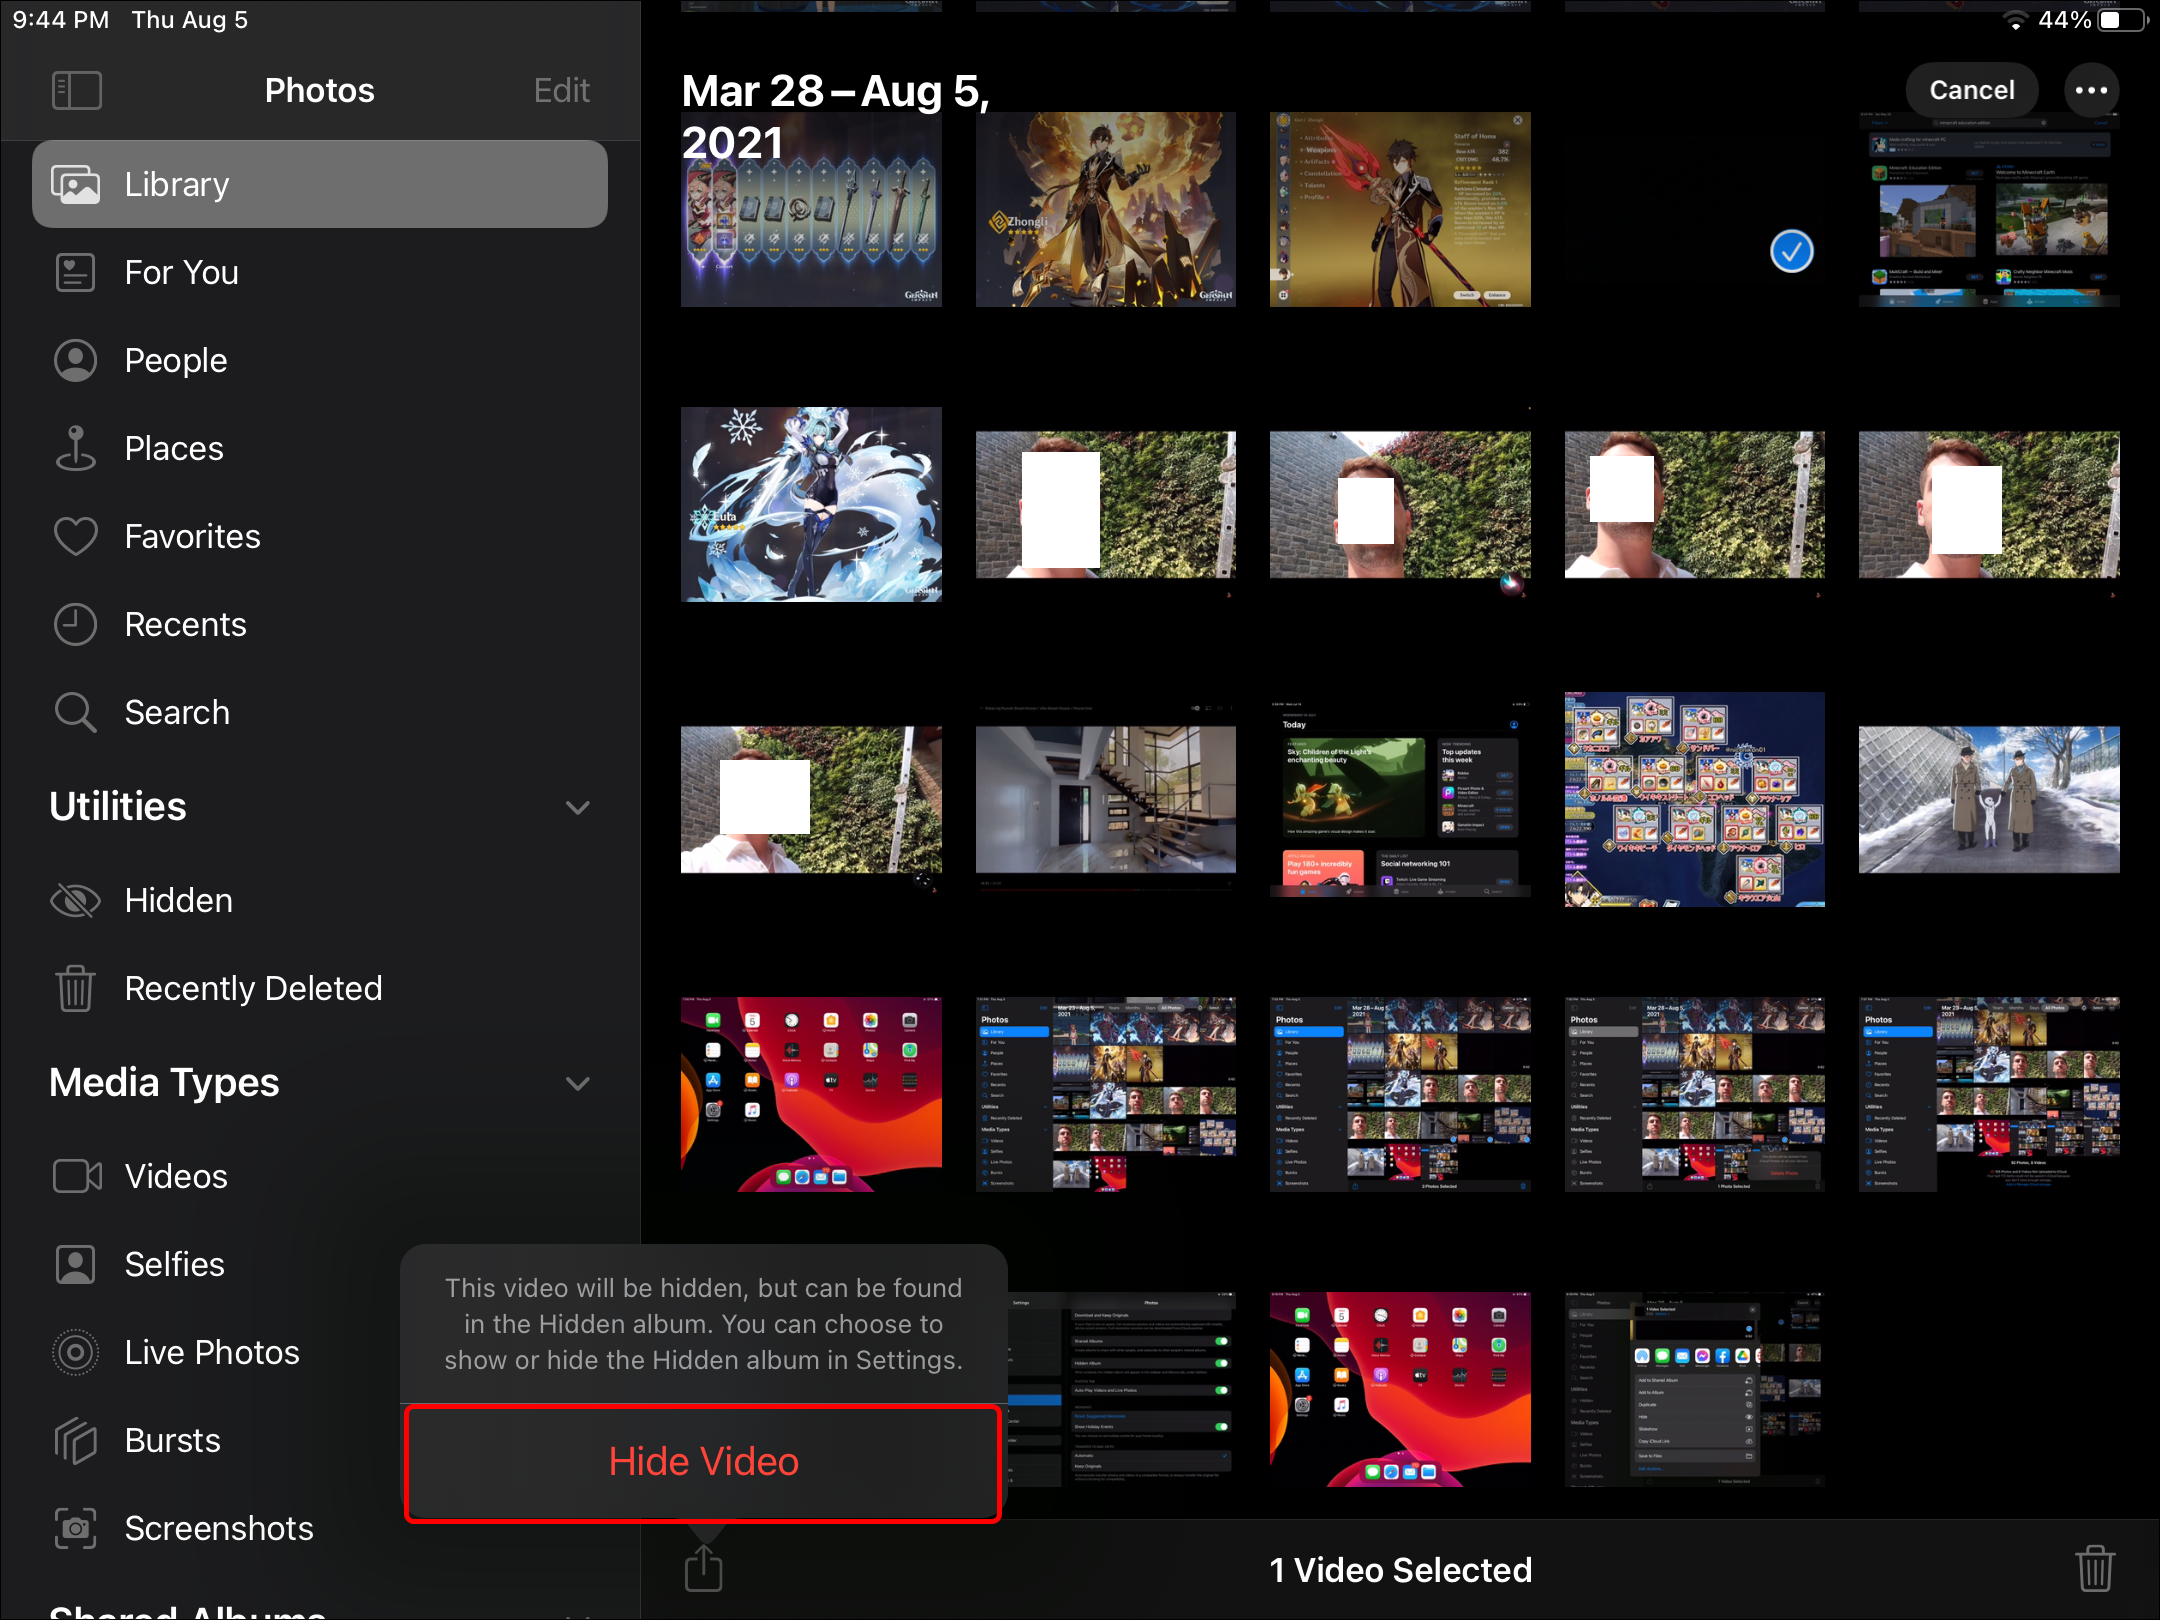
- Confirm that you wish to hide the photos.


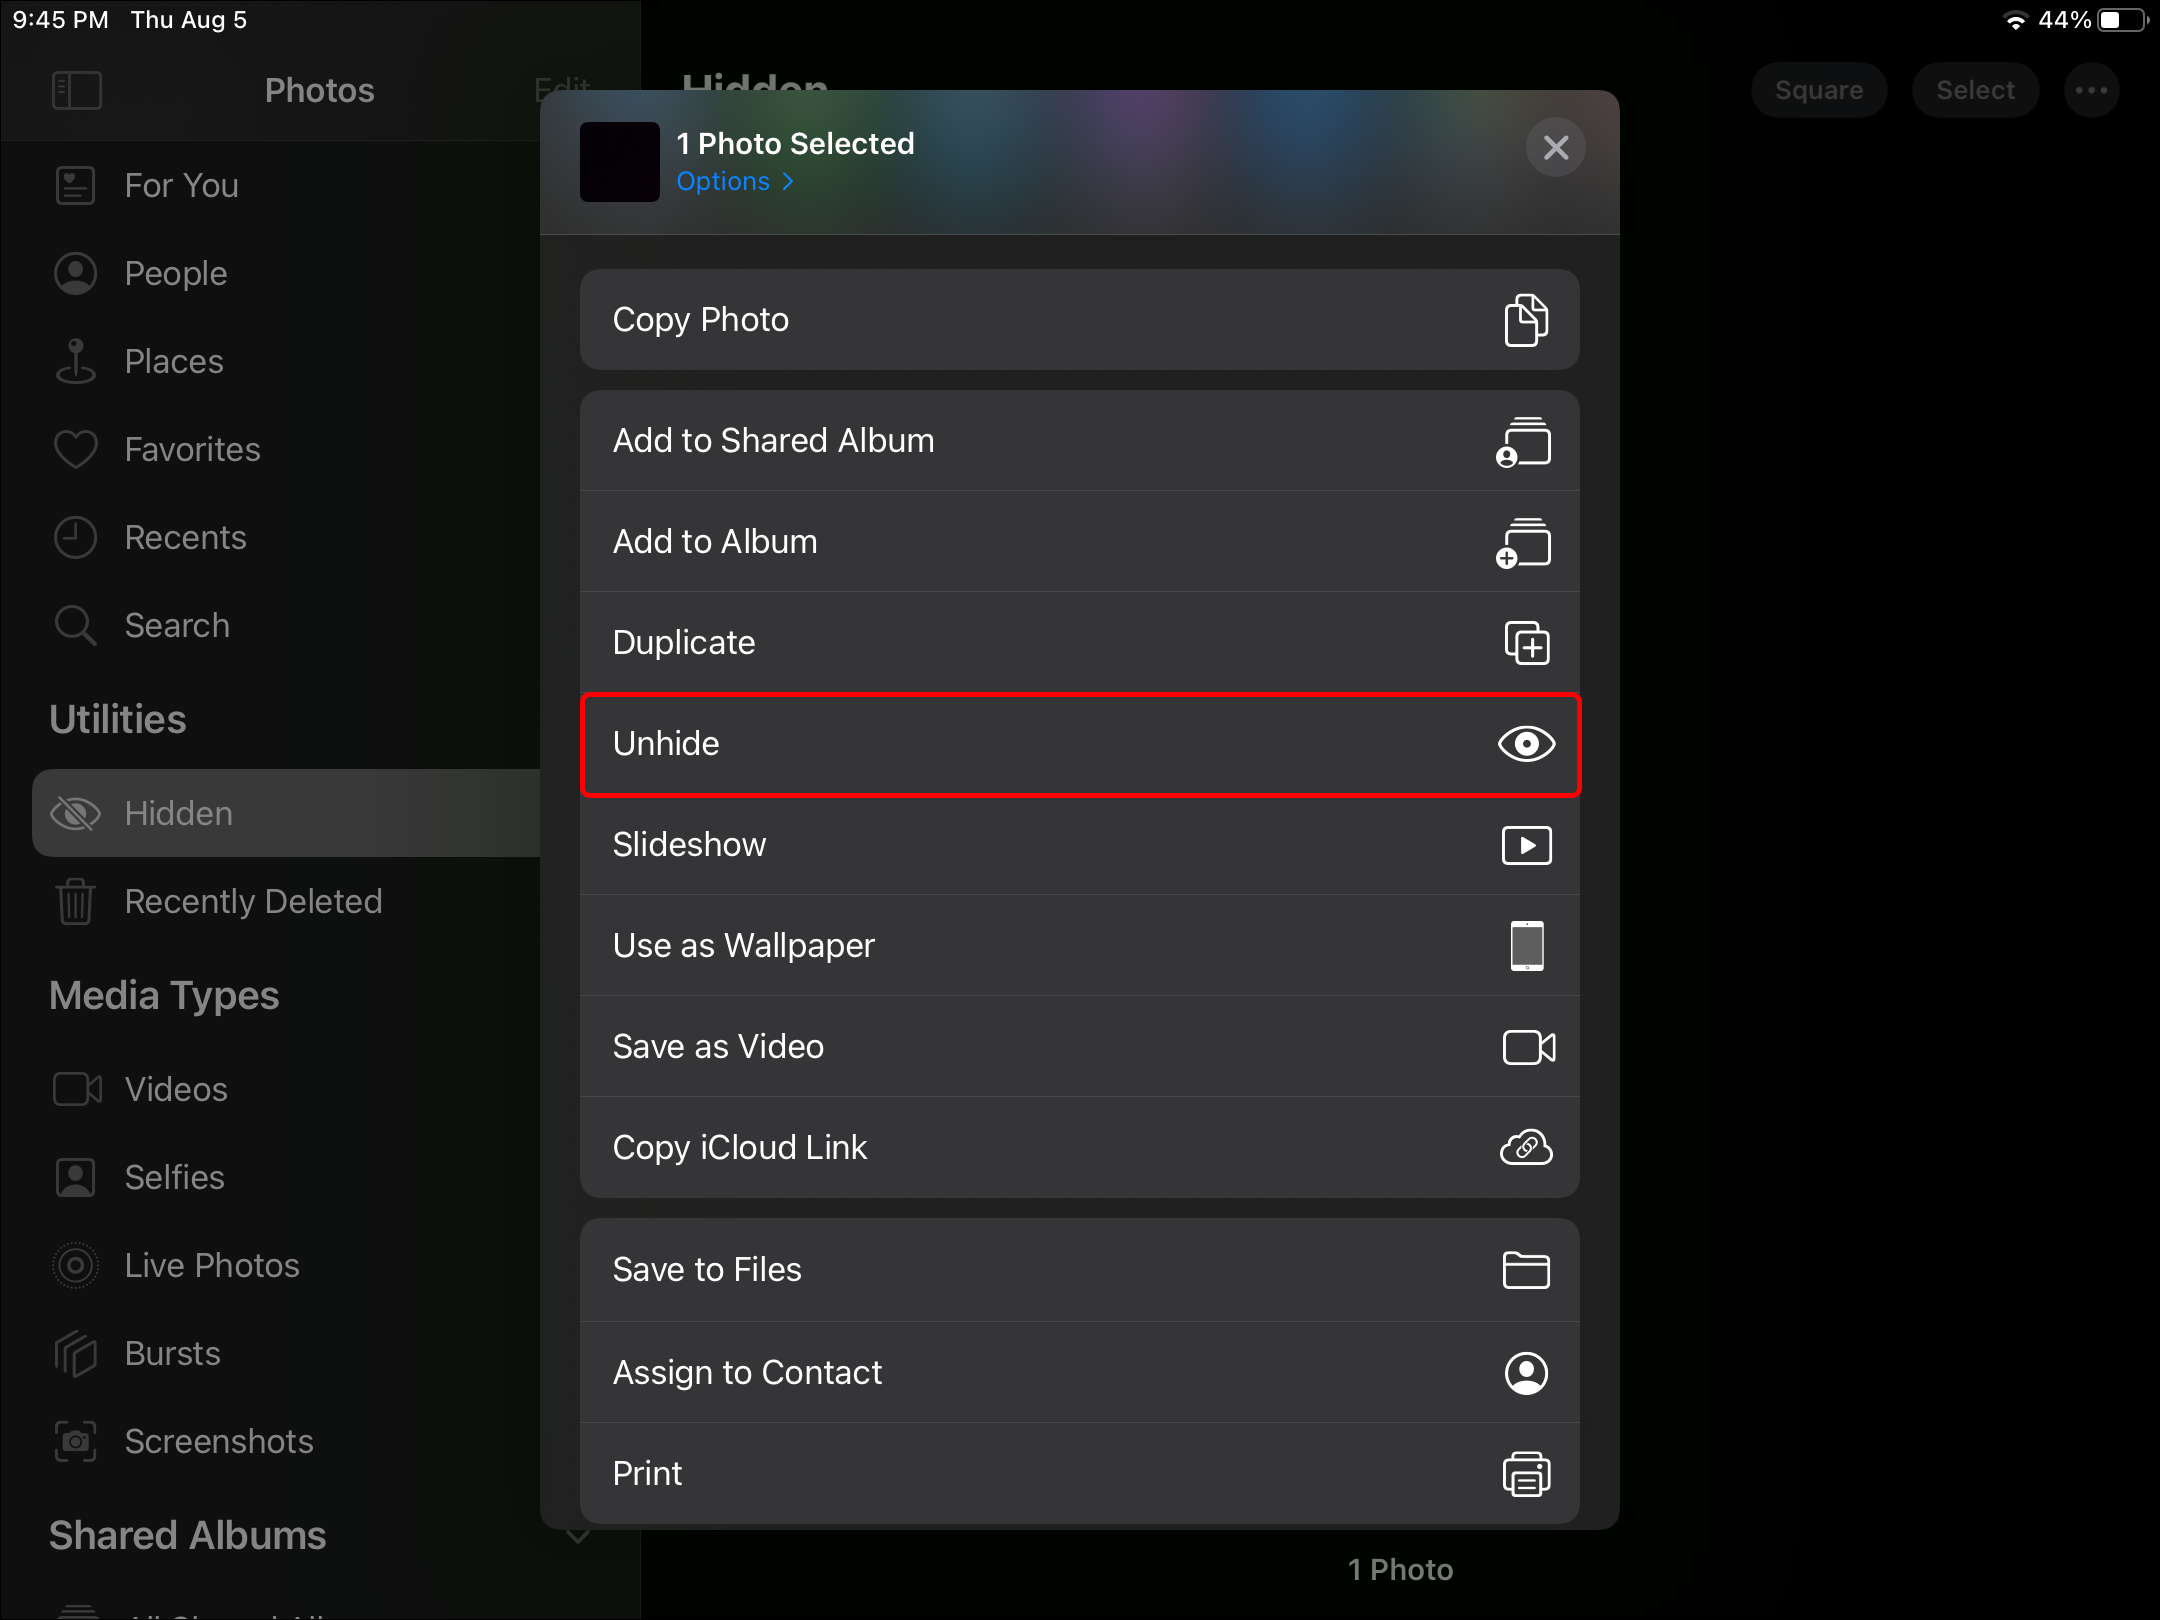
To unhide them:
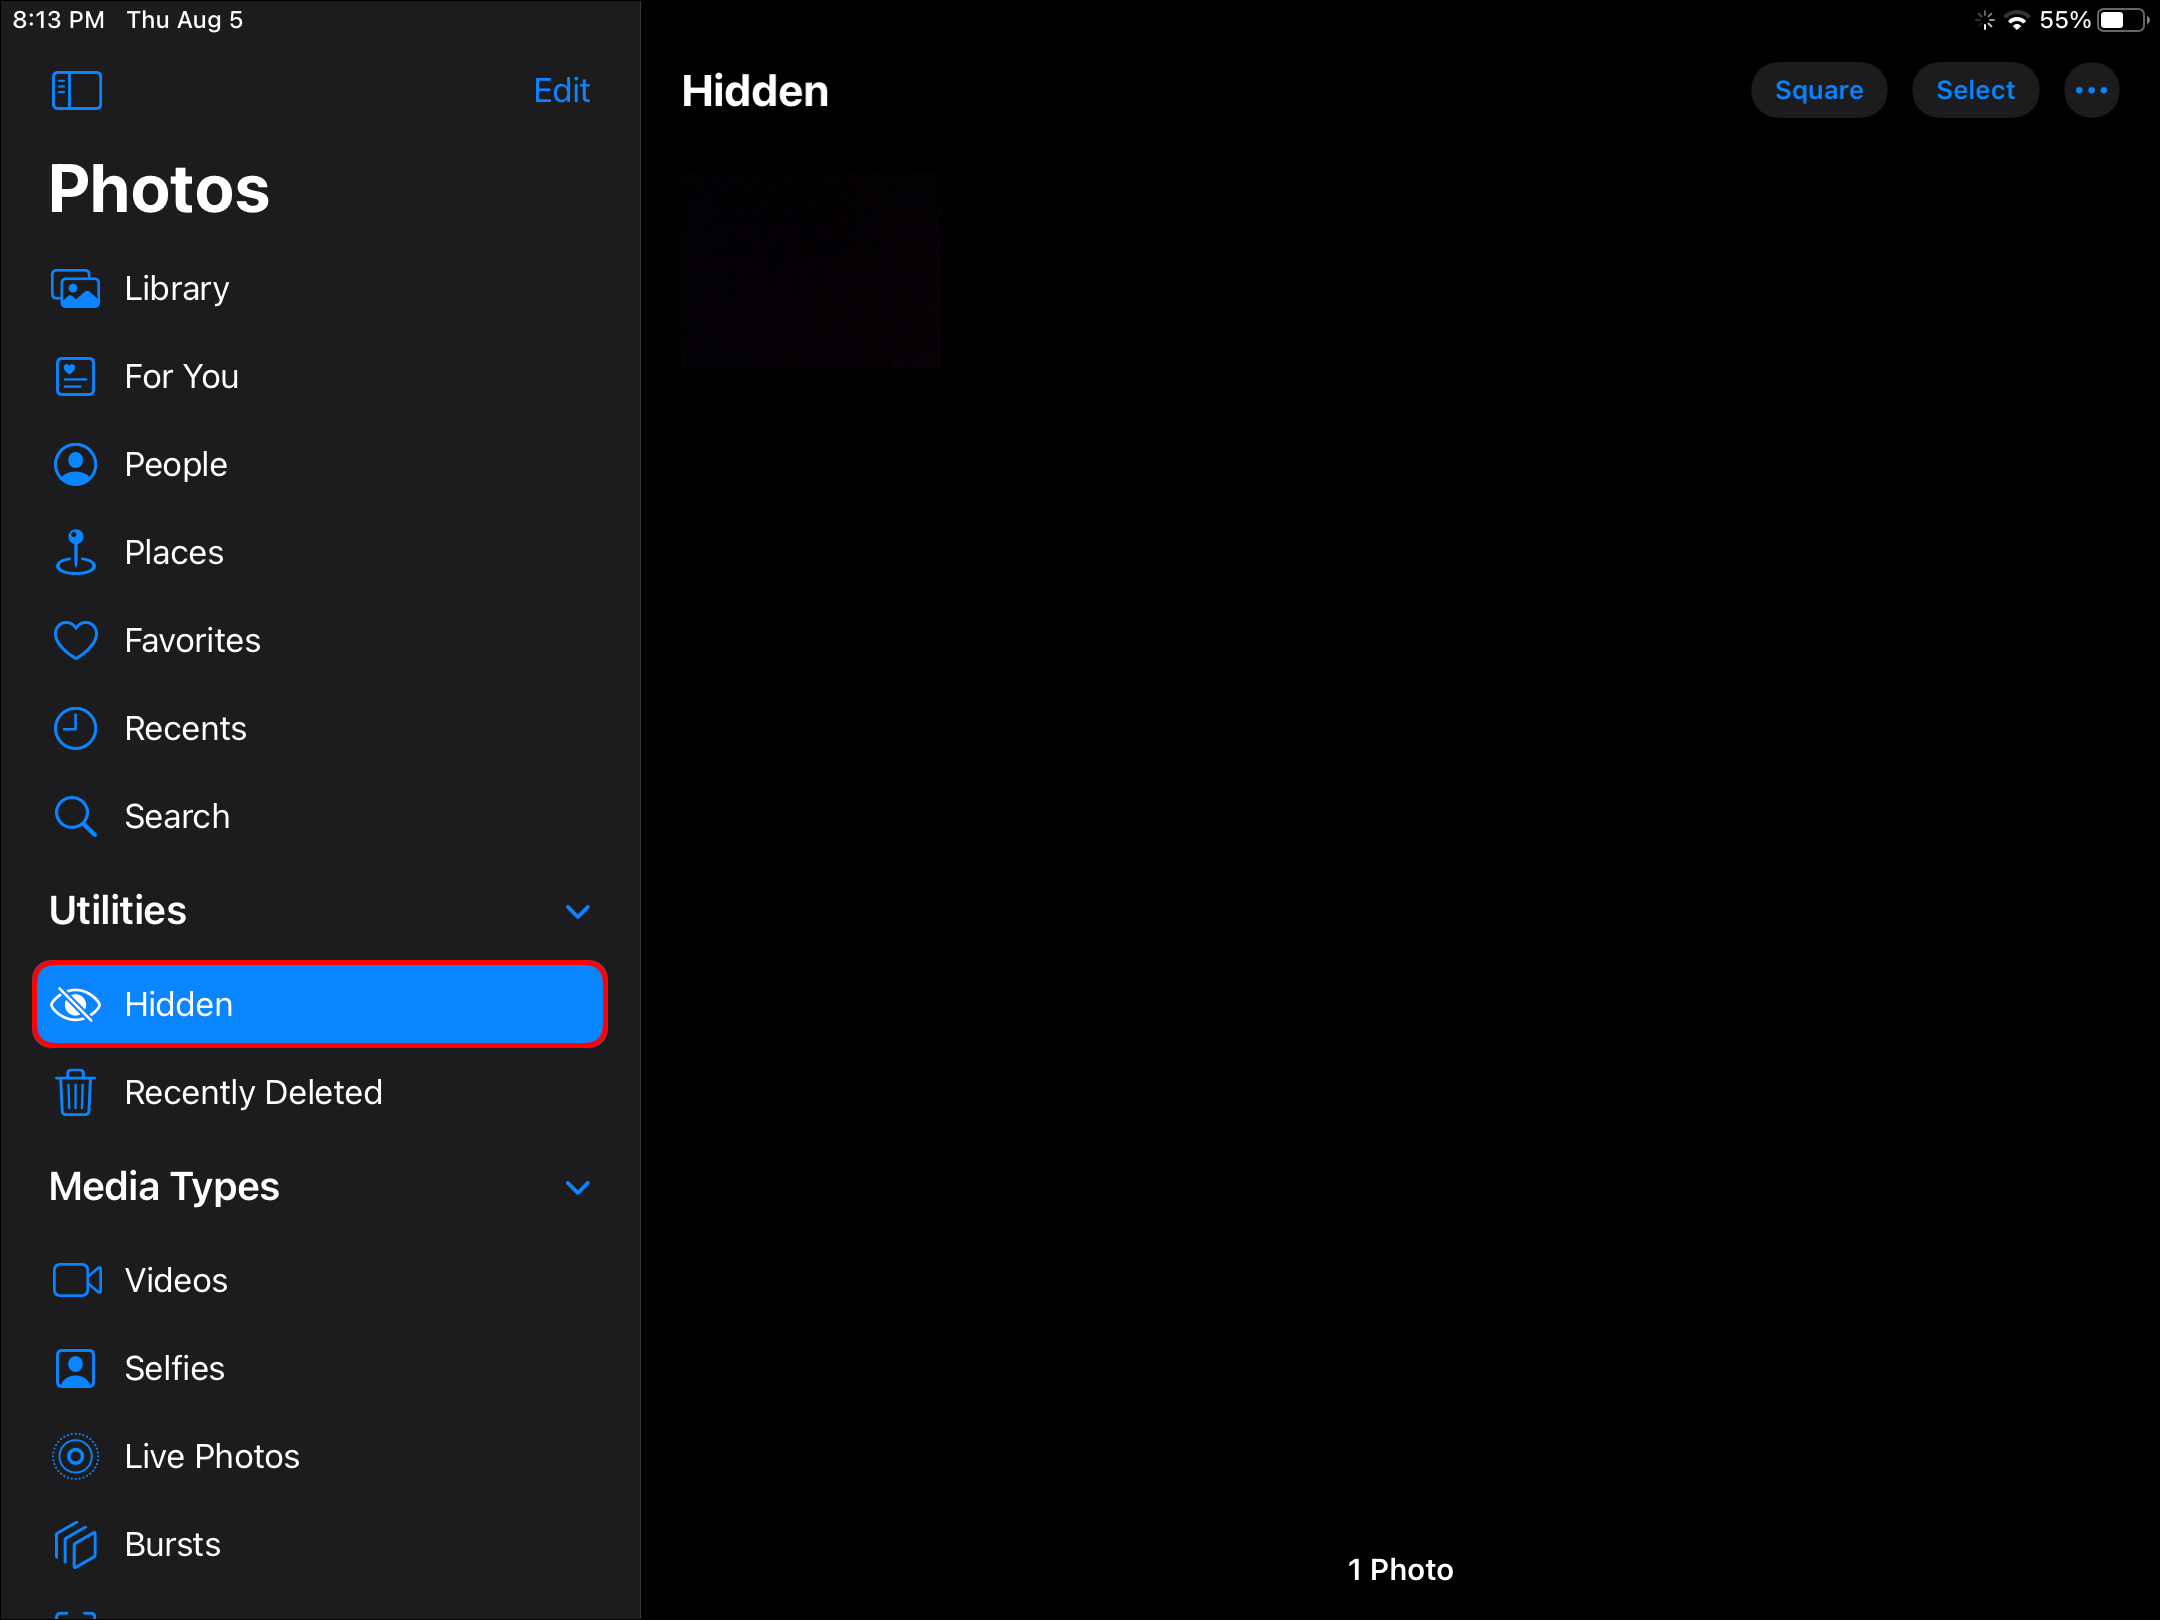
- Select “Albums.”
- Towards the bottom, select “Hidden.”
- Tap “Select.”
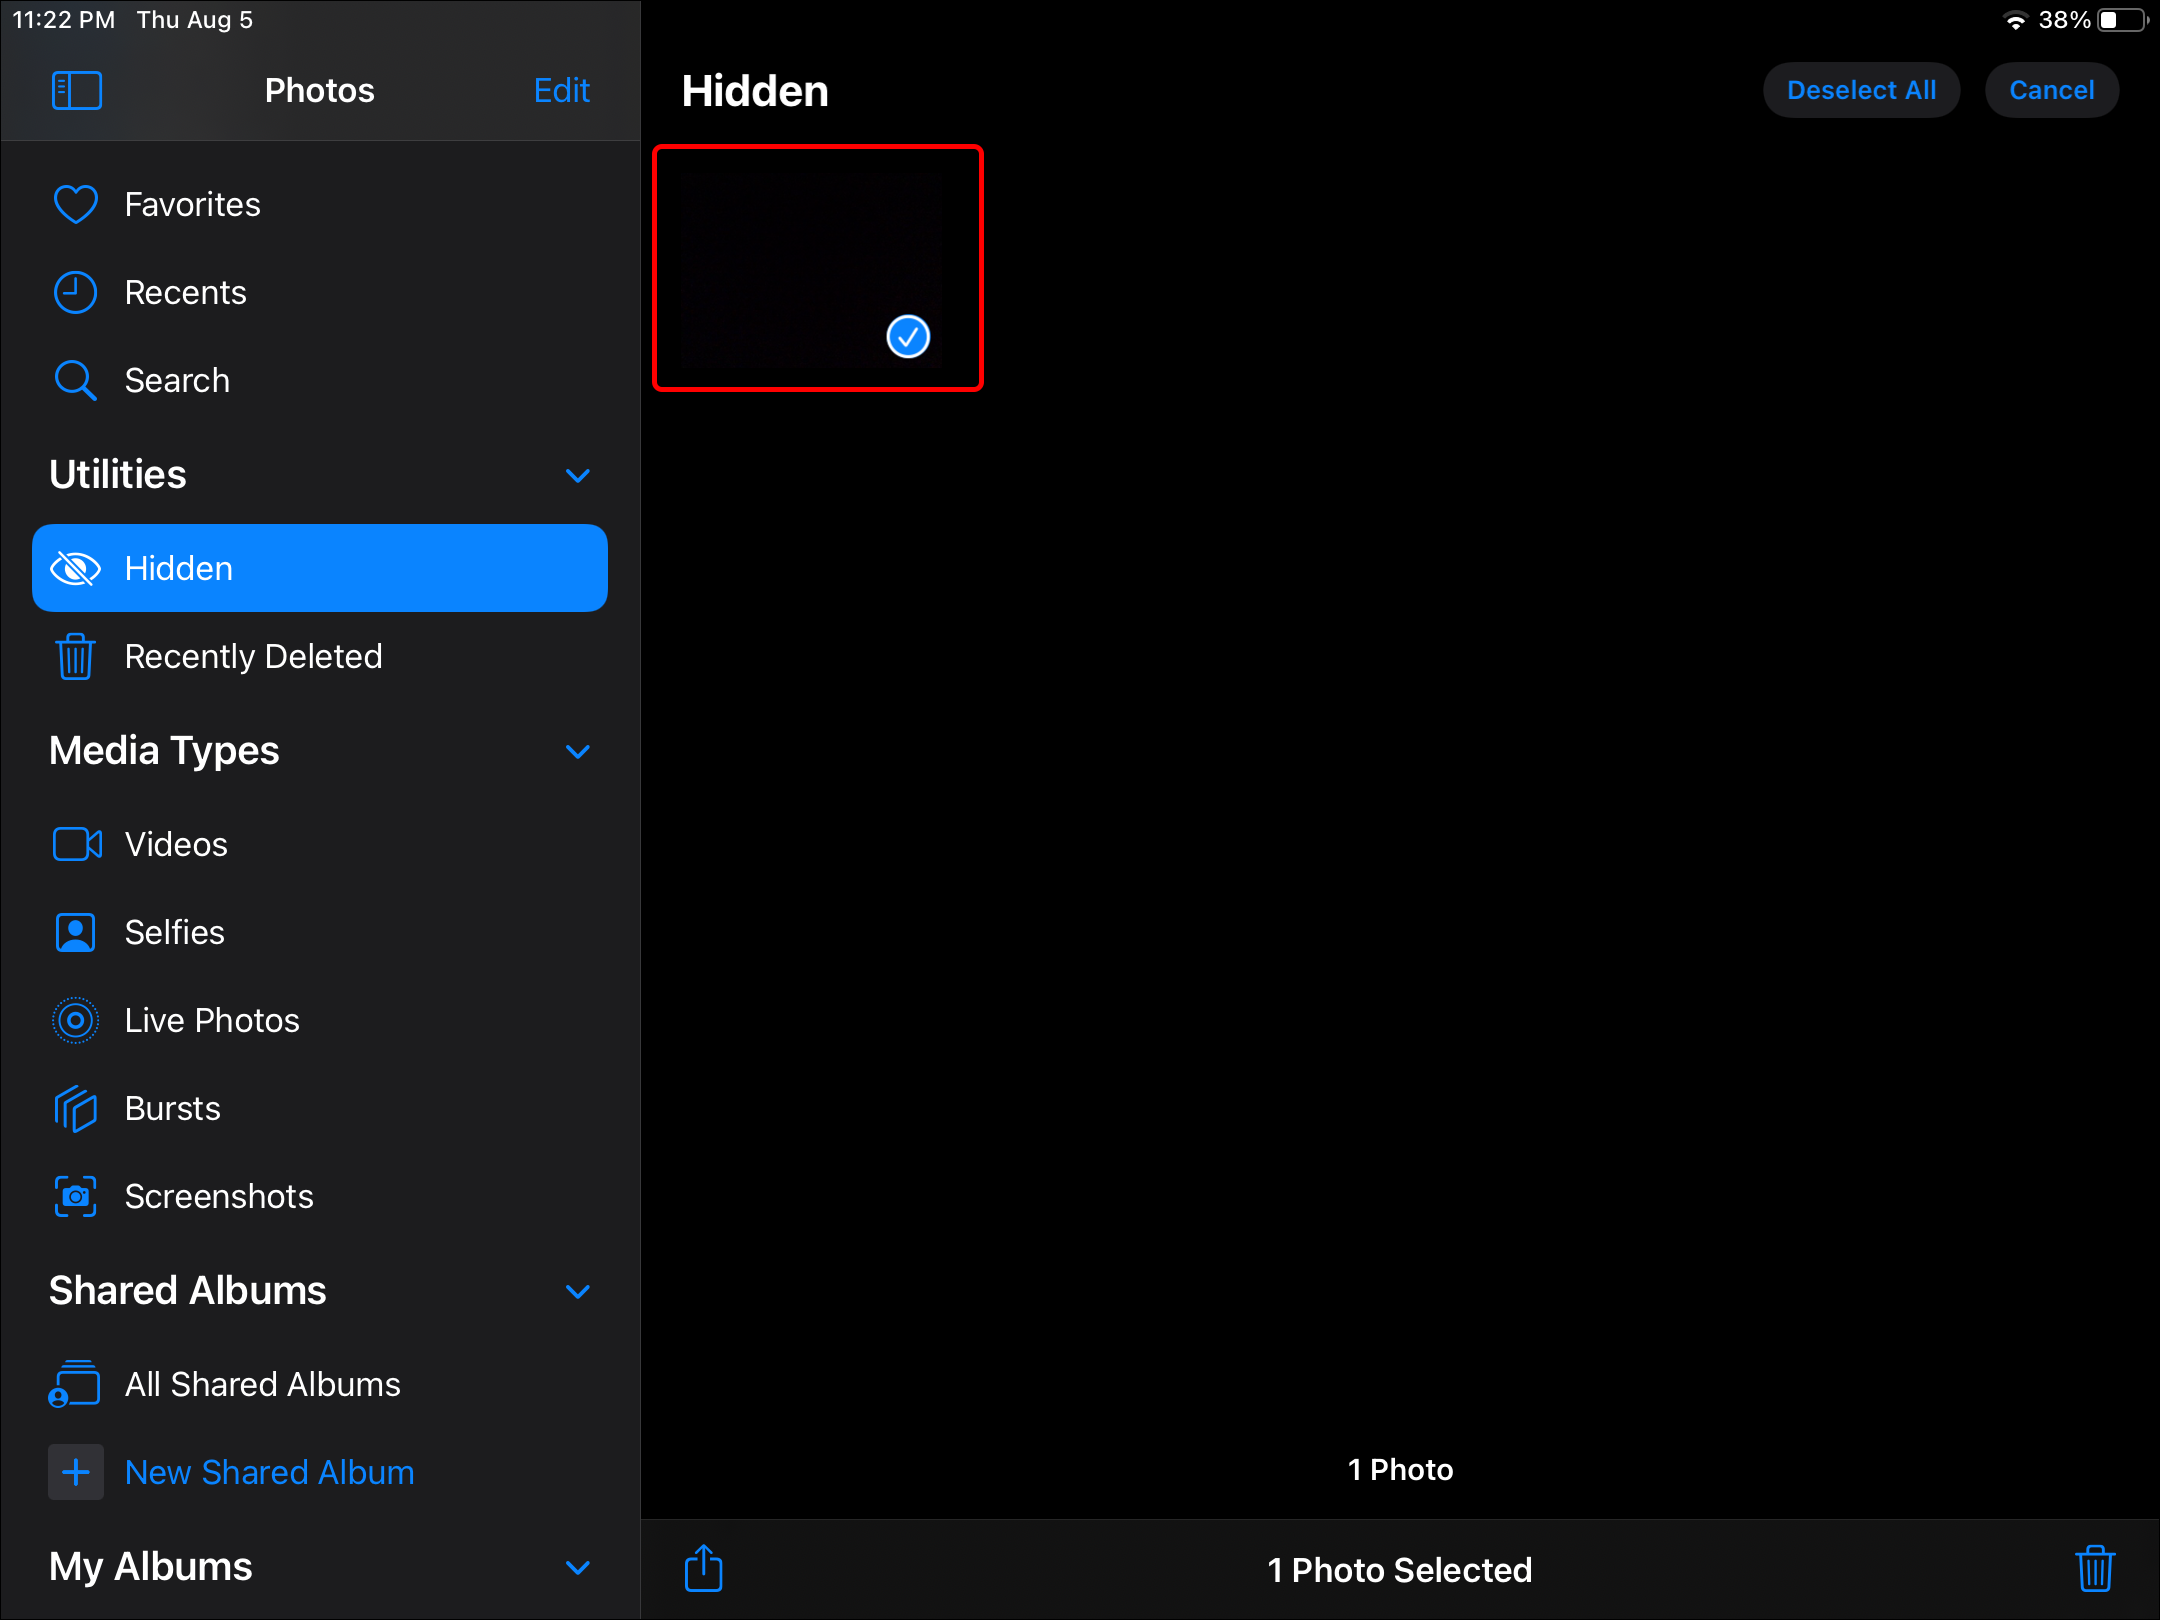
- Choose the items you want to unhide.
- Select the “Share” button.
- Towards the bottom, select “Unhide.”
Organization in Photo Apps
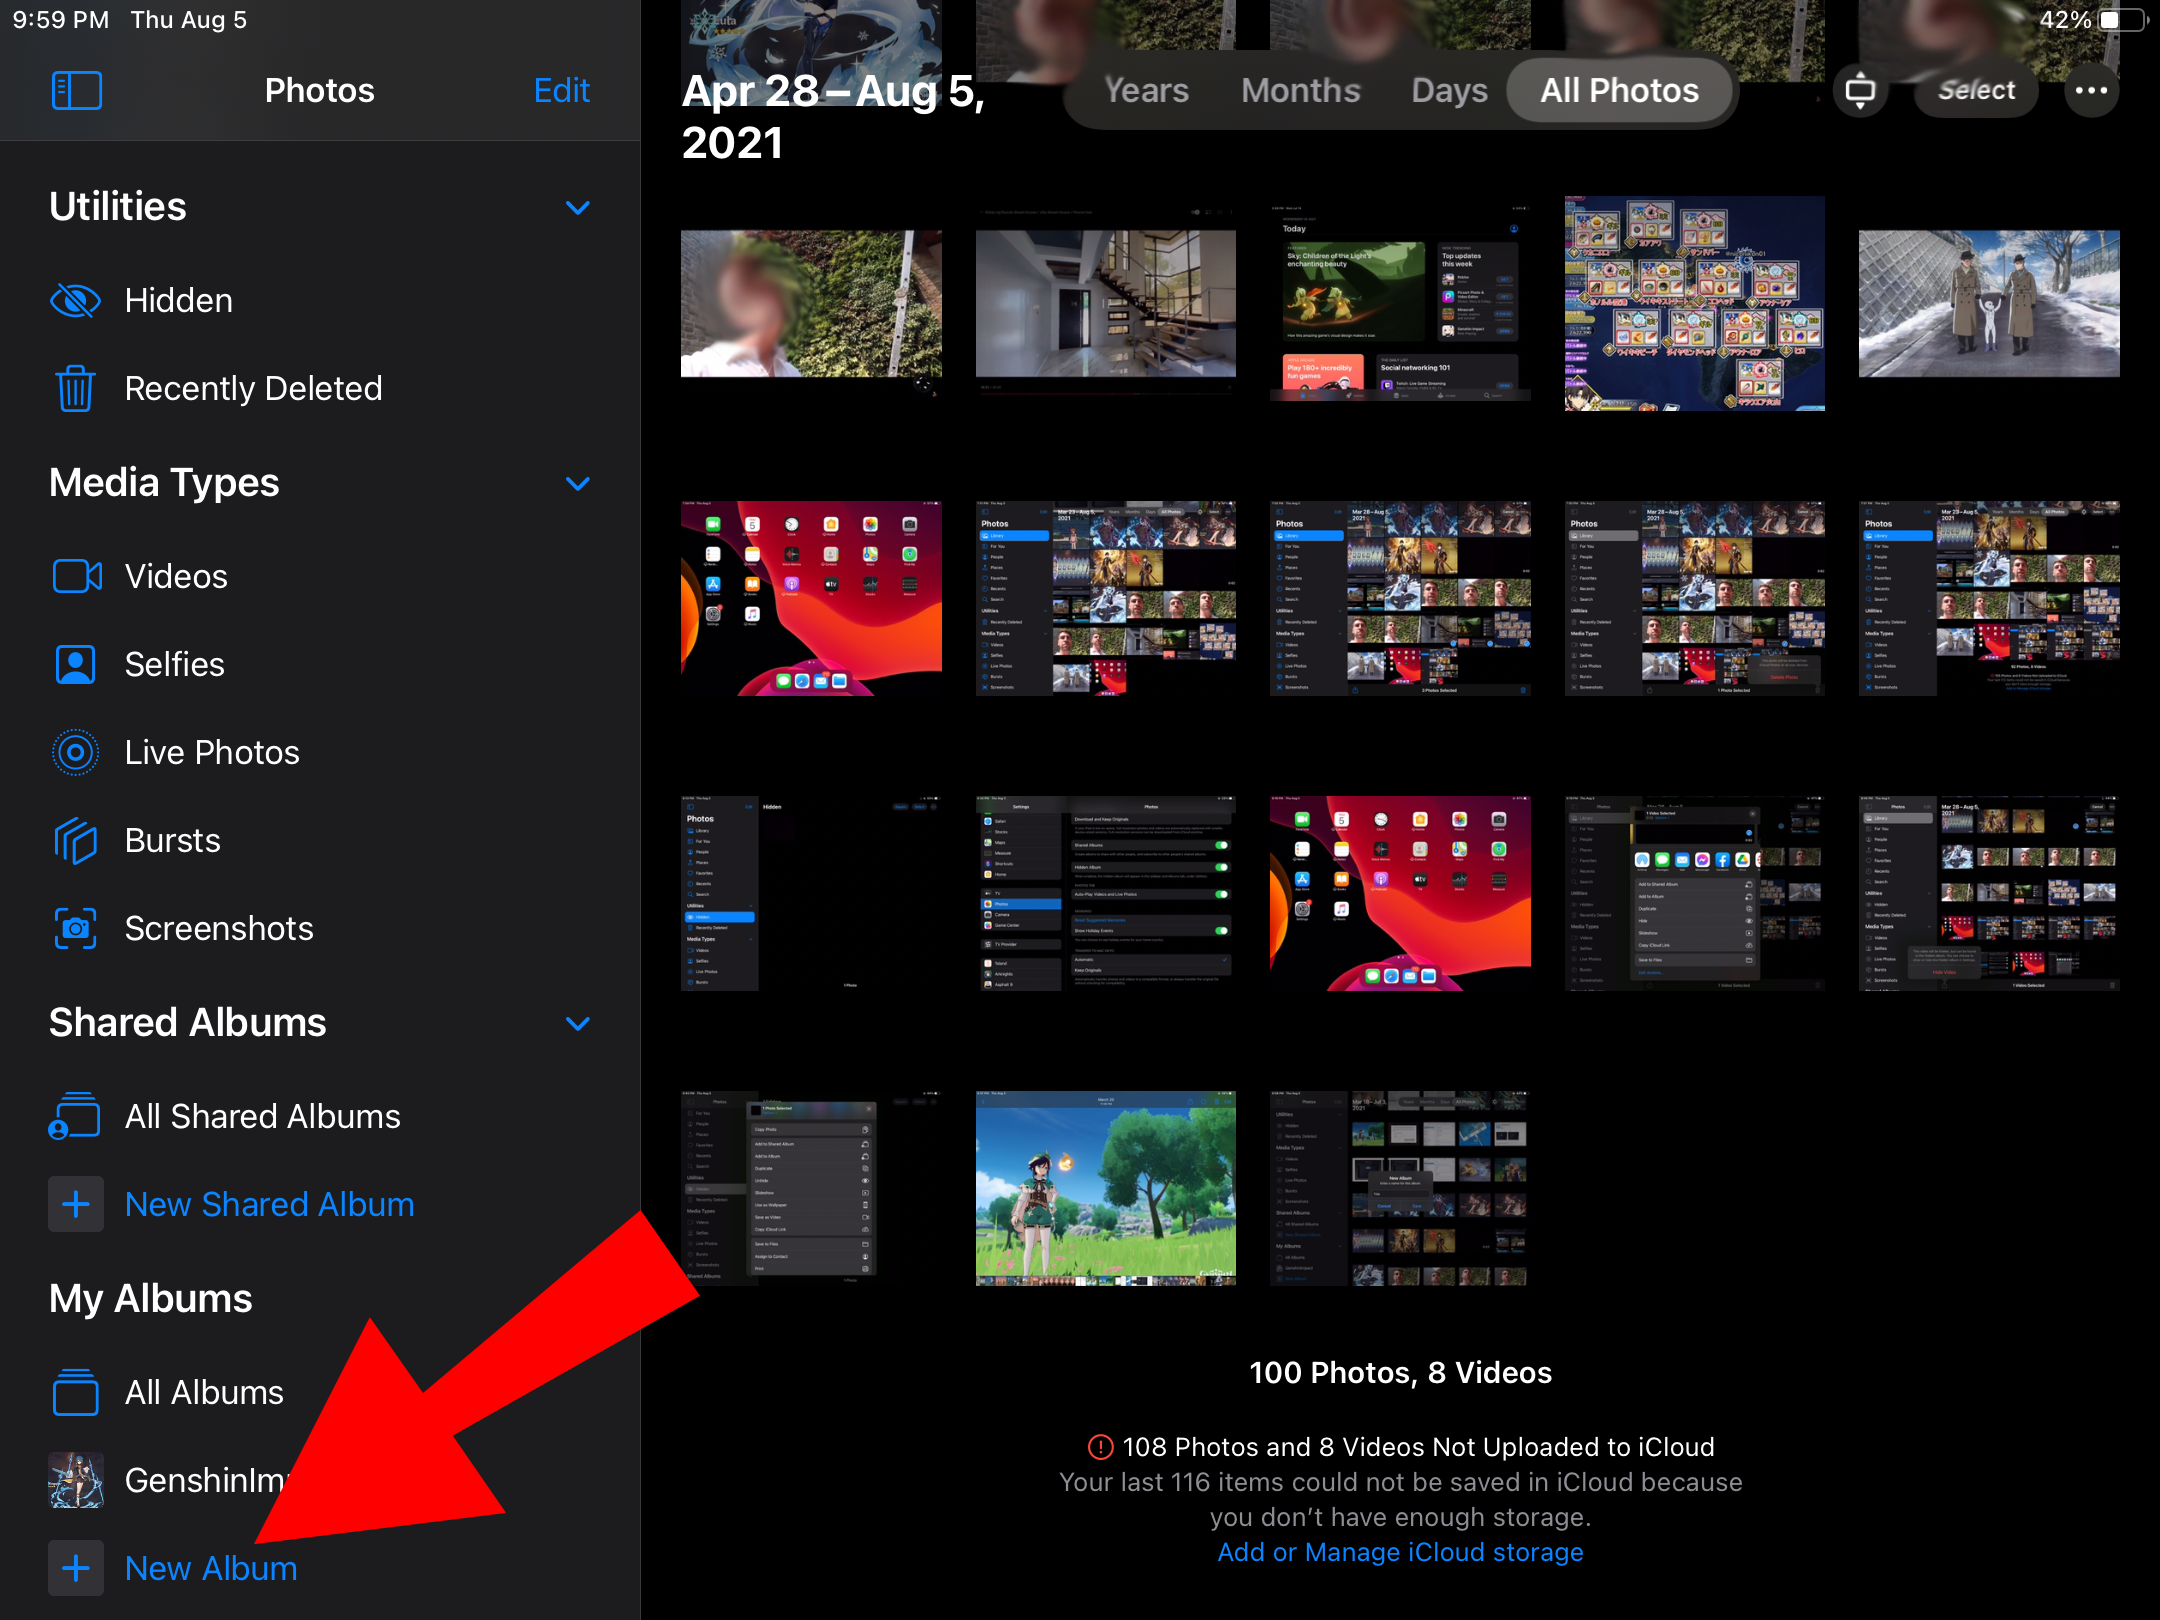
To create a new album via your iPad:
- Launch Photos.
- Select the “Albums” tab.
- From the top left, select the plus sign button (+).
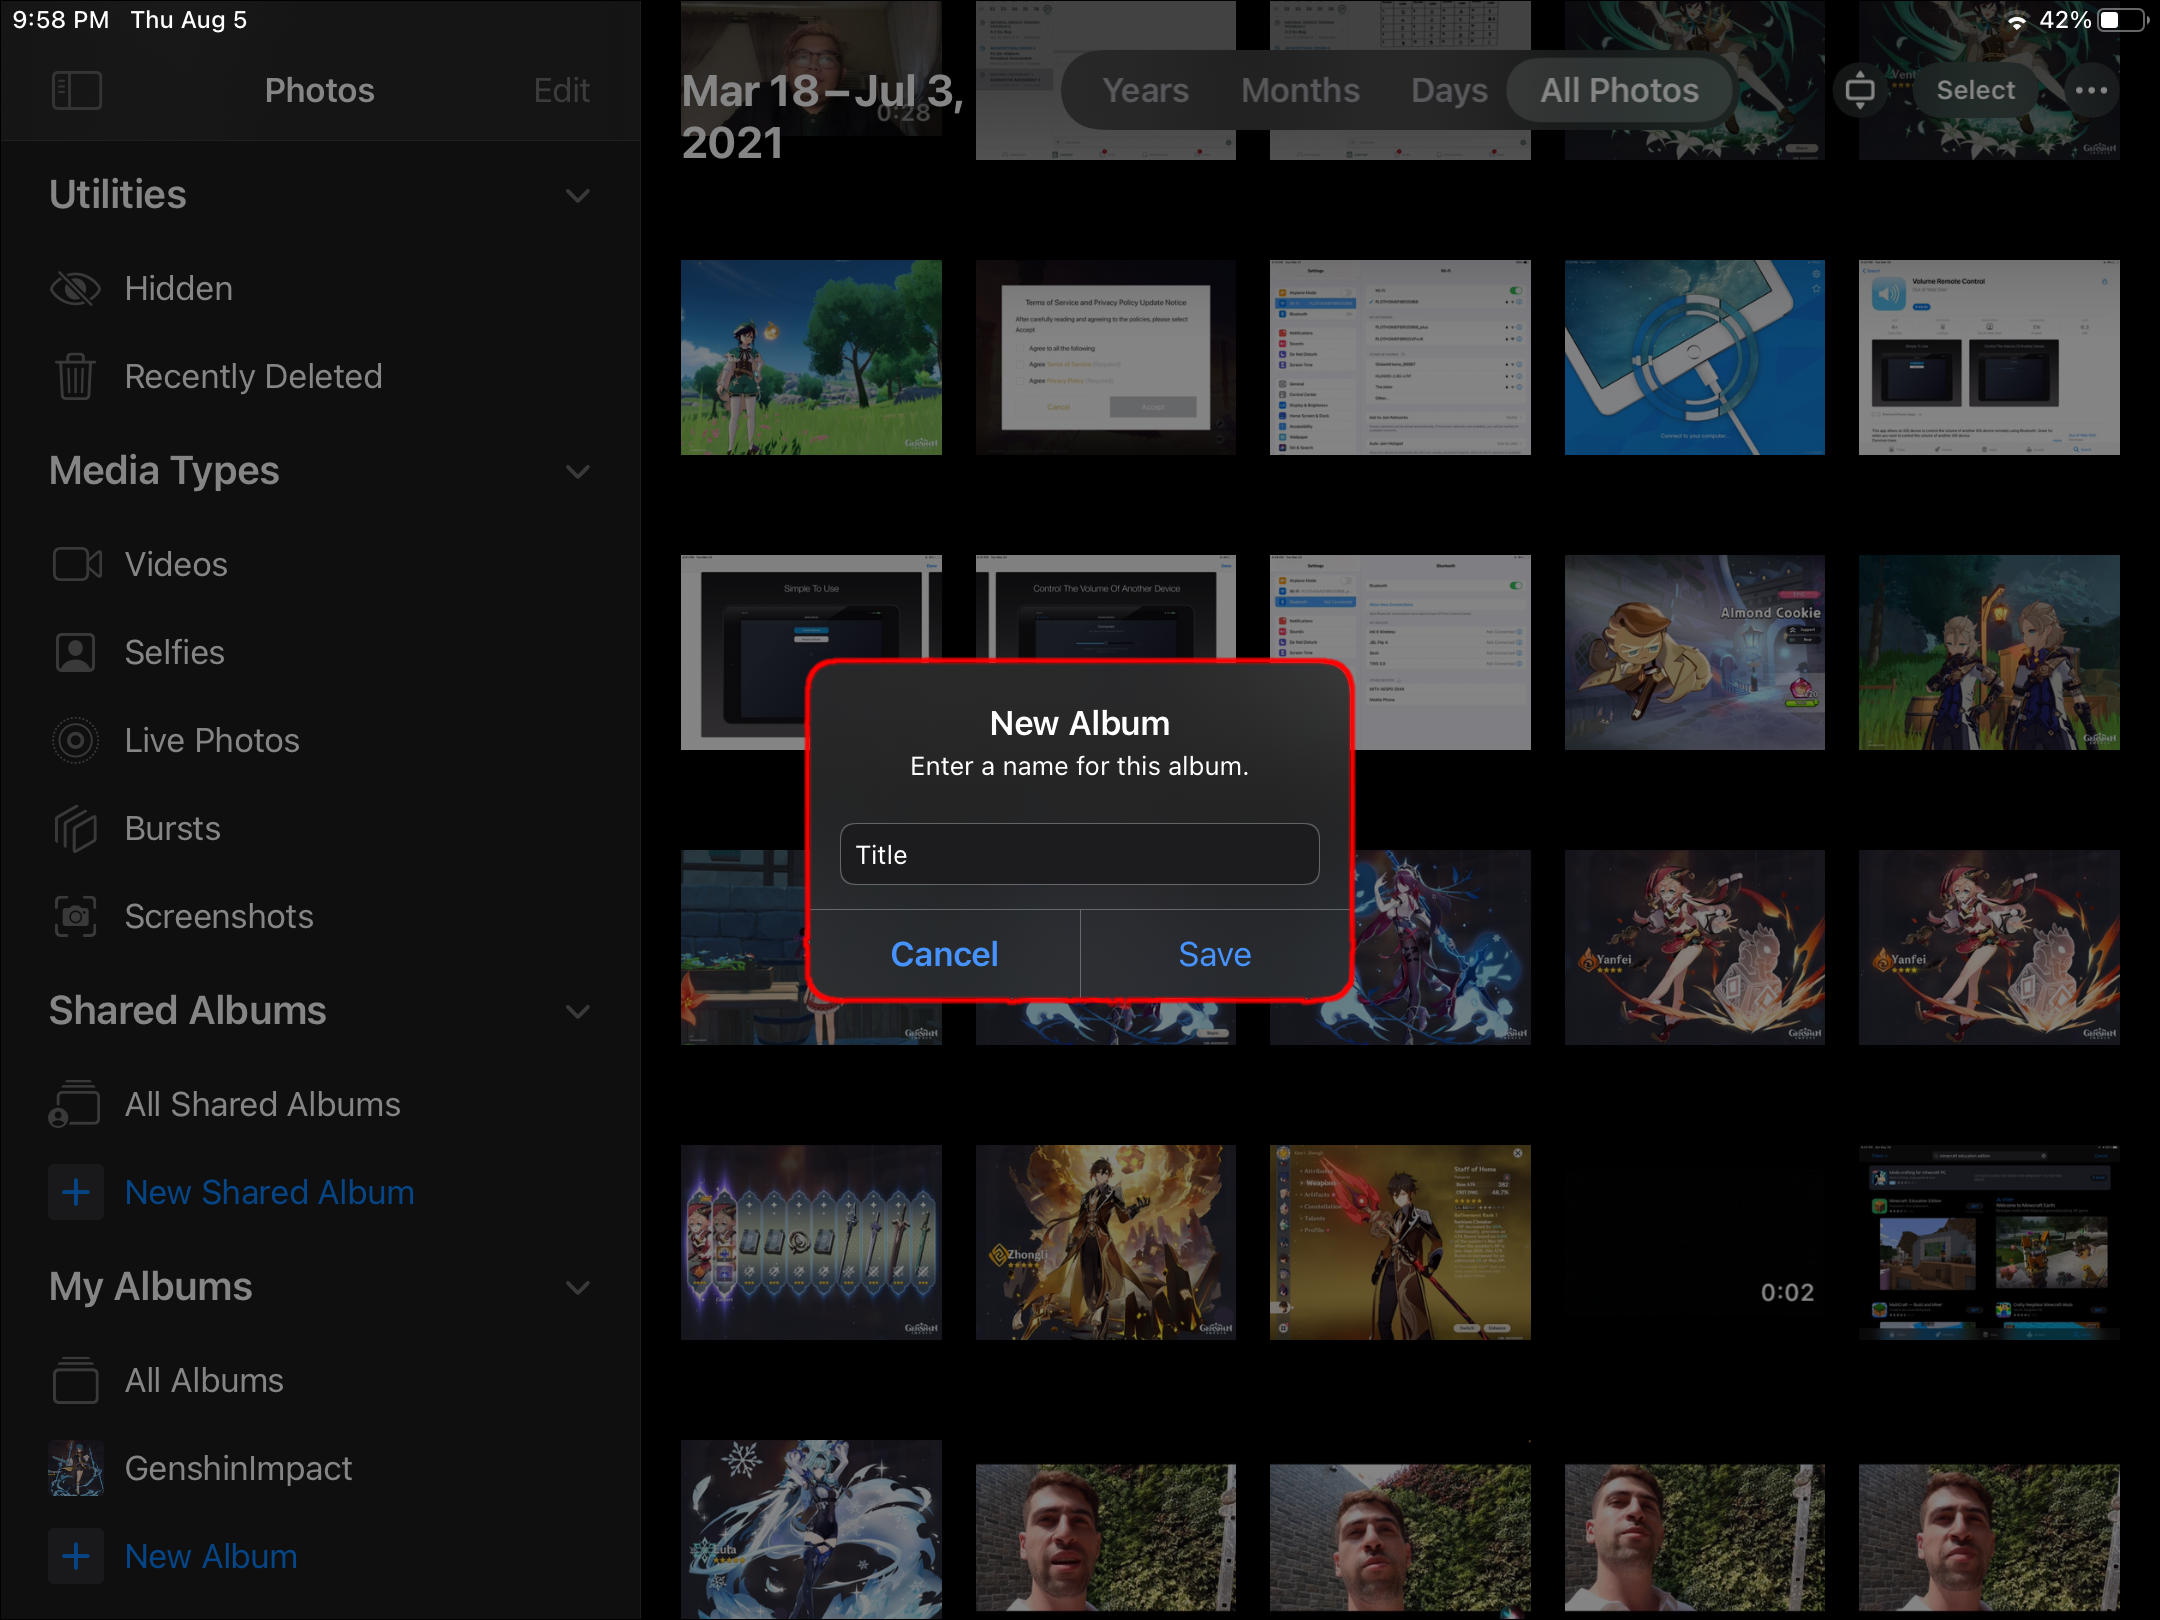
- Select “New Album.”
- Name your album then “Save.”
- Select the photos you wish to add to your album, then “Done.”
Additional FAQs
How to Use a Mac to Delete All Photos on Your iPad?
Using the “My Photo Stream” feature, if you delete photos from one device it’ll delete them from all your other Apple devices once connected to Ethernet or Wi-Fi. In this scenario, your Mac must be installed with OS X Lion v10.7.5 or later and your iPad with iOS 5.1 or later.
Then make sure the “My Photo Stream” option is enabled on your Mac and iPad:
Mac:
1. Navigate to “System Preferences,” “iCloud.”
2. Beside “Photos” select “Options.”
iPad:
· Select “Settings,” your name, “iCloud,” then “Photos.”
To delete the photos from your Mac:
1. Launch Photos.
2. Select the photos you want to remove.
3. From the menu bar, select “Image” then “Delete Photo.”
4. Select “Delete” to confirm.
Alternatively, you can right-click a picture, then select “Delete Photo.” Once your iPad has an internet connection, the photos removed from your Mac will also be removed from your iPad.
How to Permanently Delete Photos?
To permanently delete your photos, delete them from the “Recently Deleted” album. Once it’s removed from there it’s gone for good. To do this:
1. Launch Photos.
2. Select the “Albums” tab.
3. Choose the “Recently Deleted” album, then “Select.”
4. Select the “Photos” you wish to delete or select “Delete All.”
5. Tap on “Delete” again to verify.
Can I Recover My Deleted Photos?
You have 30 days to retrieve your photos from the “Recently Deleted” album. Once recovered, they’ll display back in your “All Photos” album. To recover your deleted photos:
1. Launch Photos.
2. Click on the “Albums” tab.
3. Select the “Recently Deleted” album, then “Select.”
4. Select the photos you want to recover or select “Recover All.”
5. Choose “Recover” again to verify.
How can I delete all iPad and photos of a particular person?
1. Launch Photos.
2. Select the “Search” tab. Headshots of your most frequently photographed subjects will display.
· Conversely, navigate to the “People & Places” section in the “Albums” tab.
3. Select the person whose photos you wish to remove.
4. Select “See All” beside the X Photos section.
The same can be done to remove specific locations when the photos are geotagged:
1. Select “Search.”
2. Select an auto-generated place, then “See All” to locate, select, and remove all for that specific place.
The same can also be done by category:
Towards the bottom of the “Albums” tab, the “Media Types” section categorizes your photo types. By selecting a category you’ll have the option to individually delete or delete them all.
Photography Cleanup via iPad
The Apple Photo app is preinstalled on all Apple devices, and one of its functions is to help organize your photo collection. To delete all your photos, you must select multiple photos. Once they’ve all been moved to your “Recently Deleted” album, you’ll have the option to “Delete All” or recover them should you change your mind within 30 days.
Now that we’ve shown you various ways to delete your photos, did you keep some of them, or “Delete All” from your “Recently Deleted” album? Did you use the delete by face or place functions? Let us know in the comments section below.
Disclaimer: Some pages on this site may include an affiliate link. This does not effect our editorial in any way.