If you’re reading this on your phone or tablet because your mouse cursor is nowhere to be found, you’ve come to the right place. There are many reasons your cursor might be pulling this disappearing act. Since you can’t use your mouse, fixing the problem can be quite challenging. But, don’t worry, we’ll show you some tricks to deal with your vanishing cursor.
Just keep reading to learn how to troubleshoot a disappearing cursor on different systems, from Windows and Macs to Chromebooks.
Mouse Cursor Disappeared in Windows 11
No operating system is problem-free, even Microsoft’s latest release. If you’re having issues with your mouse cursor, you can always try restarting your computer first. Check out some solutions below if a restart doesn’t do the trick.
Check if the Mouse Is Working Properly
There are quick and easy fixes for a disappearing mouse cursor. Before moving on to more complex explanations, try the following:
- Check the mouse cable connection
- Use another USB port
- Check mouse batteries
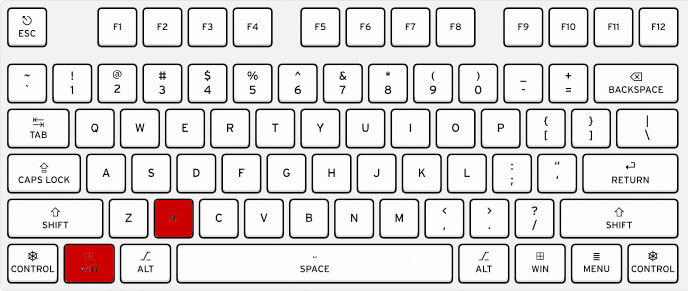
- Press F1 to F12 function keys
- Try using the mouse on a different PC
Update the Mouse Drivers
Old and corrupt drivers can easily cause mouse-related issues. Follow along to update or reinstall your mouse drivers:
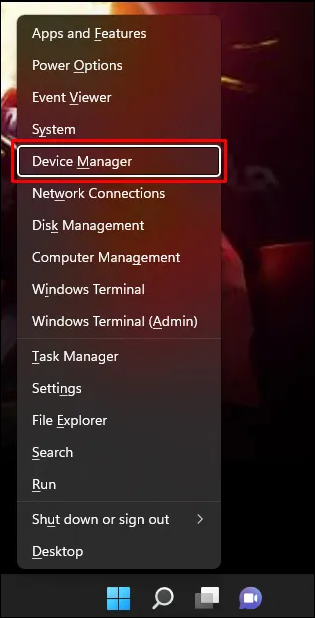
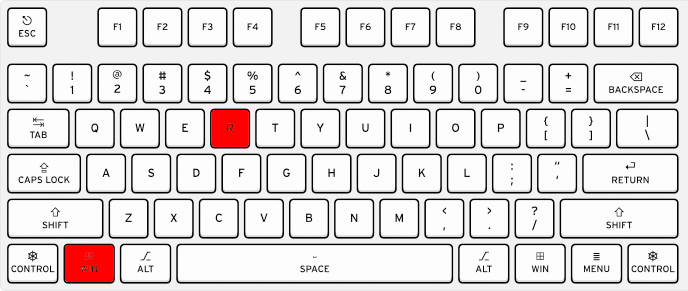
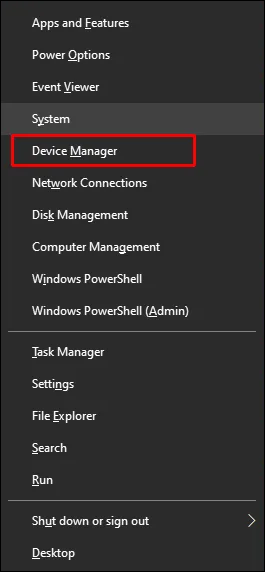
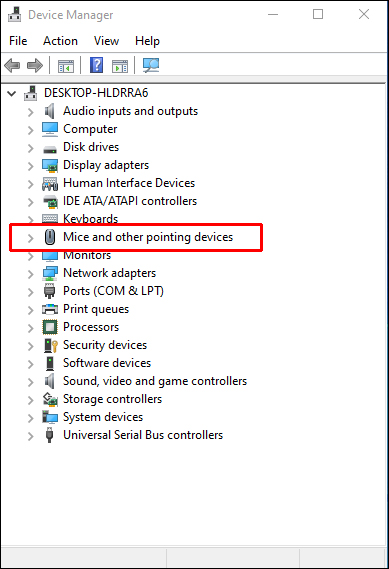
- Press the “Win + X” shortcut.
- Navigate to the “Device Manager” using the down arrow key and press “Enter.”

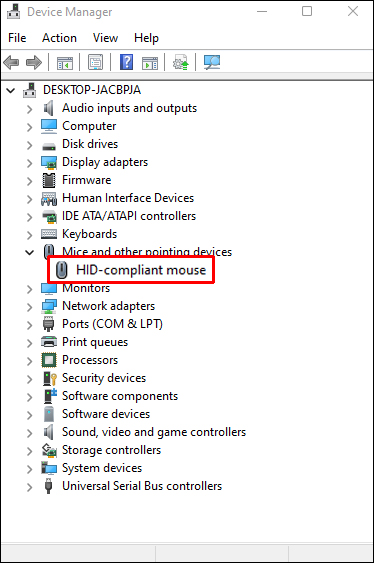
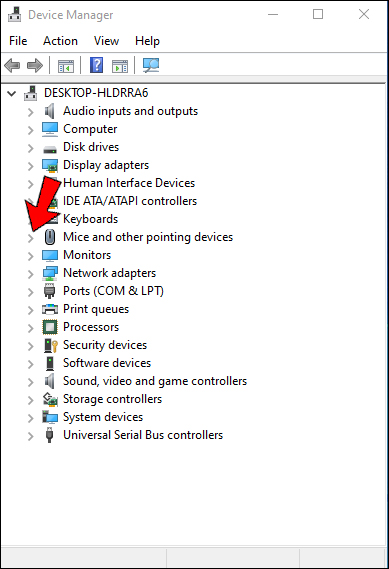
- Use the “Tab” key to focus on the window and then the down arrow key to navigate to the “Mice and other pointing devices” option.
- Hit the right arrow key to expand the option.
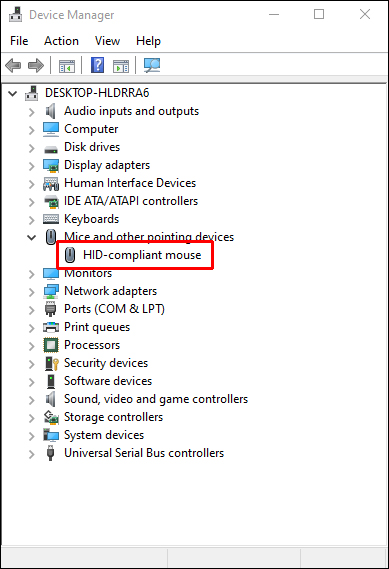
- Choose your mouse using the down arrow key.
- Press “Shift + F10” to right-click on the driver and open a drop-down menu.
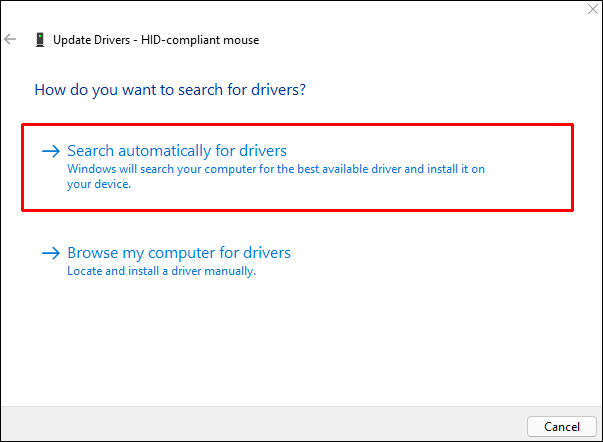
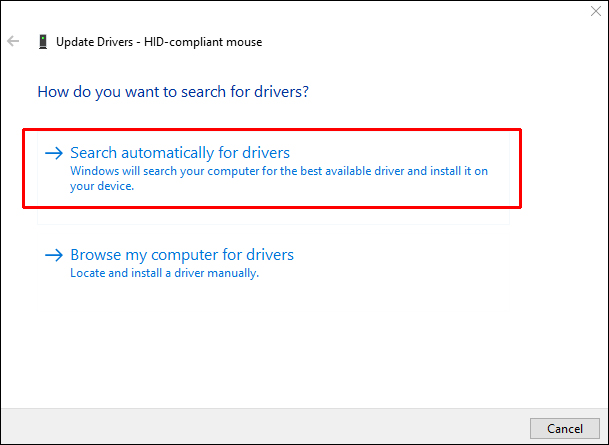
- Go to “Update driver” using the down arrow key and press “Enter.”
- Select the “Search automatically for updated driver software” option using the arrow keys.
- Follow the on-screen instructions to finalize the process.


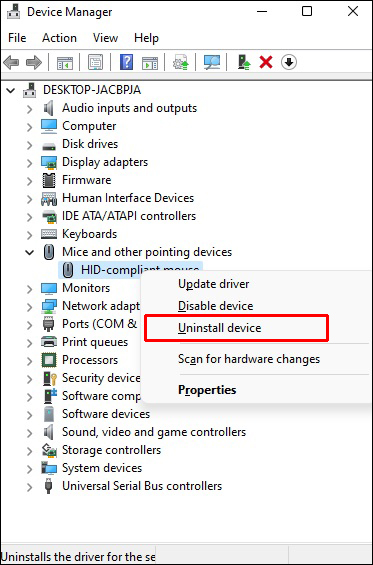
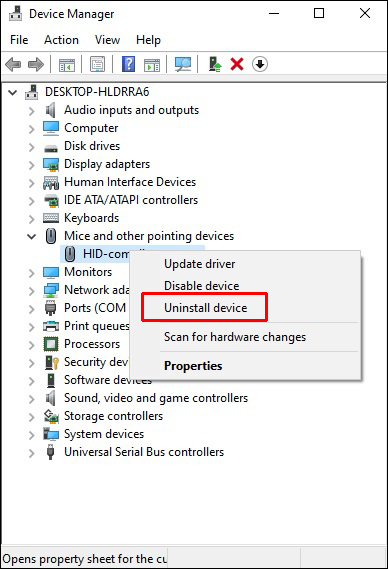
If the issue persists, you can uninstall and reinstall your drivers:
- Repeat steps 1–4 above.
- Press “Shift + F10” and select “Uninstall device.”
- Go to the “Mice and other pointing devices option” and press “Shift + F10.”
- Navigate to “Scan for hardware changes” and hit “Enter.”

Unhide Your Mouse
There is a possibility your mouse is configured to hide the cursor. If it only disappears while you’re typing, take the following steps to “unhide” it:
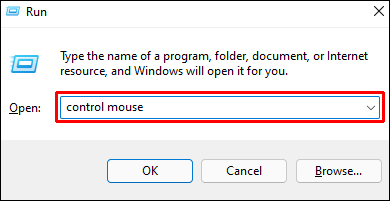
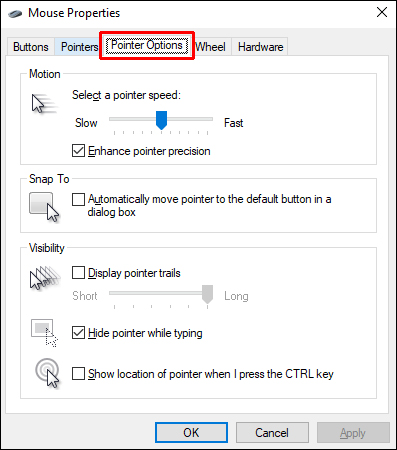
- Press “Win + R” to open the Run dialogue box.
- Type “
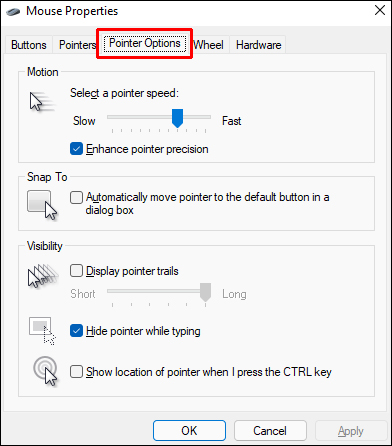
control mouse” and hit “Enter” to open the “Mouse Properties.” - Go to the “Pointer Options” tab using the right arrow key.
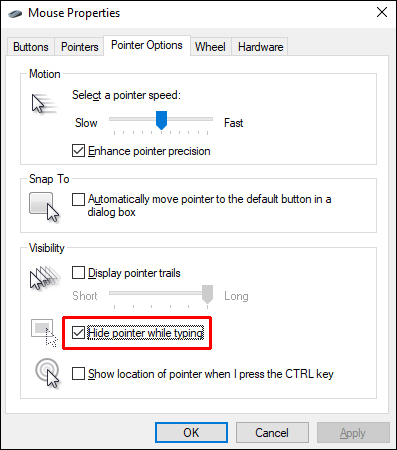
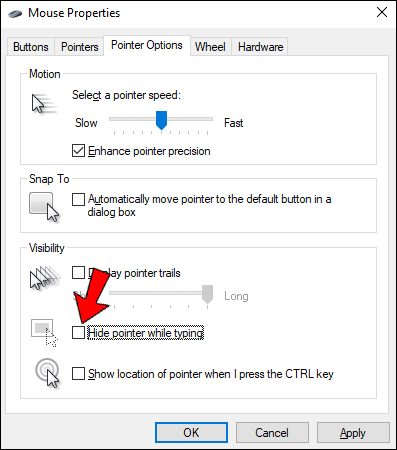
- Use the Tab key to move to the “Hide pointer while typing” tick box.
- Press Spacebar to remove the tick.
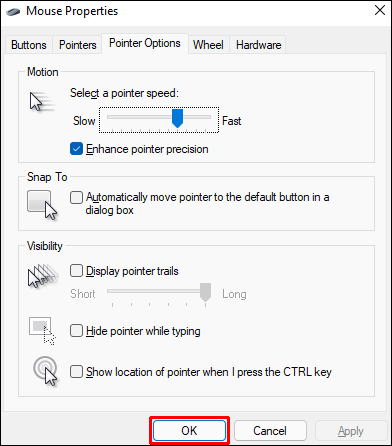
- Using the Tab key, go to “Apply” and hit the Spacebar.
- Navigate to “OK” and press the Spacebar to exit.


Mouse Cursor Disappeared in Windows 10
If your mouse is giving you trouble while using Windows 10, try to reboot your computer and update the system. Did nothing happen? Read along to uncover the reason.
Your Mouse Is Faulty
Before exploring detailed solutions to your problem, let’s make sure your mouse is working correctly. Here’s what to do:
- Remove and reconnect the cable or Bluetooth dongle
- Examine the cable for any damages
- Check the batteries
- Try using another USB port
- Try using the mouse on a different PC
Your Mouse Pointer Is Hidden
If the mouse cursor tends only to disappear while you’re typing, it may be due to the mouse configuration. To change this:
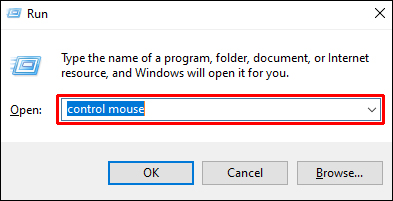
- Press the “Win + R” shortcut to show the Run command dialogue box.
- Type “
control mouse” and hit “Enter.” - Under “Mouse Properties,” keep pressing the Tab key to reach the “Buttons” tab.
- Using the arrow keys, go to the “Pointer Options” tab.
- Keep pressing the Tab key until you reach the “Hide pointer while typing” checkbox.
- Hit the Spacebar to remove the tick.
- Use the Tab key to go to the “Apply” option and press the Spacebar.
- Navigate to “OK” with the Tab key.
- Hit Spacebar to finish the process.


Your Mouse Drivers Are Outdated
Your mouse troubles could be a simple case of outdated or corrupted drivers. To fix the problem, you need to reinstall or update your drivers. For updating:
- Press the “Win + X” shortcut and navigate to the “Device Manager” using arrow keys.
- Navigate to “Device Manager.”
- Click “Tab” and then go to “Mice and other pointing devices” using the down arrow key.
- Use the right arrow key to expand the option.
- With the down arrow key, choose your mouse driver.
- Right-click the driver by pressing “Shift + F10.”
- Select “Update driver” using the down arrow key and press “Enter.”
- Use the arrow keys to click on “Search automatically for updated driver software.”
- Follow the on-screen instructions to complete the process.


If updating the mouse drivers didn’t fix the issue, try reinstalling them:
- Locate the mouse drivers following steps 1-5 above.
- Right-click the driver by pressing “Shift + F10” and choose “Uninstall device.”
- Head to the “Mice and other pointing devices” option and press “Shift + F10” to right-click it.
- Go to “Scan for hardware changes” and press “Enter.”

Mouse Cursor Disappeared on a Mac
If your Mac’s mouse cursor has a habit of disappearing, here’s what to do to bring it back.
Shake Your Mouse
There can be several possible explanations for your mouse being shy. Before diving any further, let’s first try the simplest solution. If you can’t see your cursor, try shaking your physical mouse left to right across the mouse pad as quickly as possible. This will cause the cursor to enlarge in size and become visible again.
Make Cursor Bigger
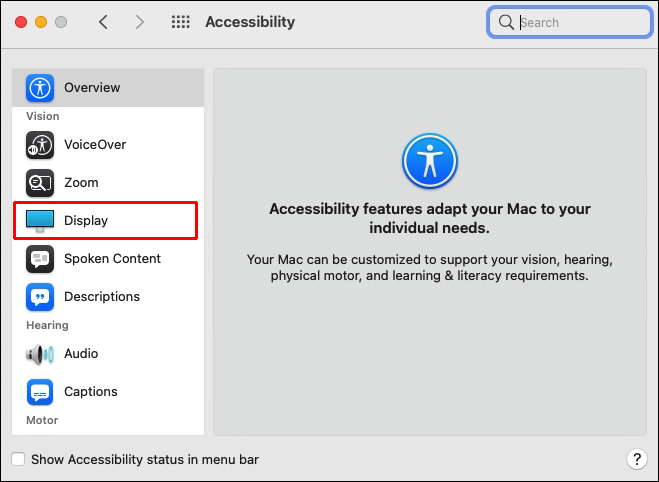
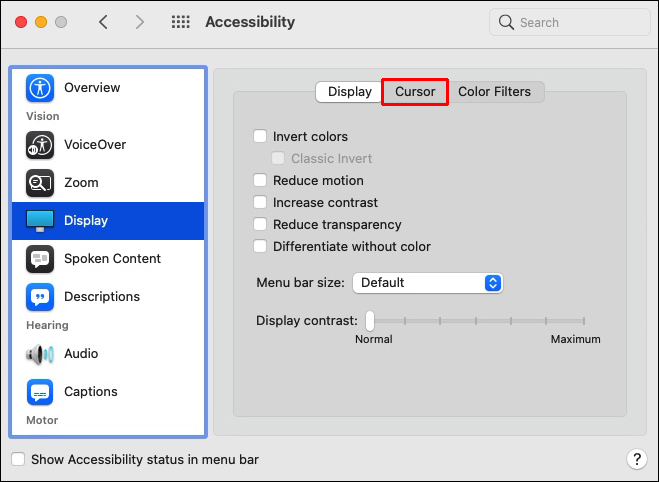
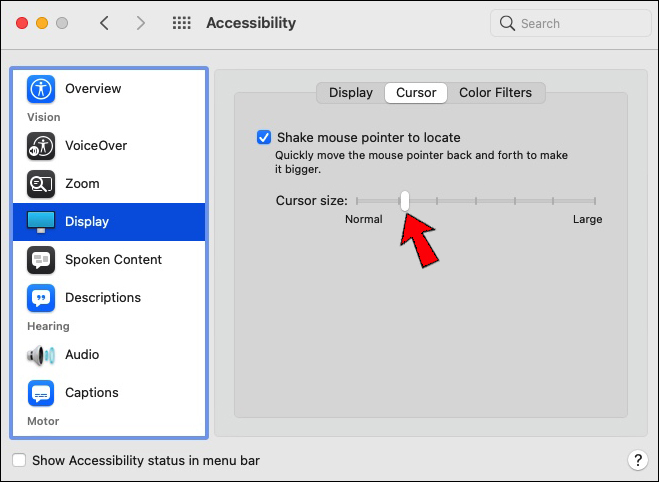
If you’re having trouble keeping track of your cursor, you might need to change its size permanently. Here’s how:
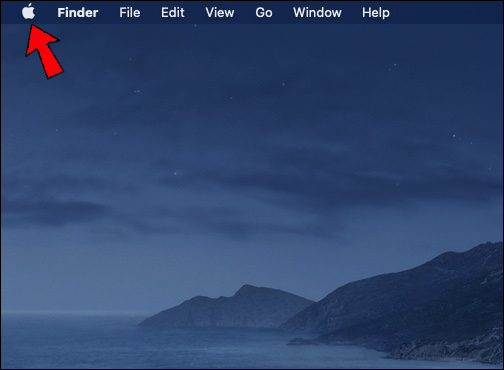
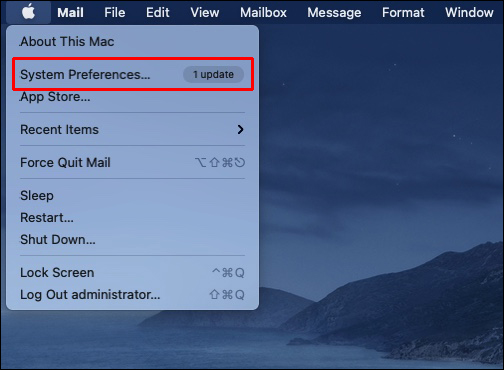
- Click the Apple icon in the upper-left corner.
- Select “System Preferences.”
- Tap the “Accessibility” icon.
- In the left pane, choose “Display.”
- Click on the “Cursor” tab.
- Increase the “Cursor size” using the slider.

Update Your Apps
Cursor-related issues can occur when you’re using a particular app. You can make sure this is the case by pressing the “Command + Tab” shortcut to switch to another app. If the cursor reappears, the first app is definitely at fault. In this case, open the App Store and check for updates. If the issue persists, contact the app developer.
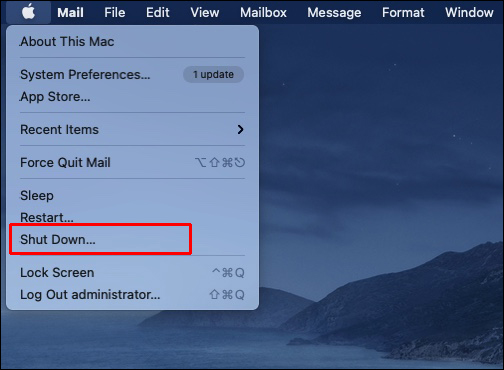
Reset NVRAM
Mac’s NVRAM (non-volatile random-access memory) might be a possible culprit for your mouse troubles. To restore your cursor, all you need to do is reset this memory:
- Shut down your computer.
- When turning it back on, instantly press and hold “Option + Command + P + R.”
- Keep holding the keys until the second startup sound is heard.
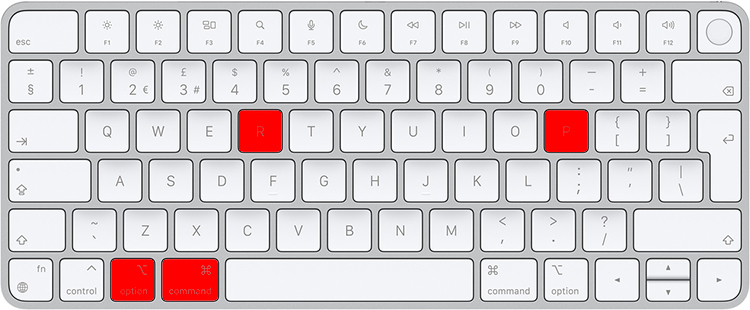
If you’re using a model with a T2 security chip, hold the keys until you see the Apple logo appear and disappear for the second time.
Mouse Cursor Disappeared on a Chromebook
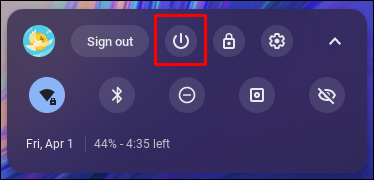
Always try to reboot your Chromebook first when experiencing any hardware problems. If the issue persists, continue reading to find a solution.
Do a Hardware Reset
If your cursor keeps disappearing, you might have to do a hardware reset. You can do a hard reset in 3 steps:
- Shut down your Chromebook.
- Press and hold “Refresh” and click “Power.”
- Once your Chromebook turns back up, release “Refresh.”
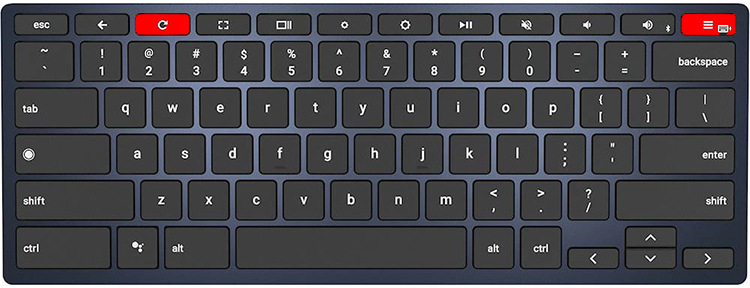
Hold the “Volume Up” and “Power” buttons for 10 seconds when using a tablet.
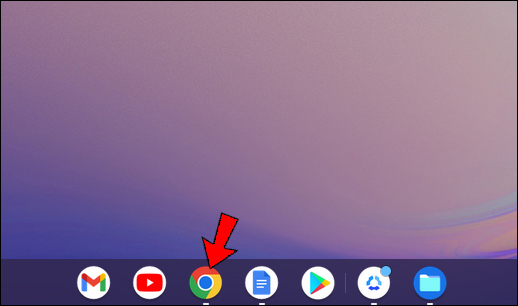
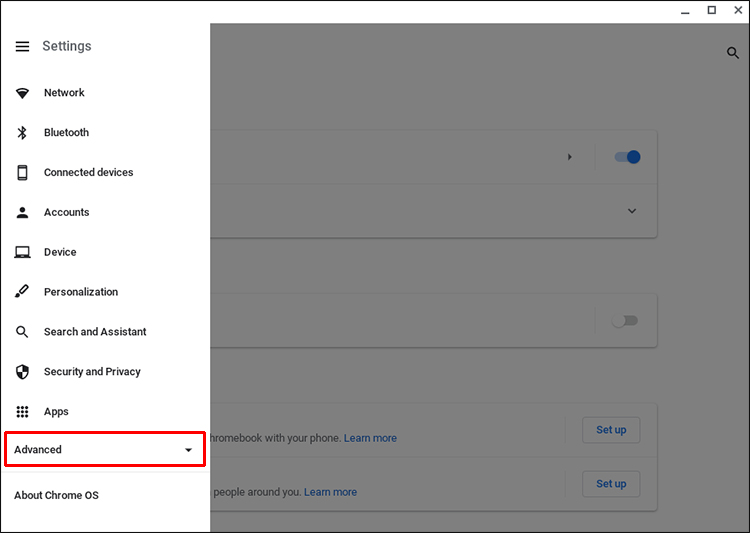
Do a Browser Reset
Try signing out of your profile and testing in Guest mode on your Chromebook. If this fixes the issue, it’s time to do a browser reset. Here’s how to restore your browser’s settings:
- Open Chrome.
- At the top-right, click “More” and navigate to “Settings.”
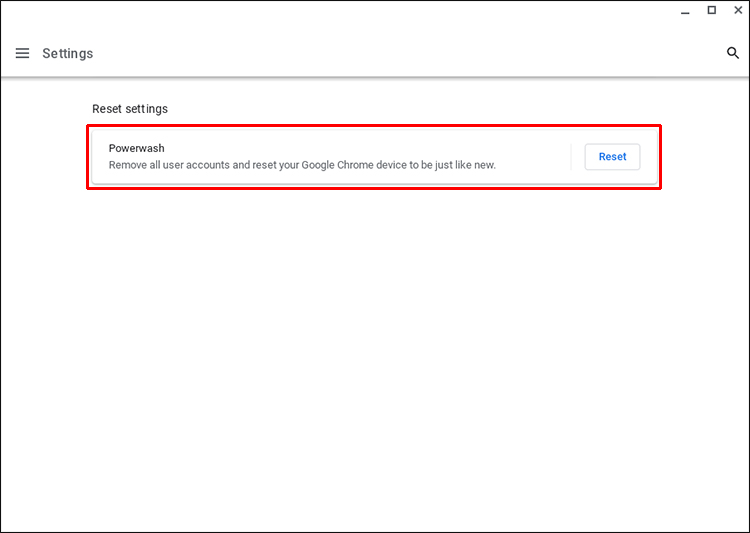
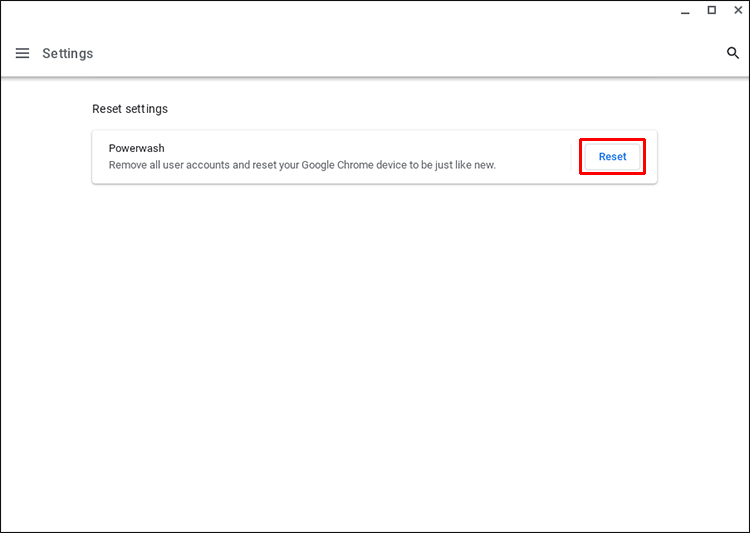
- Tap “Advanced.”
- Under “Reset Settings,” go to “Powerwash.”
- Hit “Reset.”

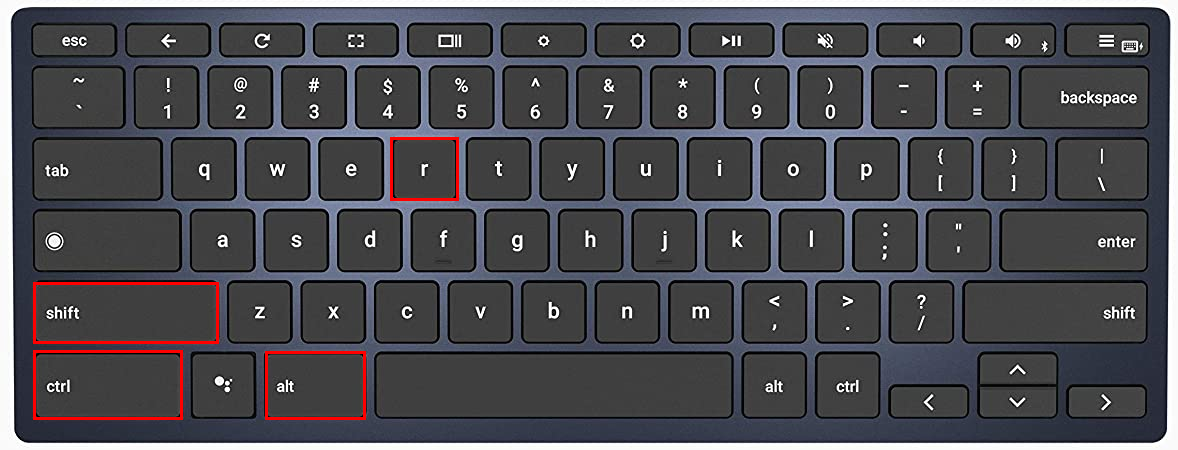
Do a Factory Reset
After a factory reset, all your existing issues can be fixed, and your Chromebook can run like new again. Before resetting, make sure to back up all your files as a factory reset will delete all information on your hard drive. When you’ve gone through all the necessary precautions, do as follows:
- Sign out of your Chromebook.
- Press and hold the “Ctrl + Alt + Shift + R” shortcut.
- Select “Restart.”
- Choose “Powerwash” and press “Continue.”
- Follow the on-screen instructions and sign in with your Google account.
- Use the on-screen prompts to set up your Chromebook again.


No More Cat-and-Mouse Game
A disappearing mouse cursor can be a frustrating experience, severely limiting your actions on the computer. Luckily, this issue is never serious and can be fixed quickly once you identify the underlying problem. It’s just a matter of tweaking some settings, and your mouse is good to go.
Have you ever had your mouse cursor disappear? How did you fix the problem? Let us know in the comments section below.
Disclaimer: Some pages on this site may include an affiliate link. This does not effect our editorial in any way.