Sony PlayStation consoles have come a long way since the days of the PS One. They’re not bulky, heavy, or weird-looking. Today’s next-gen consoles are sleek, have great ventilation, superior processing power, and are even customizable.
Thanks to Sony’s new policies regarding seals and warranties, users can remove the covers to work, clean, or personalize their consoles. However, for some users, it may not be as easy as it looks.
Tugging too hard or applying too much pressure on the faceplates can damage them. The following guides will show you how to remove a PS5 cover without effort or voiding the warranty.
Removing the Top Cover
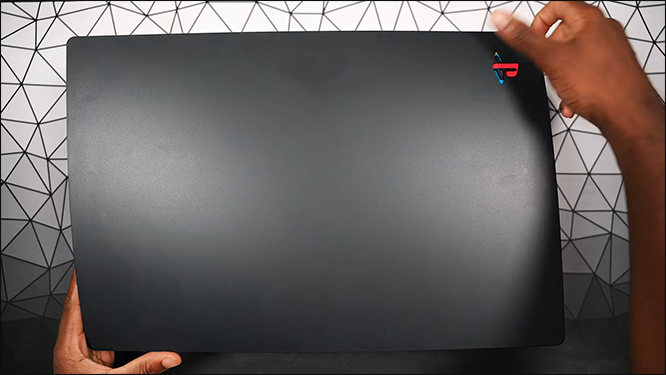
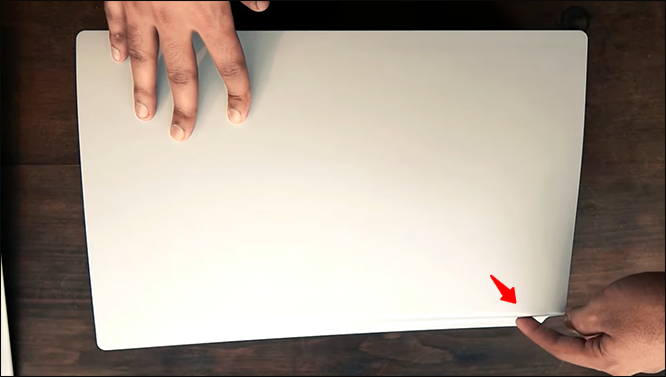
Identifying the top cover on a PS5 console is easy. It’s the cover that features the PlayStation engraved logo. The logo also serves as an indicator when removing and installing console covers.
Here are the steps you must follow:
- Shut off the PS5 gaming console.
- Unplug cables and other connected devices.

- Lay the console down on a flat surface with the logo facing up.
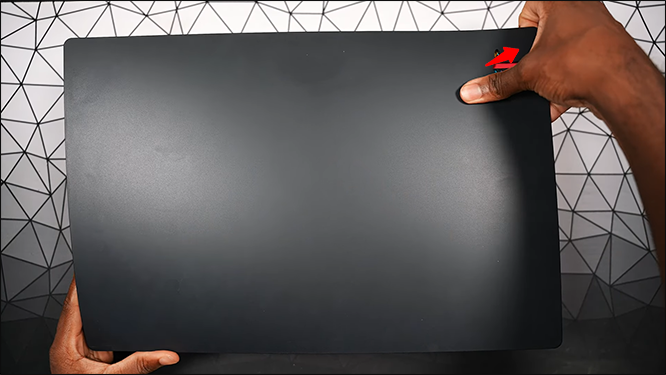
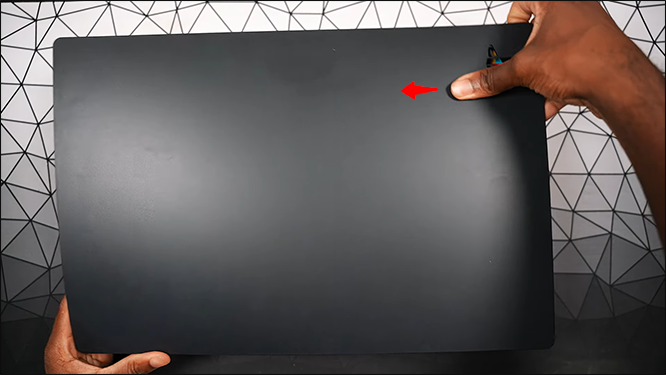
- Grab the cover corner with the logo and gently pull it up.
- Slide the cover in the opposite direction of the logo.
How to Remove the Bottom Cover
The bottom cover of the PS5 doesn’t have a logo. But removing or installing is equally straightforward if you follow the correct steps.
- Turn off the console.
- Remove connected devices and cables and let the console cool down.
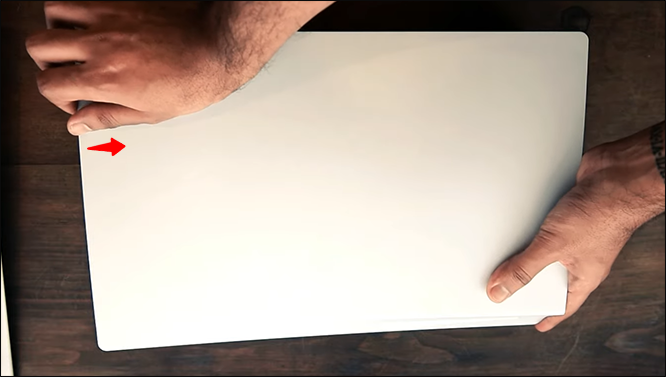
- Flip the PS5 console so the logo faces down on a flat surface.
- Position it so the power button faces you.
- Grab the upper left cover corner.
- Pull gently up while slowly pushing to the right.

Why Remove a PS5 Cover?
The PS5 has a sleek curved design. But some prefer more premium quality covers or an alternative to the basic white. Consequently, more players are customizing their consoles with new covers and colors to match their gaming setups.
Likewise, PS5 covers can be damaged by dust particles, fall damage, etc. If you’re not careful, you may have to replace busted covers to restore the console’s aesthetics and protect its internal components.
But another reason for learning to remove covers is to access the disk. Now and then, a disk might get stuck inside your PS5. It’s stressful, especially when rebooting the console doesn’t fix the issue.
Whether it’s a disk or another object stuck, you won’t always need a professional PS5 technician to fix the problem.
Remove the Covers to Eject a Stuck Disk
The best thing about the PS5 covers is their simplistic design. Accessing the disk is easy if you remove the bottom cover. Here’s how to go about the process:
- Turn off and unplug your PS5.
- Place it on a clean flat surface with the logo down and the disk drive to your left.
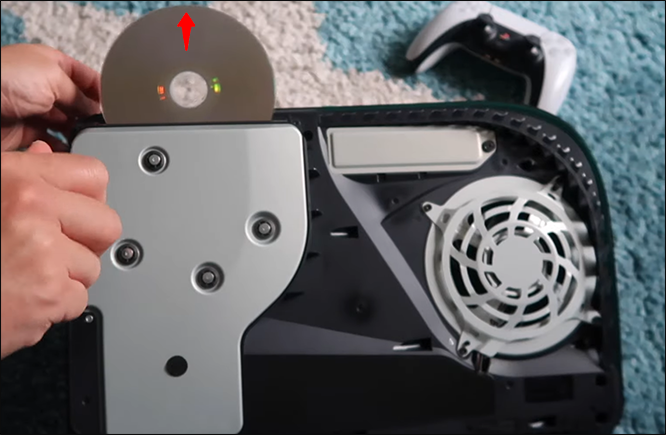
- Lift the cover from the corner and slide it to the right to expose the light gray disk drive panel.
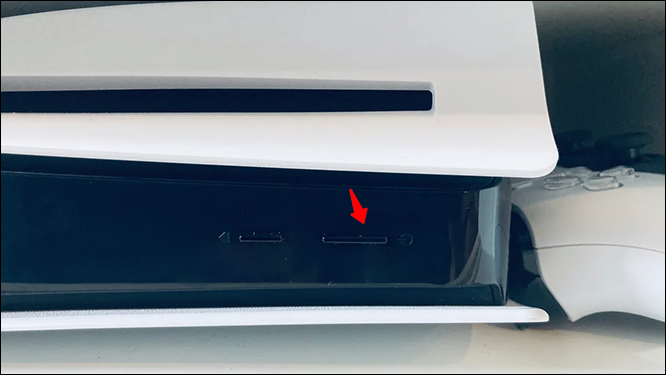
- Remove the black screw cover.
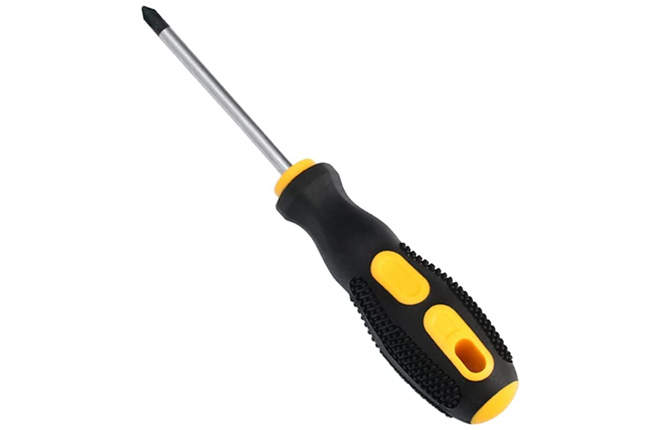
- Use a Phillips PH1 head screwdriver to turn it clockwise.
- Turn the screw over enough to expose the disk.
- Gently pull the disk without forcing it to avoid cracking.
- Slide the cover back and push down at the corners until you hear a clicking sound.

You won’t need more than a Phillips PH1 head screwdriver to complete this process. However, exercising patience and using a soft touch when exposing and handling the disk is essential. Forcing a stuck disk can quickly break it, making a professional intervention mandatory.
Interestingly, removing the cover and turning the screw won’t void the warranty on your PS5. That said, other disassembling could void the warranty. Thus, if you can’t remove a stuck disk using this method, it’s best to send the console in for repair.
Remove the Covers to Clean the System
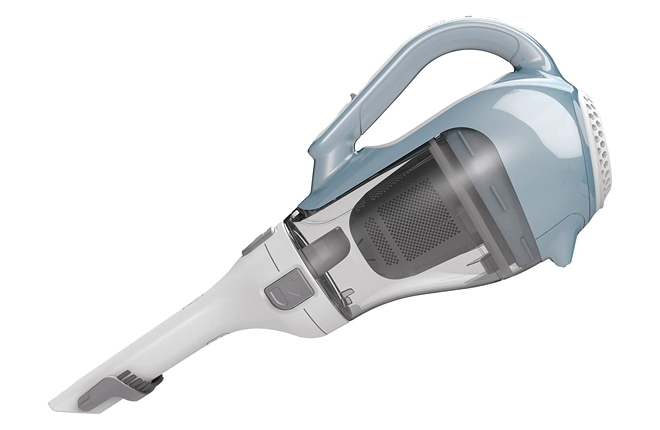
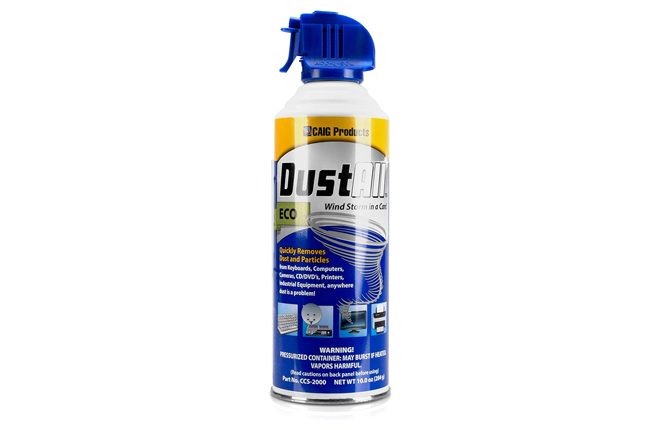
You’ll need a few things to clean a PS5 console of dust, animal hair, and other particles.

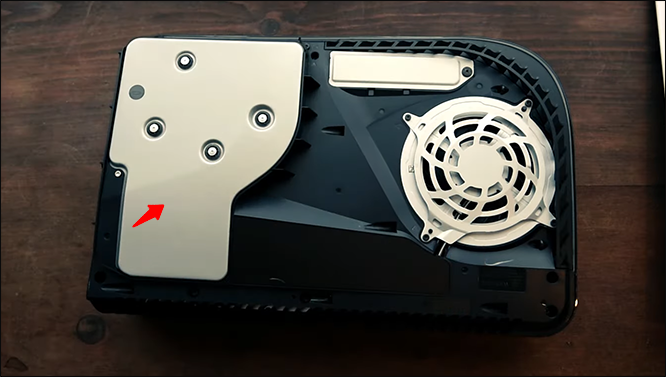
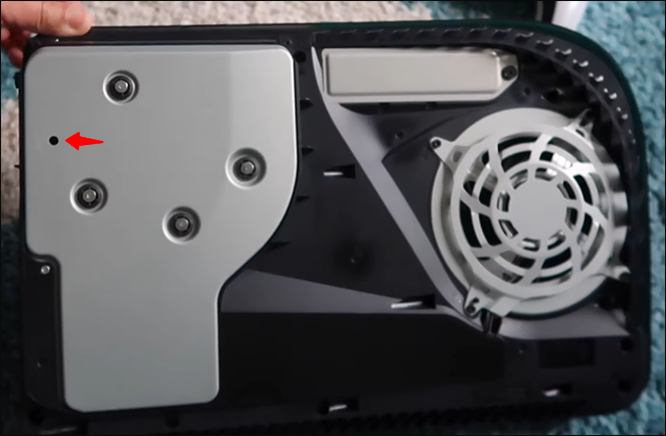
The PS5 console has a dust collector under the top cover. Therefore, that’s the most important part of the system to clean. Here are the necessary steps:
- Shut off your PS5 gaming console.
- Remove all cables and connected devices.
- Place the console on a clear flat surface with the logo facing you.
- Lift the cover from the corner with the logo until you hear a “pop.”
- Slide it in the opposite direction.
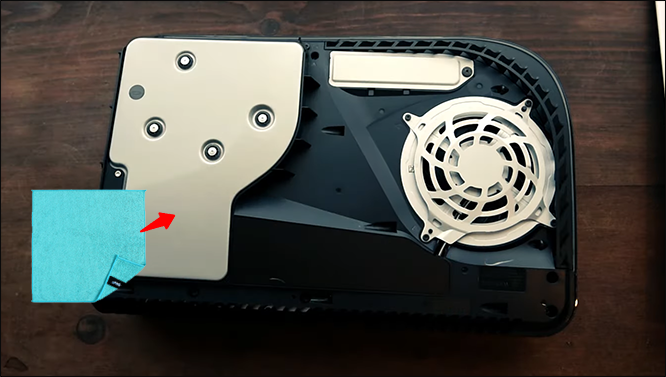
- Wipe the system with the microfiber cloth.
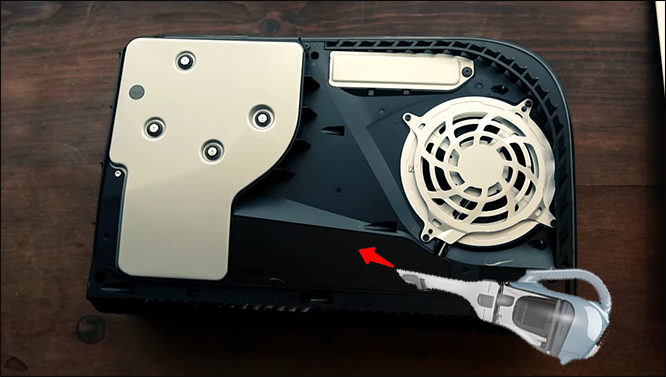
- Use the vacuum to suck the dust from the two dust collector openings.
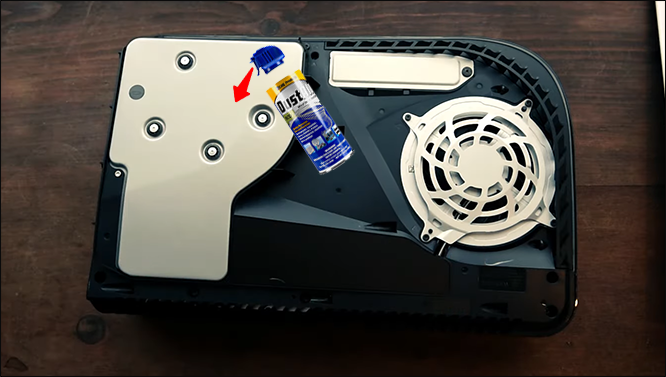
- Remove remaining dust particles from the ports and sides with compressed air.
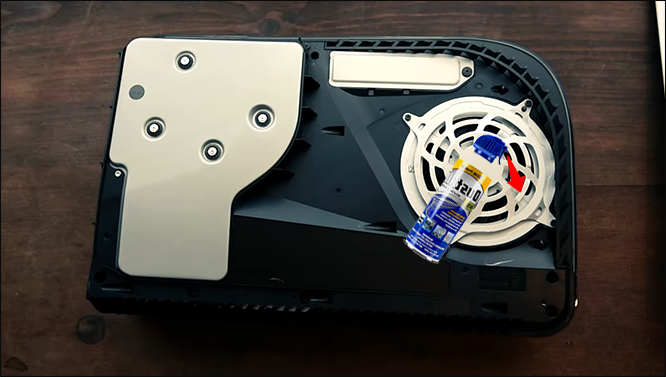
- Spray the fan with compressed air to detach debris and wipe it down with the microfiber cloth.
Following this cover removal and cleaning process is ideal if you don’t want to void the warranty. You can do a much deeper cleaning by taking the system apart and removing the covers from the SSD and disk drive, but that will void the warranty.
Naturally, you’ll want to clean both sides of the PS5 to ensure no dust particles remain. This is how to clean the other side of the console:
- Place the console on a table with the logo facing down.
- Lift the cover until you hear a “pop,” and slide it to the side.
- Clean the surface with a microfiber cloth.
- Use the compressed air can on the fan and disk drive opening.
Remove the PS5 Covers to Install New Ones
If you want to personalize your PS5’s appearance or replace damaged covers, the process takes seconds.
Here’s what you need to do for the top cover:
- Shut off your PS5.
- Take out all cables and connected devices.
- Place the console on a flat working area with the logo facing you.
- Grab the cover from underneath the logo and pull up until you hear a “pop.”
- Slide the cover away from the logo.
- Clean the system if necessary.
- Slide the new cover over the console, ensuring the engraved logo reaches the same position.
- Push down gently to hear a “pop” or “click,” signaling the cover is locked in place.
If you want to replace both covers, flip the PS5 around and repeat the following steps:
- Position the console with the power button facing you.
- Grip the upper left cover corner and pull the cover up until you hear a “pop.”
- Slide it in the opposite direction to remove it.
- Clean the system while you’re at it.
- Slide in the new cover and press until it locks into place.
- Plug the cables back into your console and power the device.
Additional FAQs
Does removing the PS5 cover void the warranty?
Removing and customizing PS5 top and bottom covers or faceplates won’t void the warranty. Thus, it’s easy to remove stuck disks and clean the system to minimize wear and ensure proper cooling. However, removing additional covers or rendering the serial number and seal unreadable will void the warranty.
What screwdriver can open a PS5?
A standard Phillips PH1 head screwdriver is enough to troubleshoot your PS5 console without voiding the warranty. But you may need a T9 Torx security screwdriver and a PH00 Philips screwdriver for other applications. These two tools work on PS4 and PS5 consoles and controllers.
What’s the best position for a PS5 console?
Sony claims horizontal and vertical placements are equally efficient for PS5 gaming consoles. However, the best position is always the one that allows maximum airflow. Keeping the console off the floor is preferred to minimize dust and animal hair collection.
Where can I buy new PS5 faceplates?
You can find PS5 covers on various online marketplaces like Etsy, Amazon, etc. Naturally, you can also find them in the accessories section on the official PlayStation store. Buying from third-party vendors might be an excellent idea if you want something flashy or a unique design.
Make Your PS5 Your Own
Before the newer PlayStation models came out, users couldn’t customize their gaming consoles like PC users could. And although we’re still far from advanced personalization, the removable covers are a great starting point.
You can take a damaged cover and give it a makeover or install cool new Sony faceplates with interesting graphics and colors. Better yet, you get unrestricted access to the system enabling you to clean it thoroughly and regularly. This should help minimize the wear and promote proper airflow through the system.
Have you removed the PS5 covers for a custom job or cleaning? Did you encounter issues or find the process as easy as advertised? Let us know in the comments section below.
Disclaimer: Some pages on this site may include an affiliate link. This does not effect our editorial in any way.