So your friend has sent you money through the new Apple Pay Cash system, and instead of just leaving the balance there, you’d like to transfer Apple Pay Cash to your bank account. Guess what? It’s easy!
If you have Apple Pay Cash already set up, linking your bank account will only take you about five minutes (and if you’re instead confused by how to get started with Apple Pay Cash or how to send and receive payments, be sure to check out Apple’s support article on the topic).
Receiving Apple Pay Cash
Once you’re up and running with Apple Pay Cash, you’ll receive a notification in the Messages app when one of your contacts sends you money.

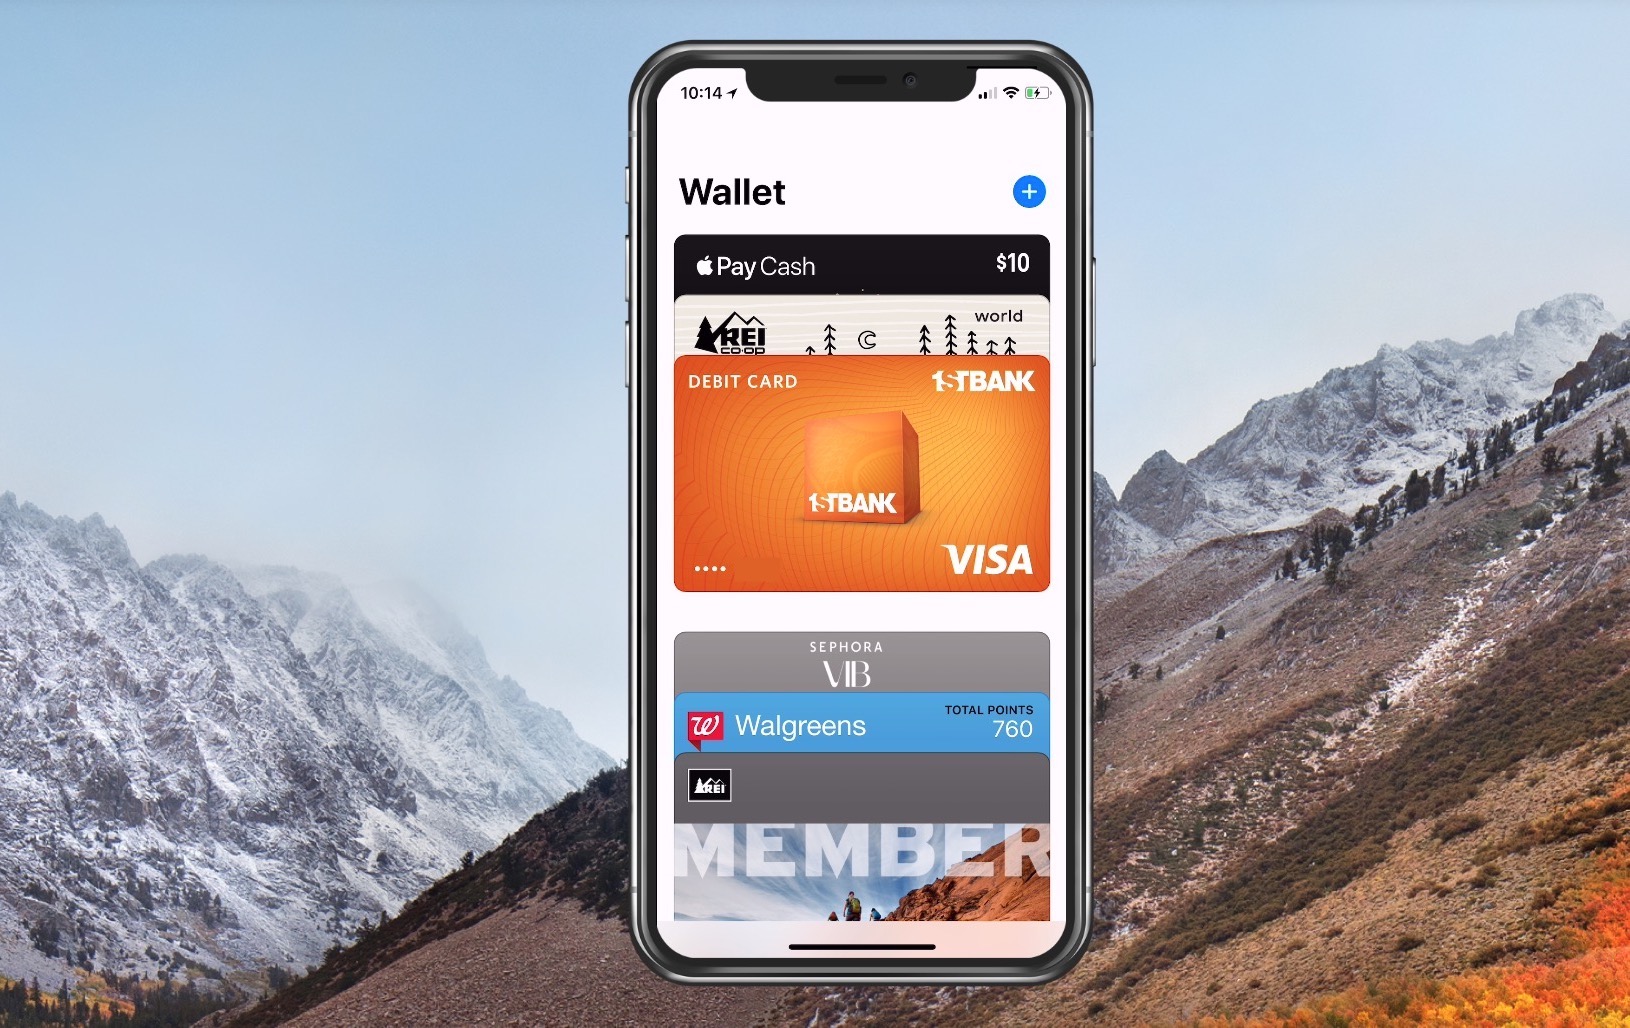
To confirm that transaction, or see the total of any other cash you’ve received, head over to the Wallet app.

Your total amount of Apple Pay Cash will be represented by its own card alongside your other Apple Pay credit and debit cards.
Transfer Apple Pay Cash to a Bank Account
After receiving Apple Pay Cash, you can send it to others in turn, or use it for Apple Pay purchases. But if you’d like to access that money outside of the Apple Pay ecosystem, you’ll need to transfer it to your bank account. To do so, from the Apple Pay Cash card in the Wallet app, find and tap the small “i” in the bottom-right corner.
![]()
This information page displays the details of your Apple Pay Cash account, a transaction ledger, and options for accepting payments.
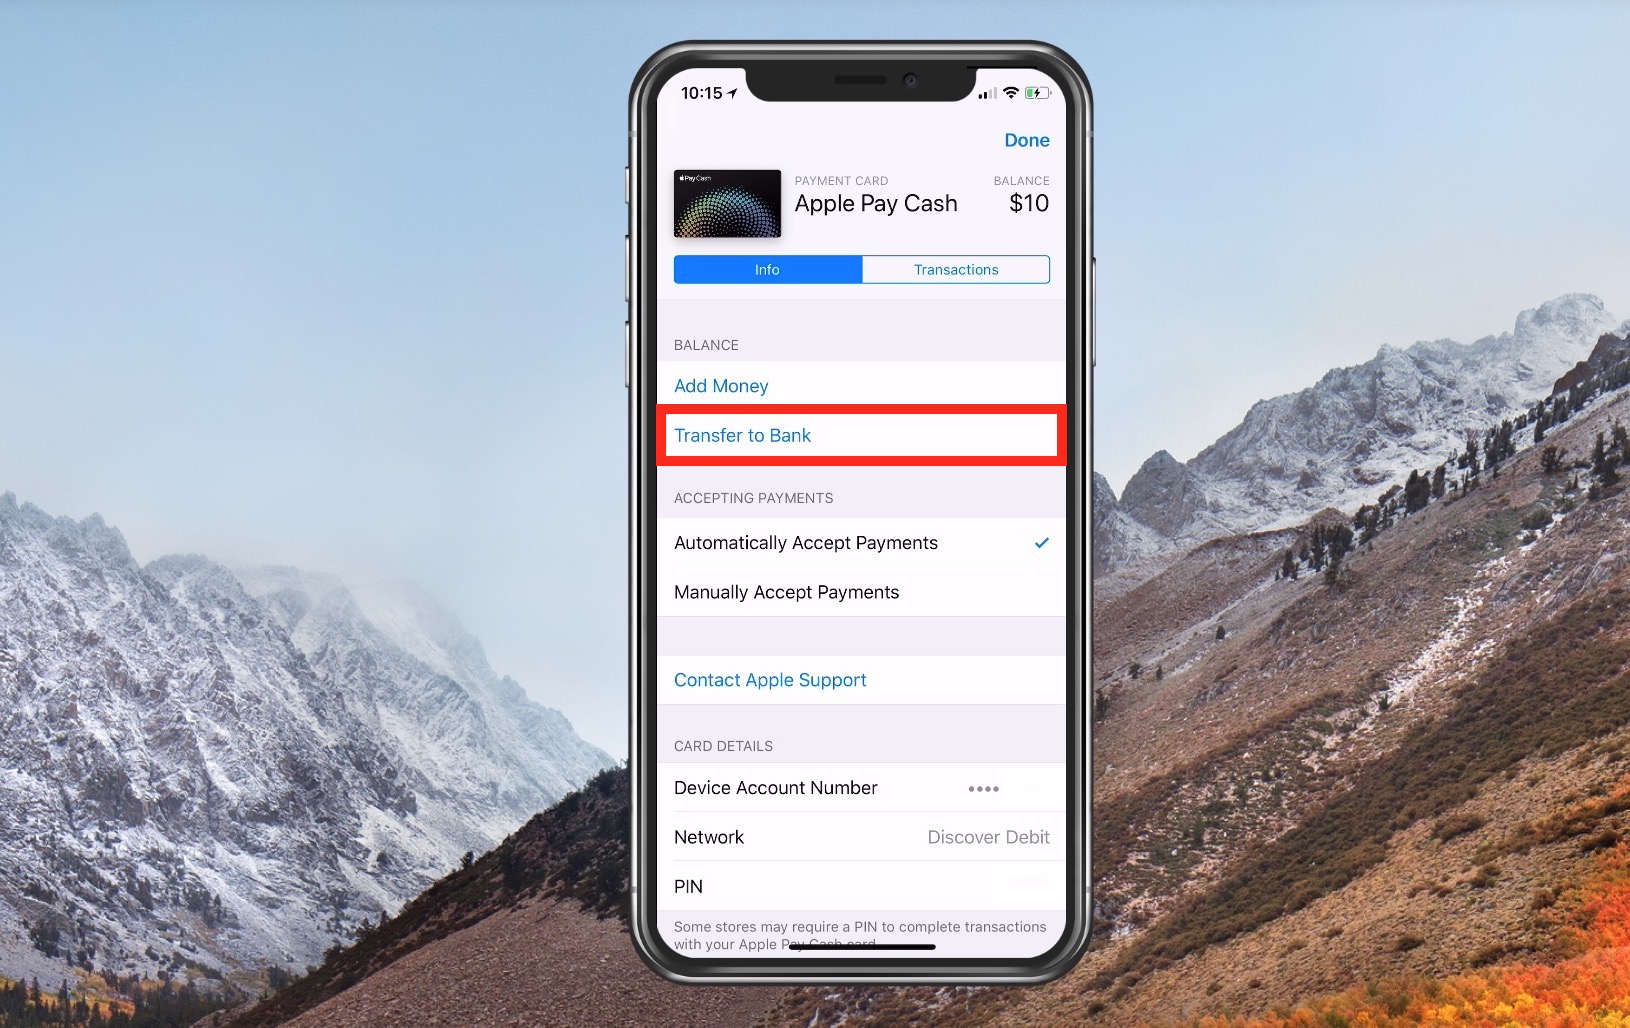
The option we’re looking for is appropriately labeled Transfer to Bank. Tap it and you’ll be asked to add a bank account if you haven’t already. The app will walk you through the usual process of entering your account and routing numbers.

Once you’re done, you’ll be prompted to enter the amount you’d like to transfer to your bank account. Enter the amount (it must be an amount less than or equal to your current Apple Pay Cash balance) and tap Transfer in the upper right corner of the screen.

You’ll be asked to confirm the transaction via either your passcode, Touch ID, or Face ID. The method used will depend on your iPhone model and your settings.

Regardless of the authentication method, once you confirm the transaction you’re all set! As is common with most financial transactions, Apple notifies you that the transfer may take up to 3 business days to complete, so don’t wait until the last minute if you need that cash from your Apple Pay Cash balance!

If you can’t seem to get this process to work, there’s another Apple Support article you can read with some troubleshooting tips, but in my experience, this has worked flawlessly. It’s really nice to be able to send money to my friends without having to deal with anything other than just the Messages app, and then be able to get that money out of the Apple Pay ecosystem when I want to!
Disclaimer: Some pages on this site may include an affiliate link. This does not effect our editorial in any way.


