HEIC, also known as High-Efficiency Image Container, is the standard image format used by iOS devices to store images. For iOS users, opening and editing HEIC images isn’t a problem because Apple devices are built to understand the format by default. However, many non-Apple devices will need specialized software to open and edit the files. If you’re having trouble opening your HEIC images, then your best option is to convert them to JPG. Unlike HEIC, JPG is a popular image format that enjoys widespread support – for added convenience.
Keep reading to learn how to batch convert HEIC photos into JPG regardless of the device you’re working with.
How to Batch Convert HEIC to JPG on a Mac
Preview is an excellent program that you can use to batch-convert HEIC photos to JPG on a Mac. It is built-in, so you won’t have to worry about the hassle of installing third-party applications. To batch-convert HEIC images to JPG using Preview, follow the steps below:
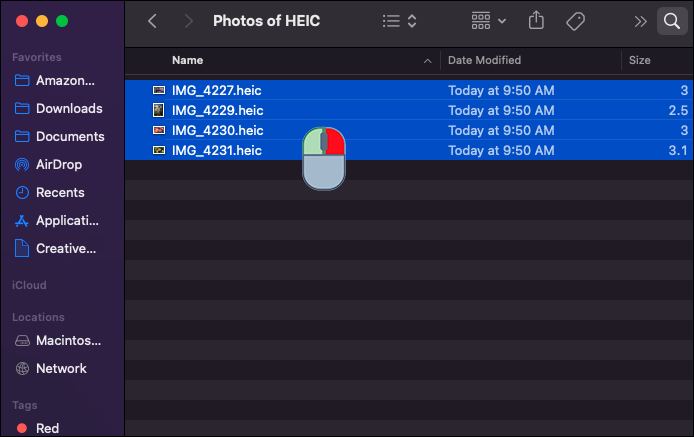
- Open the folder that contains your HEIC photos.

- Select the pictures you wish to convert to JPG and right-click them.

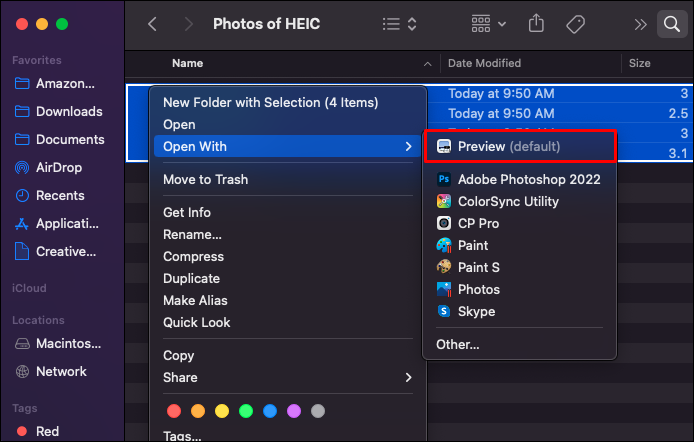
- From the menu, navigate to “Open with” and select “Preview.”
- Once the photos are opened up in Preview, select all of them by pressing the “Ctrl” + “A” buttons.
- Go to “File” and click “Export Selected Images…”.
- Specify the folder that will store your processed images.
- Click the “Options” button and select “JPG” from the “Format” dropdown menu.
- Specify your preferred quality level and press the “Choose” button to finish the conversion.


How to Batch Convert HEIC to JPG on a Windows PC
Many options exist for those who want to batch-convert HEIC files to JPG on Windows. Here are a few safe, fast, reliable, and secure programs.
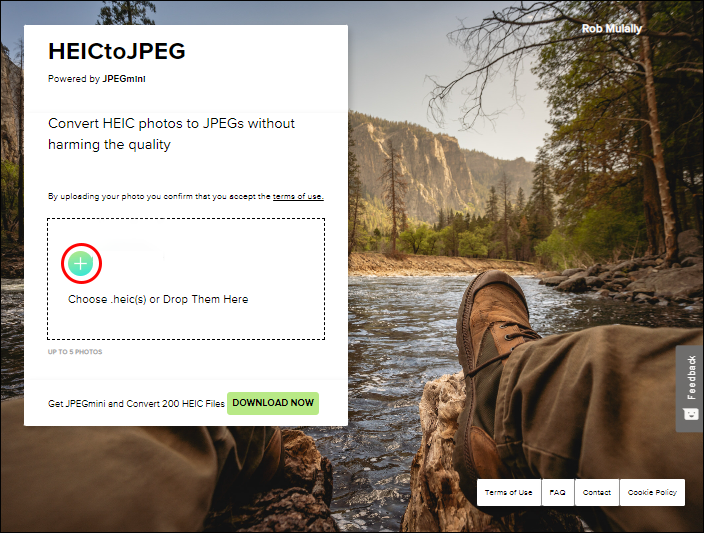
HEICtoJPEG
HEICtoJPG is a website that allows you to convert up to 50 photos from HEIC to JPG for free and without any daily limits. Below are the steps for using the program to convert your HEIC images to JPG:
- On your browser, go to “heictojpeg.com”.
- Click the plus icon to upload the images you wish to convert to JPG. To select multiple photos at once, press and hold the “Ctrl” button and make your selections.
- Once the upload is complete, processing should start automatically.
- Click the “Download JPEG” button against each image to download it.

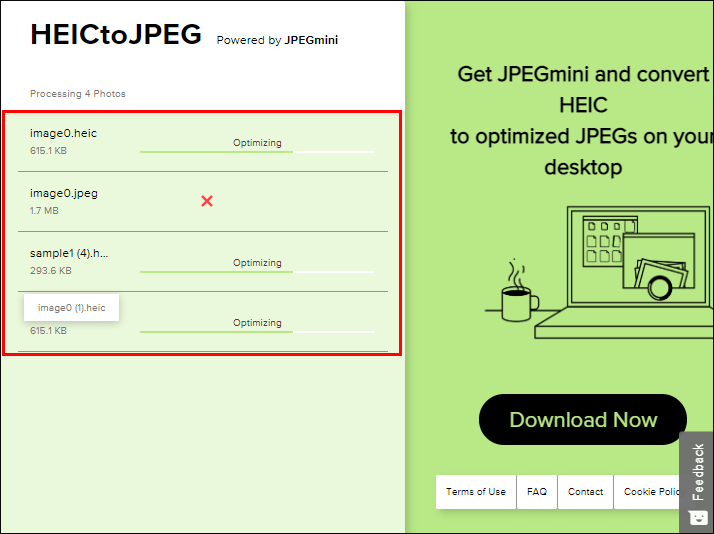

Be sure to download your processed images immediately because the website automatically deletes them when the page is refreshed or closed. Also, HEICtoJPEG has a premium version that allows you to convert up to 200 photos in a single session. However, the version comes as a desktop application rather than a web-based solution.
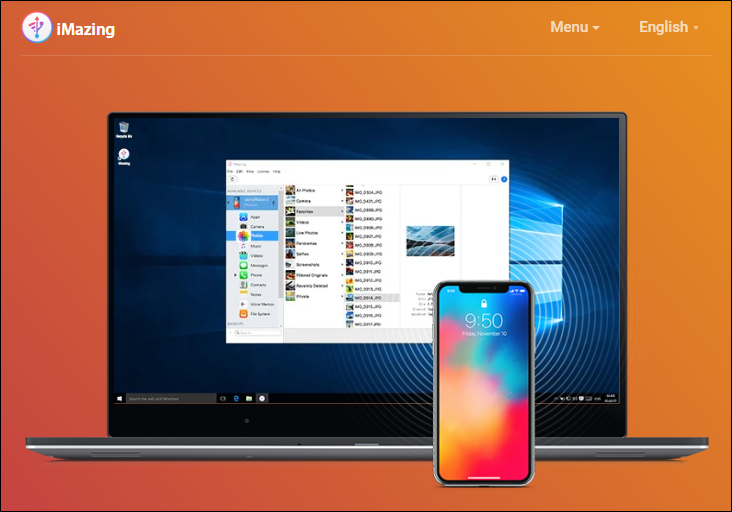
iMazing Converter
While HEICtoJPG is a reliable image file converter, being connected to the internet still exposes you to hackers and malware attacks. That’s why an offline tool might serve you better.
While many desktop apps claim to batch-convert your files, only a handful get the job done. iMazing Converter is a perfect example. This free tool allows you to convert as many images as you would like, and it’s probably one of the fastest HEIC to JPG converters we’ve seen so far.
Here’s how to use iMazing Converter to batch-convert your HEIC files to JPG.
- Download and install iMazing Converter from the official website.
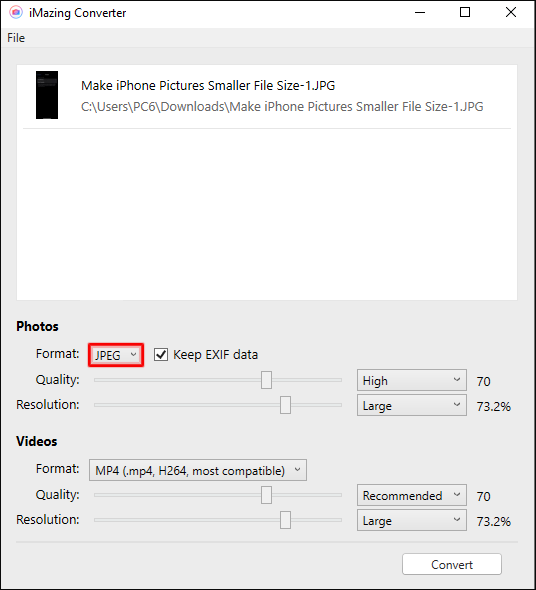
- Launch the app and drag the HEIC files into the upload box.
- Under the “Format” dropdown menu, select “JPEG.”
- Specify the quality and the resolution you want from the converted pictures and hit “Convert.”
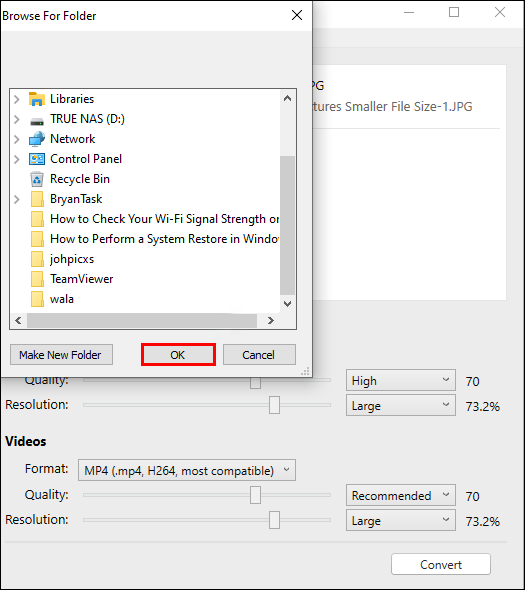
- Browse the folder that will store your processed images and press the “OK” button.
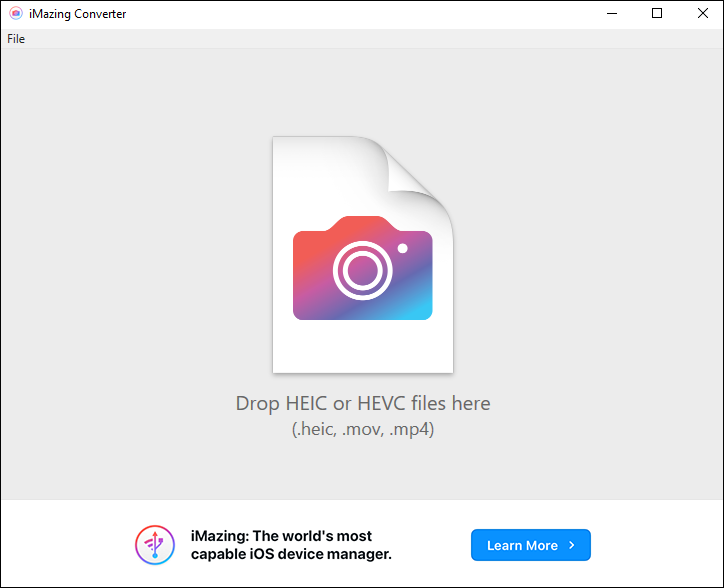

The good thing with iMazing Converter is that it doesn’t take up much space on your hard drive. Plus, the conversion is very fast.
How to Batch Convert HEIC to JPG on a Linux Machine
There are various ways of converting HEIC images to JPG on Linux. Below are some of the most efficient ones.
Libheif Library
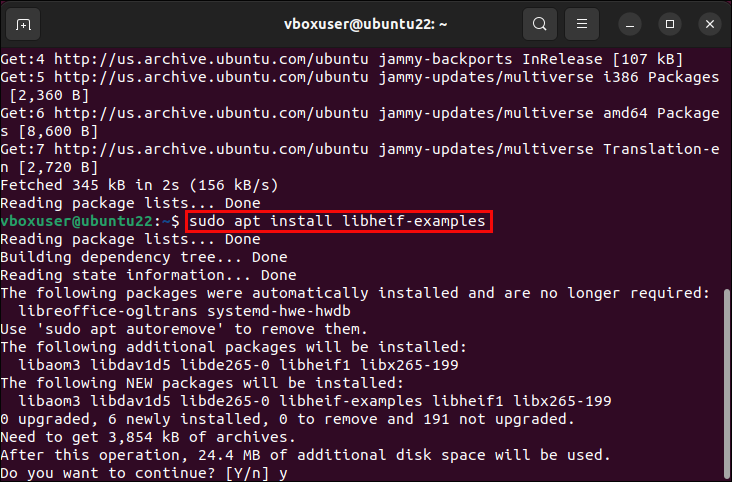
Linux has a library called libheif to help you convert HEIC images to JPG. However, to use the library, you’ll first need to install “heif-converter,” which is the actual utility that performs the conversion. Below we’ve covered the process of installing the utility across various versions of Linux, along with the conversion steps.
Steps for Debian, Ubuntu, and Linux Mint
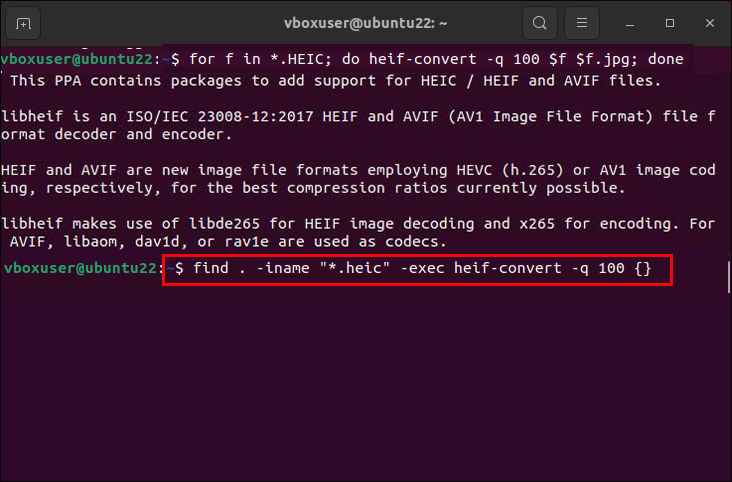
- Open your terminal and type in “sudo apt install libheif-examples”.
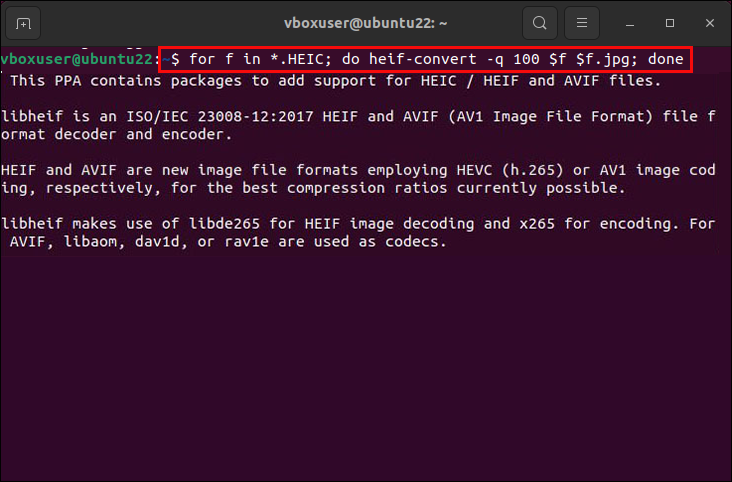
- Type “for f in *.HEIC; do heif-convert -q 100 $f $f.jpg; done” to convert multiple HEIC images at once. Please note that the -q flag specifies the quality of the JPG file you want from the conversion. It ranges from 1 to 100, and we recommend going for a high-end figure for the best picture quality.
- If your files aren’t in the same directory, type in “find . -iname “*.heic” -exec heif-convert -q 100 {} {}.jpg \;“ instead.
Steps for Manjaro and Arch Linux
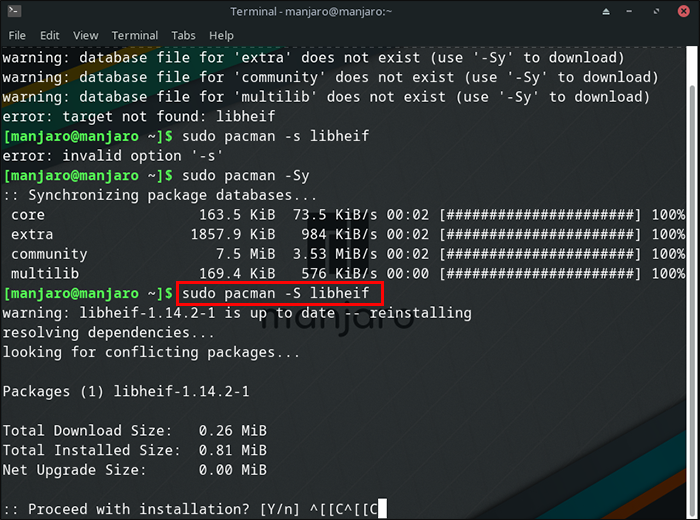
- Open the terminal and type in “sudo pacman -S libheif”.
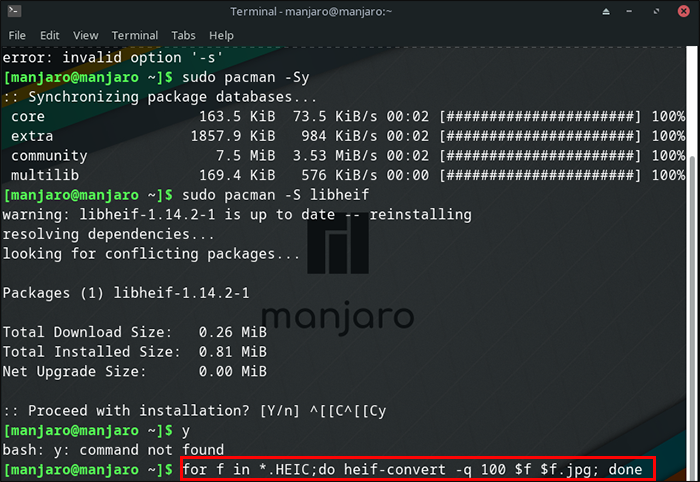
- Type in “for f in *.HEIC; do heif-convert -q 100 $f $f.jpg; done”.
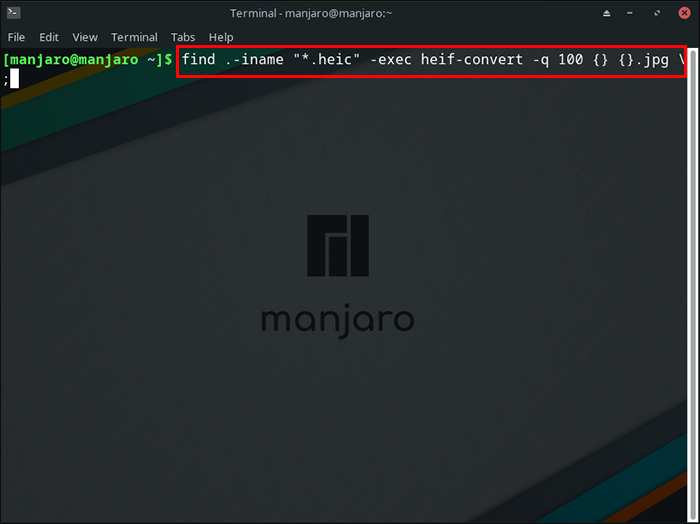
- If the files span multiple directories, type “find . -iname “*.heic” -exec heif-convert -q 100 {} {}.jpg \;” instead of the command in step 2.
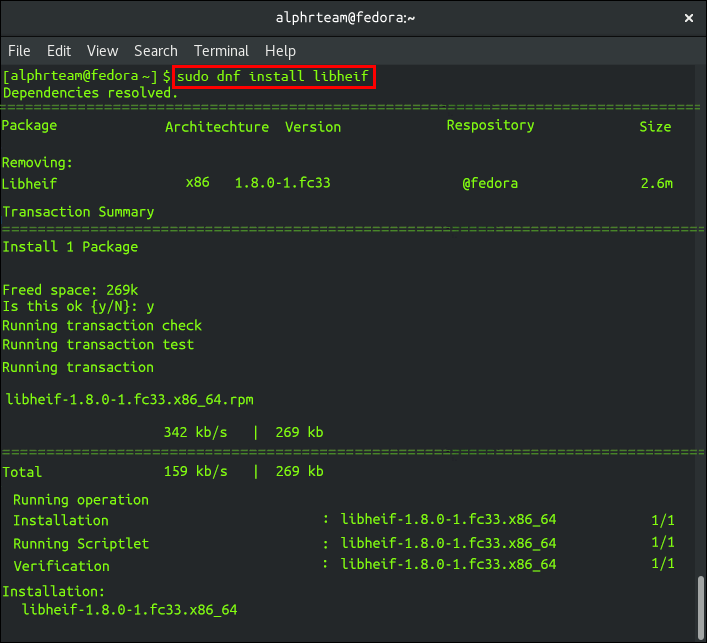
Steps for Fedora
- Launch your terminal and type “sudo dnf install libheif”.
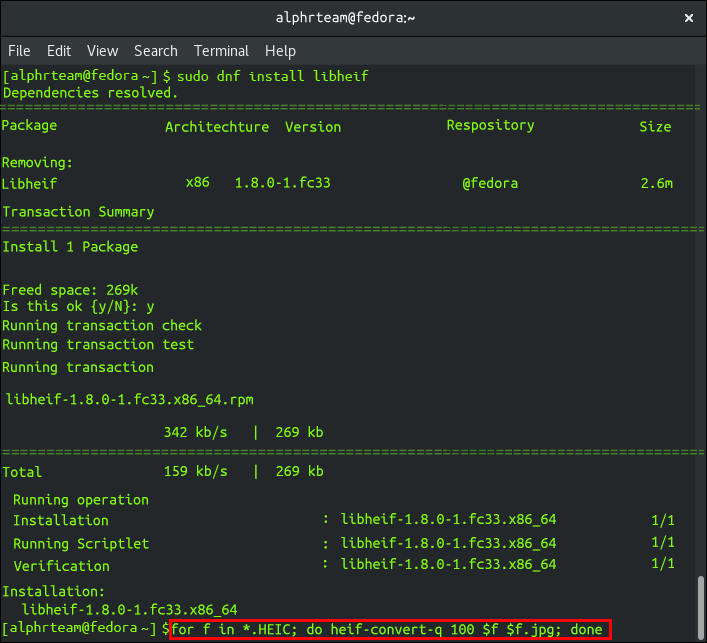
- Now type, “for f in *.HEIC; do heif-convert -q 100 $f $f.jpg; done”.
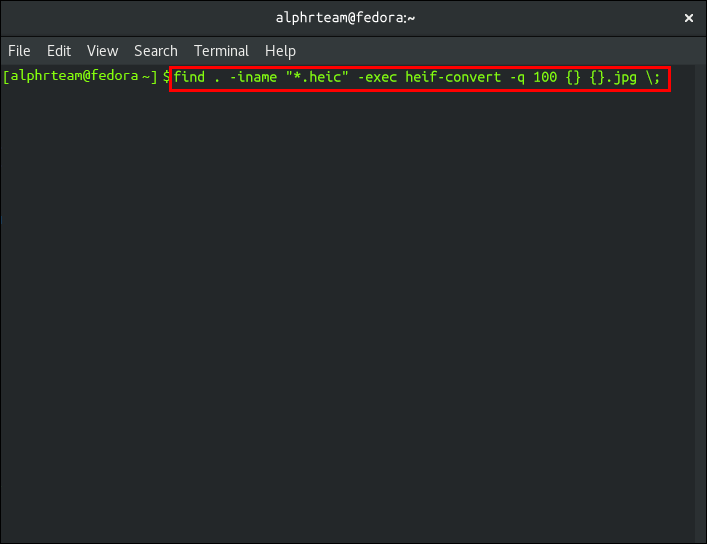
- If the images you want to convert are in multiple directories, type “find . -iname “*.heic” -exec heif-convert -q 100 {} {}.jpg \;” instead of the command you typed in step 2.
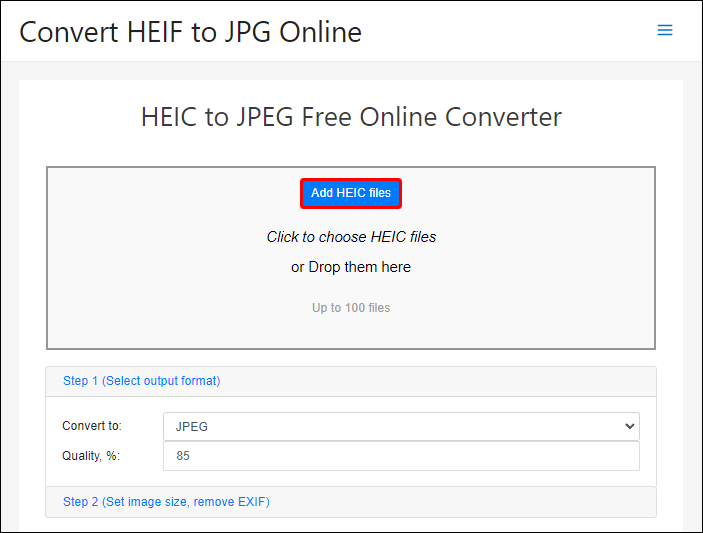
The command line can be intimidating for some users. Fortunately, there are other easier alternatives. For example, the website called “heic.online”. It is free, simple and most importantly, safe. Plus, it spares you the hassle of writing commands and installing third-party applications that might consume your computer’s space. Here’s how to use the tool to batch-convert HEIC photos to JPG.
- Go to your computer’s browser and open “heic.online.”
- Click the “Add HEIC files” and select the photos you wish to convert to JPEG. Alternatively, you can drag and drop them into the upload box.
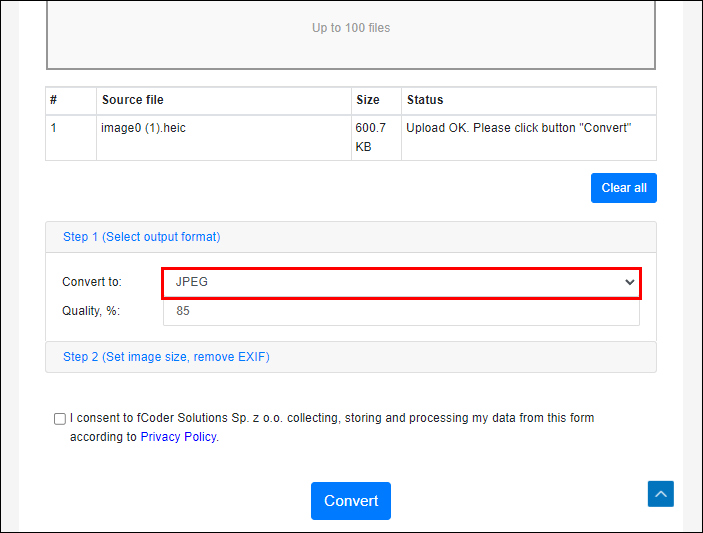
- Once the upload is complete, scroll down and select “JPEG” from the “Convert to” dropdown menu.
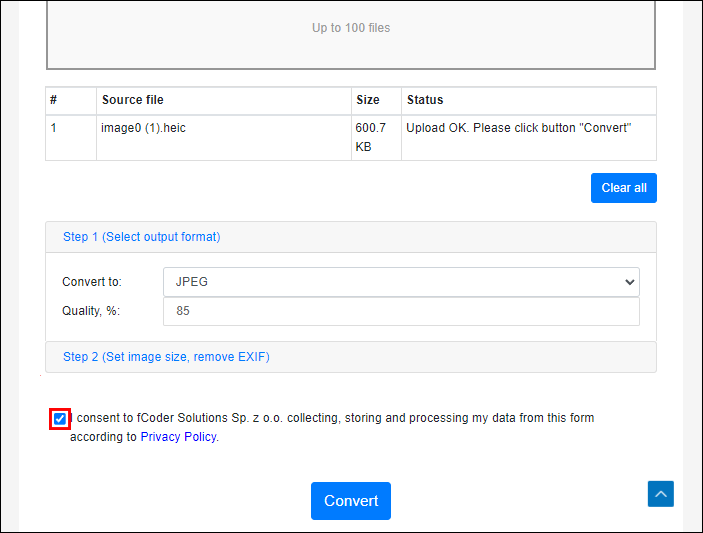
- Specify the quality of the converted images and check the “Terms & Conditions” box.
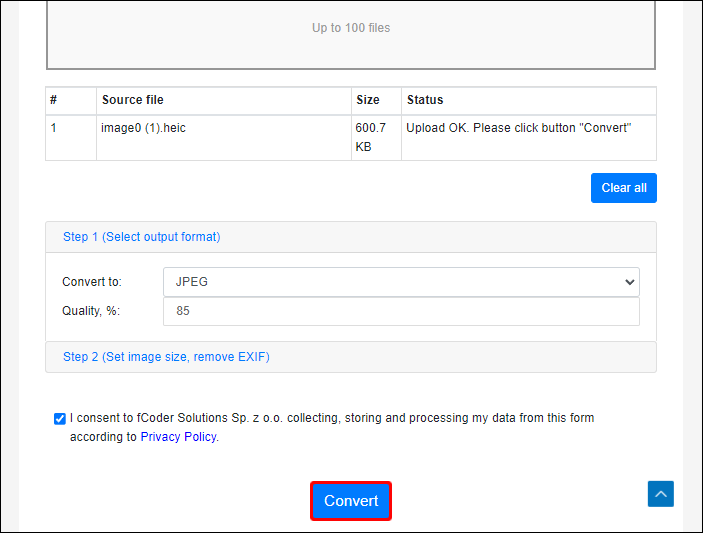
- Hit “Convert.”
- Click the “Download all” button to save the files to your local machine.

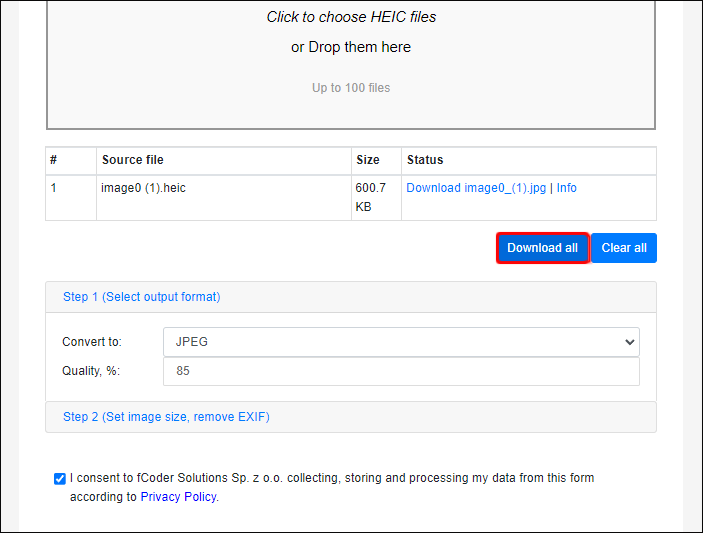
Please note that the download is a zipped file. So you’ll have to unzip the folder using a compression tool to view the pictures. If you don’t have a compression program on your computer, you can download one image at a time. Additionally, you can only convert 100 images per session, but again, the sessions are unlimited, so that shouldn’t worry you.
How to Batch Convert HEIC to JPG on a Chromebook
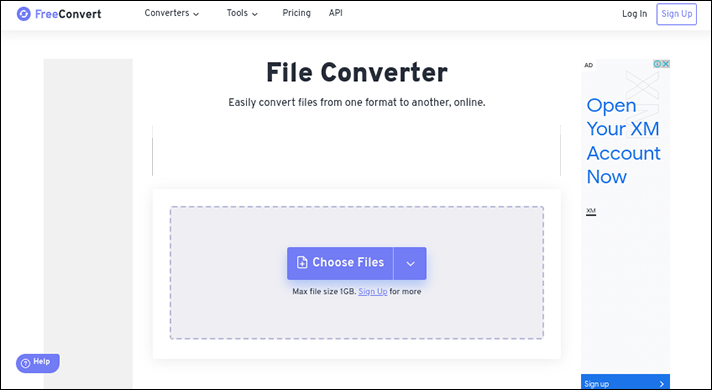
The easiest way to batch convert HEIC images to JPG on a Chromebook is by using an online HEIC converter. An excellent tool for Chromebook users is a site called FreeConvert. It is free and allows you to convert multiple files at a time. Here’s how to use it:
- Open your web browser and go to “freeconvert.com.”
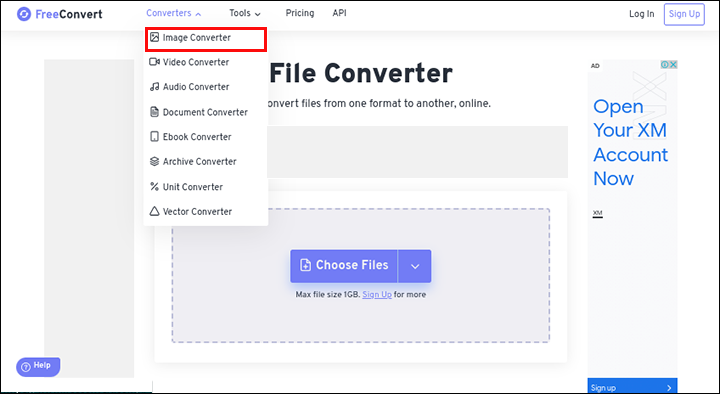
- Navigate to “Converters” and select “Image Converter.”
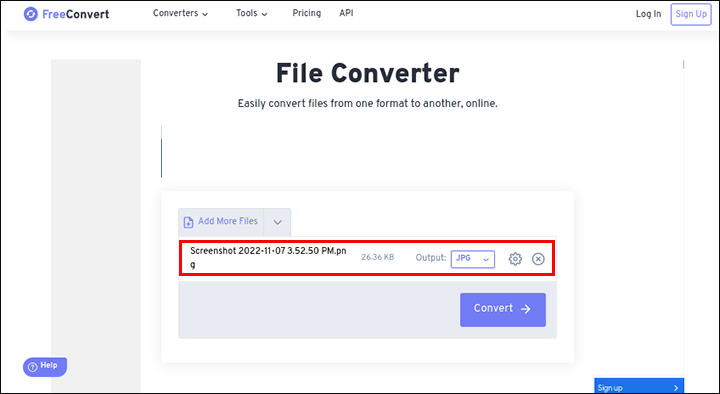
- Upload the images you want to convert to JPG.
- Choose “JPG” as your final output and hit “Convert to JPG.”
- Download your images once they are processed.

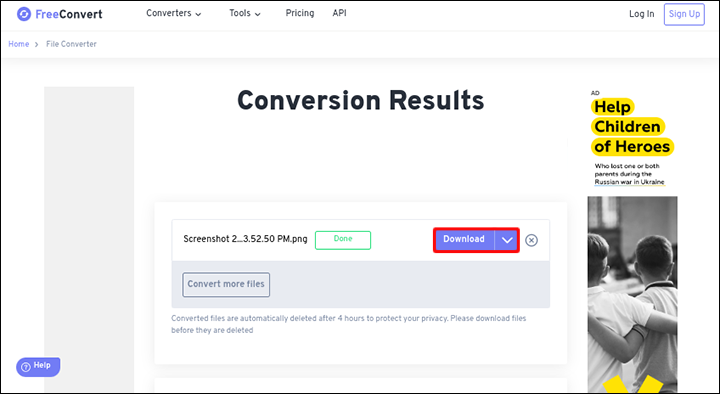
You can also save your image to Dropbox or Google Drive or scan its QR Code and share it with your friends.
If you only want to convert a single HEIC image, then TinyWow is the best choice. Here’s how to use the website to convert a HEIC file into a JPG:
- On your Chromebook, open the browser and go to “tinywow.com.”
- Go to “Image” and select “HEIC to JPG.”
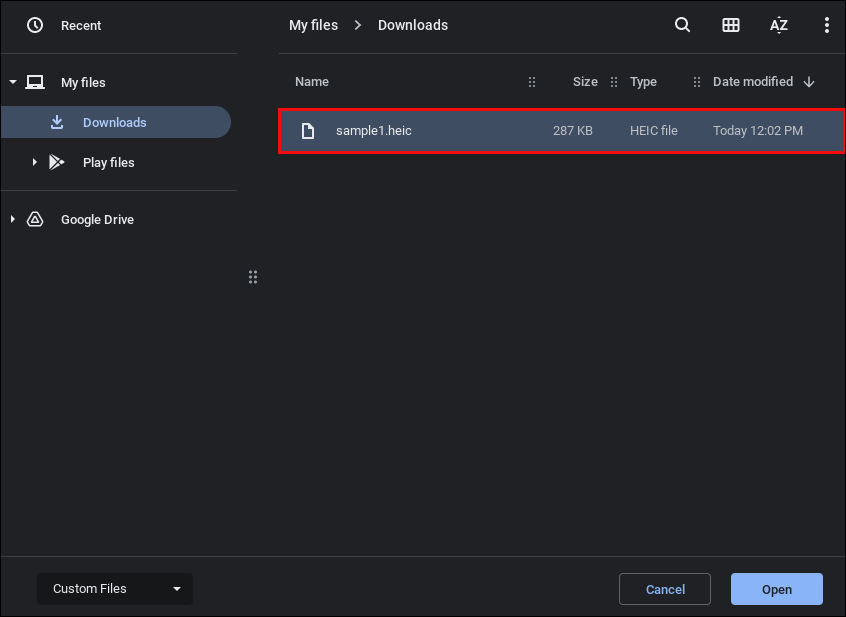
- Click the “Upload from PC or Mobile” button and select the HEIC image you wish to convert to JPG.
- Complete the Recaptcha and wait a few seconds for the image processing to finish.
- Click “Download” to save the image to your local machine. Alternatively, you can upload the image to your Google Drive if you want to have a copy synched up to the cloud.


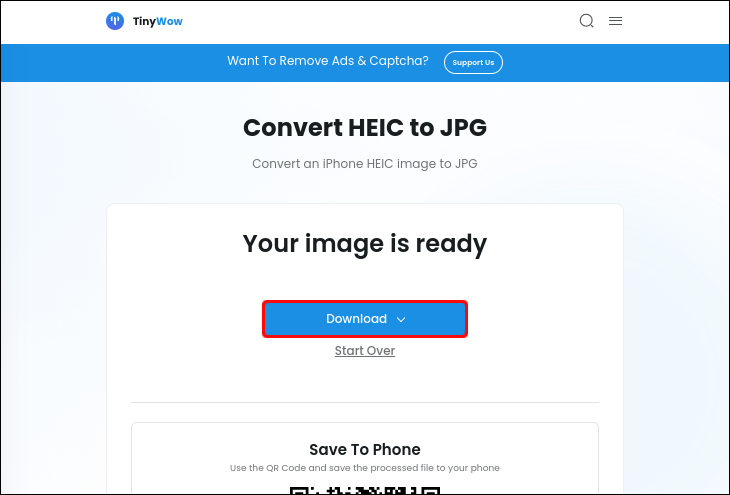
Please note that TinyWow deletes your processed files an hour after the upload for your privacy. So, be sure to download your file once the processing is finished.
FAQ
What is the difference between JPEG and JPG?
JPEG, or in full Joint Photographic Export Group, is an ISO-certified bitmap compression format used for lossy compressions. The advantage that comes with the JPEG image format is the flexibility to decide the balance between a photo’s quality and its storage size.
Then we also have JPG. Fundamentally, there is no difference between the two formats, except that one has three characters and the other has four. In fact, you can interchange these two extensions, and your image file should continue to work properly. JPG only exists because earlier versions of Windows used to only accept file extensions with at most three characters. So the format creators decided to shorten “.jpeg” to “.jpg” so Windows users could also use the format.
Don’t Get Stuck With HEIC Photos
As you can see, converting HEIC images to JPG doesn’t have to be a hassle. For Mac users, you have Preview at your disposal. So you don’t have to be connected to the internet or go through the hassle of installing third-party applications. For Windows and Chromebook users, there are many online tools to use. Some recommended websites include HEICtoJPEG, heic.online, FreeConverter and TinyWow.
Have you tried batch-converting HEIC images to JPG yet? Did you use any of the methods mentioned in this article? Please share your experience with us in the comments section below.
Disclaimer: Some pages on this site may include an affiliate link. This does not effect our editorial in any way.