Device Links
The option to batch edit photos comes in handy when dealing with many pictures that need fine-tuning. Applying the same preset to multiple images in one go can significantly speed up the editing process and enhance your overall workflow. It maintains consistency, which is essential when working professionally with preset standards you must follow.
Lightroom is a great user-friendly editing app that allows you to do this in no time. Let’s dive into a few ways you can batch edit a bulk of images quickly.
How to Batch Edit in Lightroom on a PC
Batch editing is easy with Lightroom as it offers a variety of techniques for this. First, you will need to set up a preset you want to apply to a roster of images to start processing. Once you have done that, you will go to the first method to batch edit photos with this tool.
Apply Presets During Import
Lightroom allows you to apply ready presets to photos while importing them into the app. Use a custom preset or a built-in batch edit Lightroom setting to employ them on a pile of images. Once you have readied the preset, follow the steps. This method is suitable when all the photos in a batch have similar presetting, such as the same exposure and contrast.
- Open Lightroom.
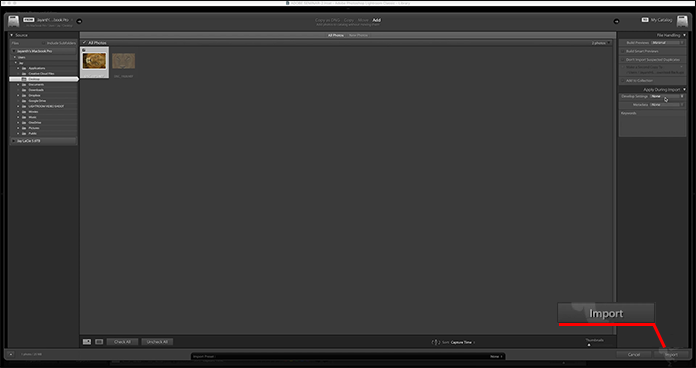
- Click on the “Import” button.

- The list of the photo folders on your device will show up. Select the one you want to edit.

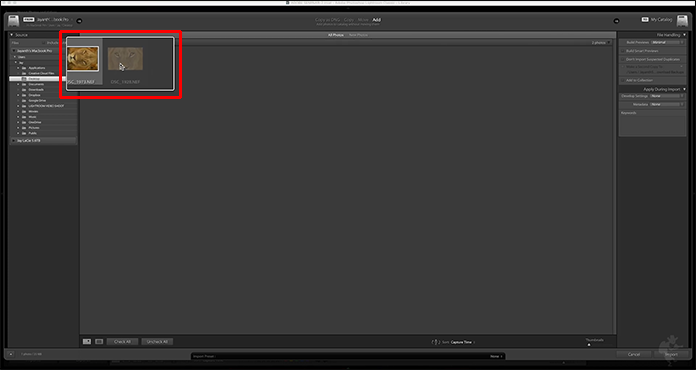
- Select all the image thumbnails you want to edit in the central panel of the Import module.
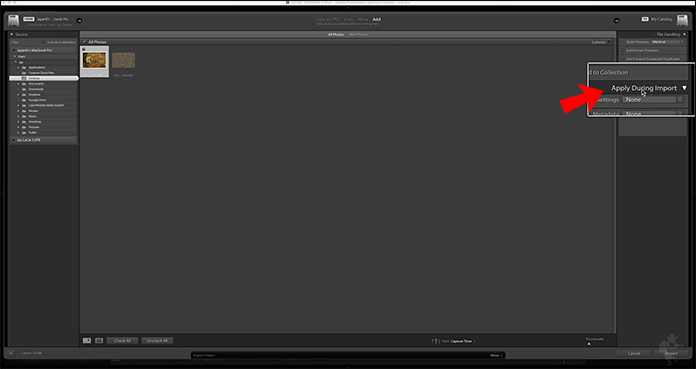
- Open the “Apply During Import” drop-down menu on the right side of the module.
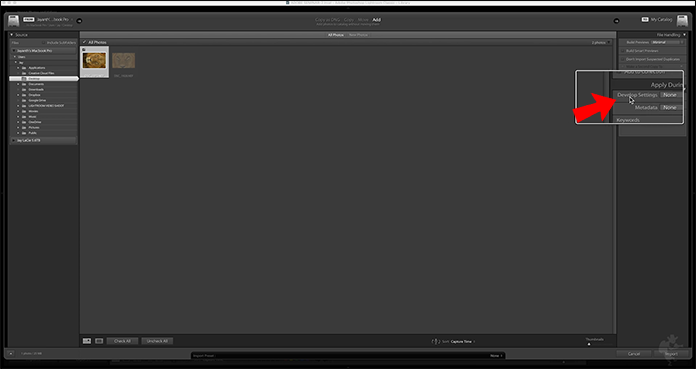
- Open the “Develop Settings” tab under this menu and pick a preset you want to apply.
- Click “Import.” You have successfully used the preset for all the photos in a batch.
This technique is handy when your photo batch has different types of photos. You can batch edit photos more selectively with this method by sorting them into smaller clusters. This way, you can apply different presets to multiple images by separating them into categorized piles.
Library Module
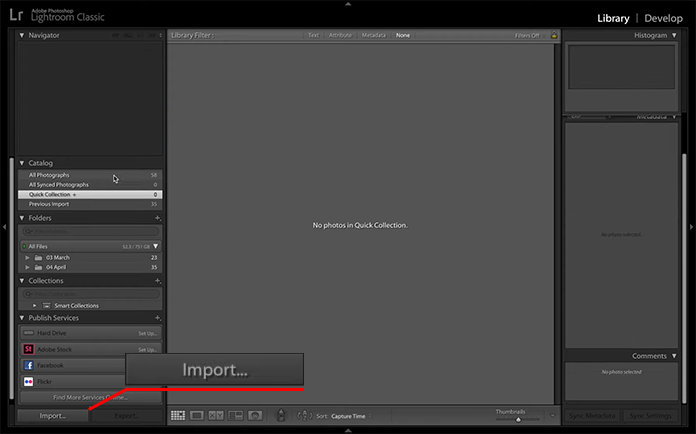
Here is how to process them in Lightroom.
- Click the button “Import” and select the photos that need editing.
- Import them into Lightroom Library.

To form separate batches once you have imported the photos into the library, proceed with these steps.
- Select the first image in the sequence to which you want to apply a preset.
- Hold Ctrl and select more pictures to which you wish to use the same preset.
- Go to the “Quick Develop” tab on the right side of the Library module.
- Select a preset in “Saved Preset.”
- Repeat the same process for as many sub-batches as you need.


The Library module also allows you in making custom edits to individual batches. You can access these settings in the “Quick Develop” tab, below the “Saved Preset” option.
Synchronize Edits
You can use this method to rapidly apply the same edits you applied to one photo to multiple ones at the same time. A sync option is an excellent tool for implementing specific presets and not wasting time editing images one by one.
Let’s go through the steps to using this option.
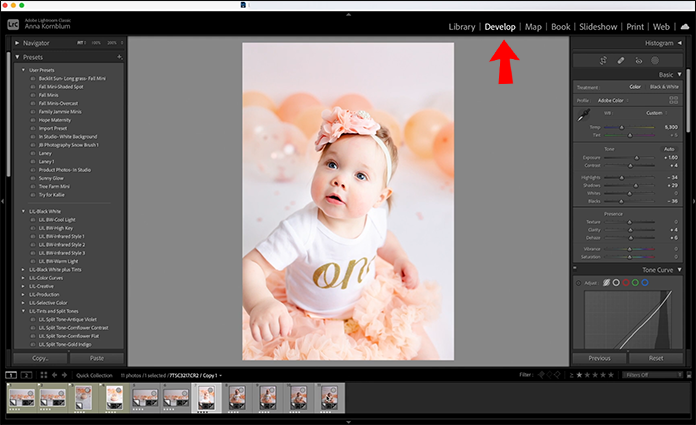
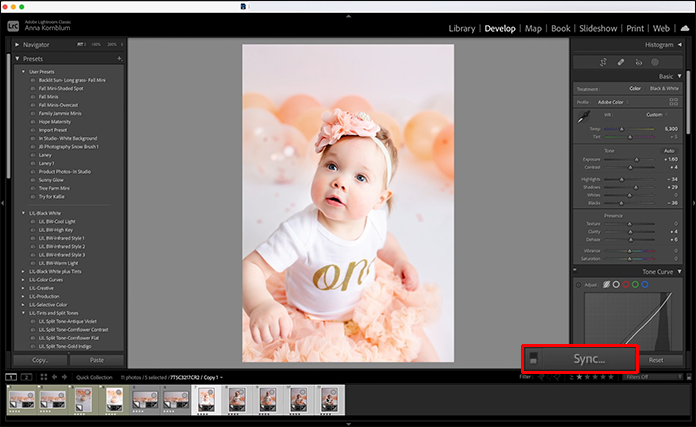
- Pick the main photo from your batch library to which you want to make specific edits.
- Edit the image using the “Develop” option on the right side of the module.
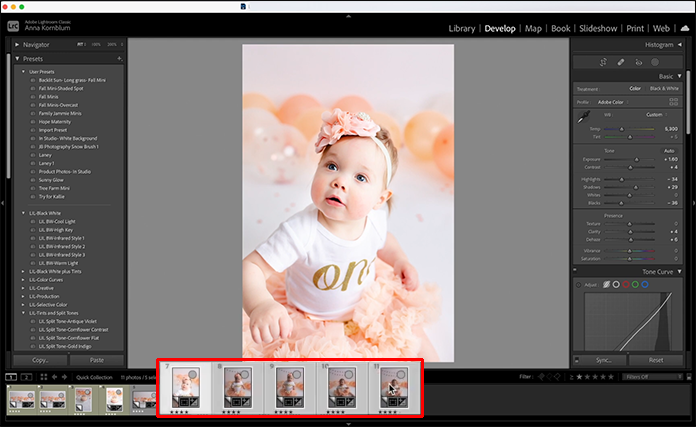
- When you have set up the primary photo, select that one first. Next, pick all other images you want your customizations applied. Lightroom recognizes the first photo as the root for the preset, so ensure that you check the edited one first.
- In the “Develop” module on the right, click “Sync.”
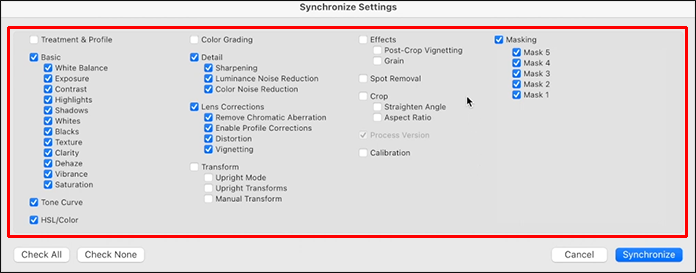
- An options box will pop up. Select all the presets you want to apply across the rest of the images.
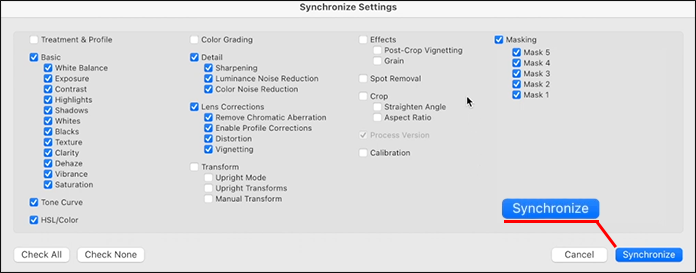
- Click “Synchronize.”

Lightroom also has an “Auto-sync” option that automatically lets you apply edits to one photo while simultaneously applying them to multiple others. This option is useful when you edit photos with the same pre-production lighting and color conditions.
How to Batch Edit in Lightroom on a Mobile Device
The Lightroom mobile app is one of the most popular tools for editing images on the go. It’s user-friendly and widely recognized by social media influencers who have made this app popular and use it for editing their photos.
Learning how to batch edit photos in the mobile version of Lightroom is simple and saves you time. Use Lightroom next time you need to adjust some photos taken during travel in one take, as you can finish the job in a few minutes.
You must first edit a single photo before applying the modifications to the others. Avoid cropping and selective adjustments on a single image. Instead, edit the more general adjustments, such as contrast exposure or color balance, edits that can quickly be transferred across the photos.
- Set the edits on the main photo.
- Click the “…” button in the top right corner of the app and choose “Copy settings.”
- Check the settings you want to transfer to other images under this tab.
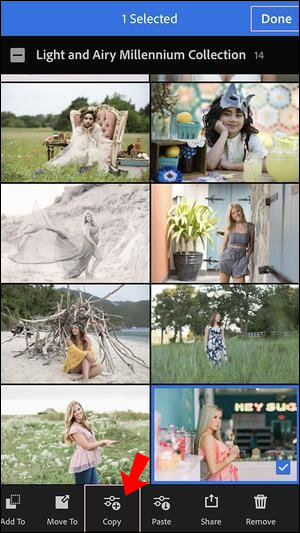
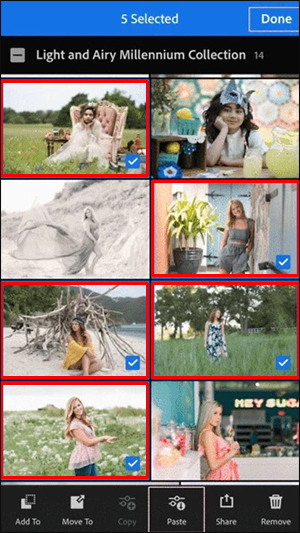
- Go to your image library and select the photos to which you want to apply settings. You can do this in the following ways.
• Click on the three dots icon and choose “Select.”
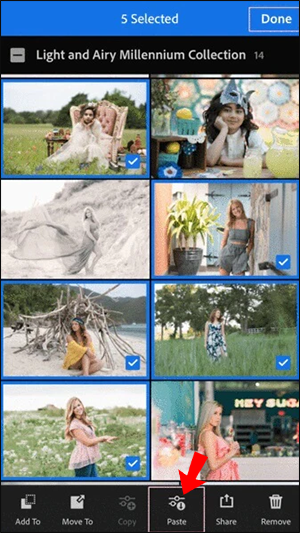
• Click and hold the image to select, then tap the ones you need for batch editing. - Click the “Paste Settings” button in the bottom bar.


Lightroom mobile lets you use pre-defined Lightroom presets if you don’t want to make custom edits to the photos. This feature allows you to apply already defined settings in a single tap, saving you even more time.
How to Batch Edit in Lightroom on an iPad
The Lightroom batch editing process on the iOS platforms goes pretty much the same as for the app’s mobile version. Lightroom mobile supports any iPhone or iPad that runs iOS 13.0 or newer versions.
To batch-edit photos on an iPad, do the following:
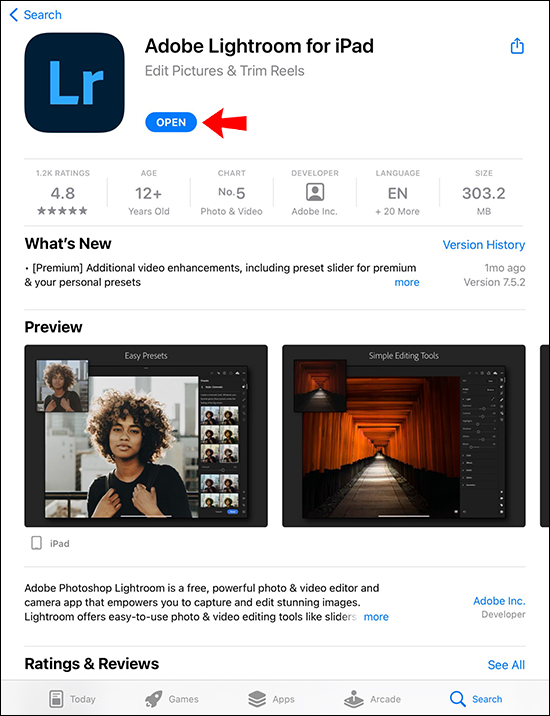
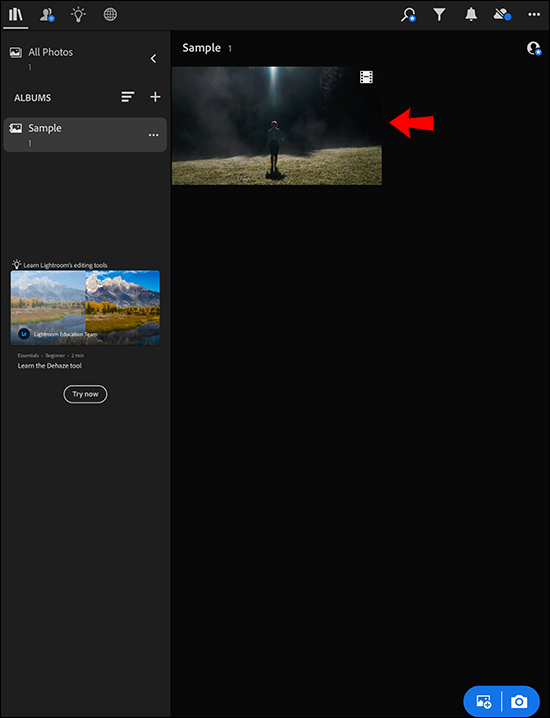
- Open the Lightroom mobile app for iPad.
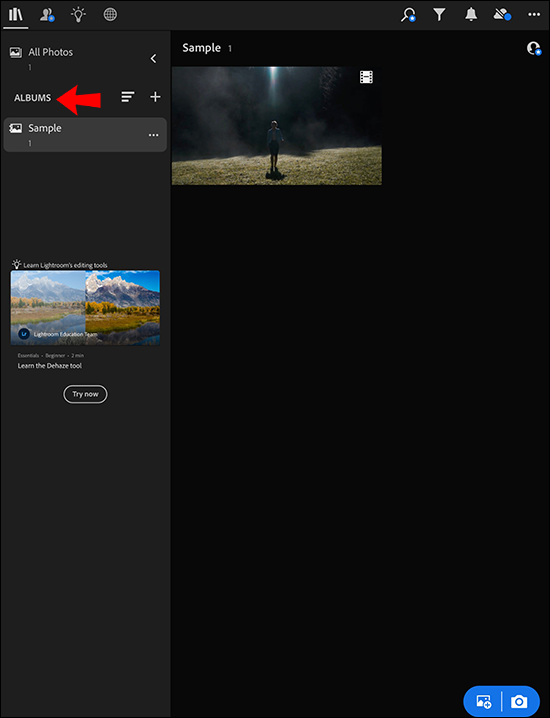
- Go to “Albums.”
- Select the primary photo you want to edit.
- Go to “User Presets,” apply the preset and make specific adjustments.
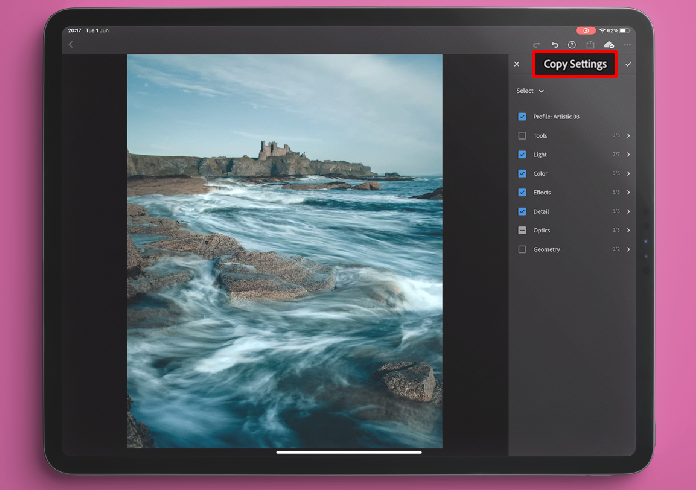
- Tap the “…” in the upper right corner and choose “Copy Settings.”
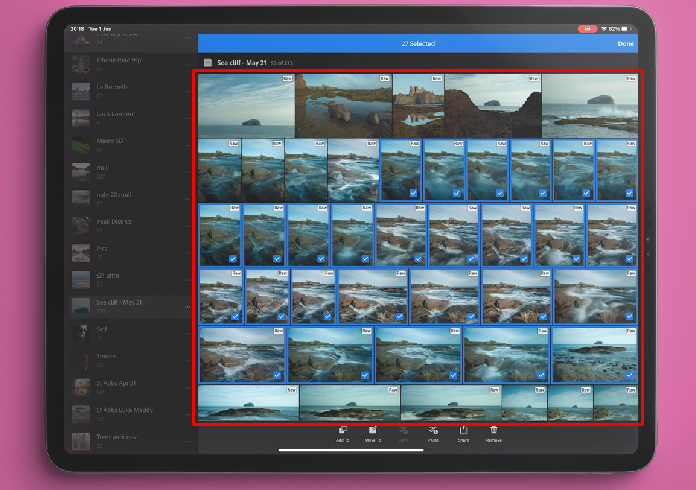
- Go back to the grid, press the “…”
- Choose “Select” and pick the images to which you want to apply the preset.
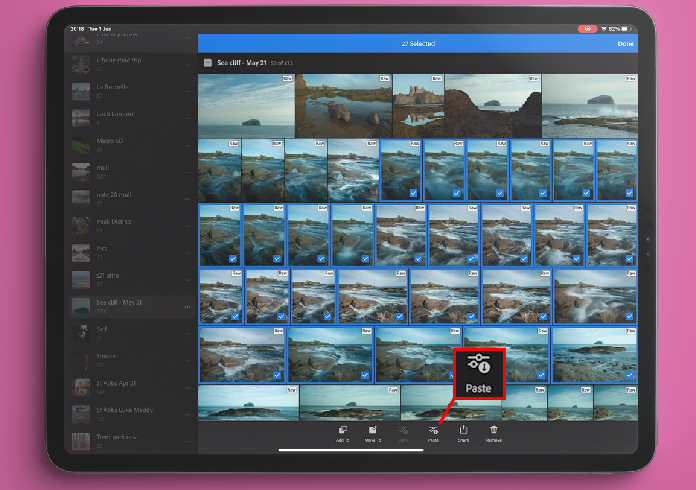
- Press “Paste” on the bottom of the screen and use the preset.


Save Your Precious Time
Being able to batch edit photos is a lifesaver for photographers. Editing images with the same settings one by one devours time, and Lightroom has made a fix for this available. Choose a Lightroom preset or create a custom one and apply it to as many images as possible. The whole editing process has never been more efficient.
Which method do you use to batch edit your photos in Lightroom? Tell us in the comments section below!
Disclaimer: Some pages on this site may include an affiliate link. This does not effect our editorial in any way.