As we tend to spend more time on our phones than our PCs, most of today’s web content is optimized for mobile users. But have you ever wondered how your browser knows when to show you the mobile-friendly version of a website? How does it know what device you’re using to access a web page? Meet user-agent strings!
Every HTTP header contains, among other data, the user-agent string, which helps the server to identify where you’re accessing a site from. That’s is how it’s capable of delivering the right content format for every popular platform, such as games consoles, tablets, iPhones, Androids, etc.
How User-Agent Strings Work
User-Agent strings are part of web architecture and can provide useful information about the device asking to access a web server. It can help handle a website’s traffic better because it reveals what kind of device it is, what software and browser it uses, etc.
These strings are essential in marketing as they help you target your ads, optimize your website for different devices, analyze web traffics, and more.
Can I Change the User-Agent String Manually?
Sometimes, you’ll need to access a mobile website from your desktop. It may be out of curiosity or for professional reasons. However, to do so, you need to change the user-agent string. Is it possible? Absolutely.
If you’re testing your new website, you can do it all directly from your PC, just by changing the user-agent string. It takes a couple of easy steps.
User-Agent Strings in Google Chrome
Google Chrome is the most used browser worldwide, and, naturally, it has many user-agent strings. That’s because it needs to cover a large number of different devices and provide the user with the best possible experience.
If you’re building a website and you want to make sure it’s optimized for all the devices your target audience may use, here are two simple ways to change the user-agent string and test your product.
1. Built-In User-Agent Switcher
There’s a way to change the user-agent string in Chrome without installing additional programs. Here’s how to do it.
- Launch Google Chrome on your PC.
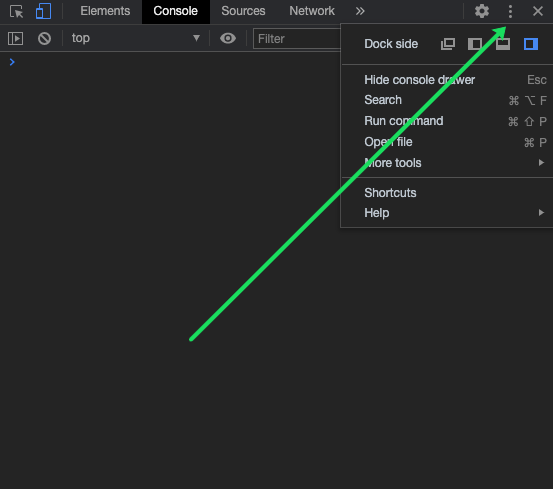
- Click on the three-dot icon in the top right corner of the window.
- Scroll to More tools and then click on Developer tools. Note that you can also use the keyboard shortcut to open Developer tools – press Ctrl + Shift + I on your keyboard.

- Click on the three-dot icon in the Developer tools window.
- Scroll to More tools and then choose Network conditions from the list.
- In the Network conditions tab, you’ll see that the Select automatically option is ticked. Disable it.
- There’s a Custom list button underneath, so click on it and choose a device from the list to see how the website would look on that device.


2. Installing User-Agent Switcher
The other way to change the user-agent string in Google Chrome is to install a dedicated program. It’s an extension for Chrome, and it’s super-simple to add it to your browser.
- Go to the official Chrome Web Store and search for User-Agent Switcher.
- Click on the Add to Chrome blue button next to the name of the extension.
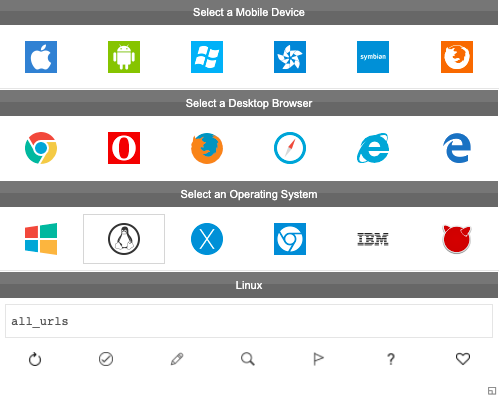
- Once it’s added to your browser, you can start using it by right-clicking on any blank space on a website and select User-Agent Switcher.
- Choose a browser and then a device from the menus.
- If you don’t see the device you want in this menu, click on Other and create the one you want. You can later add this custom user-agent to the menu.


For Safari and Firefox Users
You can also change the user-agent switcher if you use Safari or Firefox as your default browsers. Here’s how.
Safari
When you launch Safari on your computer, do the following to change the user-agent string.
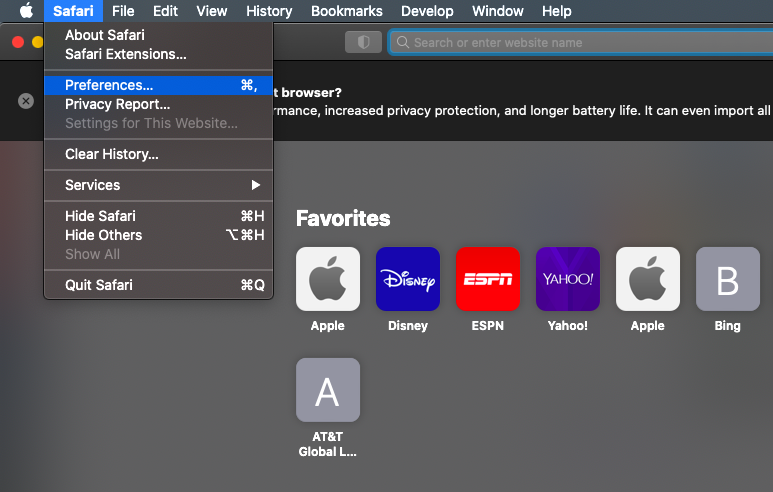
- Open the Safari menu and click on Preferences.
- Select the Advanced tab and tick the Show Develop menu in the menu bar option.
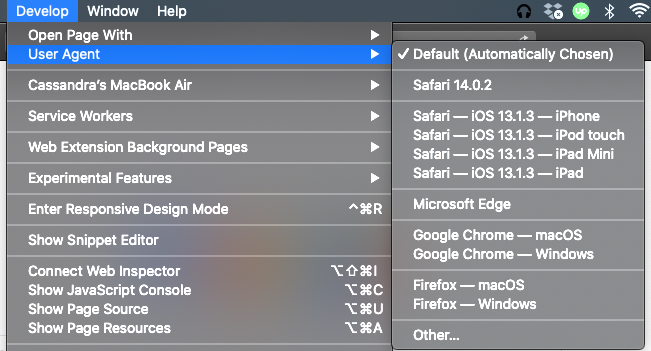
- Close Preferences and open the Develop menu.
- Choose User Agent from this menu.
- Select a browser and a device, or click on Other… if the device you need is not on the list.


Firefox
You can change the user-agent string in your Firefox browser, as well. There’s a built-in way to do this, but using an extension is more recommended. That’s because it makes the process quicker and less complicated.
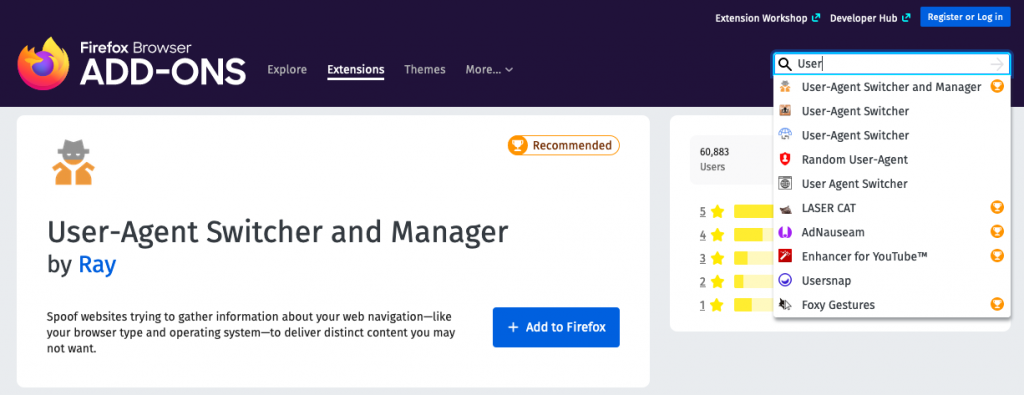
- Open your Firefox browser and go to the official Firefox Store to search for add-ons.
- Search for the User-Agent Switcher.
- Click on the blue +Add to Firefox button.
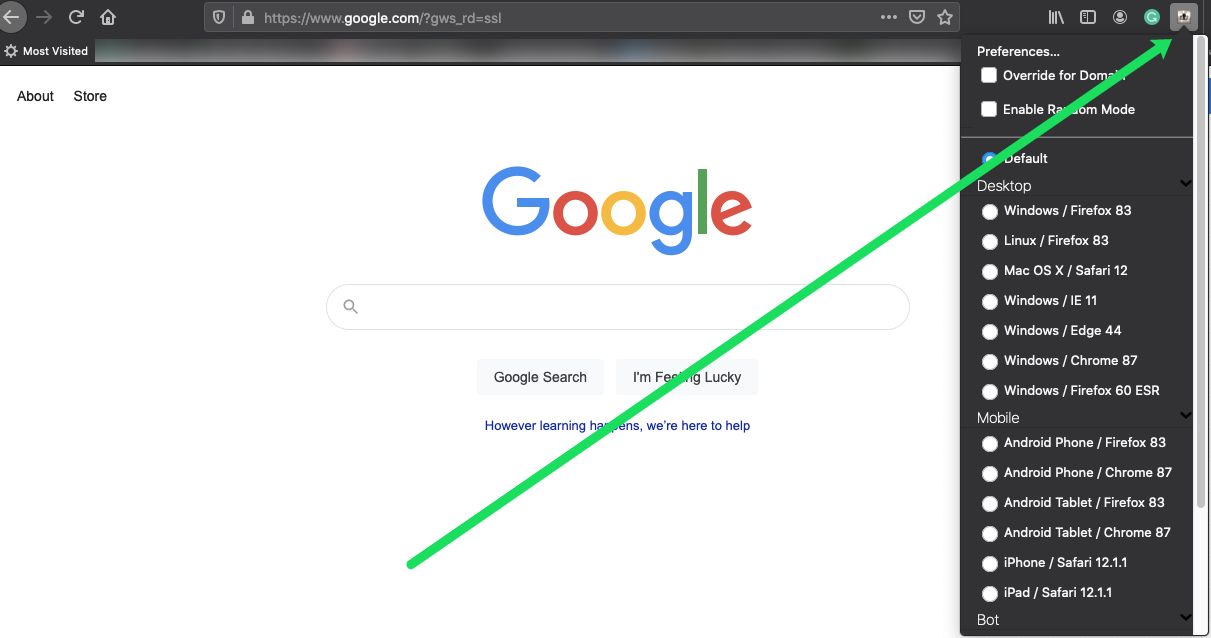
- You’ll see that a new menu and toolbar have been added to your browser, meaning you can start using the extension.
- Click on the URL then click on the extension you’ve downloaded.
- Select one of the options from the drop-down menu and enjoy viewing the webpage in the version of your choice.
Note: The Firefox store has a lot of options available from third-party developers. Be sure to read the reviews before installing. This ensures that you are using an extension that is safe and reliable.
Extensions Save Your Time
Installing an extension is certainly a good choice if you have to switch the user-agent string often. If you don’t, we also recommend doing so, as they’re very convenient and easy to use.
Have you tried to switch the user-agent string in Google Chrome or other browsers? Tell us in the comments section below!
Disclaimer: Some pages on this site may include an affiliate link. This does not effect our editorial in any way.


