Notability is the most popular note-taking app for iPads and other iOS devices. This app allows you to do much more than take notes and make annotations in PDF files. You can also make an audio recording, replay it, and sync it to your notes. When you no longer need the audio recording, you can always delete it.
In this article, we’ll explain how to delete an audio recording in Notability on your iPad and Mac. We’ll also discuss everything else you can do with your recordings in this app.
Notability – How to Deletea Recording on an iPad
Notability is primarily made for iPads, but you can also use it on iPhones and MacBooks. This app allows you to do so many things besides taking notes. You can annotate PDF files, present and share your notes, draw, do math equations, and so much more.
One impressive feature that Notability offers is the audio recording function, which allows you to make recordings and take notes at the same time. This is done by simply tapping on the microphone icon located on the top menu in the upper-right corner of the screen. When you want to stop recording, tap on the microphone icon again.
Notability takes recordings to another level by allowing you to convert them into text. You can do this by tapping on the downward arrow next to the microphone and then selecting the play button on the far-left side of the tab. This will convert your recordings into written text. Not only does this feature save you a lot of time, but it also allows you to focus on your class, lecture, or meeting. You can replay the same audio recording as many times as you like.
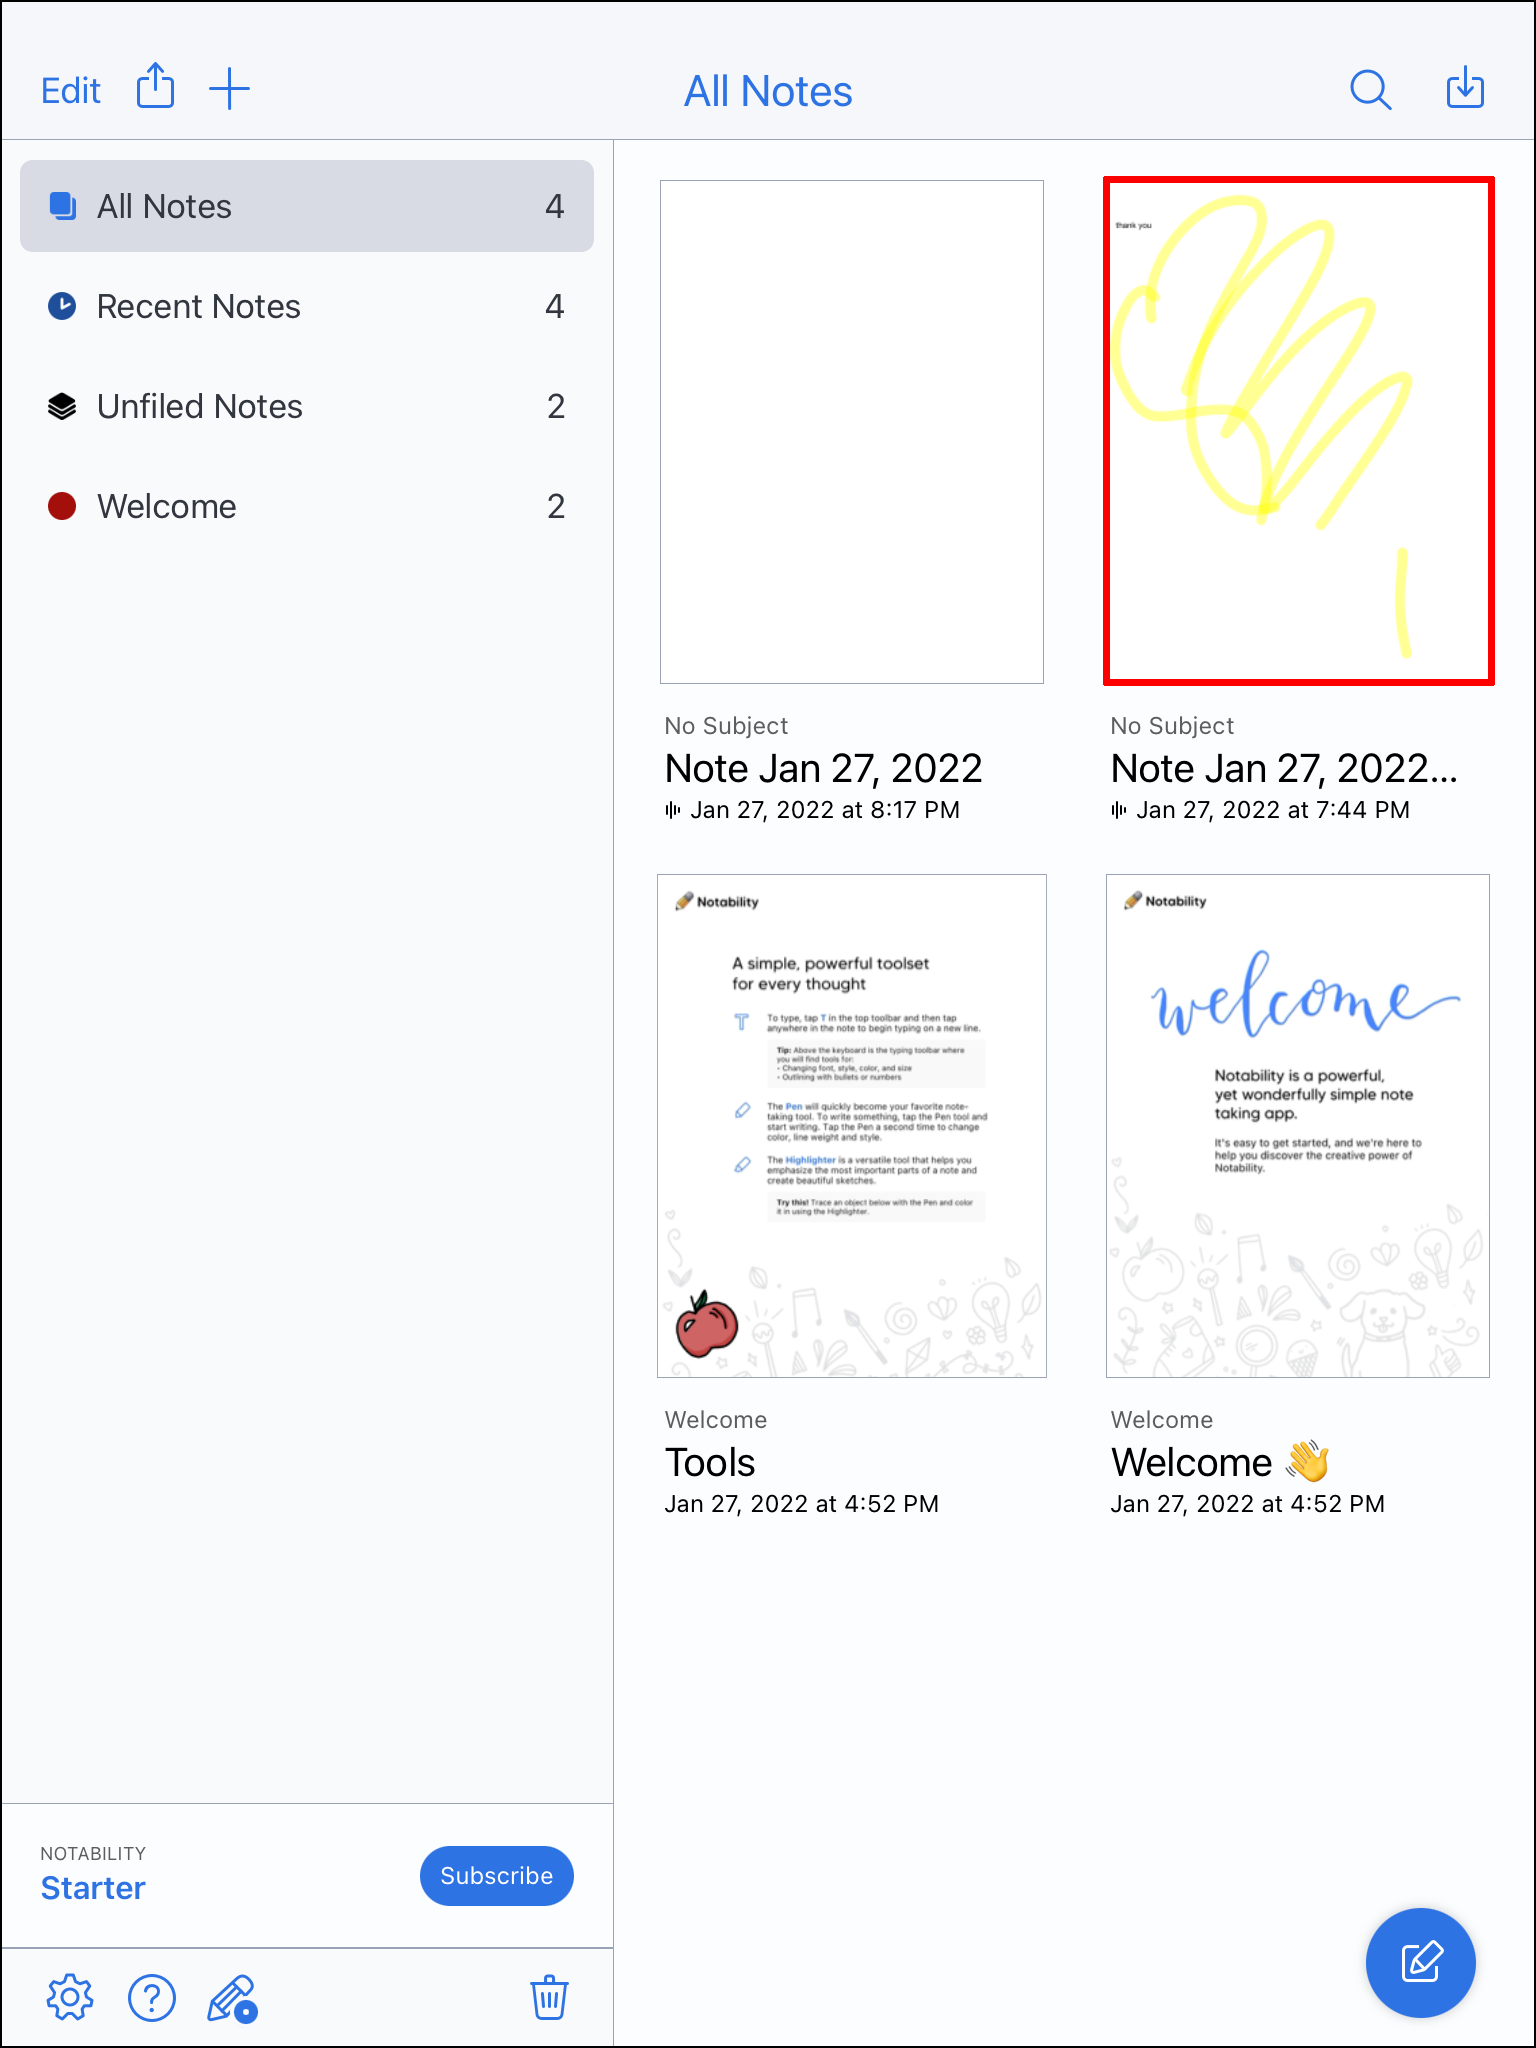
Once you convert an audio recording to text, you are free to delete it from the app. Keep in mind that on Notability, there isn’t one single place where all your audio recordings are stored. Instead, you can access each recording from the note where it was made. Therefore, to delete a particular recording, you have to remember the note file in which it was created.
Here’s how you can delete a recording in Notability on your iPad:
- Run the Notability app on your iPad:
- Open the note in which the recording was made.

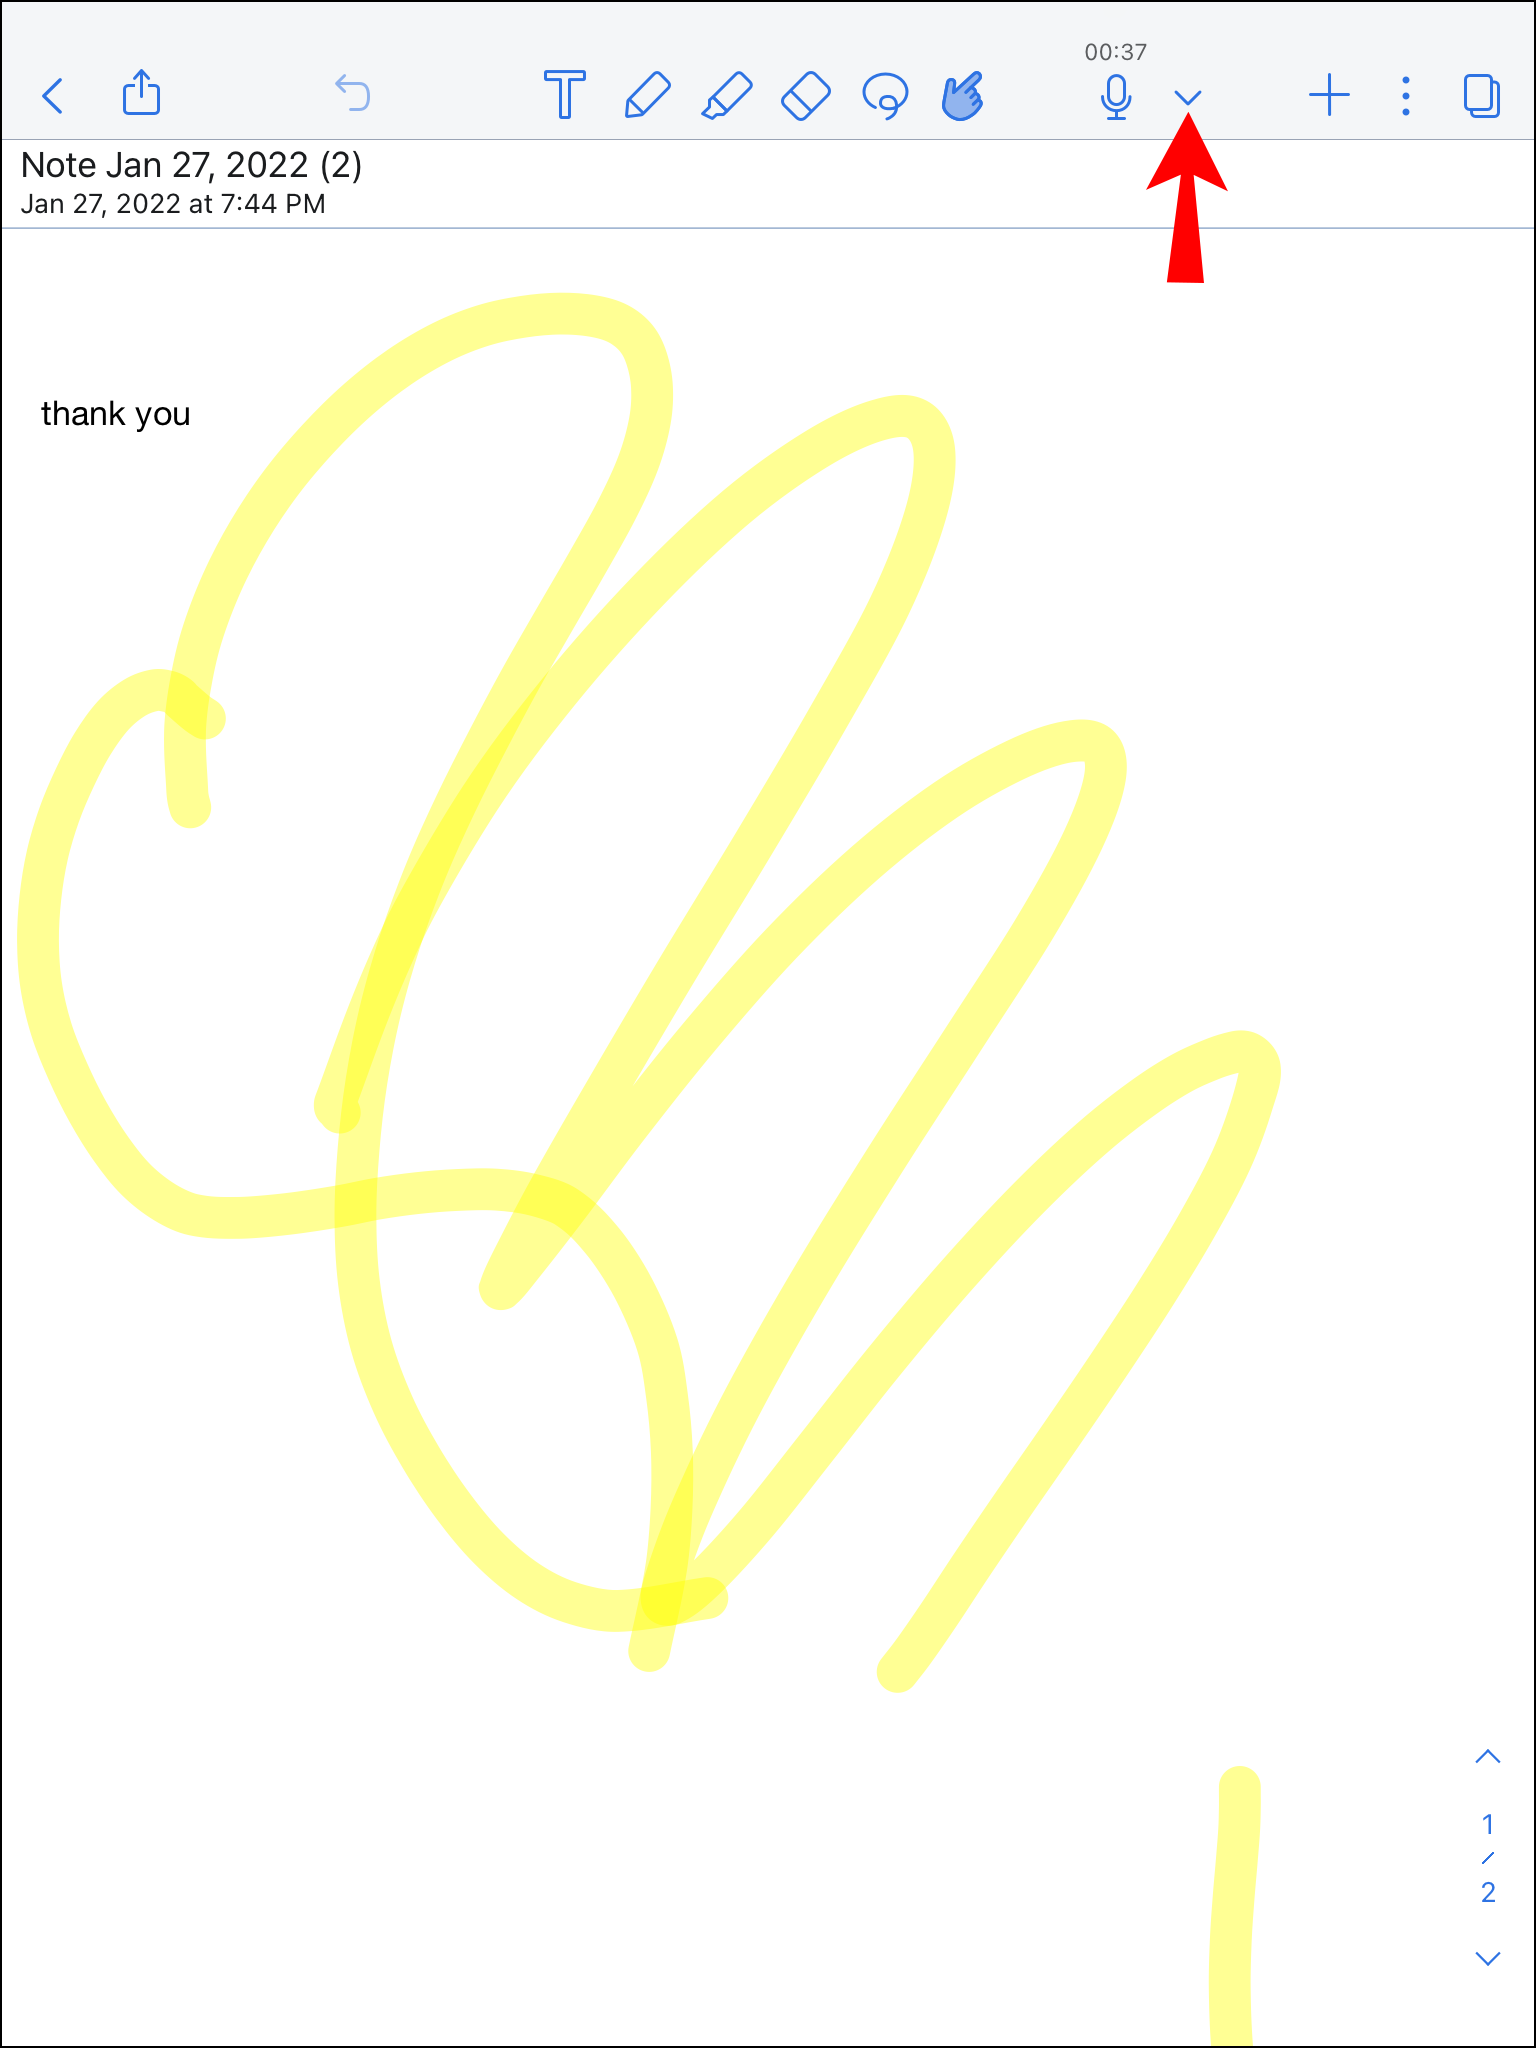
- Go to the microphone icon in the upper right corner of your screen.
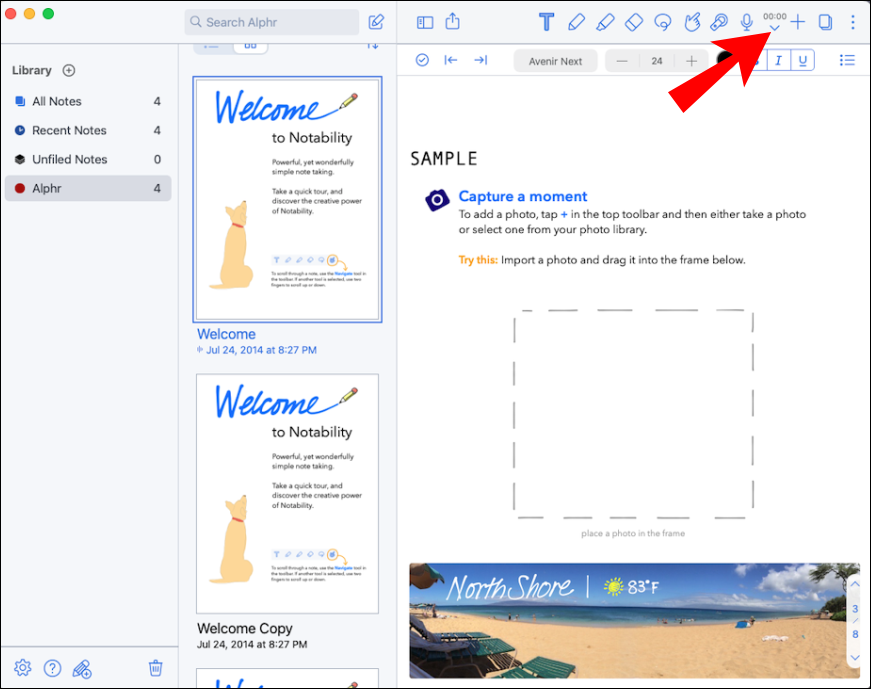
- Tap on the downward arrow next to the microphone
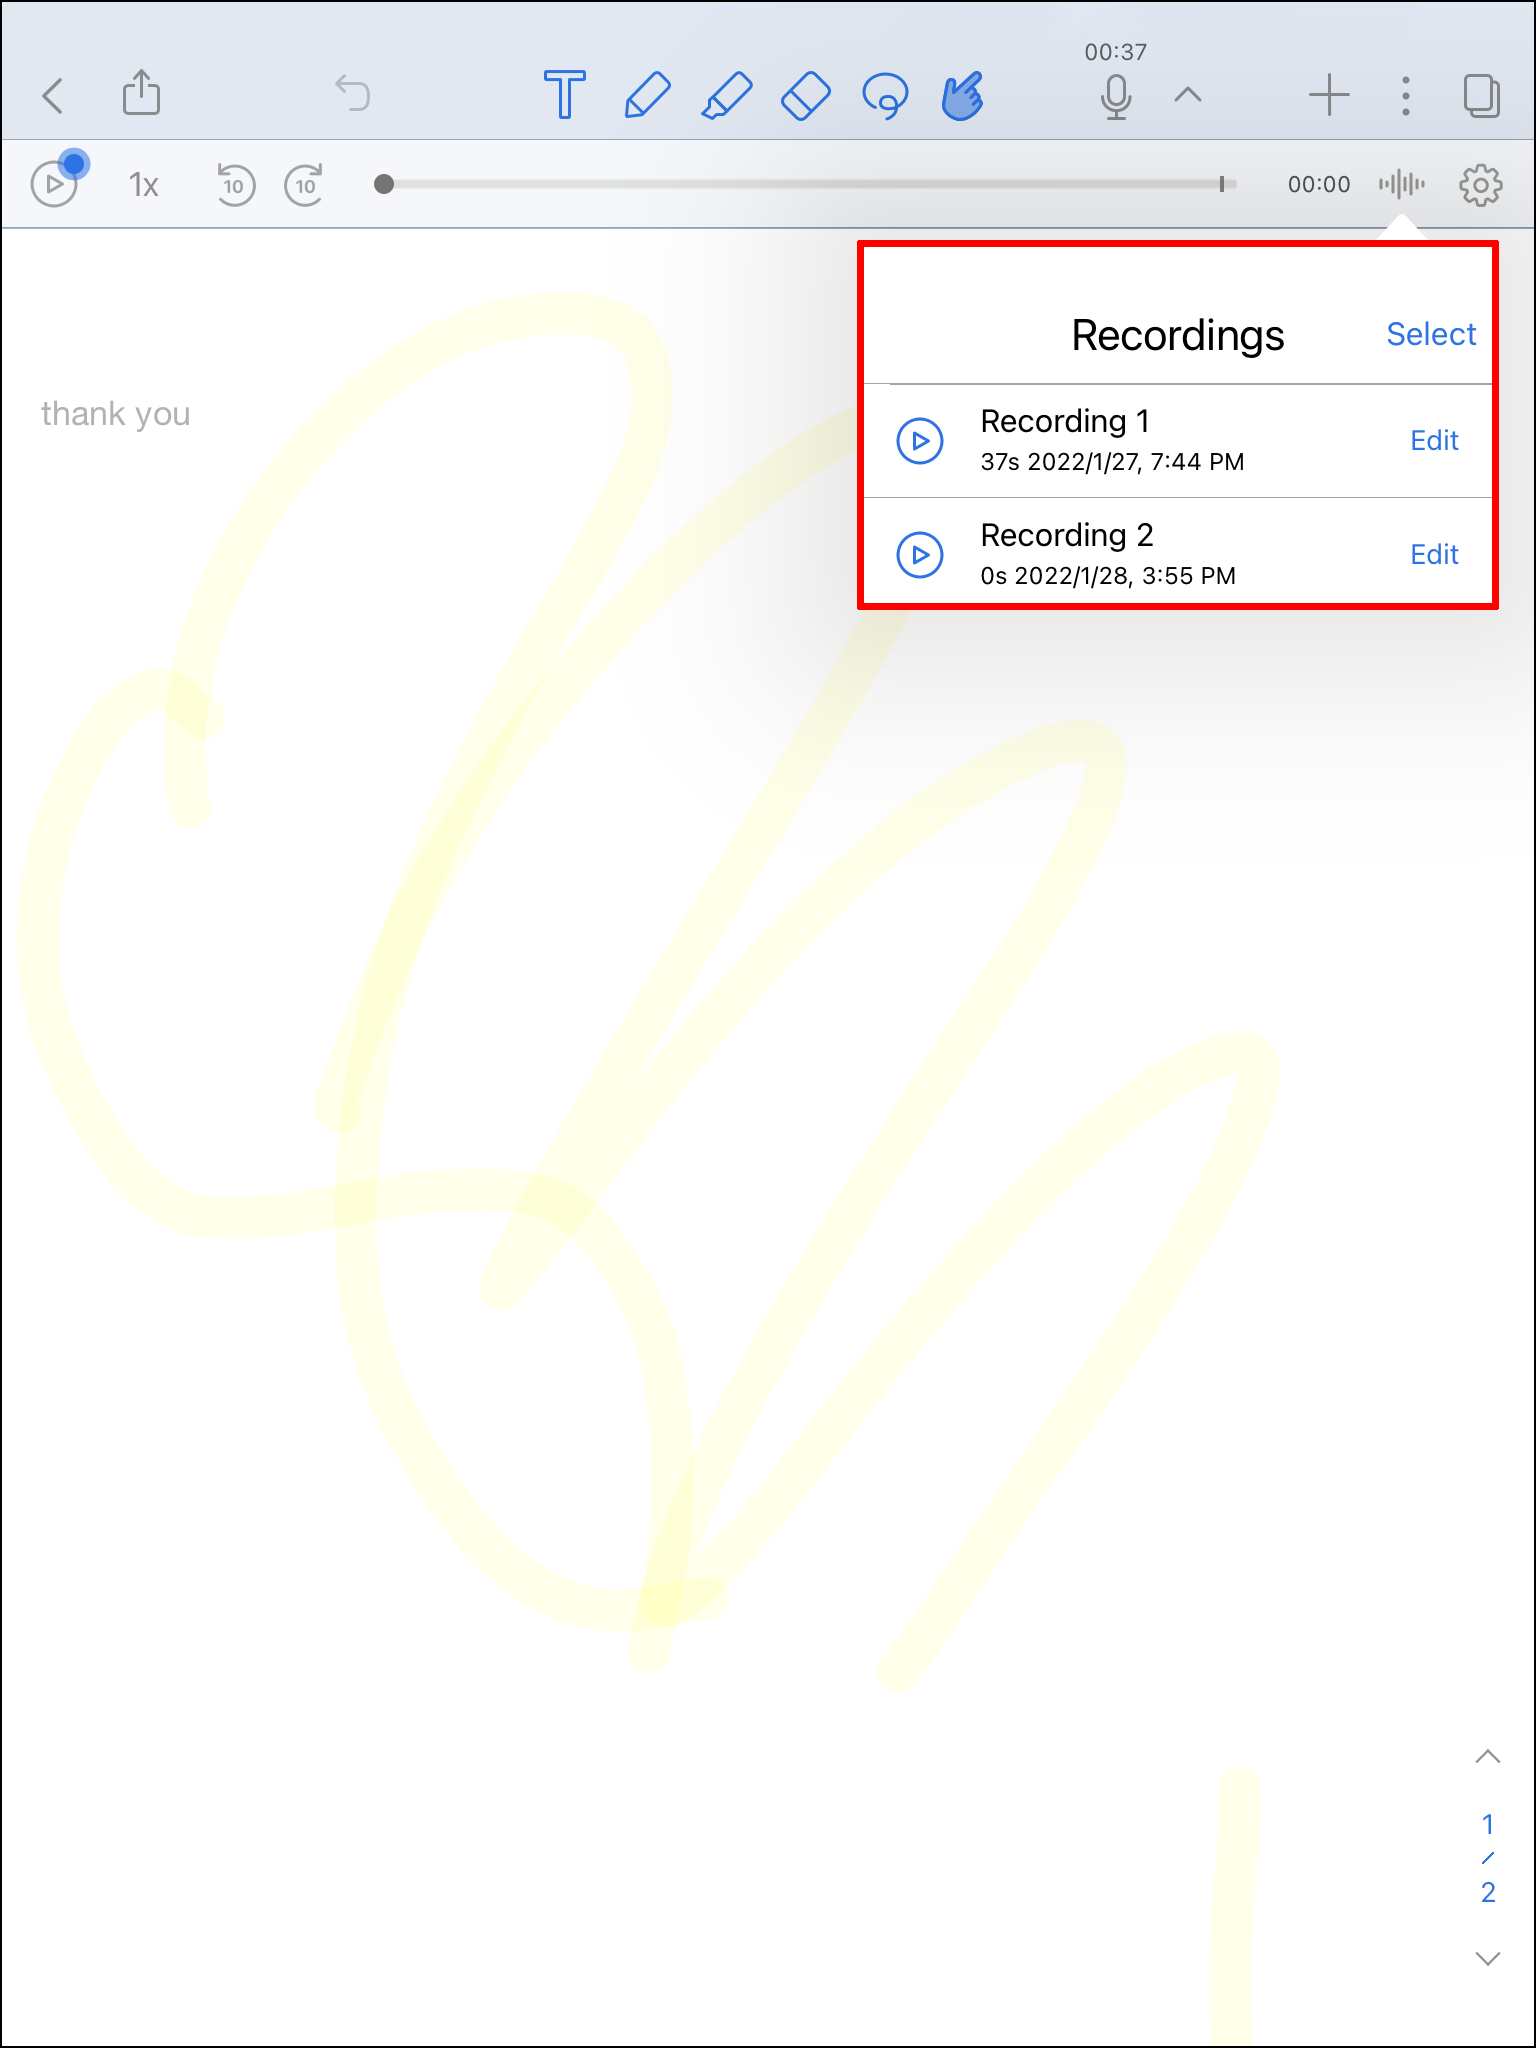
- Go to the recording icon on your menu. This will open the list of all the recordings you have made in that file.
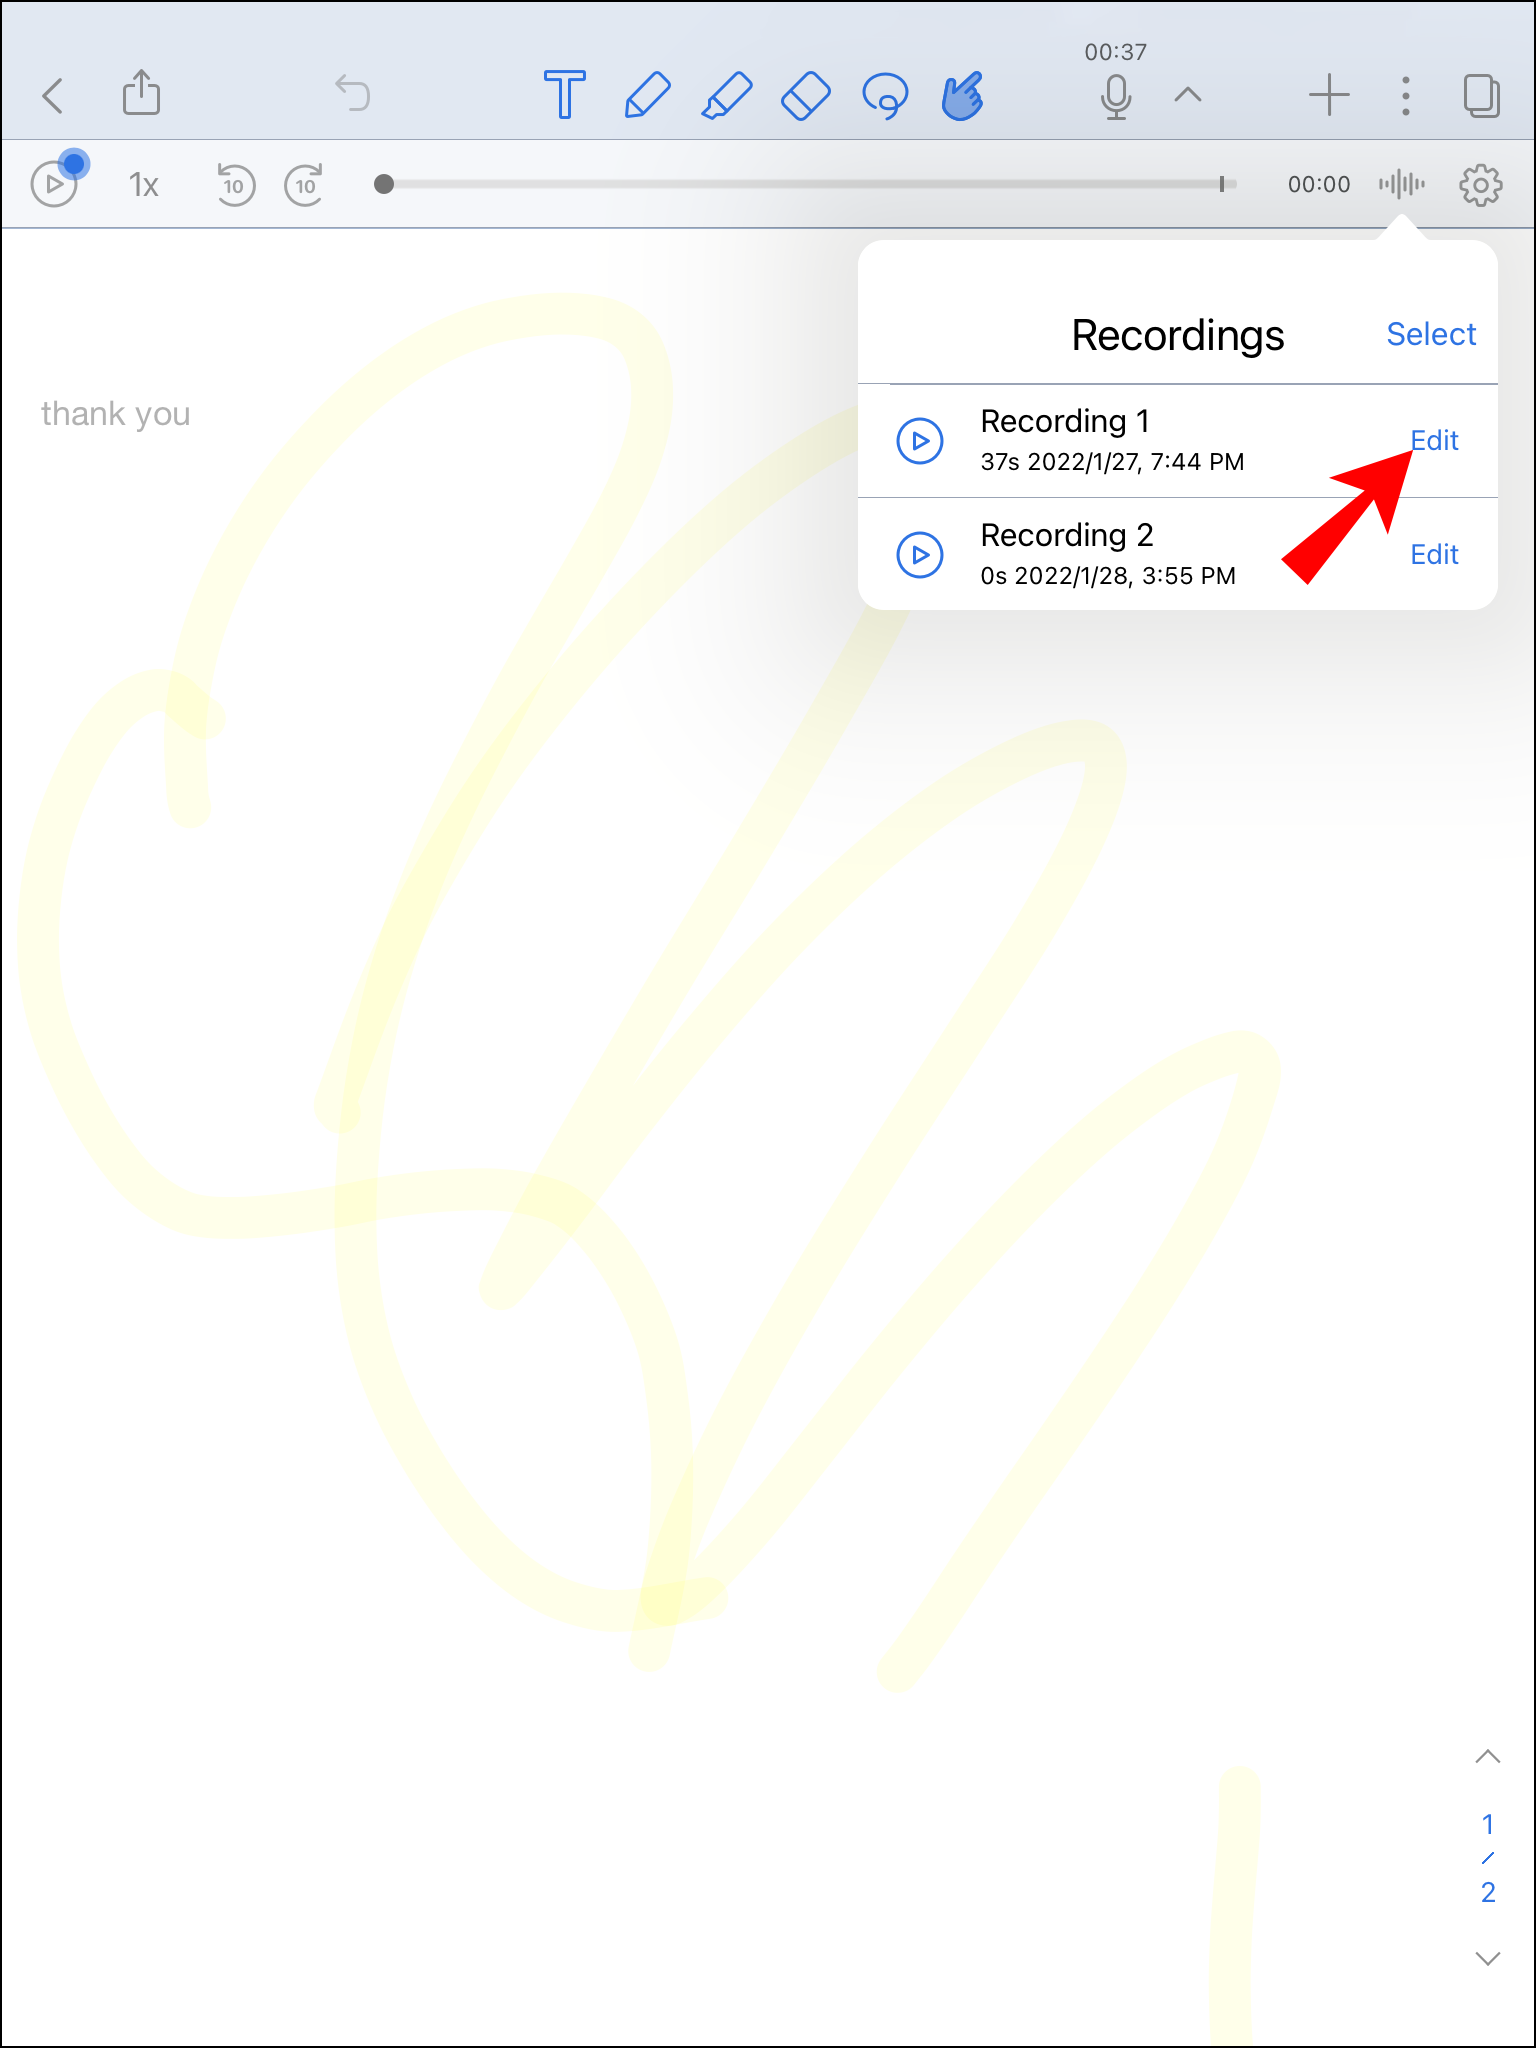
- Locate the recording you want to delete and tap on “Edit.”
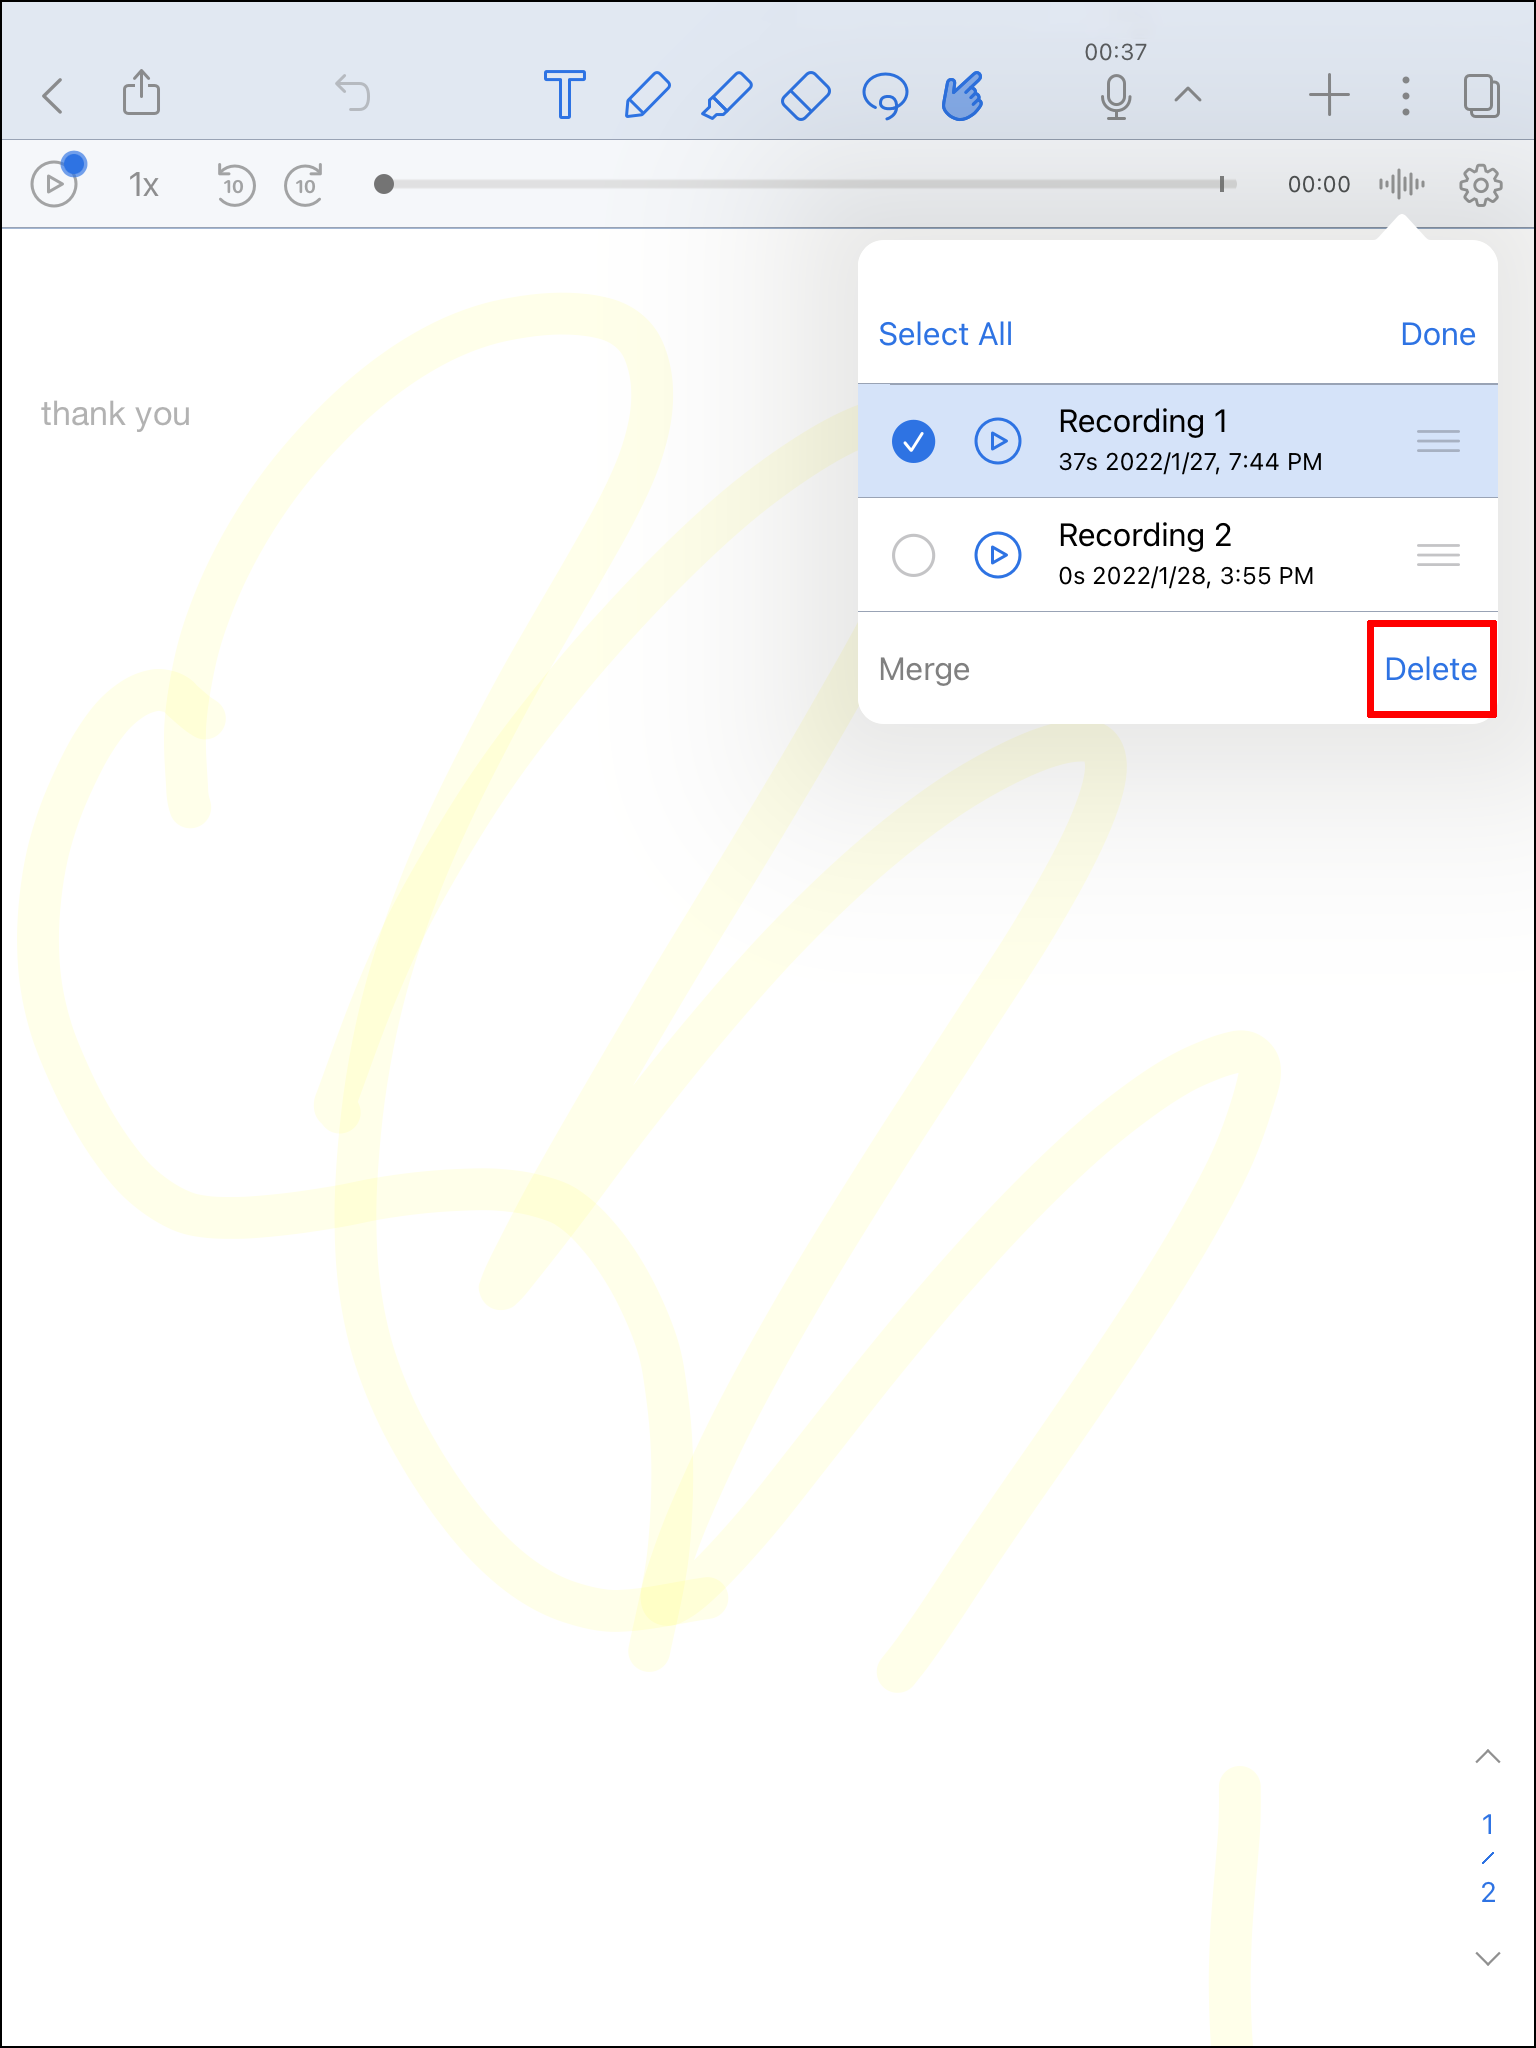
- Select the “Delete” button next to the note.

That’s all there is to it. While these steps tell you how to delete an audio recording on Notability on an iPad, the same instructions apply to the iPhone app. Once you delete an audio recording on Notability, you won’t be able to restore it.
Notability lets you do so many other things with your recordings. For example, you can merge multiple recordings into one, rewind them, split them into half, share them, export them, and much more.
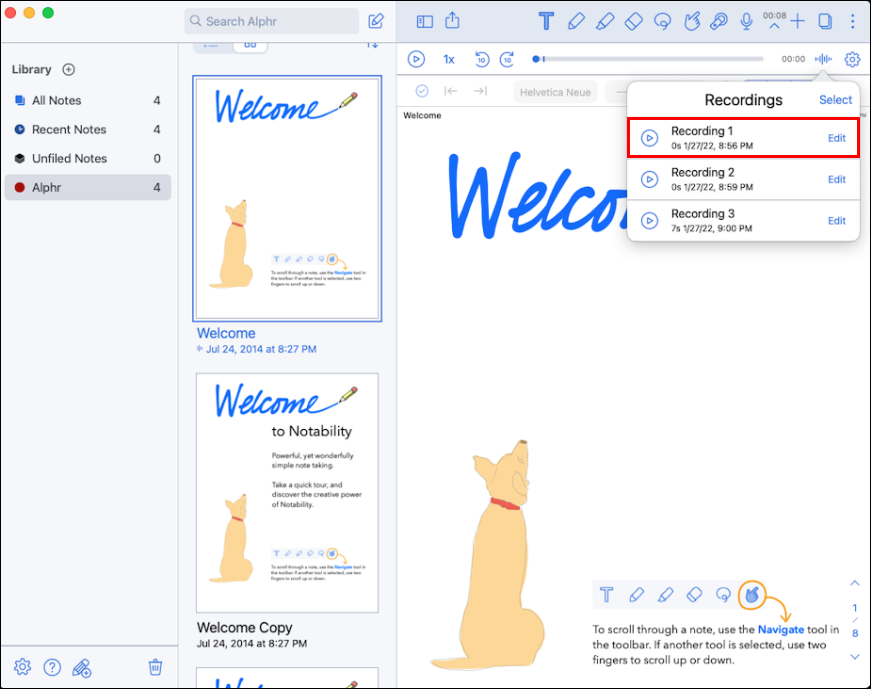
Notability – How to Delete a Recording on a Mac
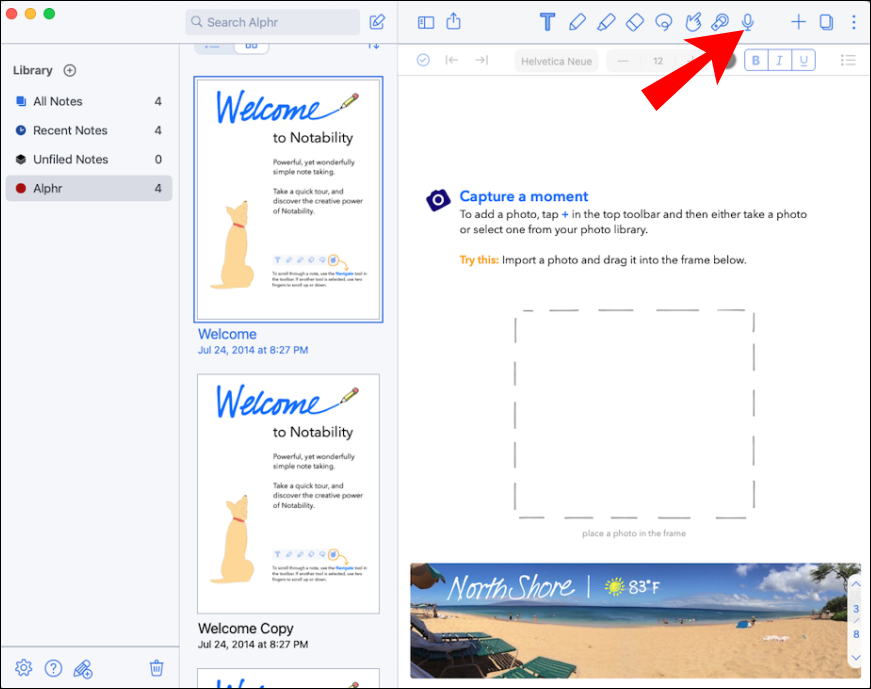
As mentioned before, Notability is designed for iPad use. However, you can use this note-taking app on your Mac as well. What’s more, the audio recording feature is also available on the desktop app. To enable this feature, simply click on the microphone icon in the upper-right corner of the screen when you’re writing something in the app.
You can also delete recordings you made within the app. Here’s how it’s done on a Mac:
- Launch the Notability desktop app.
- Open the note that stores the recording you want to delete.
- Navigate to the microphone icon on the top menu.
- Click on the downward arrow next to the microphone icon.
- Go to the recording icon on the right side.
- Select the audio recording you want to delete.
- Click on “Edit.”
- Choose the “Delete” option.


You’ve successfully deleted your Notability audio recording on your Mac.
Declutter Your Notability Storage
Notability is a handy app for taking notes, making annotations, drawing, and recording. However, once you’re done with the note, there’s no reason to clutter your storage with long recordings. To make more room for new recordings, you can easily delete your old audio recordings from the app.
Have you ever deleted an audio recording in Notability before? Did you use the same method explained in the guide? Let us know in the comments section below.
Disclaimer: Some pages on this site may include an affiliate link. This does not effect our editorial in any way.