It’s not often that an operating system emerges almost fully formed, but that’s what happened in January 2007 with Windows Home Server (WHS). Though work on codename “Q” or “Quattro” began in 2004, it was another three years before Bill Gates referred to it it in his CES keynote address.
Suddenly, we were presented with a domestic OS that promised not only to manage network storage, but also to automatically back up all of the data on all of our home PCs. Need more storage space? No problem, just add another hard drive to the storage pool. No fuss over drive letters or moving data from one disk to another – it’s handled automatically. What’s more, you could gain access to all your home files remotely via a web browser and even turn the device into a web server, hosting photo galleries for friends to view.
Now, less than a year after WHS first appeared on the radar, it’s ready to go. WHS will generally come pre-installed on a NAS-like device from an OEM manufacturer or system builder, but it’s also available to buy in a system builder version.
On a self-build WHS system, the installation of the server software itself is straightforward – far more like Vista’s hands-off approach than the complexities of Server 2003, and reasonably quick, too. In this feature, we’re going to explore the features and benefits of a completed WHS setup, and how to manage and set up the software for your home network.
Connector and console
Strictly speaking, WHS is a superset of Windows Server 2003, although wholesale changes have been made. New services, as well as a new front end, have been added to make it more suited to domestic use and, much to the chagrin of enthusiasts, many of the more complex elements have been removed, most notably Active Directory support. As far as the average user is concerned, though, he can forget all of that. All the arcane admin tools are safely hidden away, with practically everything you’ll need exposed in just two elements – the client-based Connector and the server-based Console.
Once it’s connected to the network, you’ll need to set up user accounts for each Windows user and then install the Home Server Connector on each client: the installer can be found on the server, or run from the bundled CD.
Once installed, the Connector administers scheduled backups and gives sundry warnings about network health, both on the PC itself and other basic issues on the network, such as a failed backup or disabled Windows firewall. It’s also how you get to the other main component – the Console.
For the most part, WHS runs as a headless device – no monitor, keyboard or mouse – and you won’t be able to connect these peripherals to most OEM devices. Instead, administration is carried out via the Home Server Console, either on a client machine or over a Remote Desktop connection to the server. The latter isn’t advised, however, for the simple reason that launching a Remote Desktop session brings up a warning as to the dangers of exploratory fiddling.
 WHS offers all the NAS features you’d expect, plus a lot more you wouldn’t.
The first of the Console’s four tabs, Computers and Backup, lists the computers registered on the network, as well as their operating system (XP and Vista are supported) and their backup status. You can also view, start or administer manual and automatic system backups from here, or remove clients.
User Accounts provides control over creating new users, and their local and remote access credentials. Despite Microsoft’s fondness for such things, there’s no admin/restricted user paradigm, although there’s a guest account, which can be disabled.
The Shared Folders tab shows the space used by each folder, its duplication setting and its status – essentially whether the duplication has been successful. This is the place to create, delete or rename folders, as well as restrict permissions on a user-by-user basis. The nature of the disk structure means that using Windows Explorer to administer folders on WHS itself is fraught with pitfalls, unless you stick to the \\SERVER network path.
You can also call up a history graph for each folder, plotting space used over time. Clicking on the Server Storage tab shows the physical hard disks installed, with their capacity and status, along with options to remove, add or repair any disks listed. A pie chart helpfully shows the space division between shared folders, backup and duplicated folders.
Drive Extender
Some of the new services added to WHS are unique among its Windows brethren. Drive Extender, for example, enables all the hard disks in the device to be lumped into one storage pool. As such, there are no drive letters visible from the client – just folders. Although that sounds rather like RAID, it isn’t, since the disks remain addressable through Explorer when working on the server locally – you do this at your peril, however.
This system is also dynamic – add a disk and it will be shown in Home Server as a “non-storage drive” until you run a wizard, at which point it’s formatted and added to the pool. Similarly, you can use a remove disk wizard, which will attempt to rearrange the data to make it redundant, at which point you’ll then be able to physically remove or replace it.
You can use this process to add as many internal or external USB/FireWire drives as you like. However, because they’re formatted when they’re added to the storage pool, you’ll need temporary storage even if you’re simply migrating data. Once removed, you can’t simply reattach the drive to the pool without formatting it, either, or read it from a standard Windows environment.
Folder duplication
Although terabyte-capacity hard disks are now available – arguably sufficient for most storage needs – it’s much better to use two or more physical disks in a WHS, thanks to its Folder Duplication feature. This ensures that any given folder is copied to at least two separate spindles, protecting it from the physical failure of either. In an ideal world, each folder would have this enabled, but you can disable it if you have capacity restraints. When out of space to fully duplicate, the health of the folder will be shown as “failing”, although this will automatically correct itself if capacity returns.
Backup
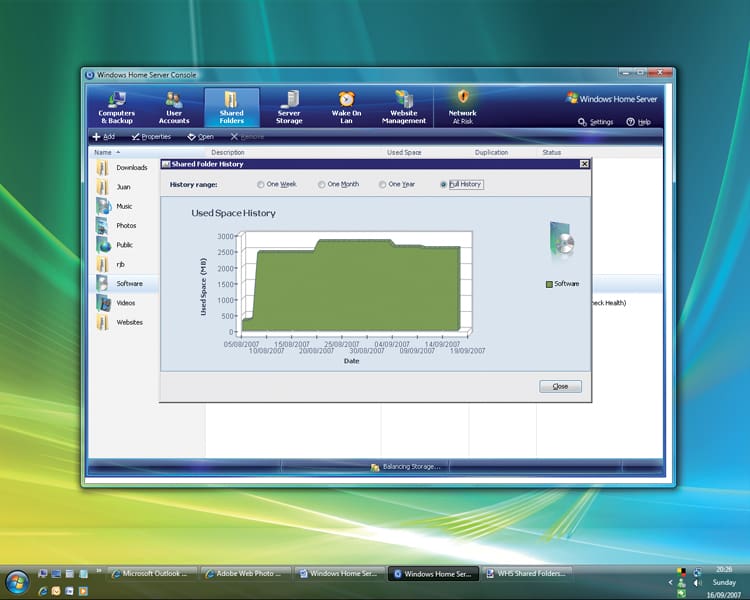 You can map your storage history over weeks, months and years.
Arguably, the most useful feature of WHS is its ability to automatically back up all the PCs on your network. Simply specify the time frame (by default between 12am and 6am), and the entire PC will be imaged to the server using a “shadow copy”, so you can carry on working.
Cunningly, the imaging works on a low-level basis – right down to the hard disk cluster, in fact. WHS stores each cluster value only once, simply mapping where the same cluster is found elsewhere. In practice, when that’s applied to several PCs all running the same OS or sharing similar files, the space saving becomes significant – we’ve seen Home Server store well over a terabyte of backups in 250GB. Subsequent backups involve only the clusters that have changed and are significantly quicker.
Backups are managed automatically, but you can manually delete them, set how many are kept and for how long, as well as perform a manual “cleanup” if you run short on space. To return a PC to an earlier state, boot it from the Restore CD and you’ll be walked through the re-imaging process, or you can extract single files or folders from the Console.
It isn’t perfect: there’s no easy way of moving or burning backup images, and specifying which folders to leave out of the backup is unnecessarily tedious. But it’s a far better backup regime than most people have, and named manual backups are also useful for migrating to a new hard disk, setting up a master image or trialling new software, for example.
 WHS has a UPnP server built in for streaming media across the network.
As with any single-location setup, we’d be nervous of crucial data being kept on a WHS alone – folder duplicated or not. To be on the safe side, we’d also use something such as Microsoft’s SyncToy to back up to an external source – and make sure you use the network rather than local paths, or your data won’t be copied properly.
Remote access
Given the potential complexity of configuring your PCs for remote access, it’s surprising just how far WHS goes with this feature. But it also makes a good job of it. The Remote Access area of the settings dialog looks simple enough, with its Web Sites, Router and Domain Name sections, but there’s much more going on beneath the surface.
For a start, WHS will try to reconfigure your router using UPnP to open the ports that enable web-based access to your files, plus Remote Desktop connections TCP ports 80, 443, 4125 and 3389. If that fails, it will then try to guide you through the process manually: good luck with the support calls on that one.
In a nice touch, it also offers you the option of a domain name – you get a free xxx.homeserver.com URL with each copy of WHS, administered by Windows Live Domains and tied in with a Windows Live account. WHS will also handle the dynamic DNS for you, so you don’t even need to discover your WAN IP address.
Assuming the average user can get all this working, it’s impressive: navigating to your domain name, you’ll be presented with a login screen (after an alarming certificate warning), where you’ll then go through to a web page offering access to your shared folders or computers.
Go to Shared Folders and you can search, rename, delete, upload or download files as you wish on an interface similar to Hotmail. It’s basic, but fine for the occasional transfer. You can only upload a single file at a time, but any downloaded folders are neatly zipped first.
Going to the Computers tab shows the status of any connected PCs and lets you initiate a Remote Desktop connection to either of these or the Console itself, with the same facilities you’d get on the local network.
Media streaming
This is one of the least developed areas of Home Server – the Music, Video and Photos folders can be shared with UPnP-compatible media streamers such as the Xbox 360, but it doesn’t do much that’s unique. You can’t stream remotely, for example, although there’s nothing to stop you installing Orb (www.orb.com) or the excellent (and free) WebGuide (www.asciiexpress.com). The other issue to bear in mind is that a UPnP client will only work if you can supply WHS login details, something that not every device will permit.
The future
All in all, it’s a promising start for Home Server. But where’s the product heading in the future? Home Server add-ins are a potential sleeping giant, used to bring additional features to both the back end and/or the Console. Installed from the settings dialog, there are a number of these in the wild already, ranging from relatively simple Wake-on LAN facilities, to more sophisticated tools for running any program as a service, DHCP serving and web server admin tools. These are easy to add and remove, and it’s likely that they’ll come pre-installed by vendors in future.
Add-ins are one way of expanding the feature set, but there are also plenty of plans being rumoured for the next version. Many of these focus on media handling, since this first version falls well short of being the true media hub it initially appears. There’s no explicit integration with Windows Media Center, for example, and while it’s possible to hack the Registry into recording to a network share, it isn’t at all pretty – a shame given the potential.
It’s also a pig to try to move any User folders across from either XP or Vista, the latter kick-starting the appalling Sync Center, and this would need work from both the Windows and WHS teams to put right. Finally, it’s almost inevitable that Domain-level control features will creep into WHS – being able to prevent internet access on PCs without the firewall switched on, for example, or centrally administered Windows Updates. Given the ambitious aims of the first version, and the response of the enthusiast community, it’s certainly one to watch – now we just need to see how it fares in the wider world.
Disclaimer: Some pages on this site may include an affiliate link. This does not effect our editorial in any way.