Stop motion is a fun way to create animated videos. At its simplest, all you need to do to create a stop-motion clip is take a photo of a scene, slightly move one or more elements, then take another photo, and so on. When viewed in rapid succession, the series of photos becomes a film, showing the items moving around on their own.
It’s a technique that dates back to the 19th century, but modern technology easier than ever to shoot a stop motion.
You can create your first stop-motion video using nothing more than a digital camera and a copy of Microsoft Windows Movie Maker (available for free as part of the Windows Live Essentials pack.
Before you start taking your photos, it’s a good idea to work out a storyboard in advance. Think about composition too: life is much easier if you can fit your whole animation into one static scene, since it’s very difficult to pan and zoom smoothly when you’re shooting one frame at a time.
What you’ll need
Here’s what you’ll need for this project:
– a laptop/PC running Windows
– a compact camera, DSLR or webcam
– video-editing software
For the most professional-looking results, we recommend that you use a stand or tripod to hold the camera precisely in place. Ideally, you might even use a remote shutter release, so that the camera’s positioning can’t be knocked off even slightly by repeatedly pressing the shutter button.
Once you’ve taken your pictures, all you have to do is drag them into Movie Maker and set the playback rate to something suitable. For example, to make your animation play back at 10fps, select all the photos in your project (press Ctrl+A), then go to Video Tools | Edit and set the duration to 0.1 second. Naturally you won’t want to apply any transitions – the impression you want to give is that all your frames flow seamlessly together.
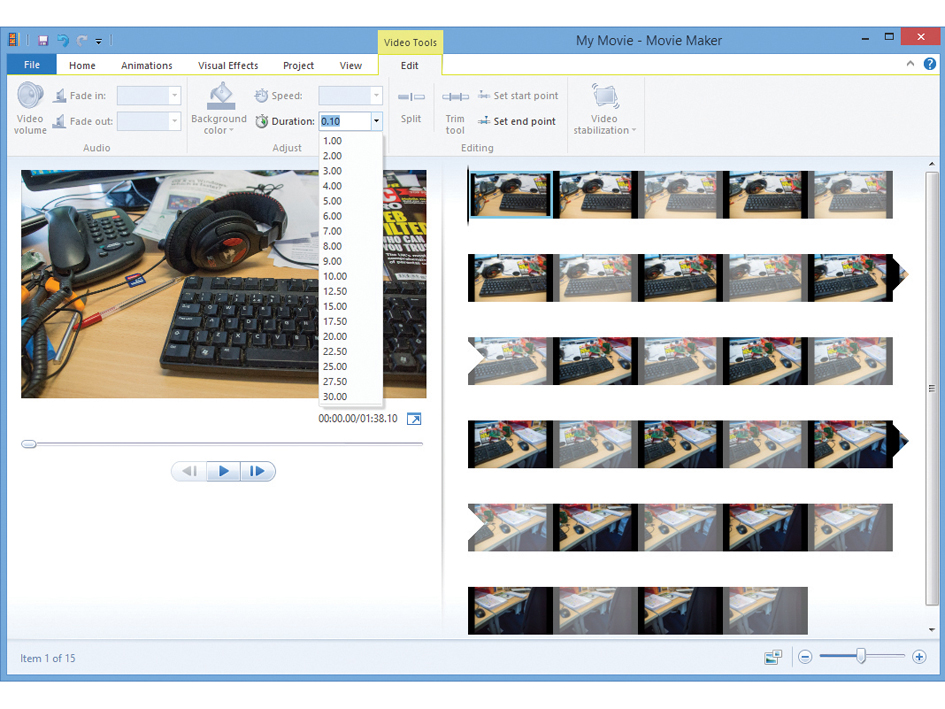
Hit the Play button in the preview window on the left to see your new animation: if some parts play too quickly, you can duplicate a frame by selecting it and hitting Ctrl+C followed by Ctrl+V. If a part is running too slowly, try dropping a frame or two. You can also add narration or music using the tools under the Home tab.
Dedicated software
If you’re ready to be more ambitious, there are several commercial video-editing packages that offer stop-motion-specific tools. One powerful and affordable option is Corel VideoStudio Pro X6. It costs £54 to download, but you can take advantage of a free 30-day trial that should give you more than enough time to try creating your first project.
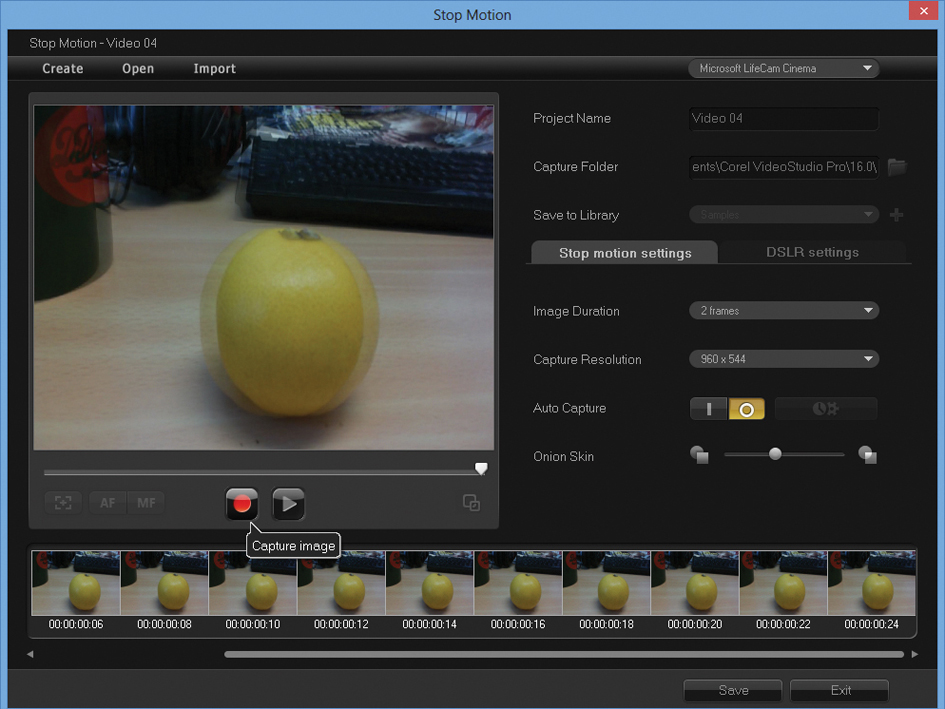
VideoStudio’s stop-motion module greatly simplifies the process of capturing footage. Hook up a USB camera device – such as a regular webcam – and VideoStudio Pro will show you a live preview of the scene, which you can set up just as you wish.
When you’re happy, click the red Record button to capture the frame; then adjust the scene, and repeat as many times as you like to create your animation. For maximum quality, it’s also possible to capture frames from a connected DSLR – although at present only a selection of Canon models are supported.
To make life easier, VideoStudio Pro X6 offers an auto-capture mode, wherein the shutter can be set to fire once every five seconds – for example – so you can set up and capture progressive frames without having to repeatedly go back to the PC and press the Record button each time.
It’s possible to push the capture interval up to minutes or hours, so you can also capture time-lapse videos of slow processes, such as the sun crossing the sky or a sunflower growing.
Perhaps the most useful feature for stop-motion capture is “onion skinning”, which optionally superimposes a translucent image of your last captured frame onto the live view from the camera. This lets you see exactly what’s changed between the two scenes, making it easier to set up smooth and consistent movements. It can also be a godsend if you accidentally move your camera halfway through a capture session and need to put it back in exactly the right place.
When you’re done, you can preview your animation in the Stop Motion window: if things are moving too quickly or slowly, you can use the Image Duration dropdown to set the display duration for each of your captured frames, from one to 30 frames. You can also optionally delete and reorder frames.
When you save your work and exit the Stop Motion module, all the frames captured are automatically compiled into a single sequence. You can then edit this on the main timeline like any other video clip – or, perhaps, add music and titles. When you’re happy with your work, VideoStudio Pro X6’s Share module lets you upload your work directly to YouTube, Facebook, Vimeo or Flickr.
Click here to return to the main 21 tech projects page
Disclaimer: Some pages on this site may include an affiliate link. This does not effect our editorial in any way.