Minecraft has it all: adventuring for the intrepid explorer, crafting for the artisan, and battles for the warrior. The game also has different biomes, ruins, and realms to explore. What more can a Minecraft player ask for?
The answer is “bees.”
The 1.05 update introduced a new element to your familiar Minecraft world that adds another resource and a whole host of possibilities for the game. Not only are bees a cute addition to an already cute landscape, but they also add honey to the Minecraft world.
Keep reading to discover where to find bees in the game as well as how to harvest honey safely, and why you’d need this resource.
How to Make Honey and Honeycombs (Safely)?
You’ve probably seen these cute little critters lingering around flora in different Minecraft biomes. They’re most plentiful in biomes that contain flowers like Sunflower Plains, Flower Forest, and Plains.
As in the real world, Minecraft bees carry pollen from flowers to their hives to make honey. Also like the real world, careless Minecraft adventurers may get stung if they venture too close to a bee. Bee stings inflict a poison effect that may make players think twice before approaching one again.
However, if you have your heart set on collecting honey from these wondrous new additions, there is a way to do it safely:
Method 1 – Use a Bee Nest
Finding a naturally spawned bee nest is your best bet when you first start. You can find them in birch or oak trees in different biomes like Plains, Sunflower Plains, or Flower Forest. If you can’t find a nest but see bees in the wild, you can simply follow it home.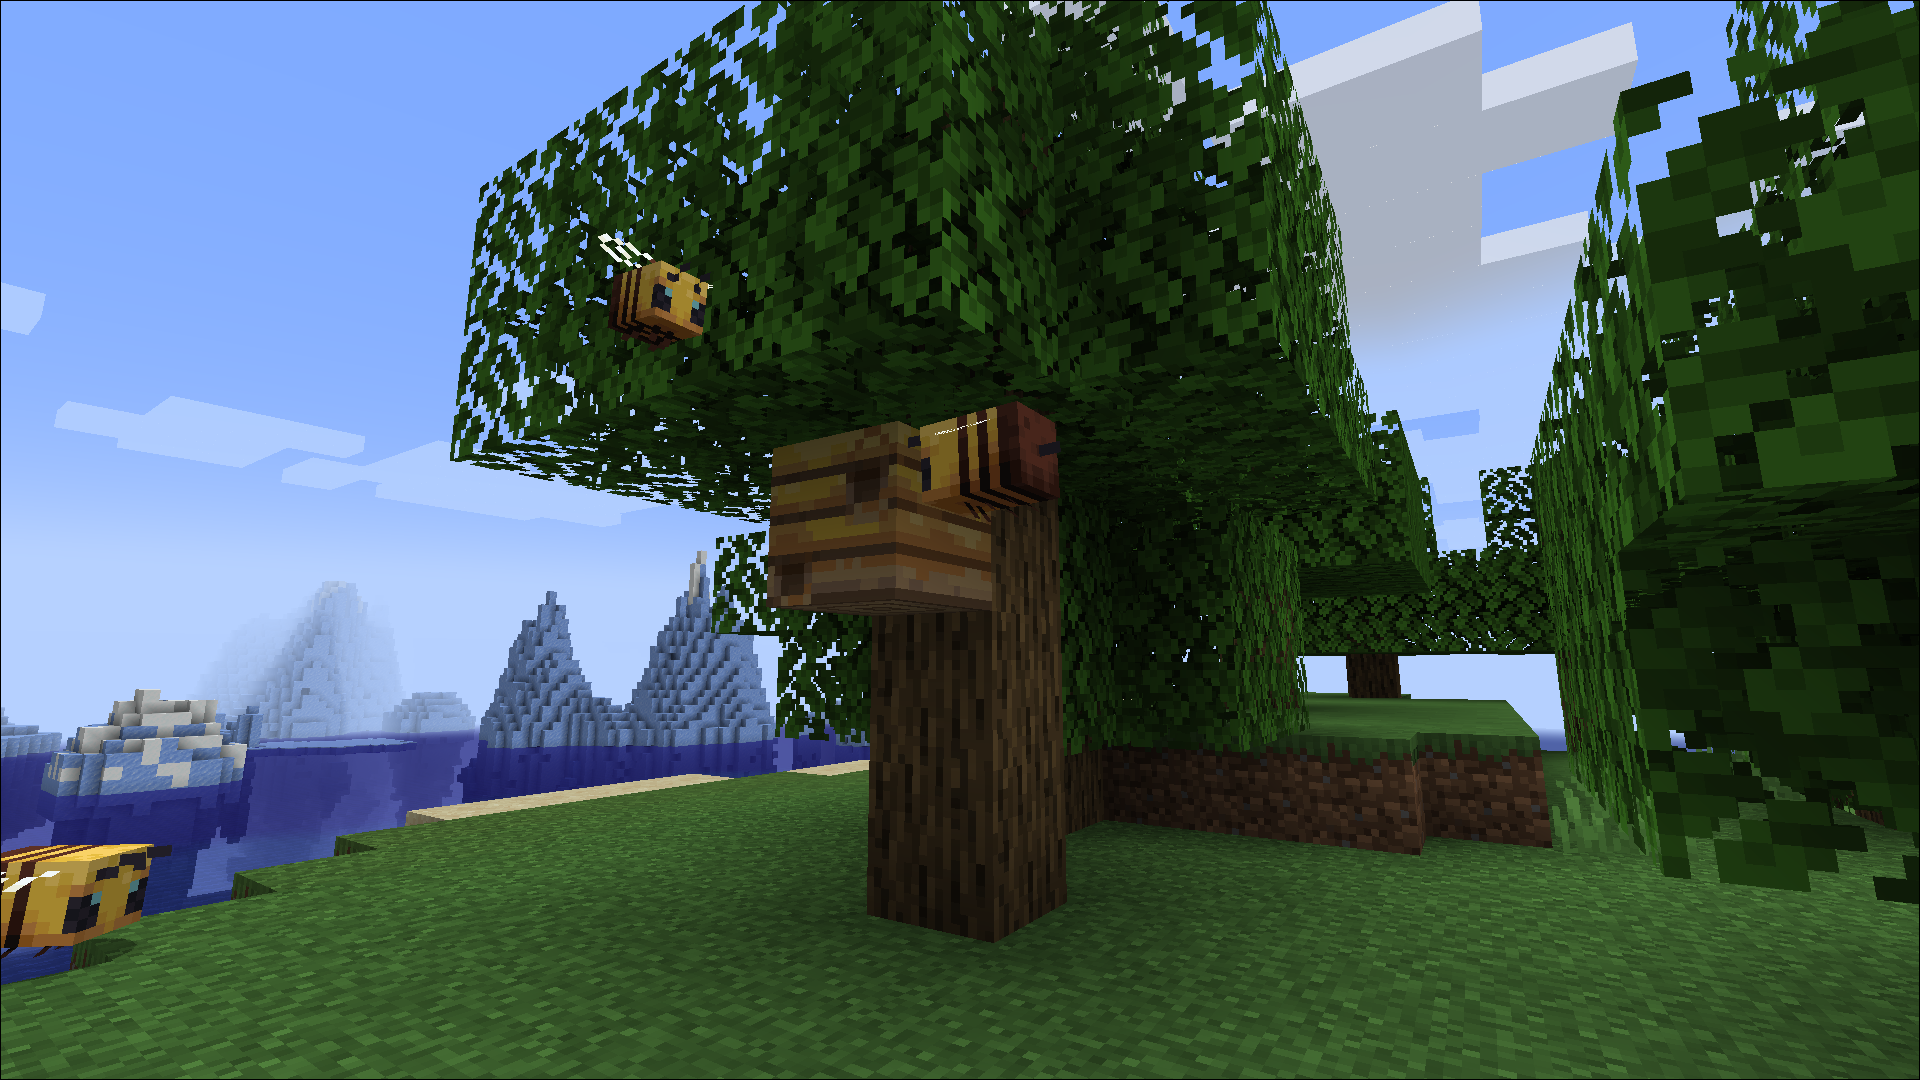
Remember to keep your distance, though. They’ll sting you and die if you try to take their nest without smoke. Not only will you be left with a poison effect, but the bee won’t drop anything useful if it dies this way.
Once you find a bee nest, you have two choices: leave it where it is or move it to another location.
Using a Bee Nest in the Wild
Many players choose to leave the nest where it is if it’s conveniently located. If you want to leave it where it is, follow the steps below to get honey:
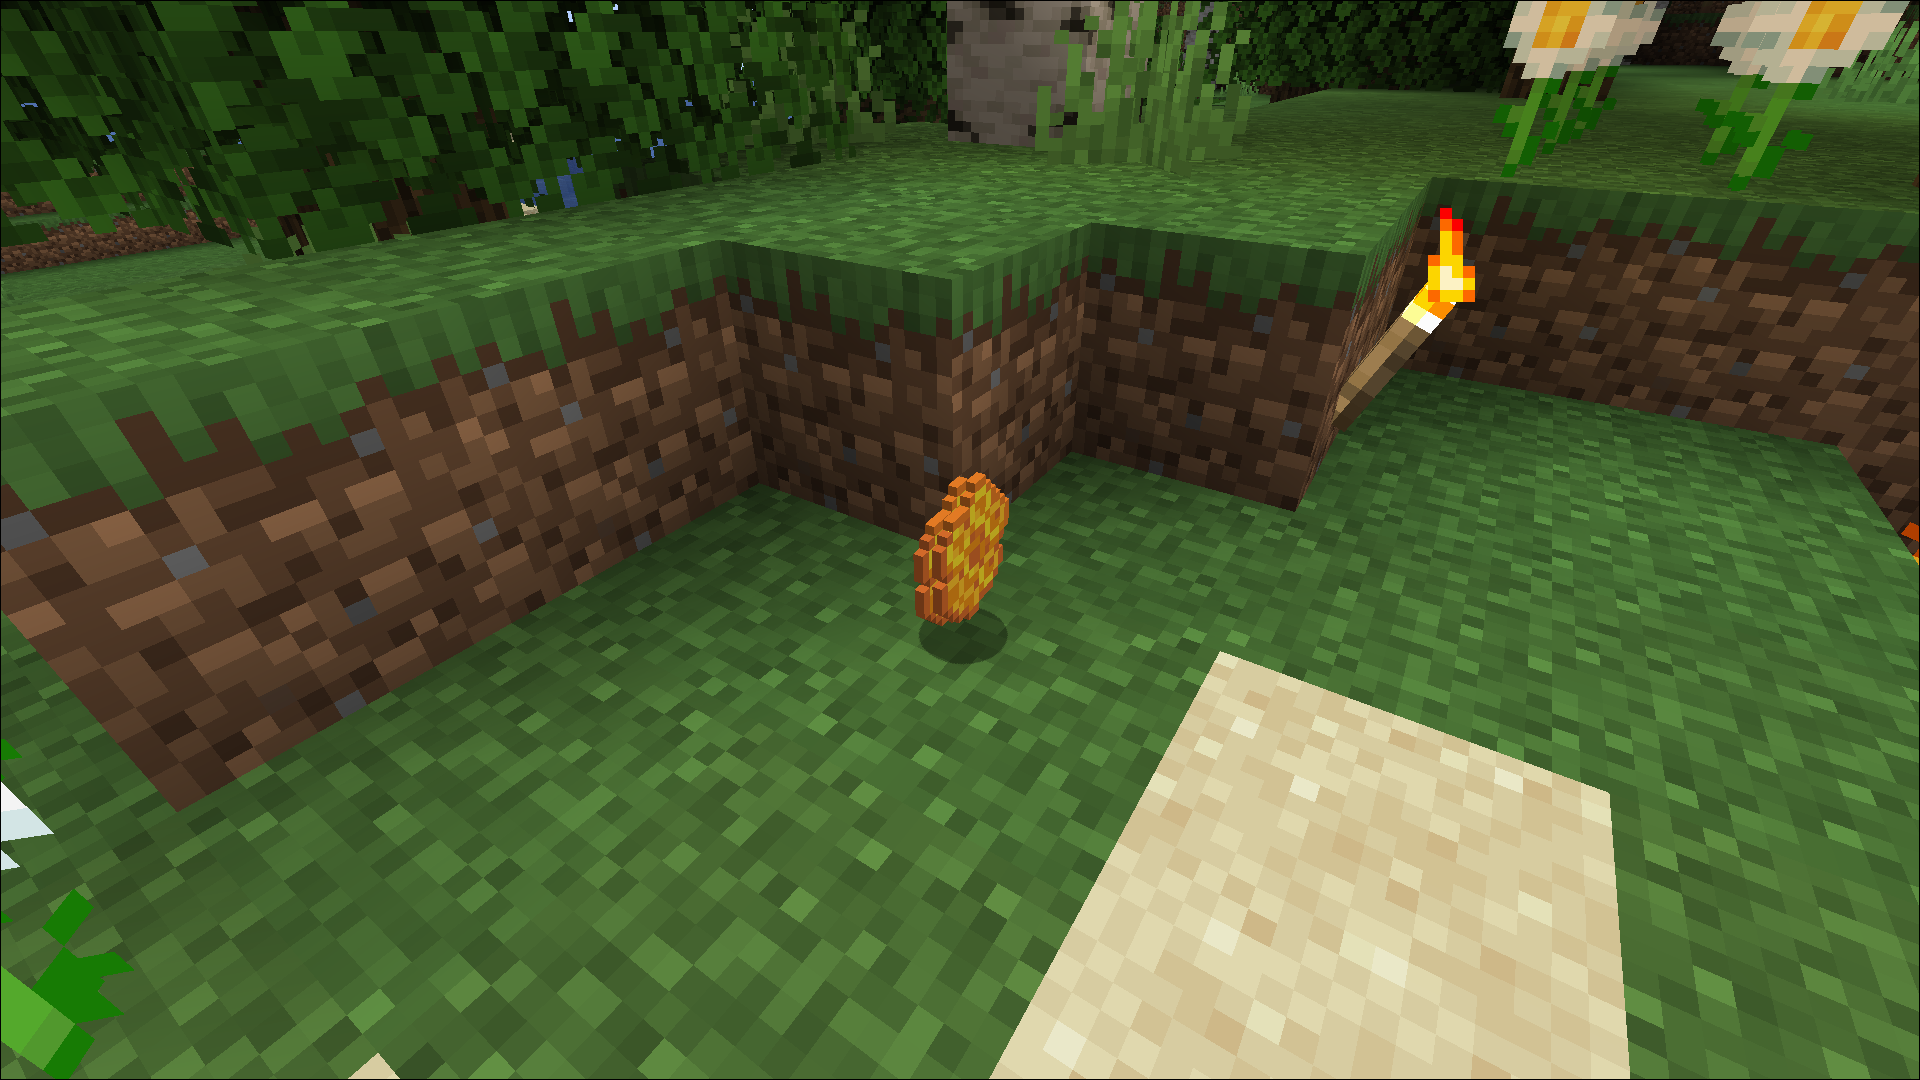
- Wait for the nest to reach Level 5. You’ll see honey dripping from the nest, and sometimes onto the floor.

- Place a campfire underneath the nest. Make sure there are no obstructions between the fire and the nest and placement is within five blocks underneath it. Using fire reduces the chances of aggravating the bees when you harvest the honey.
- Use a glass bottle on the nest to catch the honey.

If you run Minecraft Java Edition, you can also use a carpet on top of the campfire to reduce potential damage to the bees. Just make sure that you place the campfire a little below ground level.
Bringing a Bee Nest to Another Location
You can “break” a nest and transport it and its bees to another location using a tool with Silk Touch. When you use a Silk Touch enchanted tool, the bees stay inside the nest and don’t get aggravated. The best time to try this method is either when it’s raining or at night when bees return to their nest.
Once you place the nest in a more convenient location, you can follow the same steps listed above to harvest honey:
- Wait until the nest reaches Level 5 and you see honey dripping from the nest.
- Place a campfire underneath the nest.
- Use a glass bottle to harvest honey.
Using a tool without Silk Touch will break a bee nest, but it won’t drop anything. The bees surrounding the nest will also get angry and swarm the player, even if you have a campfire going.
Method 2 – Use a Beehive
Making a beehive closer to your home is a great way to ensure that you have honey and honeycombs at your fingertips, but it takes a bit of groundwork.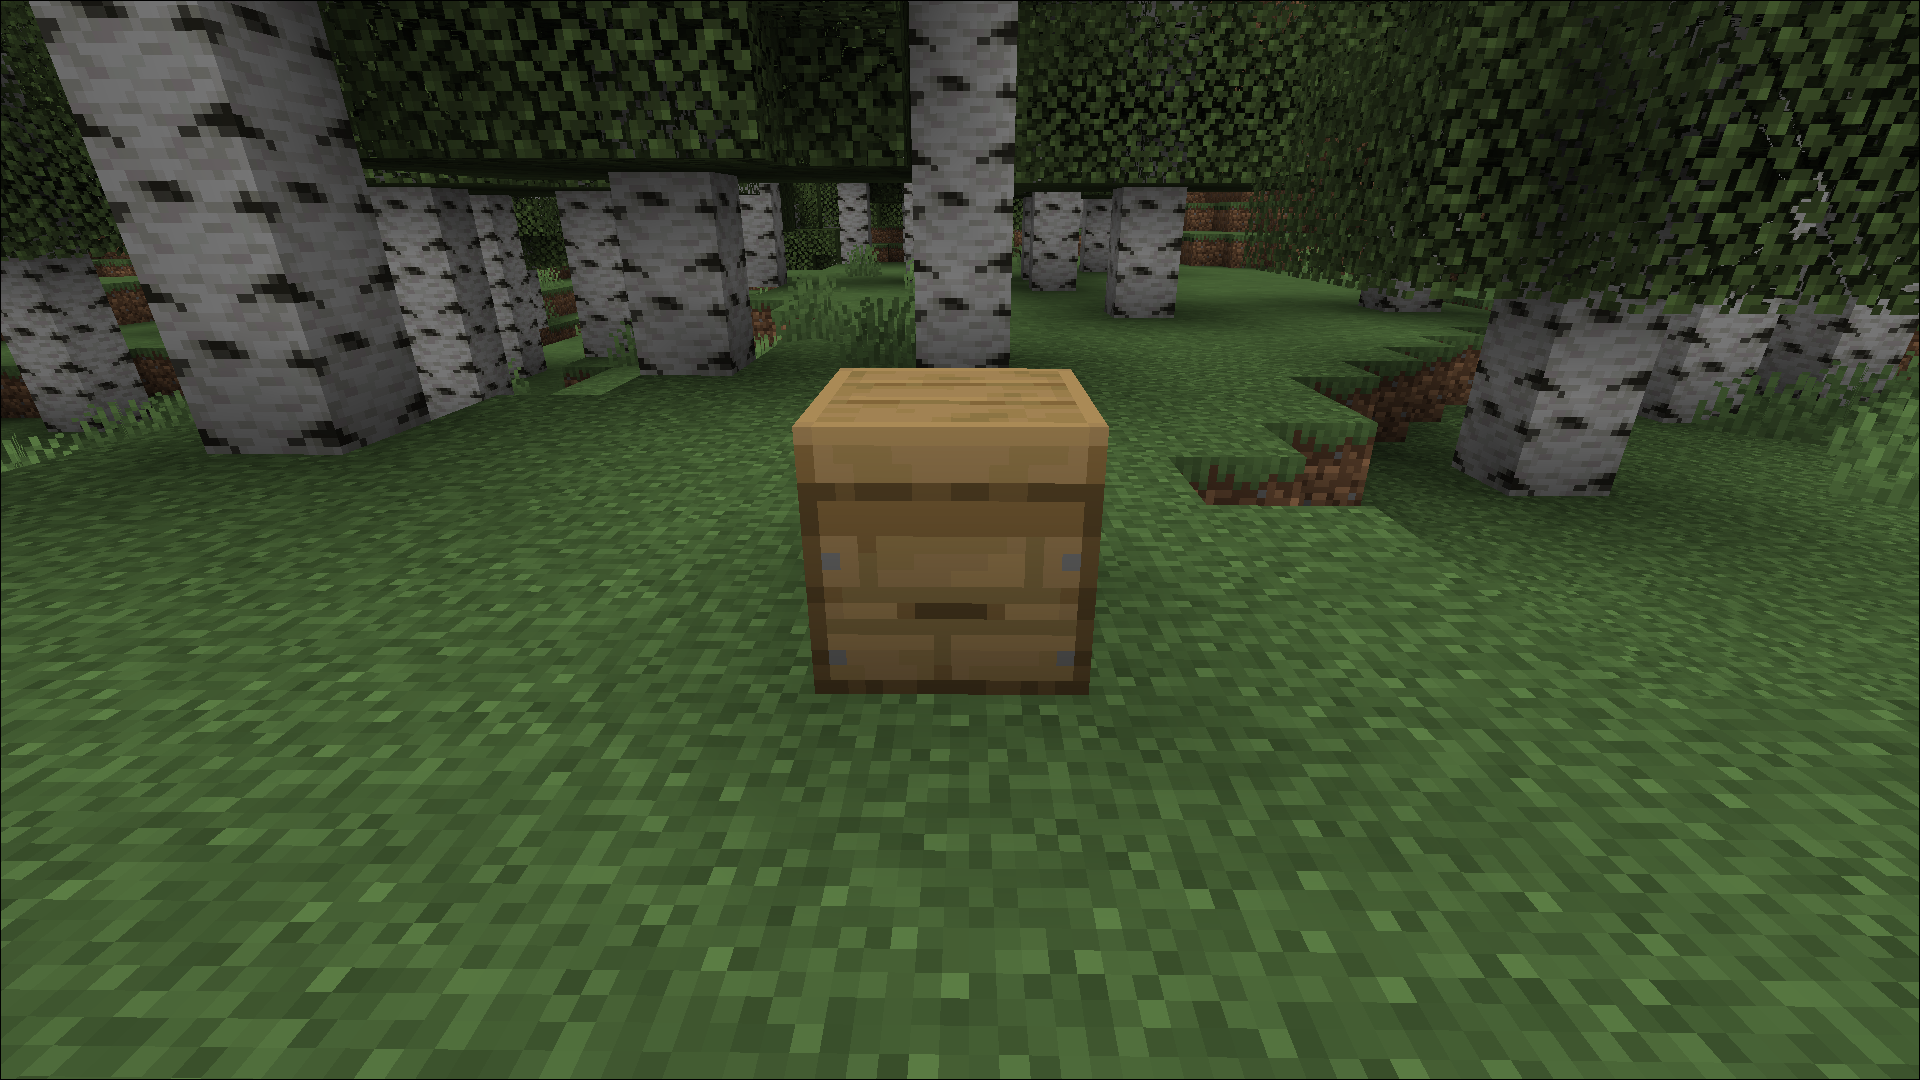
Step 1 – Find a Bee Nest
If you don’t already have honeycomb in your inventory, you’re going to need to find a bee nest in the wild to harvest some. You can find them in specific biomes like Flower Forest, Plains, and Sunflower Plains, or you can follow the bees to their nest.
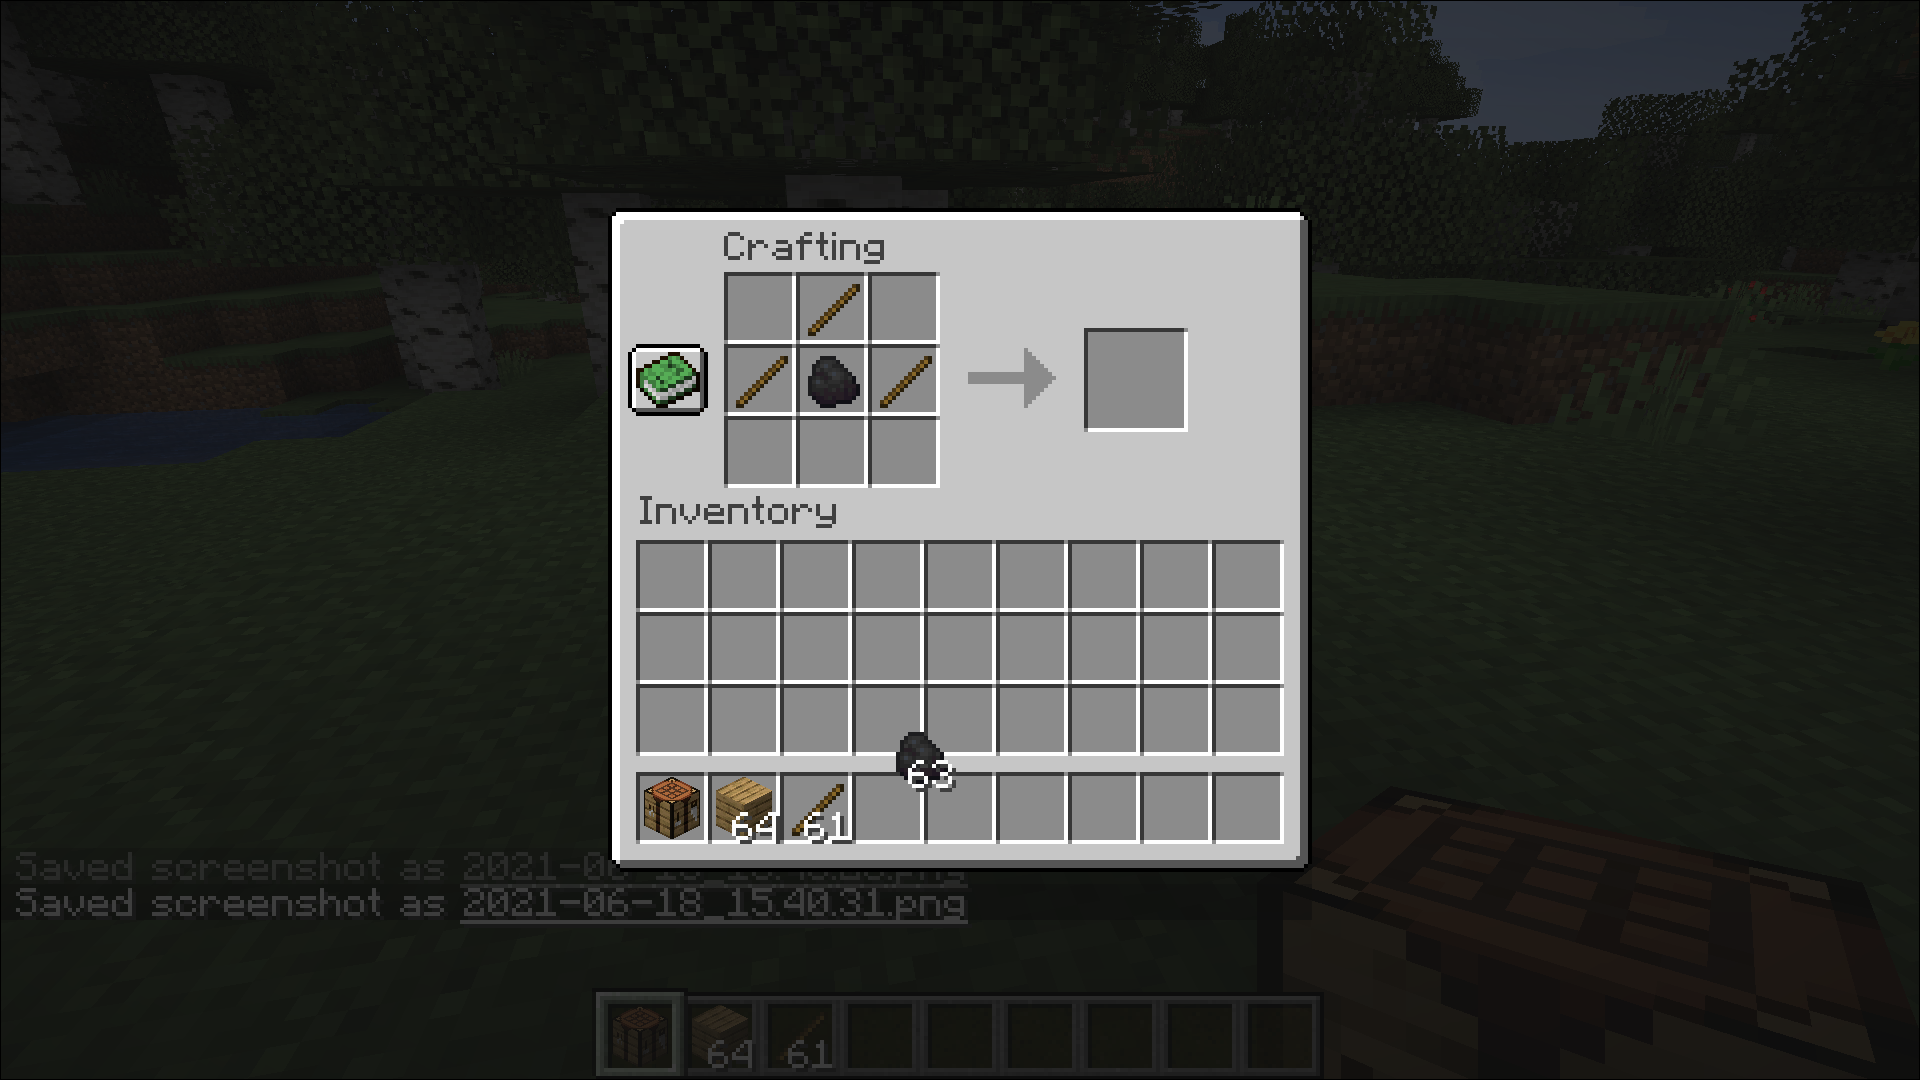
Step 2 – Build a Campfire
Next, you’re going to need a campfire to lull the bees inside the nest. It’s best if you do this before you set out unless you have a crafting table in your inventory. You’ll need:
- 3 Sticks
- 1 Charcoal/Coal
- 3 Wood/Logs
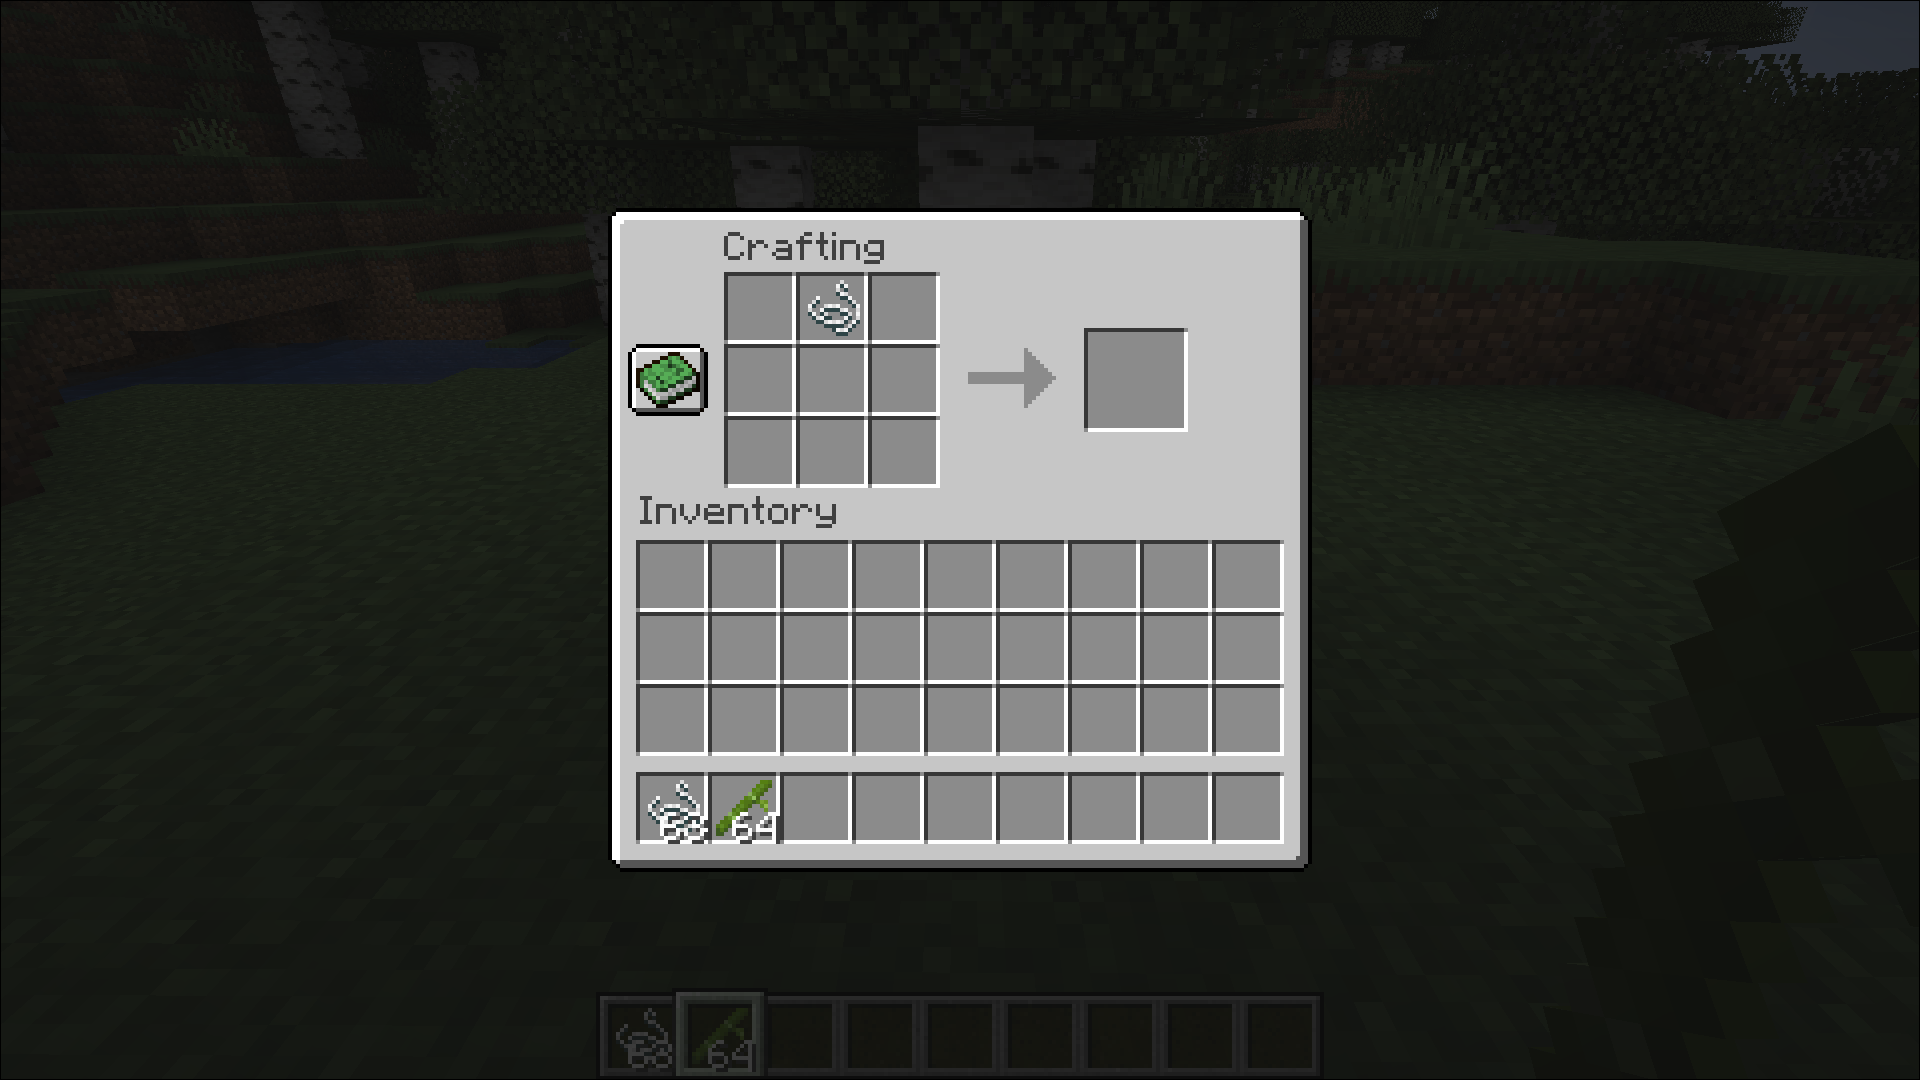
To make a campfire, check out these steps:
- Open the crafting menu.
- Place one stick in the top-middle box.
- Place one stick in the first box in the middle row and the last box in the middle row.
- Set the charcoal in the middle box in the middle row between the two sticks.
- Place the three wood pieces in the boxes in the last row of the grid.
- Drag and drop the campfire into your inventory.


Once you have a campfire, place it underneath the nest. If you have Java Edition, you can place the campfire a little below ground level and set a carpet on top to protect the bees. Unfortunately, you can’t use this trick in any other Minecraft edition.
Step 3 – Harvest Honeycomb
Once your campfire has been burning for a while, it’s time to harvest the honeycomb to build a beehive. Simply use shears on the nest and it’ll drop three honeycomb pieces. Collect the pieces and head to your beehive location.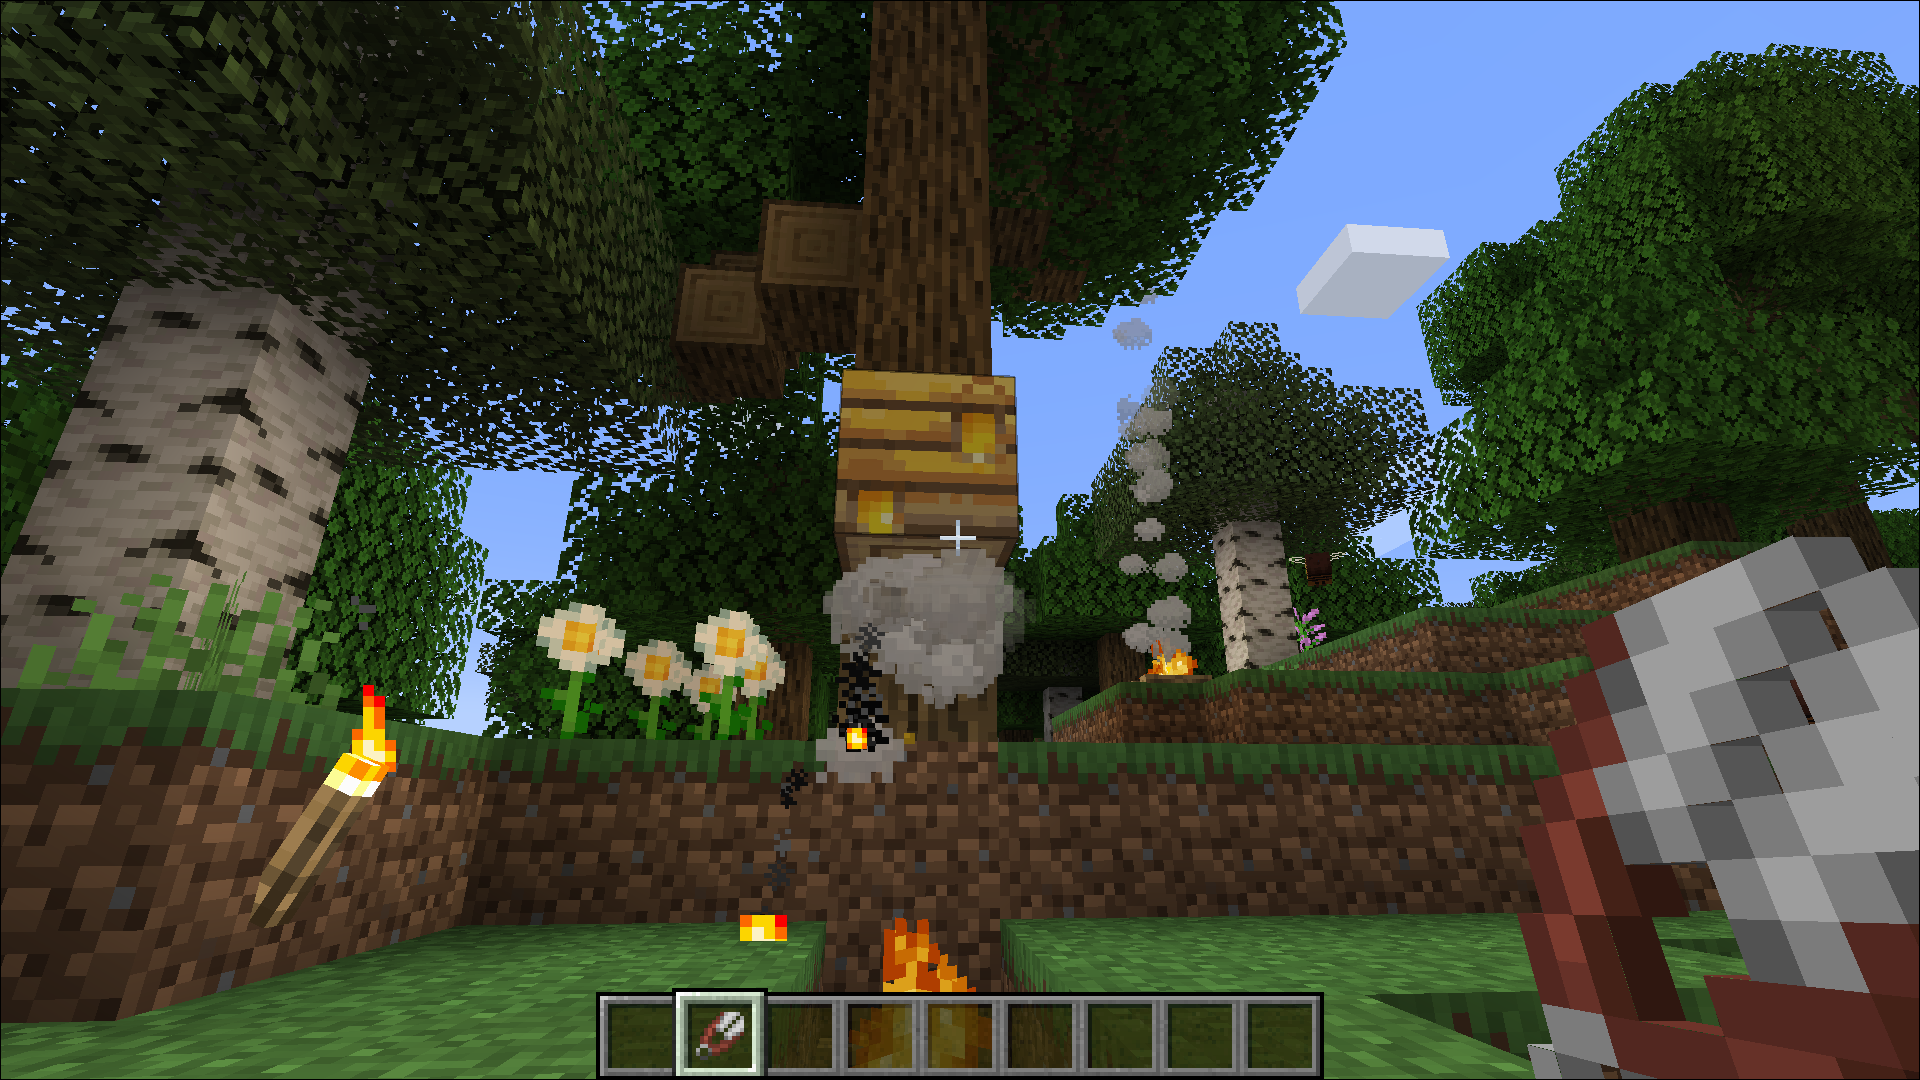
Step 4 – Craft Glass Bottles (Optional)
You’ll need a few empty glass bottles to collect the honey. If you don’t have them already, they’re simple to make. You do need three pieces of glass, though. Each batch yields three bottles.
You can make glass bottles with the process below or skip to the next step if you already have bottles in your inventory.
- Open the crafting menu.
- Place a glass piece in the first box of the top row and a piece in the third/last box of the first row.
- Set the final piece of glass in the second/middle box of the middle row.
- Collect your newly crafted glass bottle and place it in your inventory.


Step 5 – Craft a Beehive and (Optional) Scaffolding Base
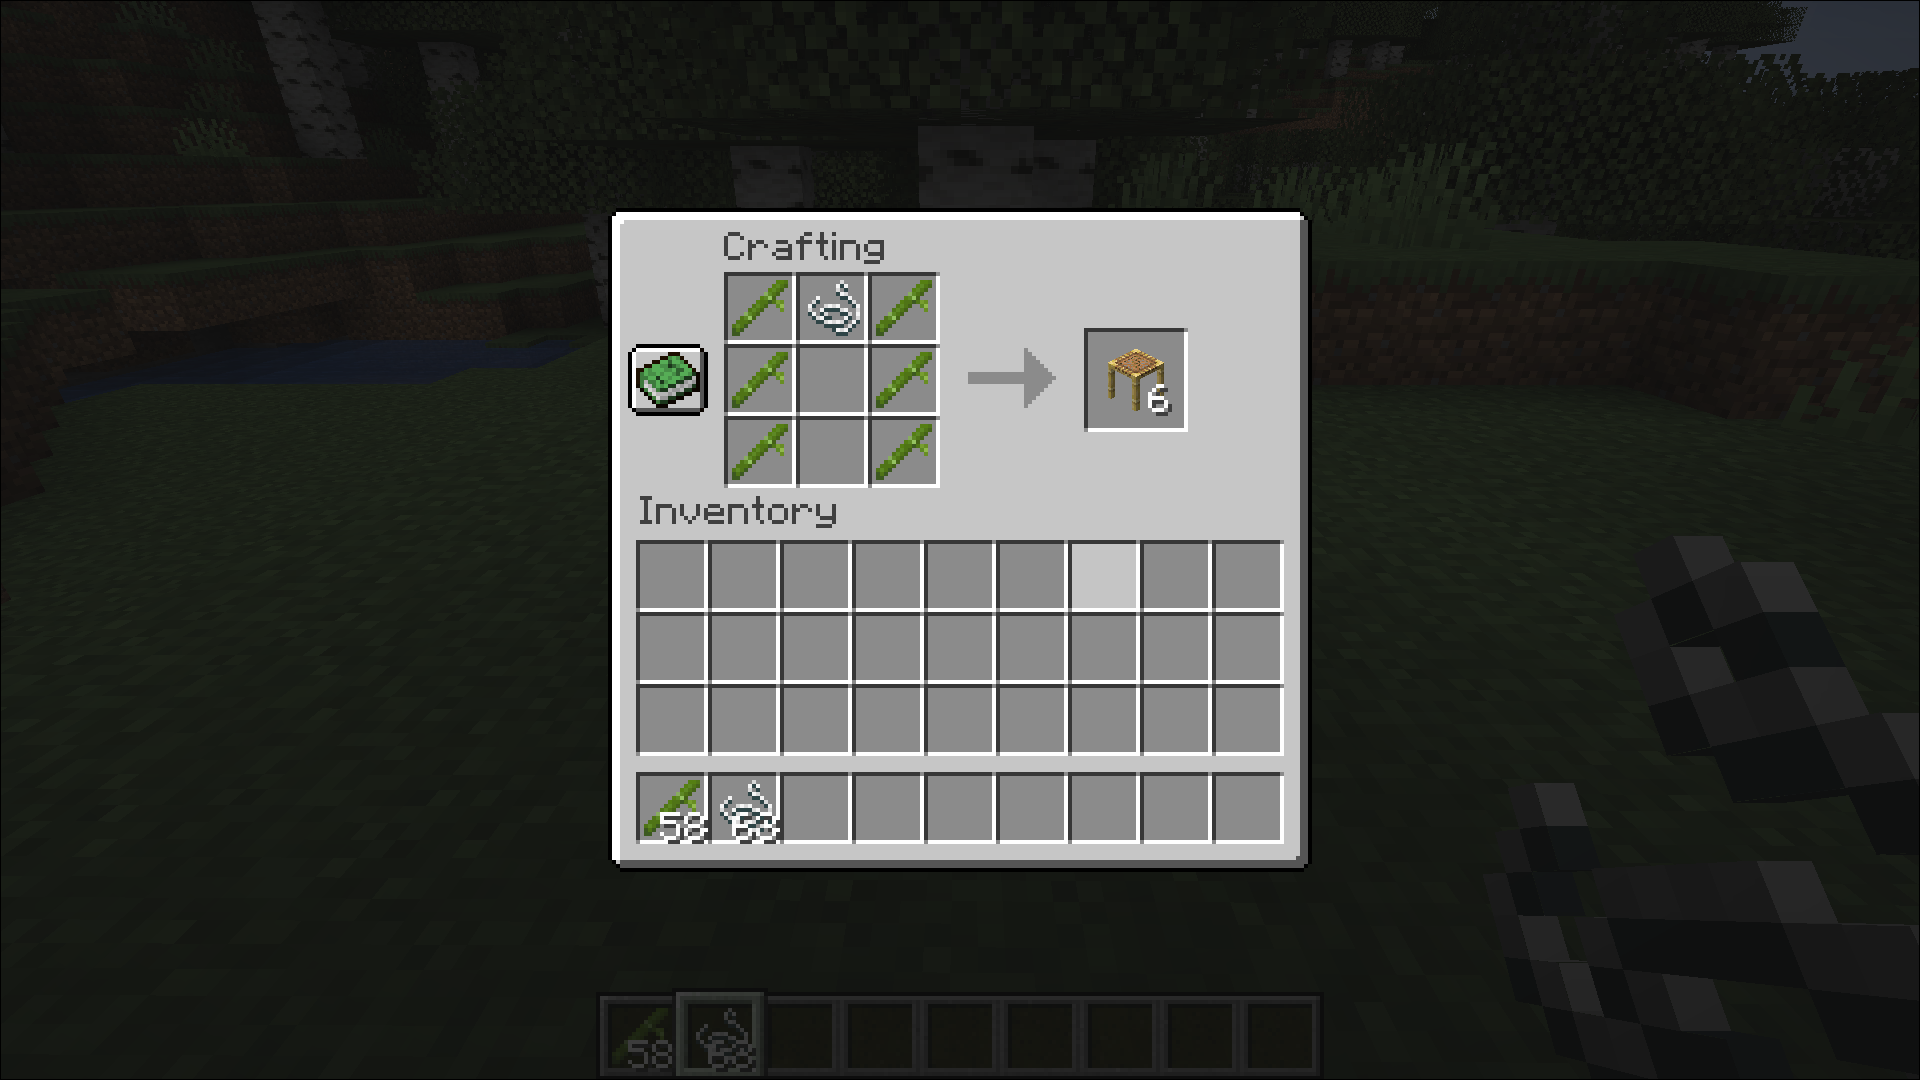
Now it’s time to craft a beehive. You’ll need six wood planks and three honeycomb pieces for this recipe. Once you have the resources, follow these steps to get started:
- Place the wood planks in every box along the top row and bottom row.
- Set the honeycomb pieces in all three boxes in the middle row. It should look like a honeycomb sandwich with the planks as the bread pieces.
- Take your new beehive and place it in your inventory.


If you want to get fancy, you can also make a Scaffolding Base for your new beehive. It isn’t a requirement to harvest honey, but it makes your beekeeping set-up look fancy. You’ll need six bamboo sticks and some string to make the base.
Here’s the crafting recipe for a scaffolding base:
- Place the string in the top-middle box.
- Place the bamboo pieces along the sides of the box with the string. You’ll have bamboo in the first boxes of the top row, middle row, and last row. Bamboo pieces also go into the last boxes of each row with nothing in the boxes directly underneath the string.
- Drag your scaffolding and place it into your inventory.
Step 6 – Create a Garden (Optional)
You don’t necessarily need to create a garden for your beehive, but the bees need flowers. Why not make it easy for them to get the pollen they need by placing flowers near their home? Growing a flower garden takes a lot of time and patience, though, so you may need to choose a location that’s relatively close to flowers already growing in the wild.
Step 7 – Lure Bees to the Beehive
Now that you have the basics in place, it’s time to move some bees into their new home. Unfortunately, you’re going to have to do this the “hard” way and lure them from the wild. Use a flower to entice them to follow you home.
Bees aren’t picky about flowers. Arm yourself with wither roses and two-block flowers and start leading them away. Instead of flowers, you can also use a lead to rope bees and take them to their new location.
Step 8– Place the Campfire
Do you remember that campfire you made a while back? It’s time to take it out of your inventory and place it next to the beehive. Ideally, the smoke will be close enough to soothe the bees without setting the hive (or anything else) on fire.
Step 9 – Wait for Bees to Make Honey
Making honey takes a while, so you’re going to need a lot of patience while the bees get to work. You’ll know that honey is ready to harvest or reaches Level 5 when you see glimmers of honey seeping out of the beehive block. You may also see honey on the floor if you chose to put your beehive on a scaffolding.
Step 10 – Harvest Honey
Once you see the tell-tale signs of honey coming from your beehive, it’s time to harvest it. Arm yourself with an empty glass bottle and use it on the beehive.
Un(Bee)lievable Benefits
Honey and honeycombs have a variety of uses in the Minecraft world, including:
- Restorative properties for hunger
- Removing poison effects
- Crafting to make sugar
- Making honey blocks to slow down people
Some players like to use multiple beehives to expedite the honey-collecting process because each “ready” beehive yields one bottle of honey. Once it’s collected, you need to wait for the bees to make more. However, if you have a collection of beehives, you can collect more honey with less wait time.
Sweeten Your Minecraft Experience
Getting into apiculture or beekeeping isn’t for everyone. It takes a lot of patience to build the necessary foundation for a thriving bee community. There’s something about bees, though, that makes life a little sweeter – even in the virtual world of Minecraft.
Do you have an apiary in your Minecraft homestead? What are some of your favorite recipes? Tell us about it in the comments section below.
Disclaimer: Some pages on this site may include an affiliate link. This does not effect our editorial in any way.