Images have many purposes. You can use them to create engaging visuals when marketing your product or even share them with family and friends. But if you’re working with multiple images at the same time, size can be a big problem. You might have issues with storage space, and some of the images may be too large to fit in targeted spots.
In this article, we’re going to show you how to batch resize images in Windows 10 using a variety of tools.
What Is Resizing?
Resizing is changing the size of an image without cutting anything out. When the size is changed, so does the image’s pixel information. However, the top image resizing tools on the market today are able to discard any unneeded pixel information. You end up with a smaller or larger image without compromising on quality.
Is Resizing Necessary?
Resizing your images can help you to:
- Overcome file size limits when sending your images via email
- Save on disc space on your Windows device
- Come up with a more compact PowerPoint presentation
- Achieve faster loading times when you upload the image on a website or blog
How to Batch Resize Images in Windows 10
Windows 10 is hailed as one of the most flexible operating systems in the Windows series, but it falls a bit short when it comes to image resizing tools. If all you want is to resize a single image, Windows 10 has plenty of in-built tools which you can use. Paint, Paint3D, and Photos are all applications that are suited for the job.
The challenge comes when you need to resize multiple images at once. Maybe you’ve got a long-awaited road trip coming up and you wish to free up disc space for some new photos. Windows 10 doesn’t have in-built batch resizing tools.
Luckily, developers have bridged the gap to ensure that you have a variety of third-party software solutions for batch resizing. We’ll now look at one of the best third-party resizers on the market: Image Resizer for Windows.
How to Batch Resize Multiple Images in Windows 10 Using Image Resizer for Windows
Image resizer for Windows is powerful yet easy-to-use software that’s absolutely free. The software may be under 1MB in size but make no mistake, you can use it to resize a multitude of images in a flash. One reason Image Resizer is quite popular has much to do with its flexibility. It works well with almost all image formats: PNG, JPG, JPEG, GIF, TIF, TIFF, ICO, and many others.
Here’s a step by step guide on how to use Image Resizer for Windows to batch resize images:
- Download and follow the on-screen instructions to install Image Resizer for Windows.

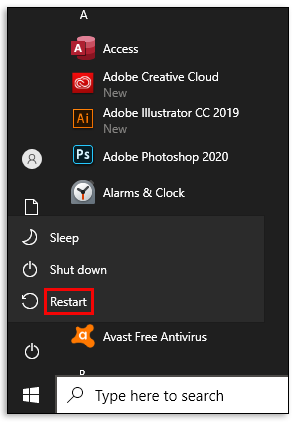
- Restart your computer to complete software integration.

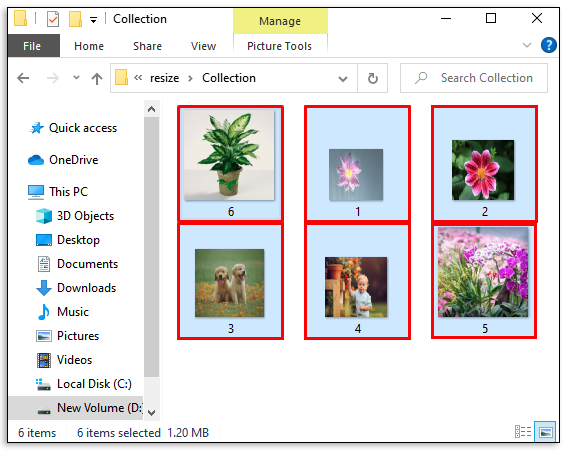
- Open our images folder and select all the files you’d like to resize.
- Right-click on the images you’ve selected.
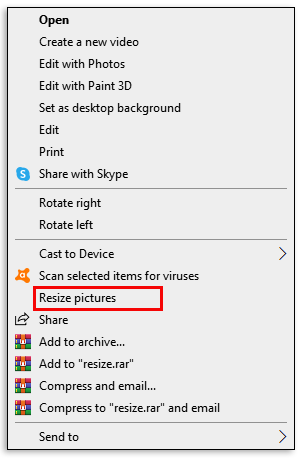
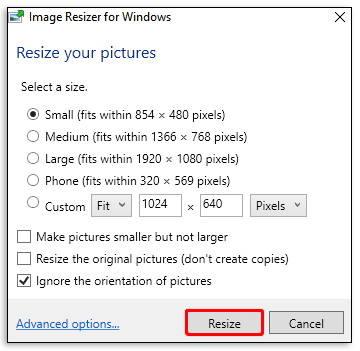
- From the resulting dropdown menu, select “Resize Pictures.” At this point, a new window will open giving you the chance to adjust various properties of your images. Notably, you can choose to go with one of the specified dimensions (small, medium, large, or mobile). Alternatively, you can enter your own custom dimensions in the width and height boxes.
- Click on “Resize” to complete the process.
The conversion process may take a while depending on the size and number of images selected. Your resized images will automatically save in the same folder as the original files.
How to Batch Resize Multiple Images in Windows 10 Using the Mail Recipient Hack
If you wish to resize multiple images manually without extra software, you can do so, but you have to be a little creative. And that involves Windows 10 explorer.
Here’s what you need to do:
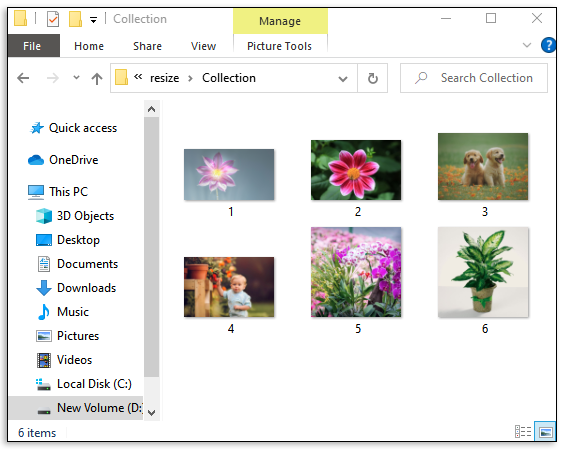
- Gather all the images you wish to resize in one location.
- Select all the images.
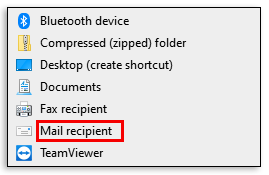
- Right-click and select “Send to.”
- From the resulting pop-up window, select “Mail Recipient.” At this point, a new window will appear where you’ll be able to attach your files. In the same window, you can specify the image size you want.
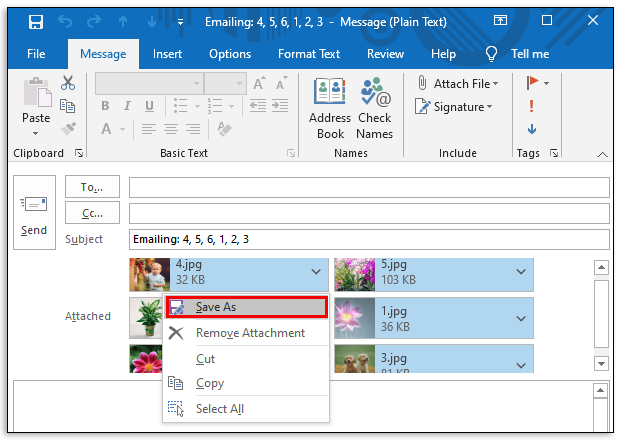
- Once you’ve settled on one of the pre-specified size dimensions, click on “Attach” at the bottom. Since you’ve chosen to mail these images, Microsoft Outlook will launch automatically.
- Within Outlook, you’ll see a list of the resized images.
- Click on the small arrow to the right of any of the images and then click on “Select All” from the dropdown menu.
- Once again, click on the small arrow to the right of any of the images and then click on “Save As.”
- Set a location for your newly resized images and then click on “OK.”


How to Resize Photos in Windows 10
For single-image resizing, PicPick is one of the best software options on the market. Besides resizing images, you can use it to take screenshots and annotate your images to your liking. And the good thing about it is that it’s absolutely free for personal use.
Here’s how you can bulk resize images using PicPick:
- Download and follow the on-screen instructions to install PicPick.
- Restart your computer to complete the installation.
- Open the folder containing the images.
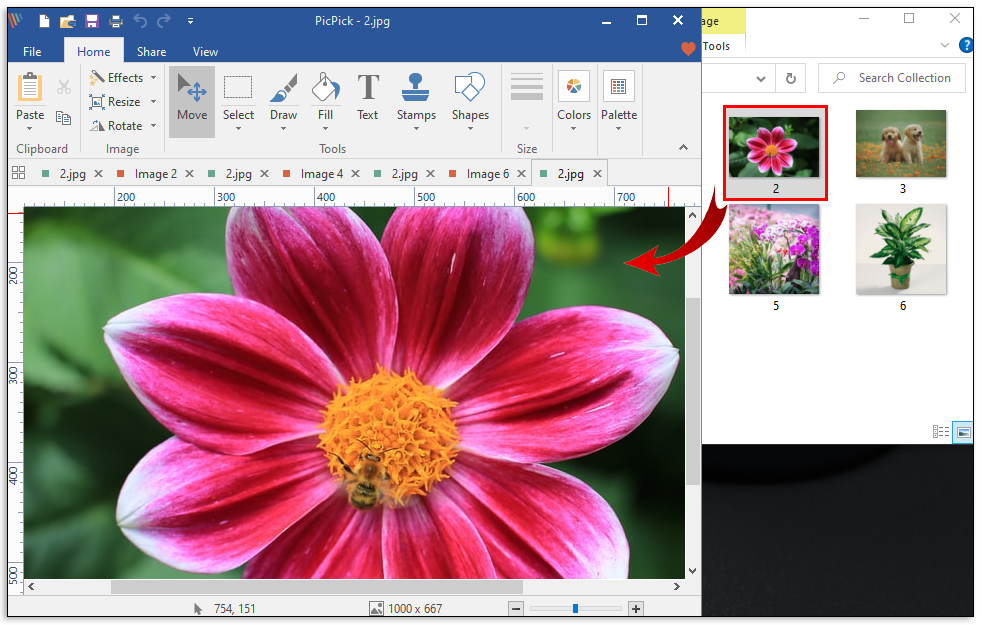
- Select the image you’d like to resize and then drag it onto an open PicPick window.
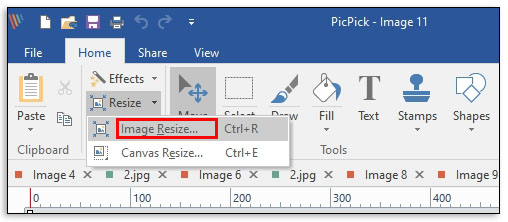
- Click on “Resize” in the top menu and then select “Image Resize.”
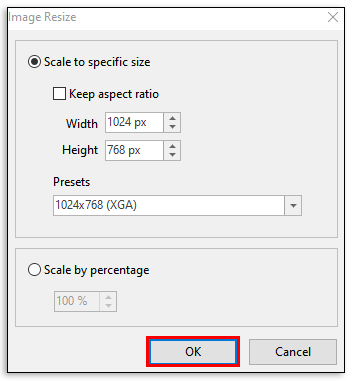
- The software gives you two options: you can either scale your image by percentage or scale by pixels. If you want to resize to specific dimensions, choose the second option and proceed to enter your preferred width and height values.
- Click on “OK” to complete the process.
- Click on “File” and then select “Save as” to save your new image to a location of your choice.


How to Use Paint to Resize Your Images in Windows 10
Microsoft Paint has been a mainstay in the Microsoft Windows series since the early days, and that speaks volumes about its efficiency as a resizing tool. Here’s how to use it:
- Open the location of the image you’d like to resize.
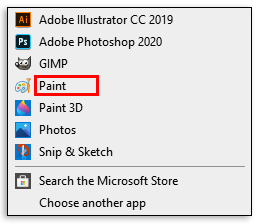
- Right-click on the image and click on “Open With.”
- Select “Paint” from the resulting dropdown menu.
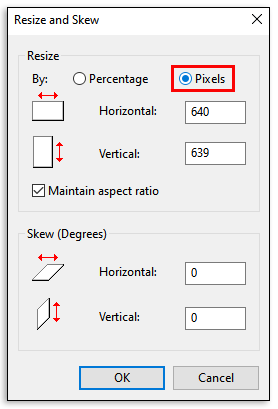
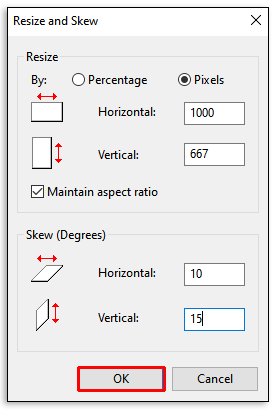
- Once the image opens inside the Paint window, click on “Resize” in the top menu. This will automatically trigger a new window where you can adjust the dimensions of the image.
- Paint gives you two options: you can either scale your image by percentage or scale by pixels. If you want to resize to specific dimensions, check the box next to “Pixels” and proceed to enter your preferred width and height values.
- Click on “Ok.”
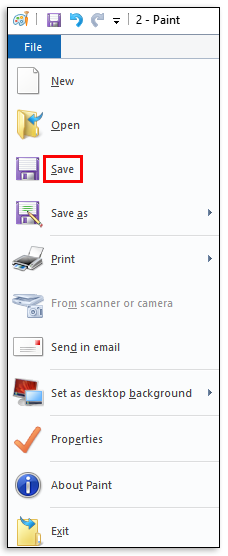
- Click on “File.”
- To replace the original image with the one you’ve edited, select “Save.”
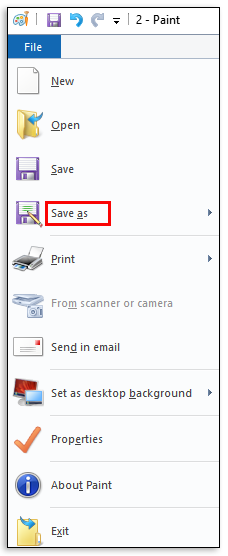
- To keep both the original image and the newly resized copy, select “Save As.” A new window will appear where you’ll be prompted to give the new image a name and specify where you’d like to save it.


How to Use the Photos App to Resize Images in Windows 10
- Open the location of the image you’d like to resize.
- Right-click on the image and click on “Open With.”
- Select “Paint” from the resulting dropdown menu.
- Once the image has opened in Photos, click on the three small dots in the top right corner and then click on “Resize.” A small popup window will appear where you can either choose one of the three pre-specified dimensions for the image or enter your preferred width and height under “Define Custom Dimensions.”
- Click on “Save Resized Copy.”


How to Batch Crop Images in Windows 10
Batch cropping is one of the toughest actions to automate. That’s because it’s difficult to develop an algorithm that can analyze and understand what needs to be cut out of an image, what needs to be kept, and then apply the criteria to all images. On the few occasions when batch cropping is possible, the images have to be roughly similar. There has to be an object appearing in more-or-less the same spot in all the images.
In these circumstances, you can use IrfanView to batch crop images in Windows 10. Here’s how to do it:
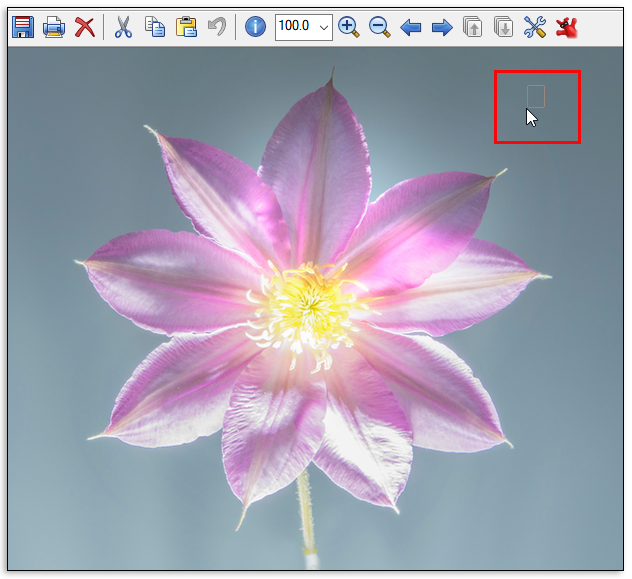
- Use IrfanView to open one of the images you wish to crop.
- Click on the spot in the top right corner where you’d like the cropping to start.
- Note down the “XY” values in the title bar.
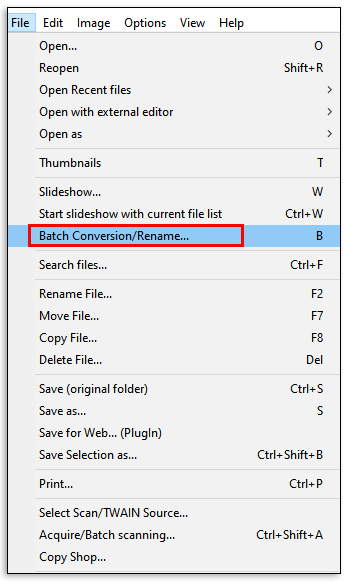
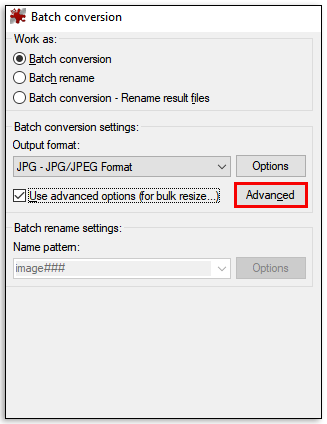
- Click on “File” and select “Batch Conversion.” This will automatically launch a new window.
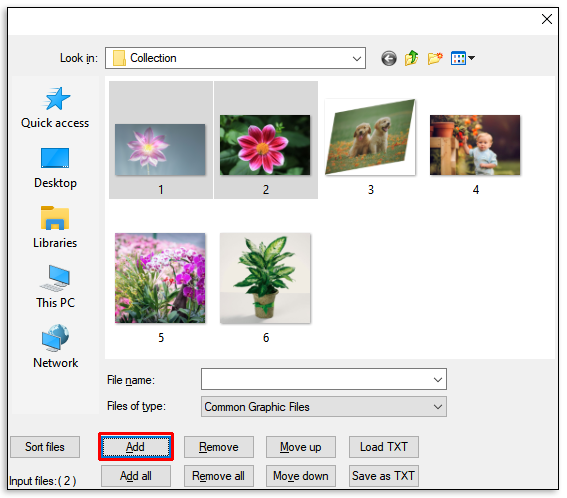
- Select all the images you’d like to crop to the window and then click on “Add.”
- Click on “Advanced.” A new window will launch.
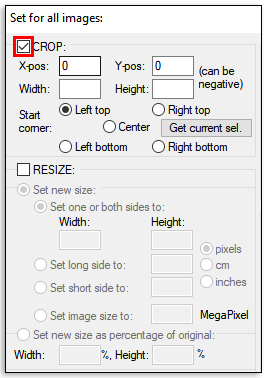
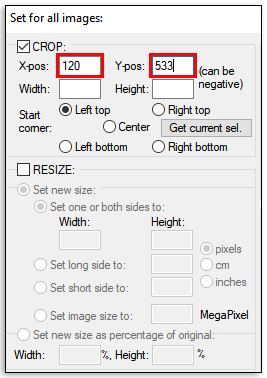
- Check the box next to “Crop.”
- Enter the values you noted down earlier in the “XY” boxes.
- Proceed to enter the desired width and height of the cropped images.
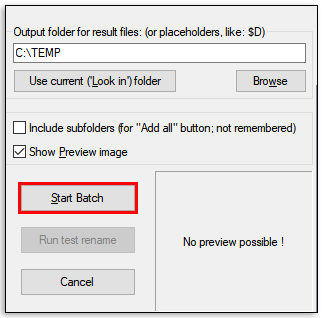
- Click on “Start Batch.” The cropped images will automatically save to a TEMP folder in your computer’s drive.

Additional FAQs
What’s the Best Photo Tool for Windows 10?
Adobe Photoshop Express is by far the most complete photo tool for Windows 10. It’s packed with features that can help you execute a wide range of modifications to your images and comes with a simple user interface that’s easy to understand.
Resized Images Are Shareable Images
Modern digital cameras may have revolutionized photography, but images captured are of different sizes and some can be quite large. To make them sharable with others via email, you have to resize them accordingly. And thanks to this article, you know just what you need to do to resize images of various formats on Windows 10.
Which is your favorite batch resizing tool for Windows 10?
Let’s engage in the comments section below.
Disclaimer: Some pages on this site may include an affiliate link. This does not effect our editorial in any way.