Since all Roblox characters use the same template, clothing and accessories are what make each one unique. A custom hat could help you truly stand out – but creating and publishing one on Roblox isn’t at all simple.
In this article, we’ll explain how to make a Roblox hat in Blender, and share the easiest way of customizing Roblox items. Additionally, you’ll discover how to create clothes on paint.net, how to upload your creations to the website, and much more related to user-generated content on Roblox.
How to Make Your Hat Using Blender?
Blender software is great as you get a wide range of customizing options, but it does require some tech skill. You also have to keep in mind that you have to be extremely lucky to get your creation uploaded to the Roblox website. If you have a basic understanding of 3D modeling, visit blender.org and download the software. Then, use the Load Character extension to transfer a character from Roblox to Blender. Once you’ve done this, follow the instructions below to make a Roblox hat in Blender:
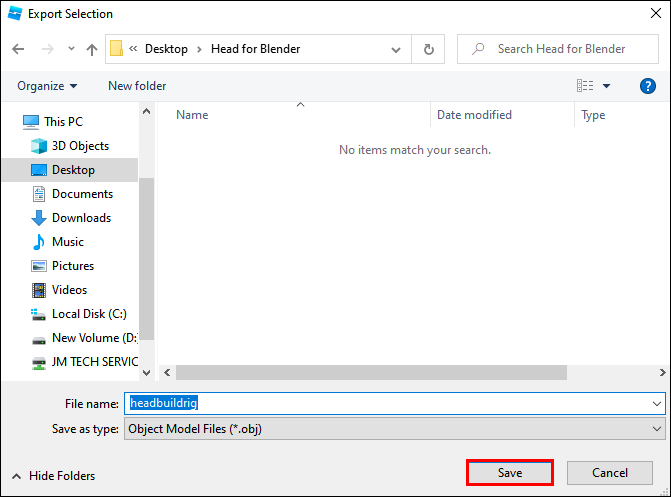
- Right-click the character and select “export selection” from the drop-down menu.

- Select where you’d like to save the character.

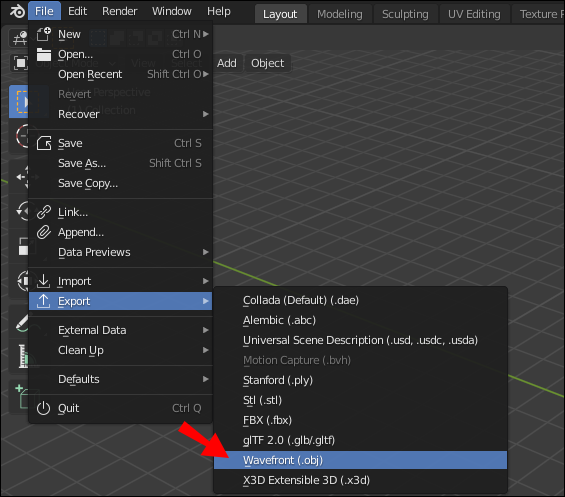
- Launch Blender and click “File” from the menu in the upper part of the window.
- From the drop-down menu, select “Import,” then click “Wavefront (.obj)” and import the file with your character.
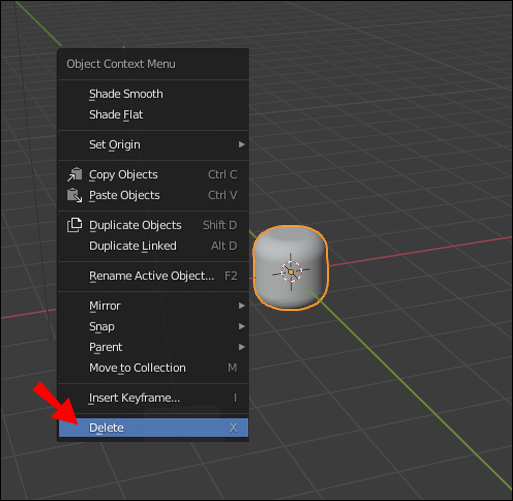
- Click on a character’s body part and press the “X” key to delete it. Repeat until the character only has a head left. This step is optional, but doing so may make the process more convenient.
- Switch to layer two before creating the basis of your hat. In the menu in the upper part of your screen, you should see two panels consisting of ten small squares each. Click the second left square at the top of the left panel to move to layer two.
- To switch to the orthographic view (two-dimensional view of three-dimensional objects), press the “Num5” key, then the “Num1” key.
- Press “Shift” and “A” keys at the same time, then select “Mesh” and choose any basic shape.
- Right-click on the mesh, then press the “Tab” key.
- From the menu at the top of your screen, click the grey square icon with a tiny orange square next to it.
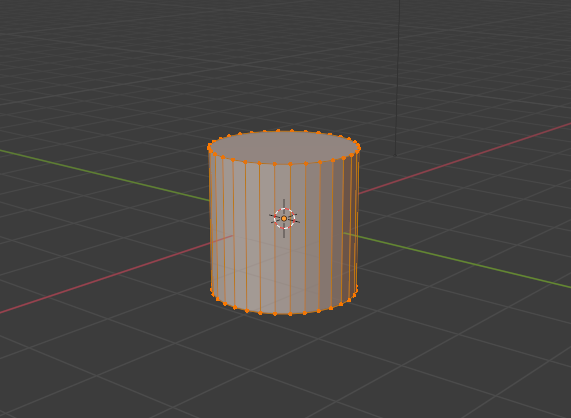
- Press and hold the “A” key and left-click to select all of the vertices.
- Press and hold the “X” key to erase all the vertices. This is required to create a blank mesh.
- Press and hold the “Ctrl” key, then left-click on the mesh to start creating the first vertex.
- Drag the line to start drawing the outline of your hat, then release your mouse to set the first line. Repeat until you get the shape of a hat.
- To undo an action, press the “Ctrl” and “Z” keys at the same time.
- To switch to the top view instead of the side view, use the “Num7” key.


Press and hold the “A” key and left-click to select all vertices, then use the “Alt” + “R” keyboard shortcut to activate the spin tool. Use the Angle slider at the bottom of your screen to spin the shape.
Now, let’s move on to smoothing the shape of your hat and add a texture to it unless you want it to stay angular and plain. Follow the steps below:
- Press the “Tab” key to switch to the Object mode.
- From the menu at the top of your screen, select “Tool,” then “Shading,” and click “Smooth.”
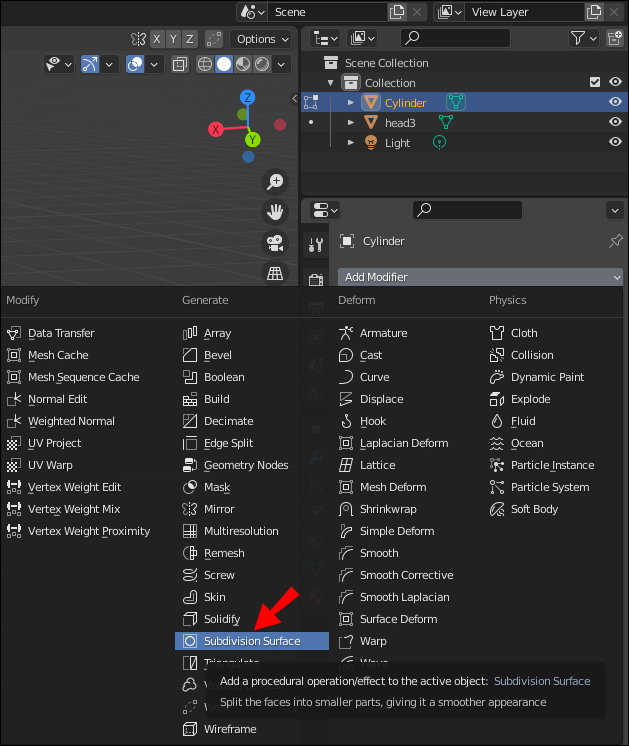
- From the Properties window, click the wrench icon.
- Select “Add Modifier,” then “Subdivision Surface.”
- Find a picture with desired texture online and save it to your PC.
- Select “Shading” from the menu at the top of your screen, then drag and drop your image to the Shader editor window. It will appear as a new window containing image information in the Shader editor.
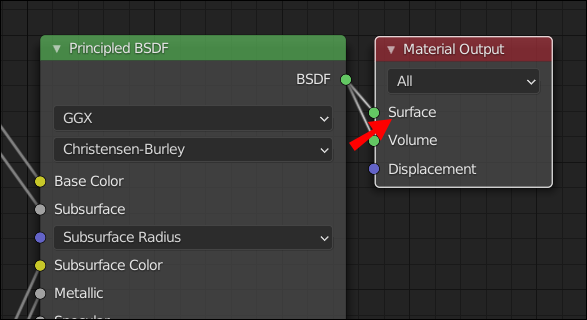
- Connect the dot next to “Color” from the left window to the dot next to “Base Color” from the middle window in the Shader editor.
- Connect the dot next to “BSDF” from the middle window to the dot next to “Surface” from the right window in the Shader editor.
- The texture should be visible on your model now.
- Click “File,” then “Save,” give your file a name, and save it as a .obj object.


How to Make Your Hat Using Paint.net?
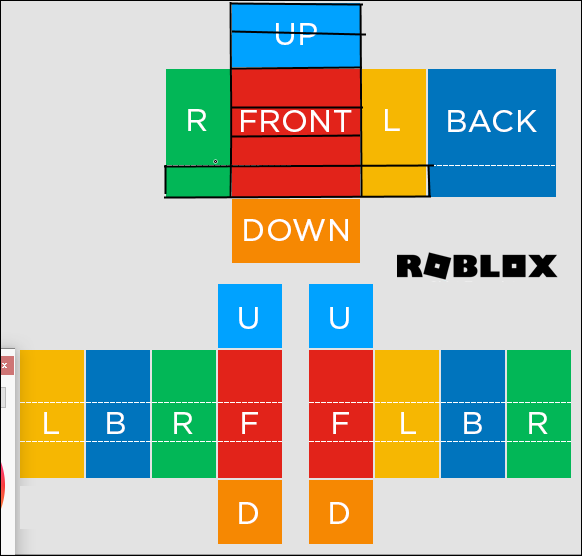
You can’t create 3D objects such as a hat on Paint.net, but you can use it to customize Roblox clothing templates as they’re flat. First, install paint.net from the official site and download the official Roblox clothing template. Then, open your template with paint.net and follow the instructions below:
- Draw the outline of your clothing piece. Press and hold the “Shift” key, then left-click your mouse and drag the line. Release the mouse, then repeat. Don’t forget about details, such as a collar, buttons, etc.
- If you need to reflect any items, select an item and click “Layers” at the top of the page. From the dropdown menu, select “Flip Horizontal” or “Flip Vertical.”
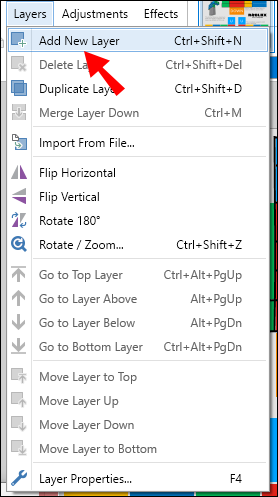
- Click “Layers” at the top of the page, then select “Add New Layer.”
- Add trim lines. They should repeat the outline but be moved to the side by a pixel and be white.
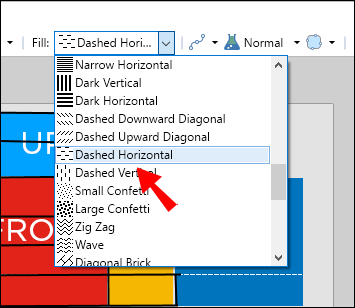
- If you wish to add stitching, change your line type to dotted, dashed, or any other and draw more lines. Add small details. Here, you have to be creative – the instructions vary depending on which details you want to make.
- Add another layer.
- Select a part of your clothing piece with a magic wand tool and color it using any tool you find the most convenient (paintbrush, fill, etc.).
- Hold down the “Ctrl” key. With the magic wand tool, select the background and all the areas where the skin should be showing. Make sure the magic wand tool mode is on Global.
- In the menu at the top of the page, switch the Flood Mode to Local.
- Delete selected areas.
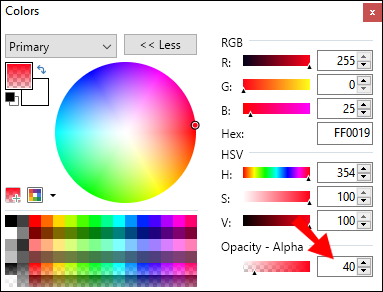
- Adjust the layer opacity. Set the first layer’s opacity to approx 40, second – to 20, and third – to 10.
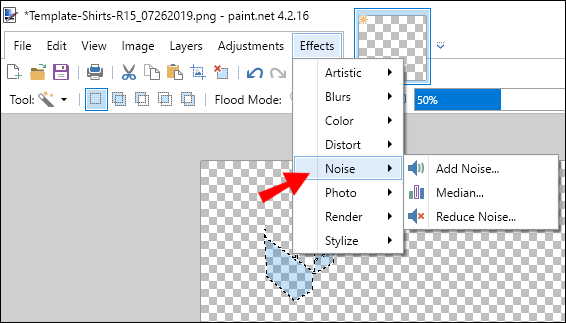
- To create a texture, click “Effects” at the top of the page, then “Blurs” or “Noise.” Select the preferred effect type.
- Save your clothing piece.


How to Add a Custom Hat From Any Imaging Program Into Roblox?
Now that you know how to make a custom hat, it’s time to find out how to transfer your creation to Roblox. Unfortunately, the answer to this question isn’t too encouraging – only selected creators can publish their works to the website, and getting into their ranks is nearly impossible.
You can try contacting some of the creators who have permission to share their works on Roblox or writing to developers on social media such as Twitter. But you will be very lucky to get a reply since you likely won’t be the only one aiming to get into Roblox UGC creators this way.
The originally selected users were ones who have worked with Roblox developers beforehand, meaning that they have proven their skill. Developers are still testing the user-generated content system, and we don’t yet know for sure whether regular players will be able to upload their work freely in the future.
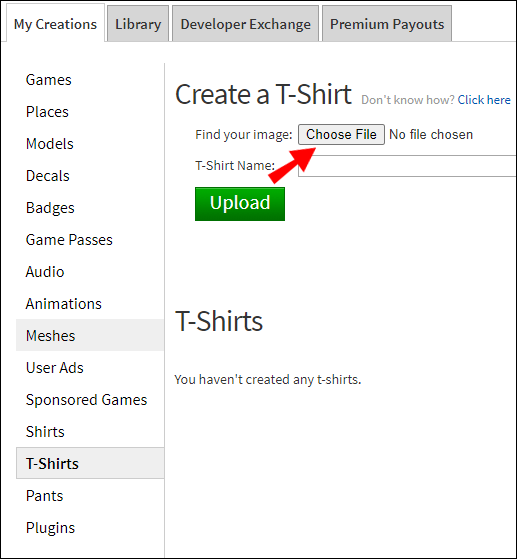
However, regular players are allowed to upload their custom clothes on Roblox. Here’s how to do that:
- Sign in to Roblox.
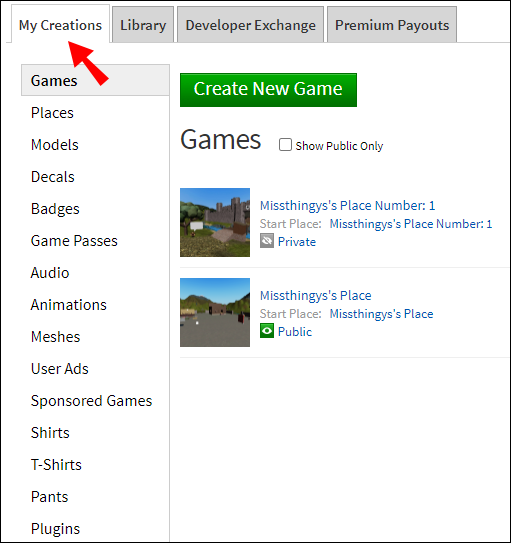
- From the main menu, navigate to the “My Create” tab.
- Click “Shirts,” “Pants,” or “T-Shirts” depending on the type of clothing you have created.
- Click “Choose File,” then find your file from paint.net on your PC.
- Name your creation and click “Upload.”


Frequently Asked Questions
In this section, we’ll answer more questions related to custom hats in Roblox.
What Is the Easiest Way to Make a Roblox Hat?
If creating a hat in Blender seems too tricky, don’t worry – there’s actually an easier way to create one. You can design a hat style in Roblox Studios software that can be downloaded from this page. However, there are two complications. Firstly, you can only use a limited number of existing templates, while in Blender, you can create a hat of any shape. Secondly, just like with other Roblox UGC items, you have a very low chance of getting your work published.
What Is Required to Make a Roblox Hat?
There are no special requirements for creating a Roblox hat – all you need is a device that meets the technical requirements of selected software and a bit of creativity. Roblox Studios can be used on computers, tablets, and even mobile devices, whereas Blender requires a PC. The requirements for uploading your content are higher, though. You have to either be among the selected by the developers and creators or be in contact with someone who is.
Can I Publish My Roblox UGC Hat for Sale?
You can’t, unless you have proven your skills to Roblox developers. Only a limited number of creators can publish their custom items on the website, and even fewer can earn money from these items. Regular players also can’t sell games, although they are allowed to create them in Roblox Studio and have a chance to get them published.
Get Noticed
Despite the difficulties in publishing your creations on Roblox, we hope that you don’t lose all of your enthusiasm for making custom items. Possibly, in the future, developers will lower the threshold and permit regular users to upload items to the user-generated content catalog.
In the meantime, you may try sharing your work with developers and selected Roblox creators using social media. If you’ve created an outstanding item, you might get noticed and become an exception. And if you’re interested in 3D modeling, keep on practicing regardless of Roblox rules. This field is constantly evolving – therefore, your skills may be useful for creating UGC for other games.
Do you think Roblox developers should allow regular users to upload content to the website freely? Share your thoughts in the comments section below.
Disclaimer: Some pages on this site may include an affiliate link. This does not effect our editorial in any way.