Memory integrity is an integral part of Windows System and data security. However, it can be turned off to improve device performance. Typically, gamers disable this feature if they get a mediocre gaming performance. If memory integrity is disabled intentionally, it can easily be turned back on.
This article covers more on disabled memory integrity issues and how to turn it back on.
Disabled Memory Integrity on Windows
Memory integrity provides system protection against the most sophisticated attacks. It can be accessed on Windows 10 and 11, and it’s possible to either enable or disable it. It is enabled in Windows 11 by default. Since it protects your PC’s critical processes, especially when there is a serious malware infection, disabling it is not ideal.
Sometimes the feature is disabled due to other issues within the system.
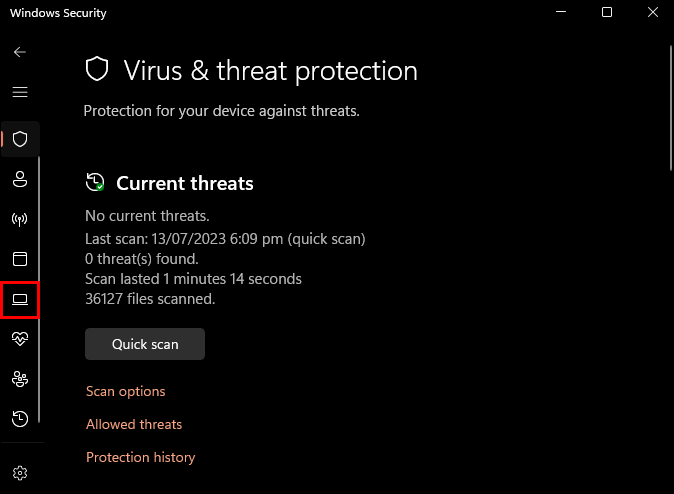
The memory integrity status can be checked through the Windows security app. If your memory integrity is disabled, you can enable it by following these steps on Windows 10 or 11:
- Press the Windows key.

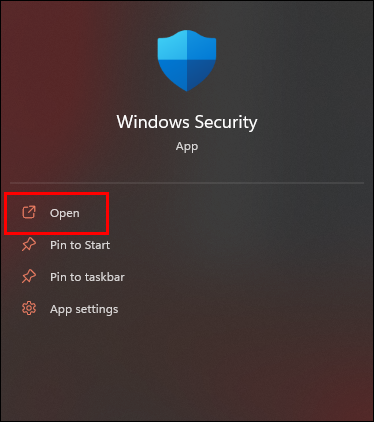
- Type “Windows Security” and choose the top result below the “Best match” section.

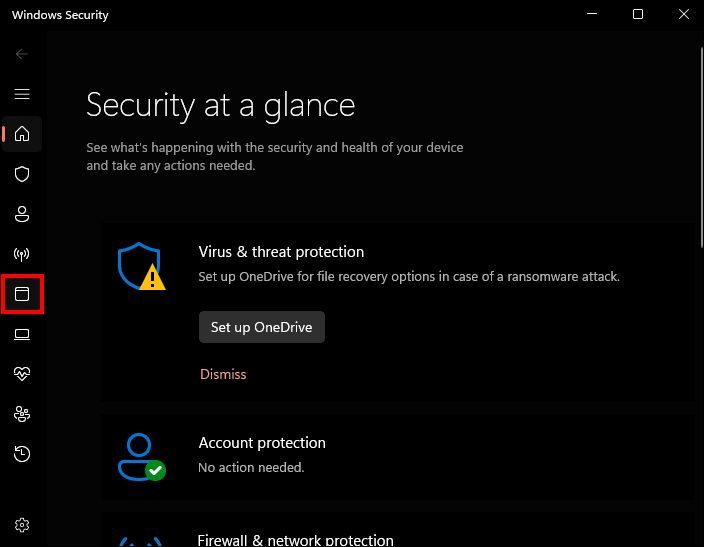
- Choose “Device security” from the “Security at a glance” screen.
- Under core isolation, click “Core isolation details.”
- Enable Memory integrity by toggling the switch on.


You can disable it again by toggling off on the same switch. When turned off, you’ll have to restart the system. You will receive a notification to restart to apply the changes in the taskbar.
If this does not work, you may be dealing with another issue.
Memory Integrity Incompatible Driver’s Error
If you are dealing with an incompatible driver’s error, you need to uninstall any recently installed drivers from third-party sources. Once you remove the drivers, follow the steps below.
- Navigate to the “Windows Security” app and open it.
- Select “Device security,” located on the sidebar (left).
- Go to “Core Isolation details.”
- Enable “Memory integrity.”


You may get an error notification regarding incompatible drivers when attempting to turn on memory integrity. If you receive such a notification, you need to:
- Click the “Review incompatible drivers” option. Take note of the device that’s causing the problem.
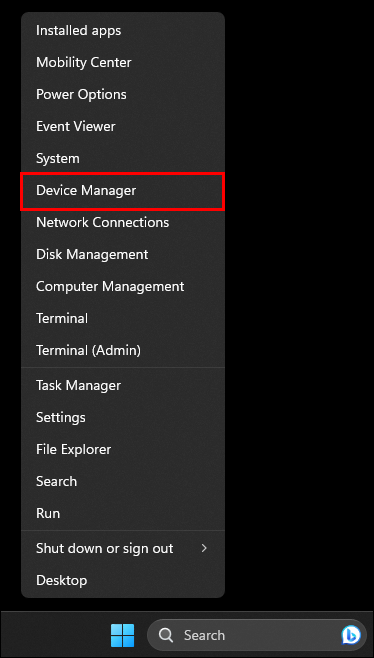
- Once you identify the problematic driver, right-click the start button and choose “Device Manager.”
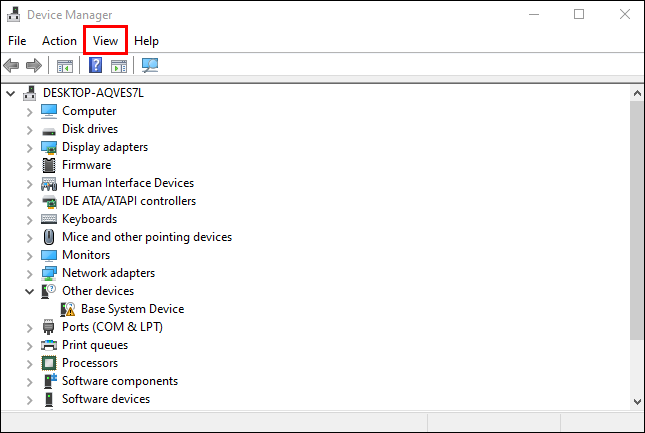
- In the “View” tab, select “Show hidden devices.”
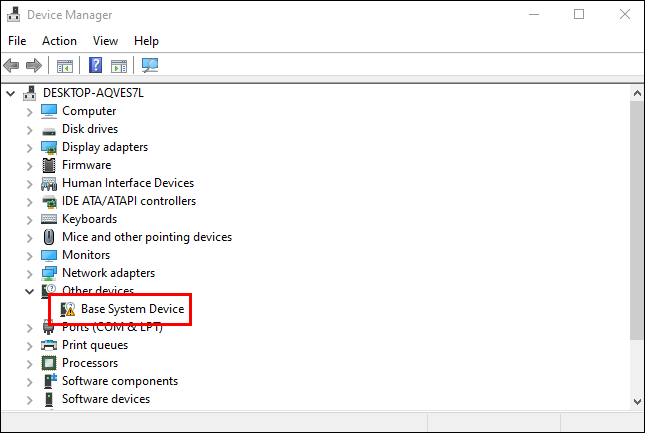
- Find the device bearing a triangle (yellow) and the exclamation mark or the problematic drivers as indicated by Memory integrity.
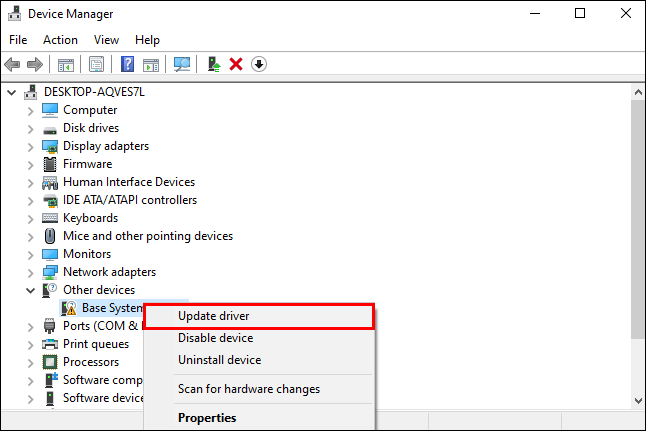
- Right-click the identified device and choose “Update driver.
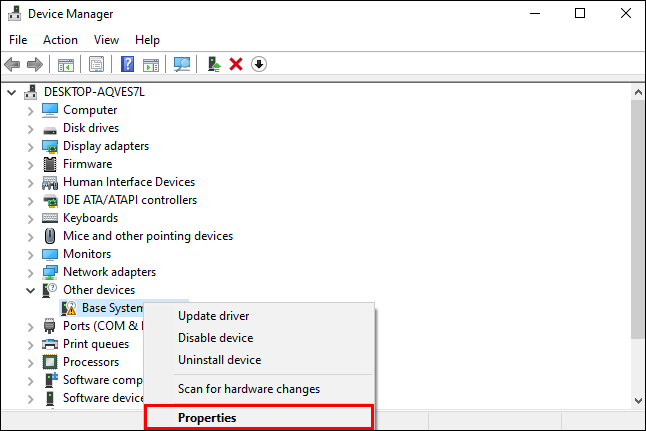
- If this doesn’t solve the issue, right-click and choose “Properties” instead.
- In the “General” tab, look at the “Device status” box.
- Note the error code and then go to Microsoft’s official support documentation page. Here, all device manager-related errors are listed.
- Find the code information and then apply the recommended fixes.
Use Third-Party Programs to Locate and Uninstall Incompatible Drivers
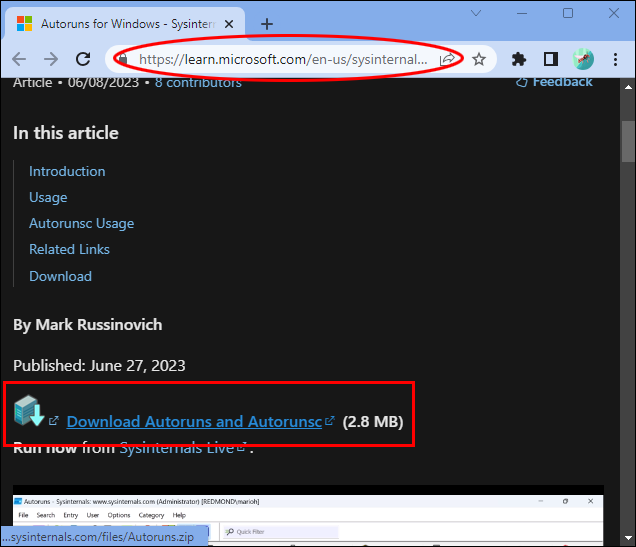
Third-party programs can do the trick if the “Device manager” doesn’t yield any incompatible drivers. A good option is Autoruns. It can identify incompatible and corrupt drivers and uninstall them.
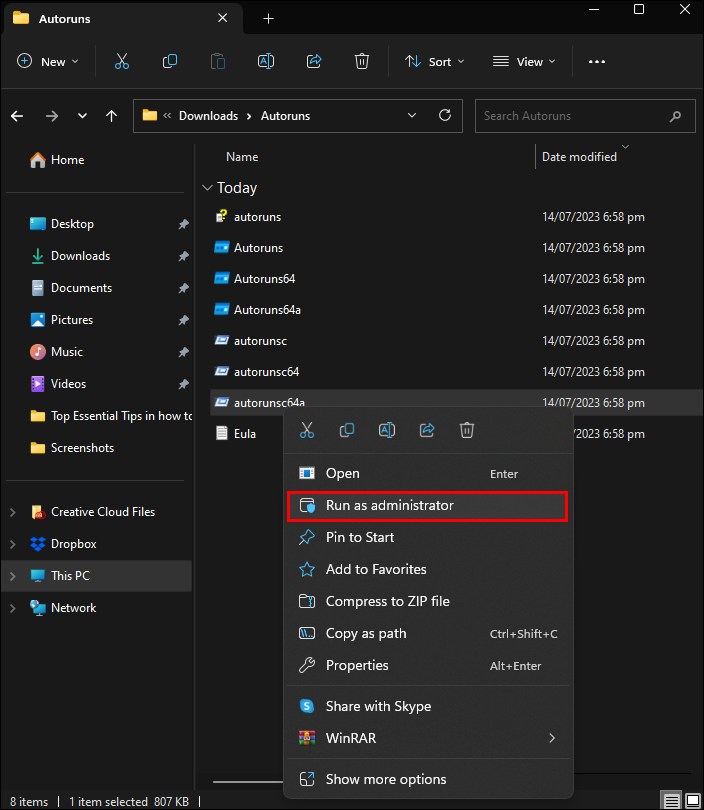
- On the Microsoft website, download Autoruns.
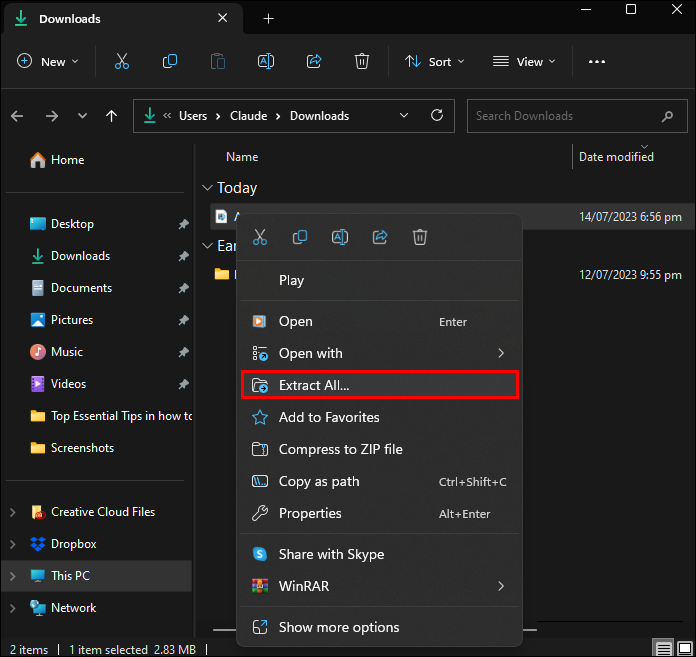
- Unzip the file.
- Right-click on the executable file to run it as an administrator by selecting “Run as administrator.”
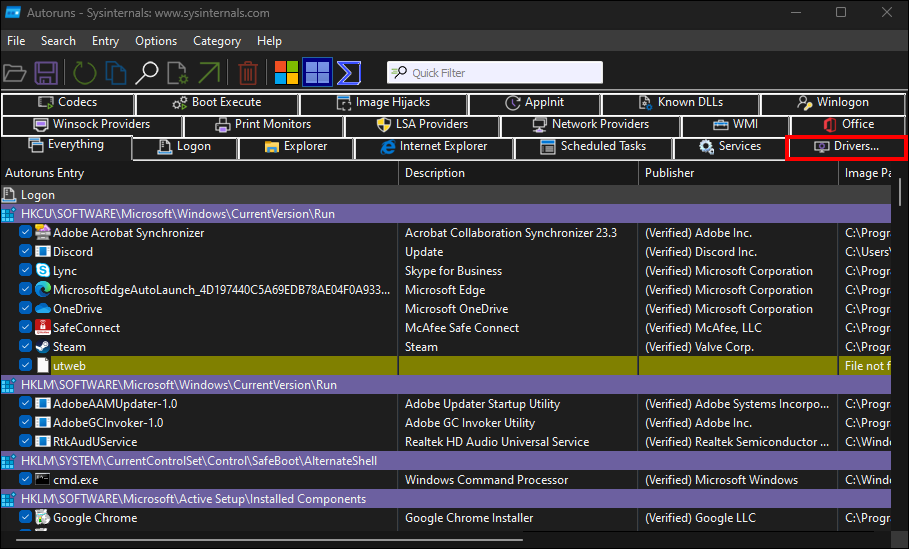
- Navigate to the “Drivers” tab.
- If there are any drivers with issues, they will be highlighted and easy to locate.
- When located, uncheck the box to disable them. If there is an error disabling any of the drivers, right-click it and delete it instead.
- Visit the official website and install the latest drivers.
- Reboot the device and allow Windows to update automatically.
Uninstall the Relevant Apps
If there is no success even after the incompatible drivers have been removed, you need to get rid of software and apps installed from the same manufacturers as the removed drivers. To do this, follow these steps:
- Right-click the “Start” button.
- Select “Apps and Features.”
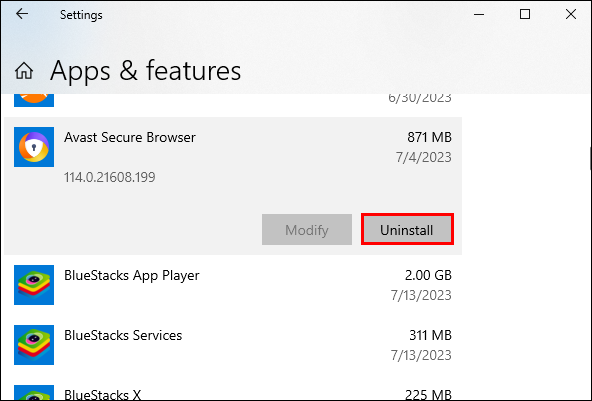
- Find any software developed by the same manufacturer in the installed apps list.
- When located, select the three vertical dots next to the software and choose “Uninstall.”


Uninstalling such apps should resolve the memory integrity disabled issues. If not, there are more things to consider.
Enable DEP
The DEP or Data Execution Prevention option needs to be turned on. This setting protects the Windows system by blocking any executable code from launching in the secure memory areas. To check whether DEP is enabled and set it accordingly, follow these steps:
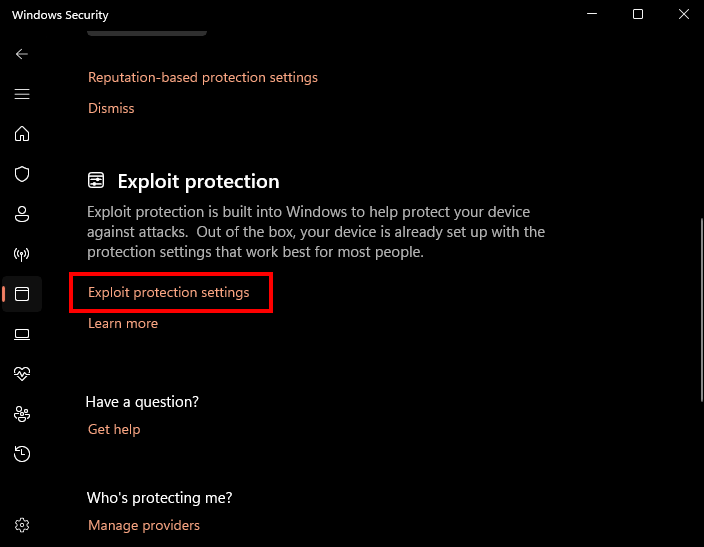
- Navigate to the “Windows Security” app.
- Select “App & browser control.”
- Scroll and select “Exploit protection settings.”
- Make sure “Data Execution Prevention” is on.

Do a Windows Update
Ensuring an up-to-date Windows version is installed on your device can fix disabled or grayed-out memory integrity. Updating your Windows version can fix this issue with no further action needed. To check the status of your Windows version:
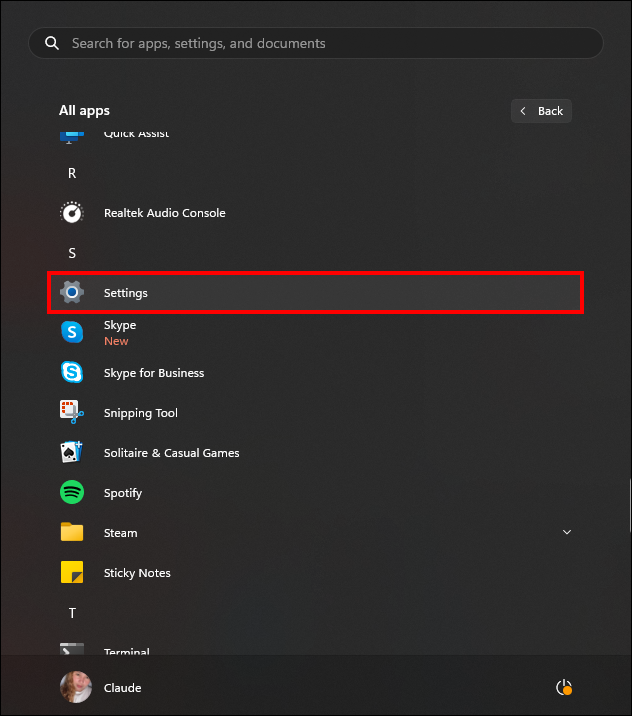
- Click “Start” on your device.
- Go to “Settings.”
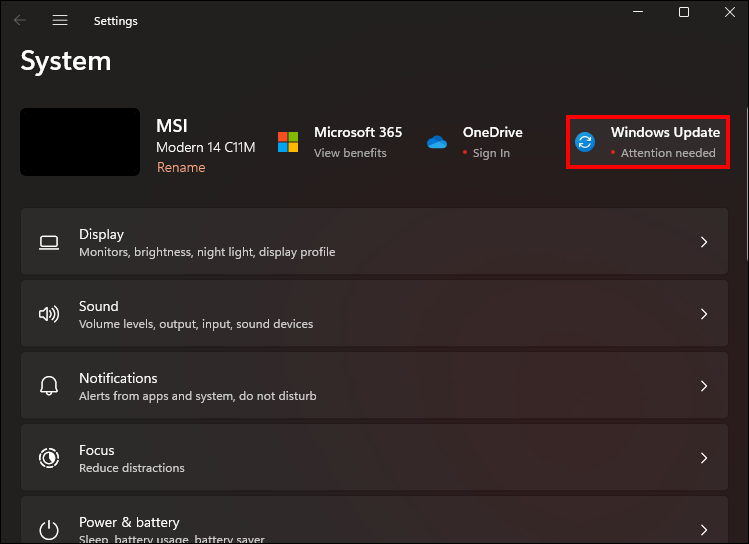
- Select “Windows Update.”
- Click the “Check for updates” option.
- If any updates are available, download them and install them on your device.


Fix Any Corrupt System Files
One of the issues that could cause the disabled memory integrity is missing or corrupt system files. To check and fix the system errors, run a DISM and SFC scan.
To run the DISM and SFC scans:
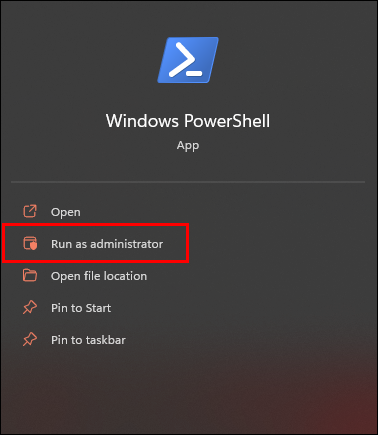
- Select the start button and type in “Windows PowerShell.
- Open it as an administrator by selecting “Run as Administrator.”
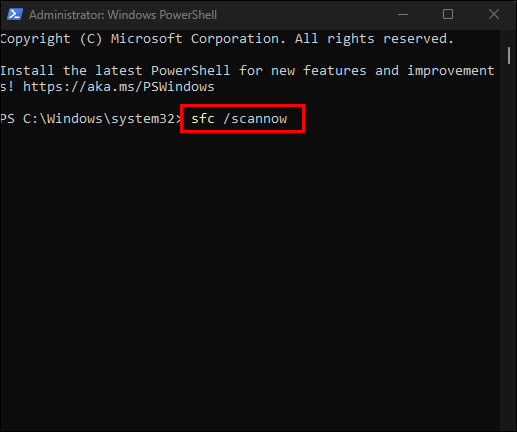
- Type in “sfc /scannow” and press “Enter.”
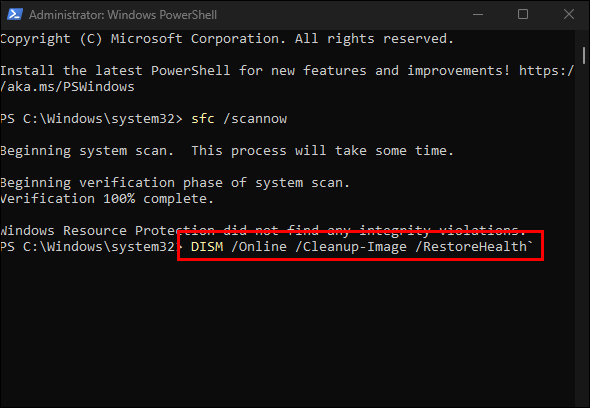
- While PowerShell is still open, run the command “DISM /Online /Cleanup-Image /RestoreHealth” and press “Enter.”
- Once the scans are complete, restart your PC.
This should solve the issue with the memory integrity feature. It should now be possible to enable and disable it.
Reset the Security App
If the security app has some issues, it can interfere with the security functionality, including memory integrity. Here, you need to reset the Security app on Windows. Before taking this path, be aware that resetting Windows Security reverts all security customizations you’ve ever made.
The process here is the same as resetting other Windows apps. Doing so could resolve the disabled memory integrity.
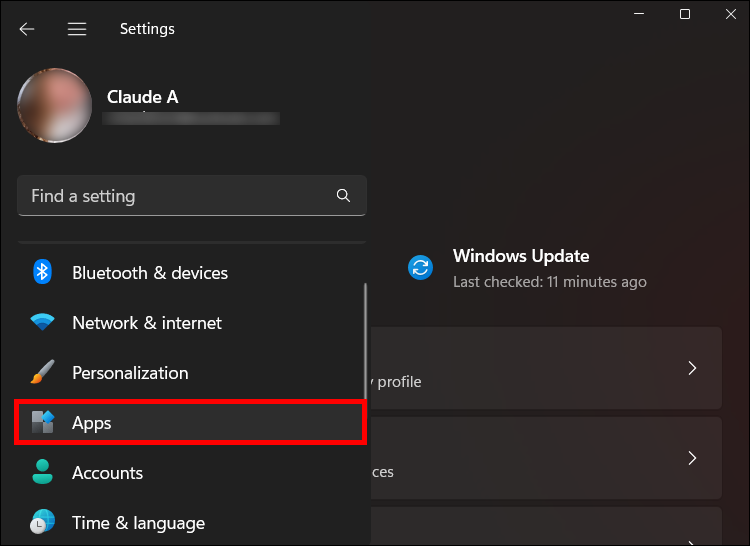
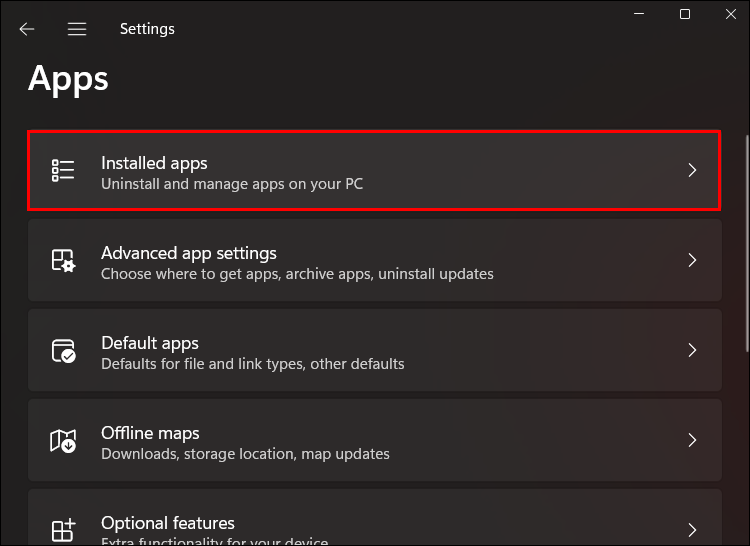
- Press “Win + I” to open Settings.
- Select “Apps.”
- Click “Installed apps.”
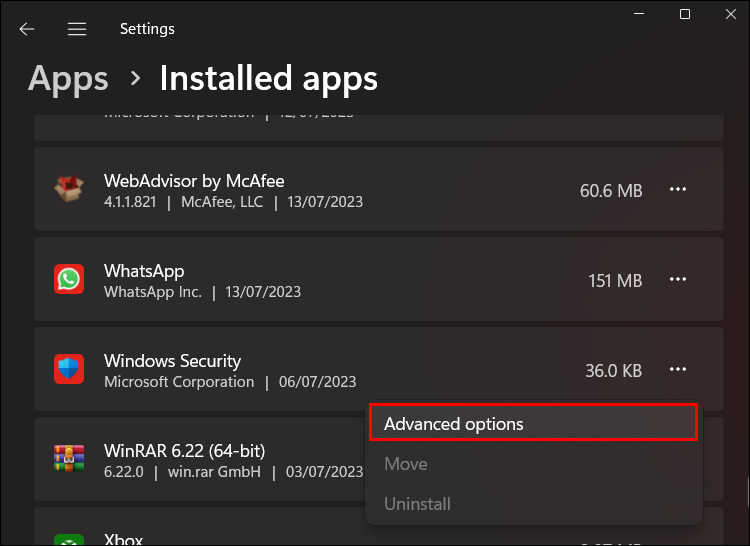
- Scroll through to find the security app.
- Click on the dots and pick “Advanced options.”
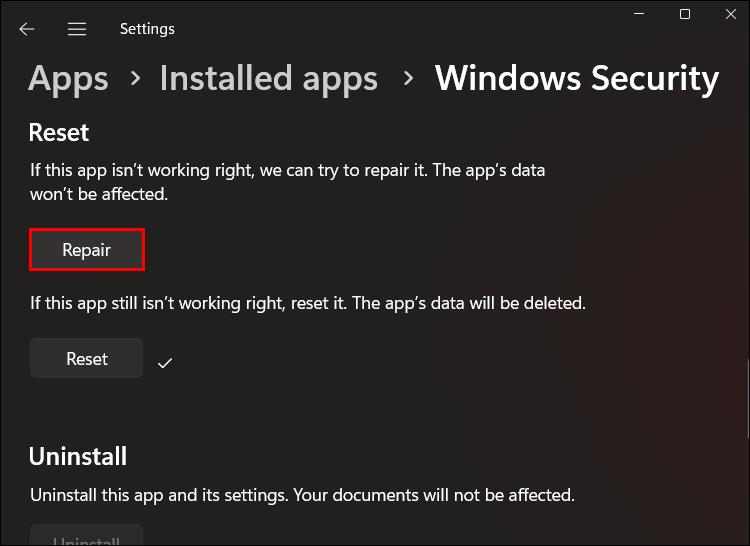
- Scroll to “Reset.”
- Repair the app and try to fix it.
- If it doesn’t work, “click reset” and confirm.


Keep Your Windows Device Secure With Memory Integrity
The Windows integrity feature must be enabled to ensure your device is secure from malware attacks. When disabled, your devices and data stored within the system are vulnerable. The downside is that device performance can be affected.
Have you ever dealt with a disabled or grayed-out memory integrity feature? Which steps did you use to fix the issue? Let us know in the comments section below.
Disclaimer: Some pages on this site may include an affiliate link. This does not effect our editorial in any way.