While there’s nothing wrong with playing Minecraft alone, the game is extra fun when a few friends join you. Many players create servers for lengthy building projects or play with mods because endless possibilities exist. However, not everyone knows how to make one because the process contains slightly confusing steps.
Look no further if you’re searching for the instructions. We’ll also cover the steps Mac users must use to make one.
Creating a Local Minecraft Server for Friends on Windows
These steps in this section will only work for Minecraft: Java Edition. If you play on Bedrock Edition, you must consult different instructions. You’ll need the latest version of Java on your computer, as this program is the only one that can run JAR files. Minecraft should include an embedded version (always up to date), but you can modify the location to point towards a stand-alone version.
Your PC should prompt you to update Java using the stand-alone option whenever it detects a newer version. If using the Minecraft embedded Java, it auto-updates every time the game launches.
Part 1
- Download the “Minecraft Java Edition server“ file.

- Create a folder on your desktop and name it “Minecraft Servers” or whatever you prefer.

- Drag the “minecraft_server.1.xx.x.jar” JAR file into the folder.
- Type “Command Prompt” on the Windows search bar and open it. Admin privileges are not needed.
- Go back to “Windows Explorer” and copy the directory.
- Type “cd” and paste the address before executing the command.
- Type” Java -jar filename.jar” and press “Enter.” You should get a failure to load prompt.
- Open “eula.txt” in the server folder.
- Set “eula=false” to “eula=true” before saving. Now, it will open successfully in the future step.


Part 2
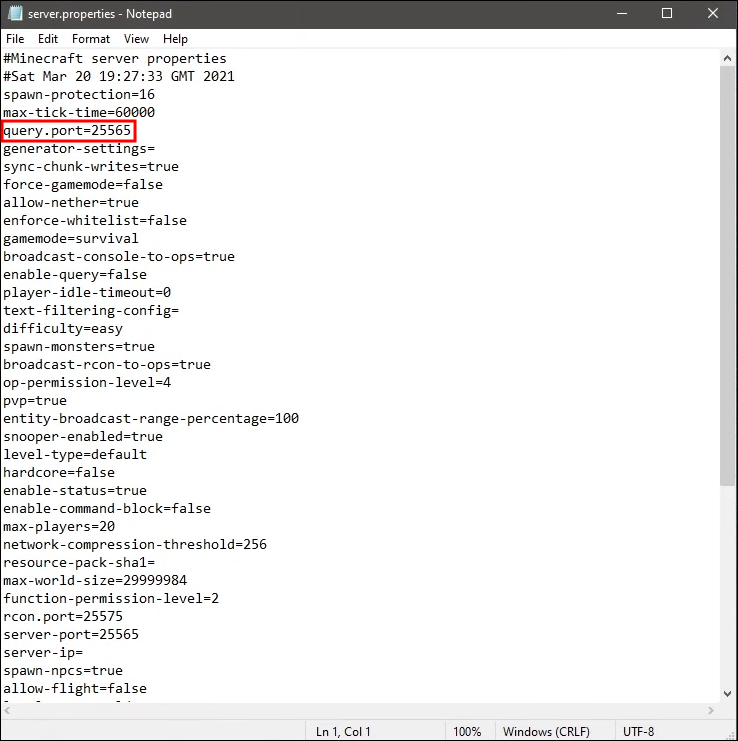
- Right-click “server.properties” and select “Open with -> Notepad.”
- Write down the setting for “query.port=” because this number will be required for port-forwarding later.
- Type your “PC IP address” (IPv4) in the “server-ip=” setting. You can obtain it using “ipconfig /all” in the “Command Prompt.” Others use this address to connect to your PC’s Minecraft server.
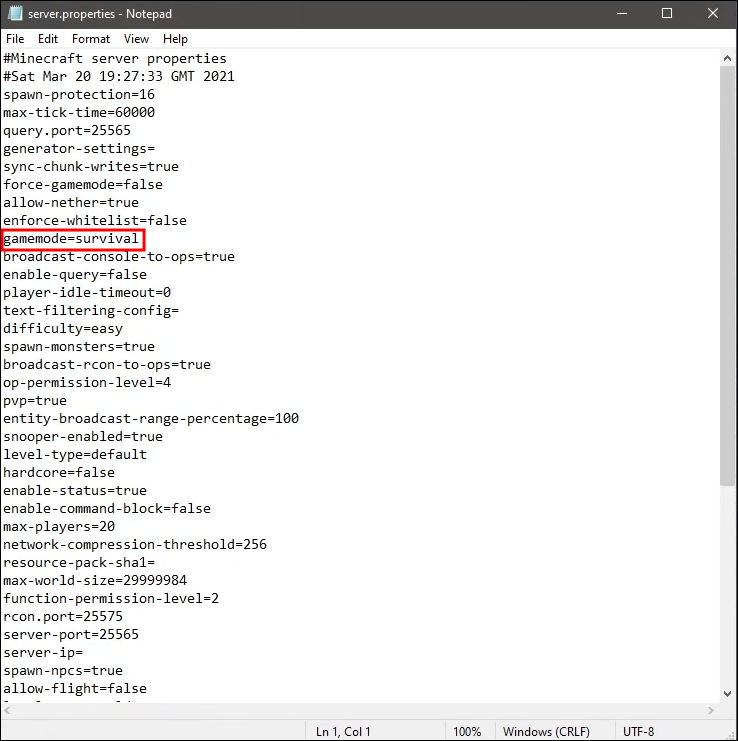
- Type “survival” or “creative” after “gamemode=” to set the mode.
- Modify “spawn-protection” if you wish.
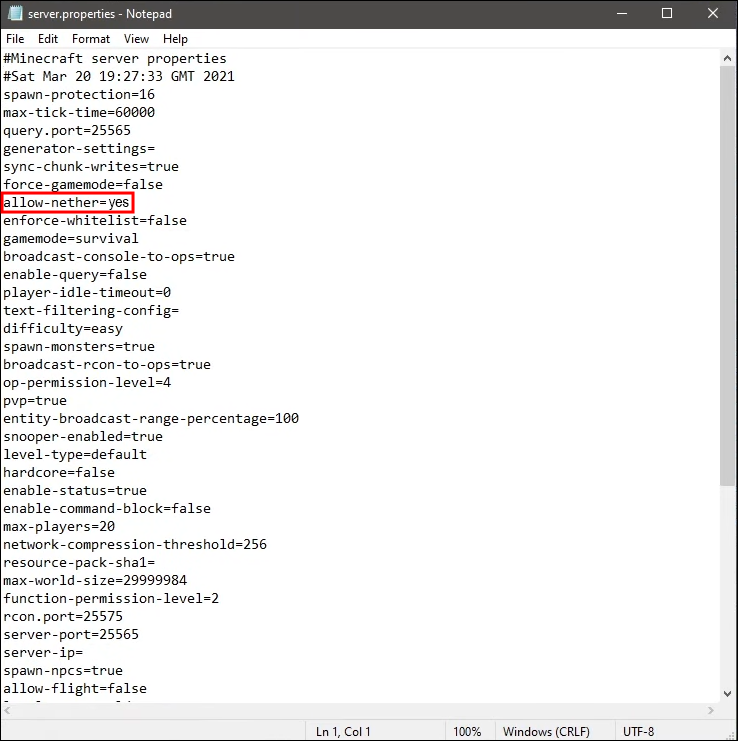
- Type “yes” or “no” for “allow-nether.”
- Set up the difficulty to “peaceful,” “easy,” “normal,” or “hard.”
- Choose whether you want PVP by typing “true” or “false.”
- Designate the maximum amount of players the server can hold.
- After “level-seed,” you can type a seed if you need to add a particular world.
- Finish setting up the “server.properties” file with other preferences as needed, then click “File ->Save” and close “Notepad.”


Part 3
- Go back to the “Command Prompt.”
- Type “cd” and paste your “Minecraft Servers” folder (or whatever you named it) address, then press “Enter” to execute the command.
- Type” Java -jar filename.jar” and press “Enter.” This time, the command should work successfully.
- Launch your “server.jar” file within the “Server” folder.
- Refer to the server port in the server.properties file, which is always “25565,” and add that number to the TCP and UDP port lists in your router settings. See your router’s manual for details.

For the complete list of configurable server properties, visit this page for the details. In addition to some of the aspects we covered above, you can adjust some obscure settings.
Creating a Minecraft Server on Mac
While Macs use an entirely different operating system, they can still run the same Minecraft server file as Windows users. It can be downloaded here. You’ll be running commands using the Terminal as well.
Part 1
- Download the “Minecraft Java Edition server“ JAR file.
- Open “TextEdit” and set the format to “plain text.”
- Paste the following lines in the file:
#!/bin/bashcd "$(dirname "$0")"exec java -Xmx1G -Xms1G -jar minecraft_server.jar - Save the file as “start.command” without quotation marks.
- Open “Terminal” on your Mac.
- Type “chmod A+x” without quotes and drag “start.command” into the Terminal to provide the right path.
- Press “Enter” to save the changes.
- Double-click the file to start the server.
- Exit the server.


Part 2
- Go to the server command line and type “/op <Minecraft username>” without quotes (“”) or brackets (< >) and with your Minecraft username. When you log in to the server using your Minecraft account, this will provide you administrator rights.
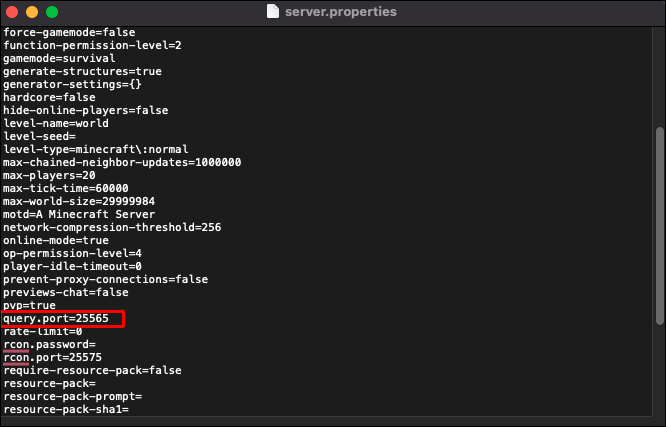
- Open “server.properties.”
- Configure the server to your preferences. Insert your “PC IP address” in the “server-ip=” setting for private play with friends.
- Check your “query.port” number and record it. It should be “25565.”
- Save the file.
- Access your router settings and add the TCP and UDP port number “25565” to the firewall. Ensure you consult the exact instructions for your router since they differ.


As for getting a public IP address to use for public players, it only takes one Google search and several seconds. If you go that route, you’ll change the PC IP address to the public one.
This website will help you find your IPv4 address for private play with friends.
Minecraft Server Creation FAQs
How much is a private Minecraft server?
Private Minecraft servers are extra secure, but you must pay to use them. The cheapest options cost less than $5 a month, but some plans are more expensive because of additional protection against DDoS attempts and other threats.
How much is a Minecraft Realm?
Minecraft Realms are personal multiplayer servers that Minecraft runs. They’re active even after everyone logs off. A Minecraft Realm costs $7.99 a month.
Who’s Around?
With the help of Minecraft servers, friends can collaborate on a grand reconstruction of the pyramids of Giza or survive in the wild together. Servers for public use can be free, but private ones are available as subscriptions if you want extra protection. However, you only need your PC’s IP address to play with trusted friends. Hosting your own server requires some RAM, but that’s doable with a gaming PC.
Disclaimer: Some pages on this site may include an affiliate link. This does not effect our editorial in any way.