Minecraft is one of the most popular games but has its share of issues. One common problem is that the Minecraft Launcher won’t open. Double-clicking the program doesn’t seem to do anything. So, how do you overcome this obstacle?
This article shows you how to troubleshoot the problem when your Minecraft launcher doesn’t respond.
Minecraft Launcher Won’t Open on Windows 11
The Minecraft Launcher may not open on Windows 11 due to certain mods and privilege issues. The program requires administrative permission to access system resources.
Solution 1: Run Minecraft Launcher as an Administrator
- Right-click the “Minecraft Launcher” shortcut and choose “Properties.”

- Click on the “Compatibility” tab.

- Add a tick to the “Run this program as an administrator” box.
- Click “Apply” then “OK” to leave the properties window.
- Relaunch “Minecraft Launcher” to see if it works fine.


Solution 2: Update Graphics Drivers to Fix the Minecraft Launcher
An outdated graphics driver might also be the culprit that causes Minecraft Launcher not to open. Here’s how to resolve the issue:
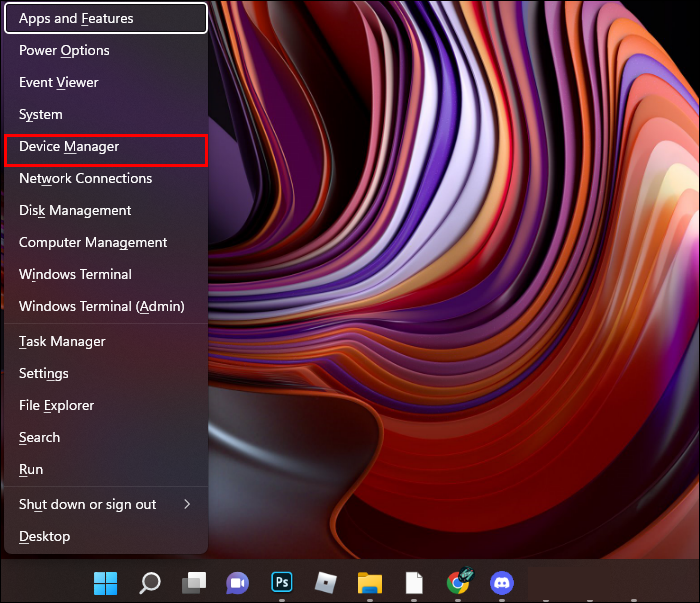
- Press “Win + X” and select “Device Manager.”
- Click “Display adapters.”
- Right-click on your graphics card in the “Display Adapters” dropdown, then select “Update driver.”
- Choose “Search automatically for drivers.”
- Let the process complete, then reopen “Minecraft Launcher” to see if this solves the problem.


Minecraft Launcher Won’t Open on Windows 10
There are several reasons why your Minecraft Launcher doesn’t work on Windows 10. For instance, you might be dealing with conflicting programs. Third-party applications, background services, and antivirus utilities can interfere with Minecraft properties, keeping the launcher from opening.
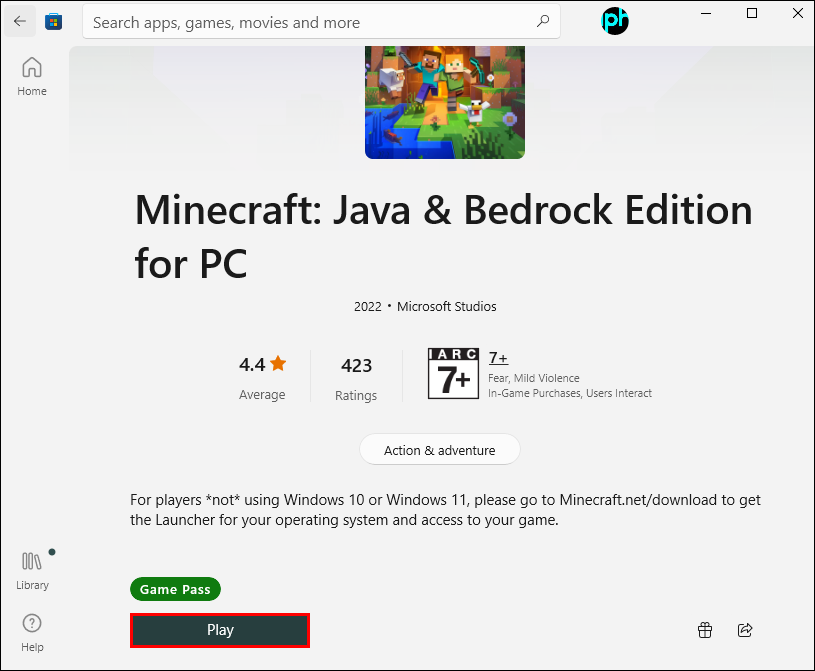
Solution 1: Reset Microsoft Store and Reinstall Minecraft Launcher
The easiest solution is to reinstall Minecraft, but if this doesn’t do the trick, you can reset the Microsoft Store.
- Press the “Windows key + R” combination.
- Type “WSReset” in the “Open:” box, then click “OK” or press “Enter.”
- Reopen the “Minecraft Launcher.”


Solution 2: Reset the Minecraft Launcher
Another way to address conflicting programs is to repair and reset the Minecraft Launcher.
- Click on the “Windows Start Menu.”
- Right-click on “Minecraft Launcher,” then select “More -> App settings.”
- Scroll down and choose “Repair“ to try and fix the issue without losing data.
- Reopen “Minecraft Launcher” and see if the problem persists. If it worked, you’re done. If it fails, move on to the next step.
- Return to the “Minecraft Launcher” settings and choose “Reset,” which will erase all data.
- Reopen “Minecraft Launcher” once again and see if the problem persists.


Solution 3: Disable Mods
If mods are interfering with the Launcher, you can delete or temporarily move them to see if that solves the problem.
- Press “Windows + R” to open the “Run” window.
- Type or copy/paste”
%Appdata%"without quotes into the “Open:” box, then click “OK” or press “Enter.” - Open the “.minecraft -> mods” folder.
- Press “Ctrl + A” to select all files in the folder.
- Press “Delete” or right-click and select “Delete,” “Cut,” or “Copy,” depending on your preference. The copy option is the safest to use, just in case all files can’t paste successfully. However, you must delete the originals once complete.


Solution 4: Delete the Profile Data
Another potential culprit to Minecraft Launcher not opening is corrupted profile data. Erasing it should make the program work normally.
- Press the “Windows key + R” combination, then type or copy/paste”
%appdata%"without quotes and press “Enter.” - Find and right-click on “launcher_profiles.json,” then choose “Delete.”

Minecraft Launcher Won’t Open on a Mac
Mac users face similar problems as Windows PC gamers regarding Minecraft Launcher not opening. Problems such as incompatible software or corrupt files could easily be the culprit. Here are some solutions.
Solution 1: Find and Remove or Edit Incompatible Software
The Minecraft Launcher on Mac might not initiate due to startup issues caused by incompatible software. Removing or editing such programs may solve the problem.
- Open your web browser and go to MinecraftHopper. It lists programs incompatible with Minecraft and provides solutions, such as uninstalling, making exceptions, or changing the settings.
- Click “Go -> Applications” from the Menu bar at the top.
- See if your computer contains any incompatible software. If so, select it and click the “Uninstall” button or follow the modifying instructions on the MinecraftHopper website.
- Restart your machine to apply the changes.
- Try to open Minecraft Launcher again.


Solution 2: Reinstall Minecraft Launcher
In addition to removing programs, you can redownload your Minecraft Launcher to overcome startup problems.
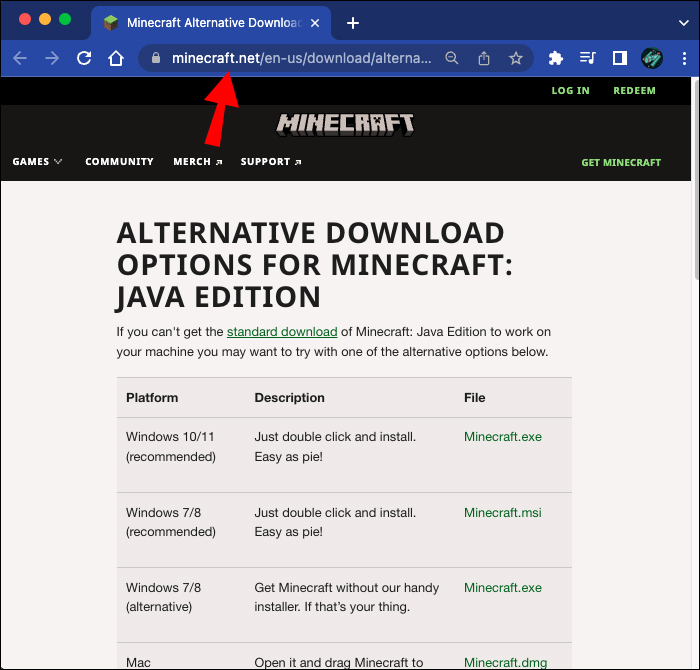
- If Minecraft Launcher fails to work, download an alternate proper Minecraft install option. Look for and download the Mac option.
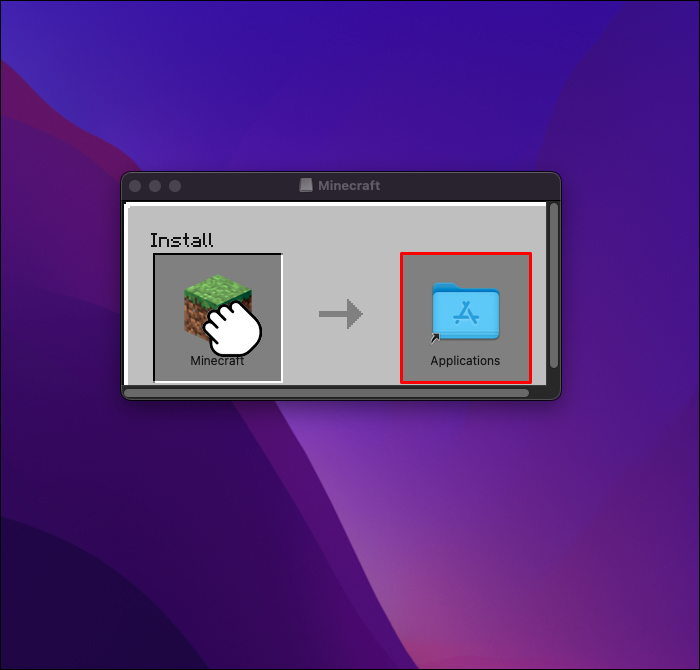
- Install the file by double-clicking the downloaded entry and dragging your Minecraft icon to your “Applications” folder. Disregard any warnings about an outdated Java version.
- Once Minecraft Launcher installs, open the program to see if it works.
Solution 3: Open Minecraft Launcher using the Bootstrap.jar file
If you download the Legacy Launcher but it still doesn’t open, you can use the application with the “Bootstrap.jar” file.
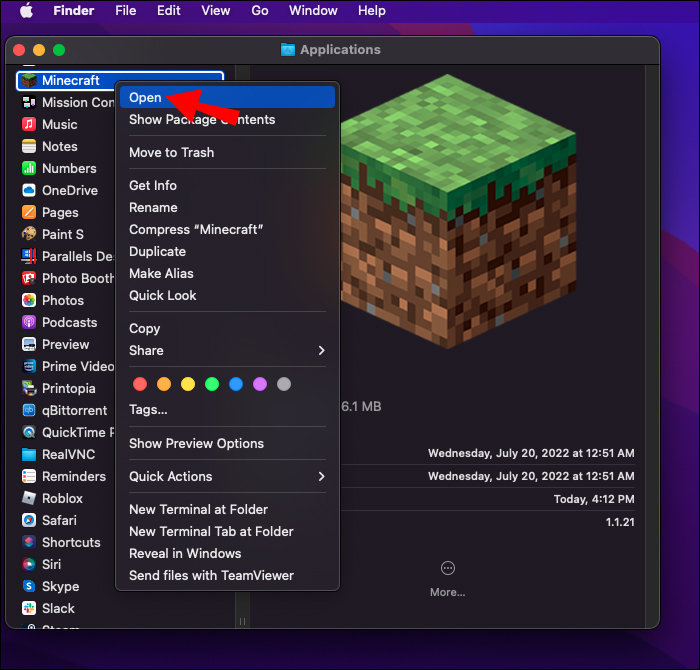
- Double-click the alternate install file you previously downloaded. Rather than drag the “Minecraft” folder to the “Applications” folder, right-click it and choose “Show Package Contents.”
- Navigate to “Contents -> Resources -> Java.”
- Open the “Bootstrap.jar” file, and your Launcher should work correctly.


Minecraft Launcher Won’t Open on a Chromebook
The Minecraft Launcher can malfunction on your Chromebook too. Regardless of the culprit, the following method works great in most cases.
- Select the “Chromebook Launcher” in the lower-left part of the screen.
- Type in “
Terminal“ and press “Enter” to start your Linux terminal. - While the terminal is open, type or copy/paste the following string:
sudo apt install libsecret-1.0 - Type or copy/paste the following command to reboot your Linux configuration:
sudo reboot - Open Minecraft Launcher once more to see if the above steps solved the ‘launcher won’t start’ problem.


Minecraft Launcher Won’t Open on Linux
The solution for your Linux Minecraft Launcher is the same as for Chromebooks, mainly because they both use the Linux Terminal.
- For Ubuntu, go to the lower-left section of the display and open your Linux Launcher. Other Linux versions may vary.
- Launch the “Terminal” app using any method you desire.
- Type or copy/paste the following command:
sudo apt install libsecret-1.0 - Type or copy/paste the following command to reboot your machine:
sudo reboot - Open Minecraft Launcher to see if the problem is solved.


Minecraft Launcher Won’t Open Due to Java Issues
Your Minecraft Launcher can crash upon startup if your Java installation is outdated or corrupt. Minecraft always includes and updates to the correct Java version (custom and secure built-in version). Still, sometimes it gets corrupted or manually changed by a user, security programs, optimizing software, or system malfunctions. You don’t need the standalone Java program since Microsoft embeds it in the Minecraft Launcher.
How to Check Your Java Version on Windows 10/11
You won’t see a Java folder in “Program Files” or the Java app in “Apps & Programs” if you never installed the standalone version. Since Minecraft Java includes a “built-in” version of Java (since 2015), it gets embedded into the system and does not appear in the above two places. It receives updates regularly and gets checked for newer releases whenever you open the Minecraft Launcher.
If you modified Minecraft Java to point to a standalone version of Java (probably for older mods and such), you may see it using the steps below.
- Right-click the “Start Menu”
- Select “Apps & Features” and scroll down to find Java in the list.
- Click the “Configure Java” button to access the program’s “Control Panel.”
- Click the “About” tab in the “General” window. You should now see a dialog box displaying your Java version.
- If you need to update the program, download and install it from this website.


How to Check Your Java Version on Mac
Similar to not seeing Java in Windows, you won’t see a Java JRE folder in “Library” or the Java perfpane (for Java Control Panel) in “System Preferences” if you never installed the standalone version. Since Minecraft Java embeds the Java environment internally, it won’t appear in the above two places. When you open the Minecraft Launcher, the “embedded” Java gets checked for newer releases and receives updates regularly without user intervention.
You may find Java using the steps below, but only if you modified Minecraft Java on your Mac to point to a specific standalone version (probably for older mods and compatibility issues).
- Go to the top-left section of your display and hit the Apple icon.
- Select “System Preferences.”
- Click Java, followed by “About.”
- Download Java 8 or higher from the manual Java downloads page if needed.


Fix Wrong Java Path for Minecraft Java
While installing the correct Java version should resolve the issue, it may not always fix your Launcher. Namely, you might be running multiple Java versions conflicting with your game. If so, you must set the correct program path to prevent confusion.
- Access Java from “Apps & Features” (Windows) or “System Preferences” (Mac), depending on whether you have a Windows or Mac computer.
- Click your “Java” tab and choose the “View” button.
- Highlight and copy the text under the “Path” section. The installation path should contain the following line: /Library/Internet Plug-Ins/JavaAppletPlugin.plugin/Contents/Home/bin/java.
- Open the “Minecraft Launcher” and select “Launch Options.”
- Click the game version you wish to run.
- Turn on the “Java Executable” feature using the toggle.
- Paste the copied path into the “Jave executable” box, then click “SAVE.”
- Exit the Java configuration window and reopen “Minecraft Launcher.”


Closing Thoughts
Minecraft offers endless thrills, but Launcher complications can often spoil the fun. It may take time to restore standard settings through trial and error using the above methods. However, opening your favorite game without a hitch will be worth the trouble.
Are you familiar with any other way of repairing the Minecraft Launcher? Which method works best for you? Share your experiences in the comments section below.
Disclaimer: Some pages on this site may include an affiliate link. This does not effect our editorial in any way.