Much like any streaming software, OBS Studio isn’t immune to audio issues. Of course, you could have a crispy clear image, but what good is it if your viewers can’t hear a word you’re saying? Luckily, there are several ways to deal with low-quality mic audio in OBS.
In this tutorial, we’ll explain how to up the volume of your mic while streaming and go over the basic settings. And since OBS Studio allows you to switch between several audio filters, we’ll show you how to do it with step-by-step instructions. So keep reading to learn how to up your mic game and stream like a pro.
How to Make Mic Louder in OBS on a Desktop
Before you move on to some more advanced troubleshooting measures, it’s best to check the basics first. The default volume setting is never too loud in OBS Studio, so simply increasing it might do the trick. Here’s how to do it:
- Launch OBS Studio from your computer. Add a preferred Scene and Source to the corresponding boxes at the bottom of the screen.

- Next to the “Sources” box, you’ll see the “Mixer” panel on the right-hand side. Slide the toggle marked “Mic/Aux” to the right to increase the volume.

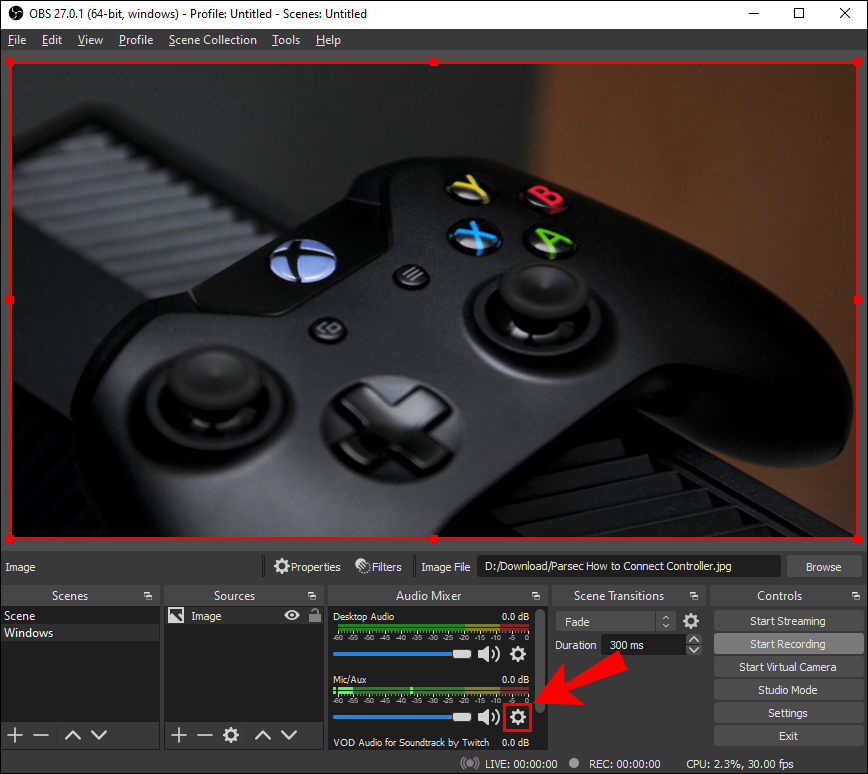
- If the volume is already up, click on the tiny gear icon in the bottom-right corner.
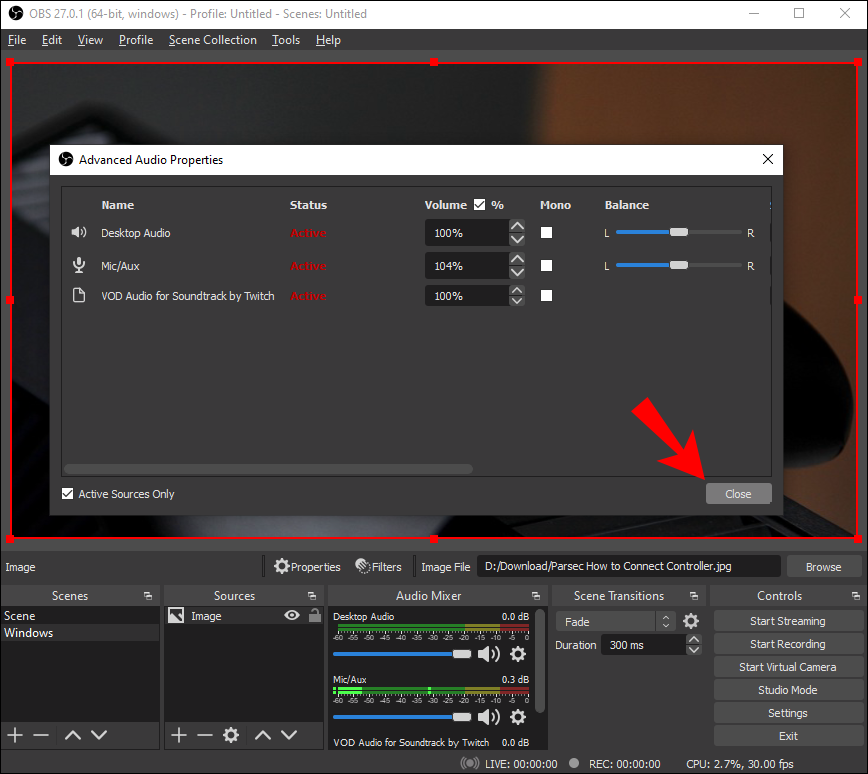
- A drop-down menu will appear. Choose “Advanced Audio Properties” from the list of options.
- A new window will open. Next to the “Mic/Aux” property, you’ll see a number indicating the volume percentage. Clear the field and enter a different value. Don’t be confused if the volume is already at 100%. You can go higher.
- Once you’re satisfied with the mic volume, click “Close.”


Another thing you can do is check whether you enabled the right mic. Since OBS Studio allows you to connect multiple devices simultaneously, it’s pretty easy to lose track. Luckily, the software is pretty streamlined, so you can switch between different mics with ease. Here’s how:
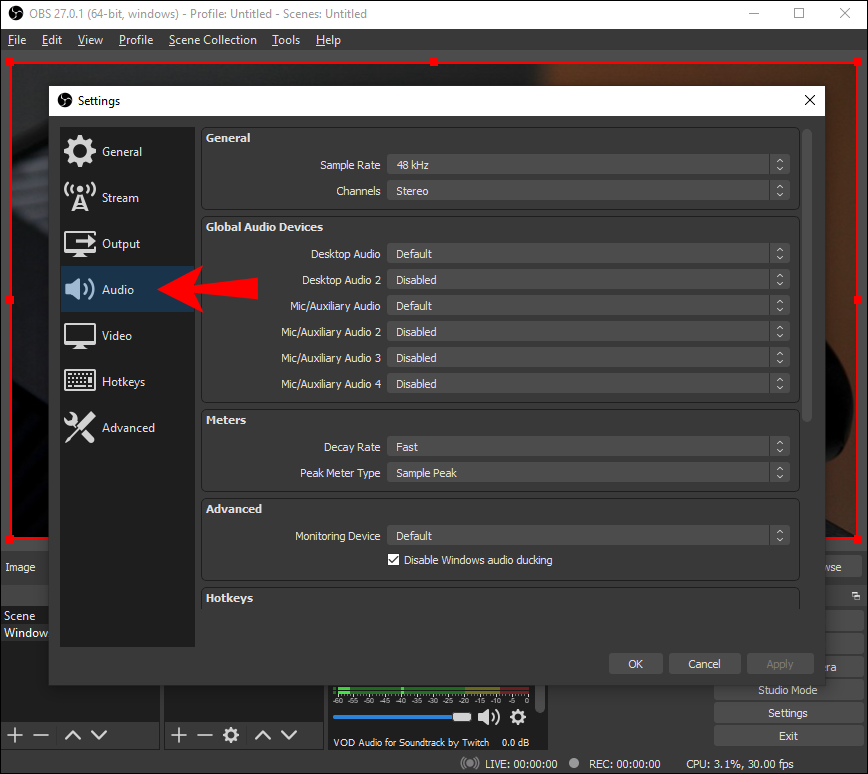
- Open OBS and click on “Settings” in the bottom-right corner of the screen.
- A new window will appear. Then, in the panel on the left-hand side, click on the “Audio” tab.
- Under the “Devices” section, make sure only the mic(s) you wish to use is enabled.
- Click “OK” to save any changes.


Sometimes, it’s best to start over and add the device manually. You can also play around with different microphone settings while you’re at it for even better results. Here’s what you should do:
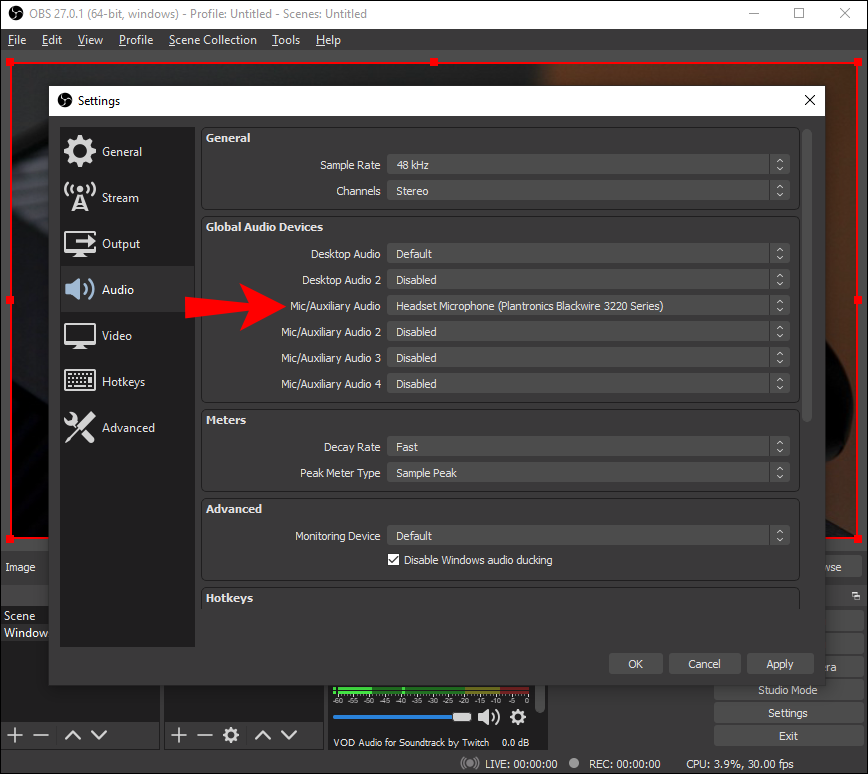
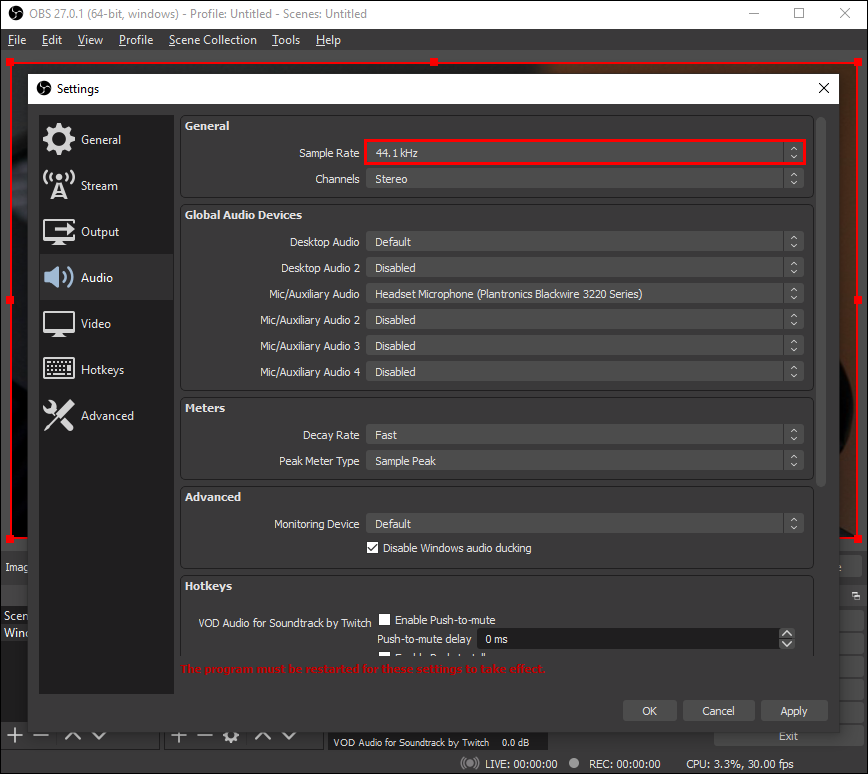
- Go to “Settings,” and then open the “Audio” tab.
- For the “Sample Rate,” make sure it’s set to 44.1 kHz since it’s the optimal configuration for OBS Studio.
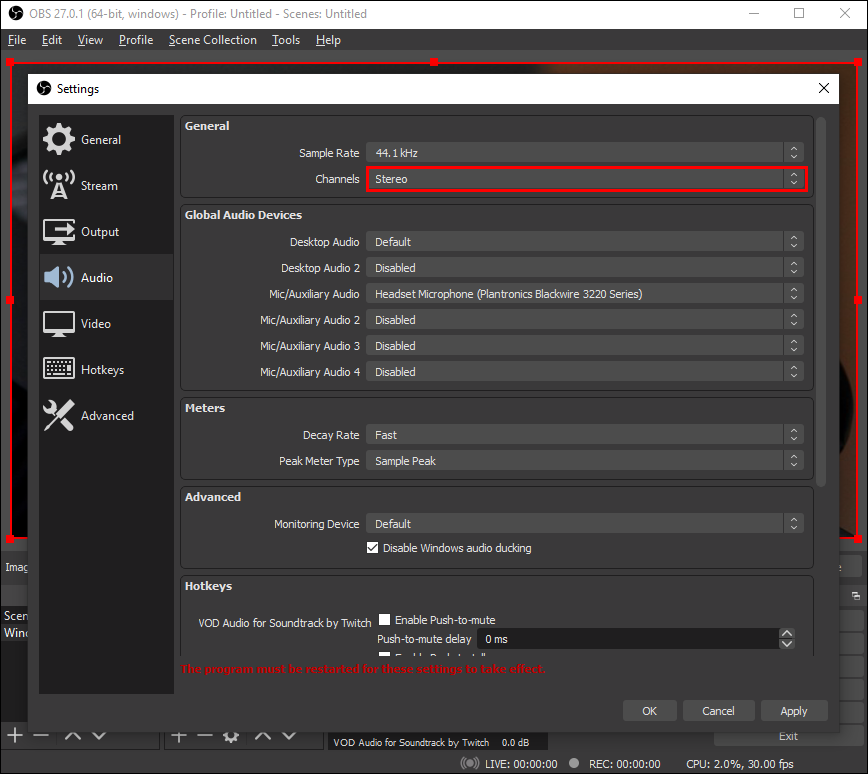
- For the “Channel,” make sure to select “Stereo.”
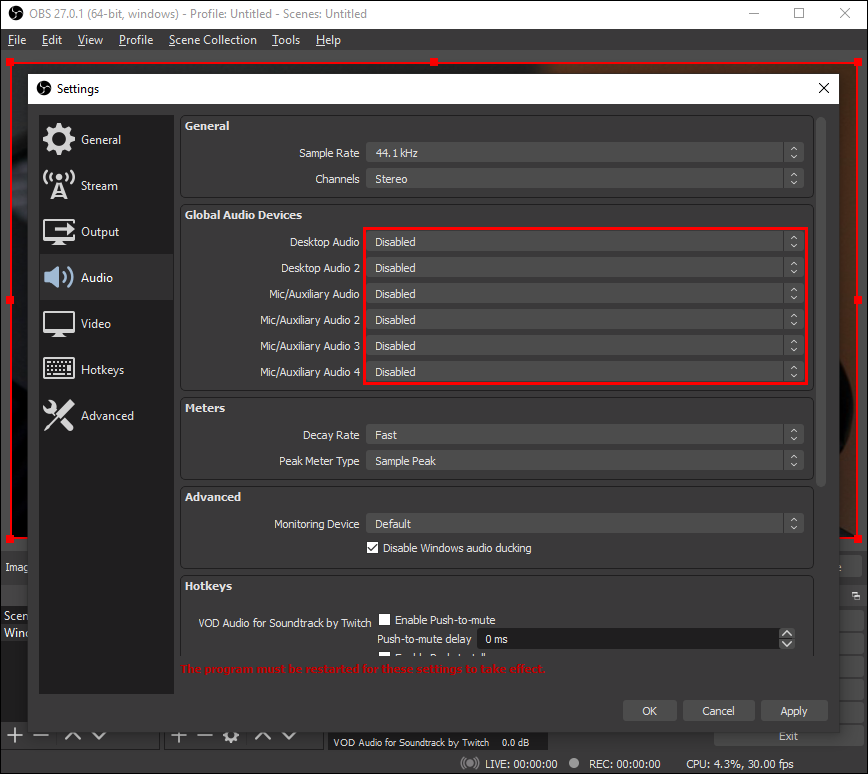
- Under “Devices,” proceed to disable every device. Yes, even the microphone.
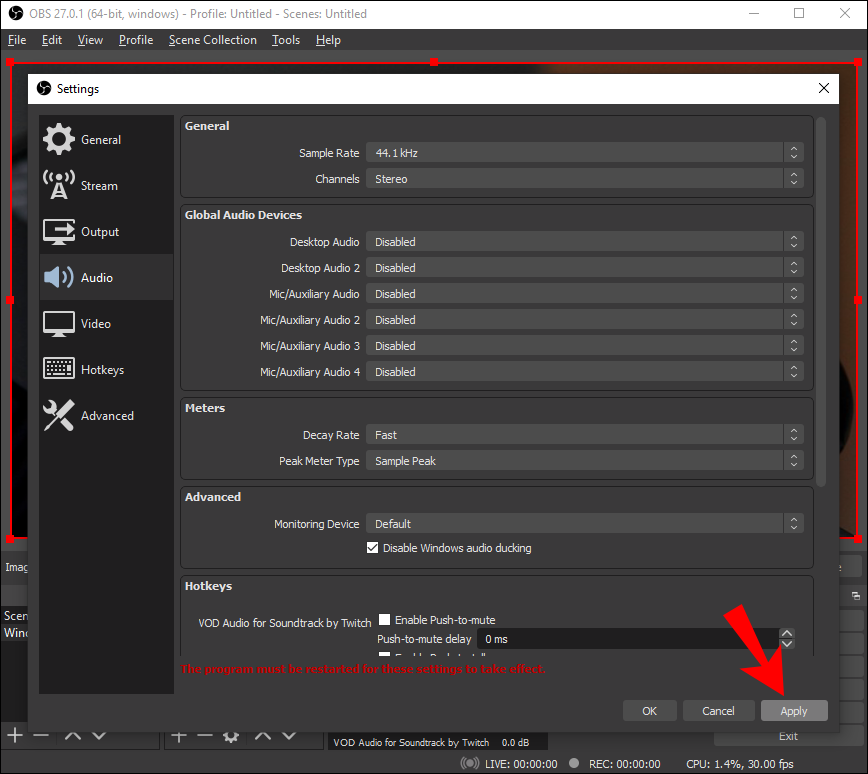
- Click “Apply” once you’re done.

After you turned off all devices, you can go on to add the preferred microphone manually. Here’s how to do it:
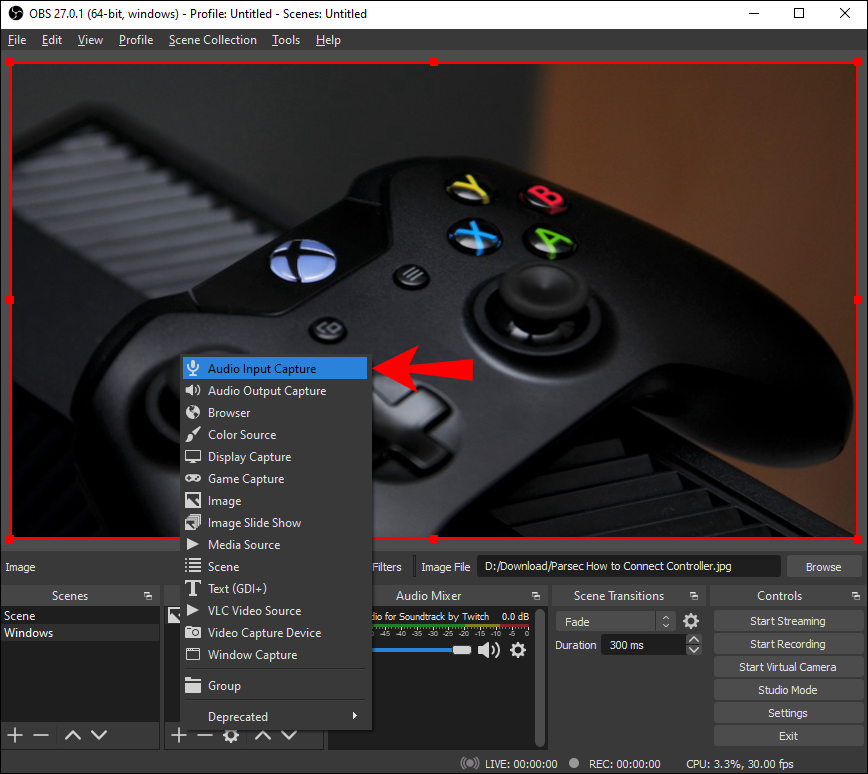
- Scroll down to the “Sources” box at the bottom of the page. Then, click on the tiny “+” button in the bottom-left corner.
- From the drop-down options panel, select “Audio Input Capture.”
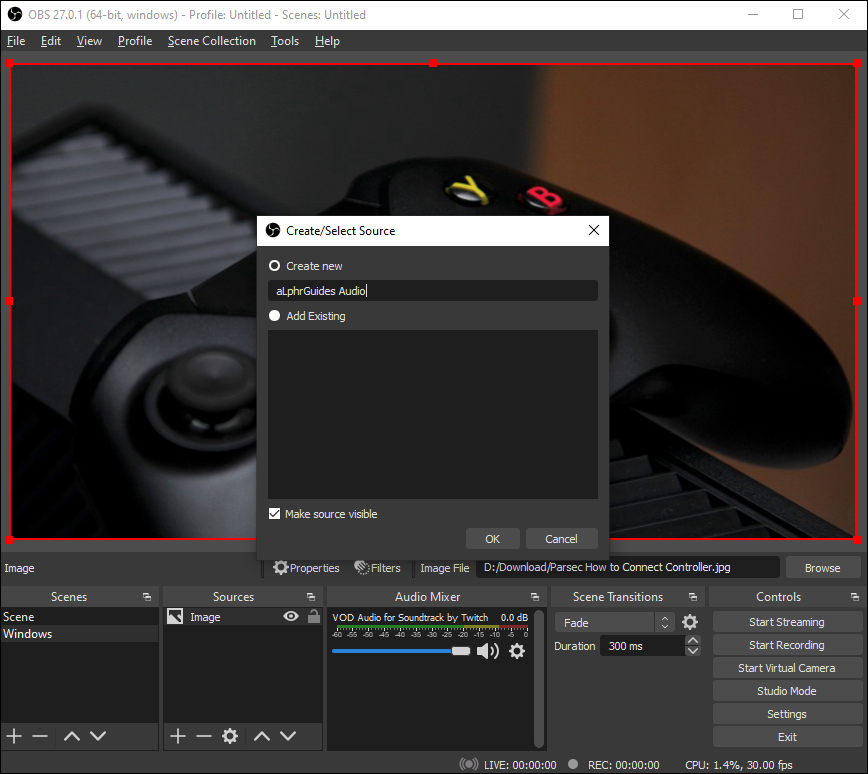
- A small pop-up box will appear. Enter the title and click “OK.”
- Another window will appear. Click on the tiny downward arrow next to “Devices” to open a drop-down list. Next, select your microphone and press “OK.”

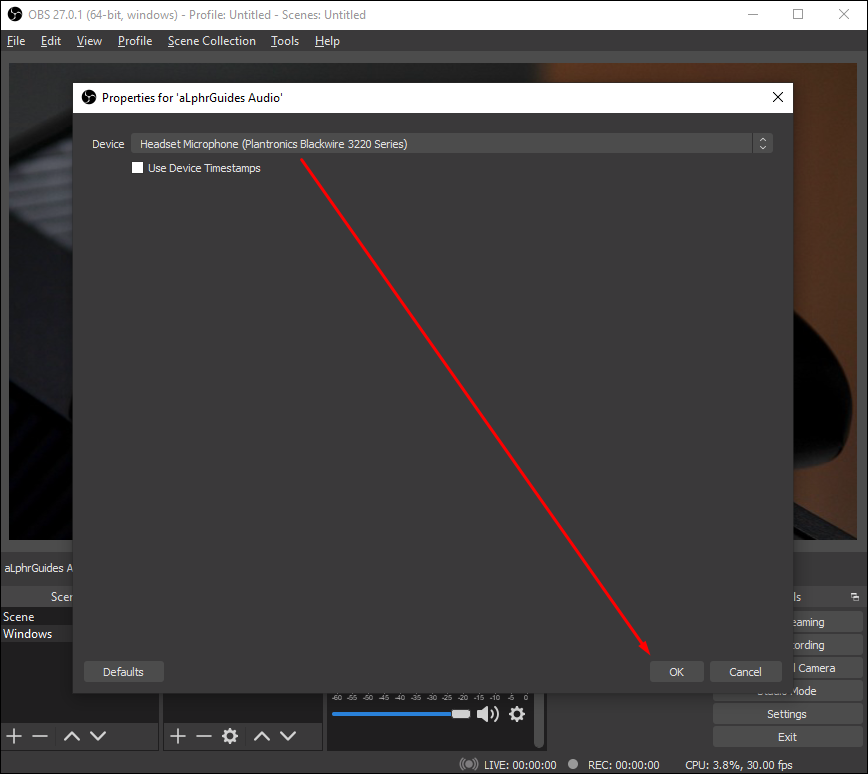
Once you’re done, check the “Audio Mixer” box to see if the mic has been added successfully.
Additional FAQs
How loud should my mic be in OBS?
While the ideal volume level can be subjective, OBS does provide a volume meter that lets you know if you’re too loud. It’s a pretty nifty feature that’s incredibly easy to interpret.
When you scroll down to the “Mixer” box, you’ll see a multi-colored bar underneath each audio source. The colors range from green to yellow and are there to indicate where you are volume-wise. Depending on how loud you are, the colors will bounce from one end to the next, allowing you to adjust accordingly.
Ideally, you want to stay in the “yellow zone” while speaking. On the other hand, gameplay sounds, music, and similar audio should be somewhat lower for your voice to be heard. In that case, aim for the “green zone” instead. Finally, much like a traffic light, if the color red is flashing, you need to stop what you’re doing and regroup.
Testing, Testing: Is This Thing On?
Mic problems are not uncommon with OBS Studio, or any other streaming software for that matter. Even with top-notch equipment, you can still come off as quiet. Luckily, it’s not a difficult thing to fix.
The most obvious step is to increase the volume by using the advanced audio settings. If that doesn’t work, you can try one of the many fantastic filters that come with the app. Finally, your OBS Studio version might be outdated. In that case, download the latest framework for better audio quality.
Do you often experience mic issues? How well do you know OBS Studio? Feel free to comment below and tell us if there’s another way to increase the mic volume.
Disclaimer: Some pages on this site may include an affiliate link. This does not effect our editorial in any way.