When it comes to computer security, passwords are one of the most important factors. By password-protecting a folder on your Mac, you can keep your files safe from prying eyes.
In this article, we’ll show you how to do just that.
Securing Folders With a Password on a Mac
In today’s digital age, it’s more important than ever to take steps to protect your personal information. One way to do so is by password-protecting folders on your Mac. This adds an extra layer of security, requiring anyone who wants to access the folder to enter a password.
This can be especially important if you store sensitive information on your computers, such as financial documents or confidential work files. By password protecting these folders, you can help to ensure that only those with authorized access can view the contents.
In addition, password protection can deter casual users from accessing shared folders on your Mac, preventing them from accidentally deleting or modifying important files.
Disk Utility is an excellent tool for this purpose. It allows you to create a password-protected disk image that can be used to store your confidential data. The disk image can be mounted as a new volume, and only users with the correct password will be able to access the data.
Disk Utility uses 128-bit AES encryption or 256-bit AES encryption to protect the data, so you can be confident that your data will be safe from unauthorized access.
Here’s how to password-protect a folder using Disk Utility on your Mac:
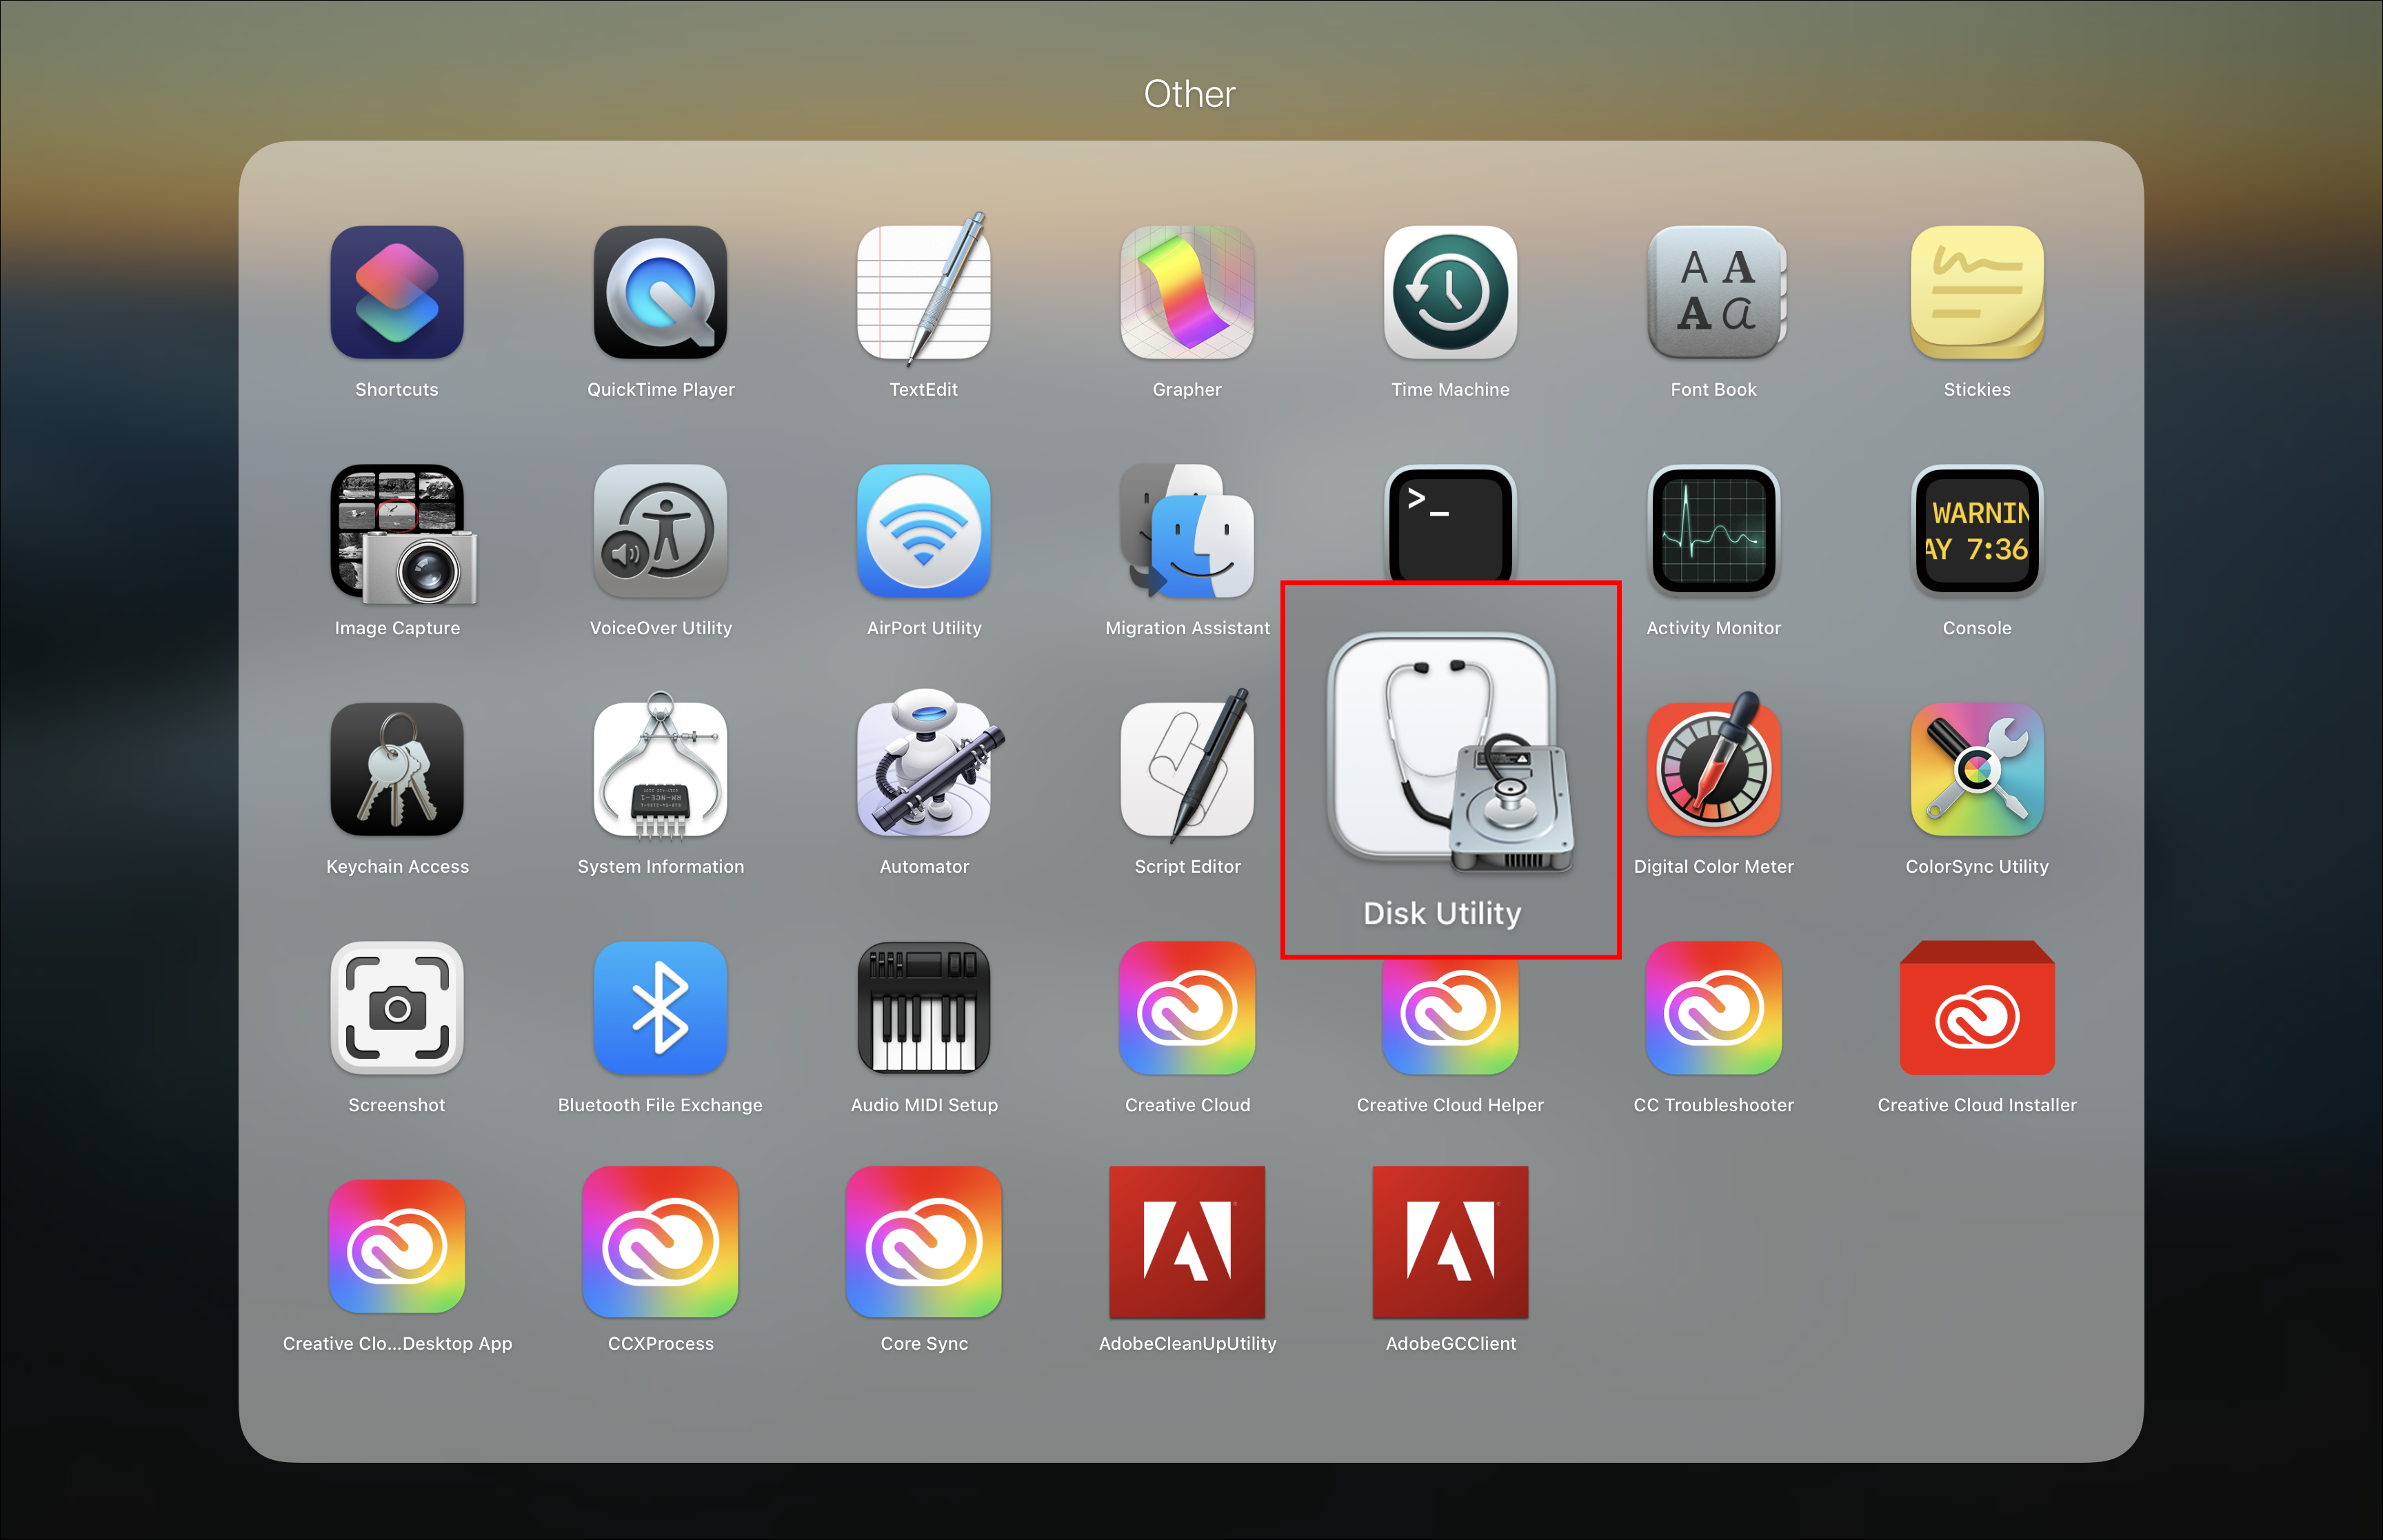
- Open Disk Utility by clicking on the Finder icon in the dock and then select “Applications” > “Utilities” > “Disk Utility.”
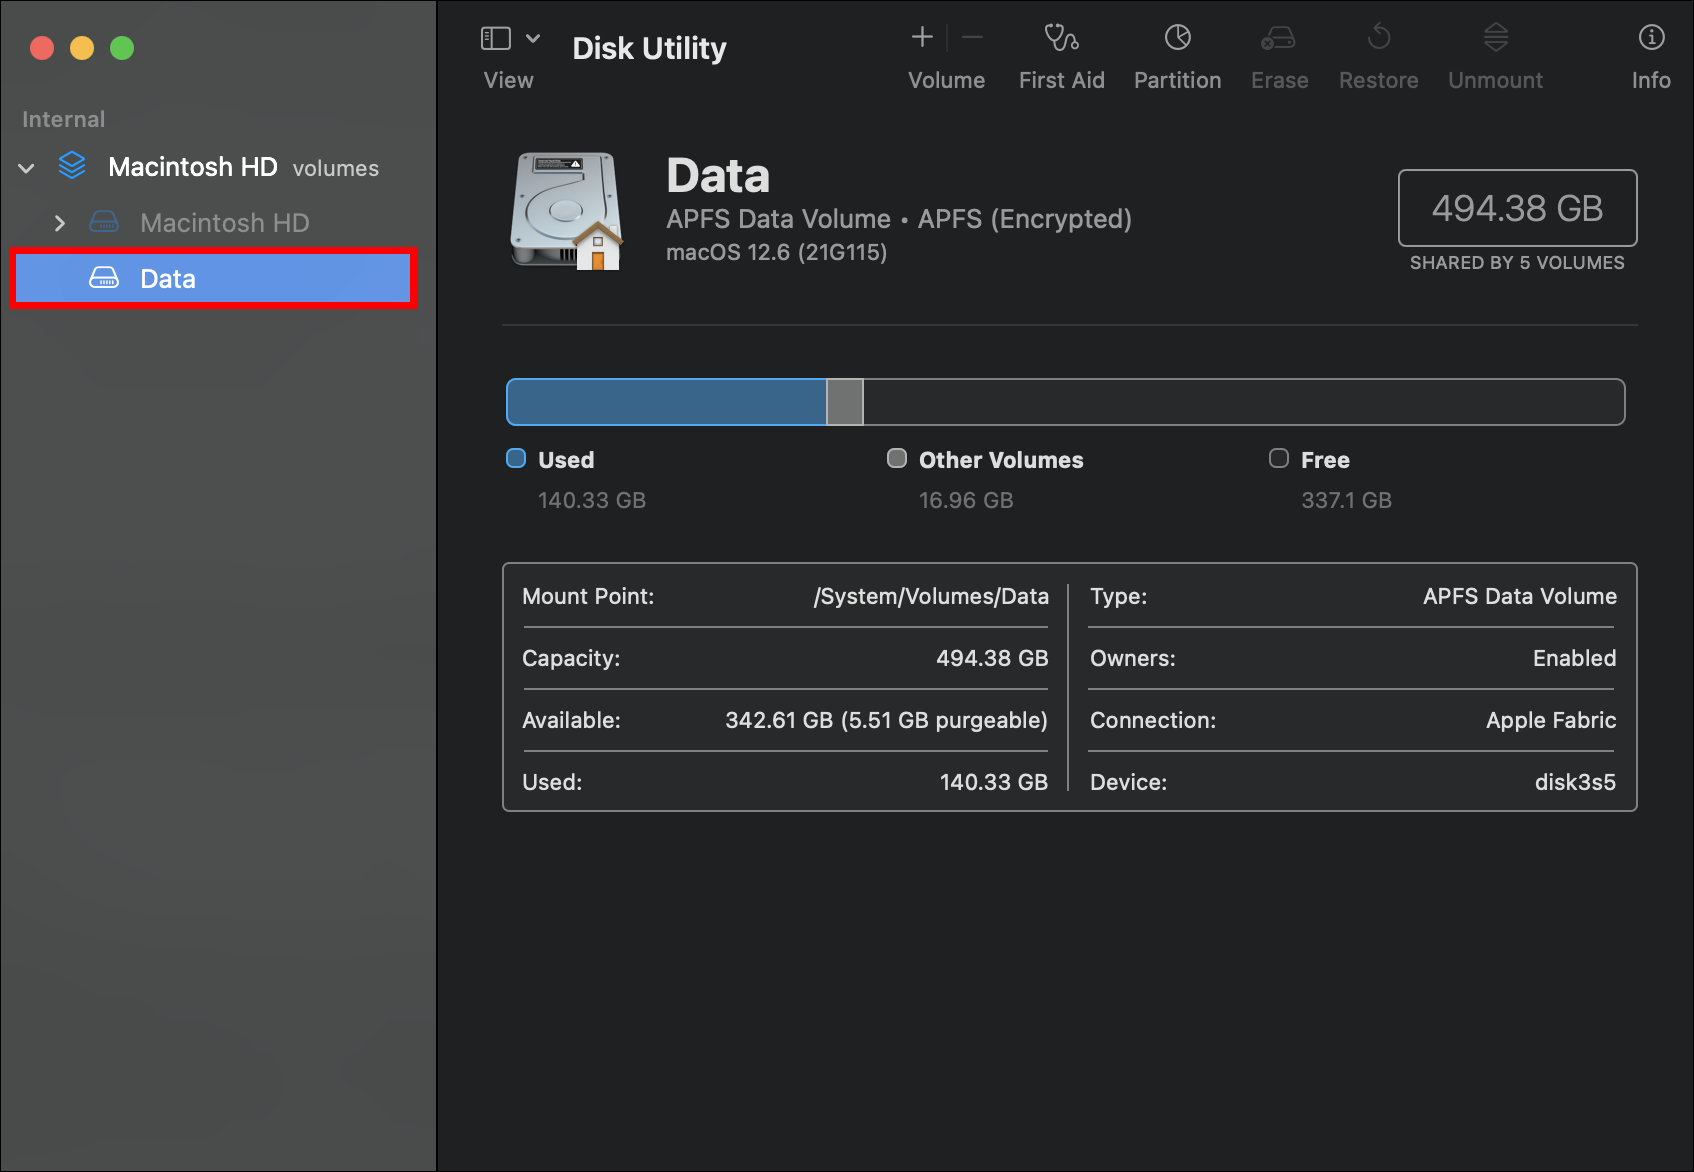
- In the sidebar on the left, select the disk or volume you want to password-protect.

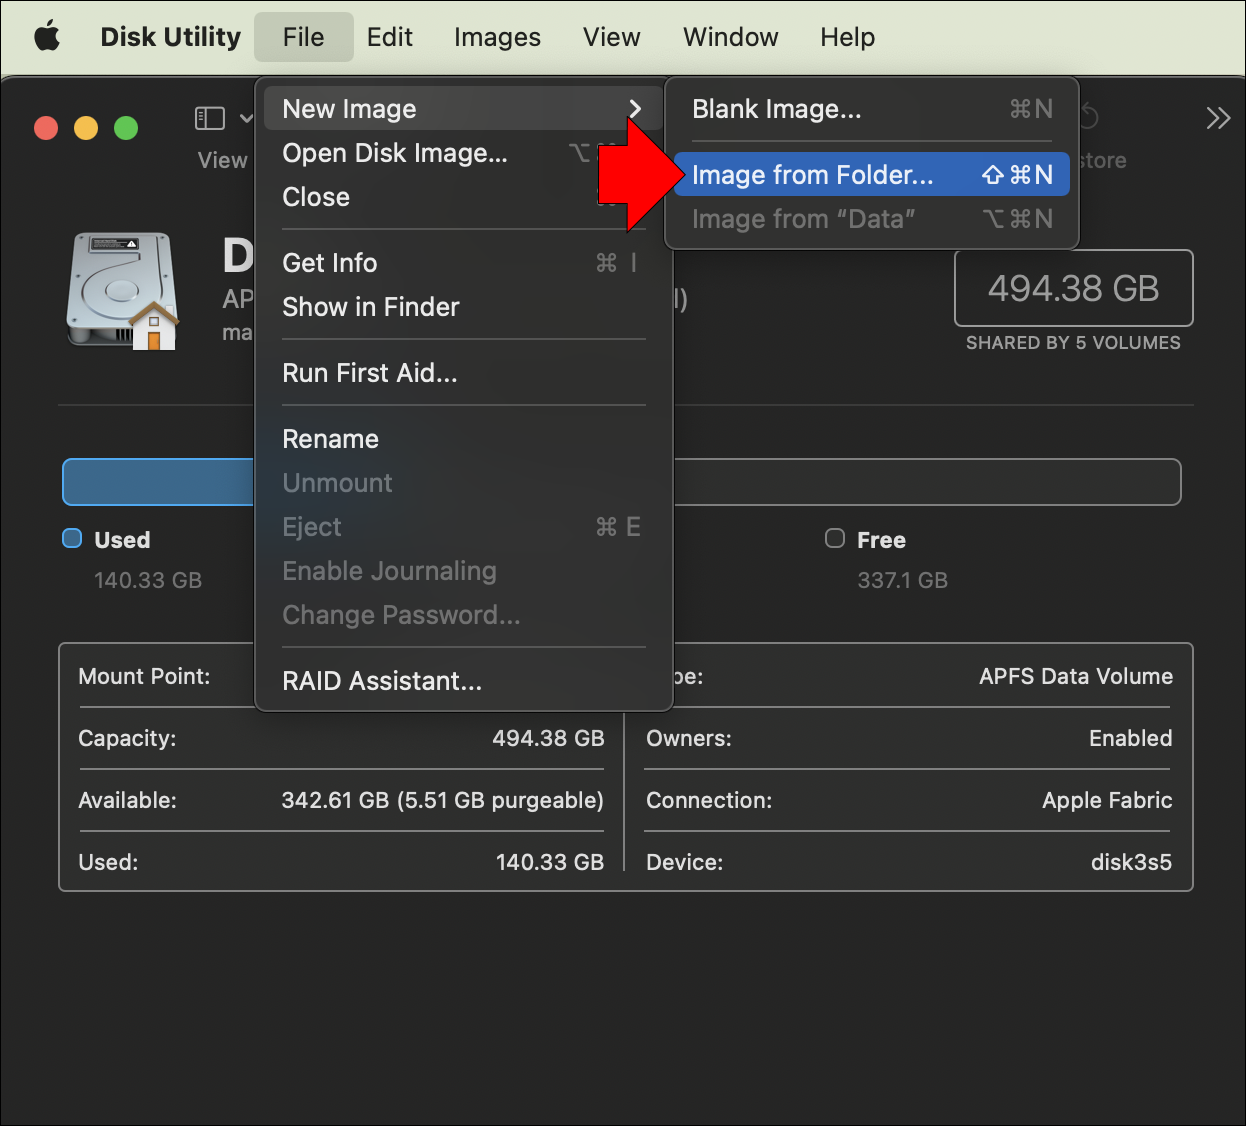
- Click on the “File” menu, and select “New Image”> “Image from Folder.”
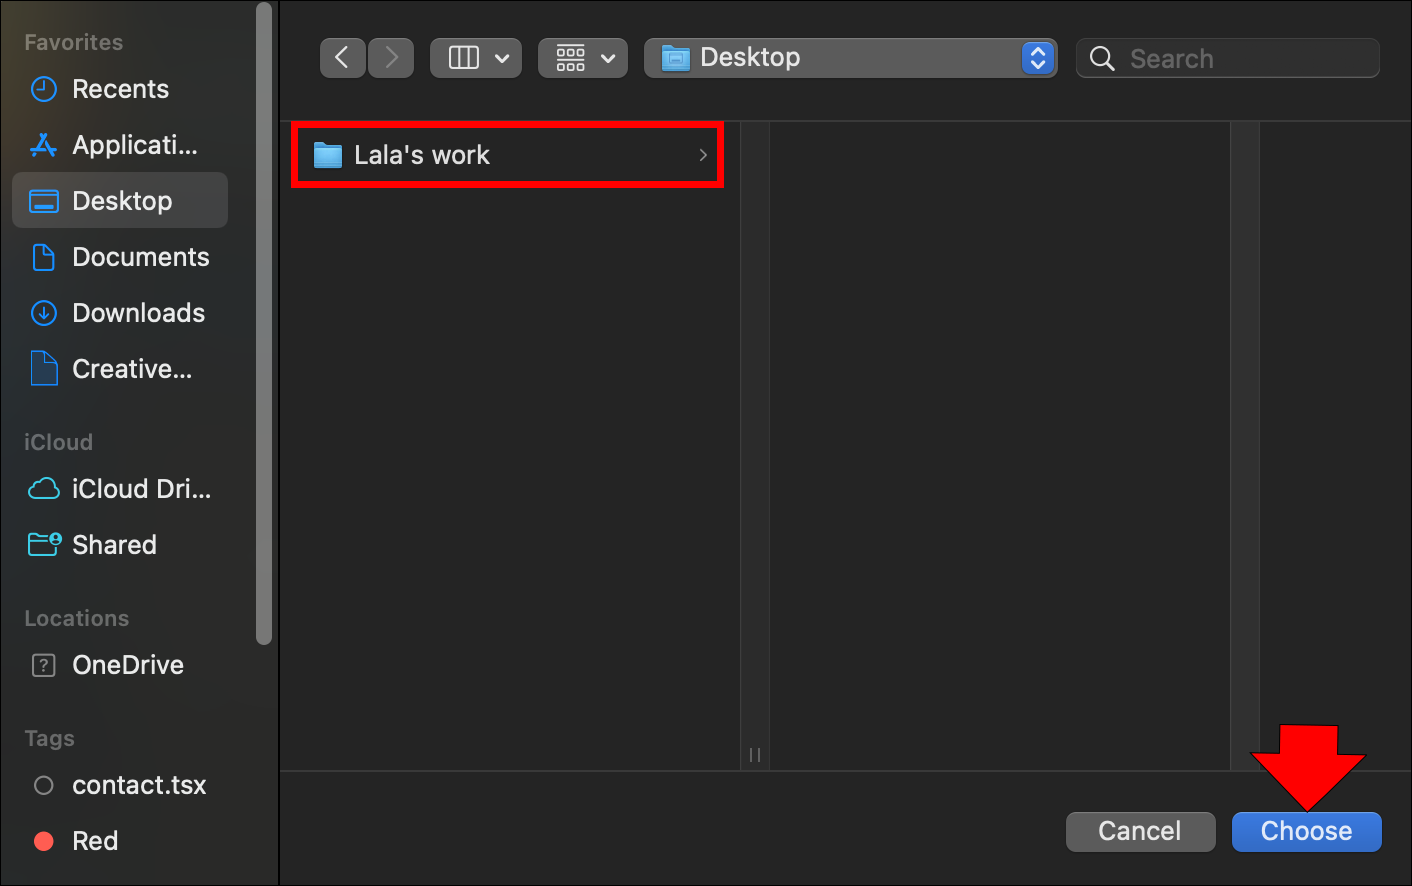
- Navigate to the folder you want to protect and then click on the “Choose” button in the bottom right corner of the selection window.
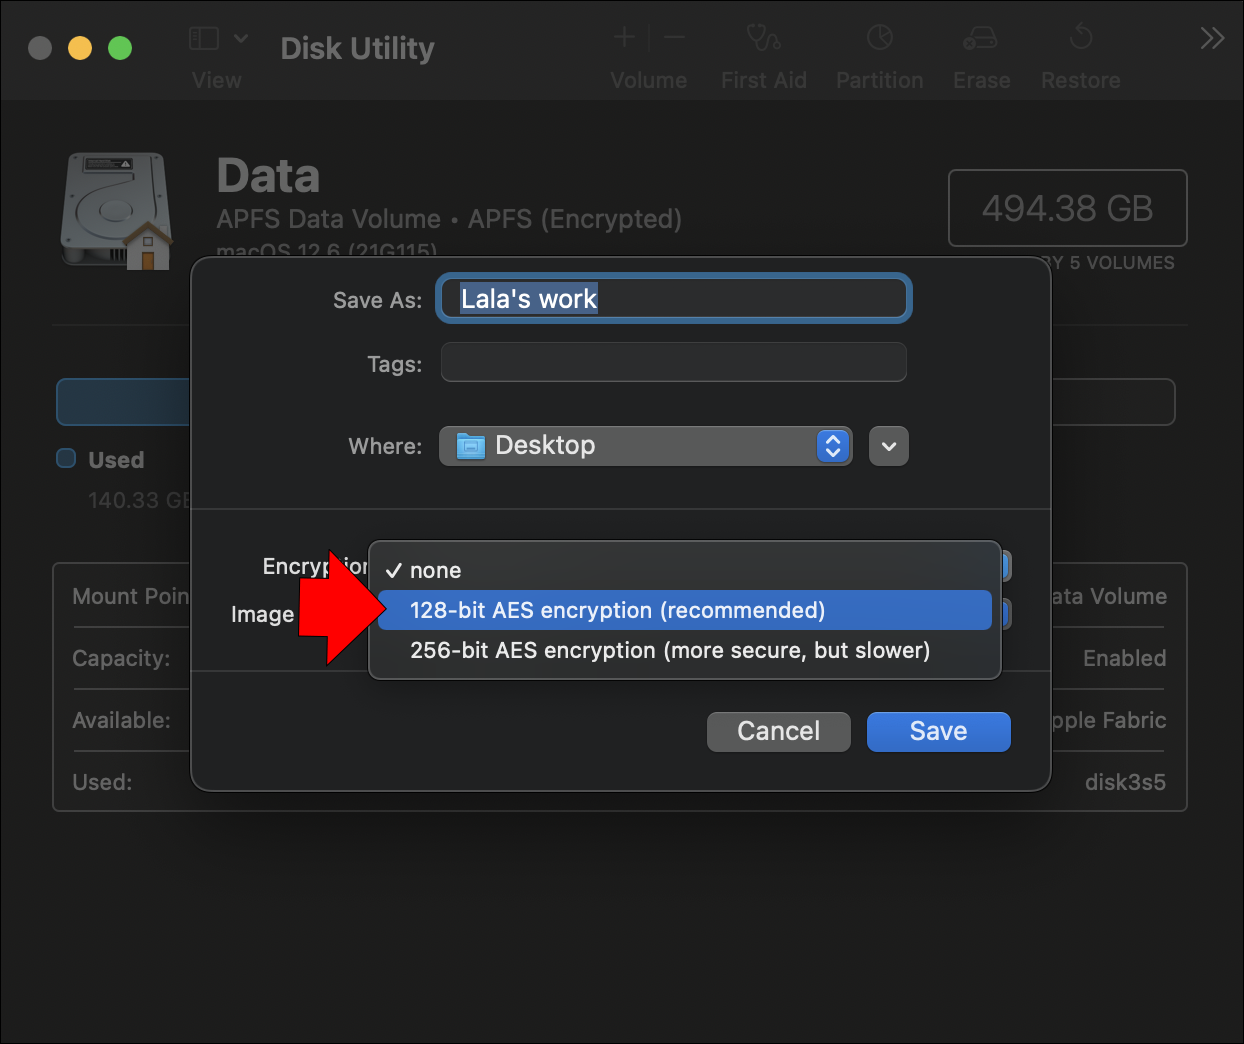
- Select an encryption type (AES-128 is recommended) and enter a password.
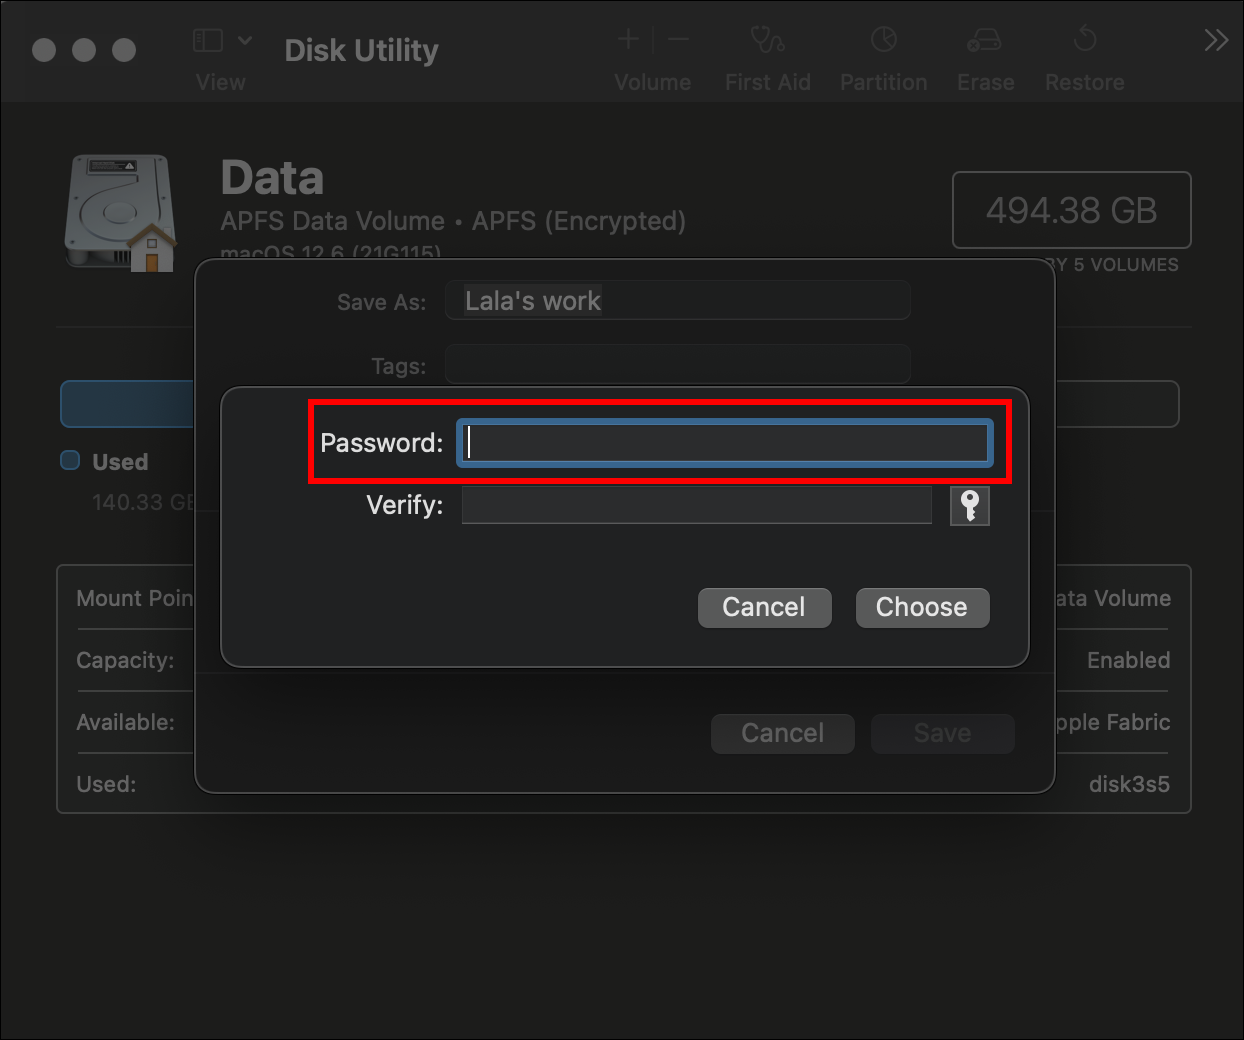
- Enter the password you want to use.
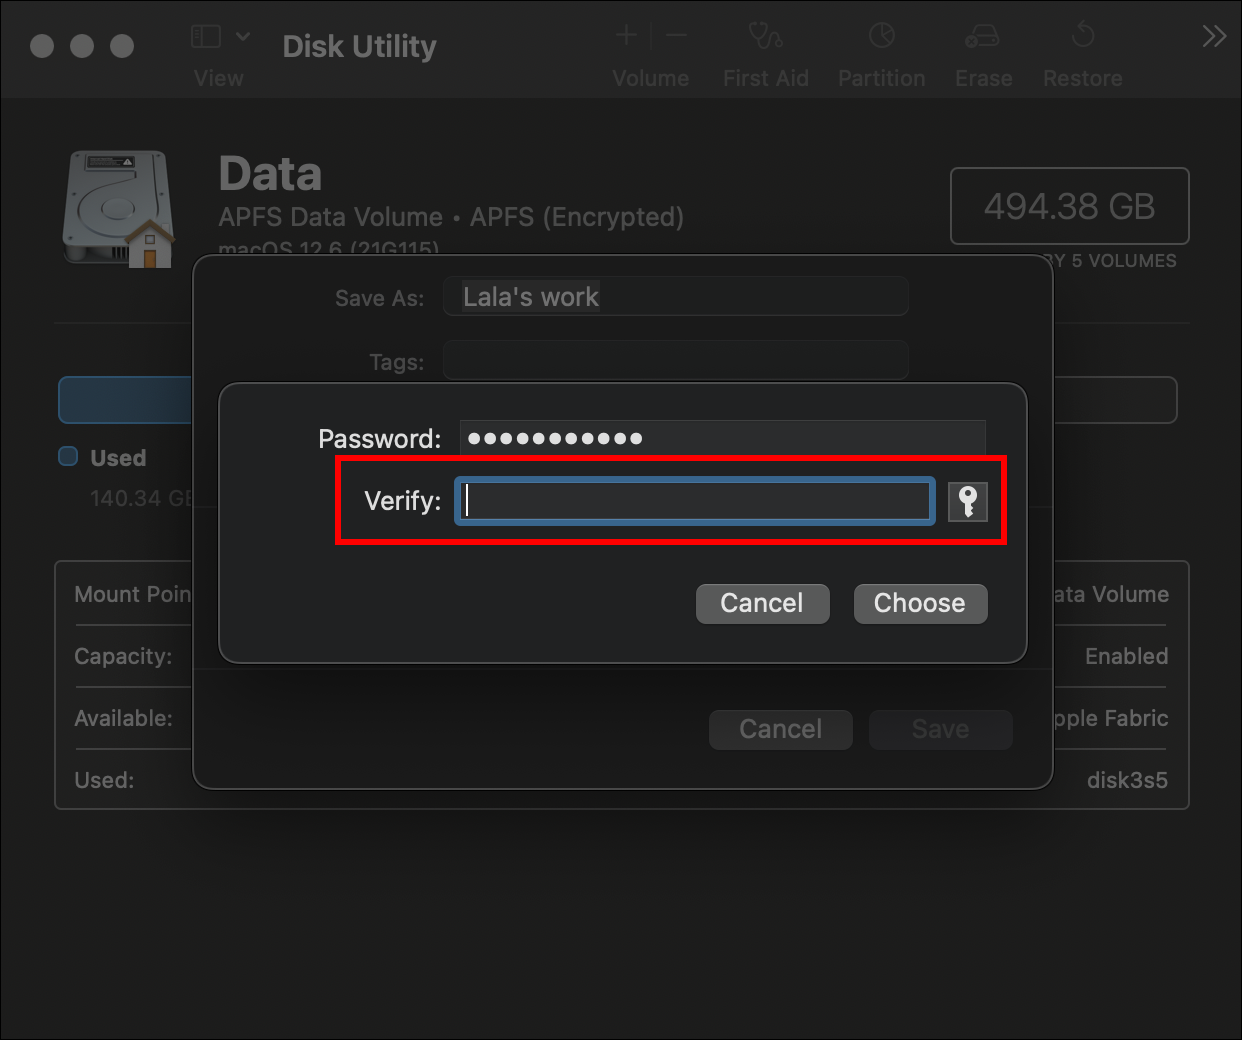
- Re-enter the password to ensure you didn’t make a mistake on your first attempt. You’ll be prompted to restart the process if the passwords don’t match.
- Under “Image Format,” click the dropdown arrow and select “read/write” from the options.
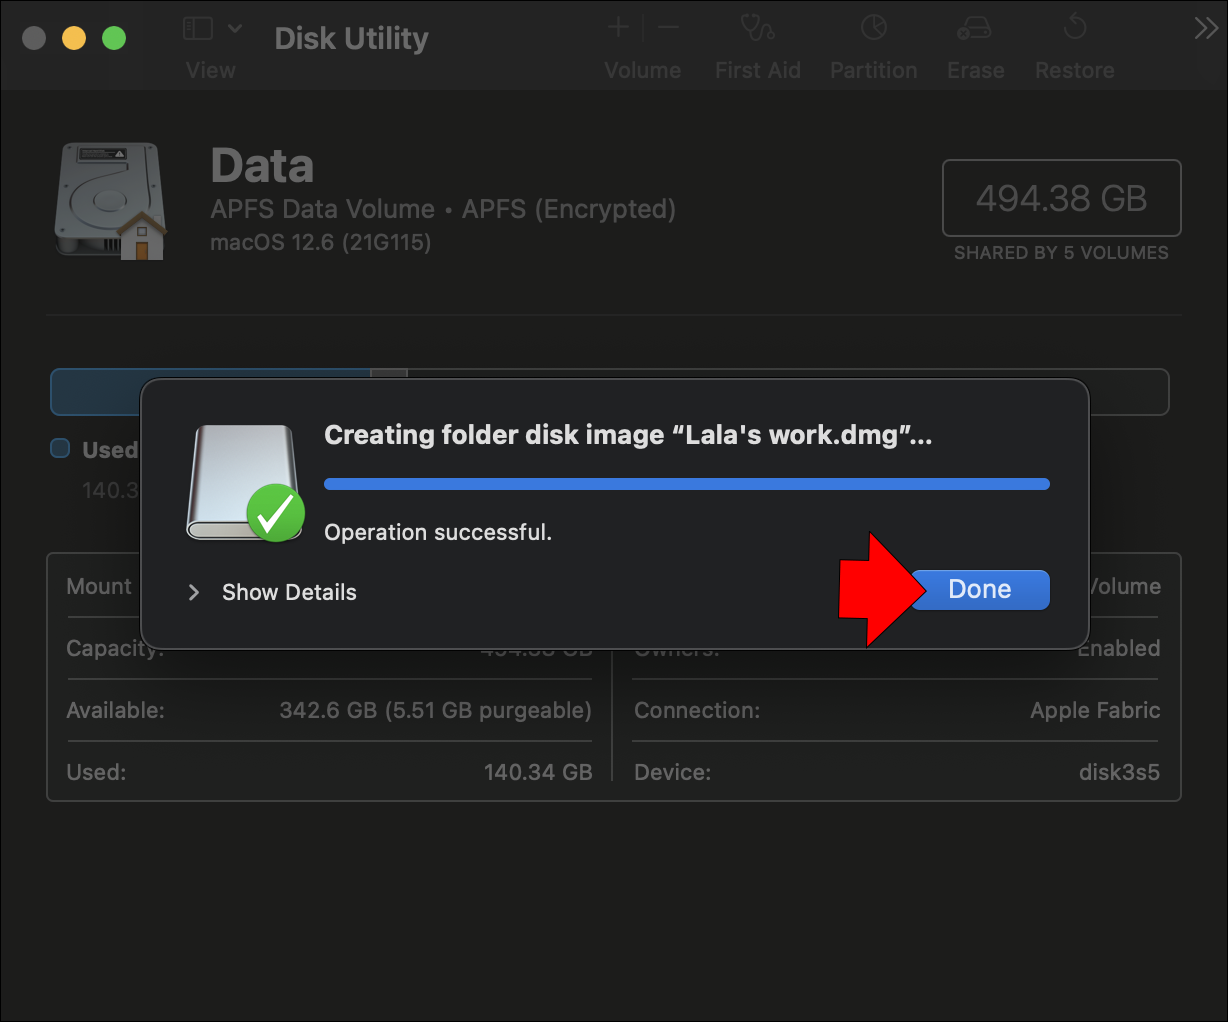
- Wait as your Mac creates a disk image of the folder. The process may take some time, depending on the size of the folder. As soon as the image has been created, click “Done.”

Et voila! You’ve just created a disk image of the original folder that can only be accessed by entering the password. The original folder will still be available and accessible without any restrictions, so be sure to delete it or transfer it to a different location on your hard drive. Note that you can add or remove files from the folder disk image as usual.
When choosing a level of AES encryption for your data, you’ll need to balance security with speed and efficiency. If the information you’re looking to password-protect is highly sensitive, then 256-bit AES encryption is the better option because it offers a higher level of protection. However, 128-bit AES encryption is more than sufficient for most purposes and is faster and more efficient.
How to Password Protect a Folder on a Mac Without Disk Utility
If you don’t want to use Disk Utility to password-protect a folder on your Mac, you can use either Terminal or a third-party tool.
Using Terminal
Let’s say you want to encrypt a folder named “Sales.” Here’s how to go about it using Terminal:
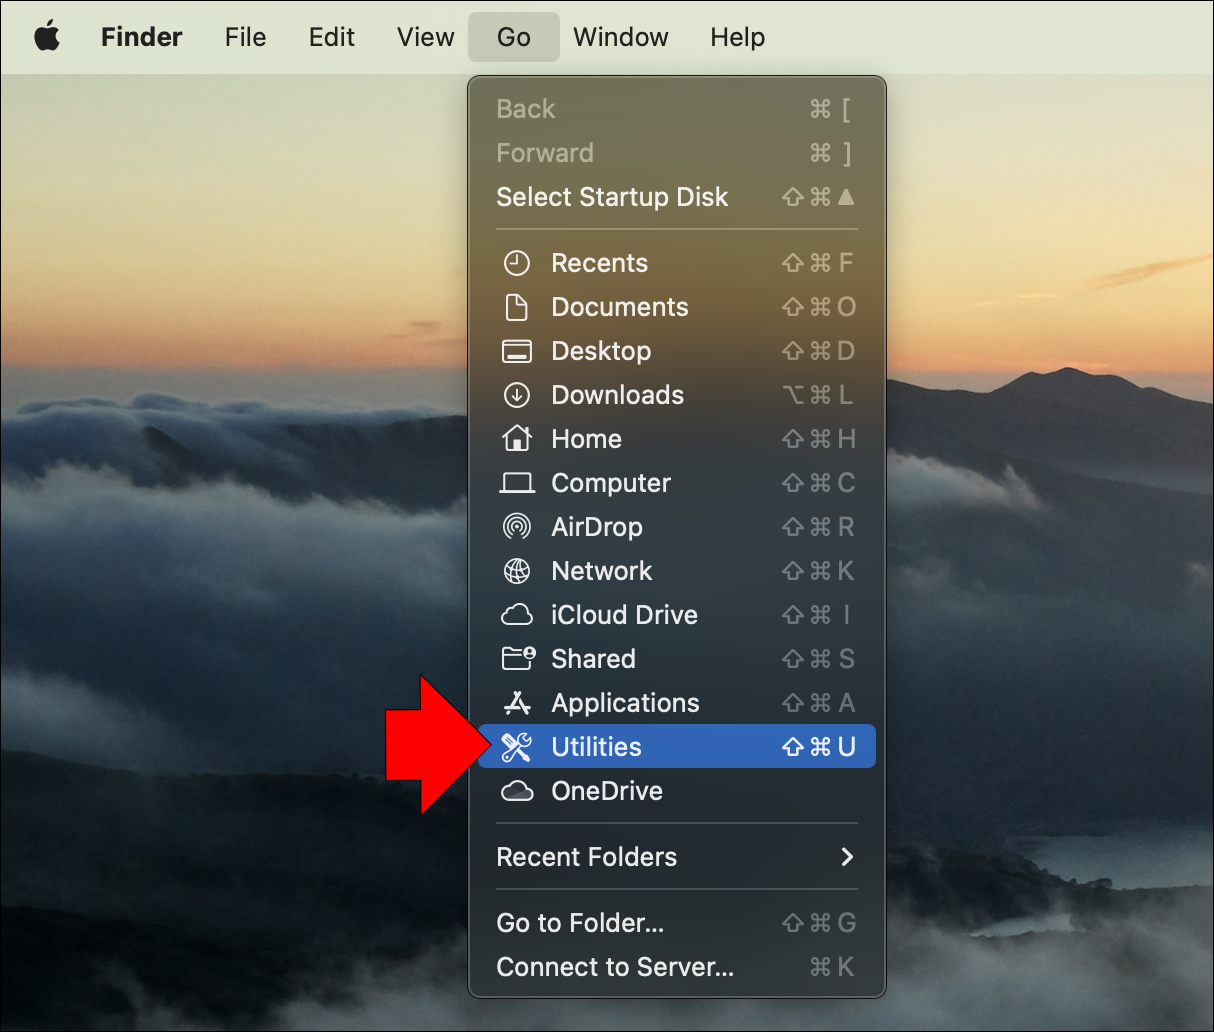
- Open Terminal. You can find this in the “Utilities” folder in Applications.
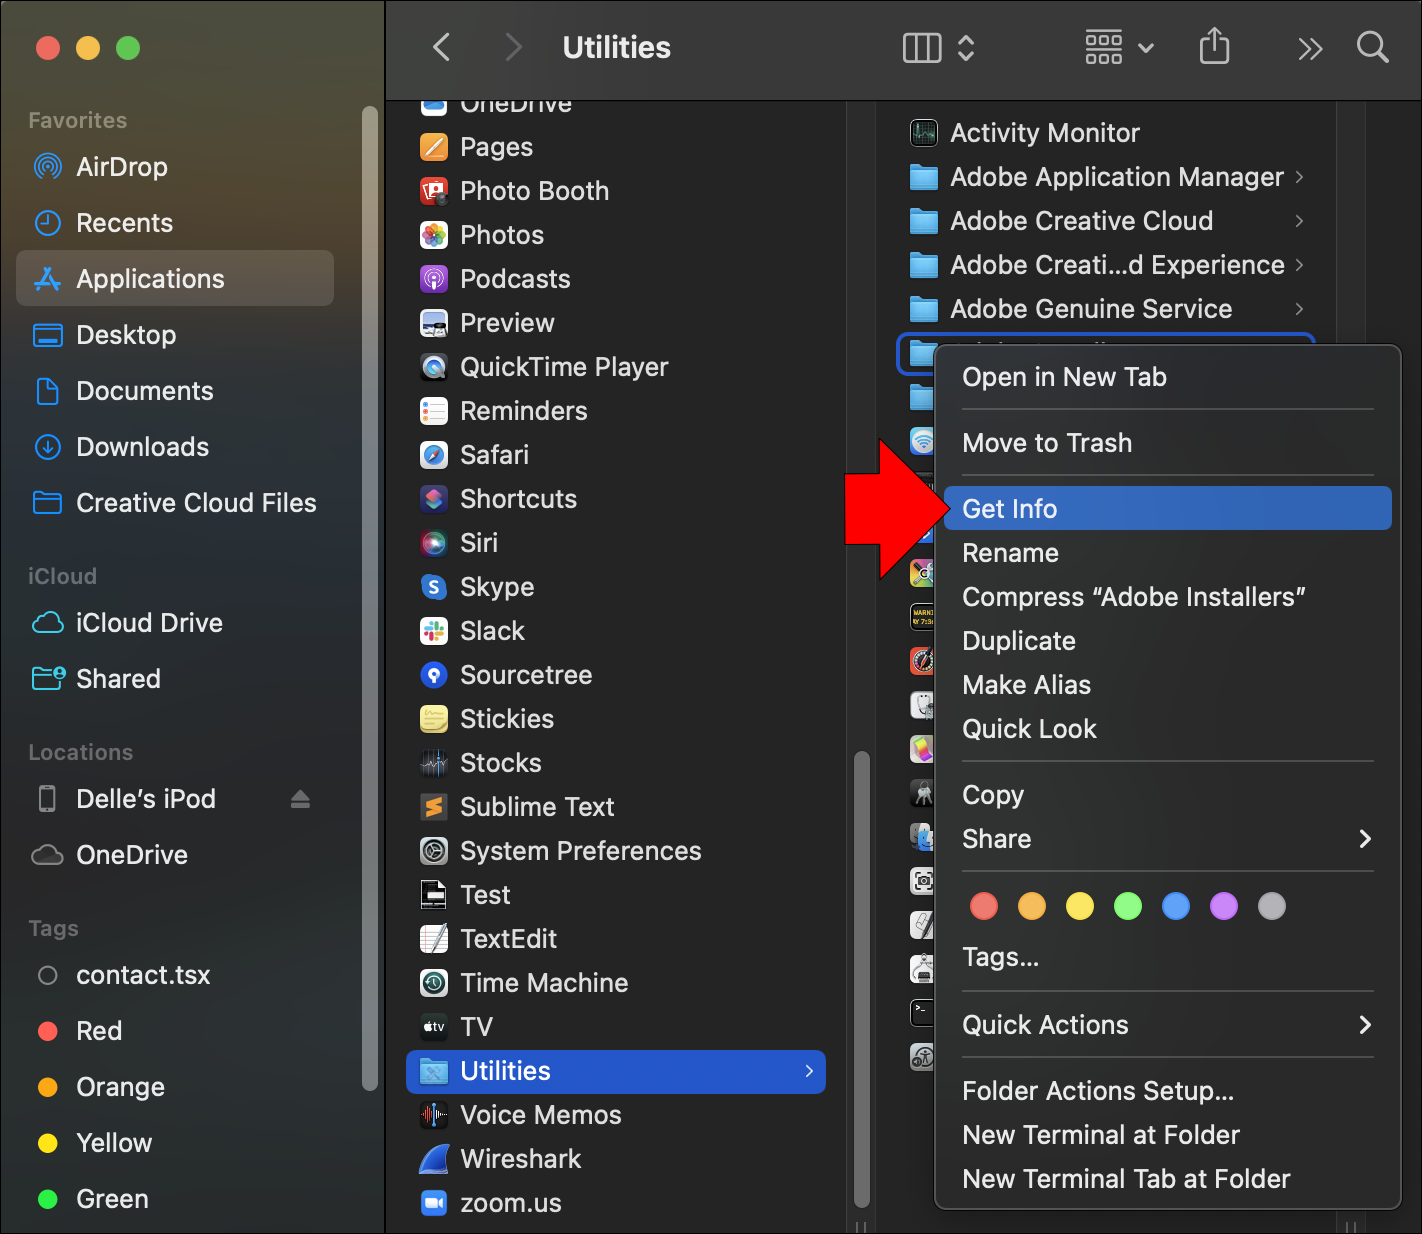
- Control-click the “Sales” in Finder and select “Get Info” from the options. This should open a new window that displays the folder’s metadata, including the size, location, and date it was created.
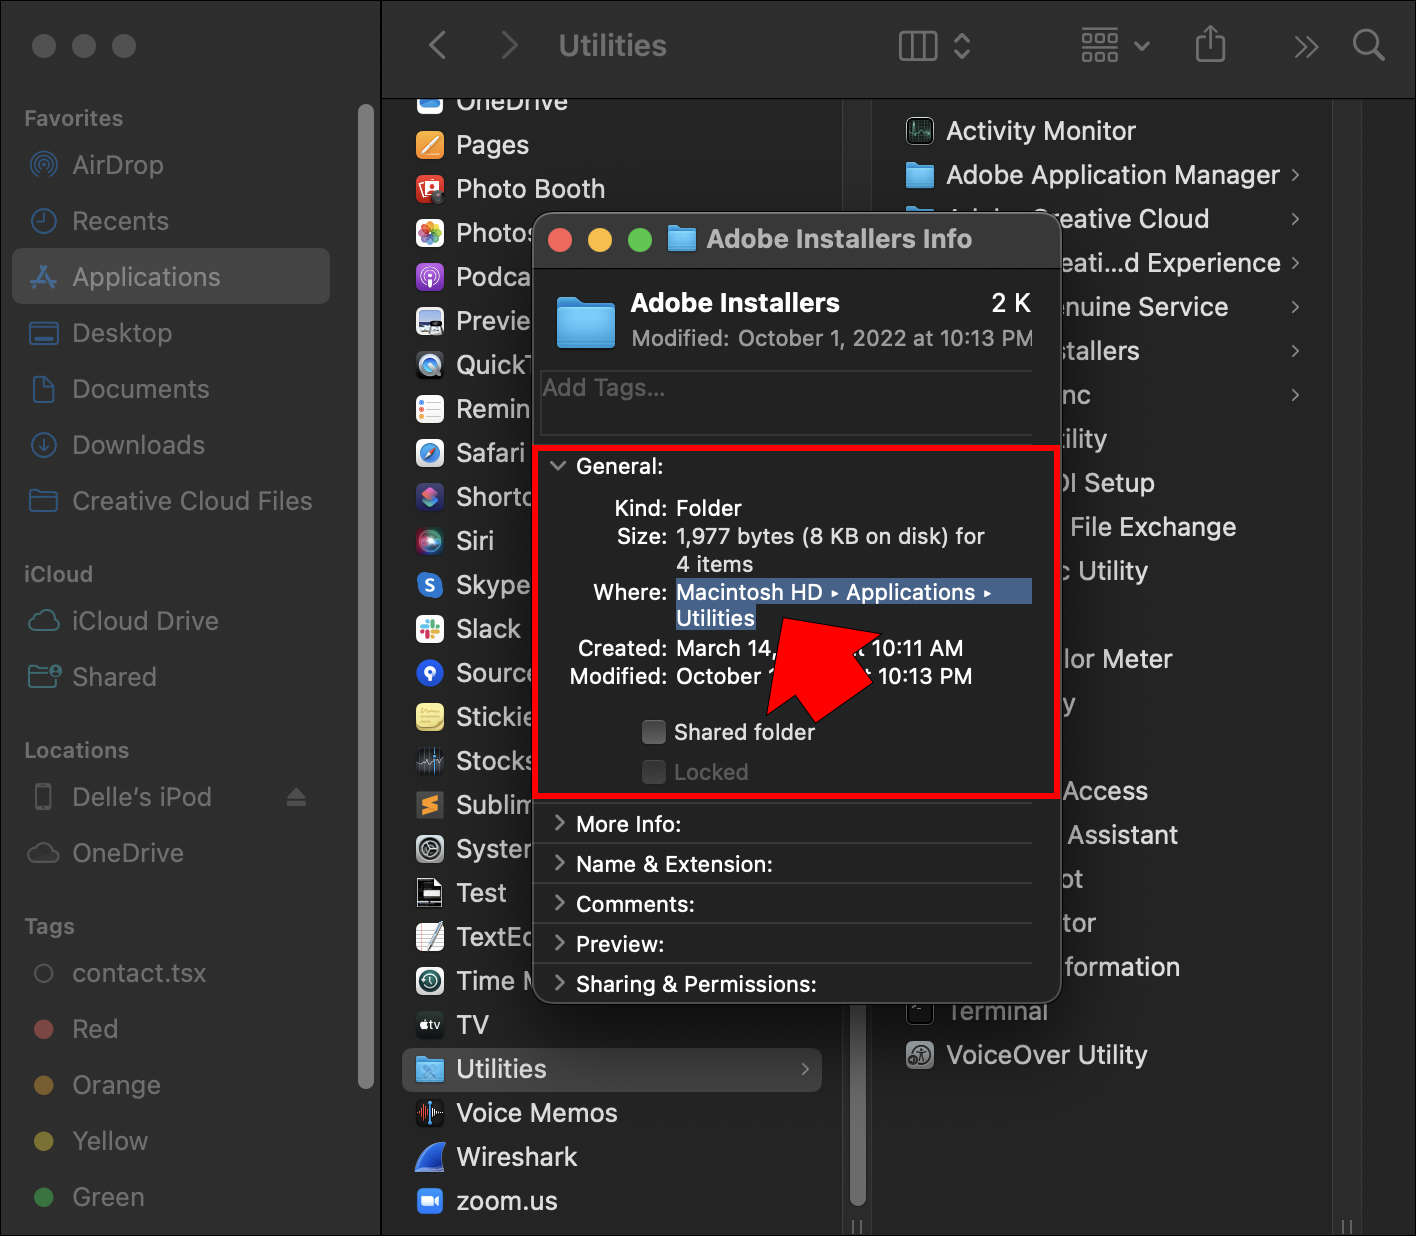
- Head to the “General” section and copy the location (path) of the folder.
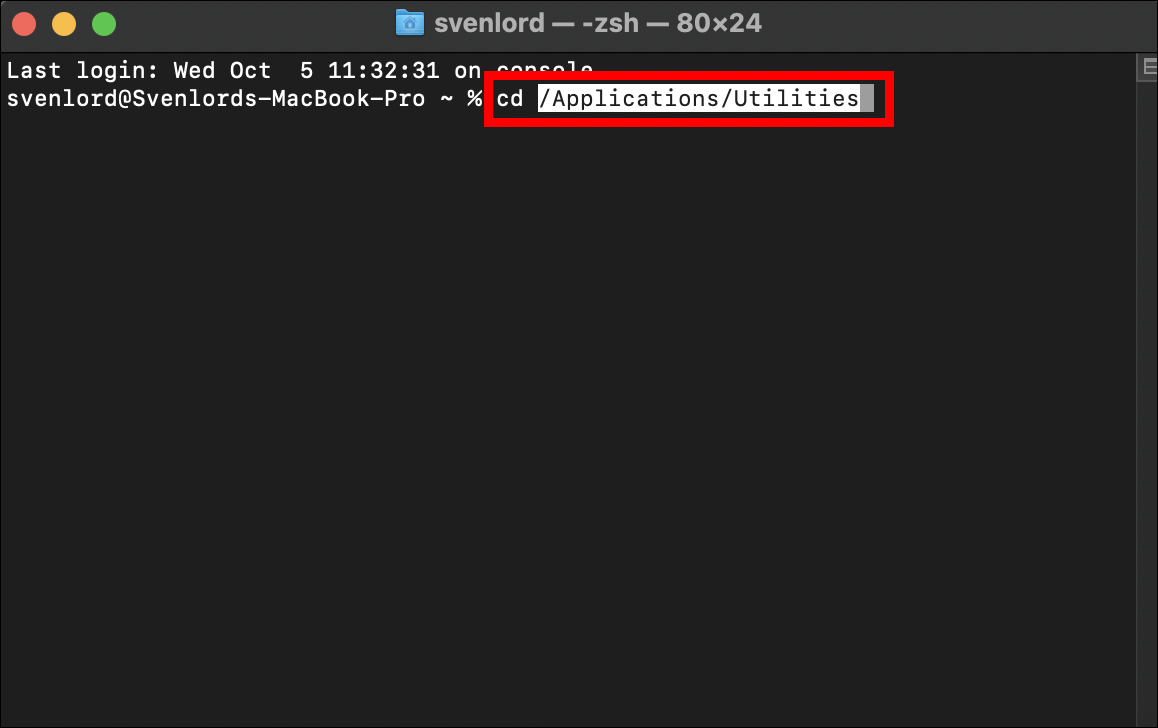
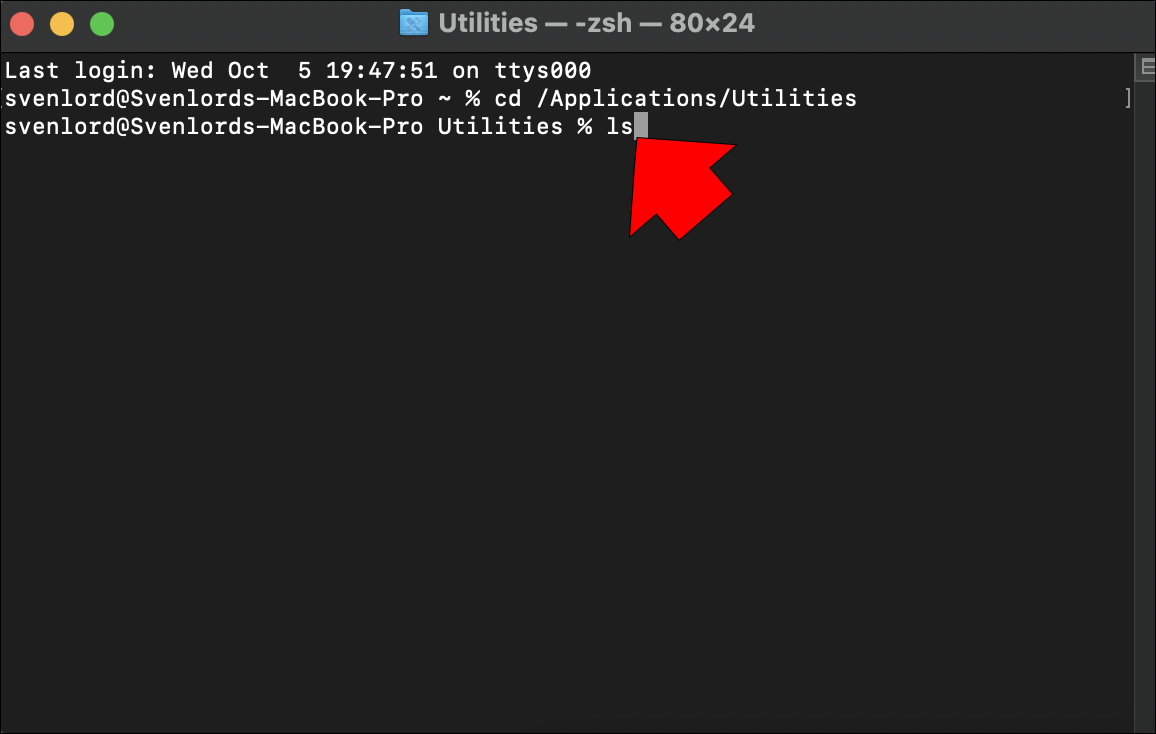
- Head back to Terminal, type cd, and a space, and finally paste the path copied in Step 3.
- Hit “Return.”
- Type “ls’ and hit “Return.”
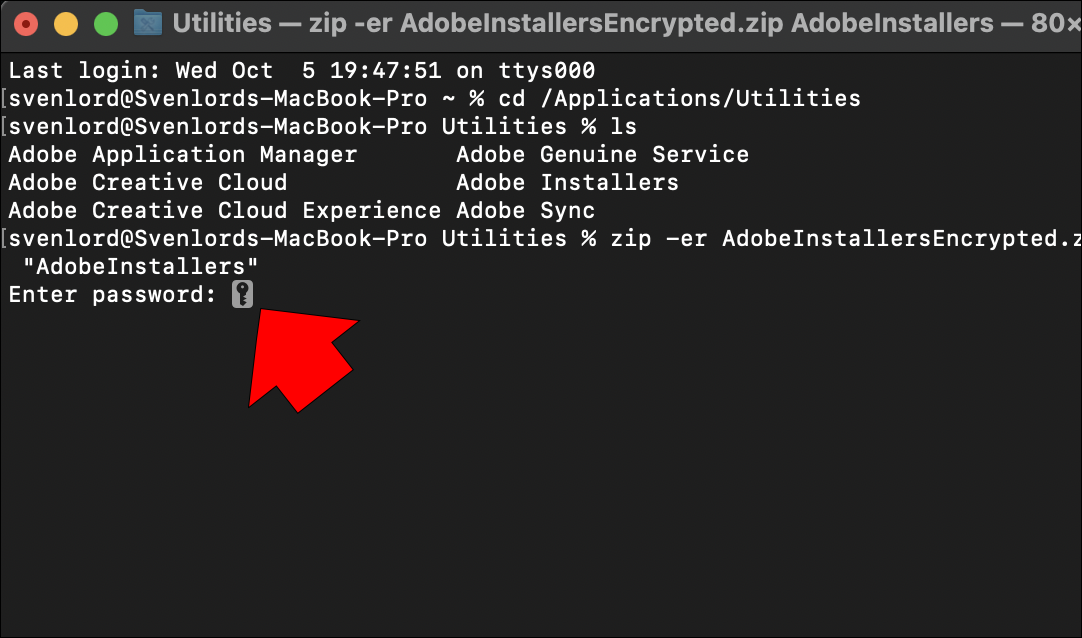
- Type the following:
Zip –er SalesEncrypted.zip "Sales"
Here “SalesEncrypted” is the name for the ZIP file. - Hit “Return.”
- Enter a password and hit “Return.”


And that’s it. The Zip archive named “SalesEncrypted” can now be found in the Documents folder. To open it, double-click and enter the password on the popup screen.
However, it’s important to note that ZIP files aren’t as secure as other types of encryption like AES-256. As such, they should only be used for general protection against casual observers and not for sensitive data.
Using Third-Party Apps
If you don’t trust your Mac’s built-in file encryption tools, you’ll be pleased to learn that several third-party alternatives can protect folders with a password.
Let’s look at the best two.
F-Vault
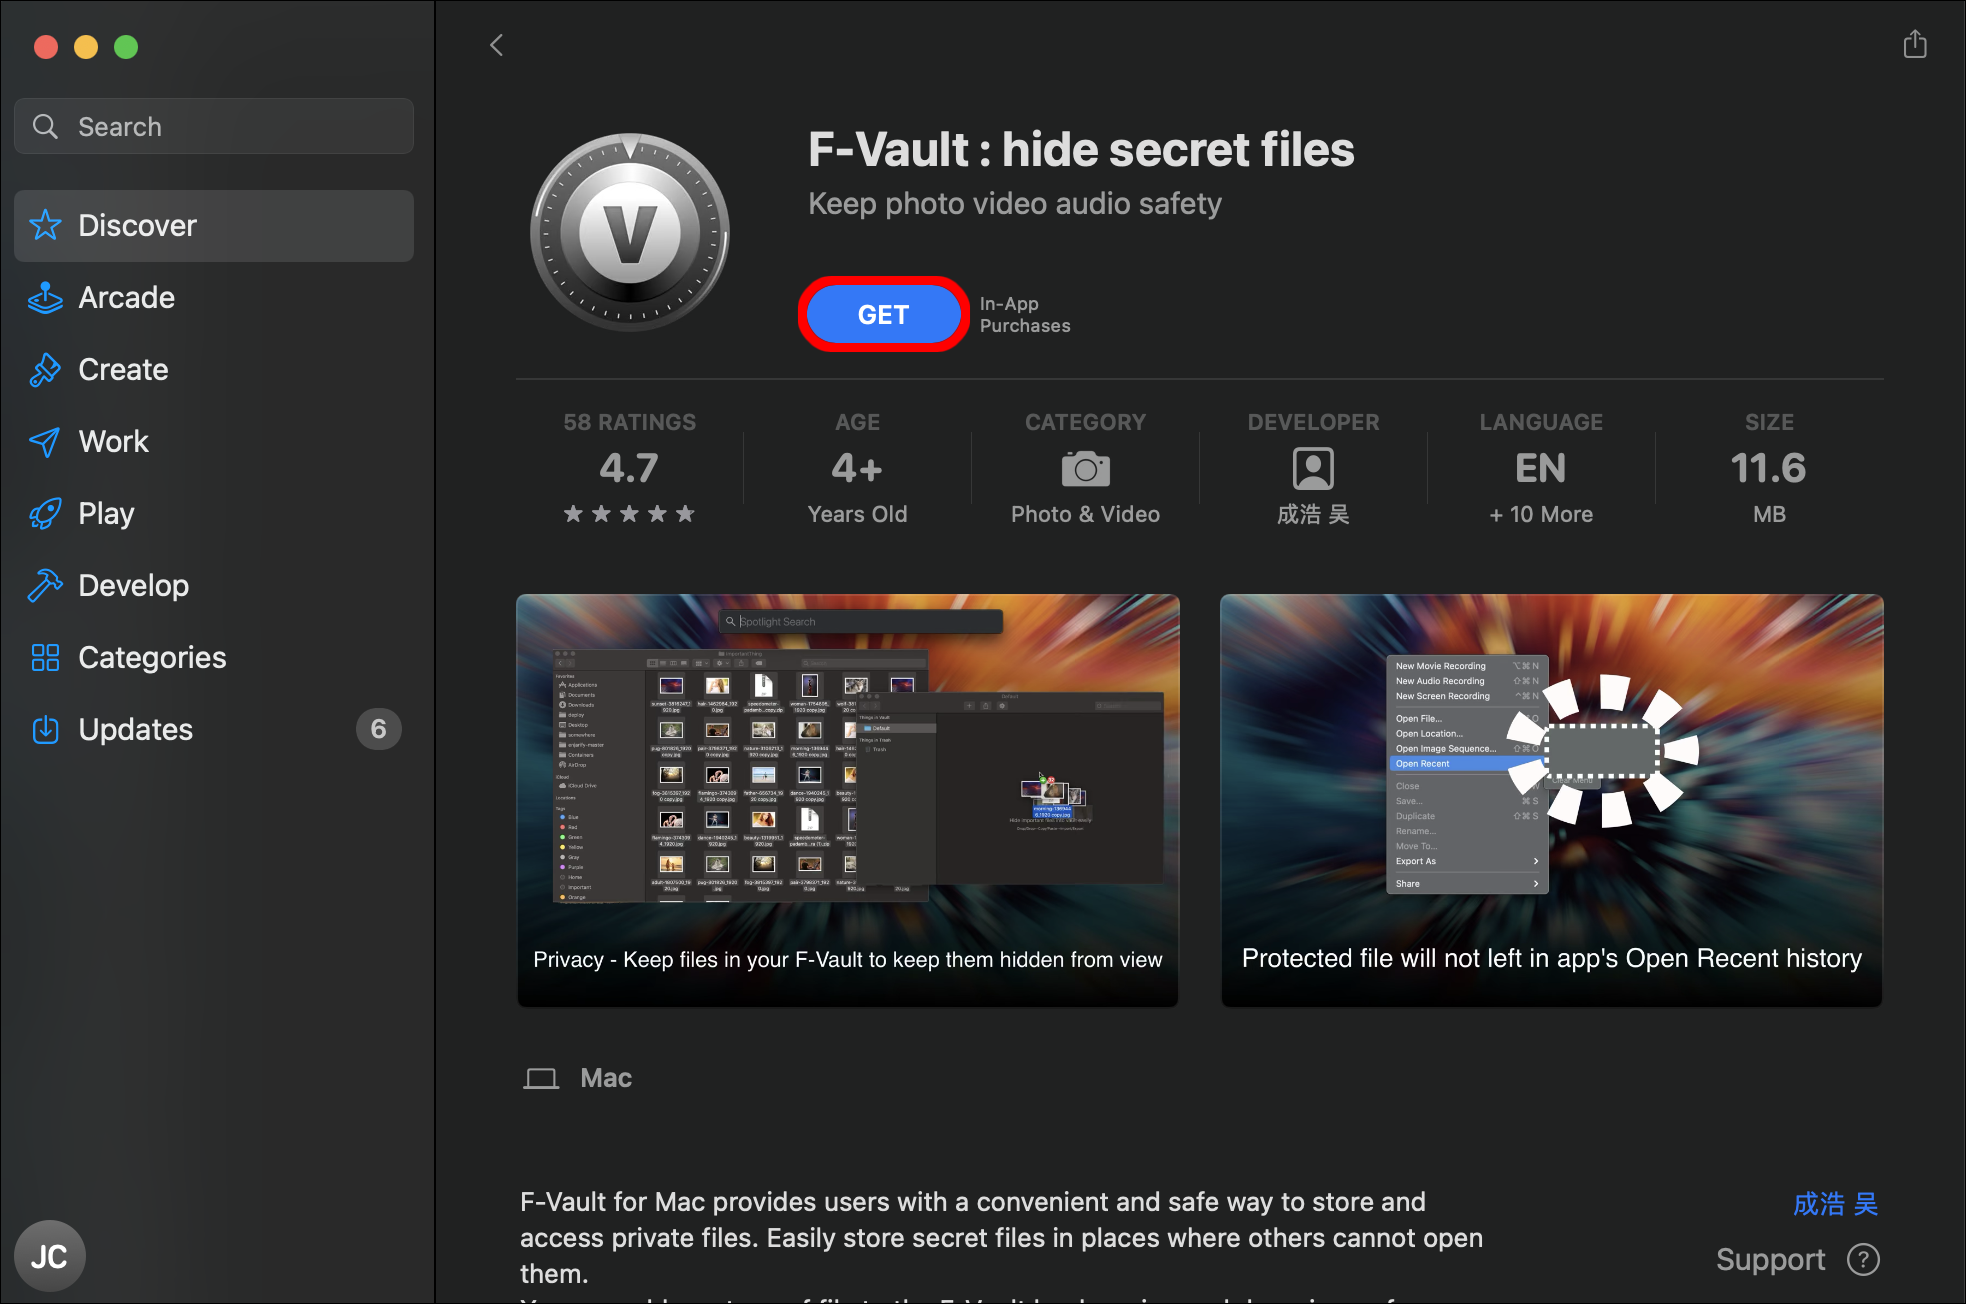
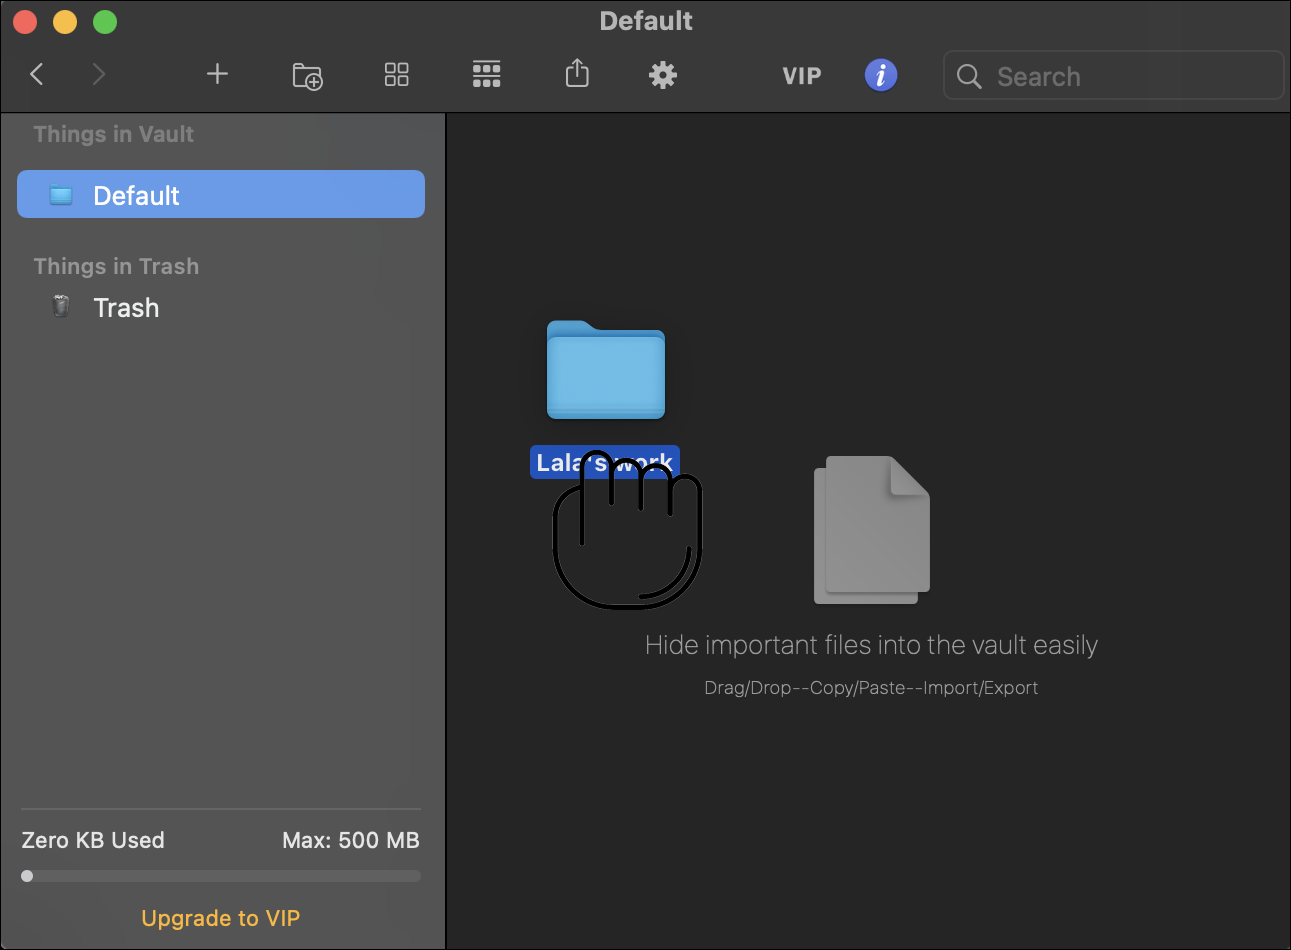
F-Vault is a powerful encryption tool that can password-protect files on your Mac. It uses the industry-standard AES-256 encryption algorithm to ensure that your data is safe from prying eyes. F-Vault is extremely easy to use and integrates seamlessly with the Finder.
Here’s how to use F-Vault to password-protect your folder:
- Download F-Vault from the App Store and install it on your Mac
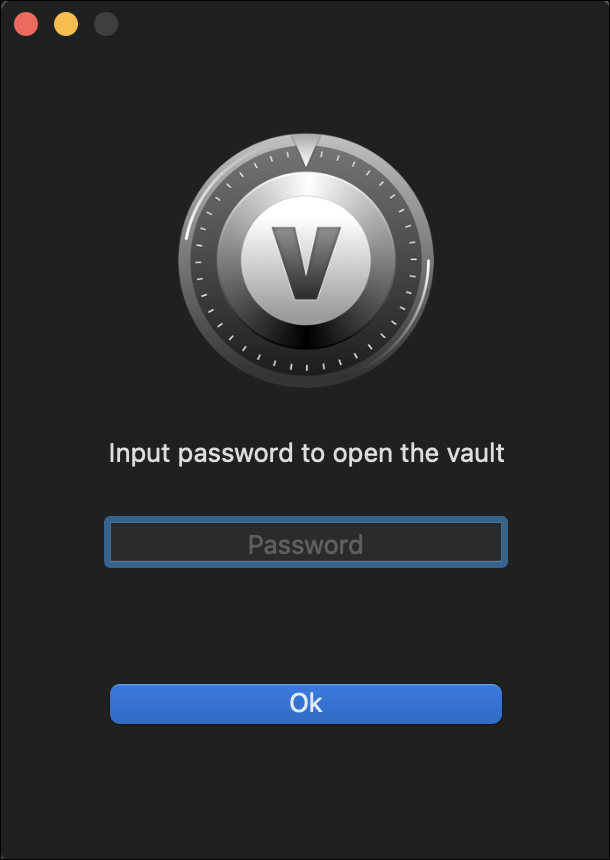
- Open the file and follow the on-screen instructions to set up a password. You’ll also be required to provide an email for account recovery if you forget your password.
- Drag and drop the files you want to encrypt into the F-Vault window.
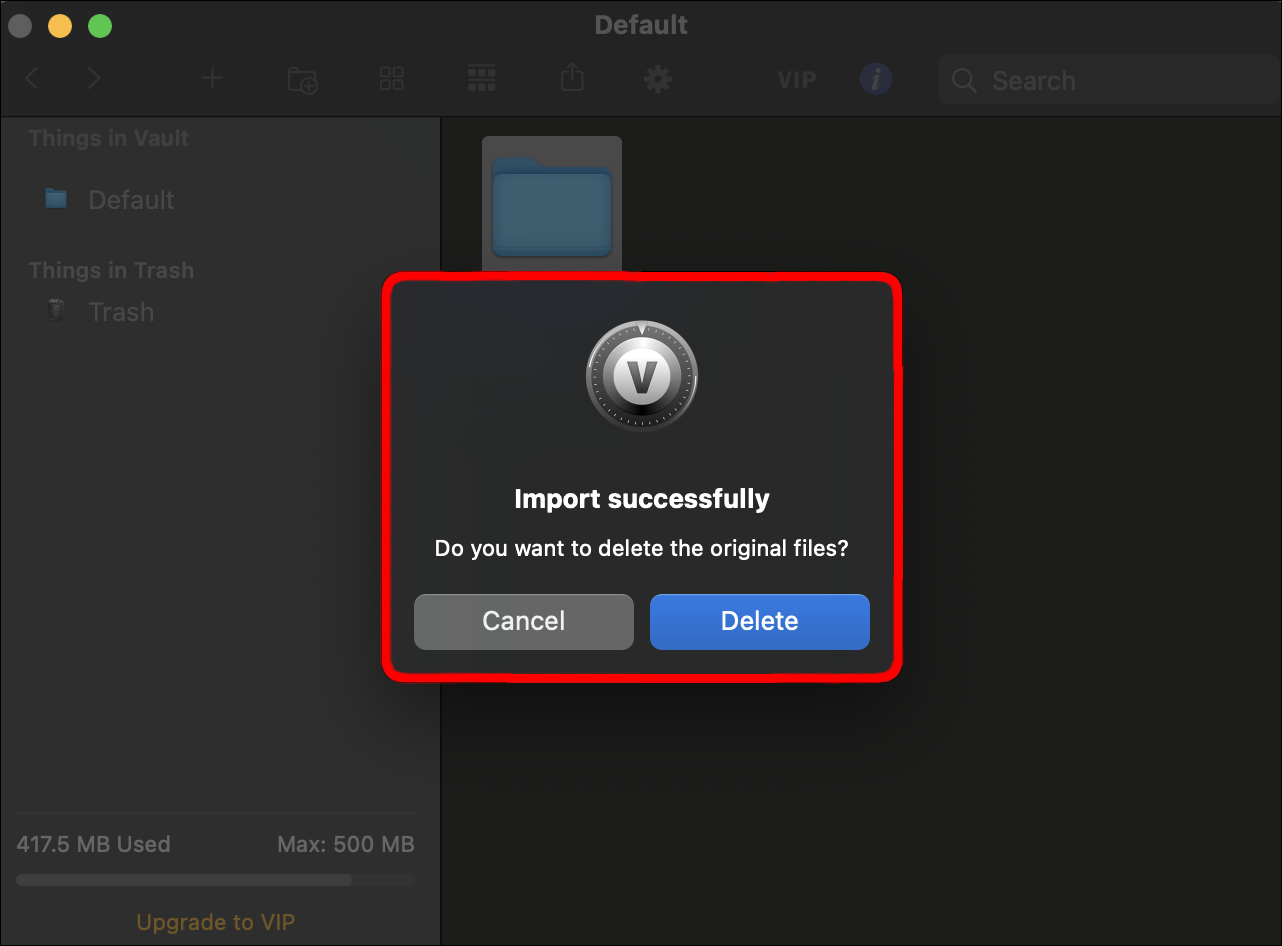
- When asked if you’d like to delete the original folder, click “Delete.” If you want to keep it, hit “Cancel.” You can always delete the original manually, even after creating an encrypted copy.
Your folder will now be protected with a password. F-Vault is an essential security tool for anyone who wants to keep their data safe from nosy roommates, curious family members, or nosy government agencies.
Encrypto
While several encryption tools are available, Encrypto provides a superior user experience with its drag-and-drop interface. In addition, it is available for free from the Mac App Store.
With Encrypto, you can encrypt files directly from the Finder and decrypt them just as easily. There is no need to open a separate app or enter passwords manually. Simply drag and drop your files onto the Encrypto icon, and they will be securely encrypted.
Encrypto uses AES-256 encryption, the same standard used by governments and other security agencies. As a result, you can be confident that your data is safe from prying eyes. In addition, Encrypto offers several other features, such as the ability to send encrypted files via email.
If you’re looking for a simple and effective way to encrypt sensitive data, Encrypto is an excellent choice.
Keep Your Files Safe
Macs are a popular target for cybercriminals, as they can be easily infected with malware and ransomware. One way to help protect your computer from these threats is by password-protecting your files. Whether you want to keep your personal files safe or just make sure no one can access your work documents, these tools will do the trick.
Have you tried any of them on your Mac? Were you successful? Let us know in the comments section below.
Disclaimer: Some pages on this site may include an affiliate link. This does not effect our editorial in any way.


