Roblox is a universe in which anyone can create unique games and let others play them. The game looks basic but it is quite powerful, with lots of versatility and many advanced options. You can even record games and then upload them to your favorite video site, but how do you do that? This article will show you. More specifically, this article is about how to record Roblox games on a Windows PC.
Best Ways to Record Roblox Games in Windows
Like many games, Roblox comes with a recording option, but there are other alternatives, too, known as third-party tools. Here are the options to record your live Roblox games.
Option #1: Use Roblox Built-In Game Recorder
The built-in Roblox recorder lets you capture your entire game or just sections of it using an in-game user interface (UI). It is relatively easy to use and will record directly to your hard drive. Here’s how to do it.
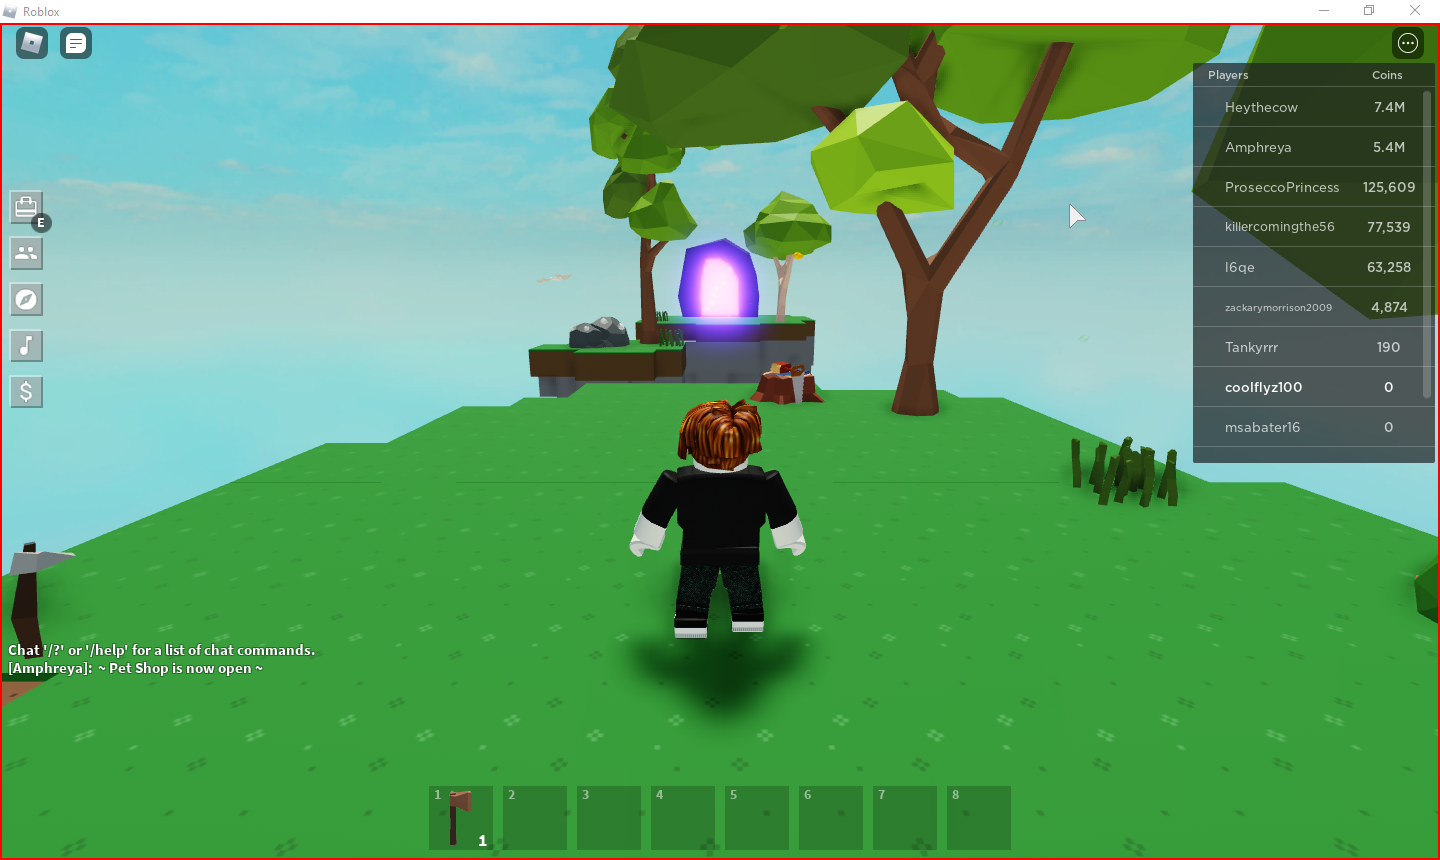
- Open Roblox and begin a game.
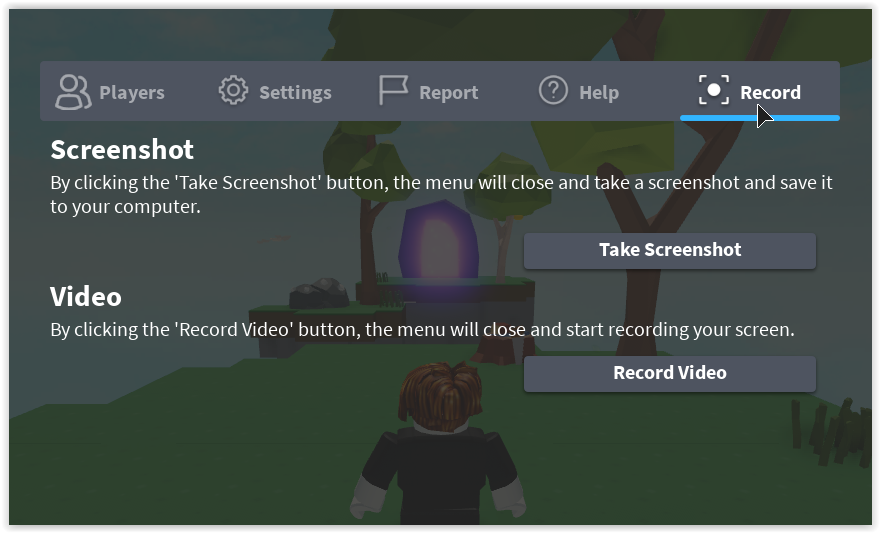
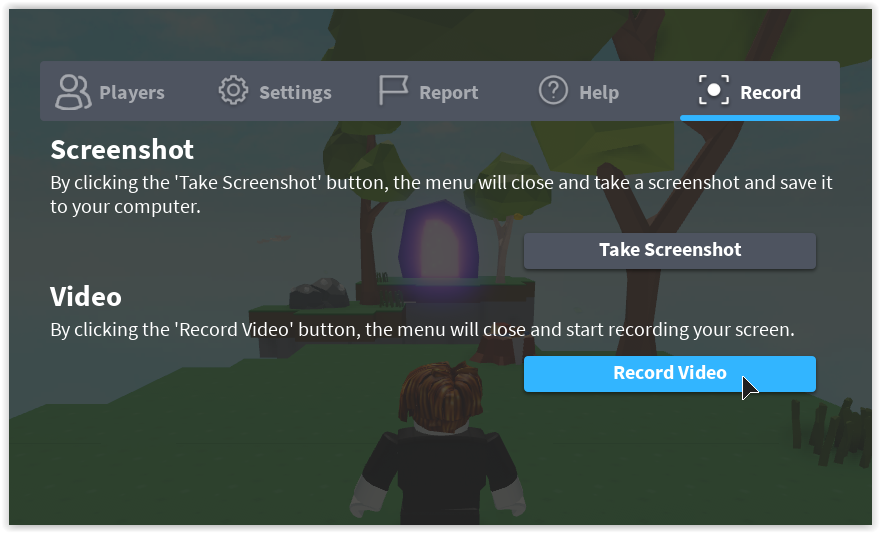
- Click on the Roblox icon in the top left section to open the settings.

- Select Record from the menu and configure your recording settings.
- Choose Record Video when you are ready to start.
- You will see a thin, red border around the game to indicate that a recording is in progress.
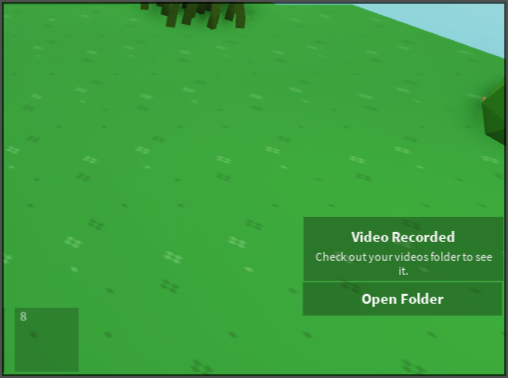
- To stop recording, select the Roblox icon in the top left section like before, click on the Record menu option, and select Stop Recording.
- The game will resume, and a notification appears on the right that says Video Recorded. Click Open Folder to view your Roblox recordings.
- If you miss the notification above, open Windows Explorer and head to your user’s Videos -> Roblox folder.


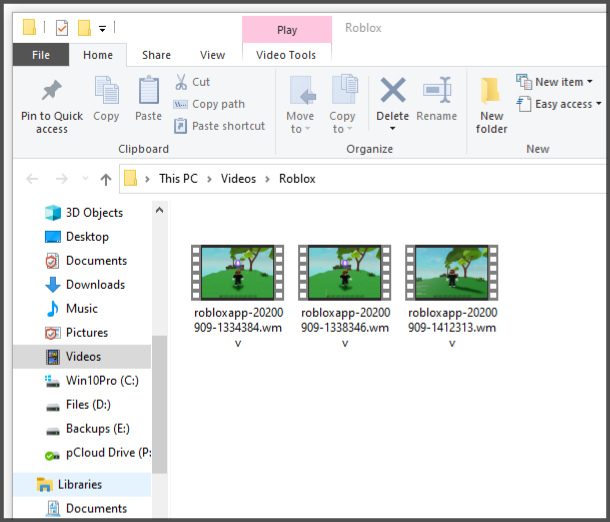
From your Videos -> Roblox folder, you can edit your recordings and submit them to any video sharing website you desire, such as YouTube or Twitch. More specifically, saving to disk allows you to cut and crop, add filters and features, and incorporate voiceovers or other effects.
The built-in recording feature within Roblox is pretty good and will capture your gameplay well. It no longer uploads to video sites, and it doesn’t have the option for voiceovers or picture in picture. So if you want to upload to Twitch or offer tutorials on YouTube, you have to use something else.
Option #2: Record Roblox Games with OBS Studio

OBS (Open Broadcasting Software) is a free, go-to application for recording anything on a PC. The program is top class and delivers broadcast-quality video with an included picture-in-picture option. OBS Studio also has voiceover functionality and hundreds of other options and effects. The recording software works on Windows, macOS, and Linux, and it is 100% free to download and use.
OBS Studio does take a little time to set up but once done; you can start recording and streaming pro-level videos in no time.
- Download and install the Windows version of OBS Studio.
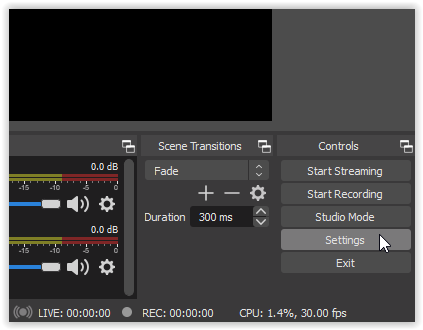
- Open Roblox so that it is running in the background. Launch OBS Studio if not already running. Select Settings in the bottom right section of the screen.
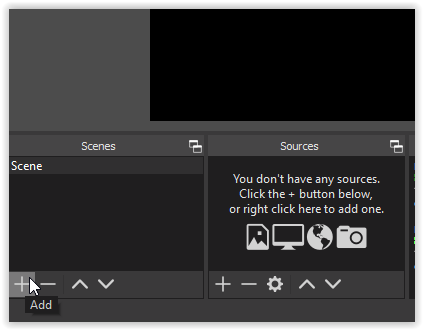
- Go to the Scenes box in the bottom-left section, and then click + to add a new entry.
- Give the entry a scene name that will act as your video title.
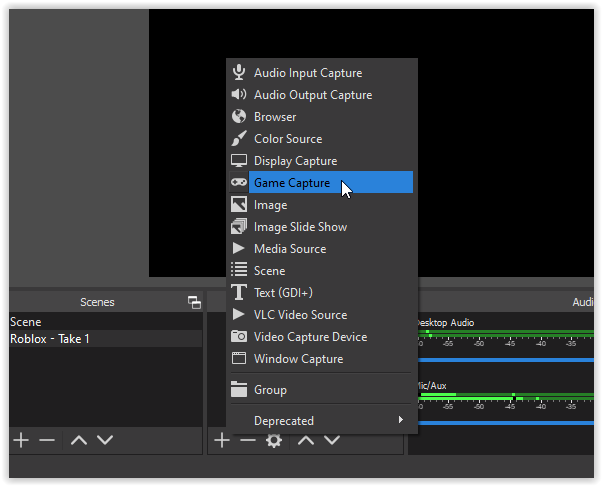
- Go to the Sources box and select “+” to add the source, then select Game Capture.
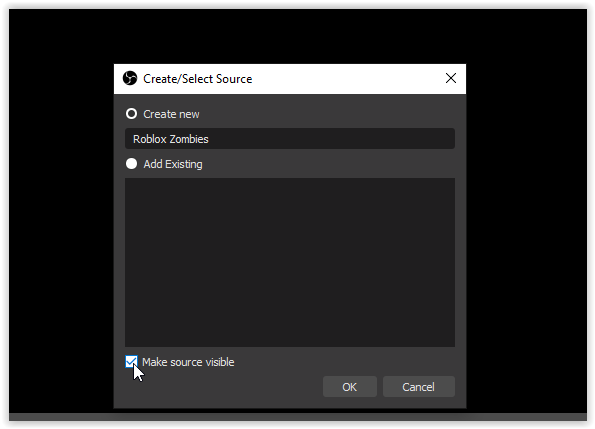
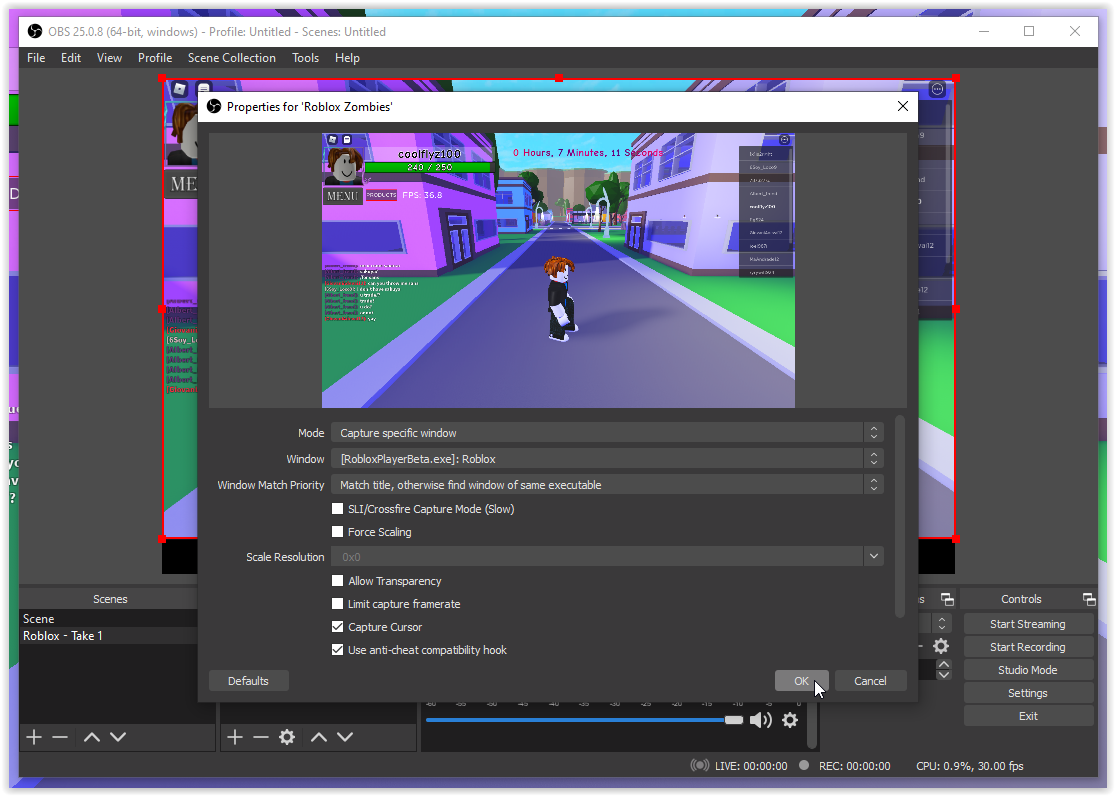
- In the new Create/Select Source window, add a source name or select Add Existing. Check the box next to Make source visible to ensure the game shows up in OBS, and then click on OK.
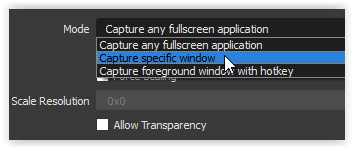
- Under the Properties for [‘your source name here’] window, select the Mode dropdown and choose Capture specific window.
- In the Window dropdown, select your Roblox game.
- Your game will appear in OBS to represent what the video will look like in the end. Click OK in the bottom right section to save changes.
- Select Start Recording when you are ready.


To further enhance your gaming video options, you can add your webcam as a source, using the “+” sign in the source section as before. You can also add your Twitch, YouTube, Facebook Live, and more to OBS, and then stream your video live if that is your thing.
To use your webcam and picture-in-picture (PIP) in your Roblox video, add your camera as a source using the “+” sign, position the webcam video location on the screen, and click Start Recording. The process is simple once you are comfortable with the settings in OBS.
To add a video streaming site like YouTube or Twitch, click Settings -> Stream and then choose your provider from the dropdown menu. Then, all you have to do is connect the account or use a stream key. Look closely, that does not say Steam key.
Overall, Roblox game recording is perfect for making simple videos that you can edit later and do whatever you want with them. OBS and other third-party capturing programs deliver more features and options to give you extras like voiceovers, screen transitions, and PIP. OBS is excellent for the price of nothing, and it offers a ton of configuration options that you can experiment with to get your Roblox game video the way you want it. Just try some options out until you have the settings you are happy with, and then go from there.
That is how to record Roblox games on a Windows PC. Get started and have some fun!
Disclaimer: Some pages on this site may include an affiliate link. This does not effect our editorial in any way.