Windows 10 has OneDrive preinstalled, but if you don’t want to use it, there are different ways to first disable, then remove this cloud service. The method you’d use to do it largely depends on the Windows 10 iteration you’re using, and some actions are simpler than others. However, you don’t need to be super tech-savvy to successfully get rid of OneDrive.
You only need to follow the steps given below, and you’ll efficiently complete the actions.
How to Remove OneDrive From File Explorer
If you installed the Creators Update, OneDrive gets installed like any other program on Windows. However, that only applies to Windows 10 Home edition. If you’re using that, take the following actions.
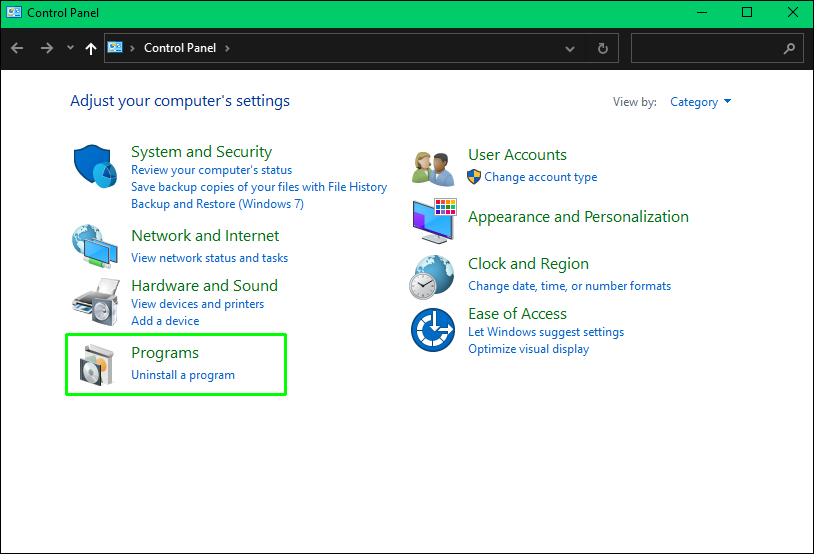
- Go to Control Panel and select “Programs. “
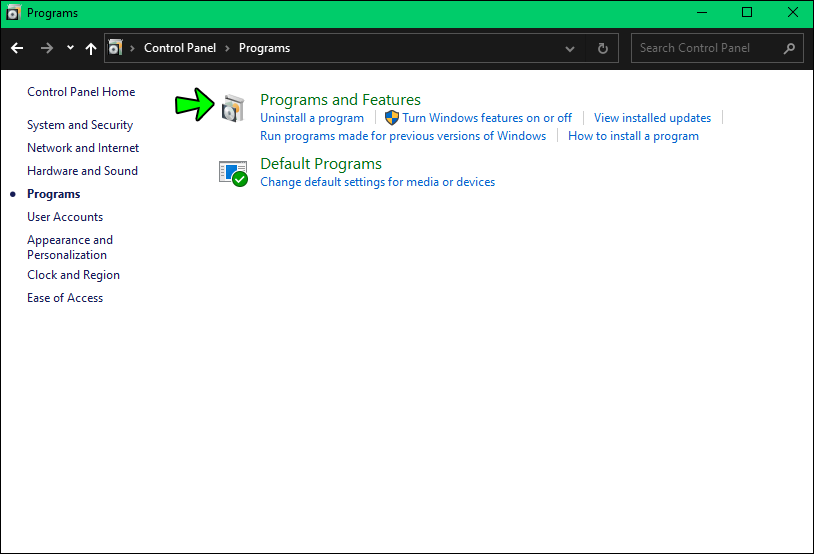
- Choose “Uninstall a Program or Settings.”

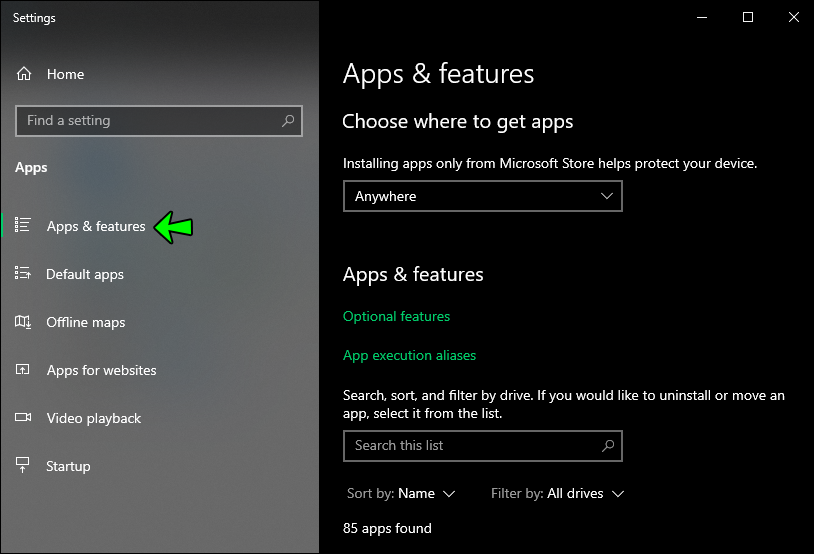
- Click “Apps,” then “Apps & Features,” and OneDrive should show up in the list.
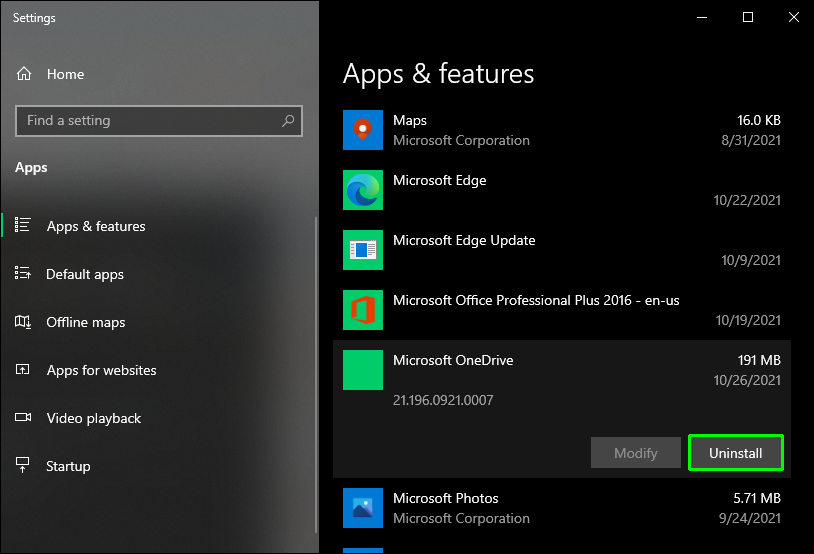
- Highlight OneDrive and choose “Uninstall.”
The cloud service will immediately get uninstalled, and the notification area icon disappears. However, it’ll remain in the File Explorer, even though the folder is empty.
To remove that, you need to resort to the Local Group Policy Editor, which is somewhat trickier to use. But there shouldn’t be any problems if you follow the steps in the section below.
Using the Local Group Policy Editor
This method is like an extension for those who use Windows 10 Home. But those who aren’t using the Home edition need to resort to Group Policy Editor anyway. And the method applies to:
- Windows 10 Enterprise
- Windows 10 Education
- Windows 10 Professional
Note that the Editor is a powerful tool, and if you’re on a company device, you should consult with your admin as to whether you can do it. Sometimes there are group policies that might override your request to remove OneDrive.
Be that as it may, here’s what to do.
- Click Start, and write “gpedit.misc”, then hit “Enter. “
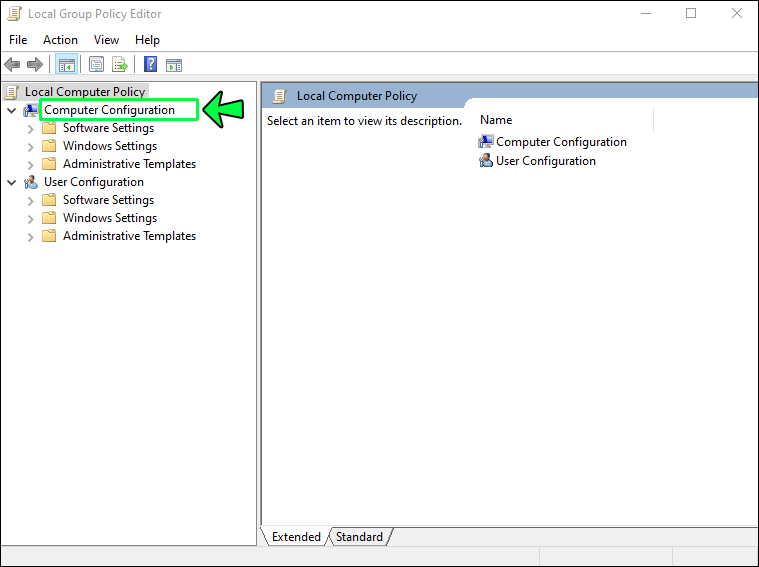
- The Local Group Policy Editor pops up, and you’ll see Computer Configuration in the left pane.
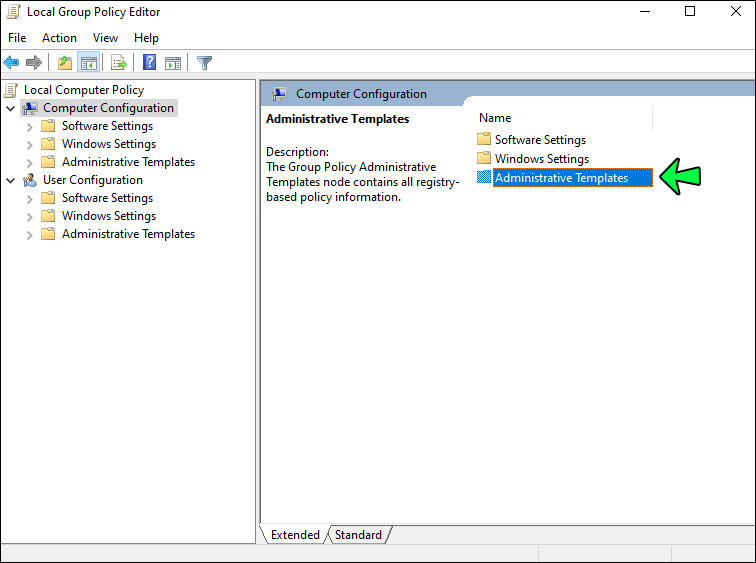
- Select “Computer Configuration,” then “Administrative Templates.”
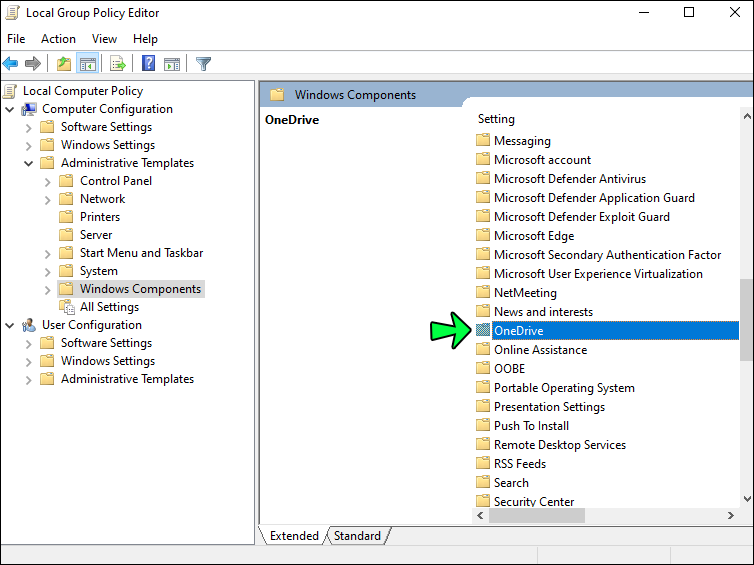
- Click “Windows Components” and choose “OneDrive.”
- Navigate to “Prevent the usage of OneDrive for file storage” and “Enable” the option.
- Click “OK” to confirm.

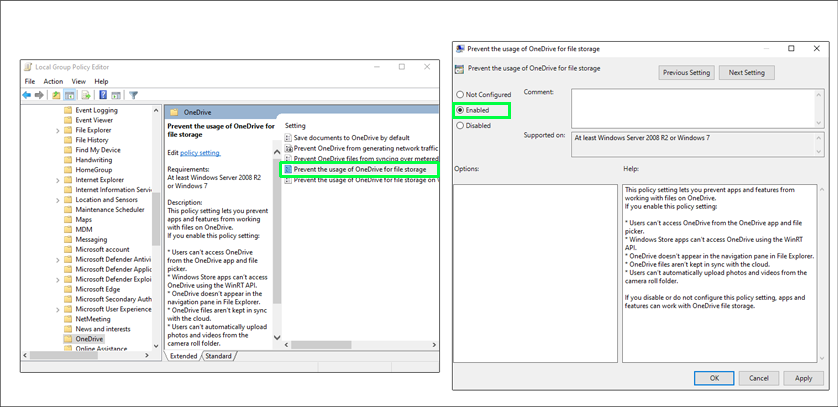
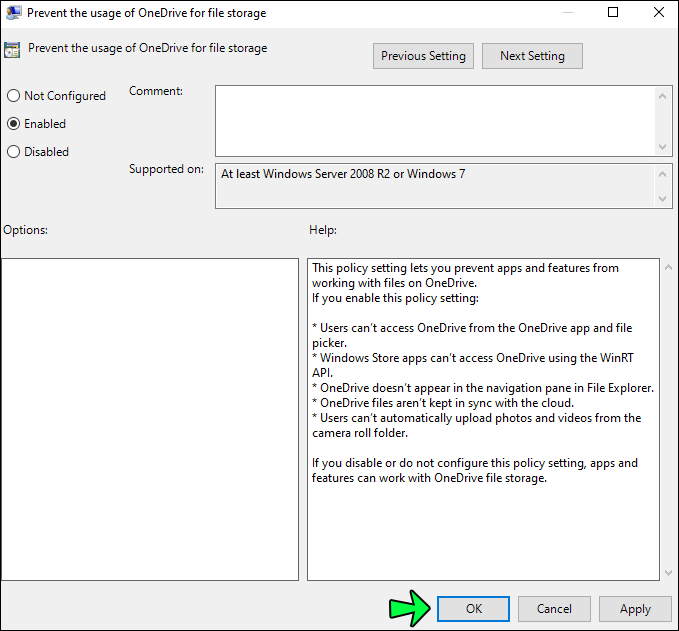
Doing that disables OneDrive and removes it from your File Explorer. That means users can’t launch the service or even access it.
Note that you won’t be able to access OneDrive from Windows Store either. And you can’t upload images to it using the camera feature.
Important Notes
As mentioned, with the method above, you don’t need to uninstall OneDrive from the Settings or Control Panel because the folder will stay in File Explorer.
However, sometimes the folder may show up even when you use the group policy method. When that happens, you should go to system folders and reinstall OneDrive to make the folder disappear.
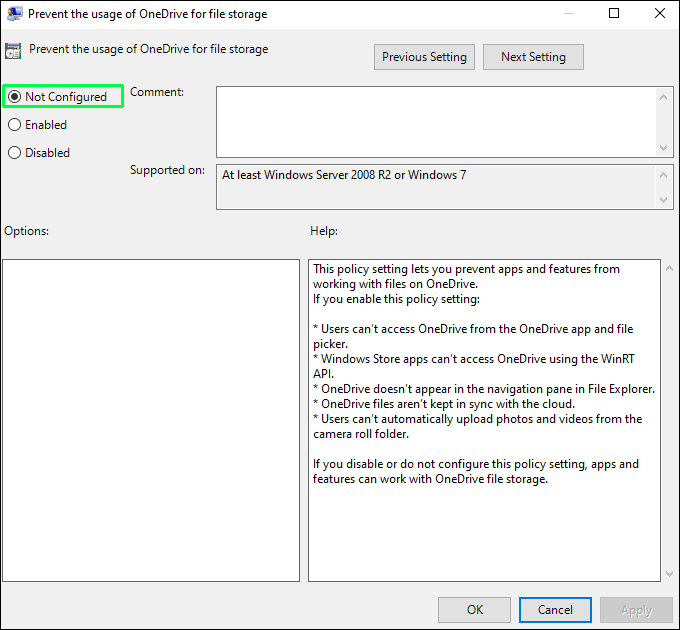
To revert the change, do the following:
- Go to Local Group Policy Editor.
- Navigate to OneDrive in the left pane and select it.
- Under “Prevent the usage of OneDrive for file storage,” click “Not Configured.”

Lastly, Windows 10 doesn’t feature DisableFileSync and DisableFileSyncNGSC registry settings. These worked with Windows 8.1, but they don’t exist in Windows 10.
Alternative Method
As discussed, Windows 10 Home users can simply uninstall OneDrive, but removing the folder from File Explorer takes more work. And instead of using Group Policy Editor to get rid of it, you can edit the registry.
To stress, this alternative method is for Windows 10 Home. Pro and Enterprise iterations of the software work best with the Group Policy Editor method.
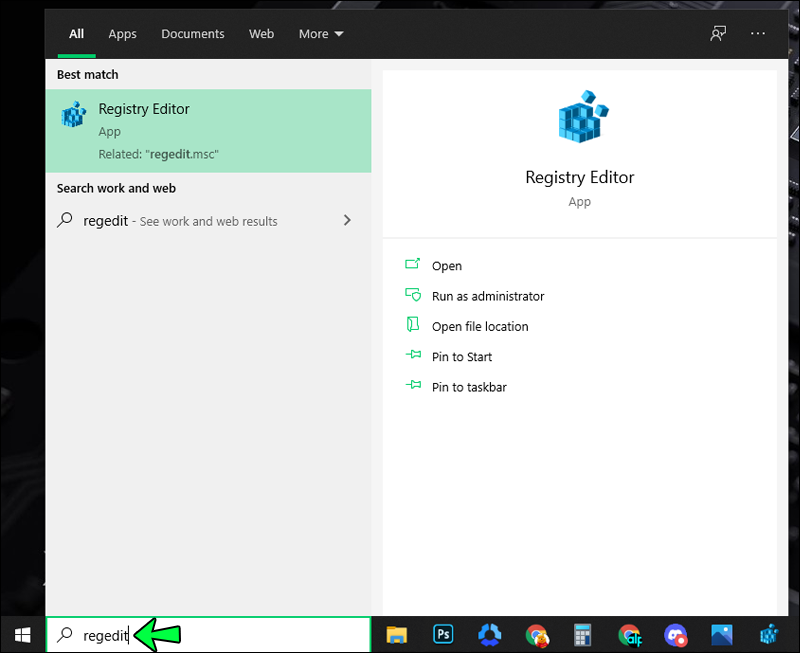
- Click Start and type “regedit” to access Registry Editor.
- Hit “Enter” and give the editor permissions to change settings.
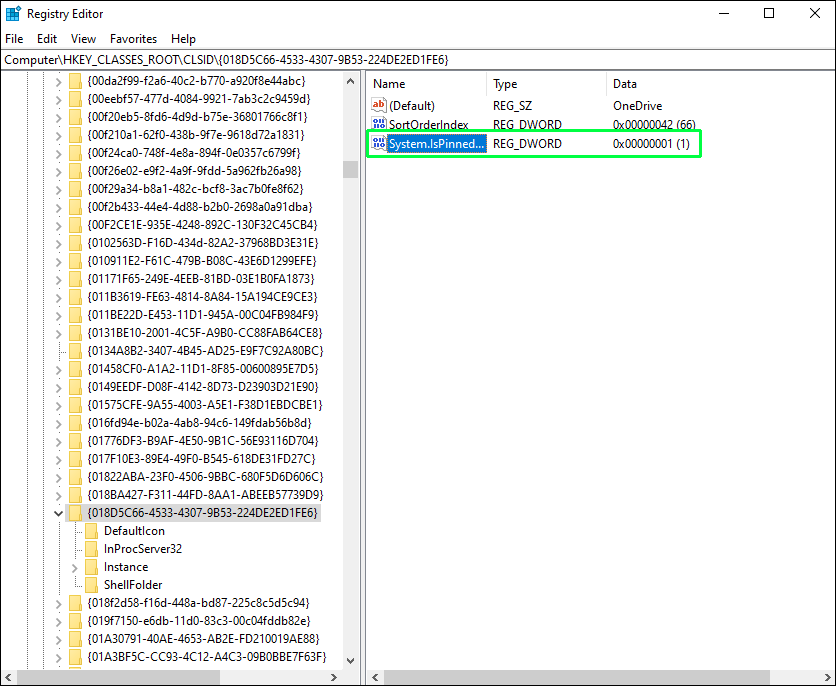
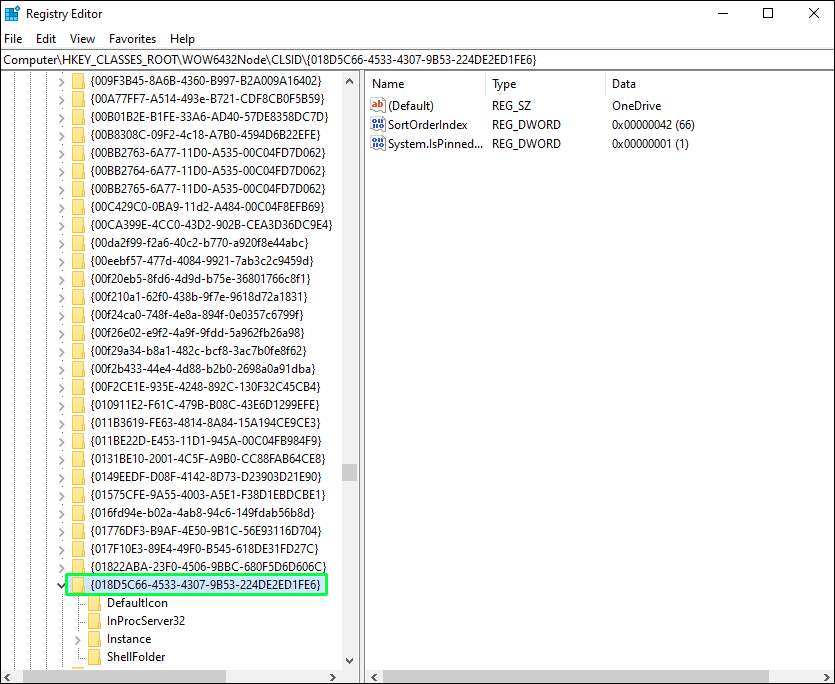
- Go to the left sidebar and find the following key.
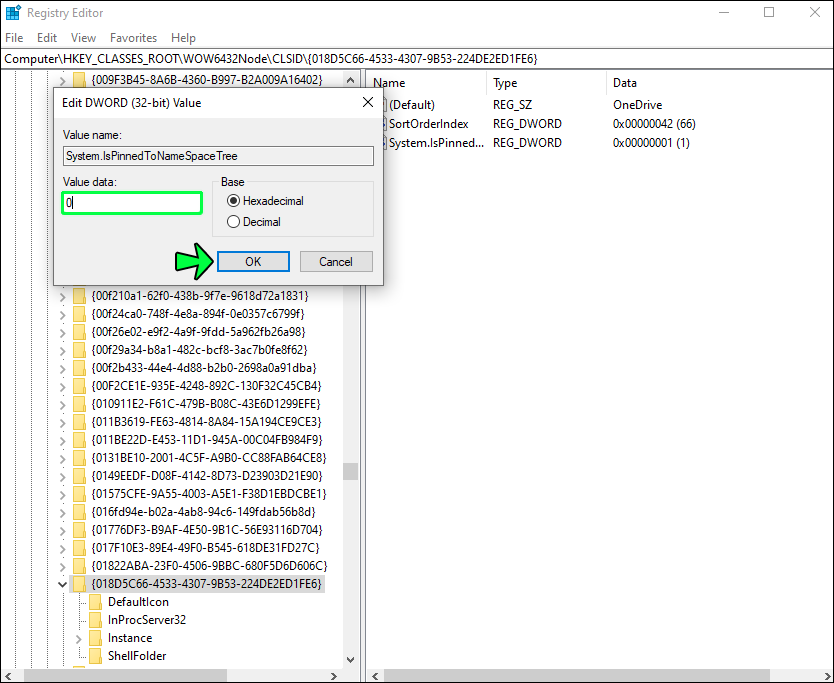
HKEY_CLASSES_ROOT\CLSID\{018D5C66-4533-4307-9B53-224DE2ED1FE6} - Find the System.IsPinnedToNameSpaceTree in the right pane and double-click it.
- Set the Value Data to zero and choose “OK” to confirm.

64-Bit Windows – Additional Steps
Aside from what’s already covered, Windows 10 64-bit need to take some additional steps.
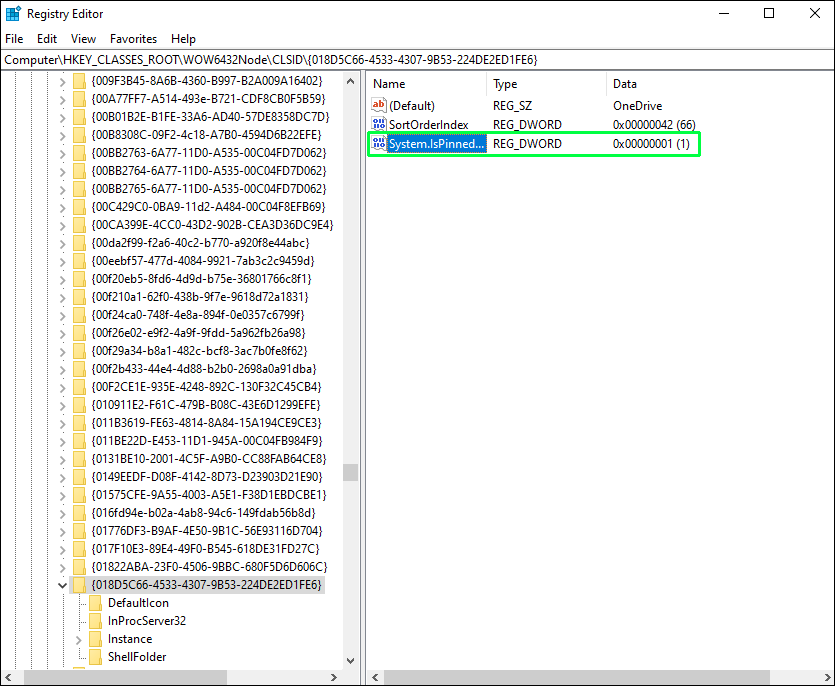
- Go to the following key in the left sidebar.
HKEY_CLASSES_ROOT\Wow6432Node\CLSID\{018D5C66-4533-4307-9B53-224DE2ED1FE6} - Find System.IsPinnedToNameSpaceTree, it’s in the right pane.
- Under Value Data, set value to zero and confirm changes.
Afterward, OneDrive gets immediately removed from File Explorer. If the action doesn’t take effect, reboot your PC, and it’ll be gone.
How to Reinstall OneDrive
It’s possible you might want to reinstall the cloud service in the future. But how do you do it since the app is gone from your computer and Windows Store?
You need to do some digging and find the app in the far recesses of system folders. However, the reinstallation isn’t as tricky as it seems, although the steps differ slightly for 32- and 64-bit versions of the software.
Windows 10 32-Bit
- Go to C:\Windows\System32.
- Find OneDriveSetup.exe and double-click on it.
- The installation is automatic, and you only need to follow the on-screen wizard.
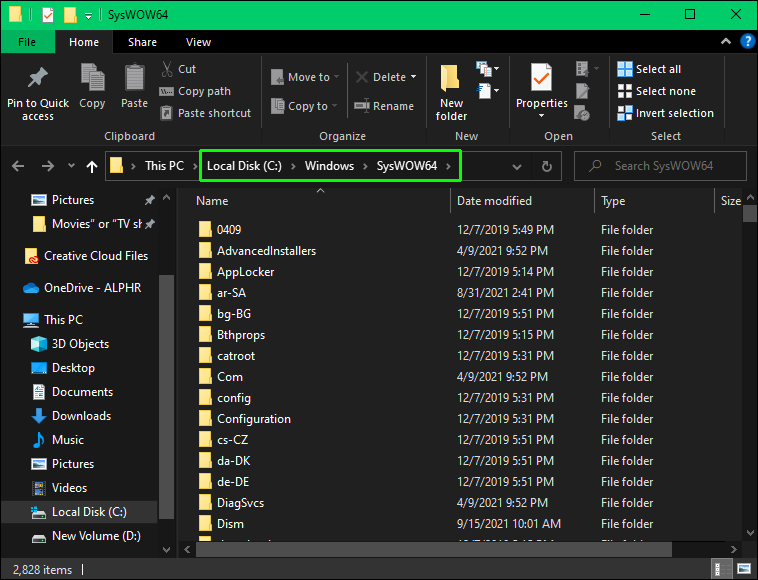
Windows 10 64-Bit
- Navigate to C:\Windows\SysWOW64\
- Double click the OneDrive .exe file and follow the installation wizard.

Note: Regardless of the Windows 10 version, you might need to restart your PC for the changes to take effect.
How to Unlink OneDrive?
Unlinking OneDrive doesn’t result in a file loss, and it’s surprisingly simple to do.
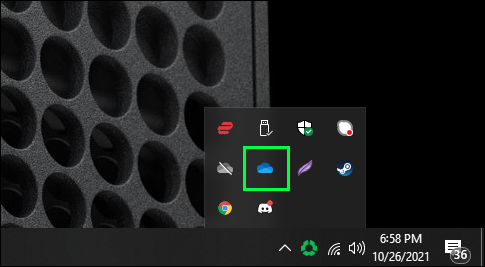
- Go to the menu bar or taskbar and choose the OneDrive icon (it’s either blue or white).
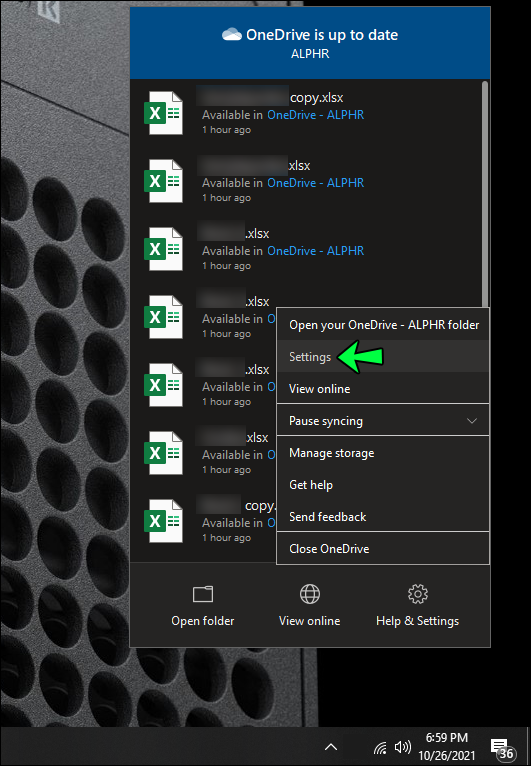
- Click Help&Settigns, then select Settings.
- Under Account, choose “Unlink this PC,” then click “Unlink Account.”

OneDrive Be Gone
Yes, it takes quite a few steps to completely remove OneDrive from your computer. In an ideal world, you’d be able to complete the action in only a couple of steps. But with so many different versions of Windows, it’s not surprising that the actions can be pretty complicated.
Nevertheless, this article has given you tried and tested methods to remove the cloud service from your computer. And don’t try any of the hacks you may see advertised online. These may open doors for malware and rarely do what they promise.
Do you use OneDrive? What’s your favorite cloud service?
Tell us more in the comments section below.
Disclaimer: Some pages on this site may include an affiliate link. This does not effect our editorial in any way.


