Pop-ups on your Squarespace website can help grow your online presence and increase customer engagement. They’re also the most powerful form of CTA, encouraging your visitors to do various things, such as sign up for your newsletter, buy a limited-edition product, or join an exclusive Instagram community.
The only question is, how do you add pop-ups to your Squarespace page? Read on to find out.
How to Add a Pop-Up in Squarespace
Squarespace is a user-friendly website builder that gives you easy access to all critical features, including pop-ups. Here’s how to integrate them into your page:
- Log into Squarespace.
- Head to your sidebar and press Marketing.

- Choose Promotional Pop-Up.

- Select Style and choose the layout that works best for your website. If you wish to add an image, pick a layout compatible with this feature. If the layout no longer fits your page after a while, you can always change it.
- Head back to the previous page and tap Action to select the purpose of your pop-up. The two options are to encourage your audience to register for your newsletter or to press a button.


Remember that you don’t always need to add a pop-up. In most cases, adding a link to your Squarespace website is more than enough.
How to Add Newsletter Pop-Up in Squarespace
Once you choose the CTA, you’ll need to fine-tune your pop-up. Here’s how to do so if you’ve selected the newsletter option:
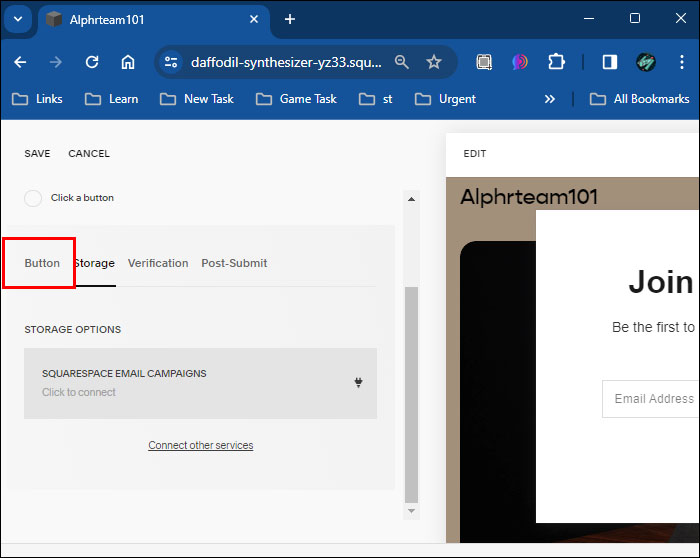
- Click Button to edit the text that appears in your pop-up:
- Email Field Placeholder Text – This is the text that shows up in your email address field. By default, Squarespace displays “Email address,” but you can change this to whatever you like.
- Submit button – Besides the email address text, you can also modify the content on the key your visitors press to send their address. Most people type something like “Sign up” or “Join us,” but you can enter whatever works best for your newsletter.
- Disclaimer – This is the text that goes below your email address field.
- Press Storage if you wish to collect audience responses. You can choose from several platforms here, including Google Drive and Mailchimp. Alternatively, select Squarespace Campaigns to use Squarespace’s built-in storage feature.
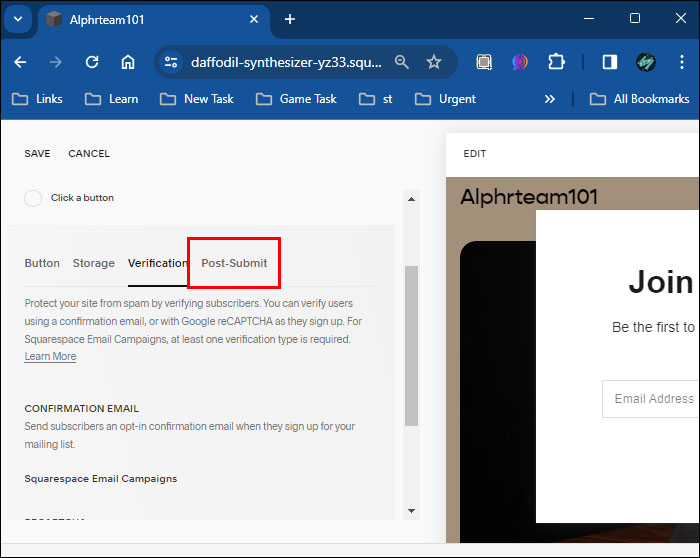
- Tap Verification to review your visitor verification options. By default, Squarespace wants you to send a confirmation message, but you can also use Google reCAPTCHA. This step is mandatory because Squarespace doesn’t allow you to set up a mailing list without a verification method.
- Click Post-Submit to tweak the content that shows up after a user registers for your newsletter:
- Post-submit message – This text appears below your headline and disclaimer once someone sends their form.
- Post-submit HTML – Skilled coders can incorporate tailor-made code to the HTML field to include additional content below the disclaimer.
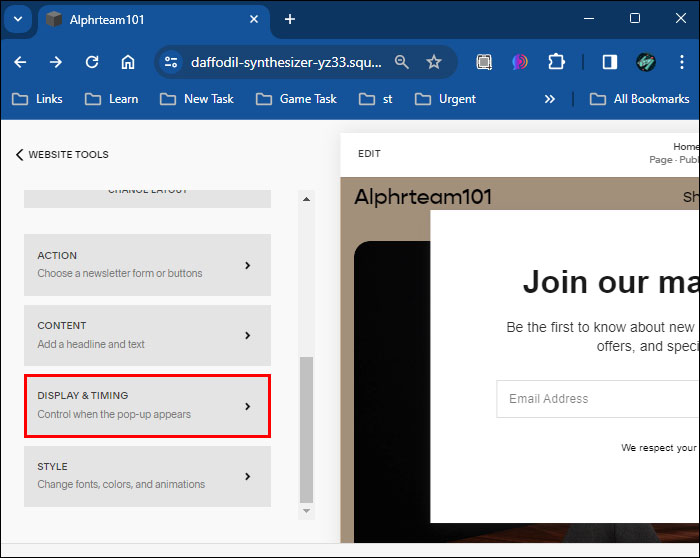
- Head back to the Promotional Pop-Up home page and tap Display and Timing. Click the prompt to select the pages where your pop-up will appear:
- The “Any First Page” option displays the first page in your drop-down menu.
- The “Only Certain” option limits the pages where your pop-up shows up, which is helpful for displaying the content on the homepage only or hiding your pop-up from pages that already have newsletters. Click anywhere outside this menu to move on.
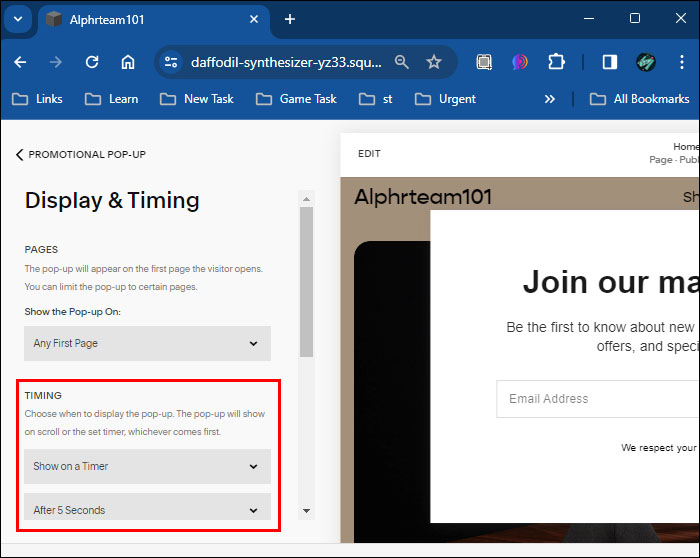
- Navigate to Timing to decide whether your pop-up will appear based on a scroll and/or a timer. If you use both the scroll and time options, Squarespace will show the pop-up after whatever happens first. For instance, if you set the scroll to 30% down and the timing to 15 seconds, your pop-up may appear in two ways:
- A user clicks your page and instantly scrolls 30% of the website.
- A user stays on your page for 15 seconds without scrolling 30% down.
- Click Frequency to determine how often your audience will see the pop-up. If your visitors have already seen the pop-up, it might be wise to hide it during their next visit, which provides a smoother experience. You can bring it back later on or eliminate the pop-up for return users altogether. Here are the available frequency options:
- Never – Your visitors will only see the pop-up once.
- 30 days – Your visitors will see the pop-up again after 30 days.
- Two weeks – Your visitors will see the pop-up again after two weeks.
- One week – Your visitors will see the pop-up again after one week.
- The next day – Your visitors will see the pop-up again after a day.
- Don’t display after signup – Your visitors won’t see the pop-up again if they’ve signed up for the newsletter.
- Head to the Show on Mobile field and decide whether you want to display the pop-up on smartphones. If yes, customize the experience using the Mobile menu in the Style window.
- Go to Reset views and click Reset to display the pop-up to your audiences during the next visit, even if your frequency settings say otherwise. This makes sense if you’ve changed your pop-up and want users to check out the design. After the next visit, your pop-up display settings will revert to the original frequency preferences.
- Click outside the Promotional Pop-Up field, and voila – your pop-up will be up and running.


Beside adding a newsletter pop-up, link to your social media channels in Squarespace to increase your visibility and reach.
How to Add Button Pop-Up in Squarespace
In addition to newsletters, Squarespace also lets you add “Press a Button” pop-ups. If you take this route, Squarespace will reformat a link you provide into a sleek button that will take your visitors to another website.
Adding a button pop-up should only take a few seconds.
- From the Action menu in the Promotional Pop-Up page, choose Click a button.
- Type in the text you wish to appear on your button in the Link Label field.
- Paste the link where users will land when pressing the button.
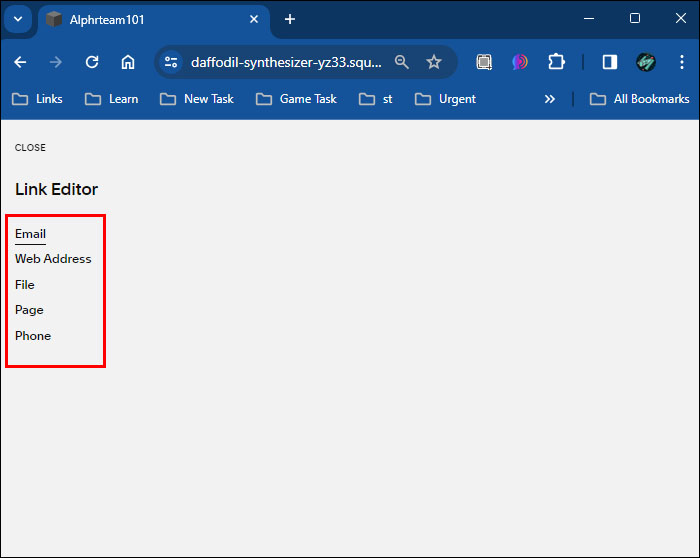
- Click the Settings button represented by a cog in the right part of the link you pasted.
- Select the type of link you’re adding to the button:
- Email address, which automatically prompts audiences to send an email
- Web Address
- File, which automatically downloads a file to the user’s computer when they press the button.
- Page, One of the pages on your Squarespace website.
- Phone number, which automatically encourages visitors to hit you up
- Customize the display, timing, and frequency settings. Leave the Promotional Pop-Up menu when you’re happy with your pop-up.


You can also consider embedding a Google Calendar in Squarespace as a pop-up or newsletter might not always be an appropriate choice.
Let Your Website Do the Talking
You don’t always need to reach out to your audiences manually. Your Squarespace website can do it for you through pop-ups. Whether you choose the newsletter or button option, be sure the content is compelling and not too disruptive. This will ensure your audience returns to your page, and who knows, they might just contact you as soon as they see the pop-up.
Disclaimer: Some pages on this site may include an affiliate link. This does not effect our editorial in any way.


