Reinstalling your Mac’s operating system always comes with a hint of fear: what if you encounter an error during the process? The possibility is both stressful and can set you back on your work considerably. Fortunately, seeing “the recovery server could not be contacted” error message isn’t usually worth worrying about.
Whether you’re installing an update or recovering your data, your device needs to communicate with Apple’s servers. And if it can’t establish a connection, you’ll get the above error message. So how do you fix it promptly and proceed with your installation? Read about the possible solutions below.
The Recovery Server Could Not Be Contacted
There are several possible reasons why you encountered “the recovery server could not be contacted” Mac error message. Some have to do with your settings, while others are server-related. Typically, one of the following causes is to blame:
- Apple’s servers are overloaded.
- Your device isn’t connected to the internet or your internet connection is too slow.
- The date and time on your Mac aren’t in sync with Apple’s servers.
Before you proceed to troubleshoot, it’s a good idea to confirm that the issue is on your end. Whenever Apple rolls out a major macOS update, a large number of users try to install it at once, resulting in server overload. The only way to confirm this would be to contact Apple, but you can still look for indications of server issues. Check Apple’s Server Status page to see if any of their services are down.
Now let’s see what you should do if the servers don’t seem to be at fault.
The Recovery Server Could Not Be Contacted in High Sierra
Checking your internet connection and/or resetting your date and time usually fixes this error in High Sierra OS. Follow the steps below to get it done.
Check Your Internet Connection
The most common reason your device fails to connect to the servers is no internet connection. If you’re using Ethernet, unplug your cable and then plug it back in. In the case of Wi-Fi, here’s what to do on the Utilities screen:
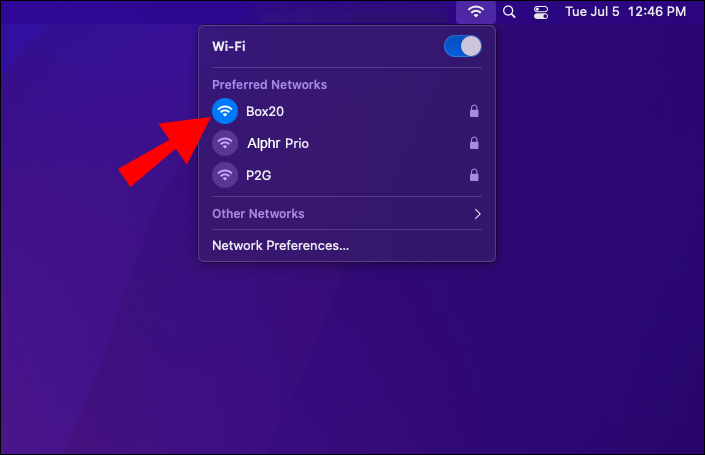
- Click the Wi-Fi icon in the top right corner of the screen.

- Make sure your Wi-Fi is on.

- Connect to a stable network.

As soon as you’re connected to the internet, you’ll be able to proceed with the installation. But if your Wi-Fi connection isn’t strong enough to reinstall your Mac OS, you’ll need to troubleshoot that first.
Sync Your Time and Date
If your internet connection is stable but the error message persists, your date and time settings may be at fault. Your device’s date and time must correspond with Apple’s servers. Follow these steps to update your date and time:
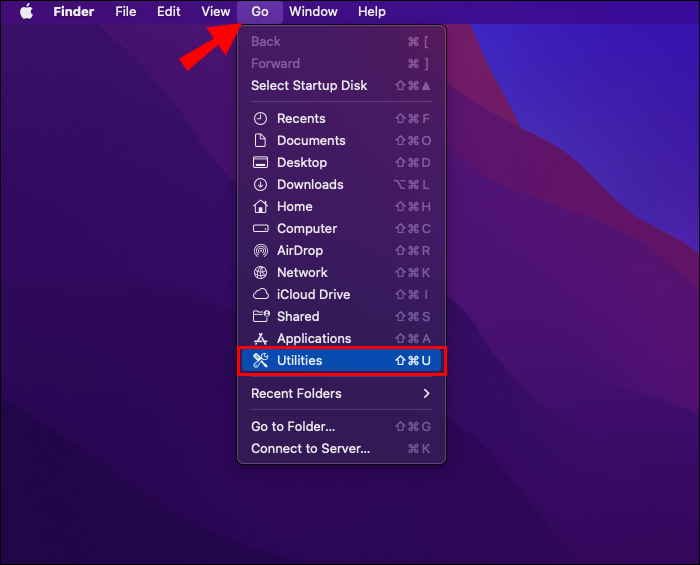
- Click “Utilities” in the menu bar at the top.
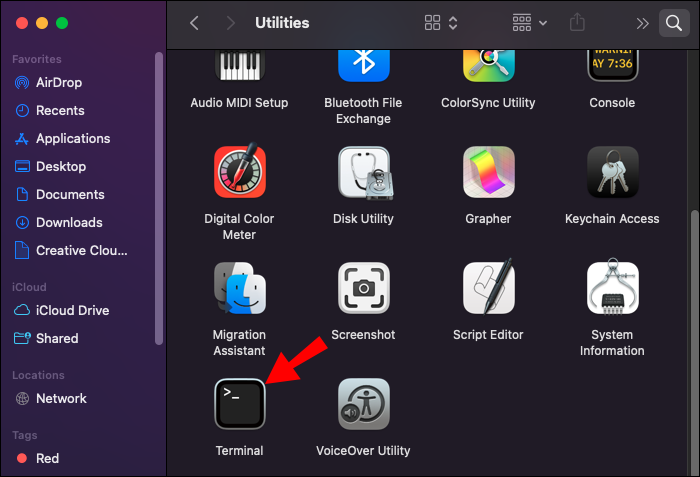
- Select “Terminal” from the dropdown menu.
- Type the “
sudo ntpdate -u time.apple.com” command (without quotation marks) in the new window and hit Enter. - Go back to the Utilities screen by clicking “Terminal,” then “Quit Terminal.”
- Try reinstalling your macOS.

This command synchronizes your device’s date and time with the servers. If you still received an error while executing this command, try typing the same code without “sudo” at the beginning. If this doesn’t work either, you can enter the appropriate time and date manually:
- Open the Terminal from the “Utilities” menu.
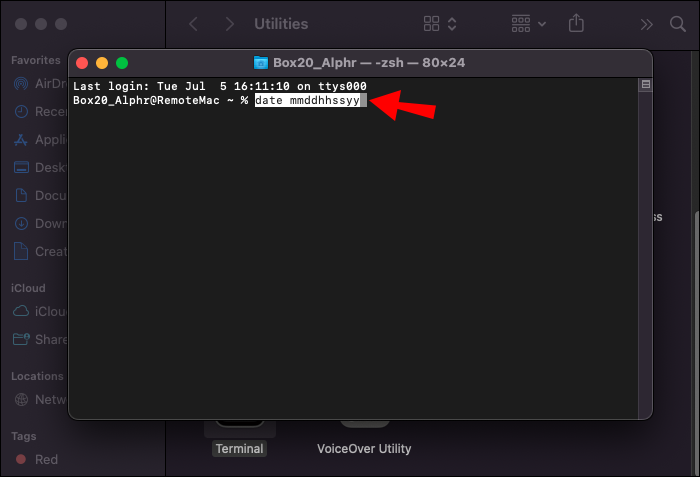
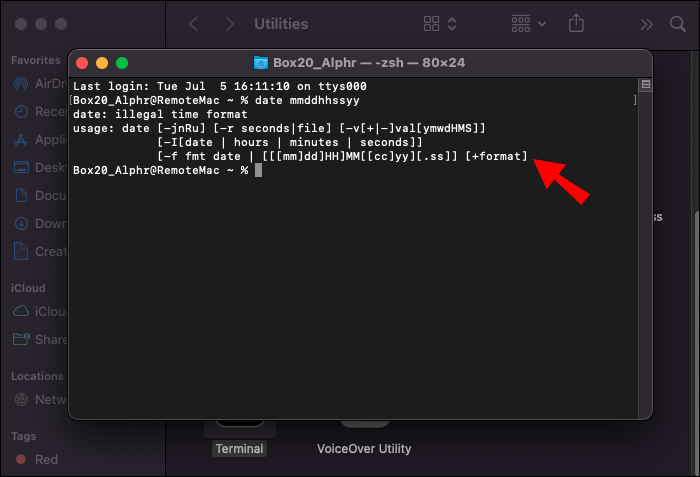
- Type “date mmddhhssyy” (without quotation marks). Replace each letter of the date and time with the appropriate number. For example, 9:30 a.m. on June 21, 2022 would look like “0621093022” in your code.
- Hit enter and exit the Terminal.
The Recovery Server Could Not Be Contacted in Catalina
If you get this error on your device running macOS Catalina, you can try the solutions below:
Connect to the Internet
Since a stable internet connection is necessary for any macOS installation, the first thing to check is your internet connection. Ethernet users should make sure their cable is plugged in correctly. Unplugging and re-plugging your cable can also do the trick. If your device uses Wi-Fi, check your internet connection in the following way:
- Find the Wi-Fi icon in the top right corner.
- Click the icon for more network options.
- Make sure your W-Fi is on and connected to a stable network.
Once your device is connected to the internet, you’ll be able to continue the installation process with no error message disrupting your work. If you have a connection but it’s too weak to install the updates, you’ll need to fix that first.
Reset Your Time and Date
If you get the error despite a stable internet connection, the next thing to check is your date and time. Sync your date and time with Apple’s servers using the following command:
- Find “Utilities” in the top menu bar.
- Click “Terminal” in the dropdown menu. A new window will open.
- Type the “
sntp -sS time.apple.com” command (without quotation marks) and press Enter. Your date and time will be updated immediately. - When you’re done, Close the “Terminal.”
- Try reinstalling your macOS again.


If this attempt wasn’t successful, add “sudo” to the command to get “sudo sntp -sS time.apple.com.” If this didn’t do the trick either, set the date and time manually:
- Open the Terminal as described above.
- Type “date mmddhhssyy” (without quotation marks), replacing each letter with the appropriate number.
- Press Enter.
- Exit the Terminal and see whether this resolved the issue.
Fetch the Full Installer
On Catalina 10.15 and newer versions, you can prompt your device to download the full macOS installer this way:
- Open “Terminal” from “Utilities.”
- Type this command to fetch the full installer:
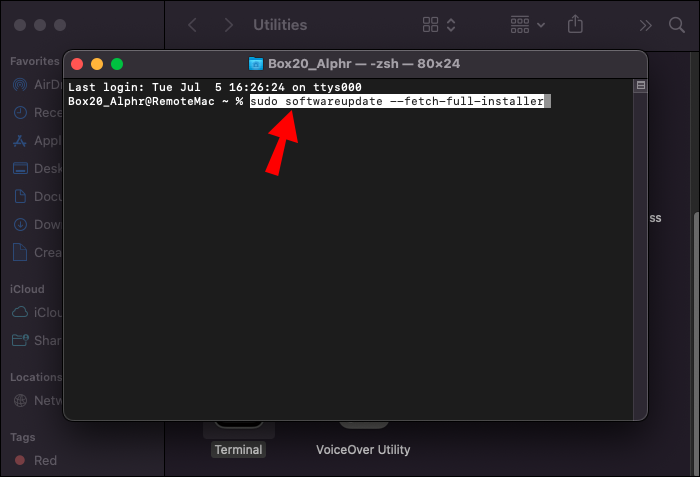
- For the latest OS version, type “
sudo softwareupdate --fetch-full-installer” (without quotation marks). - For a specific OS version, enter “
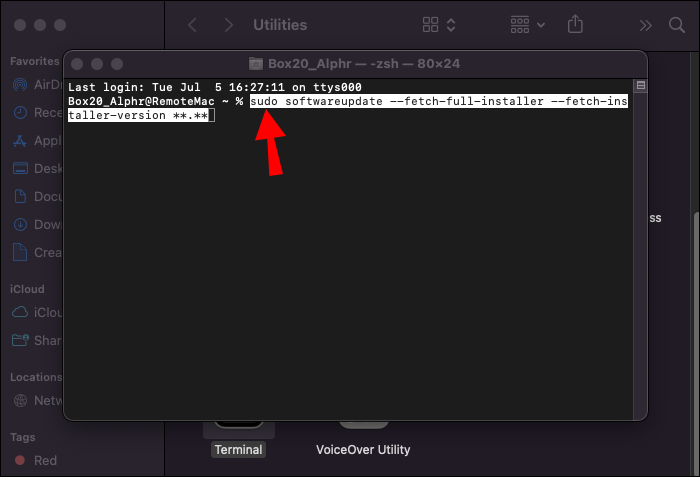
sudo softwareupdate --fetch-full-installer --fetch-installer-version **.**” while replacing the stars with the version number.
- For the latest OS version, type “
- Press Enter and wait for the download to be complete.
The Recovery Server Could Not Be Contacted in Big Sur
If you get “the recovery server could not be contacted” error message on Big Sur, check the following settings:
Ensure You’re Connected to the Internet
Most users could easily resolve this error by simply connecting to the internet. If you’re using Ethernet, ensure that your cable is plugged in. In the case of Wi-Fi, check whether you have a signal this way:
- Look at the Wi-Fi icon in the top right corner of the screen.
- If you’re not connected to a Wi-Fi network, click the icon and make sure your Wi-Fi is on.
- Connect to a network and try the installation again.
Sync Your Time With Apple’s Servers
If connecting to the internet didn’t do the trick, your date and time settings may be out of sync with Apple’s servers. You can update your date and time on Big Sur using the “sntp -sS time.apple.com” command:
- Click “Utilities” in the menu bar.
- Pick “Terminal.”
- Write “
sntp -sS time.apple.com” (without quotation marks) and hit Enter. - Go back to the Utilities screen by clicking “Terminal,” and then “Quit Terminal.”
- Try installing your macOS again.
The “sntp -sS time.apple.com” command synchronizes your date and time with Apple, which should solve the recovery server issue. If the command doesn’t work, try “sudo sntp -sS time.apple.com” (again, without quotation marks). You can also set the date and time manually if all else fails:
- Enter the Terminal as instructed above.
- Type the command “date mmddhhssyy” (with no quotation marks). Check the precise date and time on the internet and replace the letters with the correct numbers.
- Press Enter, then quit the Terminal.
Check whether you can reinstall your macOS now.
Use the macOS Full Installer
If there’s no issue with the date and time, you can also try using the macOS Full Installer to update Big Sur with the following command:
- Find “Terminal” in the “Utilities” menu.
- Enter one of the following commands:
- “
sudo softwareupdate --fetch-full-installer” (without quotation marks) for the latest OS version. - “
sudo softwareupdate --fetch-full-installer --fetch-installer-version **.**” (without quotation marks) for a specific OS version. Replace the stars with the version number.
- “
- Press Enter.
The Recovery Server Could Not Be Contacted on a Hackintosh
The solution to “the recovery server could not be contacted” error on a Hackintosh (a computer that runs on a macOS but is not authorized by Apple) might be slightly less straightforward. Finding a way to connect to the internet can be challenging. Some of the common issues and solutions include:
- Your Wi-Fi card is not supported on Mac. Try swapping it for a natively supported one.
- You’re using the wrong Kext file. Look for a different Kext and try again.
- The boot loader you’re using is faulty. Try installing macOS using an earlier version.
Once connected to the internet, ensure your date and time settings are in sync with Apple’s servers as instructed above, and you’re good to go.
No Issue Too Big to Climb
An installation error can be scary, but you probably don’t need to panic if your Mac couldn’t connect to the recovery server. This error typically results from no internet connection or faulty date and time settings. If correcting these two things doesn’t do the trick, you can also try using the full installer.
Which solution fixed this common error for you? Do you have any tips to share with those still stuck on the Utilities screen? Let us know in the comments below.
Disclaimer: Some pages on this site may include an affiliate link. This does not effect our editorial in any way.


