If you’re running errands or going out with friends, you know both can involve traveling to multiple locations or spontaneous pickups. But no worries; with Uber, you can add two additional stops to your ride. What’s more, you can even add a stop while your Uber ride is already in process.
In this guide, we’ll show you how to add more stops in the Uber app on your phone before and during your Uber ride. We’ll also answer some other questions about scheduling rides with Uber.
How to Add a Stop in Uber on the iPhone App
Uber’s Add a Stop feature is handy for numerous situations. It’s ideal when you and your friends are traveling to different destinations, when you’re on your way to work, when you want to drop off your children at school, or when you suddenly need to go to a different location.
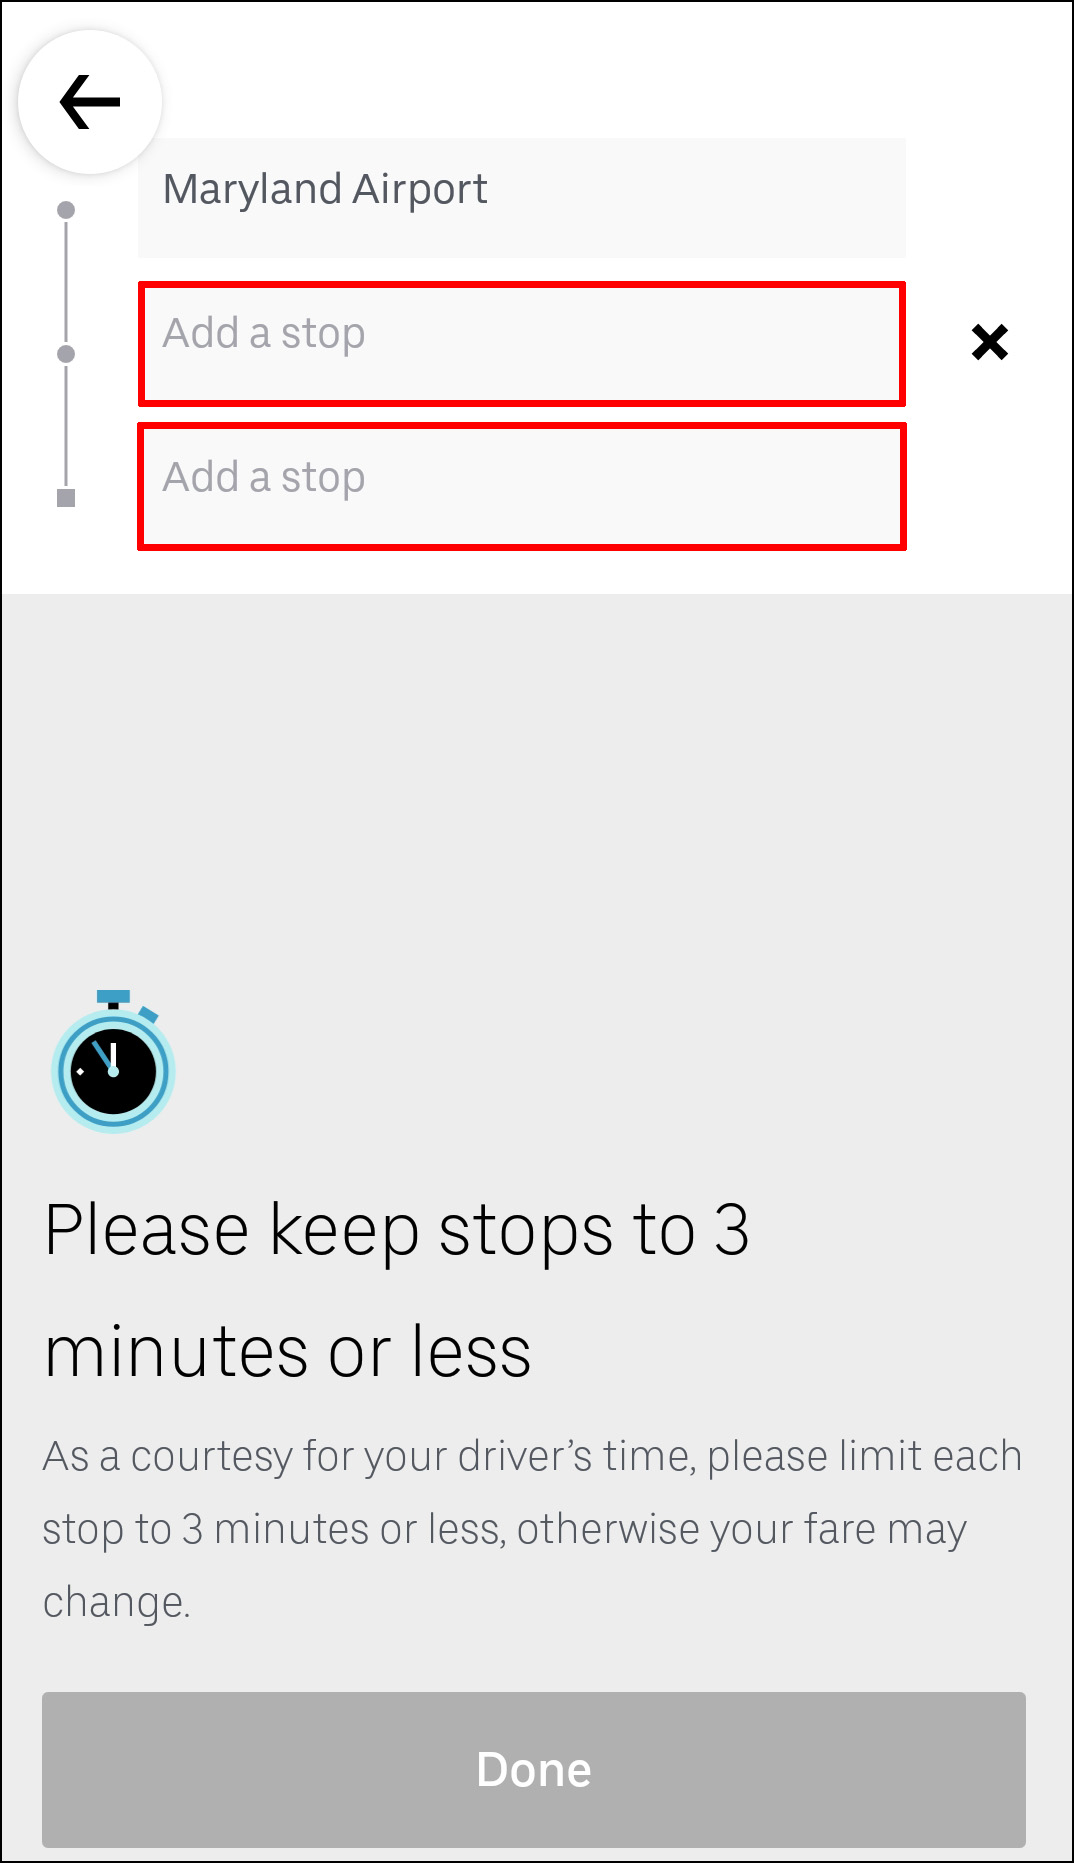
Fortunately, you can add stops before your ride begins and during your Uber ride as well. However, with every stop you add to your route, your fare will rise. And when it comes to the distance between each stop, they can only be a maximum of three minutes away. If the stops last more than three minutes, your fare will go up even more.
It’s simple to add, remove, or change the new stops, even when you’re halfway to your destination. To add a stop to your Uber ride on the iPhone app, follow the steps below:
- Open the Uber app on your iPhone.
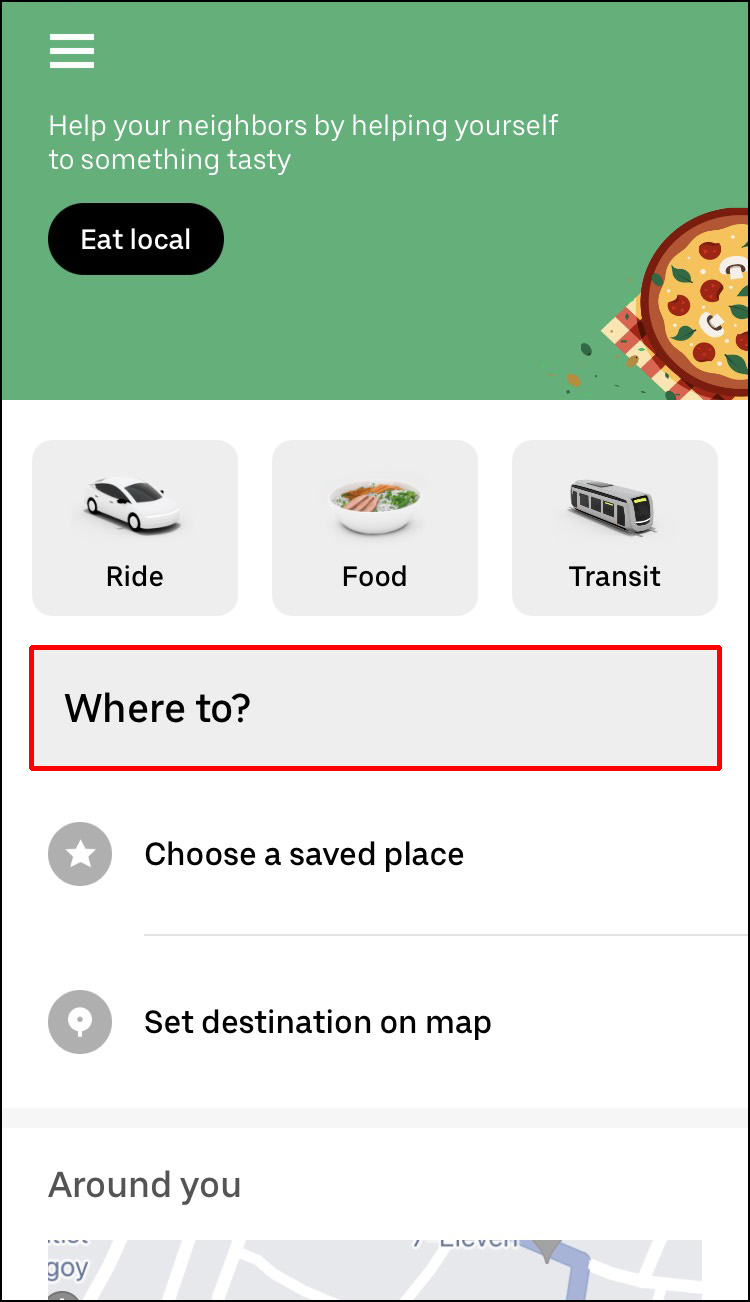
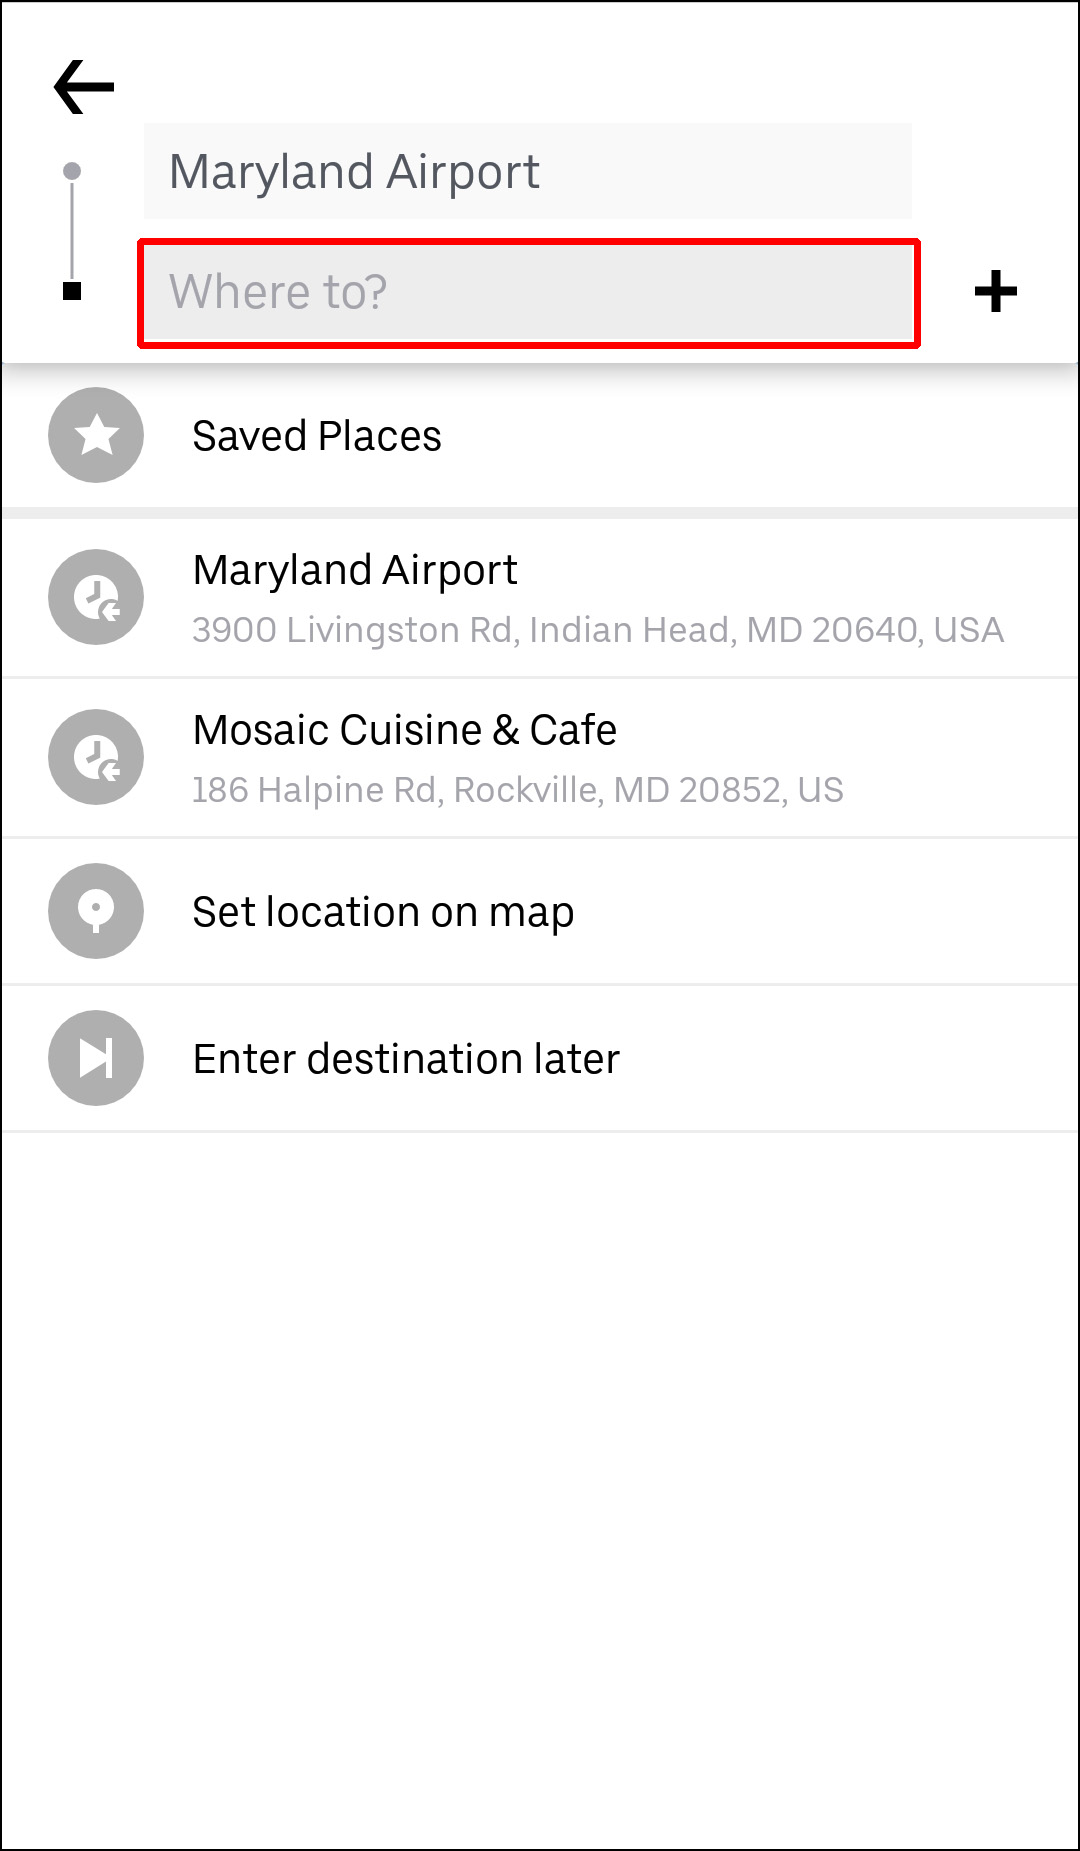
- Tap on the Where to? field at the top of your screen and type in your destination.

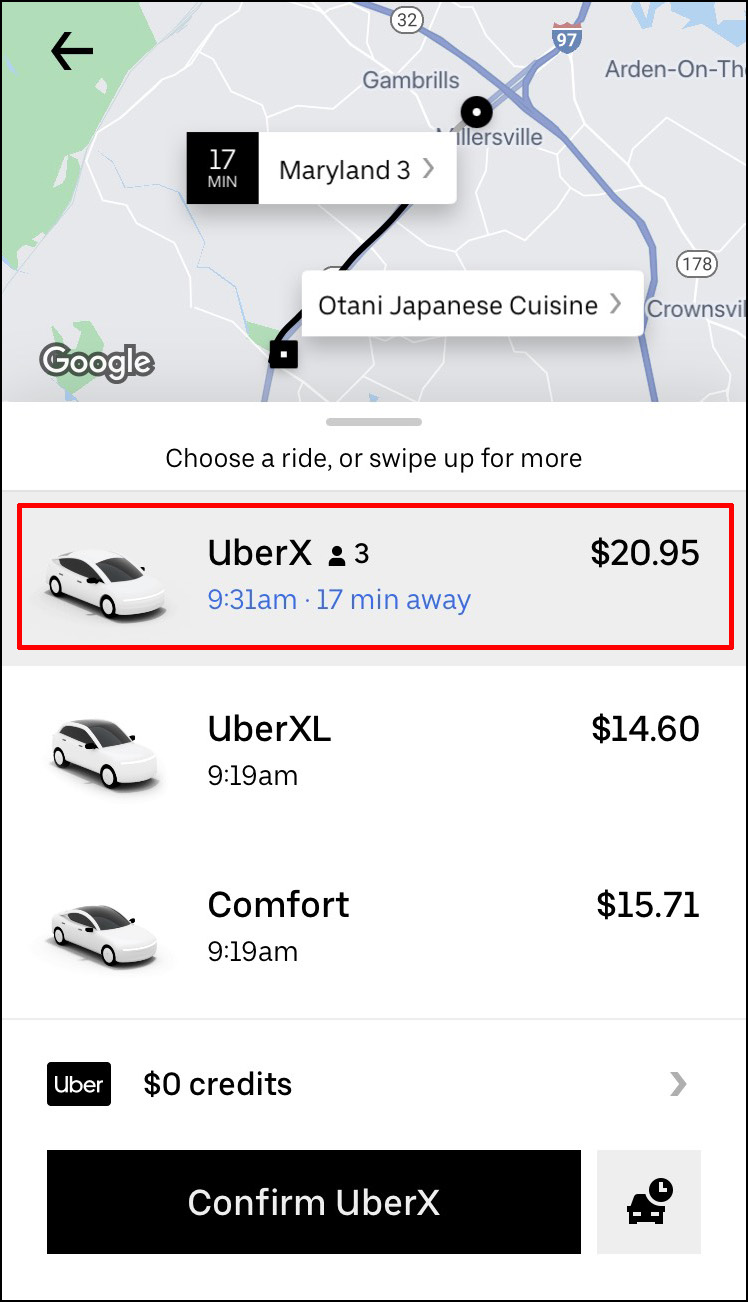
- Choose the type of vehicle you want for your Uber ride.
- Go to the Request option.
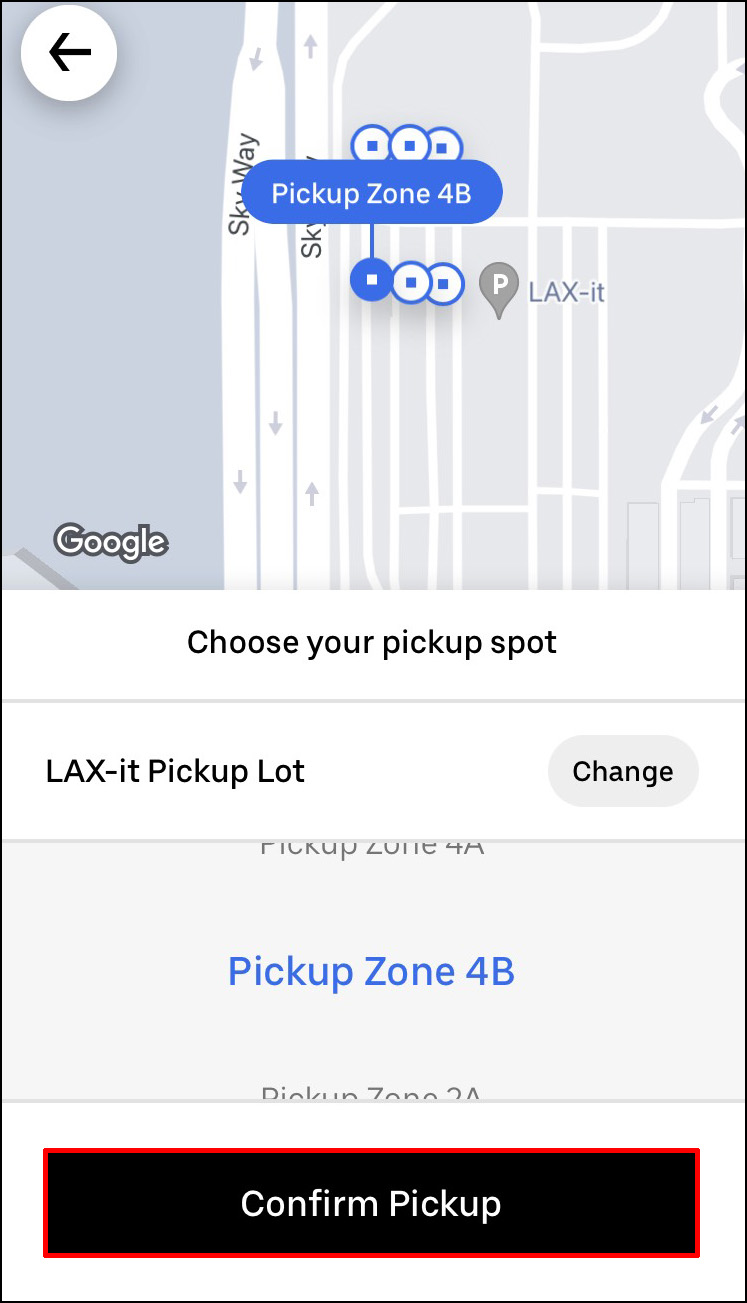
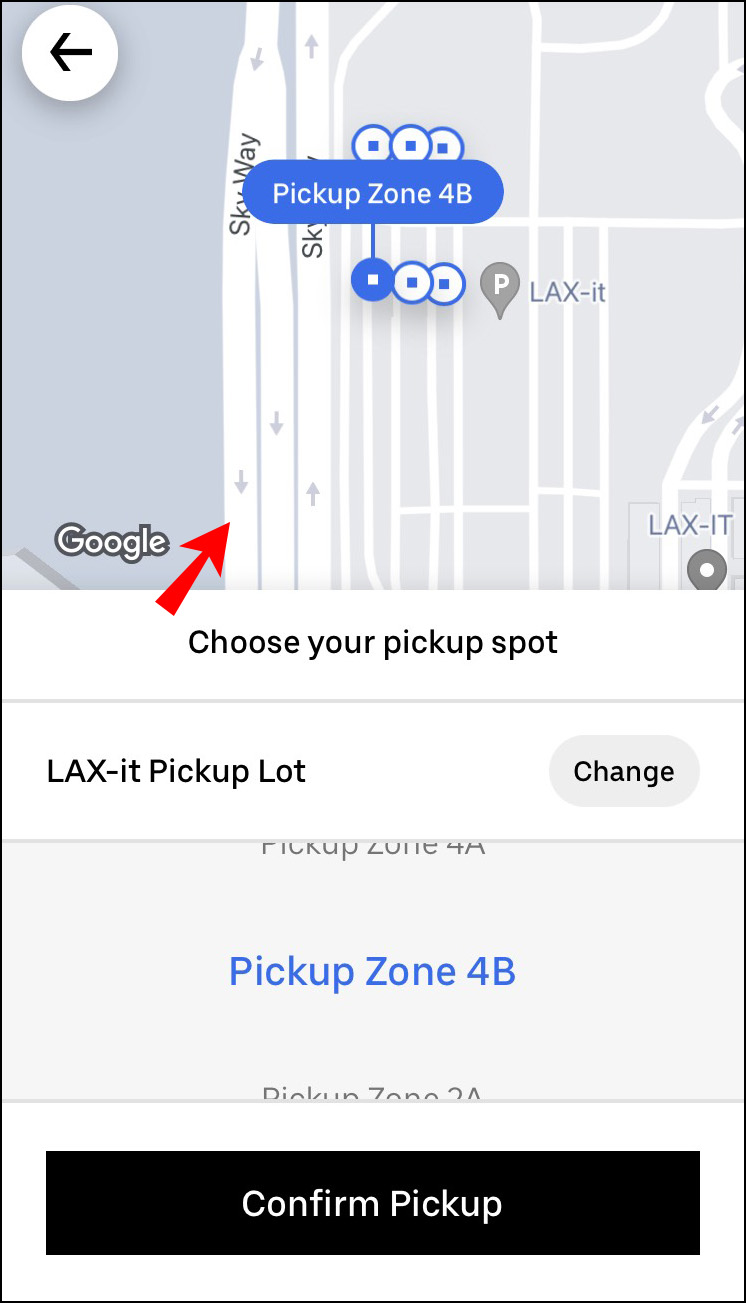
- Confirm the pickup location.
Once your Uber driver accepts your request, you can add a stop. This is what you need to do next: - Go back to the Uber map.
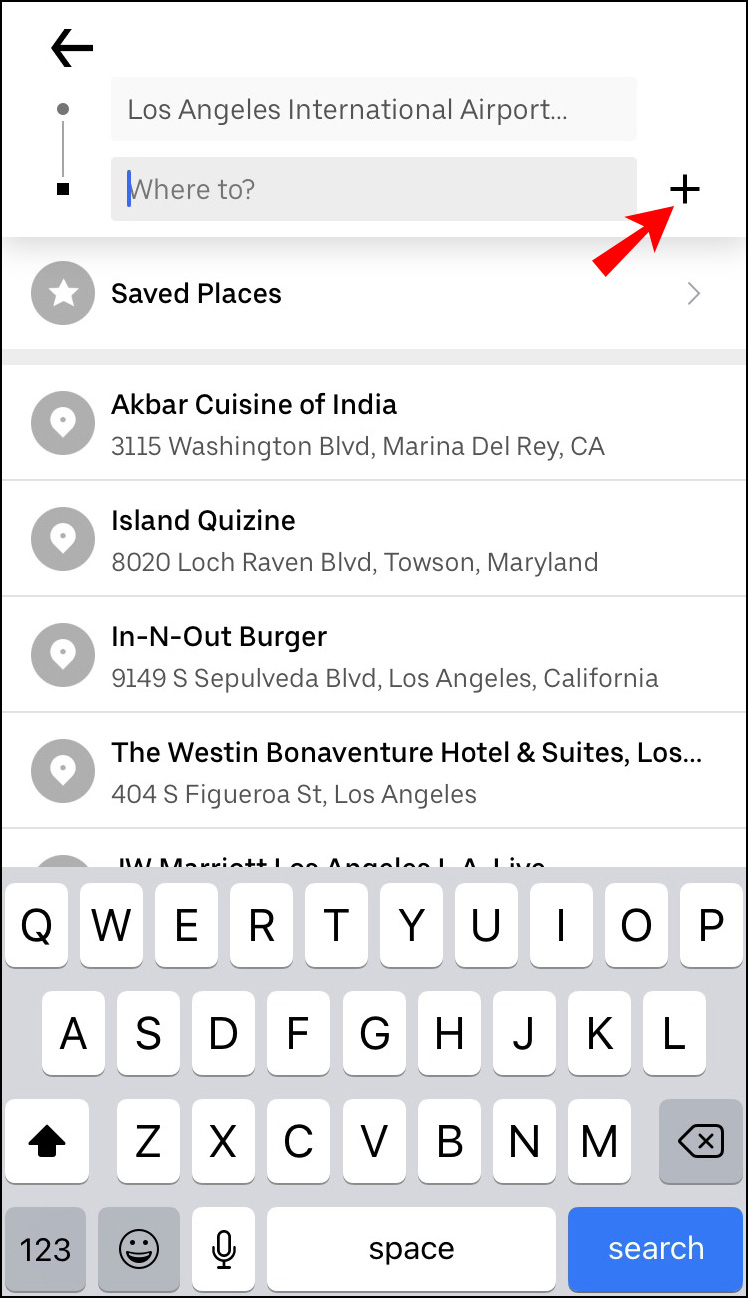
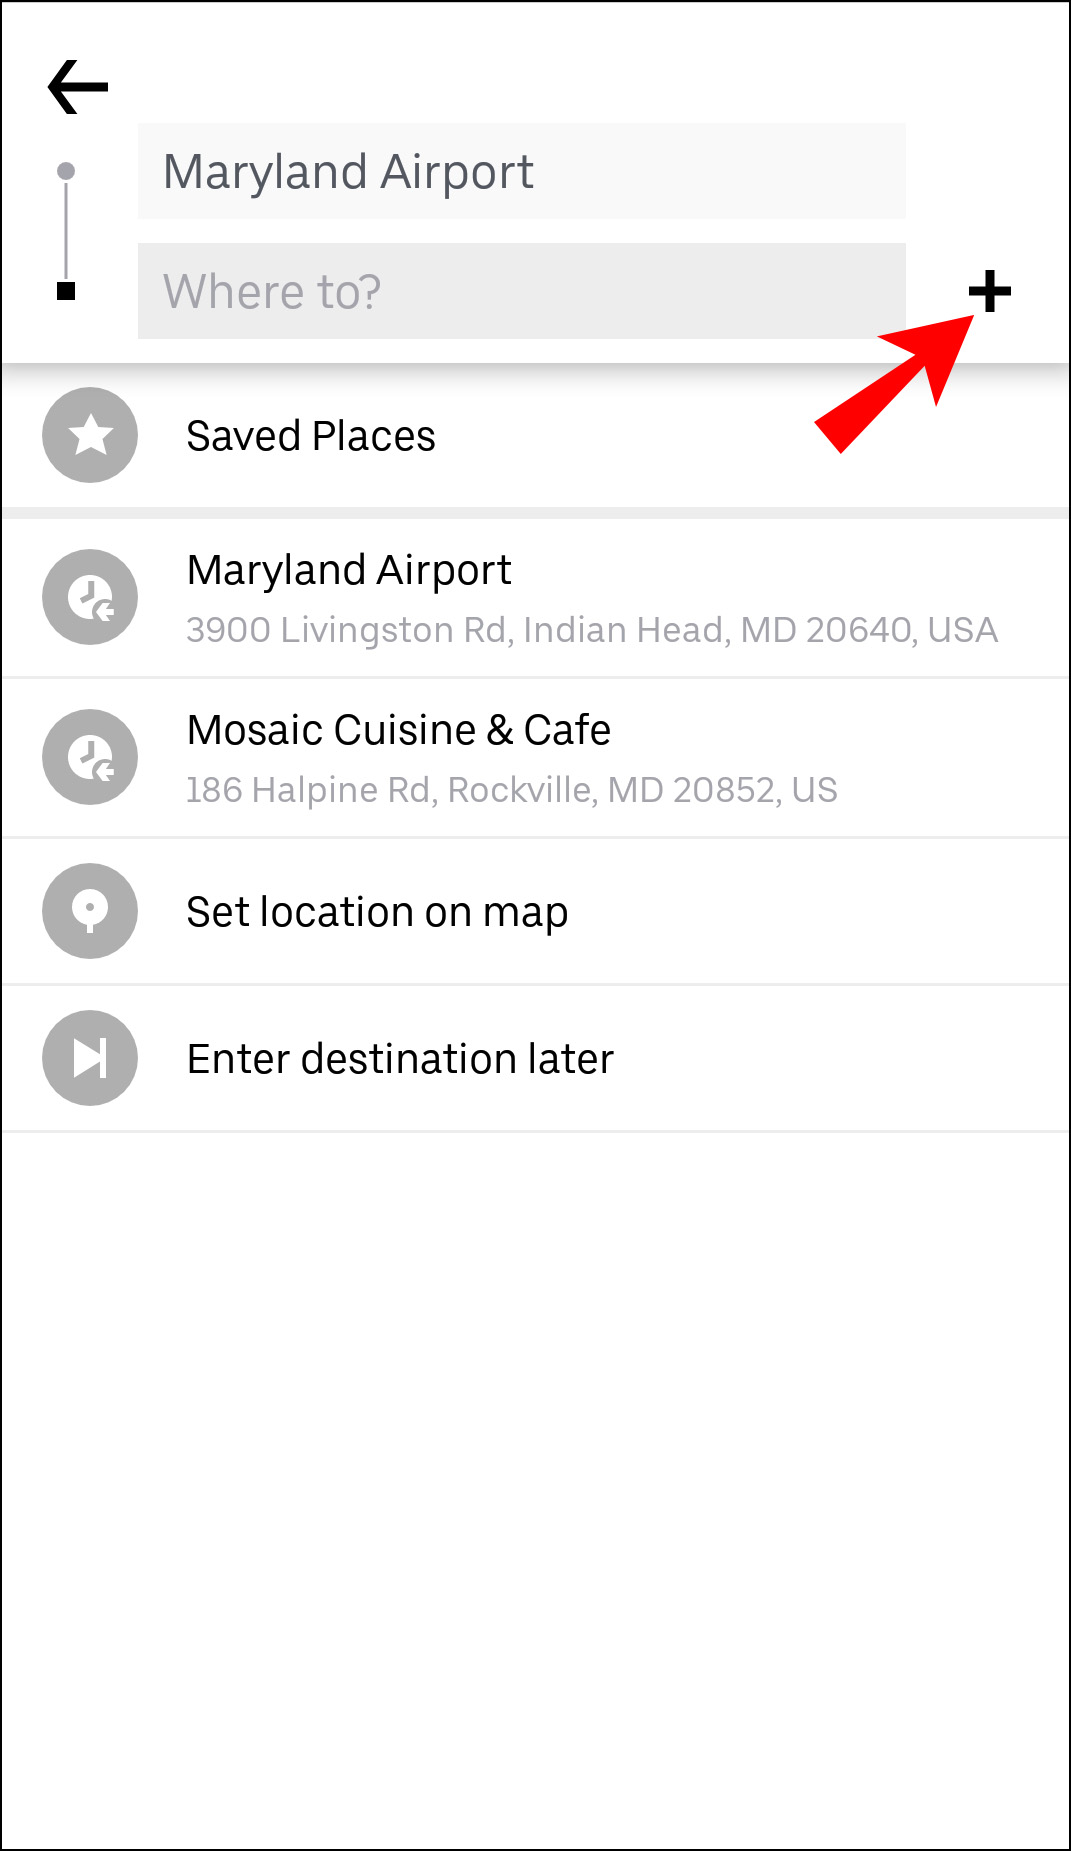
- Next to the Where to? field, tap on the + button.
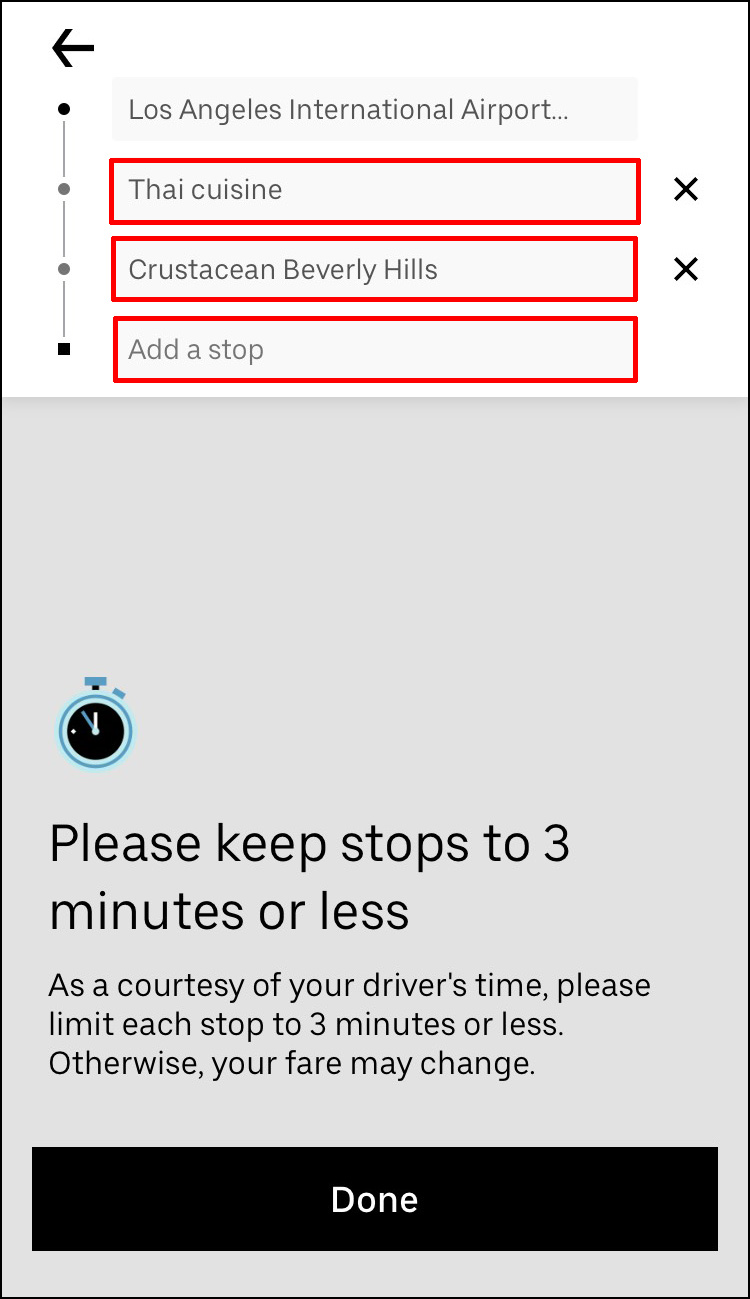
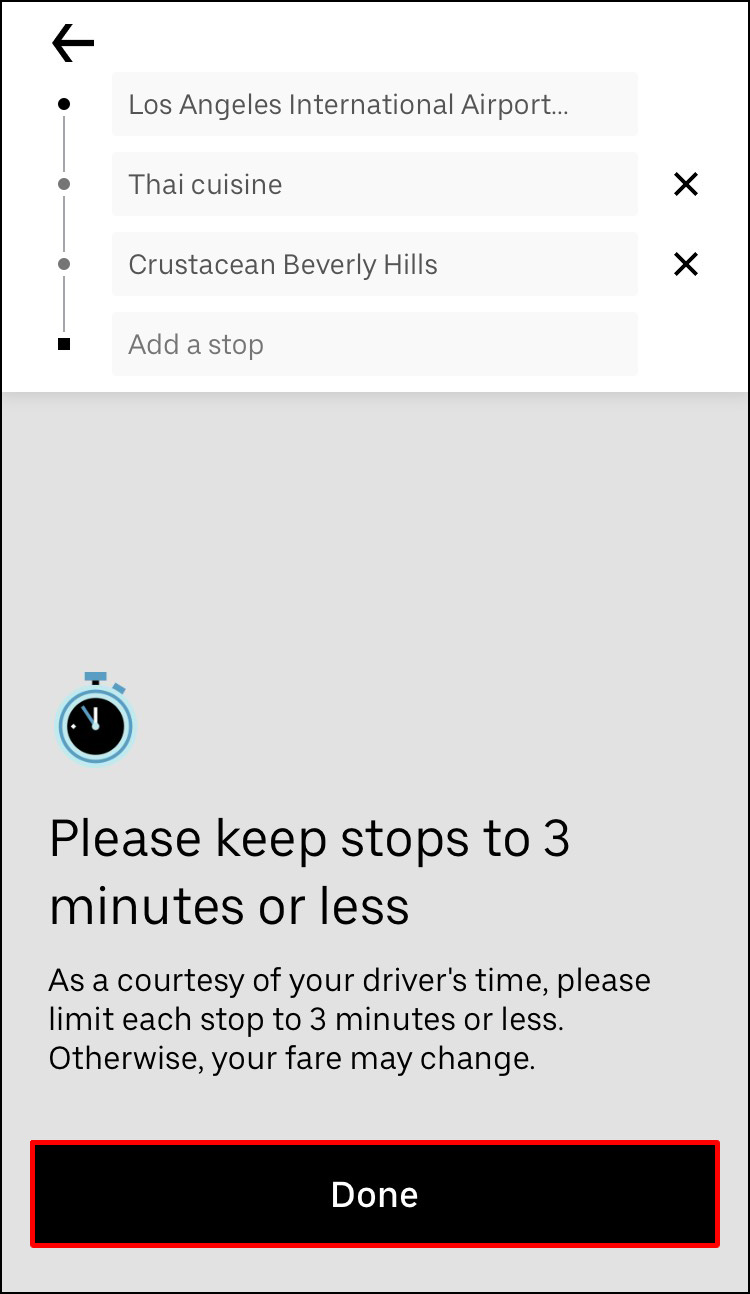
- Proceed to the Add a Stop box and type in the new stop.
- Tap on Done.
- Select the Confirm button at the bottom of your screen.
If you want to add another stop, repeat the process.
What’s great about this feature is that you don’t need to inform your Uber driver that you’ve added a stop. The information will be automatically updated on their version of the app, with the new stop instantly added to the route.
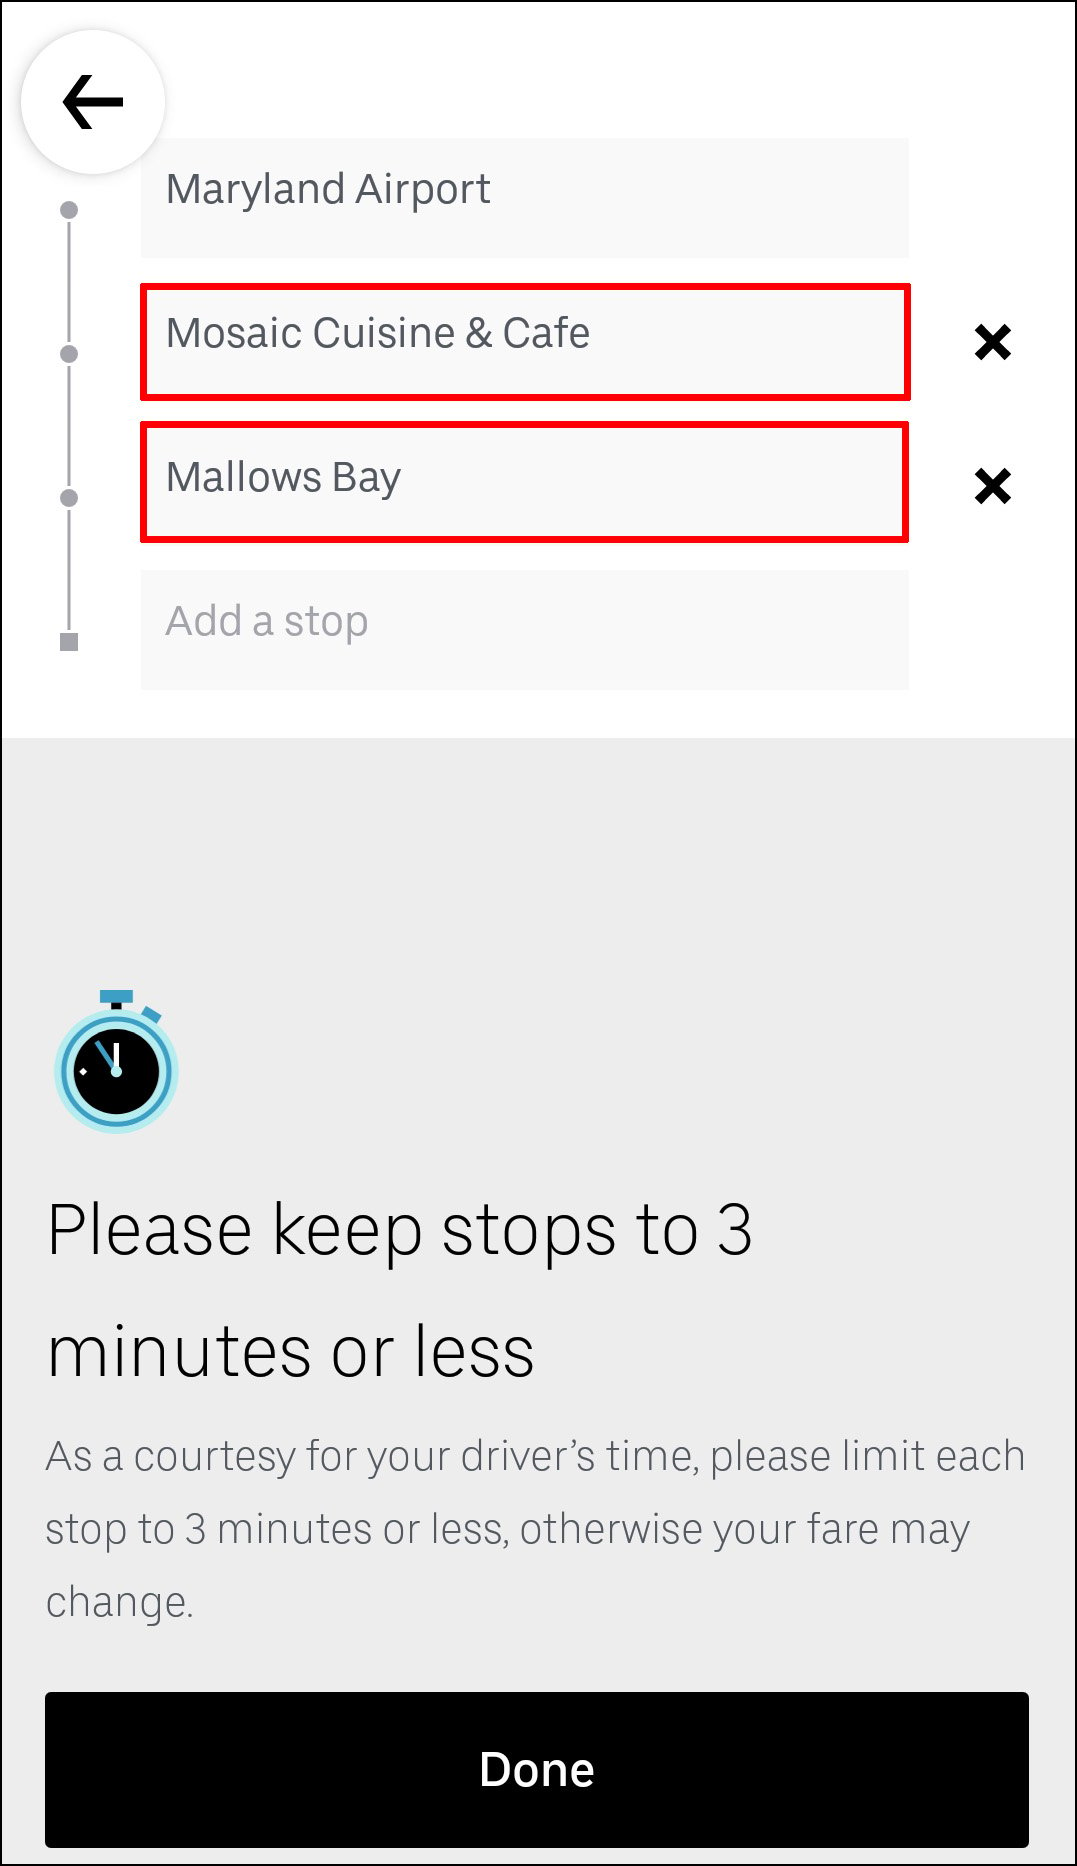
Keep in mind that you can add up to two more stops to your Uber ride. However, what you can’t do is change the order of the stops. Your Uber driver will take you to your destinations in the order that you add them.
If you don’t need to visit that additional stop after all, just tap on the X option to cancel the stop.
How to Add a Stop in Uber on the Android App
Adding a stop to your Uber ride on your Android is equally simple. Here’s how it’s done:
- Open your Uber app.
- Go to the Where to? box at the top of your screen.
- Enter your destination in the field.
- Select the vehicle type for your Uber ride.
- Tap on the Confirm button.
- Confirm your pickup location.
- Go to the + button next to the Where to? box.
- Type in your new destination.
- Select Done.
- Choose Confirm at the bottom of your screen.


Before you add a new stop, Uber will remind you that your stops need to be no more than three minutes apart. You’ll need to tap on the Agree button before you enter your new destination. Once you’ve added a new stop, you also need to verify it in the app. If your stops still take more than three minutes, you’ll get extra charges.
How to Add Multiple Stops in Uber Pre-Ride
You can schedule up to three stops before or during your Uber ride. Every stop you make will be automatically added to the cost of your entire ride. If you’re traveling with multiple people, you can use Uber’s Split Pay feature so you and your friends can easily share the cost of the ride. However, keep in mind that you can only pay separately for the entire ride, not for each stop.
If you decide to add another stop to your Uber ride before or during your trip, it’s done similarly. You can add, remove, or change destinations on iPads, iPhones, and Android devices.
To add multiple destinations before your Uber ride, you need to enter your first destination and add other stops after that. Here’s how it’s done:
- Launch the Uber app on your phone or tablet.
- Enter your first destination in the Where to? box at the top of your screen.
- Choose the type of vehicle for your Uber ride.
- Request the ride and wait for your Uber driver to confirm it.
- Go back to the Where to? box to add a new destination.
- Tap on the + button next to the Where to? box. You’ll see that you have only two more boxes to enter multiple stops.
- Enter one or two additional stops in the boxes.
- Select Done.
- Confirm your new stops.

That’s all there is to it. Now, all you have to do is sit back and wait for your Uber to pick up new passengers or leave them at their individual destinations.
How To Add Multiple Stops During a Ride in Uber
If you want to add multiple stops during your Uber ride, follow the steps below:
- Open your Uber app.
- Tap on the bar at the bottom and swipe it to the top of your screen.
- Next to your destination, tap on the Add or Change option.
- Next to the Add field, enter your additional stop.
- Select Done.
- Confirm that you want to add a new stop.
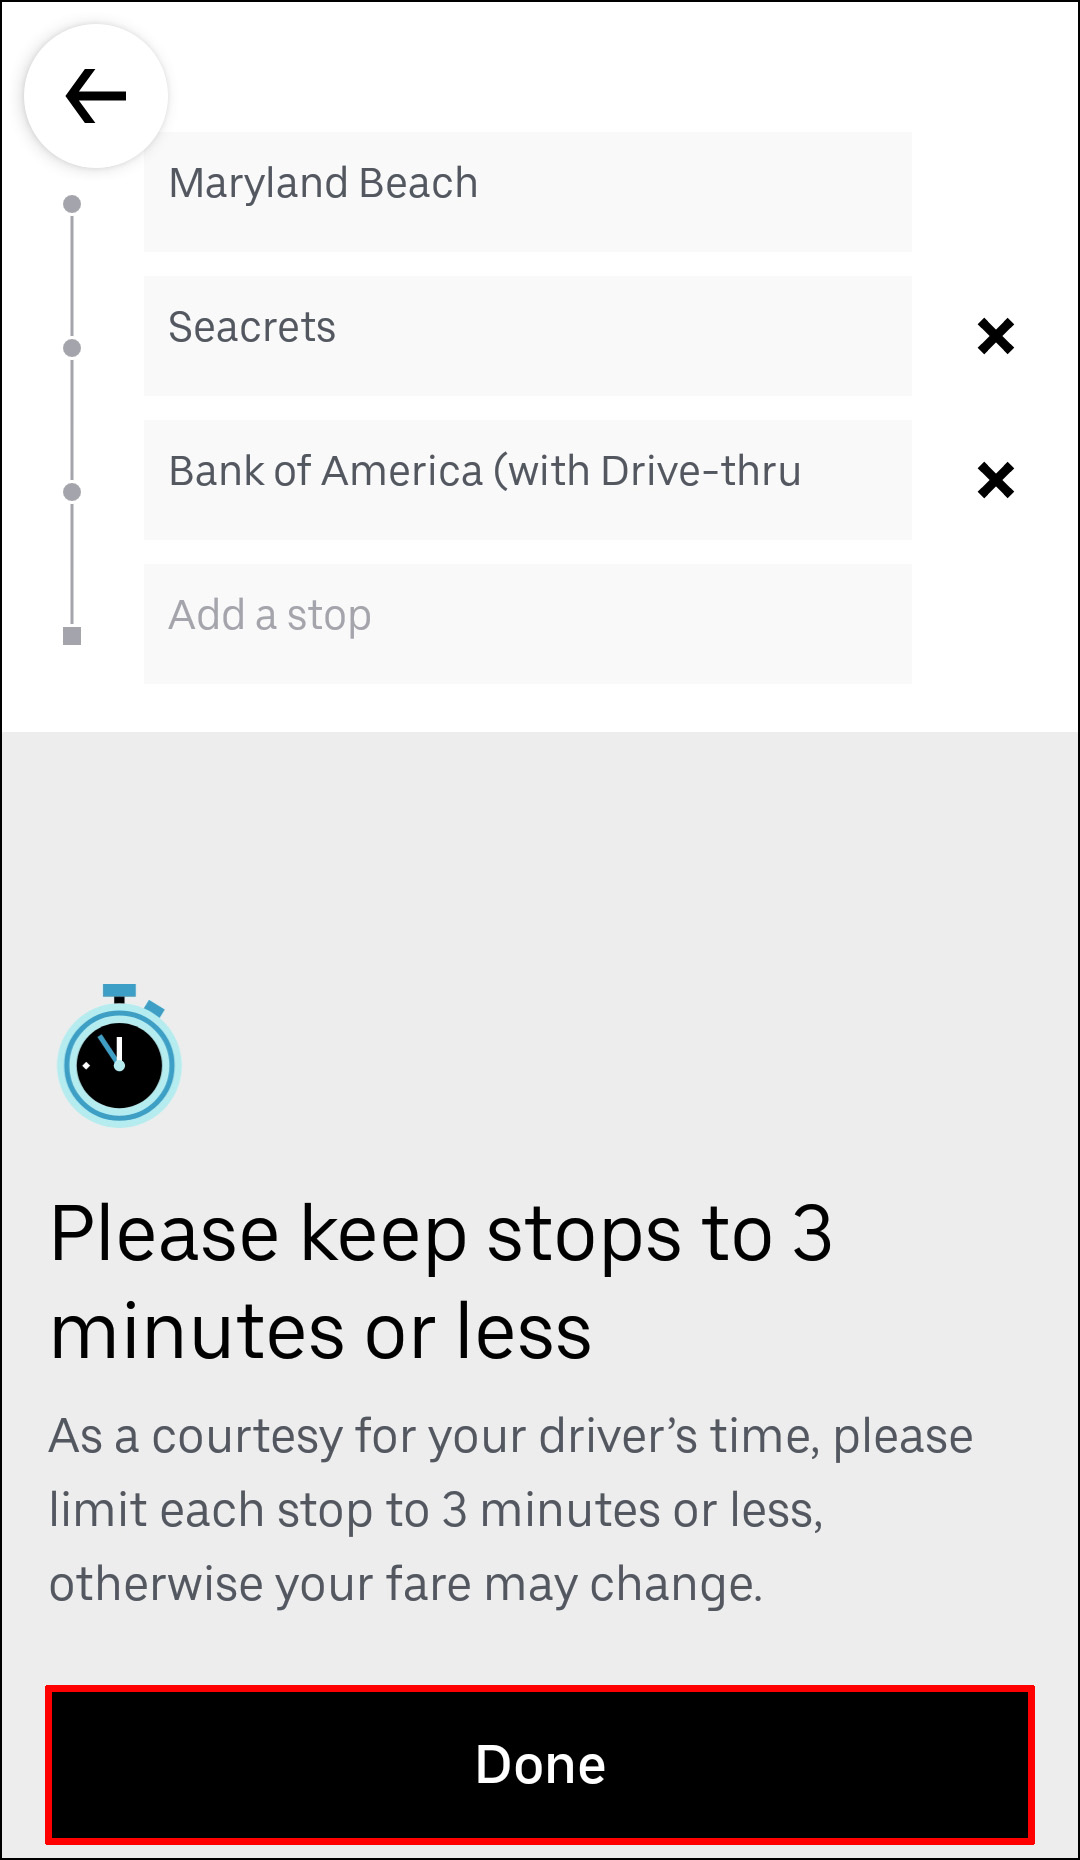
Before you tap on the Done button, Uber will remind you that your stop needs to be three minutes or less.
How to Add a Stop as a Driver in the Mobile App
Drivers are unable to add stops with the mobile app, but they can edit the route to the destination. Once the passenger places a request to add one or two extra stops to the Uber ride, the ride information will be automatically updated. After the additional stops have been added to the route, there is nothing that either the passenger or the driver needs to do. You don’t even need to tell your Uber driver that you’ve added a stop, as they will be immediately notified via the Uber app.
Additional FAQs
Device Links
custom-question">How do I remove a stop from my Uber ride?
While adding a stop to your Uber ride is fairly simple, removing it from your route is even easier. To remove a stop from your Uber ride on the mobile app, follow the steps below:
1. Open your Uber app.
2. Tap on the destination bar at the bottom of your screen.
3. Go to the Add or Change option next to your destination.
4. Find the stop that you want to remove.
5. Tap on the X next to it.
6. Select Done.
That’s about it. The changes you have made to your Uber route will immediately be updated on the Uber app.
Can I add multiple stops when scheduling an Uber ride?
As part of Uber’s service, you have the option to schedule an Uber ride. You can also add multiple stops when you schedule the ride. Not only that, but you can also schedule an Uber ride weeks before you need it. If your plans change, you can easily cancel the ride or change the route.
You can do all of these things on the Uber mobile app. First, you need to schedule an Uber ride. Here’s how it’s done:
1. Open the Uber app.
2. Enter your destination in the Where to? box.
3. Tap on the Now button in the bottom-right corner of your screen.
4. Under Schedule a Ride, select the exact time and date of your ride.
5. When you’re done, tap on the Set button.
6. Enter your pickup location on the following page.
7. Type in your drop-off location underneath.
8. Select the Uber for your ride.
9. Tap on the Schedule Uber button.
Once you’ve scheduled your Uber ride, you can easily add more stops to your route. Just go back to the Where to? field and tap on the + icon to add up to two more destinations.
Get Everything Done With One Uber Ride
Knowing how to add additional stops to your Uber route is extremely useful. It’s great when you’re traveling with multiple people, when you need to run errands all over town, or when your plans unexpectedly change. What’s more, you can change or remove the extra stops before or during the ride just as quickly.
Have you ever added a stop to your Uber ride before? Did you follow the same steps explained in this guide? Let us know in the comments section below.
Disclaimer: Some pages on this site may include an affiliate link. This does not effect our editorial in any way.