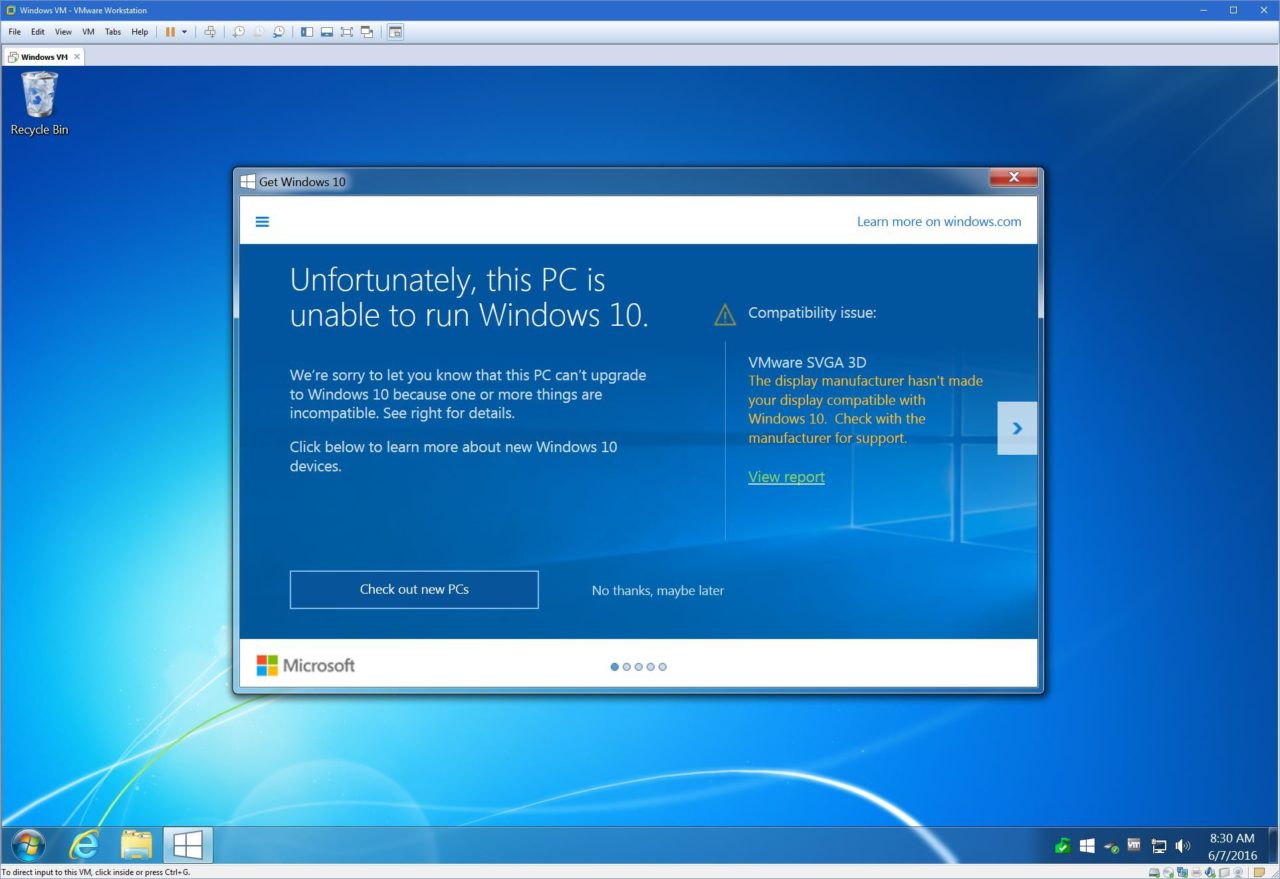
With Windows 10, Microsoft aims to make it as easy as possible — perhaps too easy — for Windows 7 and 8 users to upgrade. But some users who attempt to upgrade their Windows 7 and 8 virtual machines in VMware Workstation and Fusion may encounter a problem when using the “Get Windows 10” app, with the app informing users that their virtual “PC” doesn’t meet the minimum technical specifications for Microsoft’s latest operating system.
Specifically, users are informed that their VMware SVGA 3D virtual graphics hardware isn’t compatible with Windows 10. Thankfully, this isn’t actually the case, as Windows 10 runs just fine in a VMware-based virtual machine, but in order to successfully update your Windows 7 or 8 VM to Windows 10, you’ll need to take a different route from the much-maligned Get Windows 10 app in order to bypass this arbitrary compatibility check. Here’s how to do it.
First, from within your Windows 7 or 8 virtual machine, head over to the Windows 10 download page. Look under the section labeled “Need to create a USB, DVD or ISO?” and click Download Tool Now.

This will download the Windows 10 Media Creation Tool, which is a utility that allows you to download the complete set of Windows 10 installation files and then choose to either initiate and upgrade directly on the same system, or create a bootable USB or DVD to install Windows 10 on another system.
If you want to upgrade other PCs to Windows 10 in addition to your VMware virtual machine, or if you want to have a Windows 10 USB installer on hand for performing clean installs on new hardware, run the Media Creation Tool and select “Create installation media for another PC.” If, however, you’re just interested in getting your current VM to upgrade, click “Upgrade this PC now” and click Next.

The Media Creation Tool will begin to download the required files to upgrade your current version of Windows 7 or 8 to the corresponding version of Windows 10. The tool must download installation files which are about 3GB in size, so this process may take some time depending on the speed of your Internet connection and the current load on Microsoft’s servers.

Once the download is complete, choose what you would like to keep after the upgrade — your files and apps, just your files, or nothing (i.e., a fresh install) — and complete the process. Windows 10 should install without issuing a compatibility warning about your VMware SVGA 3D virtual display hardware.
After the installation is complete, be sure to re-install VMware Tools to ensure the best performance and stability of your virtual machine.
Disclaimer: Some pages on this site may include an affiliate link. This does not effect our editorial in any way.


