The Compatibility Telemetry process in Microsoft Windows plays an important role in gathering data about what’s happening with your device. The company uses this data (assuming you share it with them) to fix technical problems and bugs in their updates.
As useful as Compatibility Telemetry is, it’s also a resource-hungry process that can be a drain on your computer’s CPU. That drain can become so severe that it takes up to 80% of your CPUs processing power, with the issue sometimes lasting minutes and sometimes lasting long enough that it stops you from running other processes.
If you’re tired of Compatibility Telemetry sucking up resources from other applications, these fixes help you bring its CPU usage back down to Earth.
Fix 1 – Disable Compatibility Telemetry in Task Scheduler
The quickest way to resolve the issue of Compatibility Telemetry using a lot of processing resources is to disable the process via Task Scheduler using these steps:
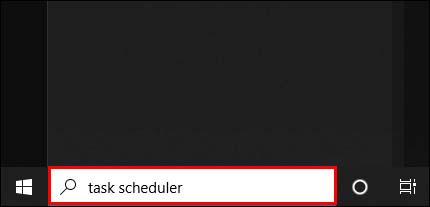
- Click the “Start” button, type “Task Scheduler” into the search bar, and hit “Enter.”
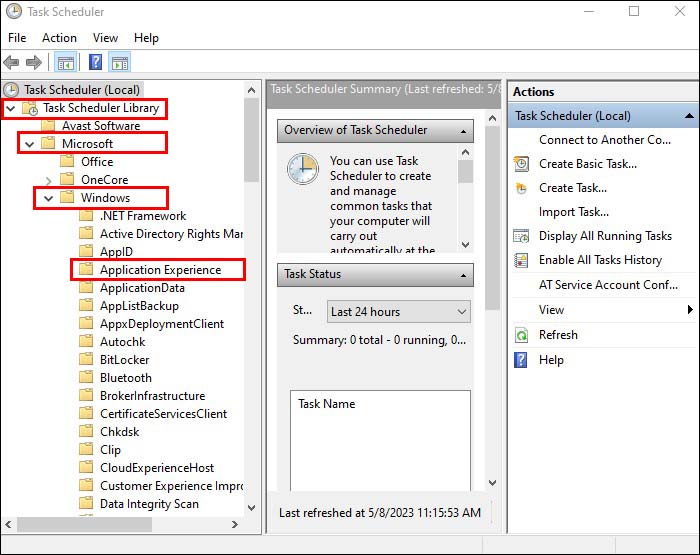
- Go to “Library,” followed by “Microsoft, “Windows,” and “Application Experience.”

- Once in the “Application Experience” folder, search for a file called “Microsoft Compatibility Appraiser.”
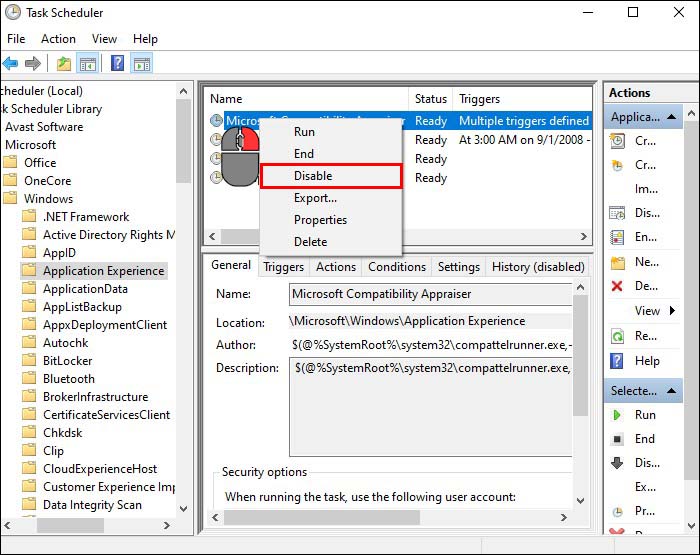
- Right-click on “Microsoft Compatibility Appraiser” and select “Disable.”
- Confirm that you wish to disable the process.

As quick as this fix may be, it forcibly closes Compatibility Telemetry, meaning Microsoft can’t use the process to gather data about any other technical issues affecting your PC. Still, as a short-term measure for those moments when Compatibility Telemetry hits the 50% to 80% high watermark of CPU usage, it’s a solution that gives you a quick and easy fix.
Fix 2 – Refresh the Telemetry Service
Window’s telemetry process can sometimes run into technical issues itself, forcing it to use more of your CPU’s resources as it battles through its own problems while trying to do its job. A quick refresh may solve Compatibility Telemetry’s problems, so it creates less of a burden.
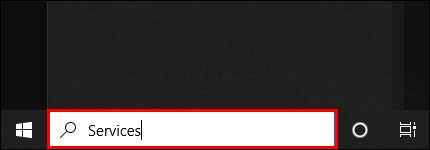
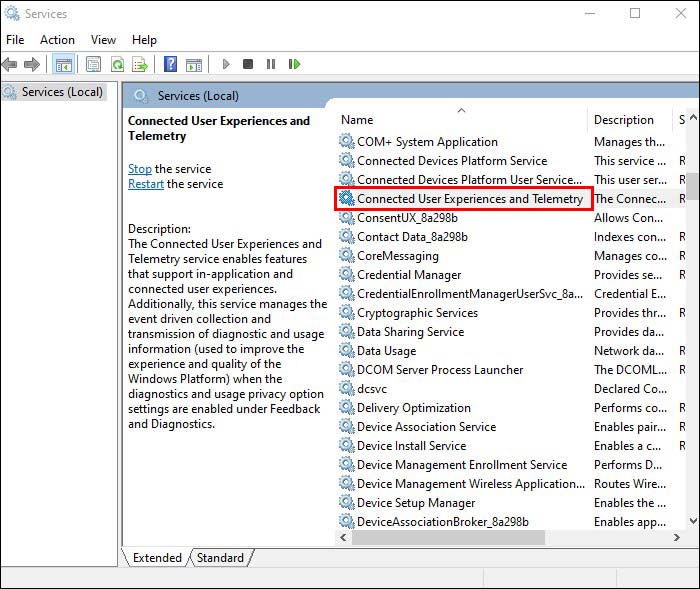
- Type the word “Services” into the Windows Search bar and open the folder.
- Scroll down to the “Connected User Experience and Telemetry” service.
- Right-click and select “Restart.”
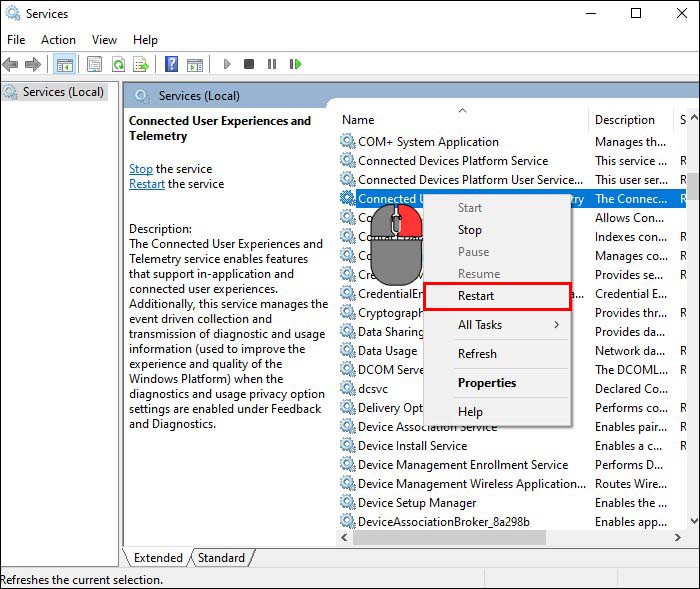
Compatibility Telemetry should restart itself, often purging itself of whatever issue caused it to absorb more of your CPU’s resources in the process.
Fix 3 – Disable Compatibility Telemetry Using the Group Policy Editor
Preventing your PC from using the telemetry process is another way to avoid the high CPU usage issue. Follow these steps to disable Compatibility Telemetry via your computer’s Group Policy Editor:
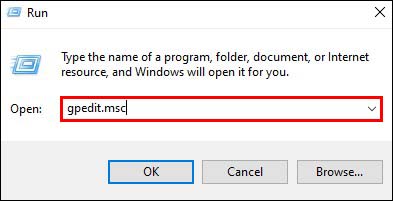
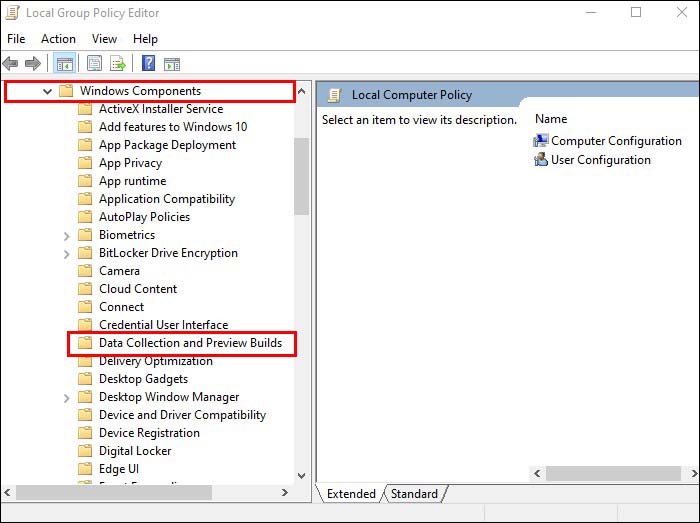
- Hold down the “Windows” key and press “R” to bring up the “Run” prompt.
- Type “gpedit.msc” into the prompt and click “OK.”
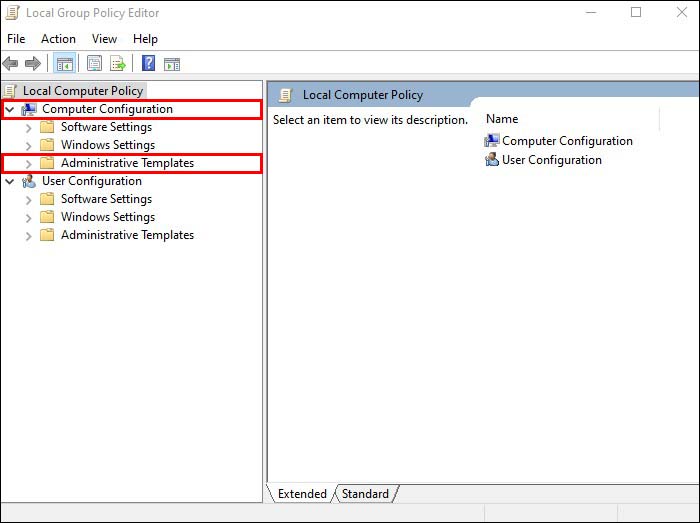
- Navigate through the folders presented in the following order – “Computer Configuration,” “Administrative Templates.”
- Go to “Windows Components,” “Data Collection, “Preview Builds.”
- Once in the “Preview Builds” folder, locate and click the “Allow Telemetry” setting.
- Check “Disabled” and click “Apply.”
- Confirm your choice by choosing “OK.”


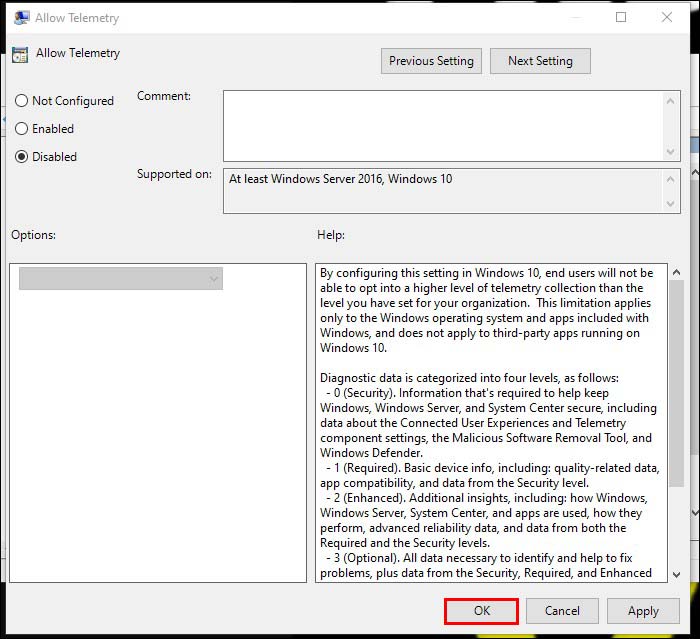
This fix disables Compatibility Telemetry entirely, meaning you need to reverse the steps to reactivate the process so your PC can start sending data to Microsoft again.
Fix 4 – Send Less Data to Microsoft
A possible reason why Compatibility Telemetry’s CPU usage is so high is that it’s sending a lot of data about your PC (and general usage) to Microsoft. Beyond creating privacy concerns, the sheer volume of this data may be too much for the process to handle efficiently. Thankfully, you can restrict how much data Compatibility Telemetry collects and sends, which has the added effect of lowering CPU usage.
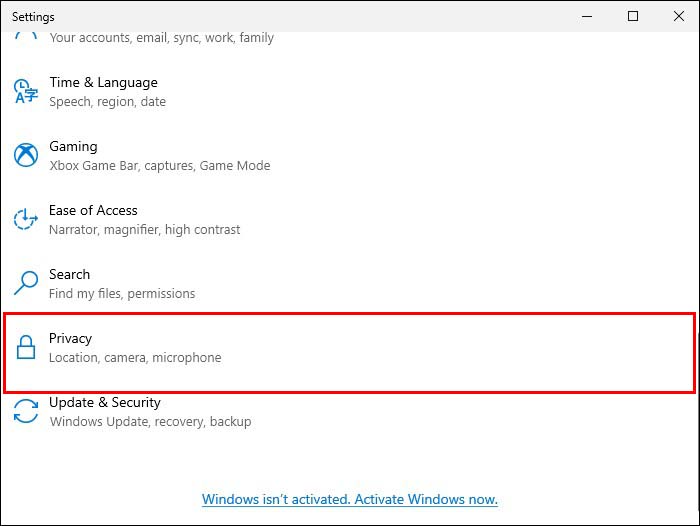
- Hold the “Windows” key and tap “I” to open the “Windows Settings” menu.
- Click on “Privacy.”
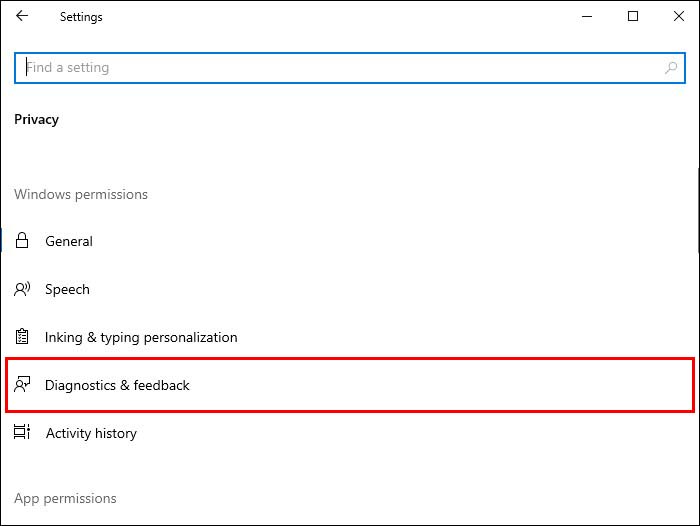
- Locate and select the “Diagnostics & Feedback” option in the navigation bar on the left-hand side.
- Under the “Diagnostic Data” heading, select the “Required Diagnostic Data” checkbox.

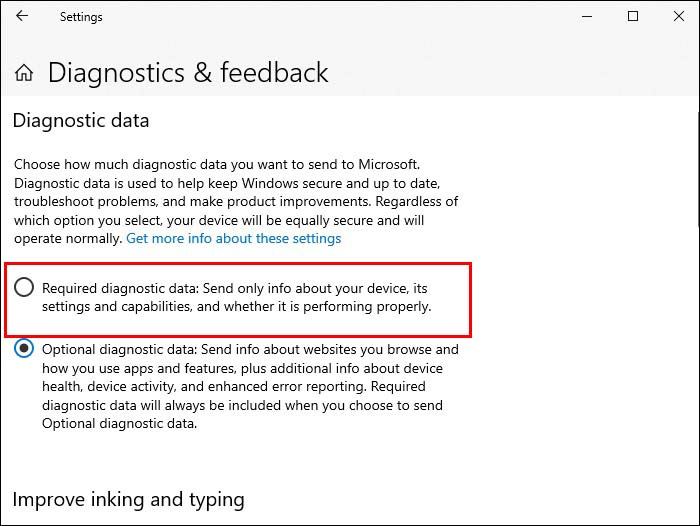
With this setting activated, Compatibility Telemetry will only send data about your device, its capabilities, settings, and performance level to Microsoft. If you leave “Optional Diagnostic Data” checked, the service sends a lot more data, including snippets about how you use your device and its overall health.
As a side note, you can also uncheck the “Tailored Experiences” checkbox in the “Diagnostics & Feedback” section of Windows settings. Doing so prevents Microsoft from using the data it collects to send you personalized ads and tips. Unchecking the box serves the dual benefit of enhancing your privacy and taking away one more telemetry task that could cause excessive CPU usage.
Fix 5 – Manage Compatibility Telemetry’s Runtime
If you don’t want to disable Compatibility Telemetry entirely (and you’re happy with the amount of data it gathers), you can control when it runs at full capacity. This fix ensures the process either doesn’t run or runs in a limited capacity when you’re using your device, with full service being resumed when your device is idle.
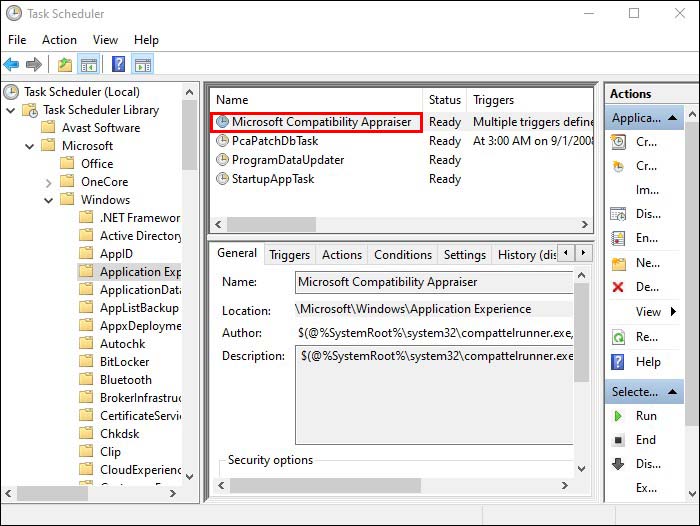
- Type “Task Scheduler” into the Windows search bar.
- Head to the “Task Scheduler Library” and click “Microsoft.”
- Select “Windows,” followed by “Application Experience,” to open a list of tasks.
- Click “Microsoft Compatibility Appraiser” from the short list of tasks at the top of the screen.
- Select the “Triggers” tab and double-click the “Enabled” trigger.

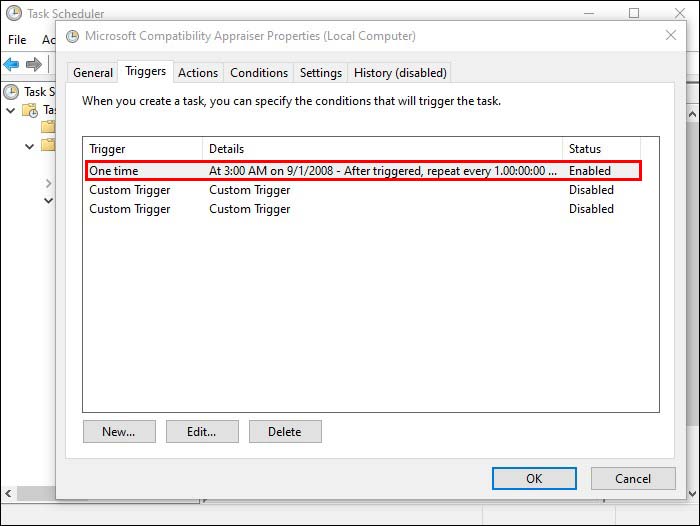
From here, you can choose to have your device run Compatibility Telemetry whenever you’re idle, which means you’re not actively running any other processes. Alternatively, you can limit how long the process runs by selecting “Stop Task if it Runs Long Than” and choosing a maximum time for Compatibility Telemetry to run.
Click the “OK” button once you’re happy with your settings and have a more controlled (and often more limited) version of Compatibility Telemetry running.
There’s one more thing to do while you still have “Microsoft Compatibility Appraiser” selected:
- Click the “Settings” tab.
- Find “Run task as soon as possible after a scheduled start is missed” and uncheck the box.

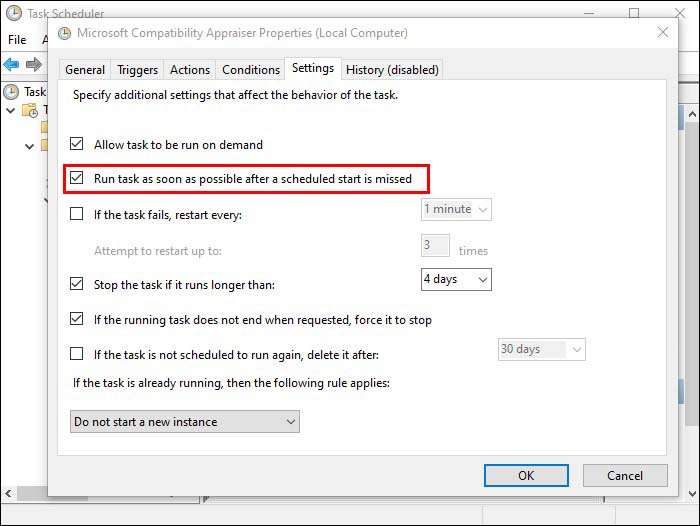
Doing this prevents Compatibility Telemetry from running itself whenever you miss a scheduled start.
Fix 6 – Replace the CompatTelRunner.exe File
Corruption of the CompatTelRunner.exe file (the executable behind Compatibility Telemetry) may be the reason why the process has such high CPU usage. You can run an SFC scan to potentially solve this problem, as the scan should pick up on a corrupted executable and run an automatic fix. But if that scan doesn’t solve the problem and no other fixes seem to work, you may have to replace the CompatTellRunner.exe file manually using these steps:
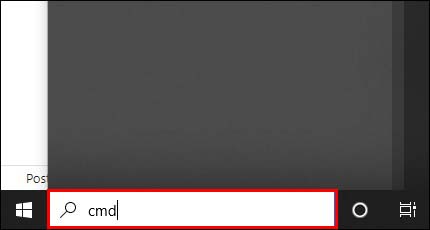
- Type “Command Prompt” into the Windows search bar.
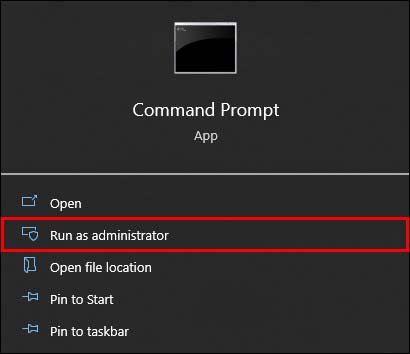
- Choose “Run as Administrator.”
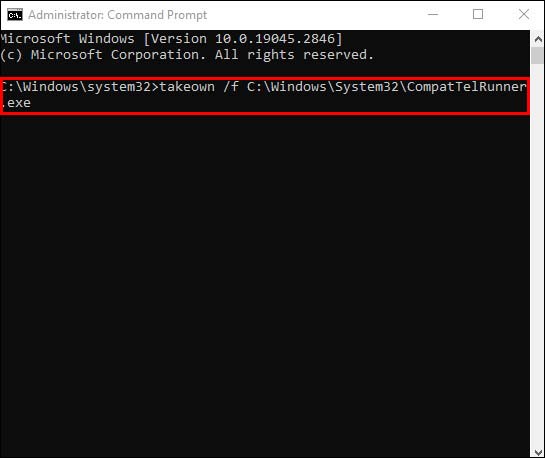
- Once “Command Prompt” opens, type the following line into the app:
takeown /f C:\Windows\System32\CompatTelRunner.exe - Hit “Enter.”
You now have ownership of your device’s CompatTelRunner.exe file, allowing you to delete the file and replace it with a healthy version from another device. You’ll need to use these steps on that other device, too, so you can make a copy of its CompatTellRunner.exe file.
Bring Compatibility Telemetry’s CPU Usage Under Control
Corruption, technical issues, and cases of the telemetry process collecting too much data can all be the causes of Microsoft’s Compatibility Telemetry using a ton of your CPU’s resources. These fixes either limit the process or disable it entirely, allowing you to continue using your device without worrying about application crashes or issues with CPU resources.
Now that you have these fixes, we want to hear from you. Did you know what Compatibility Telemetry did before reading this article? What’s the highest percentage of your CPU’s resources that the process has used, and has it ever prevented you from doing what you want with your device? Tell us all about it in the comments section below.
Disclaimer: Some pages on this site may include an affiliate link. This does not effect our editorial in any way.


