Using checkboxes is a popular choice if you need a simplified way to organize data for your business. Imagine that you have a laundry list of tasks on your Smartsheet. If you have half a dozen collaborators, you may want to add checkboxes to keep everything straight. Adding checkboxes to your sheets can give you an overview of tasks completed, and which ones still need your attention.
Checkboxes may also be used to collect information from other team members or in forms sent out to clients. They’re easy to read and, using Smartsheet, easy to collate into useful reports.
Creating checkboxes is a relatively simple process, but if you’re coming from another spreadsheet app, you may be expecting something different.
Keep reading to learn more about checkboxes in Smartsheets and how to create them for your next project.
Create Checkbox Columns in Smartsheet
Columns and rows are standard in any spreadsheet app, but Smartsheet took it one step further by creating special properties for its columns. Each column automatically receives text/number properties, but you can customize it further to suit your needs at any time.
Some of the customization properties available include:
- Contact list
- Dropdown list
- Symbols
- Checkboxes
So, let’s say that you have a sheet that tracks tasks for a project. A checkbox column is ideal in this situation. To create checkbox columns in Smartsheet, check out the steps below:
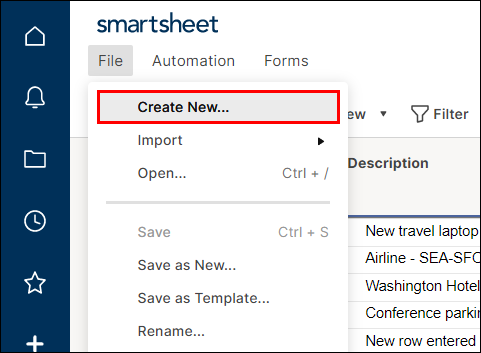
- Launch Smartsheet and open an existing sheet.
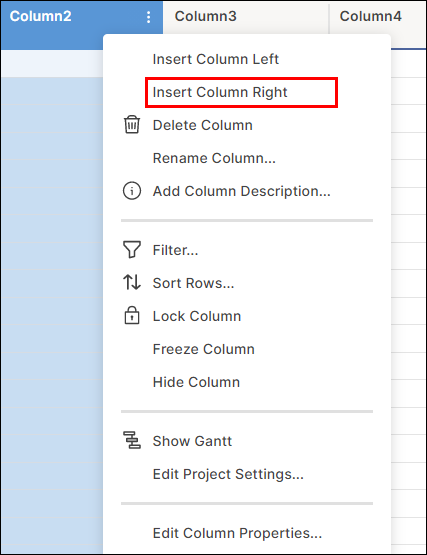
- Right-click on the column header next to the location where you’d like to insert a checkbox column.
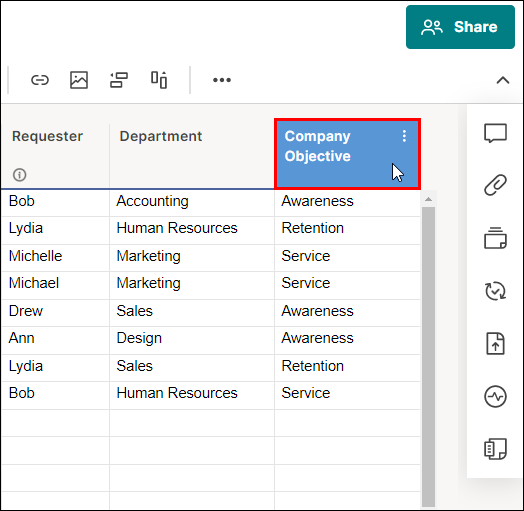
- Choose “Insert Column Left” or “Insert Column Right” to add a new column.

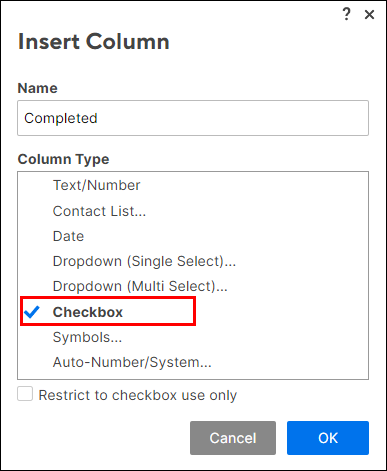
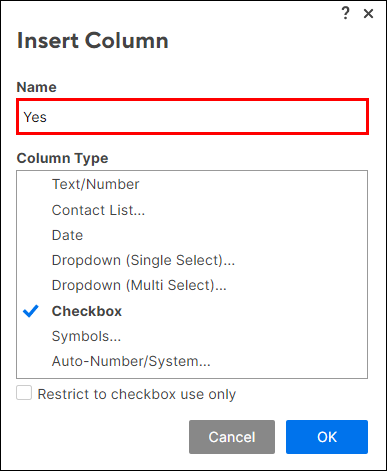
- Name the new column.
- Choose “Checkboxes” under “Column Type.”
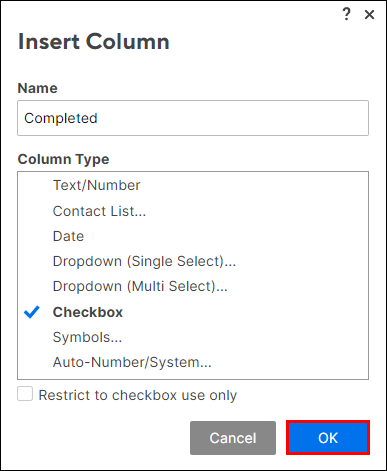
- Select the “OK” button to save the changes.


Keep in mind that, unlike some spreadsheet apps, you can’t add text to the checkbox column. If you’d like to name or add descriptions for the checkboxes, you can always add another column to the left or right of the checkbox column. Use the default text option to add descriptions for the checkboxes.
Create Checkboxes in a Form in Smartsheet
Forms are a great way to gather data for a variety of situations. If you want to keep track of event registrations, customer feedback, and field tickets, Smartsheet’s custom form creation is ideal. Including checkboxes in your forms can also give you some versatility with tracking and collecting data.
Before you can add the checkboxes, you first need to create a form. If you haven’t already or this is your first time, take a look at these steps to get started:
Step 1 – Creating a Form
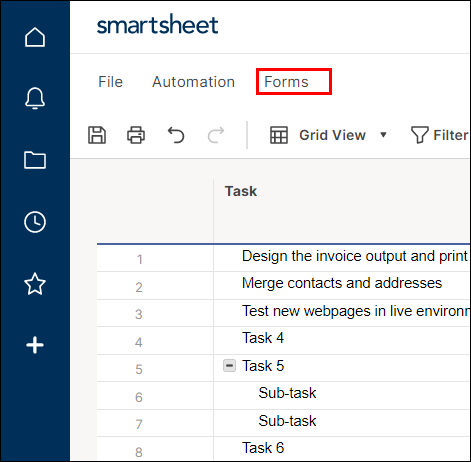
- Open the existing sheet that you want to add a form to.
- Go to the Menu Bar at the top of the window.
- Select “Forms” and then “Create Form.” Some users don’t see a “Forms” option in the menu. If that happens to you, go to the upper-right corner of the window and select the arrow icon.


Step 2 – Add Checkboxes to a Form
Before you add checkboxes to a form, make sure that the original sheet has a separate checkbox column. If you’re using a form with multiple-select answers, creates a separate checkbox column per header/description. When you’re ready to add checkboxes to the form, try these steps:
- Go to “Forms” in the Menu Bar.
- Select “Manage Forms” and then select the form you previously created.
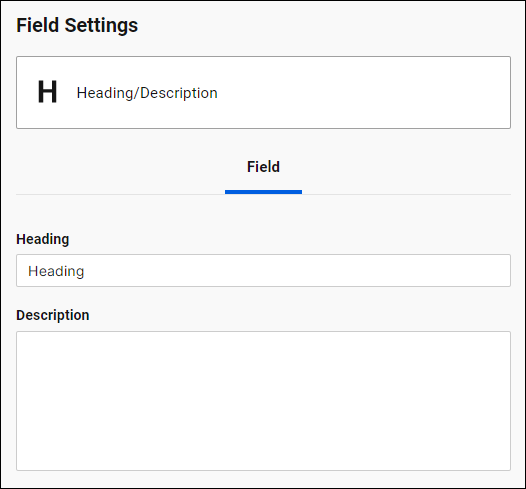
- Go to “Add Field” and add section dividers for the Heading/Description. In this case, the Heading/Description will be the question text in the form.
- Below the section divider, add each answer column as a field.
- Change each checkbox field “Display Type” to “Radio buttons (horizontal)” to display the question text to the right of the checkboxes.

Create Yes/No Checkboxes in Smartsheet
There are a couple of ways you can add “yes/no” checkboxes to Smartsheet, depending on how you plan to use it. If you just want to add the checkboxes to an existing sheet, this is how you’d do it:
- Open your Smartsheet file.
- Right-click on the column header near the location where you’d like to add the checkboxes.
- Add a new column to the left or right of that location.
- Choose “Checkboxes” under Column Type and name the new column.
- Add a new column near the checkbox column and choose “Text/Number” as the Column Type.
- “Yes” as the Header/Description.
- Add another new column of checkboxes.
- Add a new column near the new checkbox column for the “No” answer.


You may wonder why there are four new columns for “Yes/No” checkboxes, but it is the way that Smartsheet is designed. Unfortunately, you can’t add text to a checkbox column type, and you can’t add multiple checkboxes to the same cell. Consequently, each checkbox and answer need its own column.
Alternatively, you can cut this column requisite in half by specifying that a checked box means “Yes,” and an unchecked box means “No.”
Can I Individually Delete a Smartsheet Checkbox in a Cell Within the Column?
No, you can’t delete an individual checkbox in a Smartsheet cell, but there is a workaround. It may sound a little strange, but if you add a period to the cell and change the font to white. Changing the font color gives the appearance of “hiding” or “deleting” the checkbox.
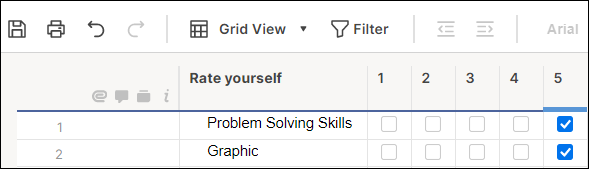
Can I Make a Checkbox List?
You can make a checkbox list in Smartsheets, but the process is a little different than other apps like Trello. With Smartsheet, you need to create two columns. One column is just for the checkboxes and the other is for the list.
The process looks like this:
- Open Smartsheet and create a new file.
- In Grid view, right-click on the column header insert a new column.
- Choose “Checkboxes” under “Column Type.”
- Right-click on the checkbox column header and add another column.
- Choose “Text/Number” under “Column Type.”
- Repeat steps 4-5 for each item on your list.

Keep Things Simple With Checkboxes
Checkboxes are a great way to track many different types of data, from keeping track of sales leads to following project tasks. Fortunately for Smartsheet users, adding checkboxes to sheets is as simple as a few clicks of a button. Try experimenting with checkboxes the next time you create a new sheet for a project or add a few to your forms.
How do you use checkboxes in Smartsheet? Tell us about it in the comments section below.
Disclaimer: Some pages on this site may include an affiliate link. This does not effect our editorial in any way.