Remote computer access can be highly beneficial both in your personal life and your business endeavors. You can use this handy option to quickly find an important file from the office computer or solve a problem for your less tech-savvy friends.
If TeamViewer is your software of choice, you might be wondering how you can make this remote control possible. Keep reading to learn how to add a computer to TeamViewer and access it with or without a password.
How to Add a Computer to TeamViewer
There can be multiple devices under your TeamViewer account. Once you add a new device to your account, you can manage and monitor it remotely at any time.
Adding a new computer to your TeamViewer account is fairly straightforward and similar across all platforms.
- Depending on your operating system, tap the “Extras” or “Preferences” tab on the three horizontal icon.
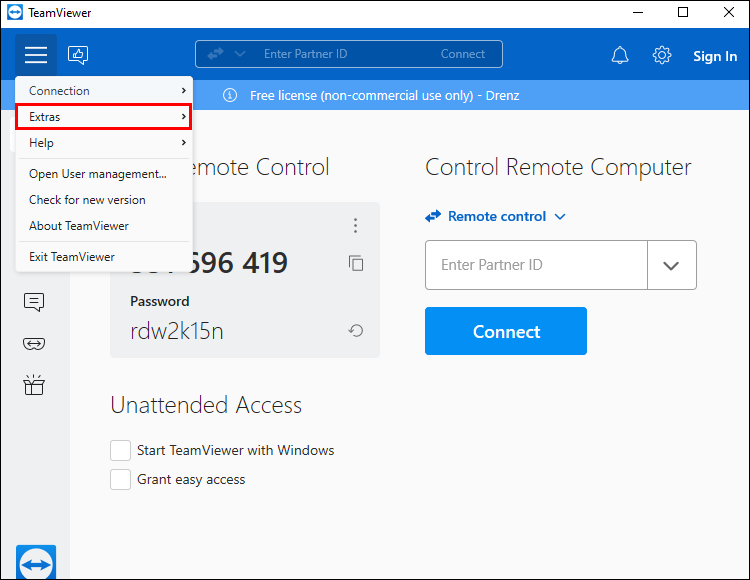
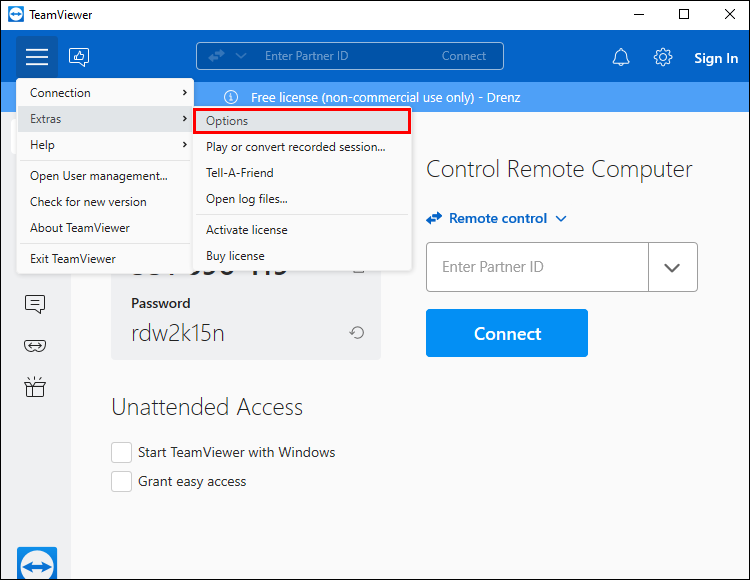
- Select “Options” from the drop-down menu.

- Click on the “General” tab.
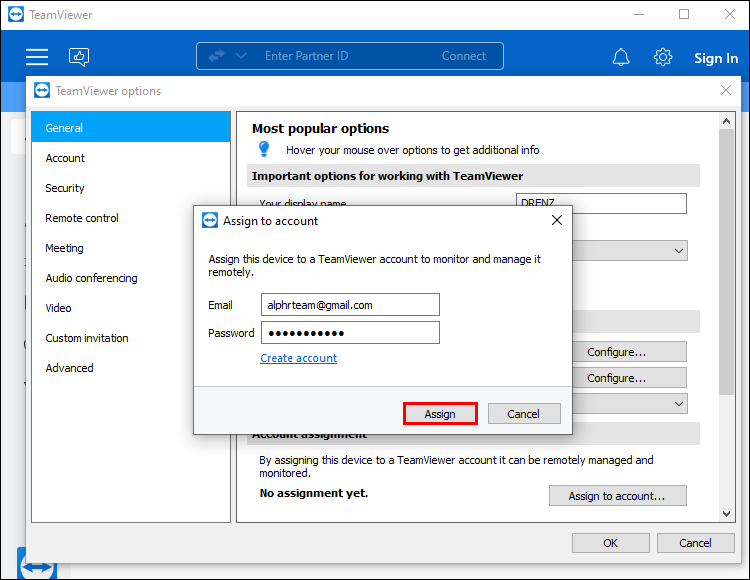
- Navigate to the “Account assignment” section.
- Press the “Assign to account…” button.
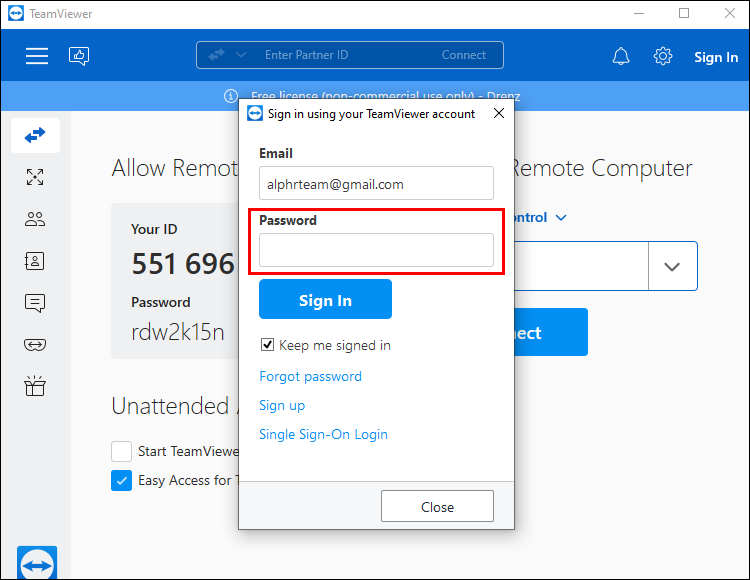
- If you’re not already signed in, enter your TeamViewer email and password in the pop-up window.
- Hit the “Assign” button.


Each time you add a new device to your TeamViewer account, you’ll have to authorize it. If this is the first time you’re using your account credentials on this device, you’ll need to add it to your Trusted Devices list.
After entering the log-in details for the first time, a pop-up window will appear. The pop-up will inform you that a confirmation email has been sent to your email address. The email will contain a device authorization link valid for 24 hours.
To authorize the new device, navigate to your email account and click on the link within the received email. Once you click on the link, the TeamViewer Management Console will open.
You can complete the authorization process in the console by selecting the trust scope you’d like to grant to the device. To do so, navigate to the drop-down menu under the “Do you want to trust this device or the IP address permanently?” question. Click on the down-arrow to expand the options and choose one of the following.
- “Yes, this device,” if you want to grant permanent access to that specific device.
- “Yes, this IP address,” if you trust all the devices from that local network.
- “No, only once,” to only allow a one-time pairing.
Once you select the desired option, tap “Trust” to complete the process. After seeing the “Device successfully added” message, you can sign in using the new device.
How to Add a Computer to TeamViewer Without a Password
When you’re connecting to a new device via TeamViewer, you’ll typically need to enter a password to authorize the connection. Although this feature is put in place for security reasons, there are situations when it isn’t needed. In fact, if you need to access a computer quickly when no one is present on the other side, the password can be a hindrance.
Fortunately, TeamViewer offers an option to connect to a device with no personal or random password required. This feature is called Easy Access. Once activated, all you need to do is log in to your account and access the desired device.
Before activating Easy Access, ensure that the device you want to connect to is assigned to your TeamViewer account. After that, follow these steps to enable Easy Access:
- Depending on your operating system, click on the “Extras” or “Preferences” tab on the three horizontal icon.
- Choose “Options” from the drop-down menu.
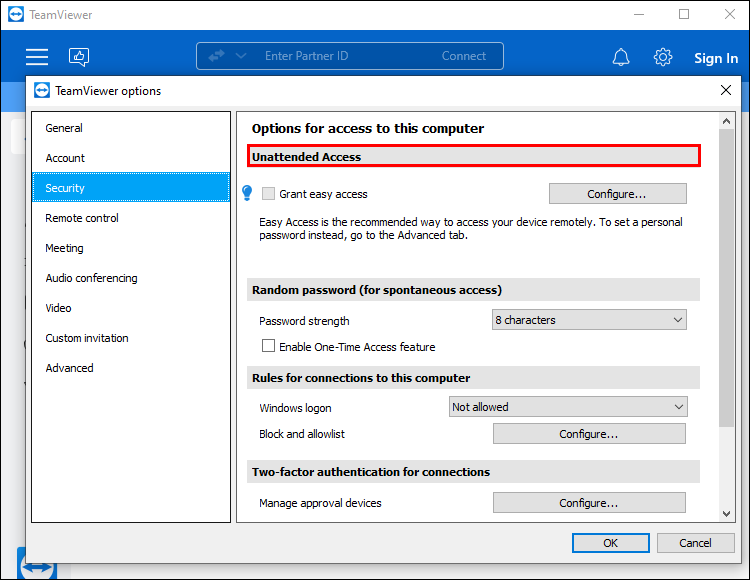
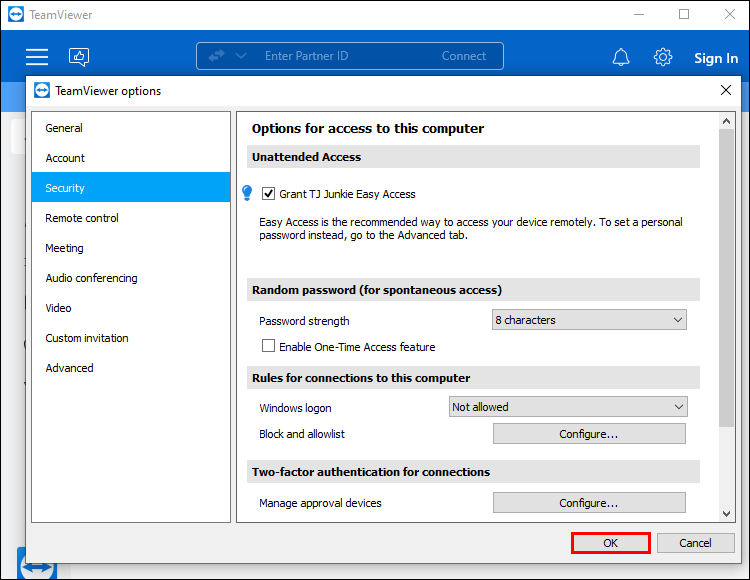
- Tap the “Security” tab.
- Navigate to the “Unattended access” section.
- Click the “Grant Easy Access” checkbox to activate it.
- Hit “OK.”


If you’re worried about possible security risks, you should know that Easy Access is very secure. Only an approved account can access a device without a password, and the account itself is protected with two-factor authentication.
How to Add a Computer to TeamViewer for Unattended Access
Users who regularly connect to a device remotely can significantly benefit from the Unattended Access feature. This allows you to access a device at any time without having to put in a password.
Before setting up the Unattended Access feature, you need to ensure the following.
- TeamViewer is set to launch on start-up. As a result, no one will have to manually run the software every time the computer boots up. This way, it only has to be connected to a power source and the internet, and you’ll be able to access it.
- The remote computer is assigned to your TeamViewer account.
- The remote computer is added to your Trusted Devices list.
Once everything is set, follow these steps to enable unattended access to that device.
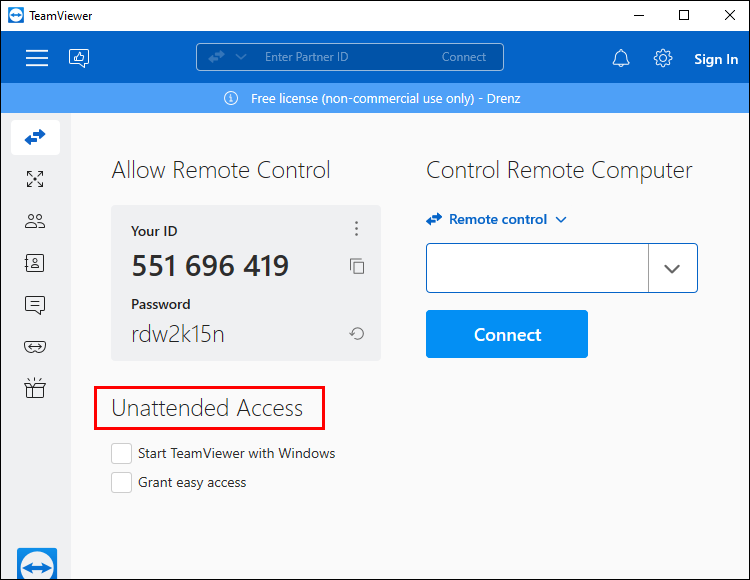
- Navigate to the “Unattended Access” section of the landing screen.
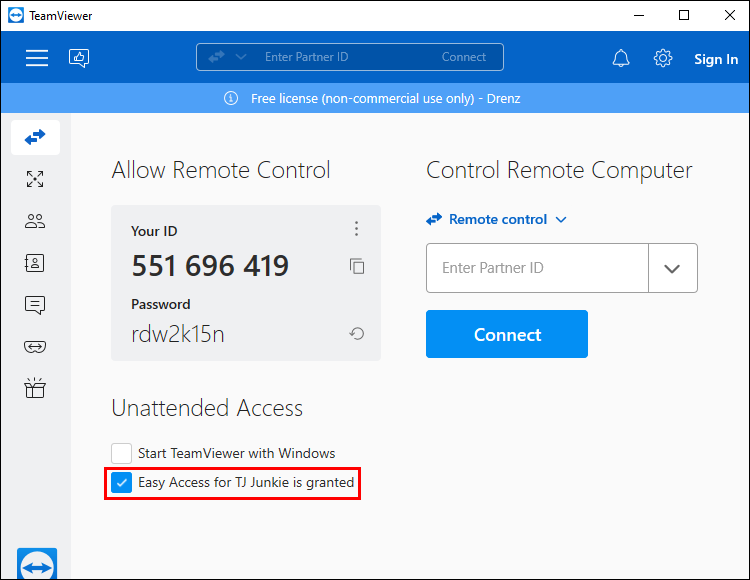
- Check the “Grant Easy Access” checkbox.
- When prompted, type in the account’s password.

How to Add a Computer by IP to TeamViewer
TeamViewer offers an option to establish a remote control session within your local area network using an IP address. This option can be helpful as it doesn’t require using the internet to connect to your desired device.
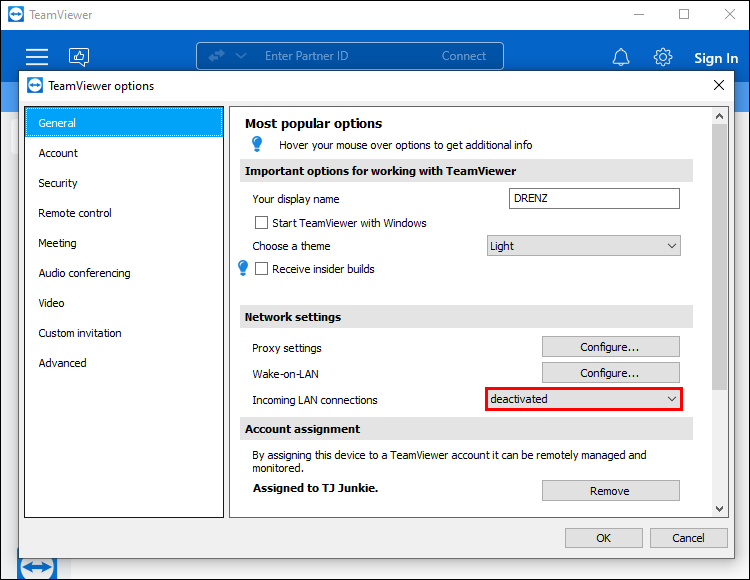
If you’d like to add a computer using its IP address, you first have to enable incoming LAN connections.
- Tap the gear icon in your TeamViewer application to launch Settings.
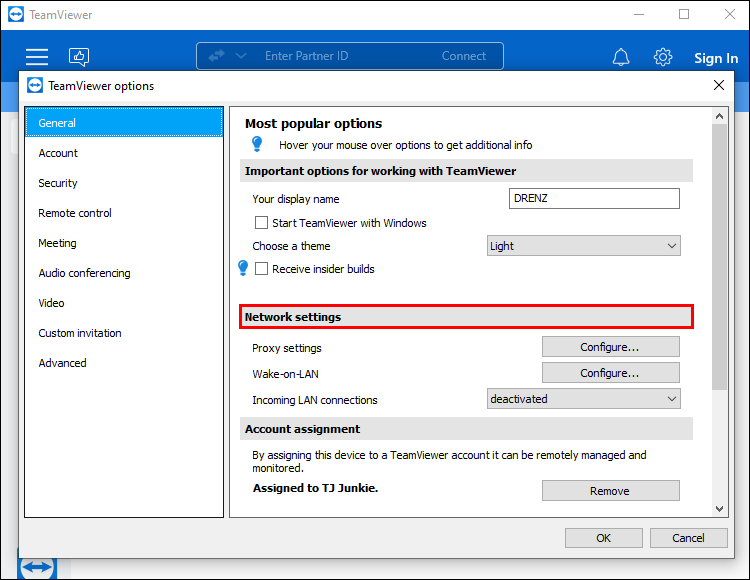
- Go to the “General” tab.
- Navigate to the “Network Settings” section.
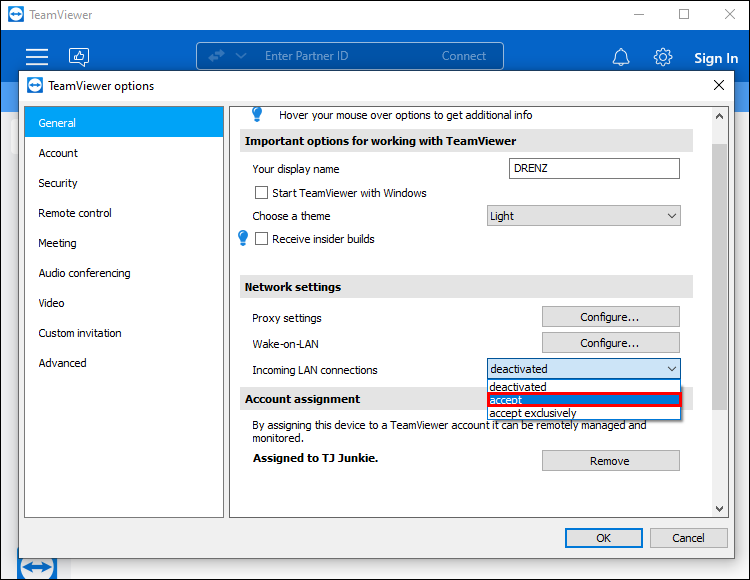
- Open the drop-down menu next to “Incoming LAN connections.”
- Select “accept” or “accept exclusively.”
- Hit “OK” in the window’s bottom-right corner to finalize the process.


If you choose to accept exclusively, you’ll only be able to connect via the IP address, as the app will disconnect from the internet. When the option is selected, you will see the computer’s internal IP address on the TeamViewer app’s main window.
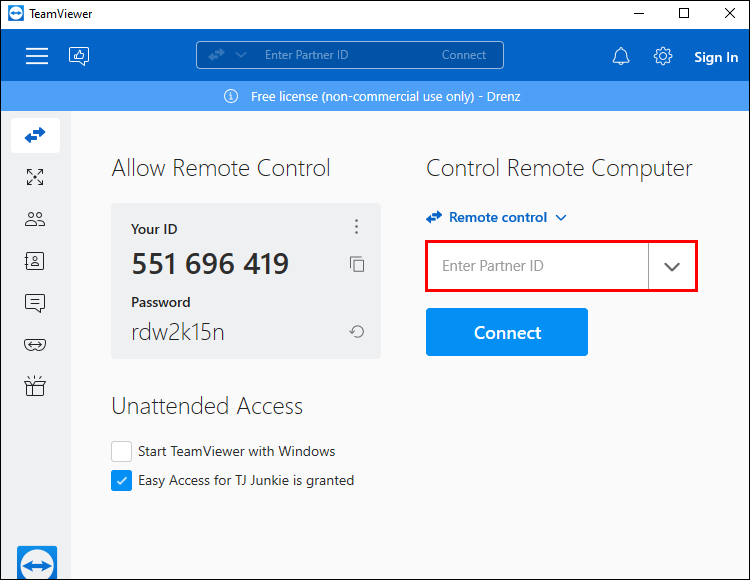
Once you’ve obtained the IP address, go to the TeamViewer’s Remote Control page. Follow these steps to connect to a device using the IP address.
- Enter the IP address in the “Enter Partner ID” field.
- Tap “Connect.”
- When prompted, type in the remote computer’s TeamViewer password.

Alternatively, if you choose to accept the incoming LAN connections but not exclusively, the TeamViewer app will remain online. You can connect to a device with both a TeamViewer ID and the IP address.
In this case, TeamViewer will not display the computer’s IP address. Instead, you’ll have to locate it yourself.
To find the internal IP address of a Windows computer, do the following.
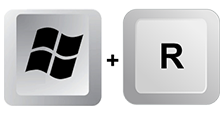
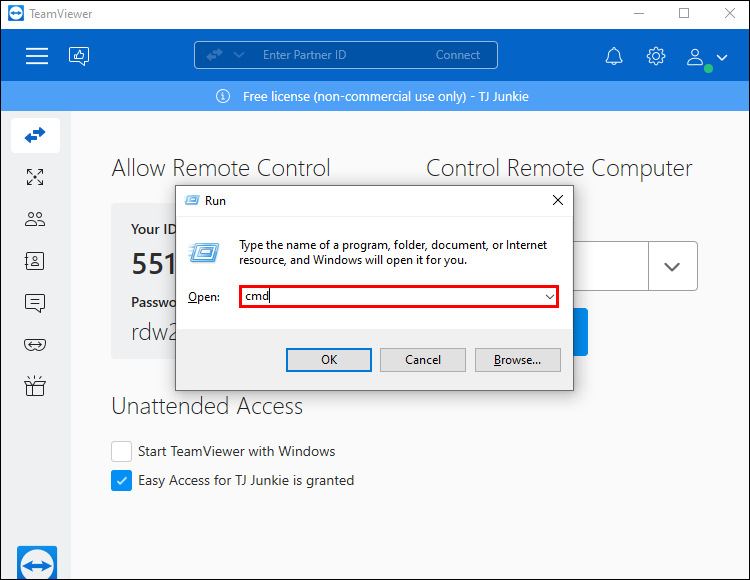
- Press “Win + R” to launch the “Run” box.
- Type “cmd.”
- Hit “Enter.”
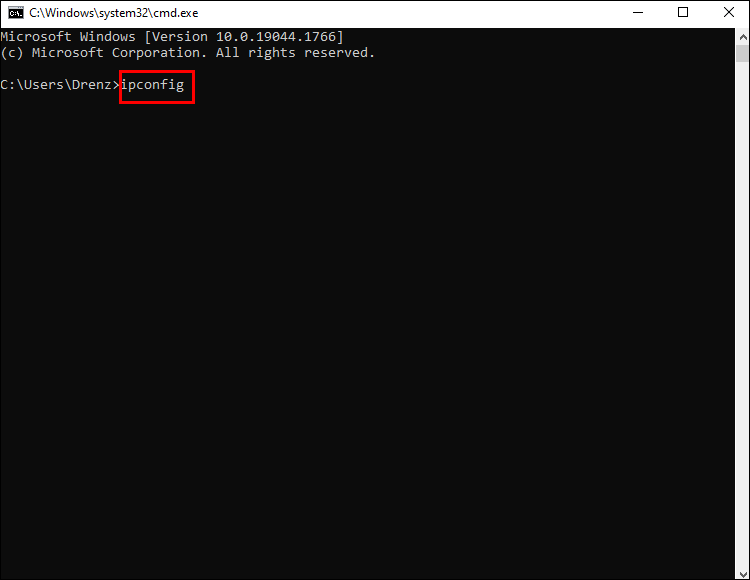
- In the Command Prompt, type in “ipconfig.”
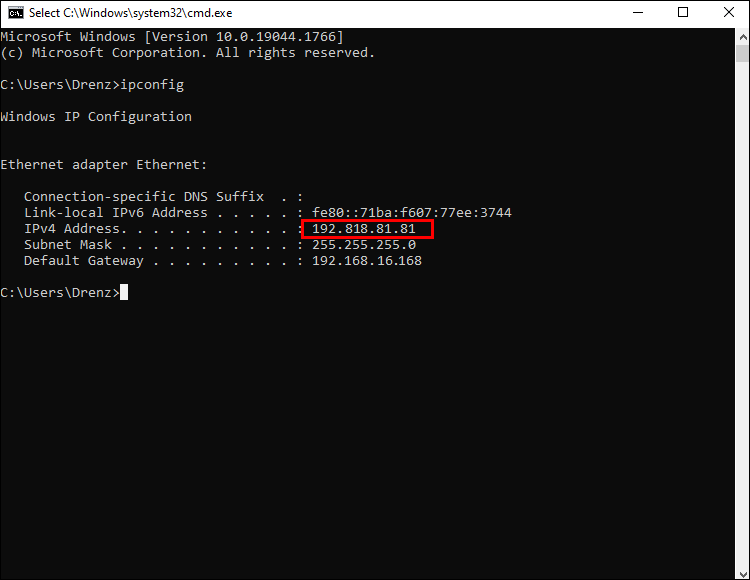
- Locate the IP address next to “IPv4 Address.”

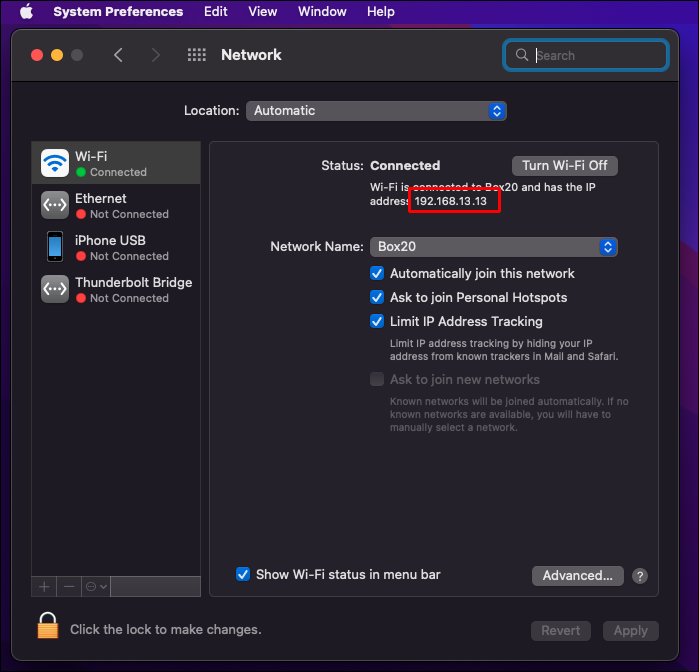
The process is equally as straightforward on a Mac computer.
- Click on the Apple menu.
- Go to “System Preferences.”
- Tap the “Network” icon.
- Select your network connection from the menu on the left.
- Locate your IP address under the “Connected status.”


Remote Access Made Easy
Thanks to TeamViewer’s intuitive, all-in-one platform, accessing any device remotely is reasonably straightforward. You might need to work on a client’s computer while they’re beside it. Or perhaps you need to access your office computer when no one’s around. Whatever the case may be, you can quickly add and connect to a new computer using the methods outlined in our guide.
How often do you use TeamViewer to access a device remotely? Do you find the software easy to use? Let us know in the comments section below.
Disclaimer: Some pages on this site may include an affiliate link. This does not effect our editorial in any way.


