Have you forgotten to complete a certain task on your work computer? You most likely have and you’re not alone. Fortunately, there are apps like RemotePC that allow users to log in to perform tasks on remote computers from anywhere around the globe, just as if the device was right in front of you. In other words, RemotePC allows users to access and operate computers without direct physical contact as long as they have permission.
This guide will walk you through the procedure you need to follow to add a computer on RemotePC so that you can complete any remote tasks you have, regardless of your present location. There’s a lot to unpack, so let’s get started.
How to Add Computers on RemotePC
RemotePC provides a robust computer management module that allows for adding and removing computers, categorizing them into groups, assigning them to specific users, and even reassigning them to a different category. What’s impressive about this remote computer access solution is that users can simply access remote computers via their web browser. Installing special software applications is not necessary to begin a remote session.
That said, there are various requirements that users must meet before they can start adding computers to their RemotePC accounts:
- They must have a working Gmail account to be able to create a RemotePC account.
- They must have an active subscription plan to RemotePC or have an active free trial.
- The remote computer must have the RemotePC software installed for the user to connect to it.
Now that you are aware of the requirements for accessing a remote computer via RemotePC, below is a detailed breakdown of the entire procedure:
Creating RemotePC Account and Preparation
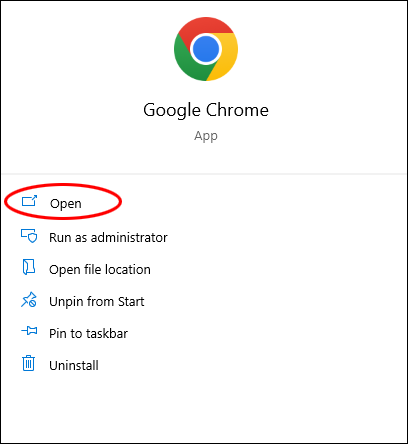
- To begin, launch Google Chrome and access remotepc.com. (Unfortunately, RemotePC doesn’t support other browsers apart from Chrome, including Microsoft Edge)

- If you haven’t already, create a new account using your email and password.

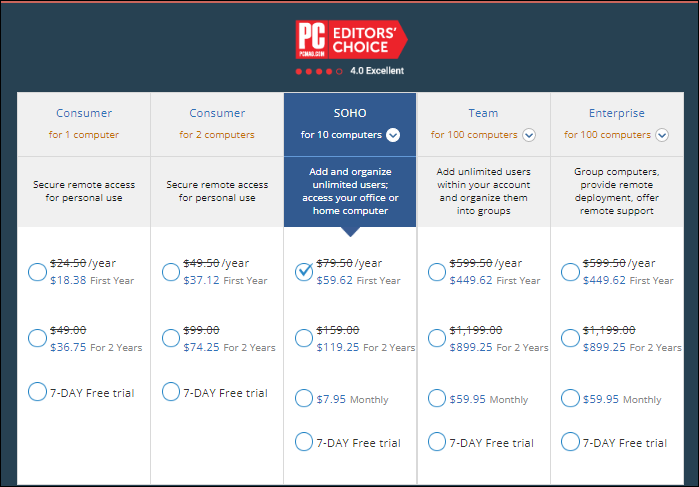
- Choose a subscription plan that works best for you as an individual or your organization, and select your payment method. Users can immediately purchase a subscription or opt for one of the free trial plans.

Download the RemotePC App
If you’ve completed the steps above successfully, proceed to download the RemotePC app. Yes, we know we said there’s no special software needed to begin a remote session. But while RemotePC doesn’t require opening any software to access the remote computer users want to connect from, special software will need to be installed on the remote computer initially to permit a remote session.
So, on your dashboard, locate the “Download” area and download the appropriate software version for the computer to which you want to gain remote access. The installer presented to you will depend on the pricing plan to which you’re subscribed. Thankfully, there’s no need to worry about which installer to download because RemotePC automatically detects the user’s operating system and recommends the appropriate installer for their computer.
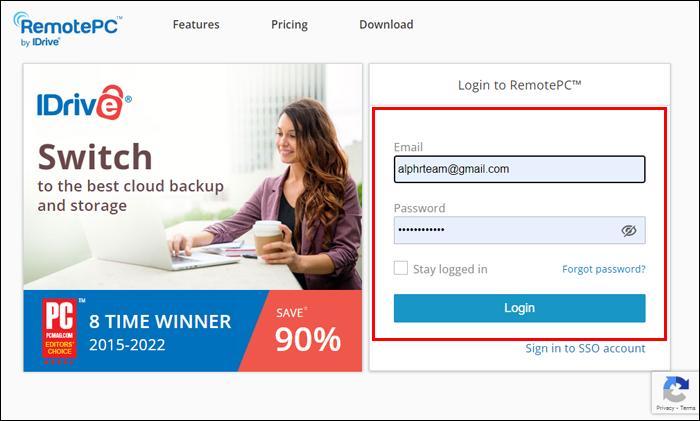
Once you’ve downloaded the recommended installer, please open it and follow the on-screen instructions to complete the installation. Once the installation is complete, open the app and provide your RemotePC email and password to access the dashboard. You should see a clear dashboard with no computers listed if you successfully completed the step above.
Configure Always-on Remote Access
RemotePC will prompt you to configure your computer and enable always-on remote access upon signing into the application. This step adds the user’s computer to their account and makes it accessible to other computers. The process of configuring always-on remote access is relatively straightforward and can be completed in a few steps:
- Click the “Configure Now” button against the pop-up at the bottom.
- Provide a custom name for your computer and a unique Personal Key in the fields provided. Think of a Personal Key as a password that acts as a unique access code for your computer.
- Once you have finished the above steps, click “Enable Now” to add your computer to your RemotePC account.
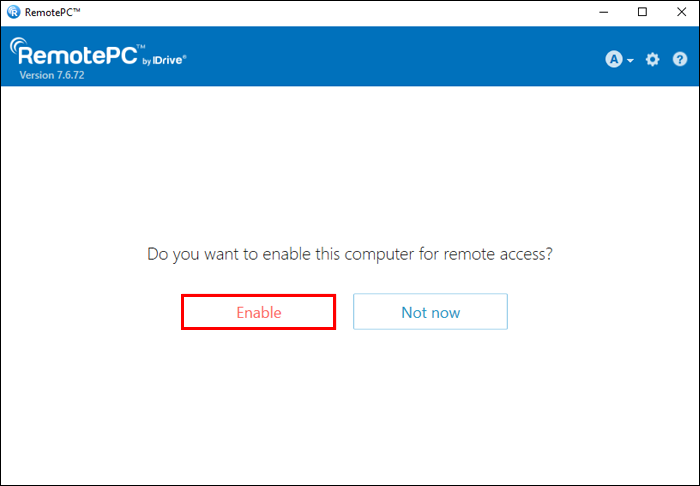


The user should see the computer they’re using listed under their account if the above steps were followed correctly.
Adding a Second Computer to Your RemotePC Account
Adding a second computer is also straightforward. You just need to have access to the computer you want to add to the account. Here’s how to go about it:
- Open the second computer and launch Google Chrome.
- Locate the remotepc.com website and use your email and password to log into your user account.
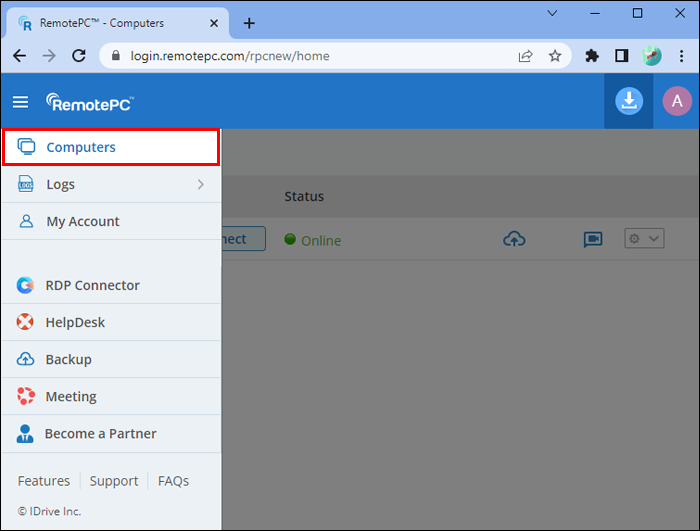
- Open the “Computers” area.
- Select “Add Computer” then “Add this computer.”
- Click on “Download installer.”

Once the download is complete, follow the on-screen instructions to install RemotePC on the computer. Once you’re done, launch the RemotePC application. You’ll notice that the computer has been automatically added to your account. But in some cases, you might be requested to Configure Always-on remote access. Just follow the instruction we listed earlier to complete this step.
With the second computer added to your account, you can now initiate remote sessions successfully. Simply click the “Connect” button against the computer you want to access remotely and follow the on-screen instructions to start a session.
How to Add a Computer That You Don’t Have Access to in Remote PC
We’ve discussed the procedure for adding a computer to which a user has physical access to a RemotePC account. But what if you can’t access the computer you want to add to your RemotePC account? Well, the procedure is also straightforward but slightly different:
- Use Google Chrome to open remotepc.com.
- Sign into your user account.
- Select “Add Computer”
- On the “Add Computer” widget, access the “Add a different computer” tab.
- Copy and share the link provided on the tab with the owner of the other computer. Ask them to click the link and download RemotePC on their PC.
- If they successfully install the software, return to your dashboard and locate the “Computers” tab. You should be able to see the new remote computer.
Note: The remote PC the user wished to connect to should be switched on for the session to start successfully.
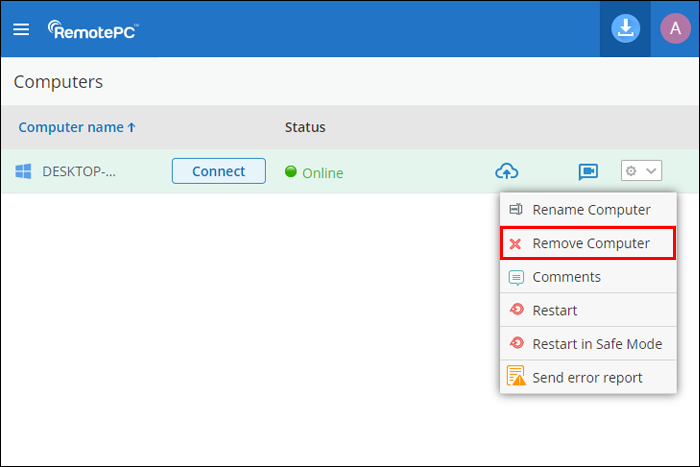
How Can a User Remove a Computer From RemotePC?
Removing a computer from RemotePC requires completing a few steps:
- Open Chrome and access remotepc.com.
- Use login credentials to sign into your account.
- Go to the “Computers” area.
- Click the “Remove Computers” button and choose the computers you want to remove from the account you’re logged into.
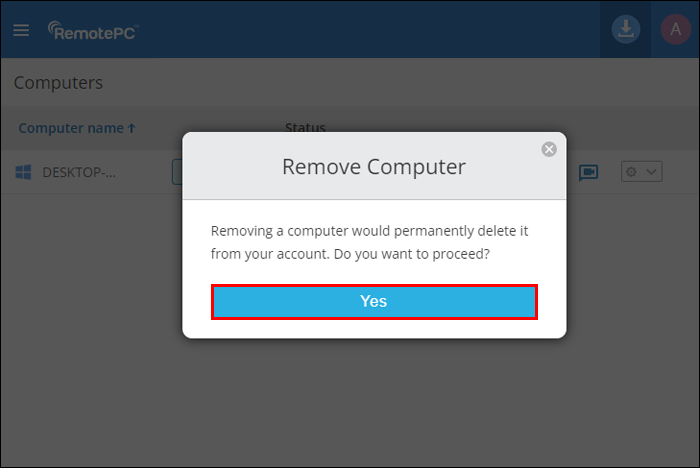
- Confirm the action on the widget that pops up by clicking on “Remove.”
- Verify the computers you want to remove on the next screen.
- Click “Yes” to finish.
Additional FAQ
What are some of the best alternatives to RemotePC?
Suitable alternatives to RemotePC include TeamViewer, AnyDesk, and GoToMyPC. A suitable remote access application depends on the organization’s nature — for example, the number of computers you need to connect to remotely and the budget.
Seamlessly Access Remote Computers From Anywhere in the World
If we can take anything from the past few years is that we don’t need to work from a physical office to get things done. And apps like RemotePC are a true testament to this notion because they make it seamless to connect to remote computers. Individuals around the world can now work anytime, anywhere.
We want to hear from you now. Have you ever used RemotePC before? On a scale of 1 to 10, how would you rate the entire remote access experience? Tell us below.
Disclaimer: Some pages on this site may include an affiliate link. This does not effect our editorial in any way.


