Device Links
Subtasks in Smartsheet represent tasks that need to be completed to finish an overall task. In other words, every subtask belongs to a parent task. Thus, creating and completing subtasks are essential to the completion of your project. Unfortunately, many have struggled with this simple undertaking.
This article addresses the issue with a step-by-step guide to the process across a number of the most popular devices. Additionally, we’ll answer some frequently asked questions about the topic.
How to Add Subtasks in Smartsheet
Tasks are incredibly easy to create – they are the backbone of Smartsheet functionality.
To add subtasks, follow the steps below:
On Mac
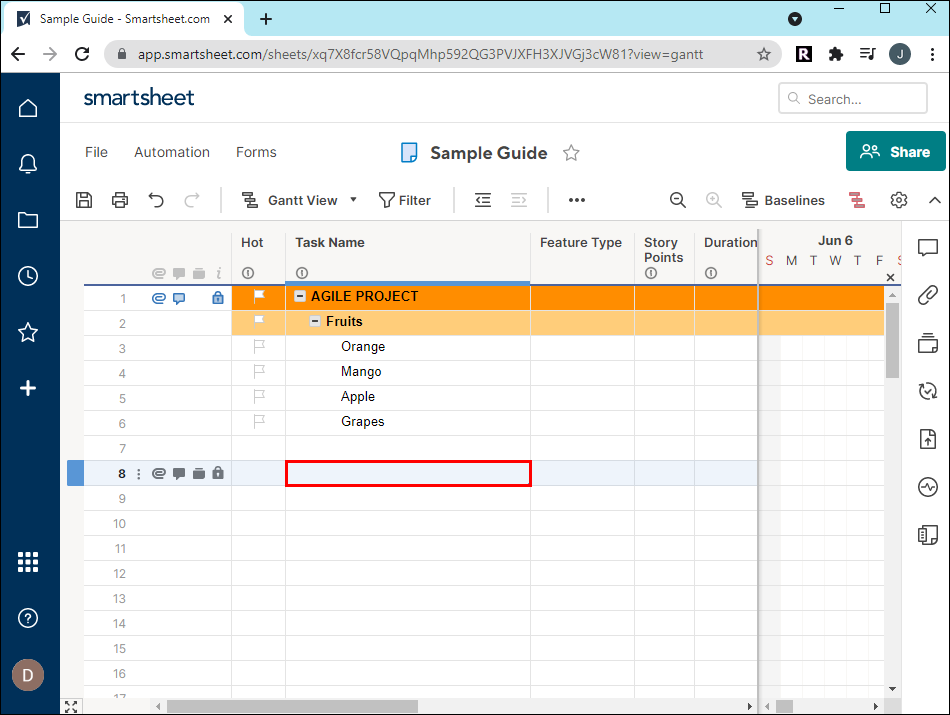
- Navigate to the appropriate project. Scroll to the section where you want to create a Subtask.

- Press control and click with your trackpad (right-click with a mouse) on the row number of the parent task, and select insert row below. Alternatively, you can simply press Control and “i” to create a new row.

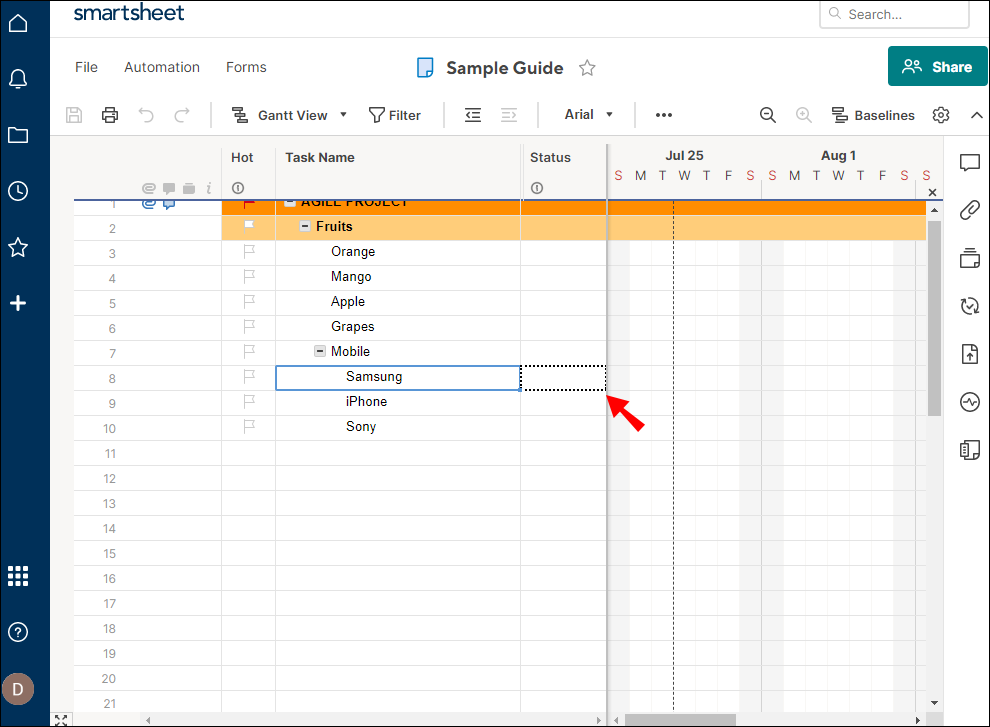
- Type the title of your subtask into the task column of your new row and click on the row number of the subtask.
- Navigate to and click on the indent button on one of the upper ribbons next to the filter button, it looks like a few lines with an arrow pointing right. Alternatively, press “Command” and “]” (right bracket) to indent the line.
- It is best practice to make sure that you created the subtask correctly immediately after you create it. To do so:
- Navigate to the parent task.
- Press on the small minus sign next to it.
- If the subtask disappears, you have successfully created a subtask.


On Windows
- Navigate to the appropriate project. Scroll to the section where you want to create a Subtask.
- Right click on the row number of the parent task, and select insert row below. Alternatively, you can simply press “Insert” on your keyboard.
- Type the title of your subtask into the task column of your new row and click on the row number of the subtask.
- Navigate to and click on the indent button on one of the upper ribbons next to the filter button (the arrow pointing right). Alternatively, press “Control” and “]” (right bracket) to indent the line.
- It is best practice to make sure that you created the subtask correctly immediately after you create it. To do so:
- Navigate to the parent task.
- Press on the small minus sign next to it.
- If the subtask disappears, you have successfully created a subtask.


On iPhone
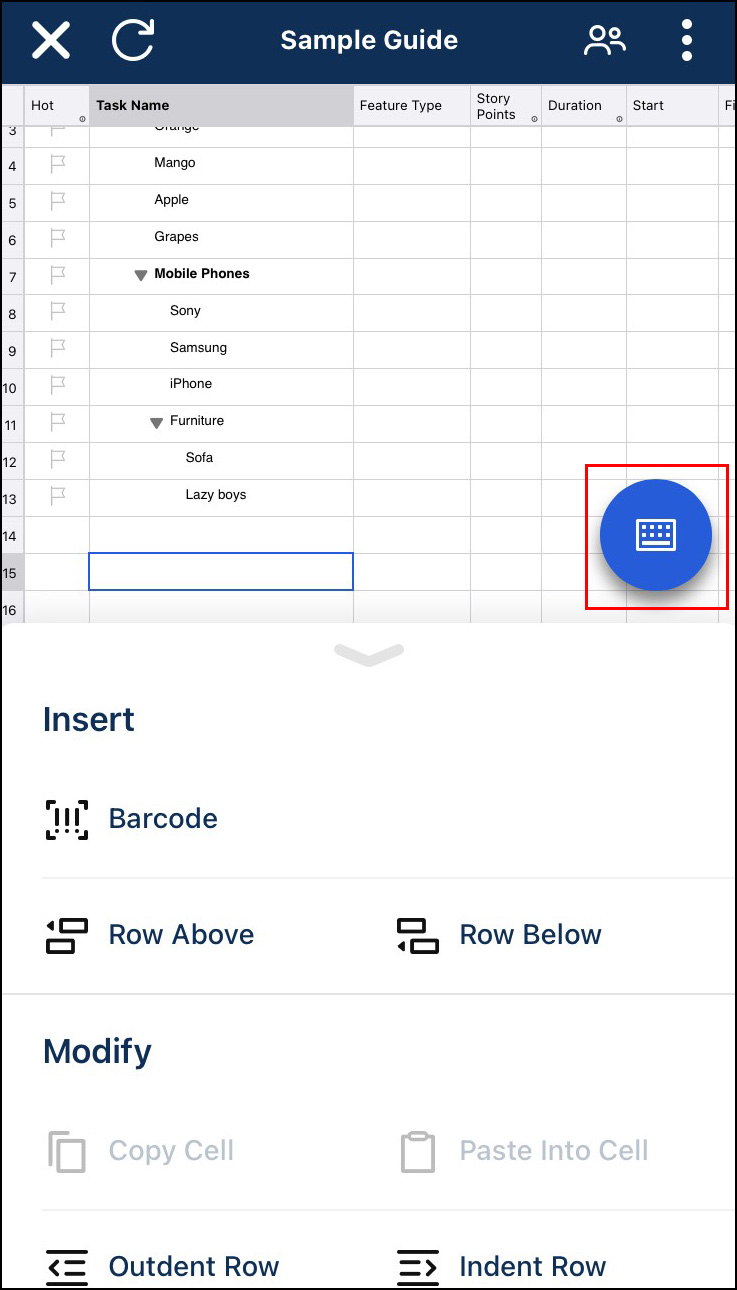
- Navigate to the appropriate Project.
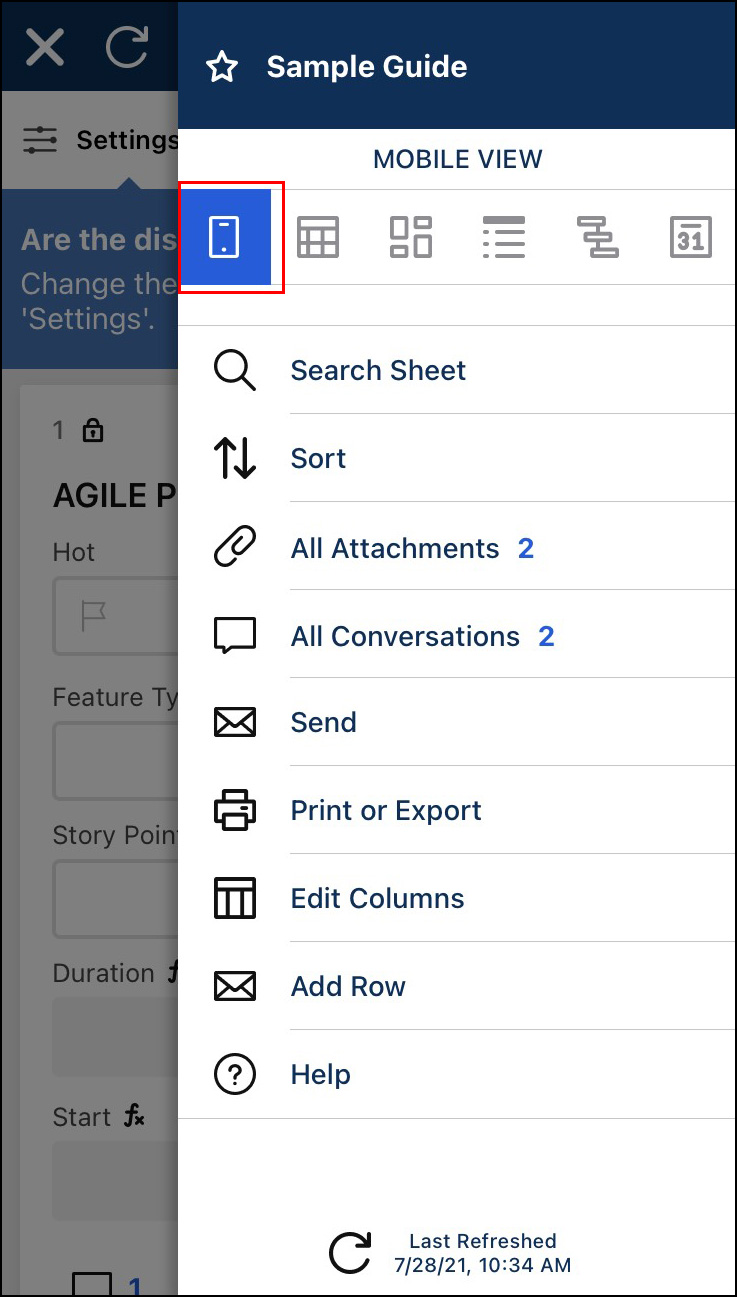
- Put the sheet in “Grid” view. It is the button at the upper right corner, second to the left. There will be quite a few options with different uses. For the purposes of this tutorial, put your sheet in “Grid” view.
- Scroll to the section where you want to create a Subtask and tap on the row number of the parent task.
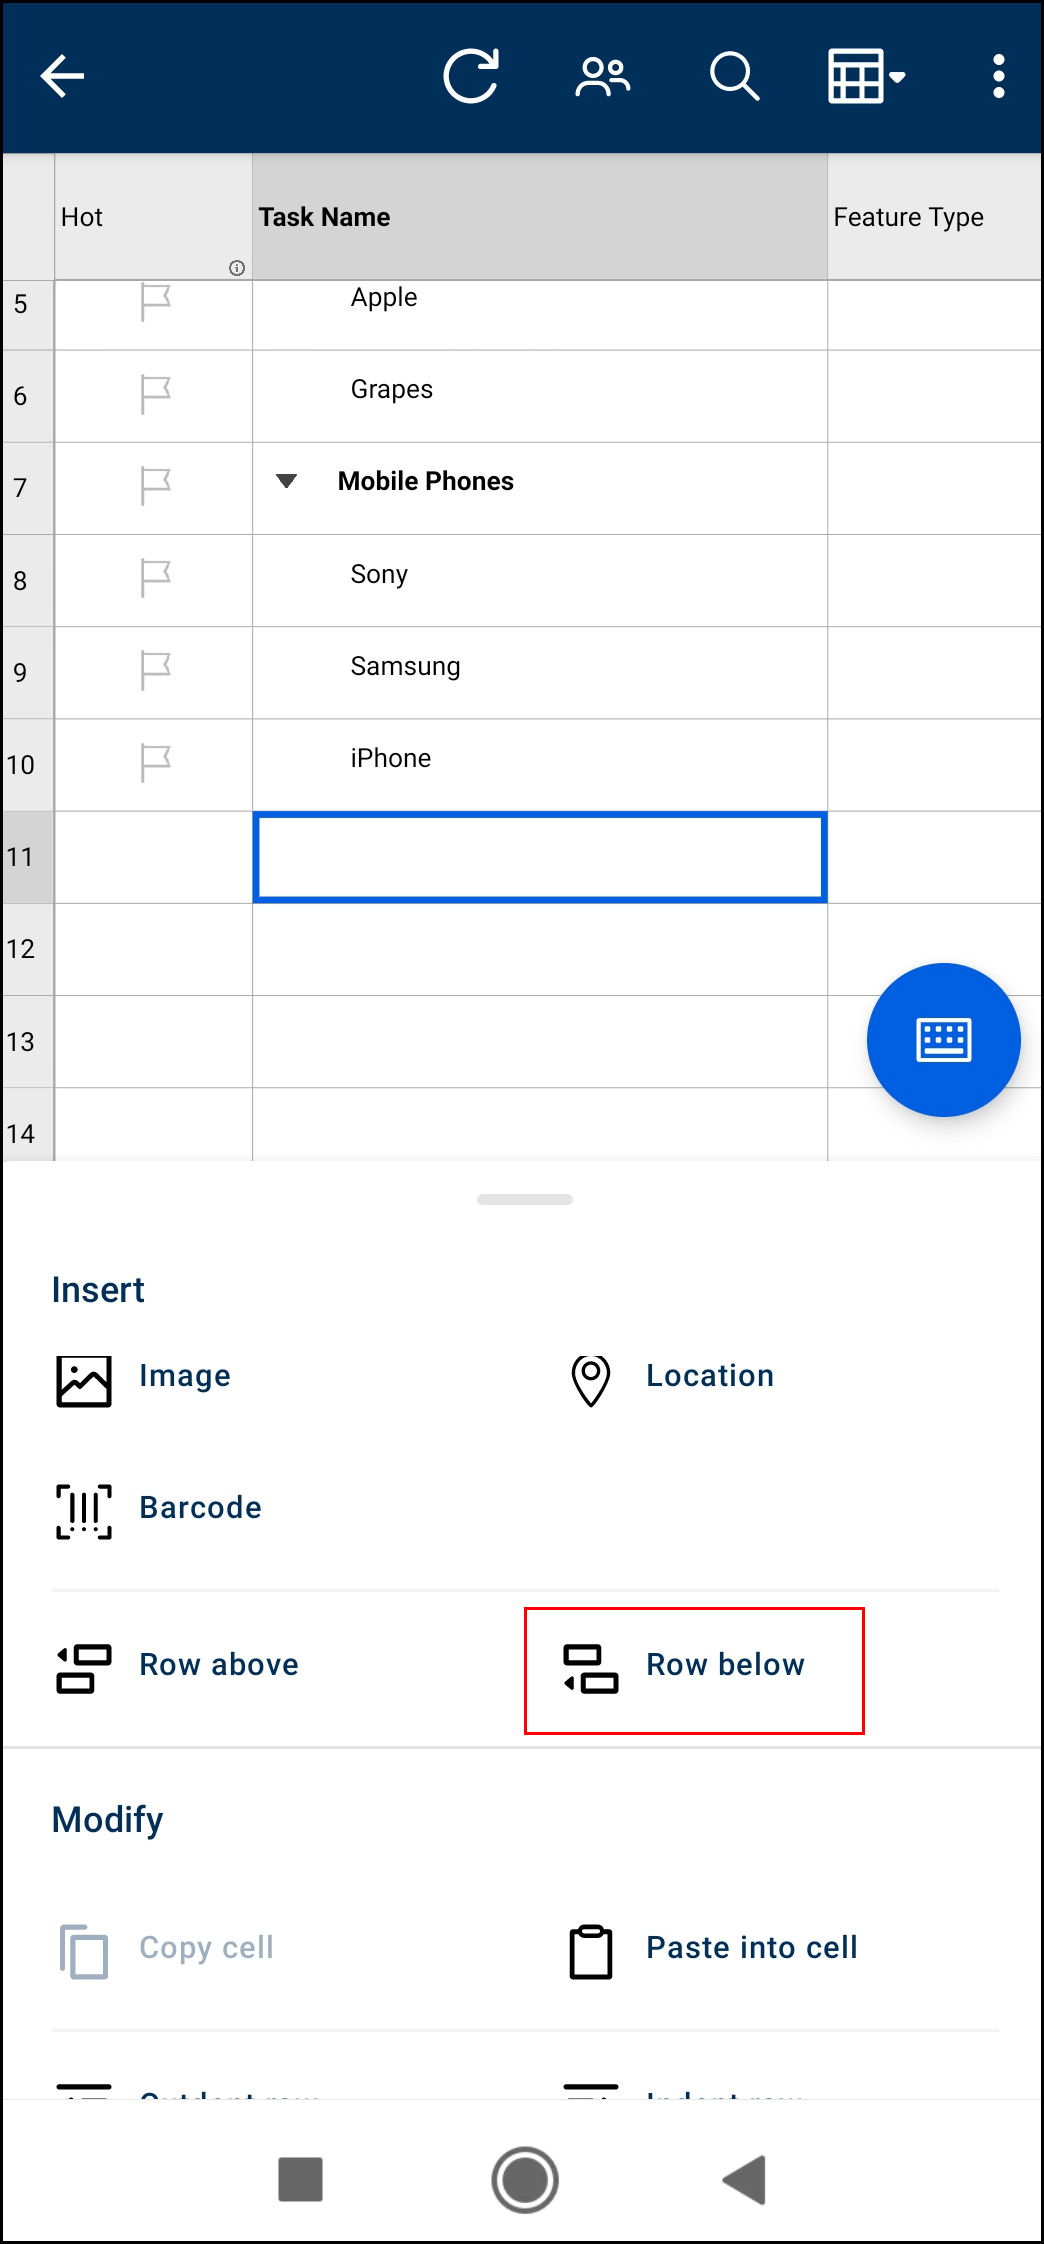
- Scroll down to insert, and tap “Row Below.”
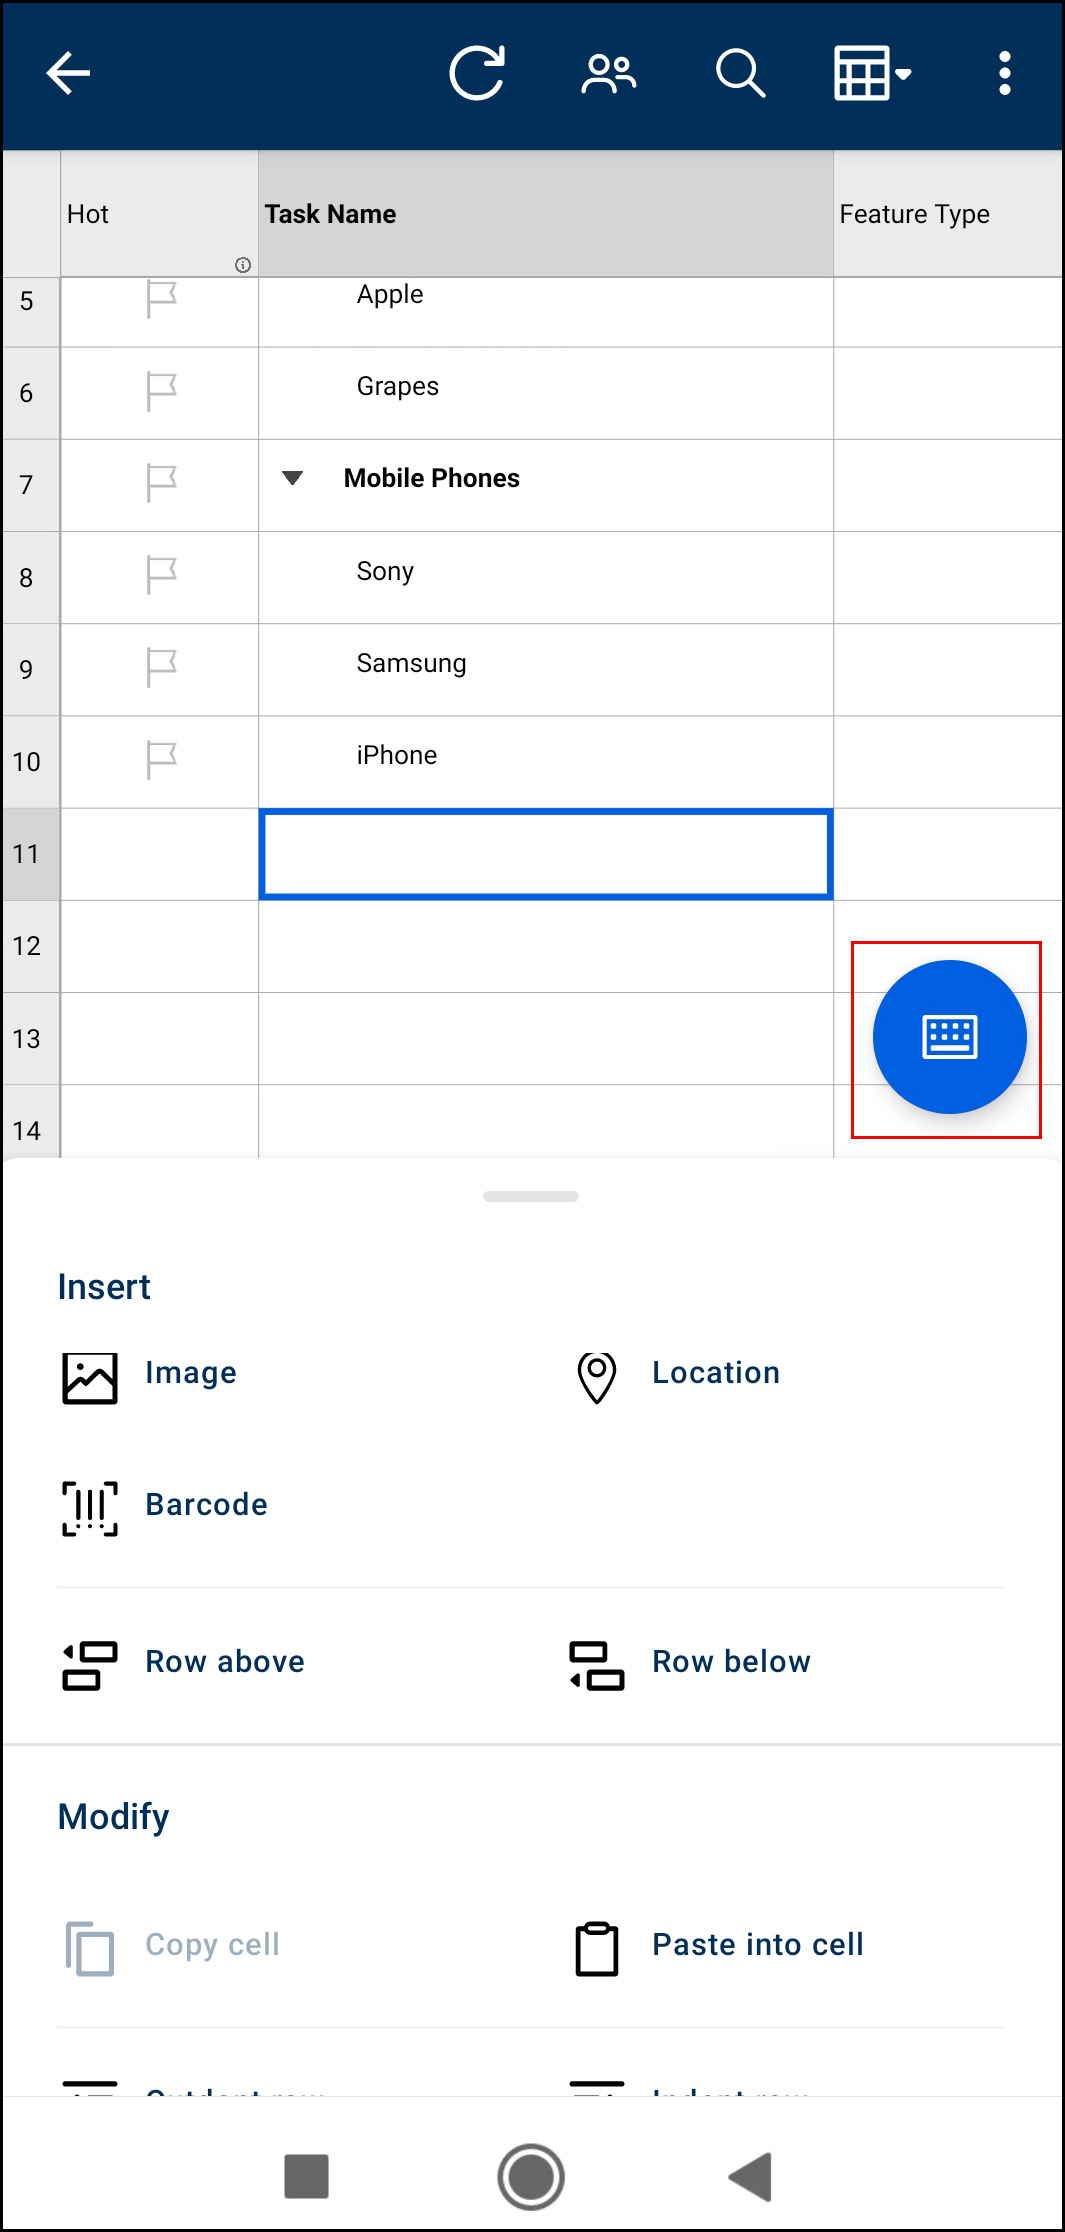
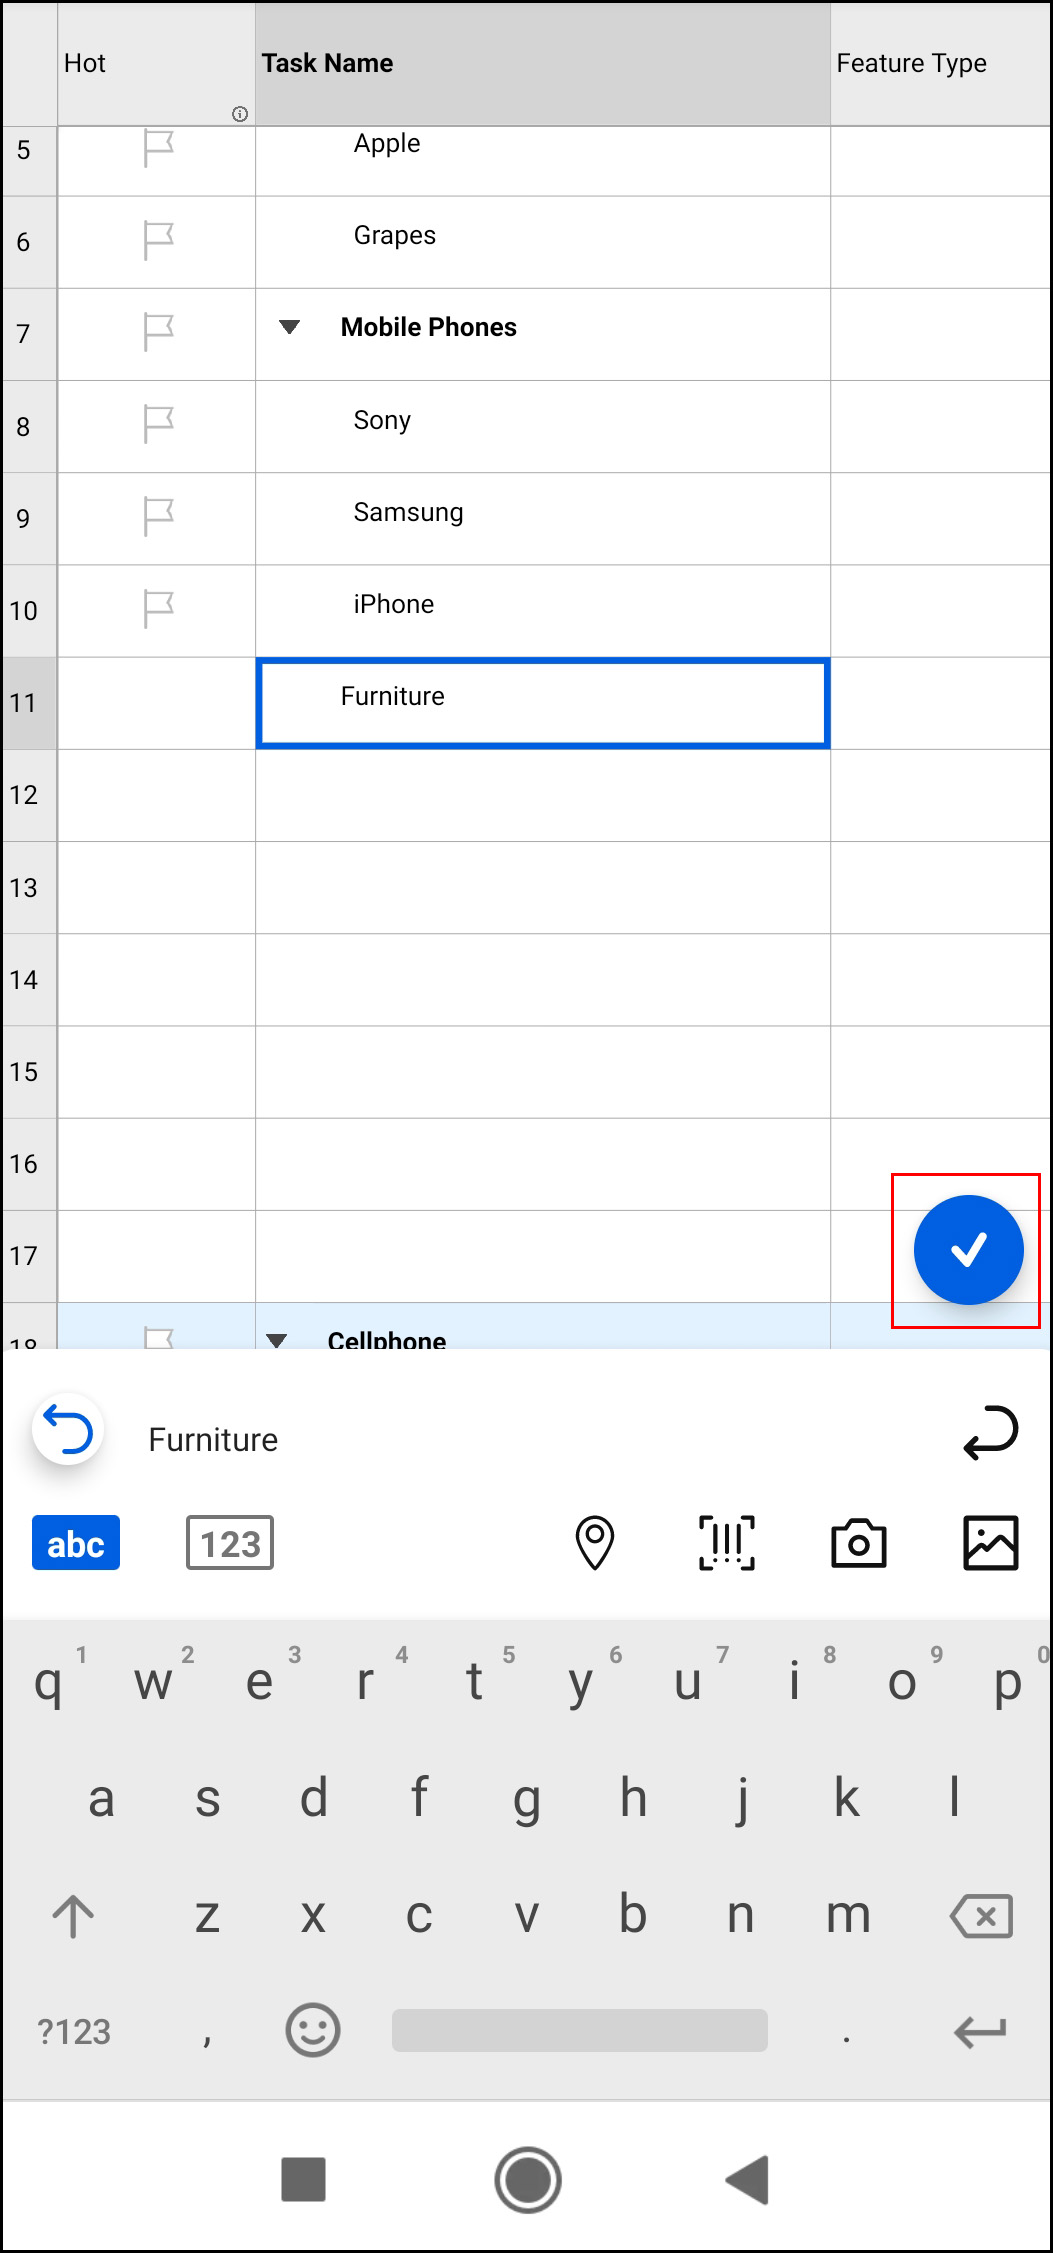
- Tap on the task column in the new row you created. Then tap the blue keyboard button in the bottom left corner of your screen.
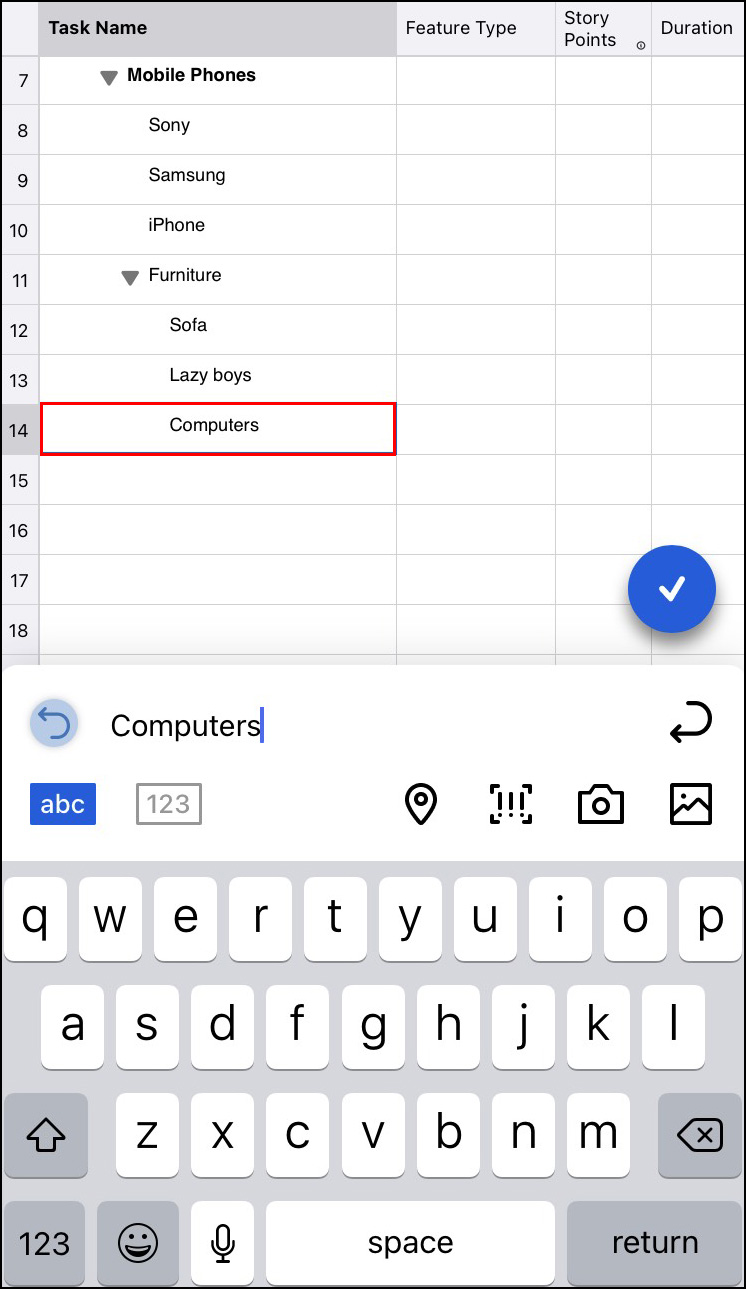
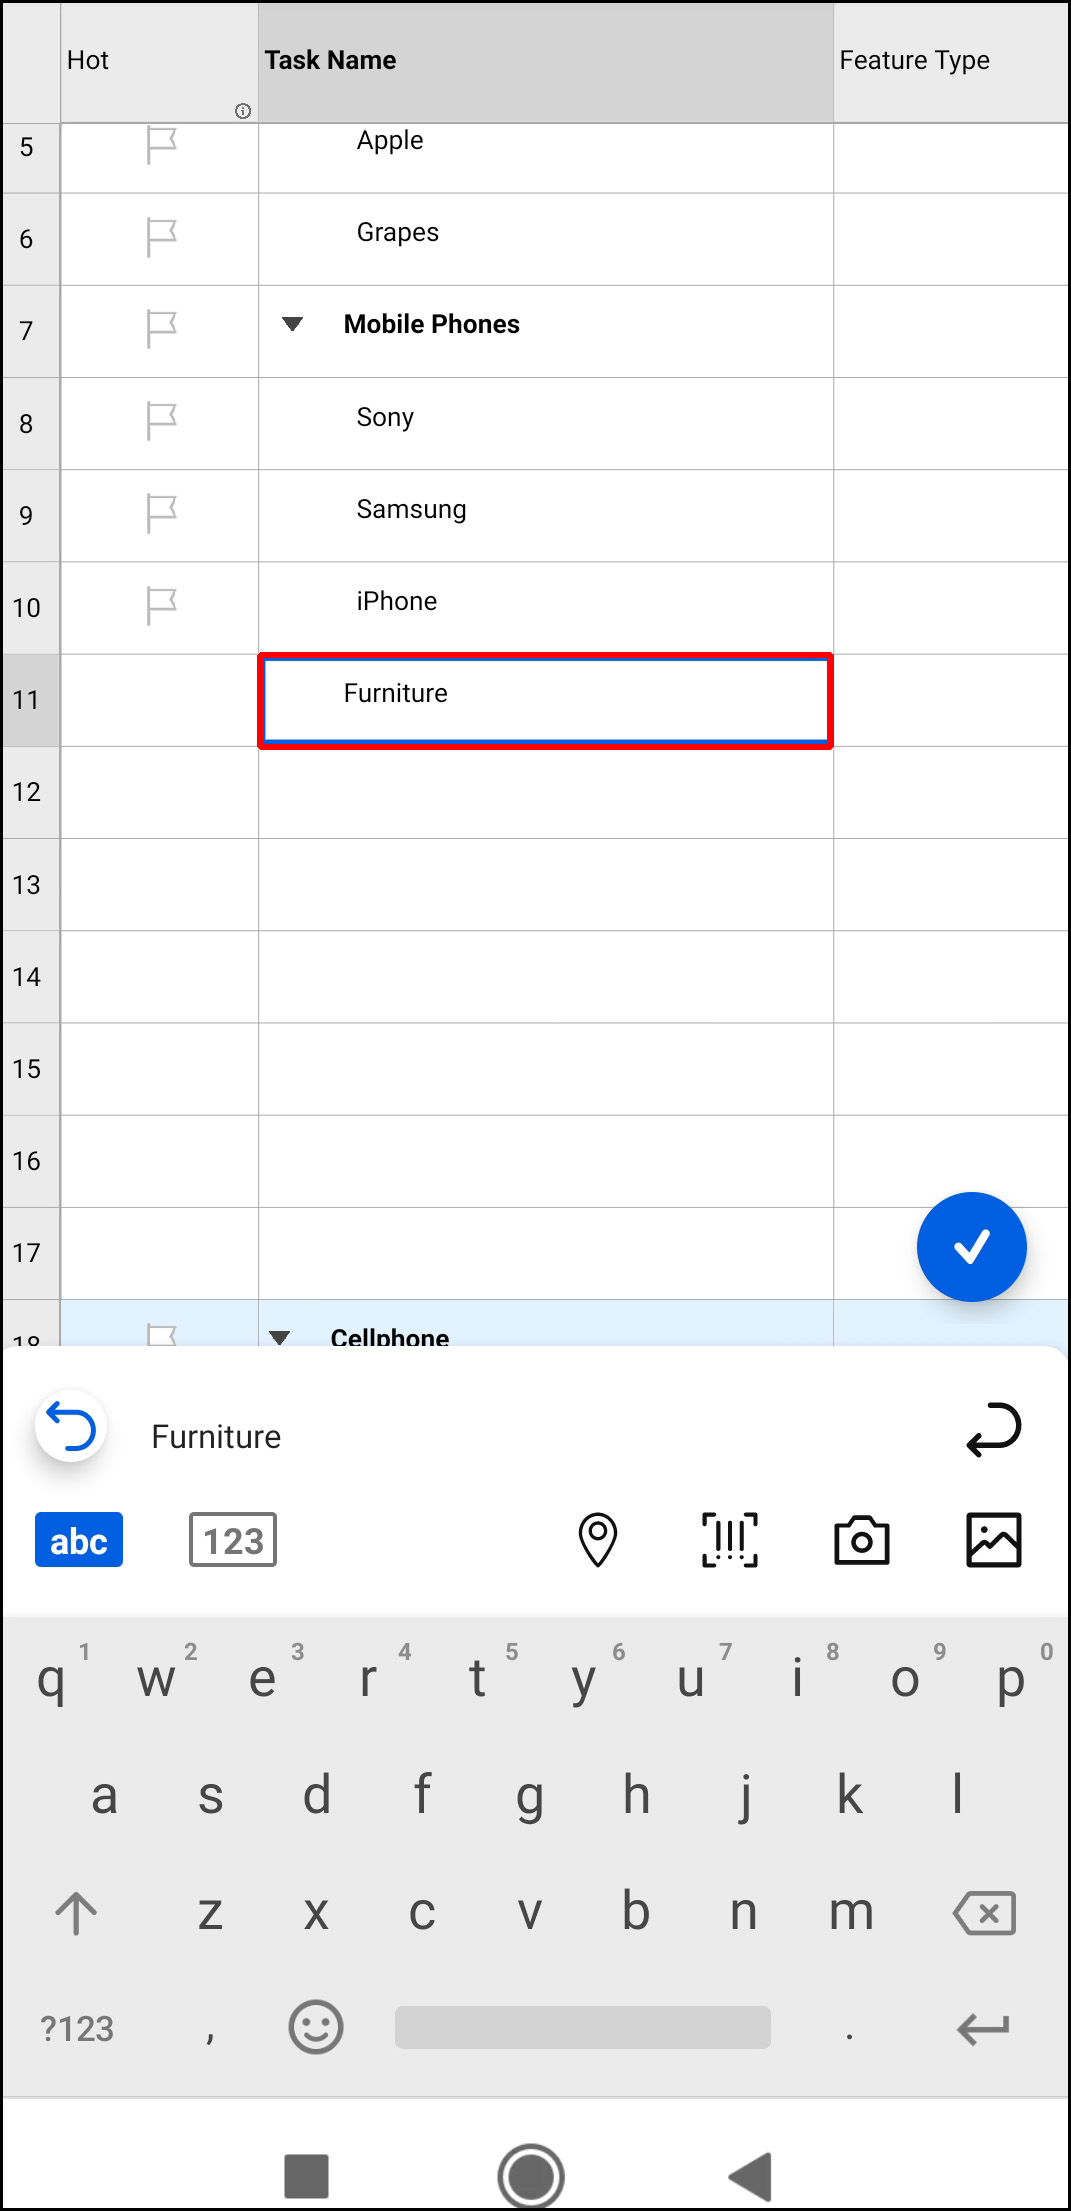
- Type the title of the task into the new row. If the parent task has subtasks other than the one you just created, then you are finished. The app automatically created a subtask for you because of how it understands hierarchy.
- Tap the blue checkmark button.
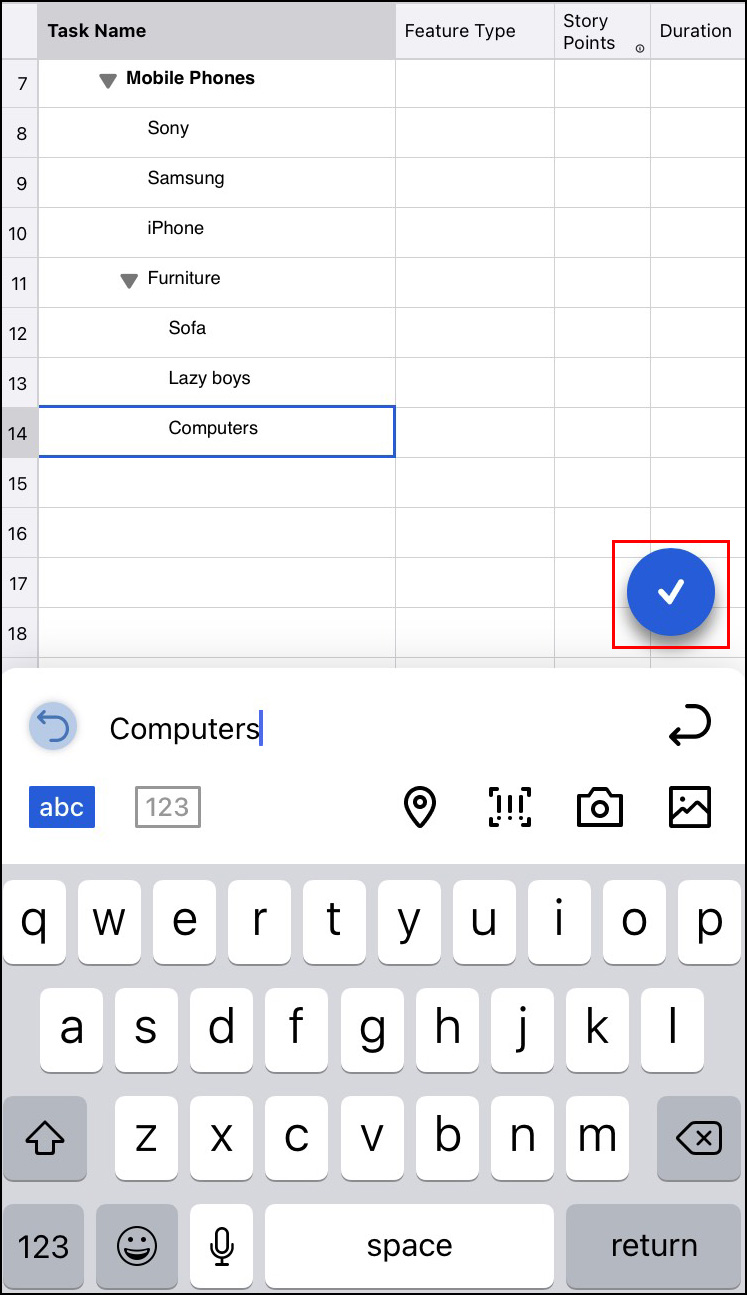
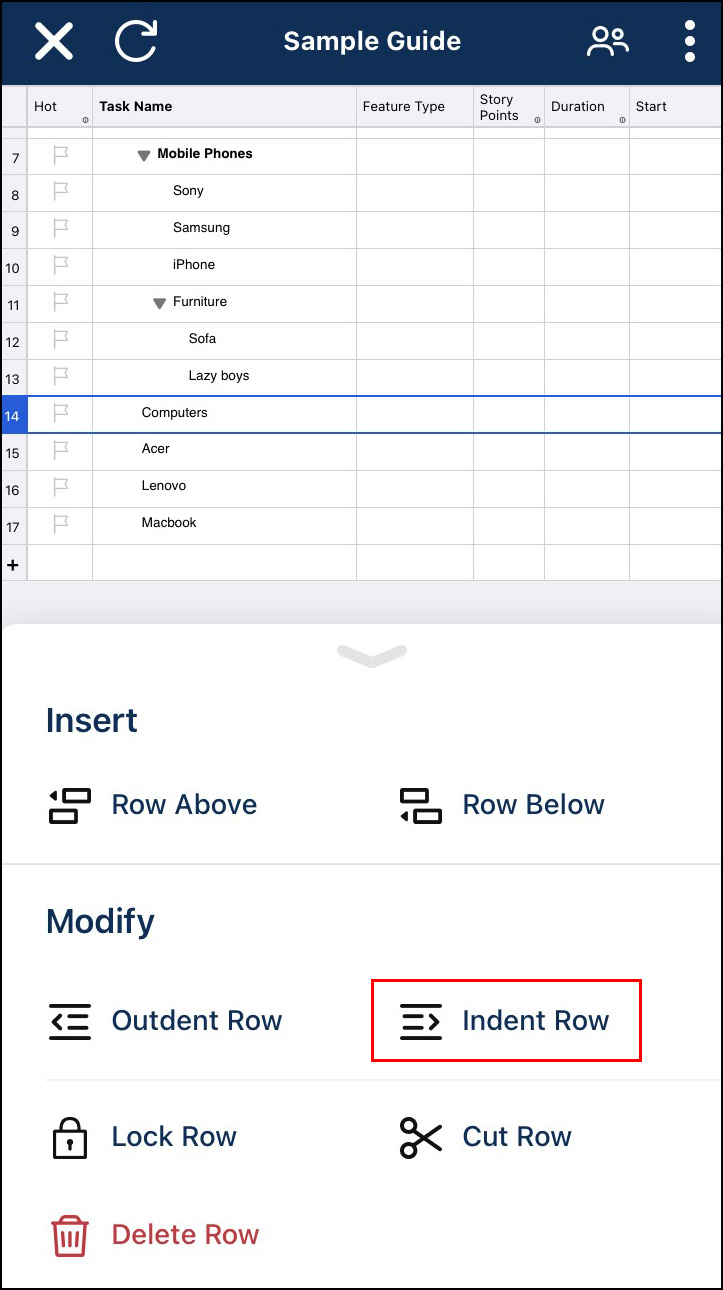
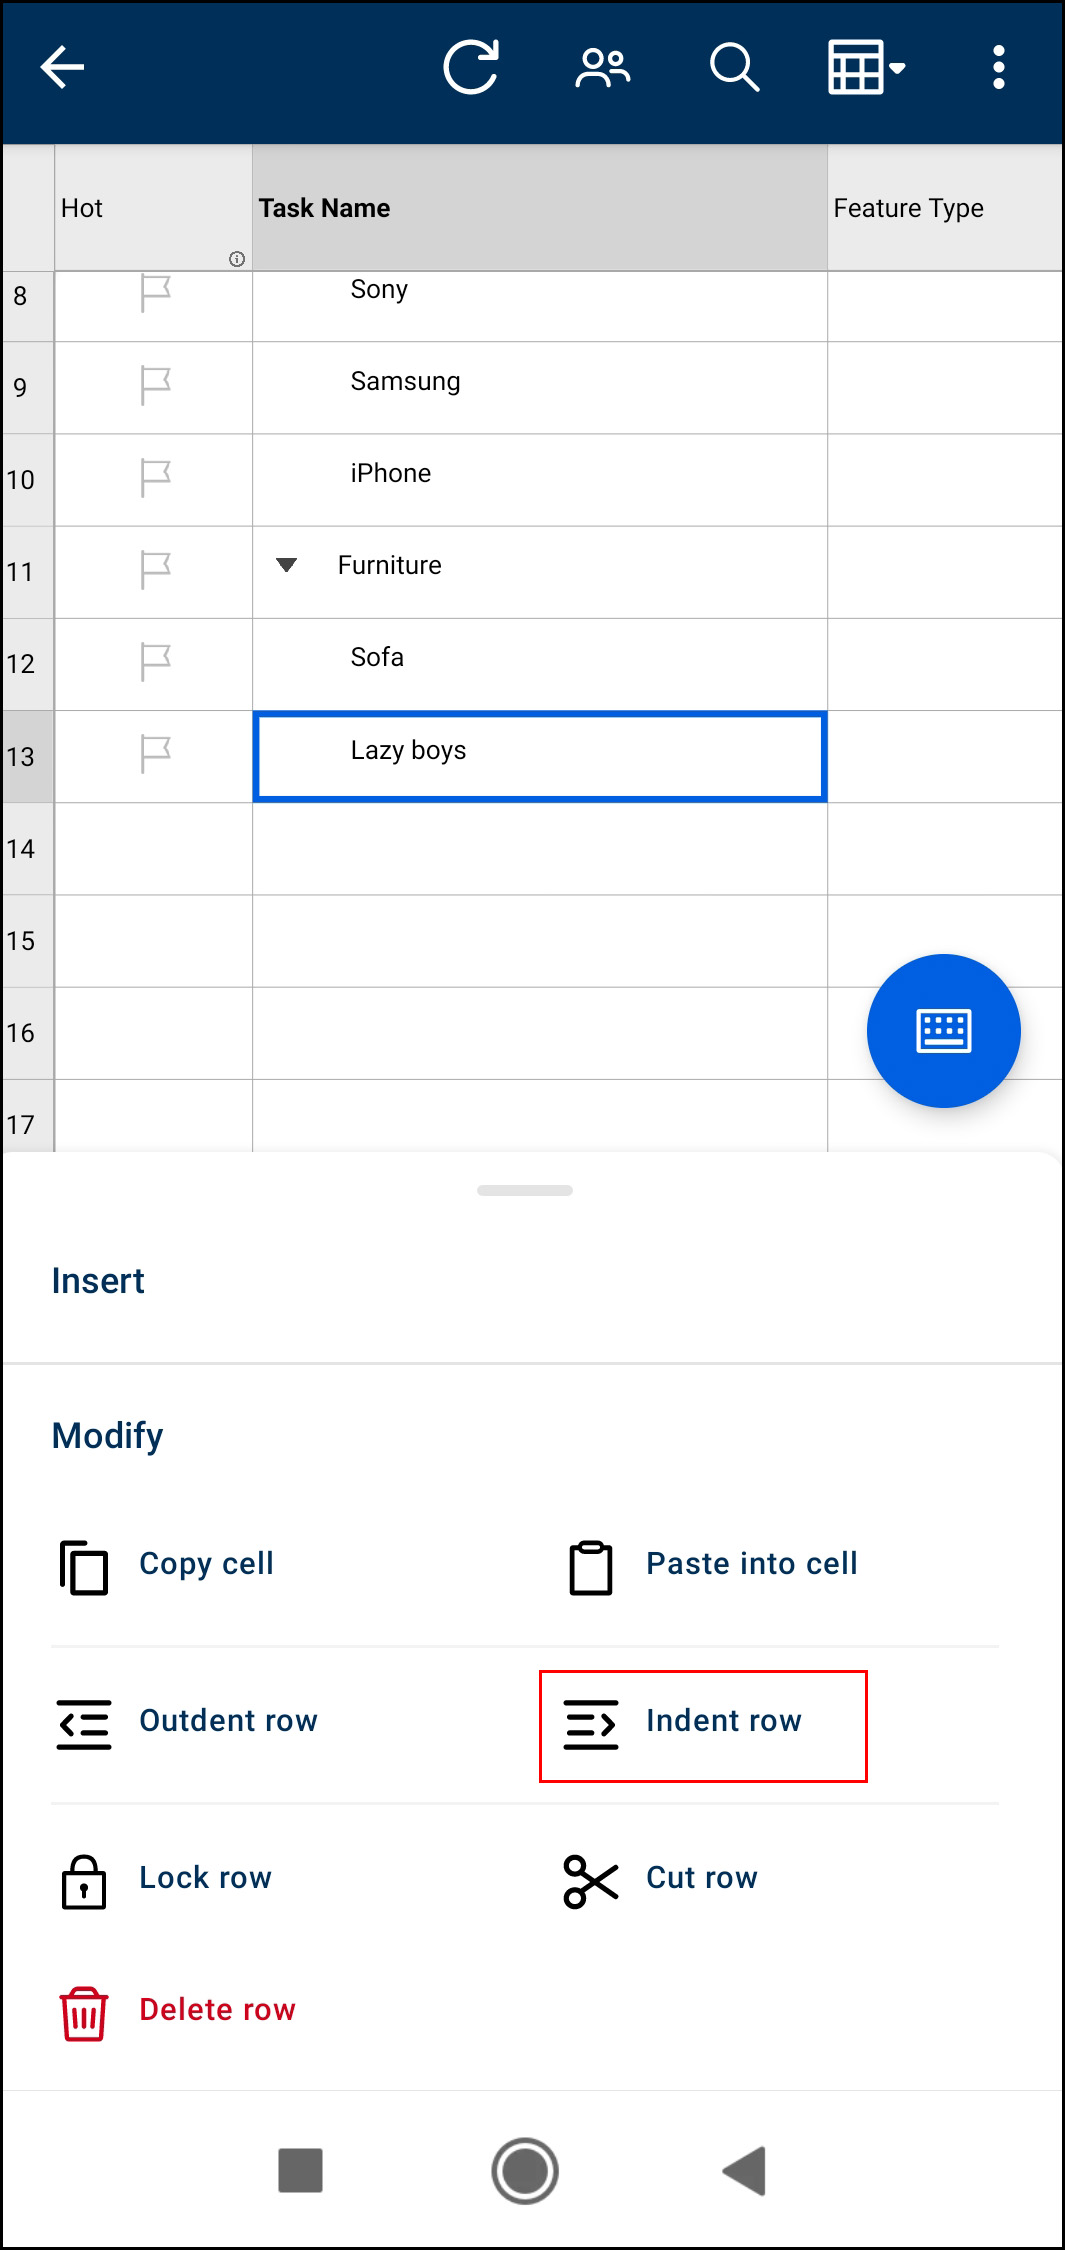
- Tap on the row number of your subtask. Scroll down to the modify section, and tap on the indent row button.
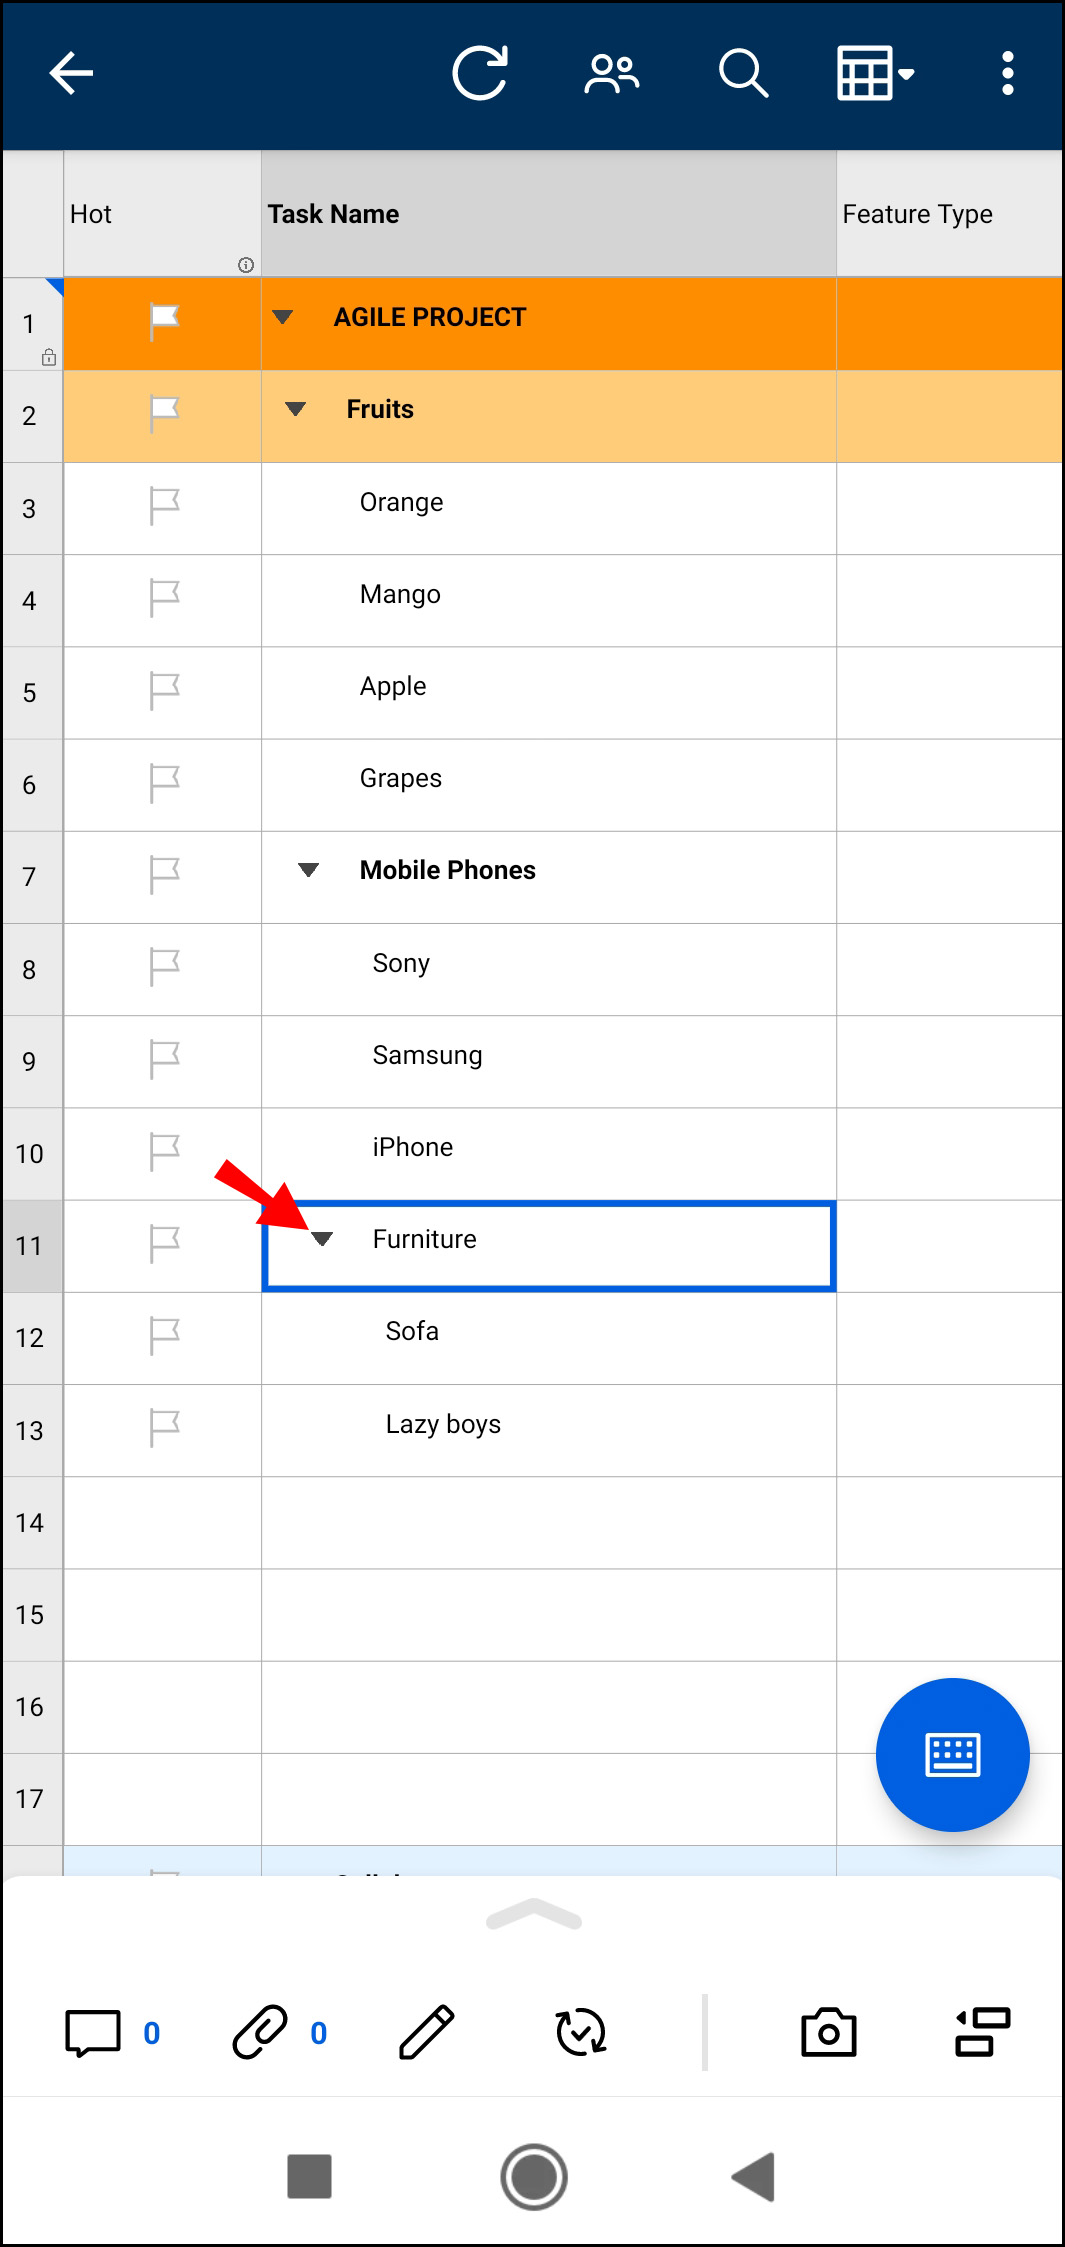
- It is best practice to make sure that you created the subtask correctly immediately after you create it. To check whether you’ve done so, press the small minus button next to the task. If the subtask disappears, you successfully created a subtask.


On Android
- Navigate to the appropriate Project.
- Put the sheet in “Grid” view. It is the button at the upper right corner, second to the left. There will be quite a few options with different uses. For the purposes of this tutorial, put your sheet in “Grid” view.
- Scroll to the section where you want to create a Subtask and tap on the row number of the parent task.
- Scroll down to insert, and tap “Row Below.”
- Tap on the task column in the new row you created. Then tap the blue keyboard button in the bottom left corner of your screen.
- Type the title of the task into the new row. If the parent task has subtasks other than the one you just created, then you are finished. The app automatically created a subtask for you because of how it understands hierarchy.
- Tap the blue checkmark button.
- Tap the row number of your subtask. Scroll down to the modify section, and tap on the indent row button.
- It is best practice to make sure that you created the subtask correctly immediately after you create it. To check whether you’ve done so, press the small minus button next to the task. If the subtask disappears, you successfully created a subtask.


How to Mark a Subtask as Complete in Smartsheet
After creating a Subtask for your project, you should have a comprehensive understanding of how hierarchy functions in Smartsheet, and how hierarchy impacts the project workflow. In other words, how the fulfillment of subtasks leads to the fulfillment of tasks. Unfortunately, however, many people don’t know how to mark a subtask as complete.
Here’s how it’s done:
On Mac
- Navigate to the appropriate project and scroll to the Subtask you have completed.
- Select and hover over it so that the row is highlighted in a blue color.
- Carefully move your cursor right, across the columns, until you see the outline of a box.
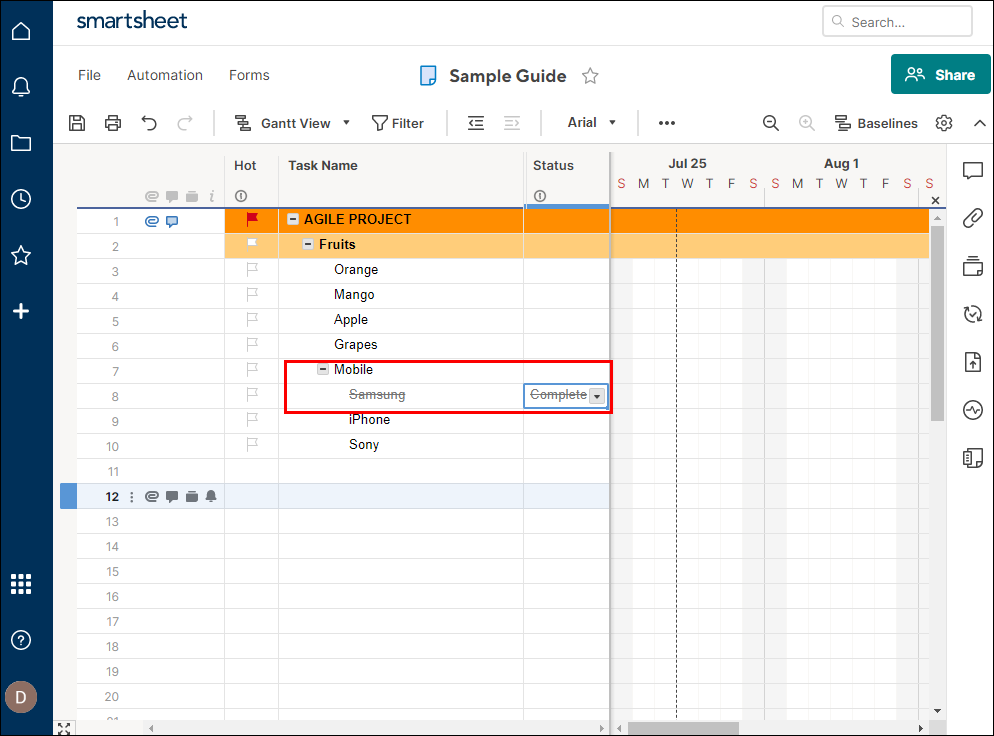
- Click on the box. A blue checkmark should appear indicating that you successfully marked the Subtask as complete.

On Windows
- Navigate to the appropriate project. Scroll to the Subtask you have completed.
- Select and hover over it so that the row is highlighted in a blue color.
- Carefully move your cursor right, across the columns, until you see the outline of a box.
- Click on the box. A blue checkmark should appear indicating that you successfully marked the Subtask as complete.
On iPhone
- Navigate to the appropriate Project.
- Put the sheet in Mobile view. It is the button at the upper right corner, second to the left. There will be quite a few options with different uses. For the purposes of this tutorial, put your sheet in “Mobile” view.
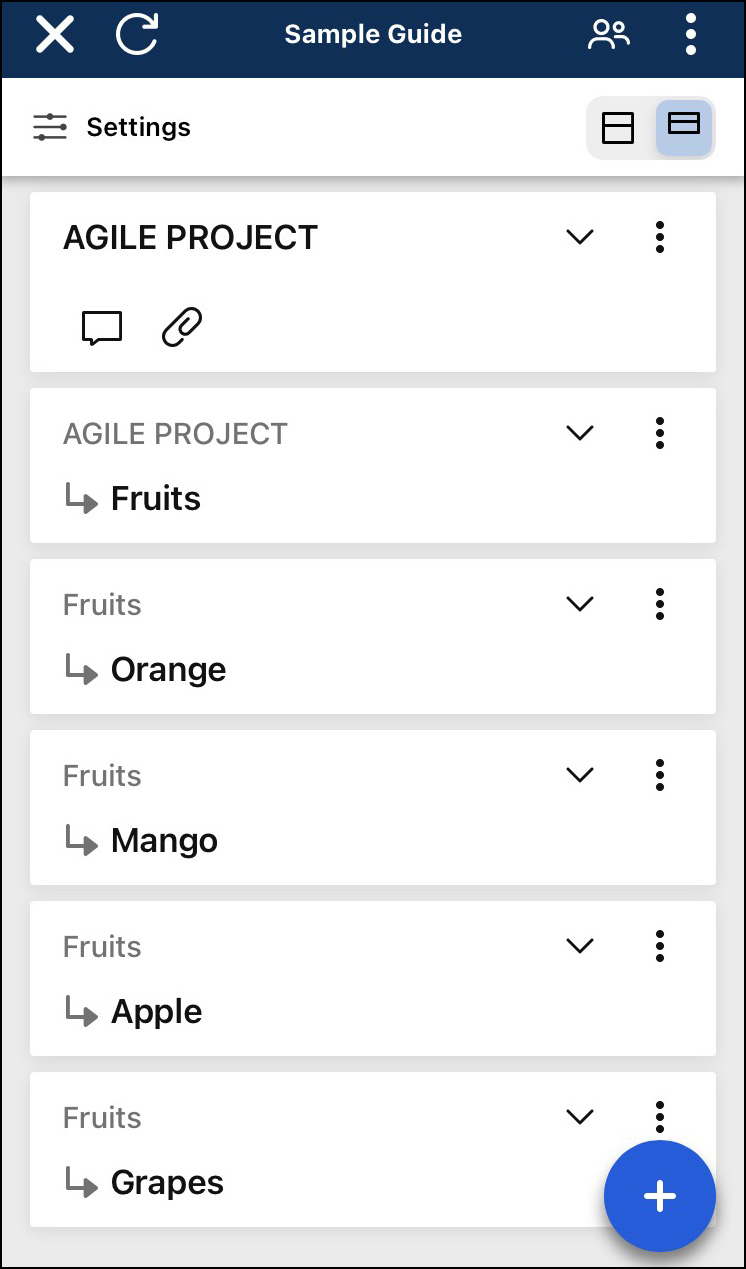
- Scroll to the subtask you want to mark as complete. Check that the name of the subtask is bolded, with the parent task above it appearing grey.
- Tap the white square above the text that says done to mark the project as complete.
On Android
- Navigate to the appropriate Project.
- Put the sheet in Mobile view. It is the button at the upper right corner, second to the left. There will be quite a few options with different uses. For the purposes of this tutorial, put your sheet in Mobile view.
- Scroll to the subtask you want to mark as complete. Check that the name of the subtask is bolded, with the parent task above it appearing grey.
- Tap the white square above the text that says done to mark the project as complete.
Marking This Tutorial as Complete
Adding and completing subtasks are vital to the successful completion of your project. It makes time management and work allocation an absolute breeze, as well as decreasing the number of errors that your team makes. The successful utilization of this technology allows you to streamline your workflow and complete projects in record-breaking time.
Have you ever added a subtask in Smartsheet? Did you use the advice outlined in the article? Share your experiences in the comments section below.
Disclaimer: Some pages on this site may include an affiliate link. This does not effect our editorial in any way.