It’s easy to connect to a network drive in OS X on demand, but if there’s a particular network drive or volume that you use frequently, you may want to have it mount automatically every time you boot your Mac or log in to your user account. This can save quite a bit of time and frustration, especially with Macs that have multiple users or that are rebooted often. Here’s how to automatically mount a network drive in OS X.
Step 1: Connect to the Network Drive & Save Your Login Info
Before you can instruct your Mac to automatically connect to a network drive, you first need to connect to the drive manually and allow OS X to save your user name and password for that drive. To do this, select Finder and choose Go > Connect to Server from the Menu Bar. In the server connection window that appears, enter the IP address or local name of the network drive you’d like to configure to automatically mount.
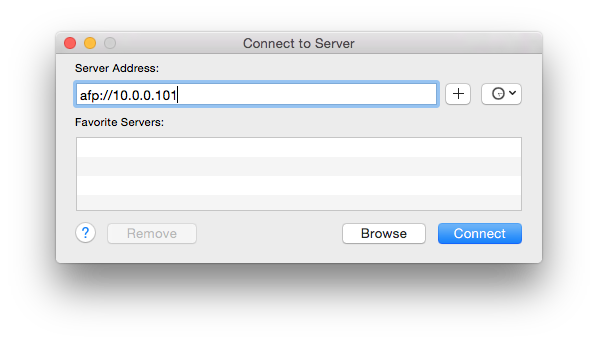
Click Connect to begin the connection to the network drive. If the drive or volume requires a user account and password, select Registered User and enter the required credentials. Before you press Connect again, however, make sure that Remember this password in my keychain is checked. This will let your Mac save and submit your account name and password when attempting to automatically connect to the network drive. Without it, you’ll be prompted to enter this information each time you log in, eliminating at least half of the purpose of setting up an automatic network drive connection in the first place.
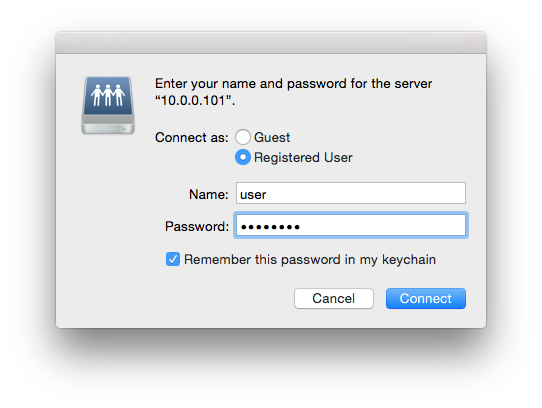
When you’re ready, press Connect a second time and the drive will mount if all information was entered correctly. You can now close any open Finder windows but don’t yet unmount the network drive; we’ll use it next.
Step 2: Add Network Drive to User Login Items
The network drive has been manually connected and the required user account information has been saved. Now it’s time to configure OS X to connect to this network drive automatically when you log in.
Head to System Preferences > Users & Groups. Select your user account from the list on the left and click the Login Items tab on the right side of the window. This shows you all of the apps, scripts, documents, and user services that are configured to launch automatically when your user account logs in.
To add your network drive to this list, simply locate the network drive’s icon on your Desktop, and then drag and drop it into the Login Items list.

By default, whenever a Mac connects to a network drive it opens a Finder window to display the drive’s contents. If you don’t want this to happen with your automatically mounted network drive, just check the Hide box after you add it to the Login Items list. This will allow the network drive to mount quietly in the background, so that it’s ready and waiting for you when you need it.
To test your new setup, either reboot your Mac or log out and then log back in. The exact timing will depend on your network connection and the availability of your network drive, but you should see the drive appear in Finder and your Desktop within a few seconds of logging in to your OS X user account. If you ever want to stop your Mac from automatically connecting to a network drive, just head back to the Login Items tab in System Preferences, highlight the network drive, and click the minus button at the bottom of the list.
Disclaimer: Some pages on this site may include an affiliate link. This does not effect our editorial in any way.