Auto-forwarding is a useful tool to make sure you never miss an email wherever you might be. Forwarding is generally set by a rule configured in your main email address that tells the email server or your email client (such as Outlook) to automatically forward that email to another address. The server-level forwarding requires admin access, but to forward email using the Outlook client itself is easy for any Outlook user to do, assuming they can leave their computer running all the time with Outlook open.
This tutorial will cover how to automatically forward an email in Outlook 2013, 2016, Outlook.com, and Outlook 365.
Why You Might Need to Forward Emails
If you don’t have access to an email address at certain times, like a college or work email address, for example, you can set a rule in Outlook that will automatically forward any emails to your home email or other address. If you’re waiting for something important and don’t want to wait until the next day, email forwarding can help.
The installed versions of Microsoft Outlook, Outlook 2013, and Outlook 2016 can be configured within the client itself. Outlook 365 or installations that use an Exchange server will need the client to be running at all times. That means leaving your school or work PC on overnight with Outlook running. If you can do that, these techniques will work for you.
Automatically Forward an Email in Outlook 2013 and Outlook 2016
Despite being five years old now, Outlook 2013 is still the most popular email client in use. Many schools, colleges, and businesses still use it as upgrades are expensive and involve a lot of work. If you use it, here’s how to automatically forward an email in Outlook 2013. The same method also works for Outlook 2016, as the syntax is almost identical.
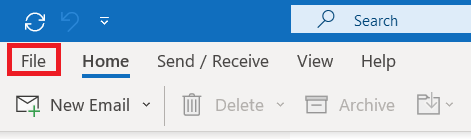
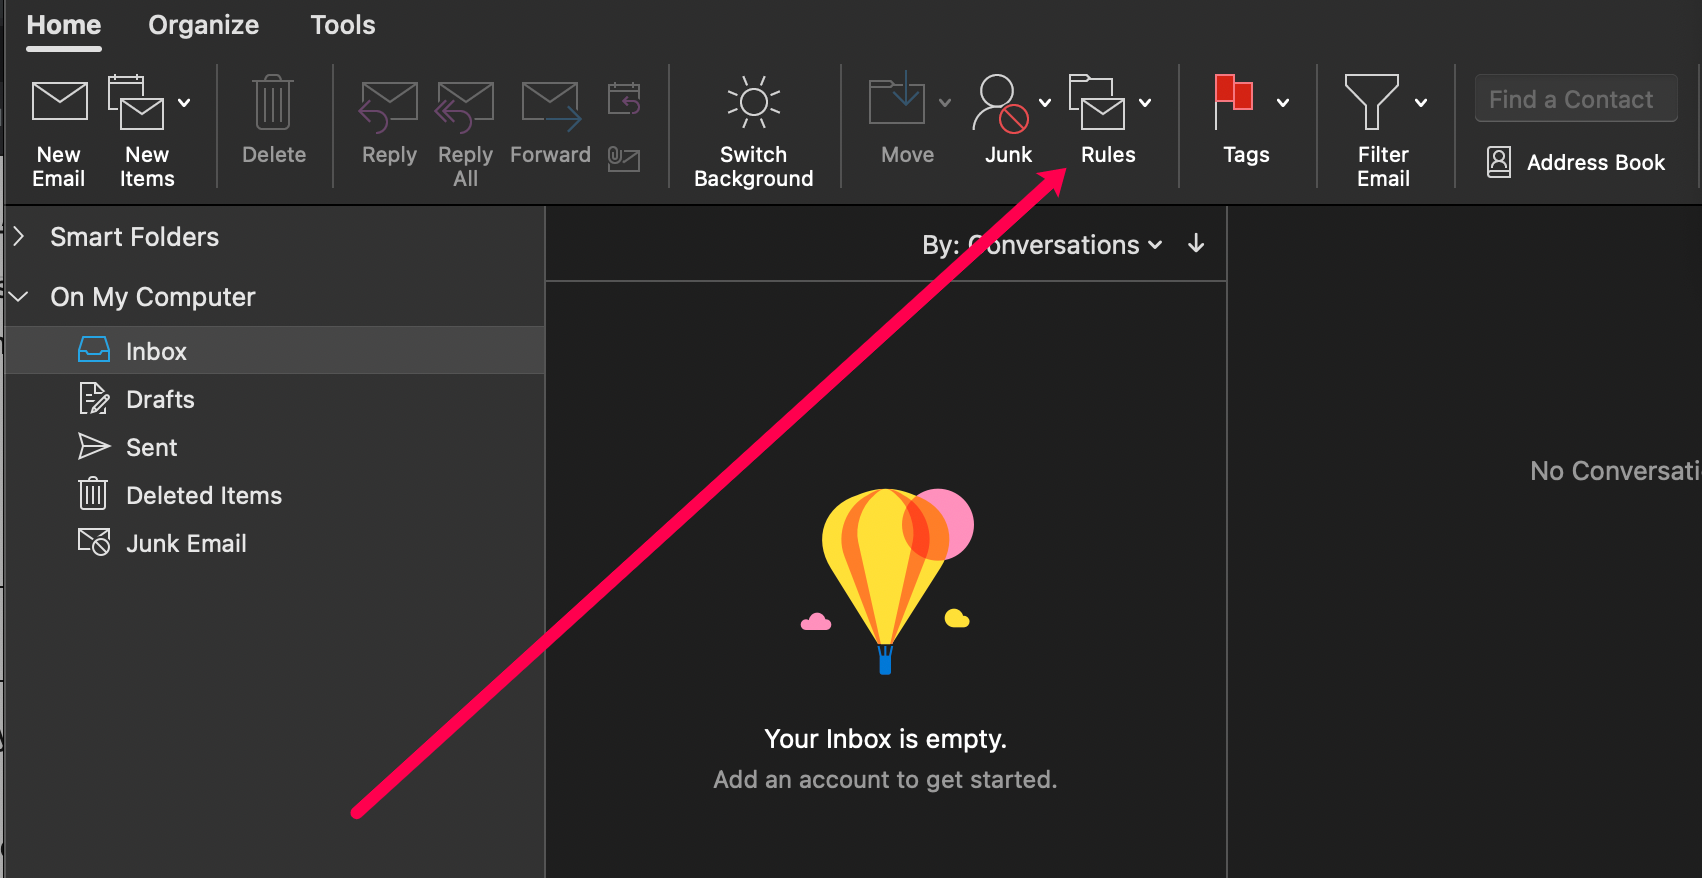
- Open Outlook and select File from the top menu on the left.
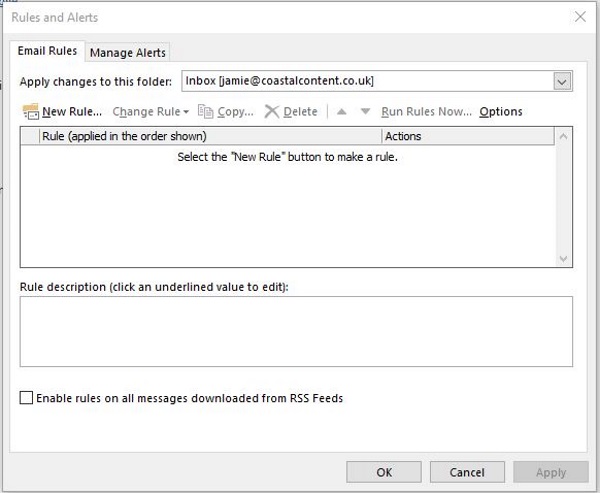
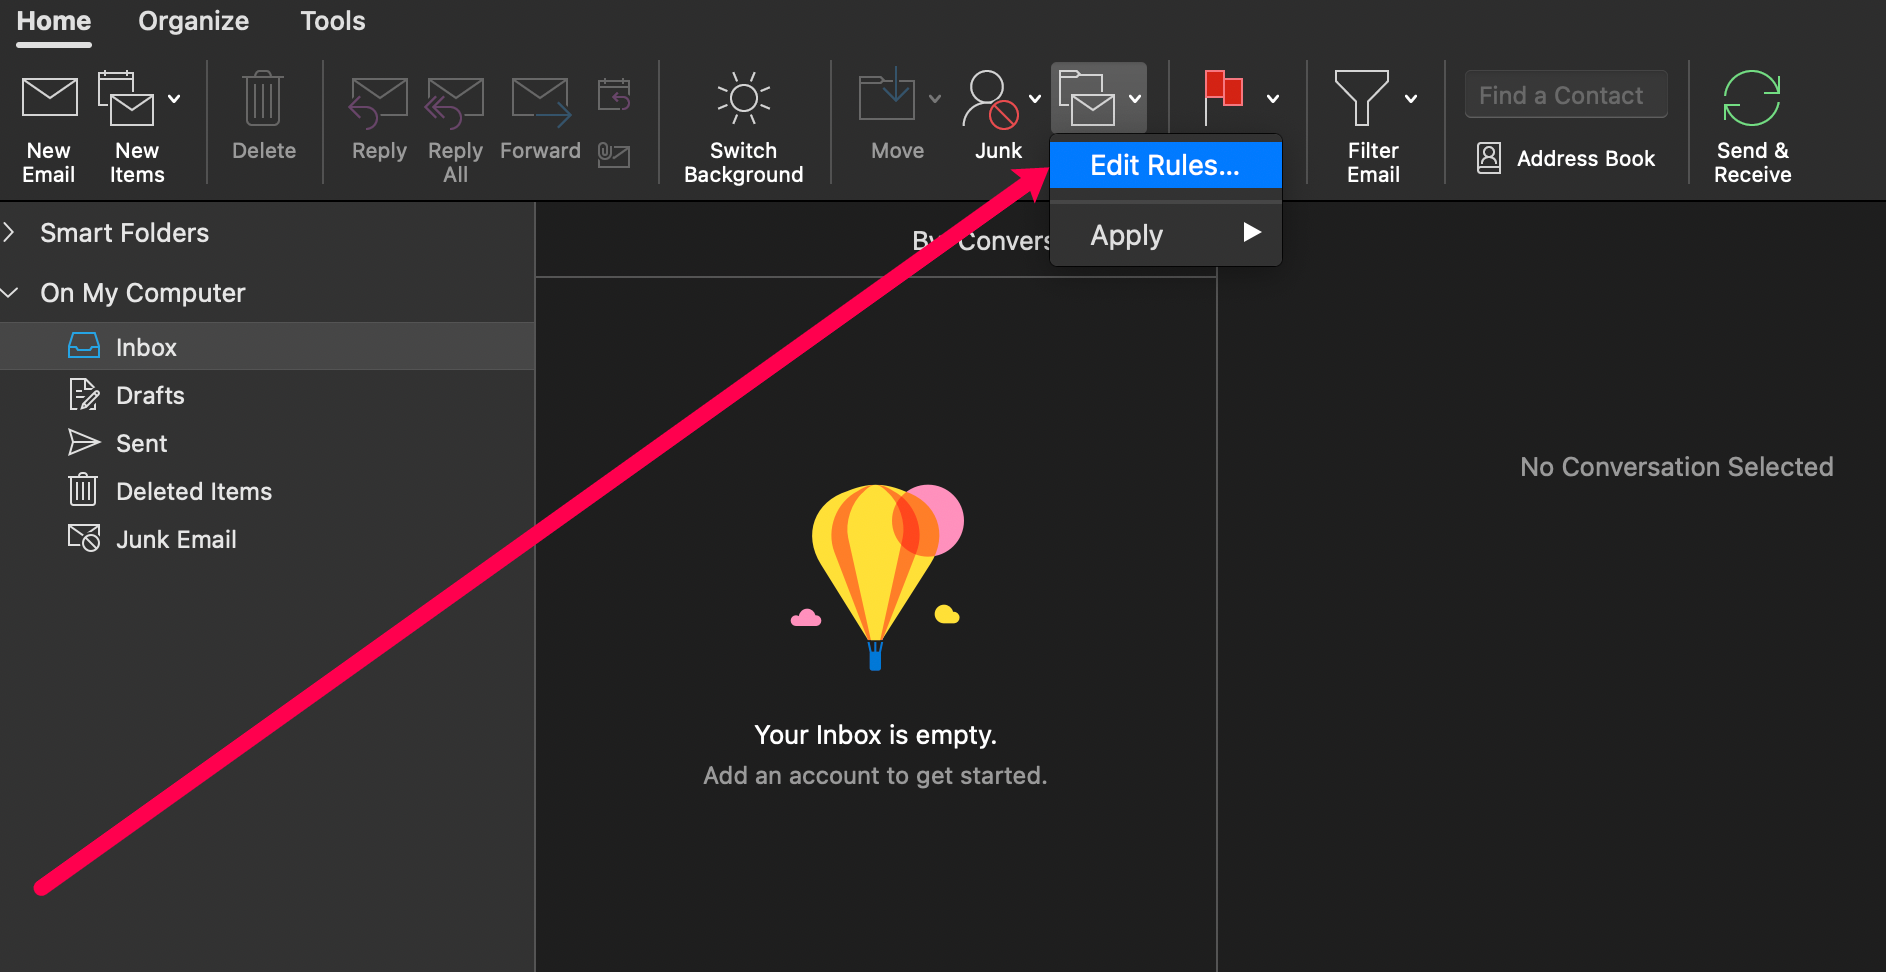
- Now, select Manage Rules & Alerts.

- Select the email address you want to apply the rule to if you have multiple addresses.
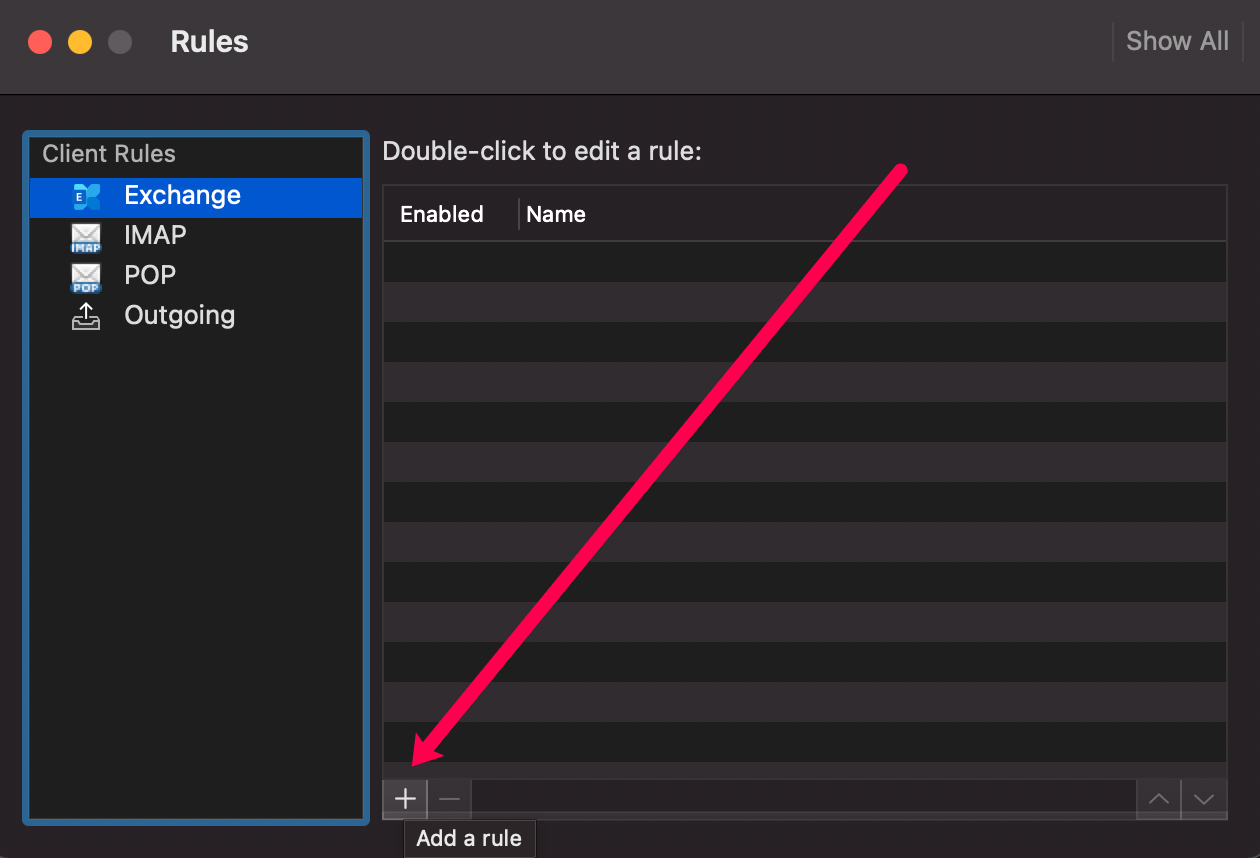
- Then select New Rule…
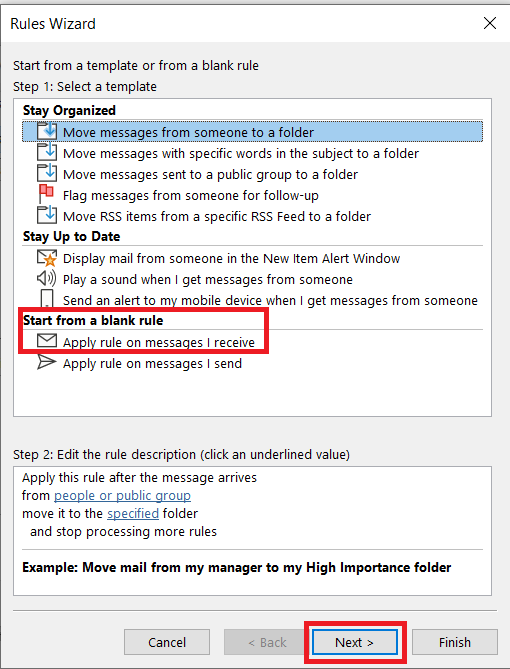
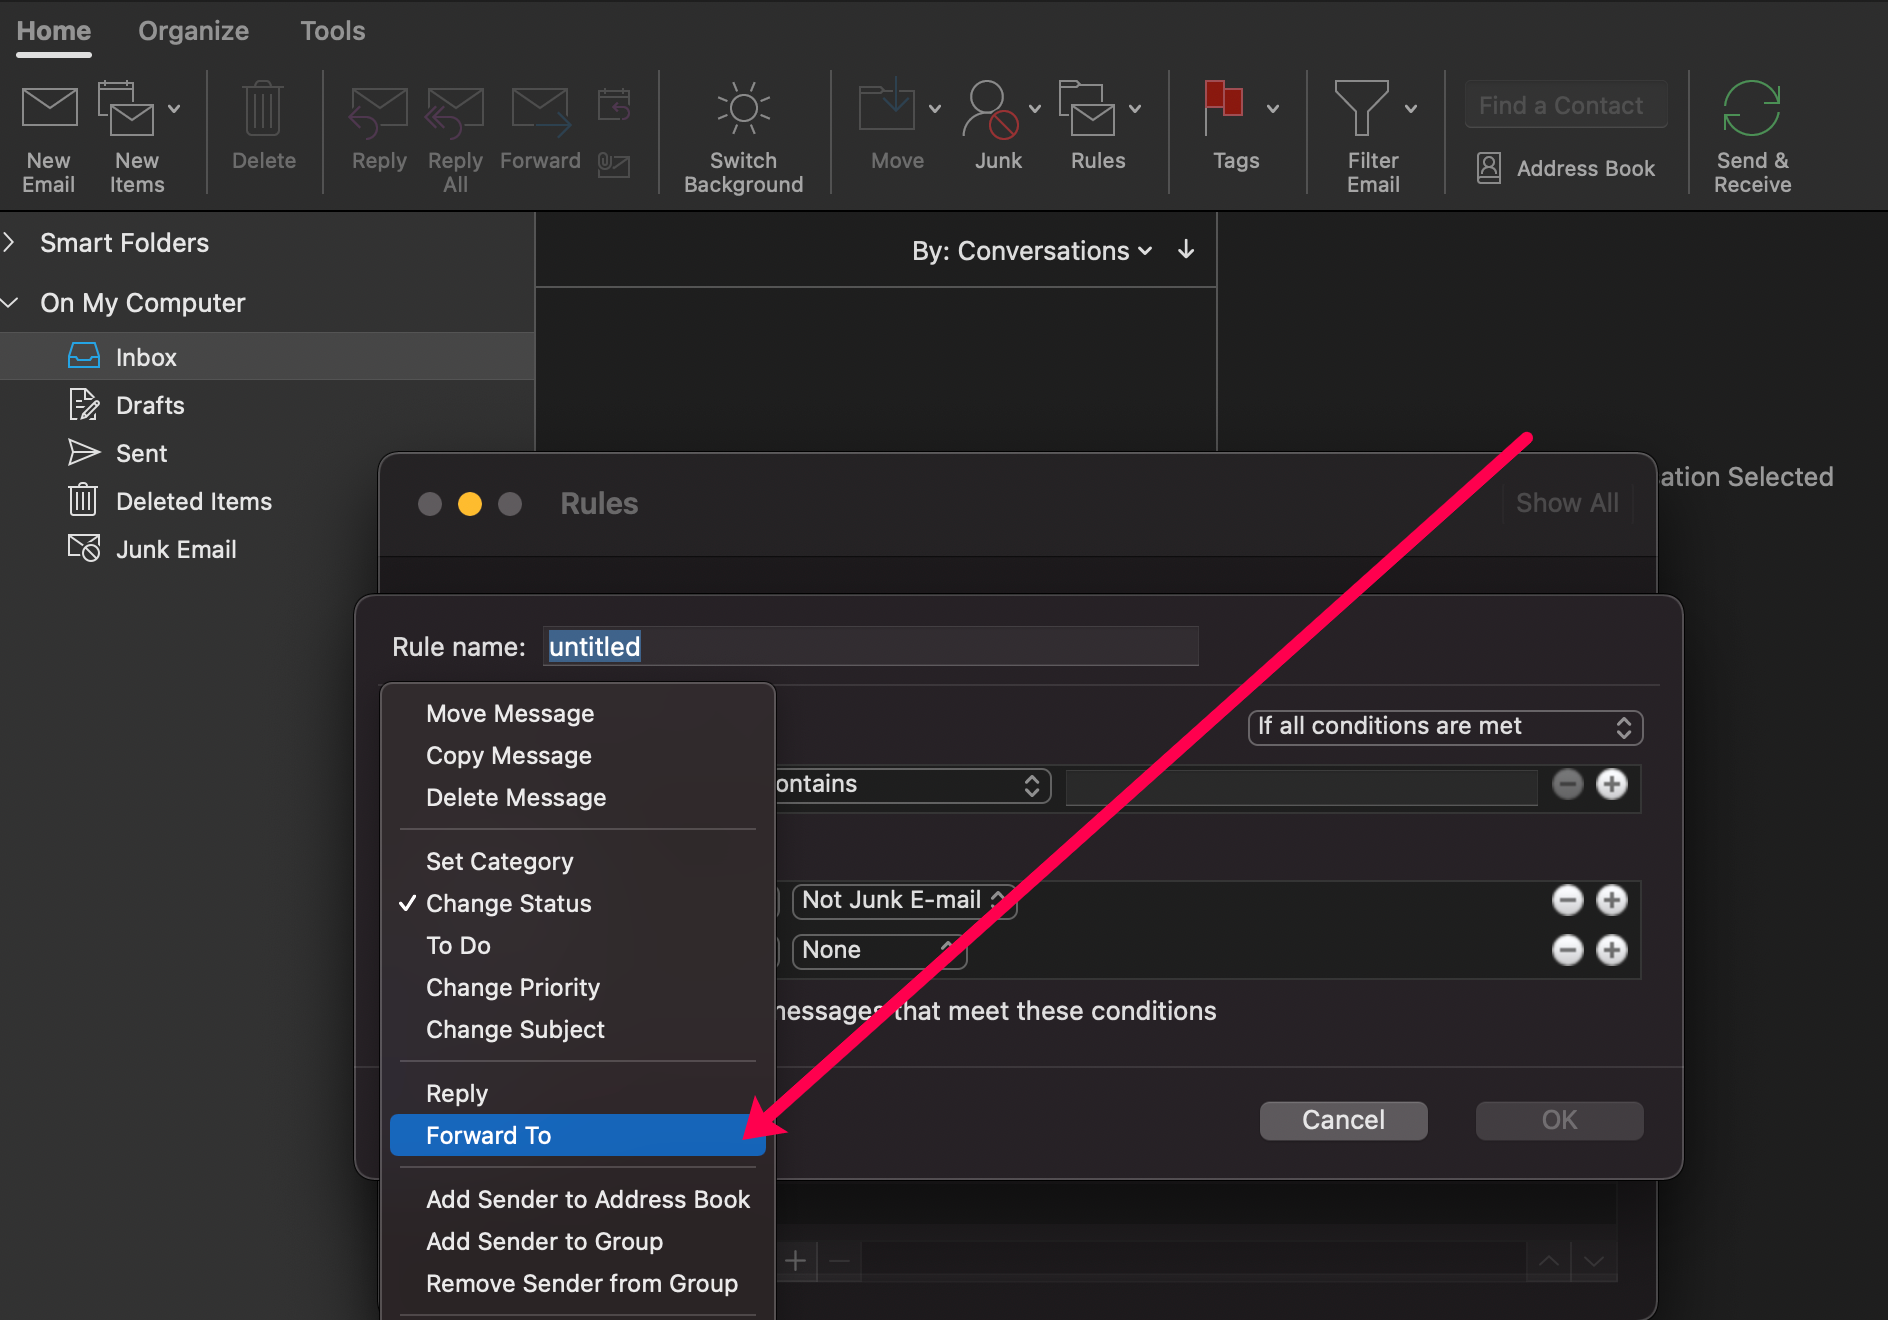
- Now, click on Start from a blank rule > Apply rule on messages I receive and then hit Next.
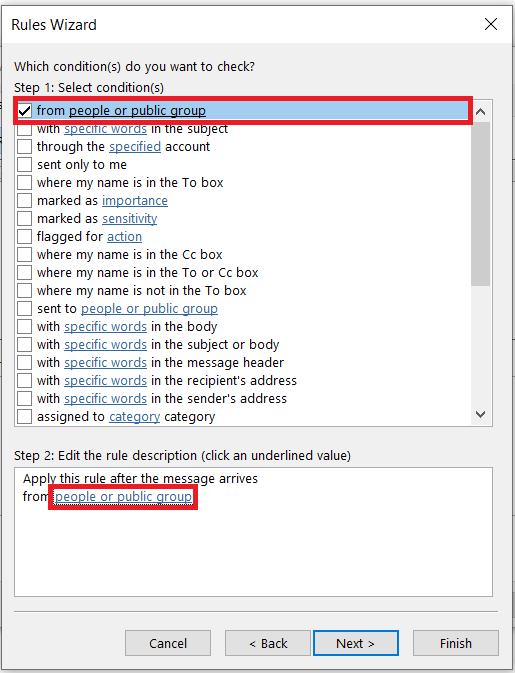
- Select your condition. Here you set whether you forward emails from certain people or only those marked as important or some other condition depending on your needs and then edit the rule description.
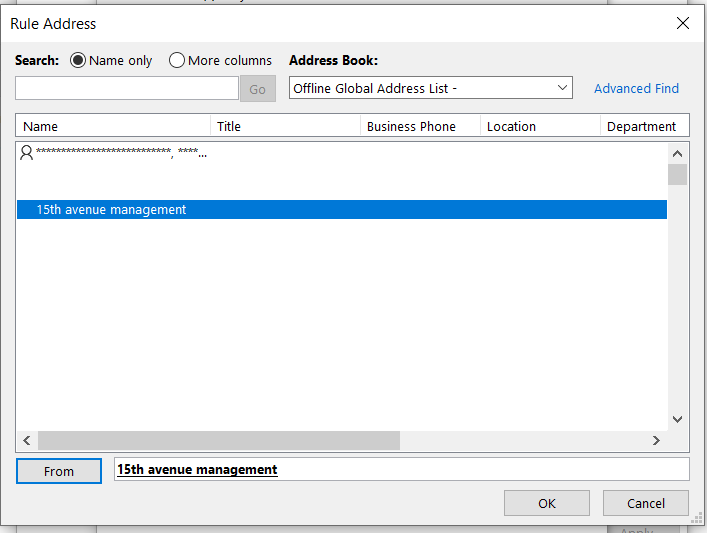
- Now, click on the emails you want to add the rule to and click OK.
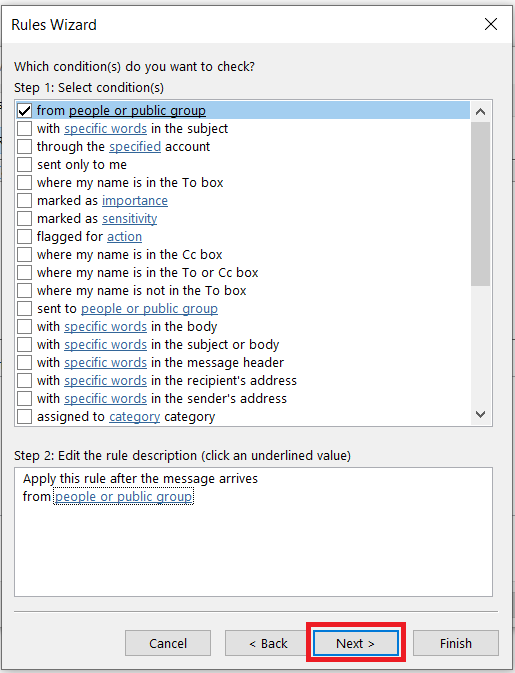
- Once you’ve edited the rule description, select Next >.
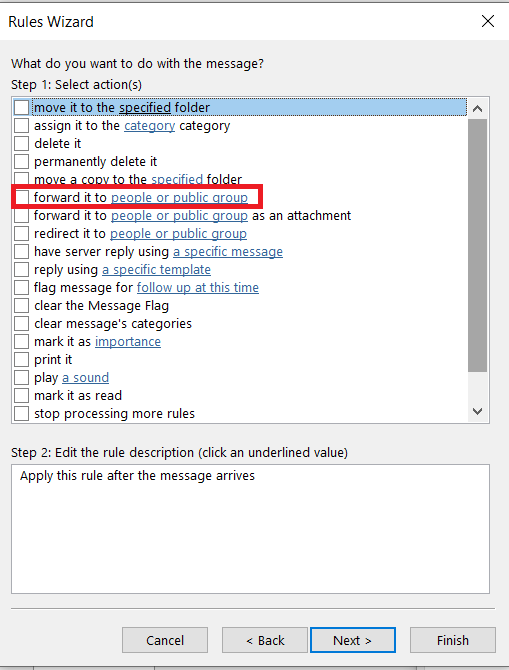
- Select the forward it to people or public group option in the next window. Select the link and add the email address of the email address you want emails forwarded to.
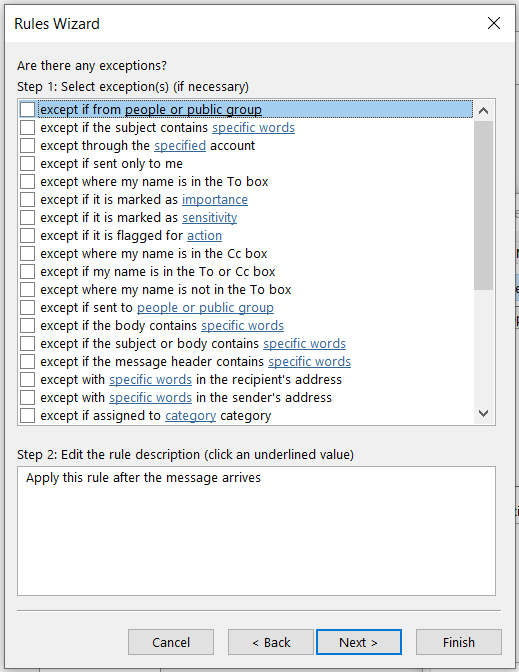
- Create an exception if necessary. This would exclude certain emails or spam from being forwarded.
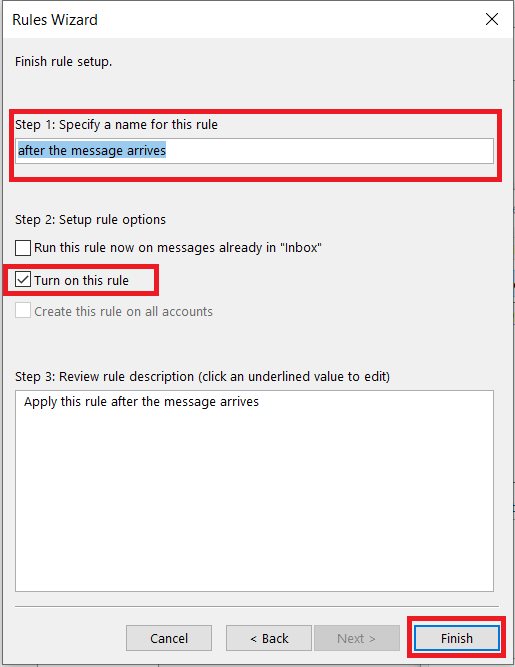
- Name your forwarding rule and select Turn on this rule when you’re ready.


Automatically Forward an Email in Outlook.com
Outlook.com is Microsoft’s free webmail service that used to be called Hotmail. It doesn’t use installed email clients or traditional Exchange servers. It is all online, so you can still forward emails.
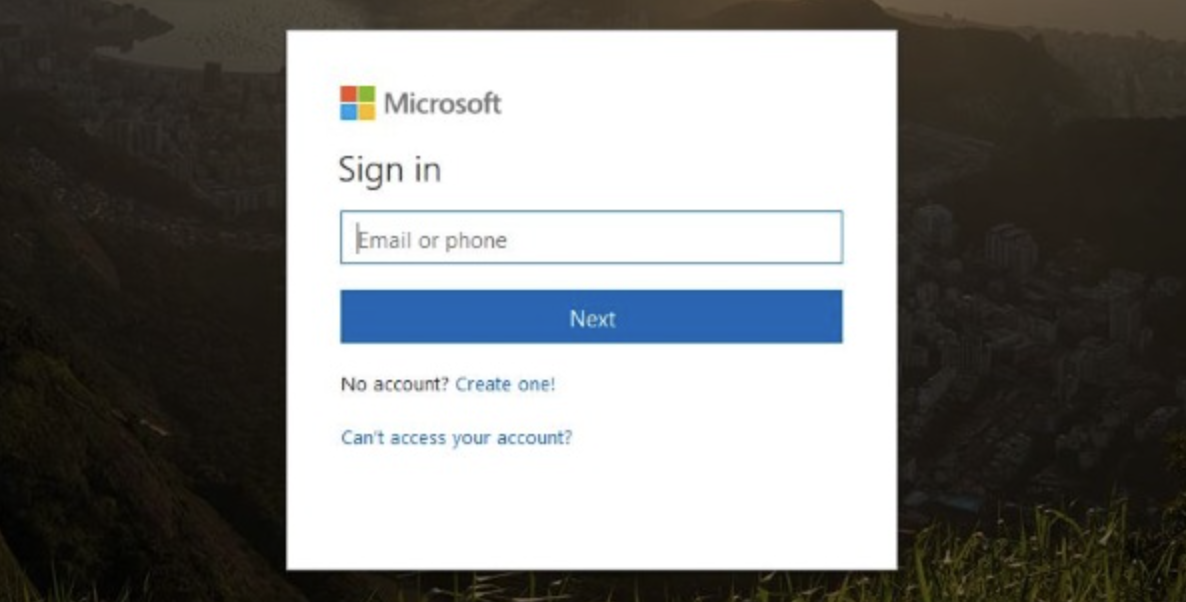
- Log into your email account at Outlook.com.
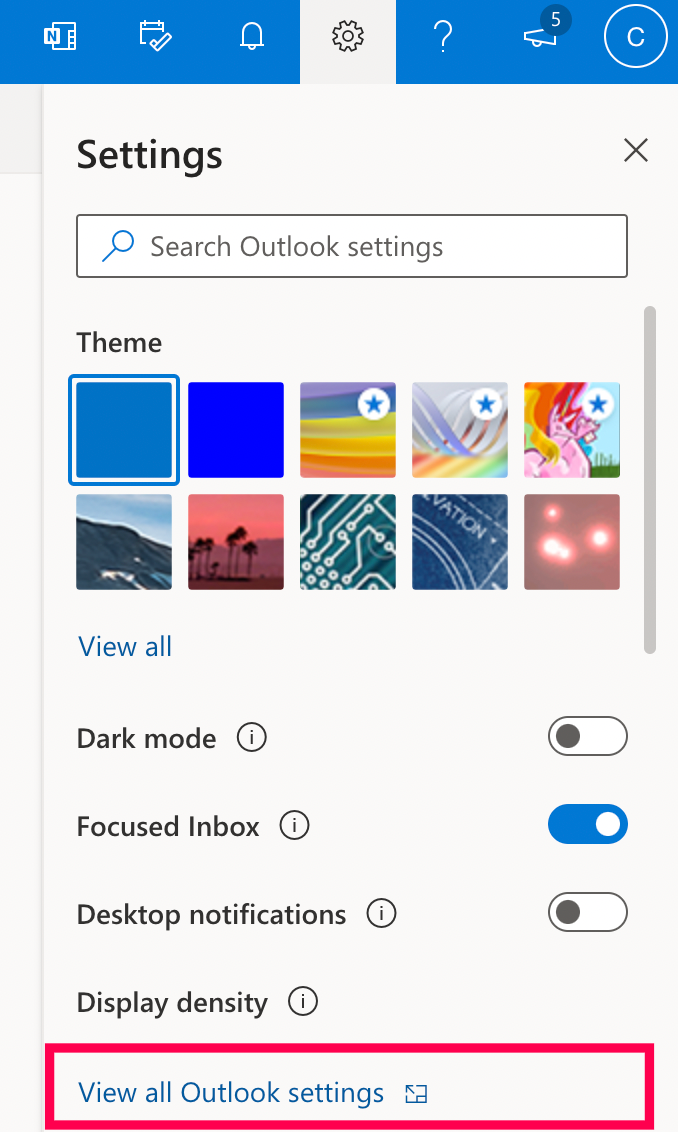
- Click on the Settings cog in the upper right corner.
- Select View all Outlook settings.
- Click on Forwarding and then set up your forwarding address.

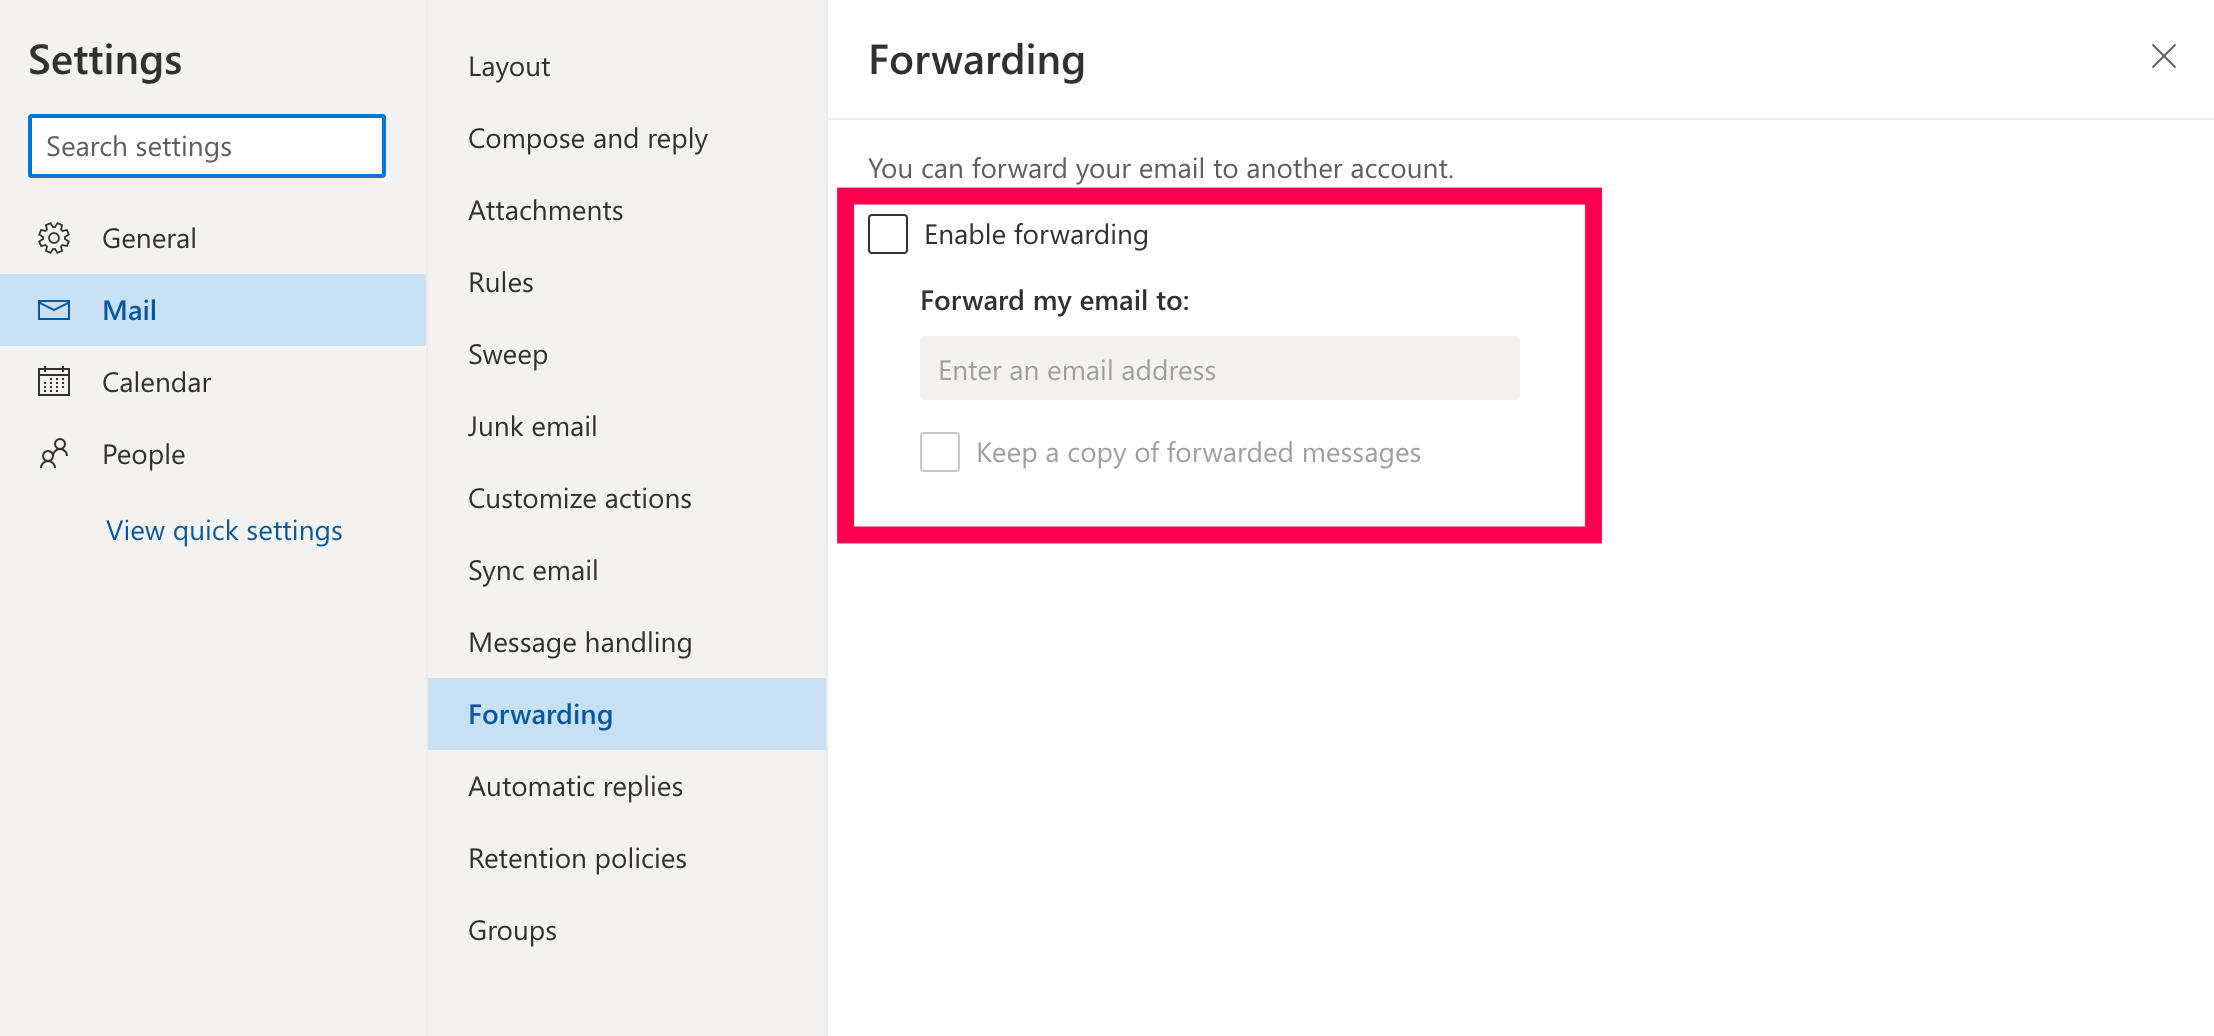
You cannot set the same kind of rules you can with Outlook 2013 and Outlook 2016, but this process gets the job done in Outlook.com.
Automatically Forward an Email in Outlook 365
Many businesses use Outlook 365 as it is online only and doesn’t involve the huge upfront license fees that installed versions of the office suite require. Outlook 365 is part of Office 365, which is the subscription-based version of Office, which includes Office applications in the cloud, including Outlook, Word, Excel, and so on. In addition, Office 365 includes email hosting, so you can host your domain name’s email using Office 365.
Cloud-based services such as Office 365 also have the advantage of allowing you to log on from anywhere to check your email. It also allows you to forward emails automatically should you wish to.
- Sign in to your Office 365 account.
- Click on Rules at the top.
- Click on Edit Rules.
- Click on the + symbol at the bottom. PC users may see Inbox rules, select that, then select New.
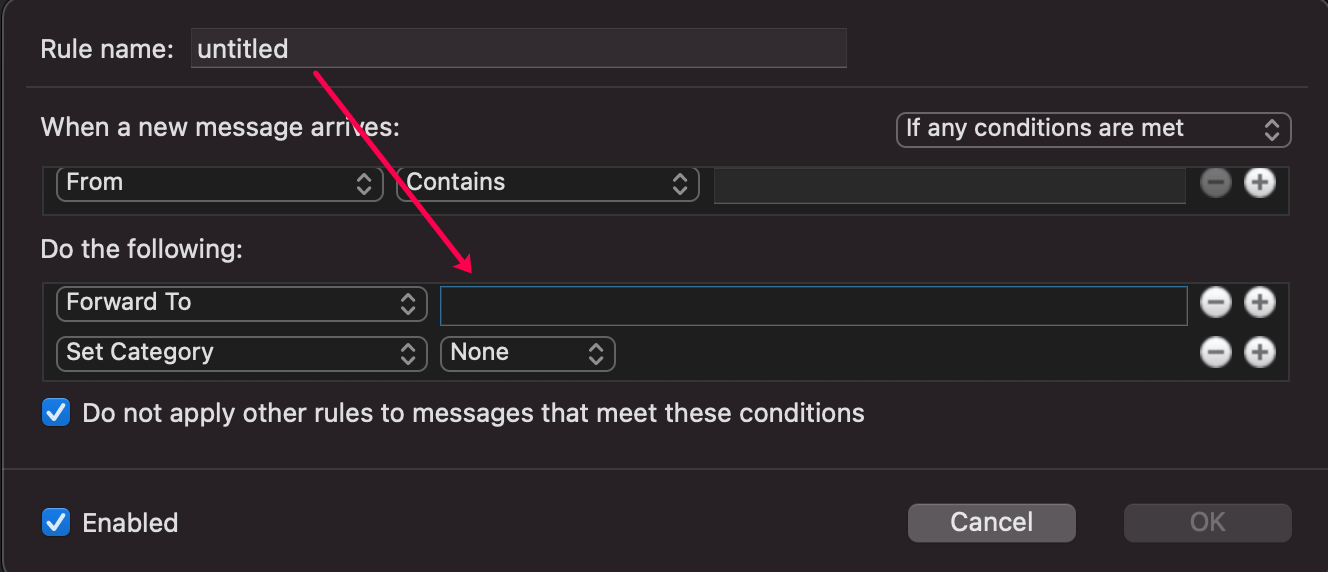
- Name your Rule, set the parameters, and then click Forward To.
- Enter the forwarding address and click Ok.
Outlook 365 differs depending on where in the world you are. In some installations, you would select Options and then Account and Connected Accounts.
In the same vein, not all Outlook 365 setups will require you to select Connected Accounts, but some do. Despite being a global product, different Outlook 365 suites look and act slightly differently.
If you need to turn off email forwarding, you just need to repeat the first steps in each process and deselect the rule. Once saved, forwarding should stop immediately.
Automatically Forwarding Emails with Outlook
Thankfully, automatically forwarding emails and setting up rules isn’t that complicated in Outlook. Regardless of if you’re using Outlook 2013, Outlook 2016, or Office 365, you’ll be auto-forwarding emails with a few clicks.
Do you have any tips or tricks for those who want to forward emails using Outlook? If so, please leave us a comment below!
Disclaimer: Some pages on this site may include an affiliate link. This does not effect our editorial in any way.