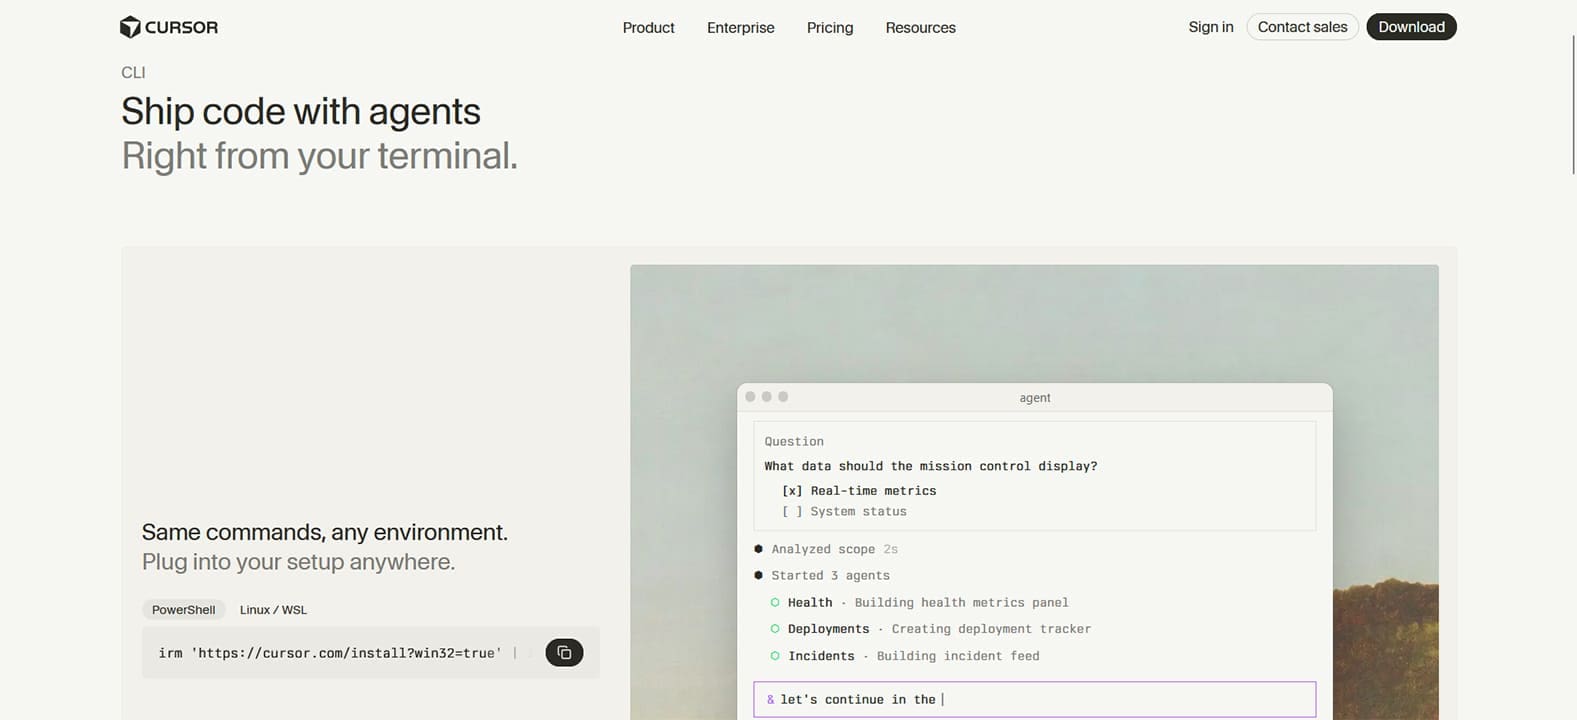
If you’re looking for a solid and reliable AI-powered coding assistant, then Cursor AI might be the partner for you. It’s GUI-based interface brings an LLM-powered coding terminal to your desktop, allowing for quite a lot: debugging, assistance, code generation, and more. In this article, we’ll be showing you how to download, install, and run Cursor AI code editor, Windows 11.
Downloading and Installing Cursor AI Code Editor (Windows)
Before you can use Cursor AI for coding, you have to download and install the code editor first. Cursor works from your desktop and not your browser. Here’s what you need to do:
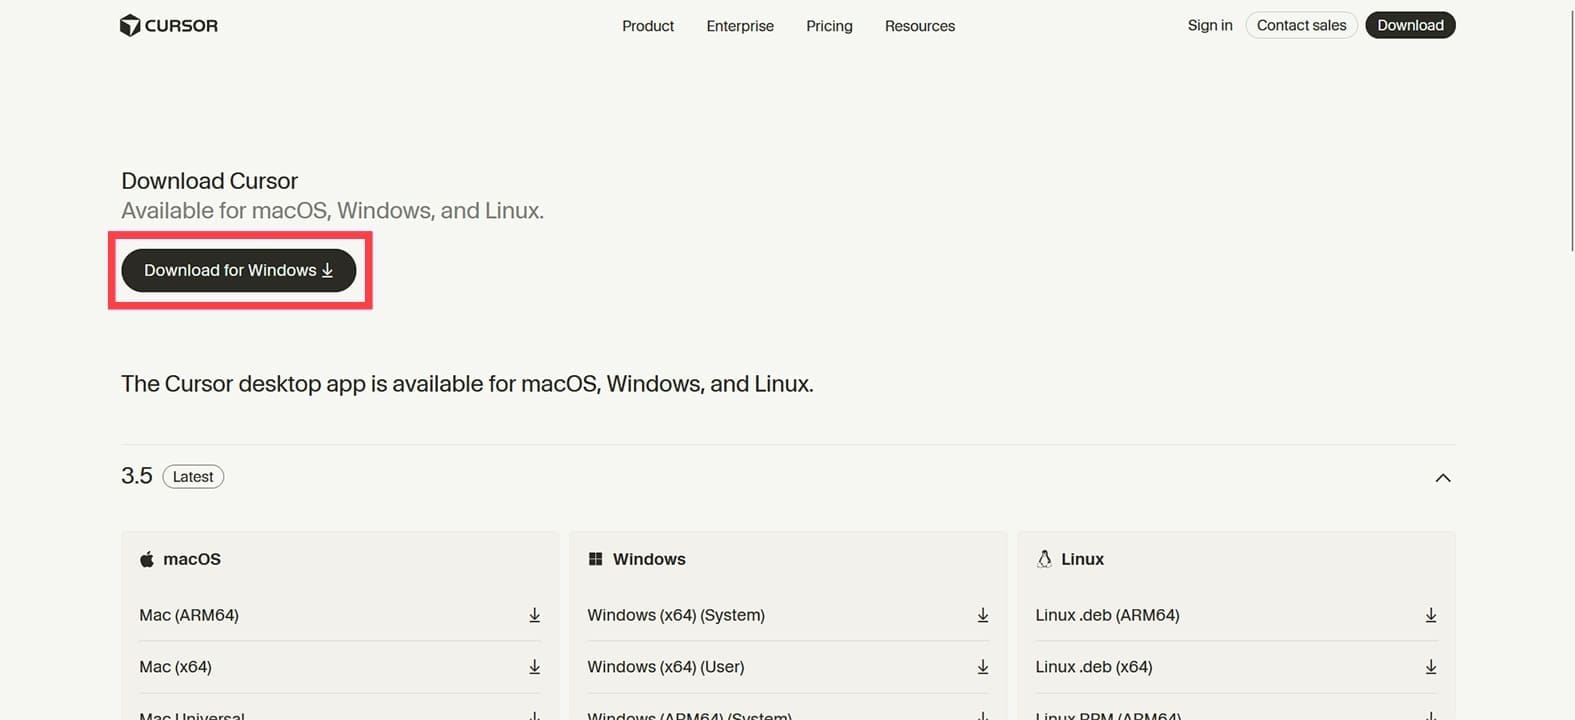
Step 1. You need to visit Cursor’s site and download the installer.
Step 2. Hit the “Download for Windows” button to begin the process.
Step 3. Once the file’s downloaded, either click on the file in Explorer or the link in the Downloads section of your browser.
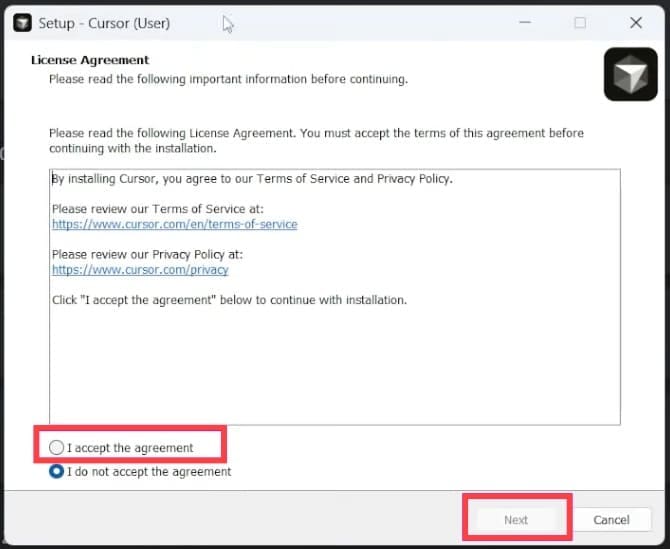
Step 4. Accept the licensing agreement and click “Next.”
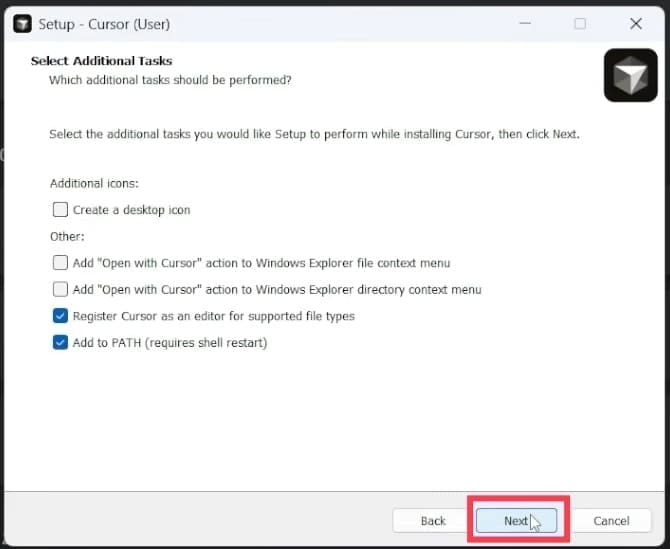
Step 5. Follow the extra installation steps. When you reach “Select Additional Tasks,” choose what extras you want before clicking “Next.”
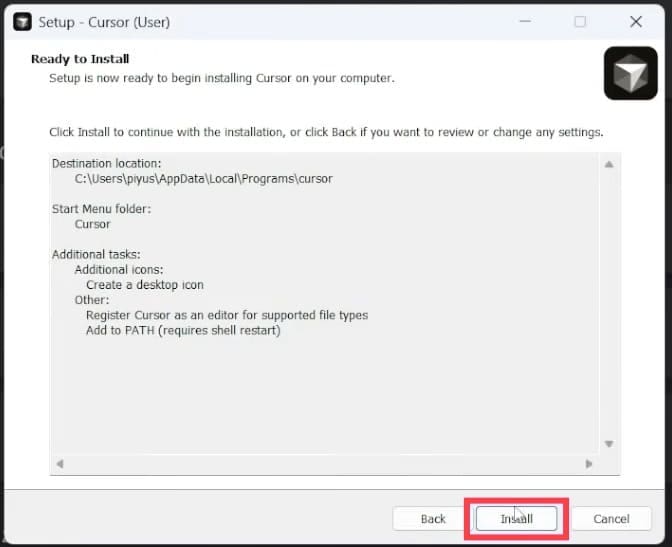
Step 6. Finally, click “Install” to begin the process.
Step 7. The editor will install. Once done, you’ll have the option to open the editor right away. Check “Launch Cursor” and click “Finish” if you want to.

Setting Up the Editor
Once installed and running, you still have to set up the Cursor’s code editor to be ready for use. Let’s look at how:
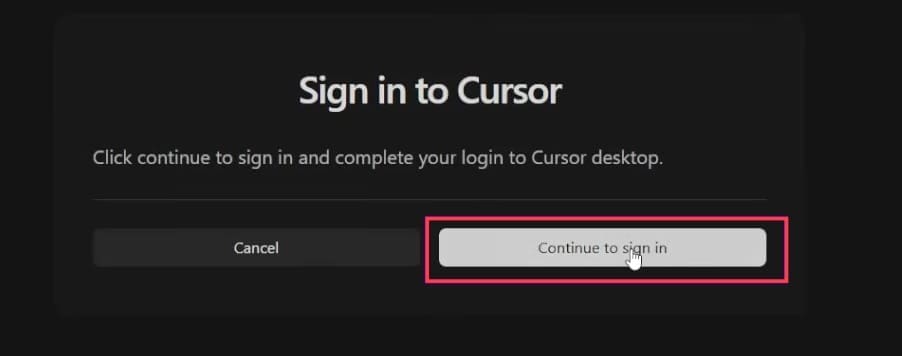
Step 1. When you open the editor, you’ll need to either sign up or log in. To do this, you’ll need to have an existing account with Cursor, which you can do via the editor or by going directly to the site.
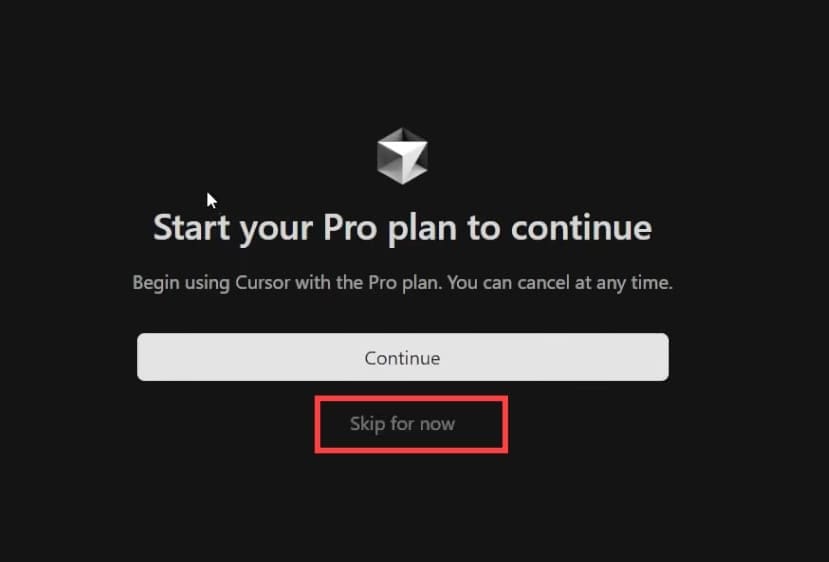
Step 2. It’s important to know that you don’t have to choose a paid plan right away. Cursor AI offers a free Hobby tier. When you come to the membership screen, click “Skip for now.”
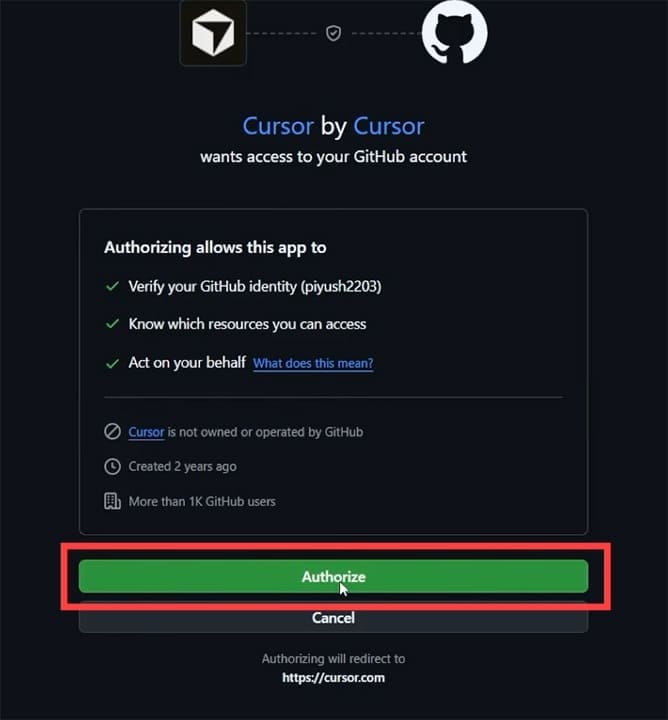
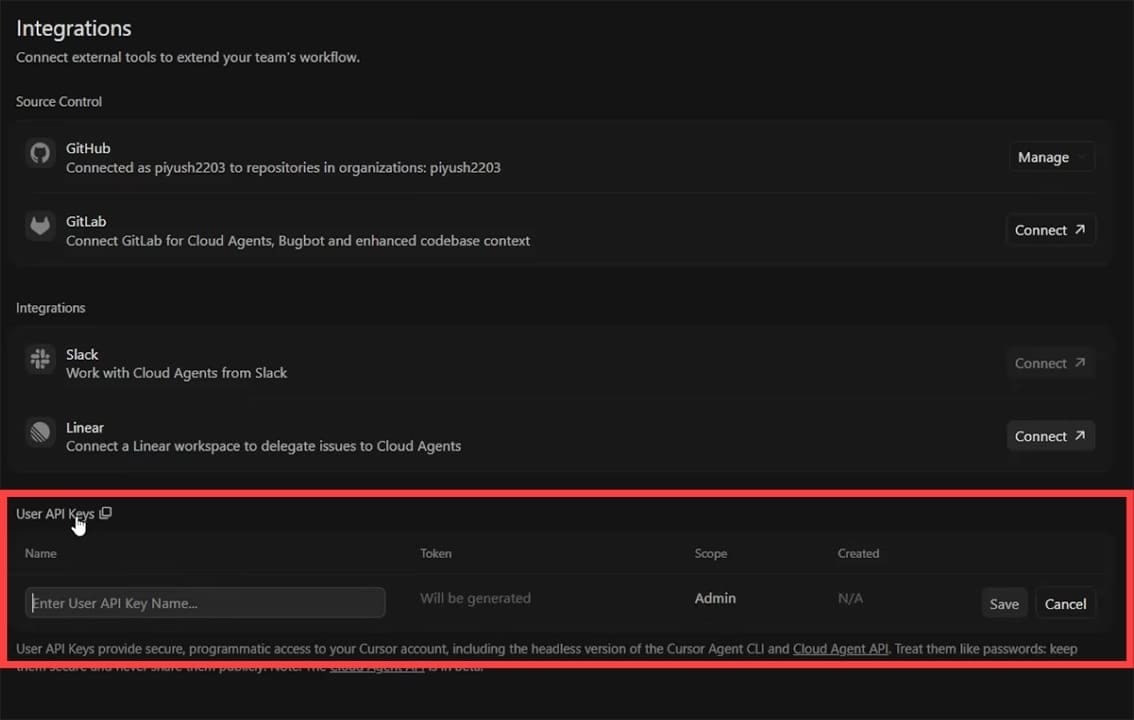
Step 3. If you’ve set up a GitHub account, you should also integrate it. Be sure to have it linked.
Step 4. Cursor comes with its own AI access, but if you want to integrate supported providers, you’ll need to enter your own API to work on cloud-based agents.
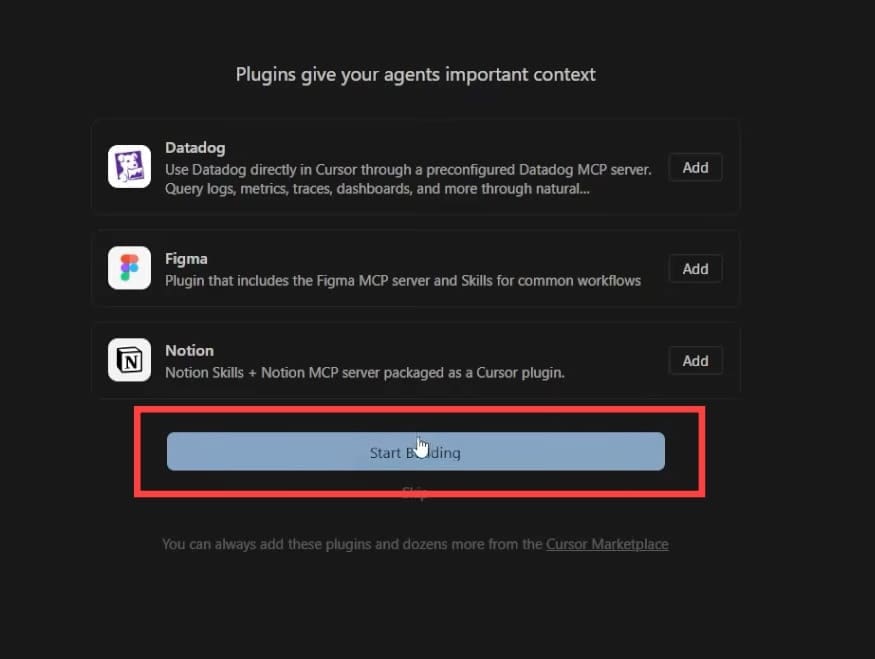
Step 5. Once you’re linked, you’re ready to go. Add any plugins and click “Start Building.”
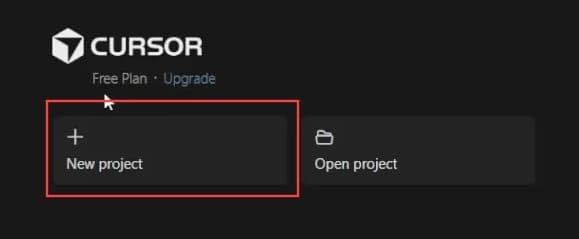
Step 6. Click “New Project,” and you’re ready to go.
Tips to Get You Started

Now everything’s set up, you’re ready to code. Just like with any tool, shortcuts are your friend. Cursor AI has its own fair share of them. Let’s take a look:
- Agent chat – In the right-hand section of the screen, you’ll see your AI chat assistant. Like any LLM, type in queries, paste code, or whatever you need assistance with. Click the “Agent” dropdown to choose the LLM.
- Autocomplete – The AI will offer assistance as you type with suggestions. Press (Tab) to add them in as they pop up.
- Generate code – To quickly put generated code in your existing file, click anywhere and hit (Ctrl + K). Type what you want, and the AI will do the rest.
Related Posts
 How to Use Cursor AI Code Editor
 How to Use ChatGPT for Research – Quick Guide
 Common Cursor AI Errors in Windows 11 and How to Fix Them
 Minecraft GPT – What You Need to Know About the AI-Powered Minecraft Guide
 What Is Google Vids – A Complete Guide to the New AI-Powered App in Google Workspace
 Visual Studio Code vs. Notepad++ vs. Sublime Text vs. Atom: Which Is the Better Notepad Upgrade
 How AI-Powered Code Assistants Changed Software Development
 What to Do When You Can’t Run Claude From VS Code
 Windows 11 Is Becoming More Powered by AI Than Ever – What to Expect
Disclaimer: Some pages on this site may include an affiliate link. This does not effect our editorial in any way.