Are you sick of manually sending emails? Does the thought of going through bulk emails make your stomach turn? If your answer is yes, then read on.
Understanding auto-forwarding ensures that you never miss a single email, no matter where you are or what you’re doing.
In this article, we’ll be discussing the ins and outs of automatic email forwarding depending on your chosen device and mail application.
Take a look to find out more.
How to Automatically Forward Emails in Outlook on a Mobile Device
Knowing how to automatically forward an email to your smartphone can save you a lot of time. You might be away on vacation and don’t want to deal with the hassle of manual forwarding. Or perhaps you’re looking to reach out to a wider business audience and are looking to speed up the process.
Whatever your reason may be, setting up auto-forwarding on your phone can be very useful. However, you won’t be able to set up auto-forwarding on Outlook directly from your mobile device. Instead, you can do this by logging in to your desktop Outlook account and altering your auto-forwarding settings. This will automatically connect to your mobile device as well.
Here’s how to do it:
- Sign in to your Outlook account on your desktop.

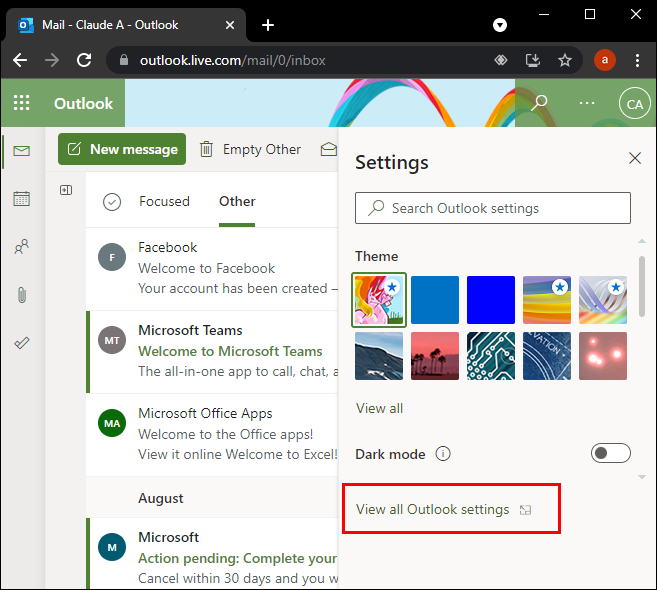
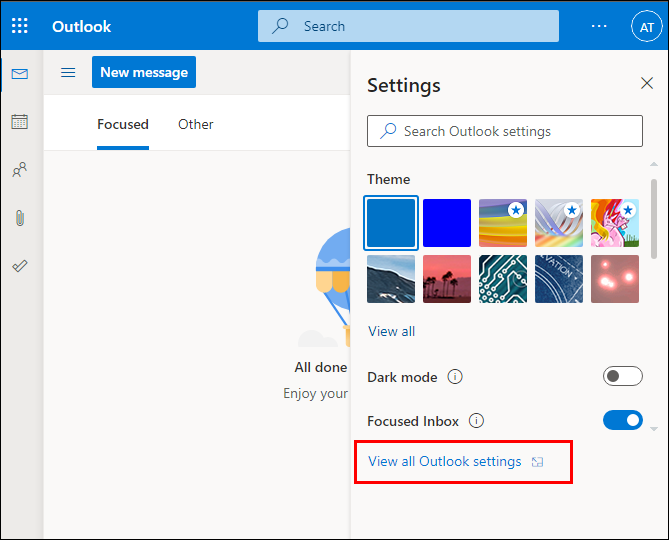
- Select “Settings” located at the top of the page and then “View all Outlook Settings.”

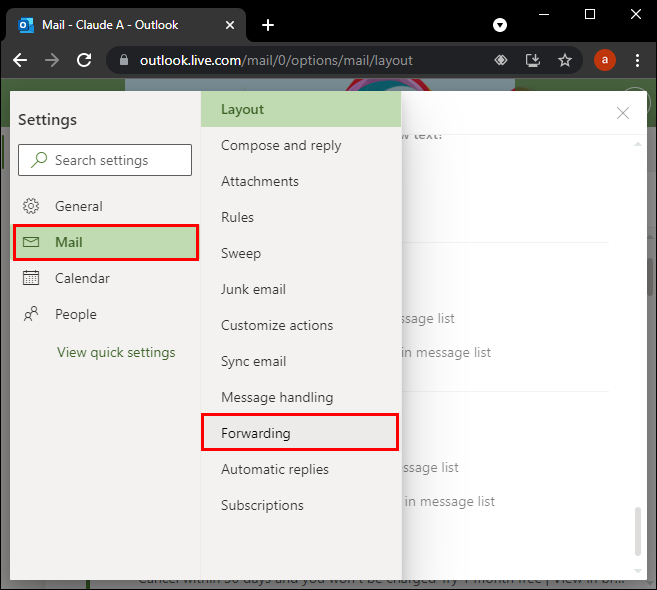
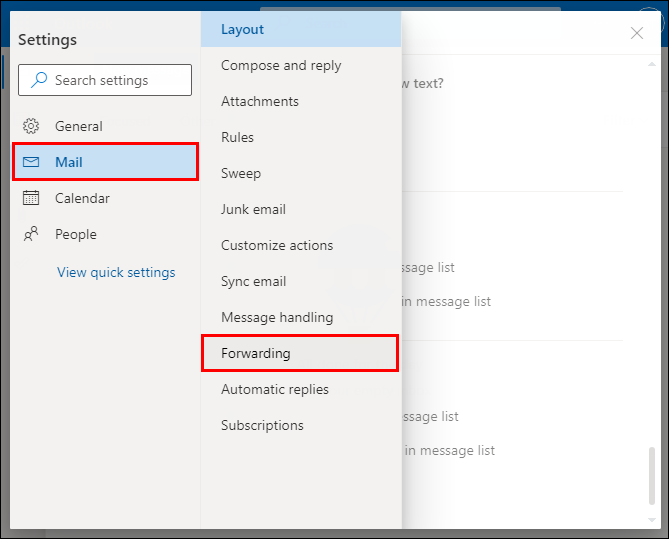
- Press “Mail” then “Forwarding.”
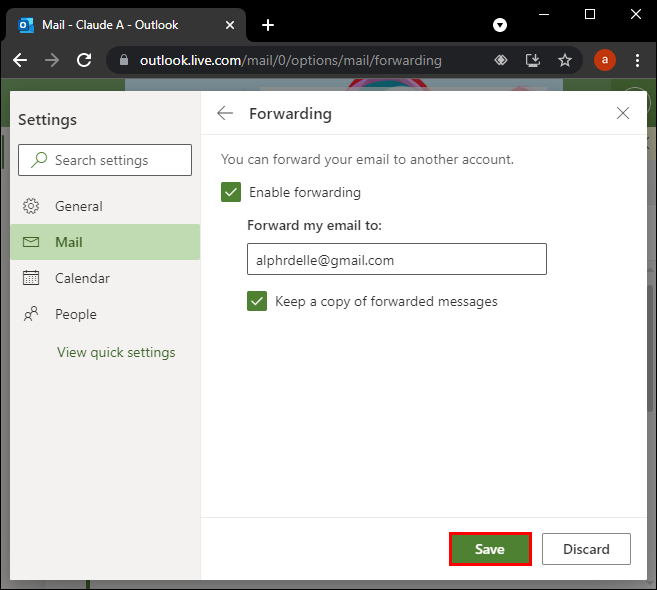
- Click “Start Forwarding” and select “Save.”
Once you have completed these steps, auto-forwarding should now be available on your Outlook account on your mobile device.
How to Automatically Forward Emails on a PC
Depending on your email account, activating automatic forwarding from a PC is a relatively simple process. Here is a guide on how to do it, depending on your chosen account.
Gmail:
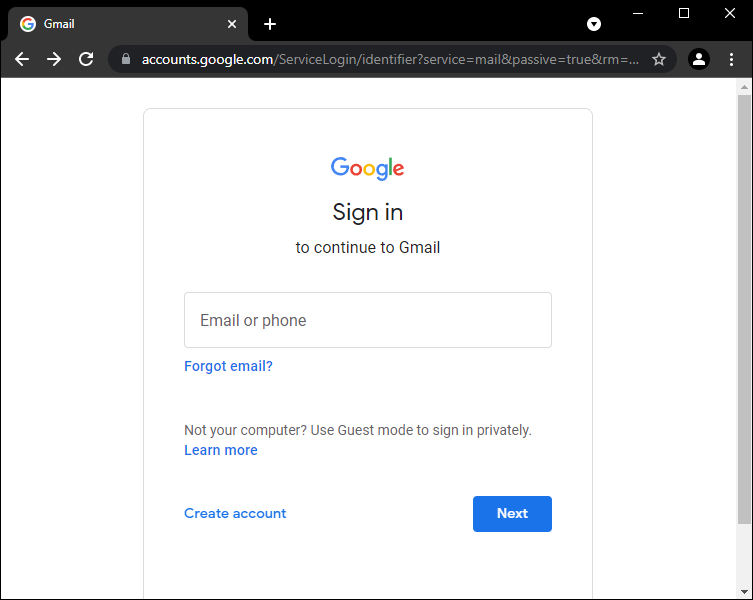
- From your desktop, open your Gmail account. Note that you can only forward messages to a single Gmail address.
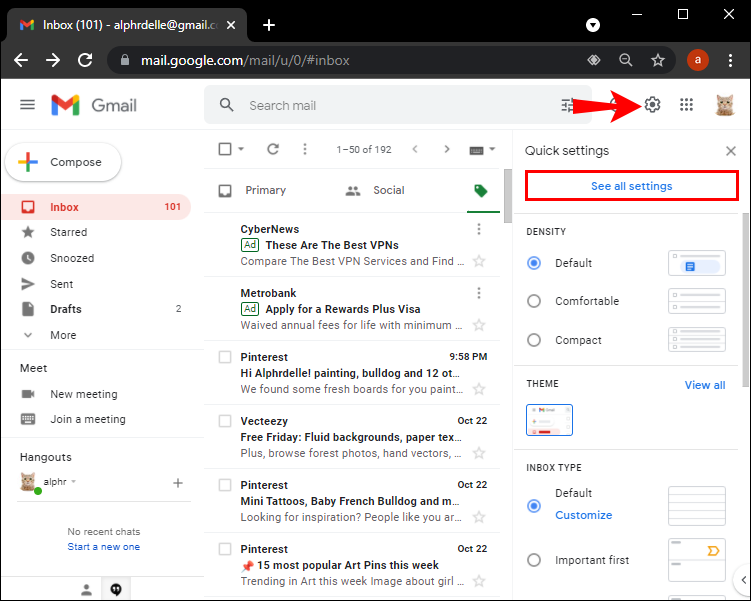
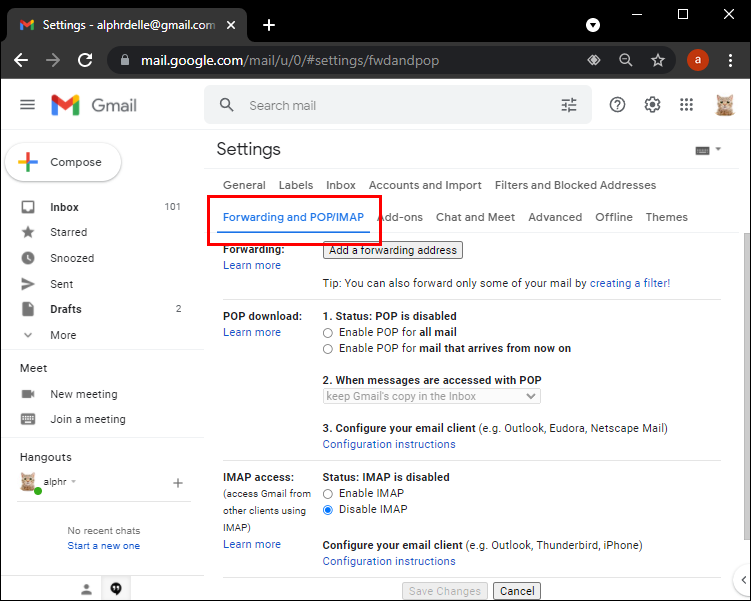
- Click “Settings” then “See All Settings.”
- Hit the “Forwarding and POP/IMAP” tab.
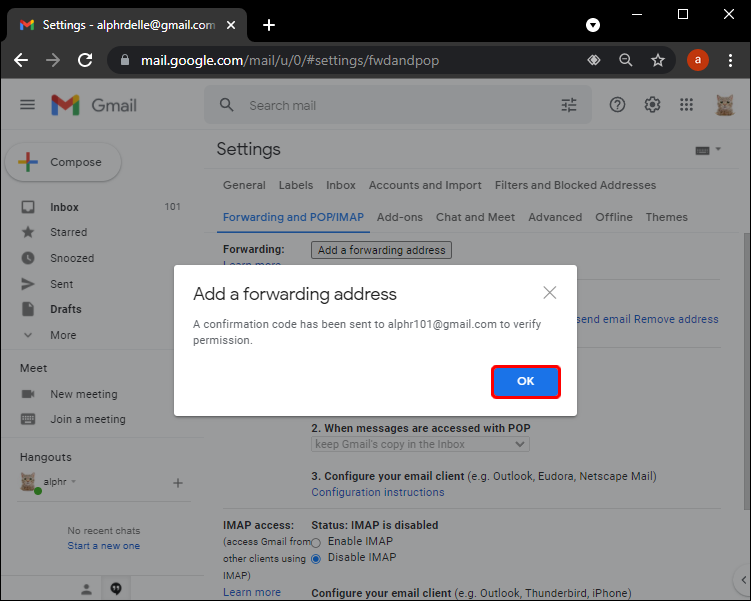
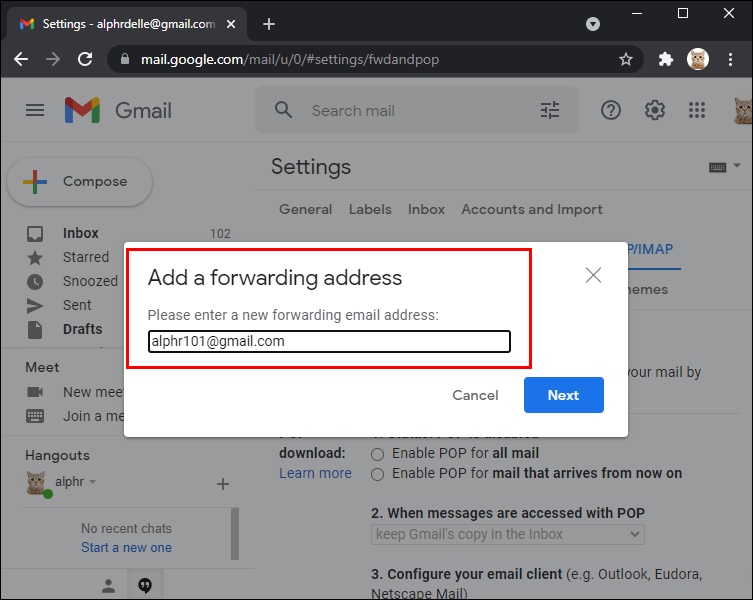
- In the “Forwarding” section, press “Add a Forwarding Address.”
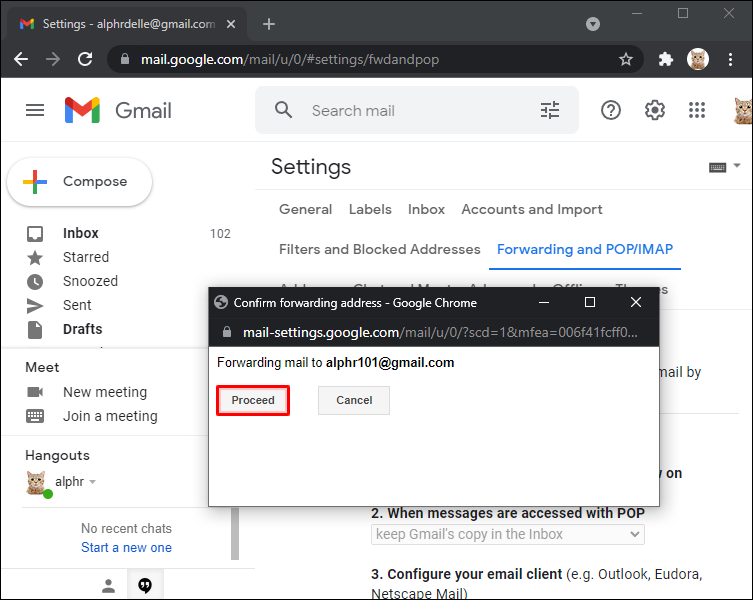
- Click “Next,” then “Proceed,” and “OK.”
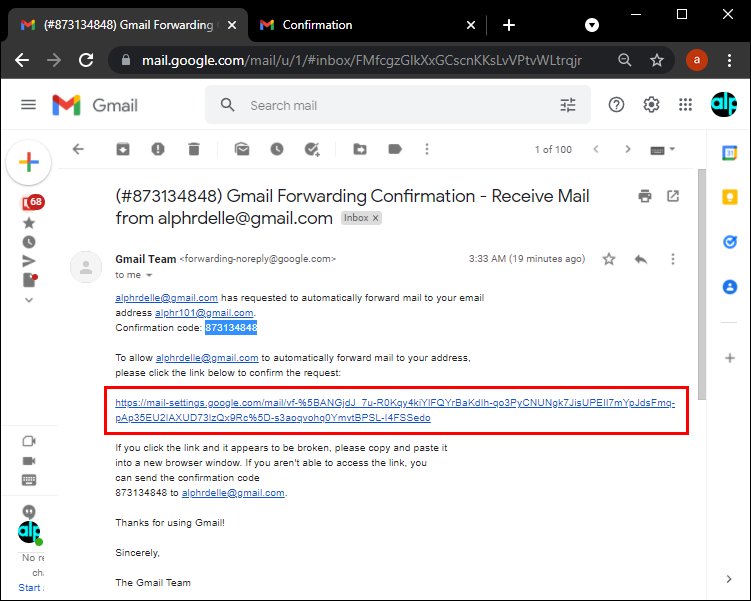
- Select the verification link sent to your email and refresh the browser.
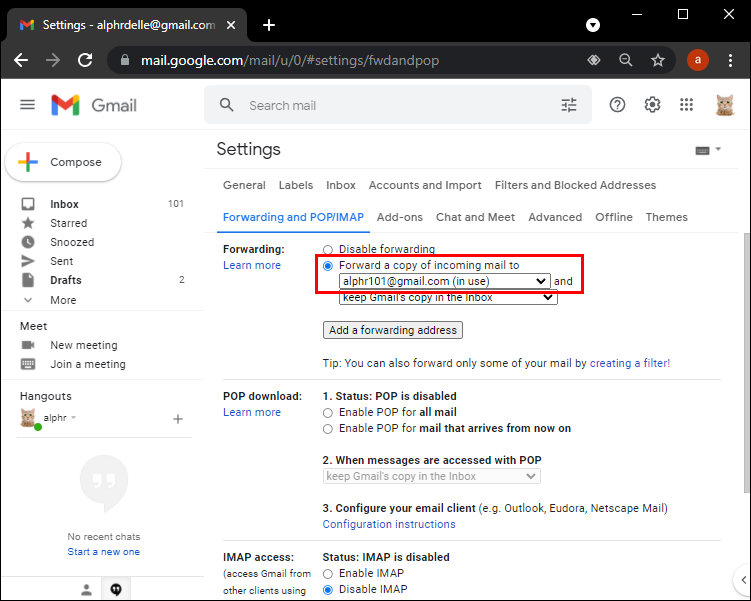
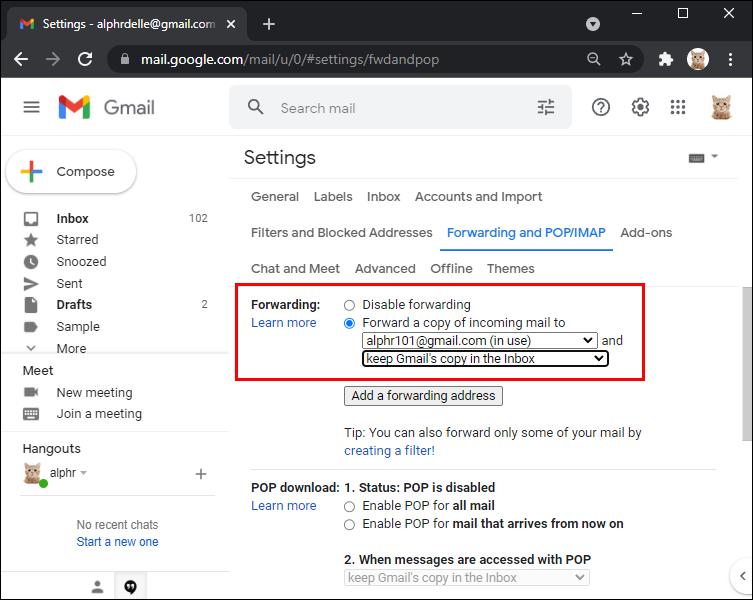
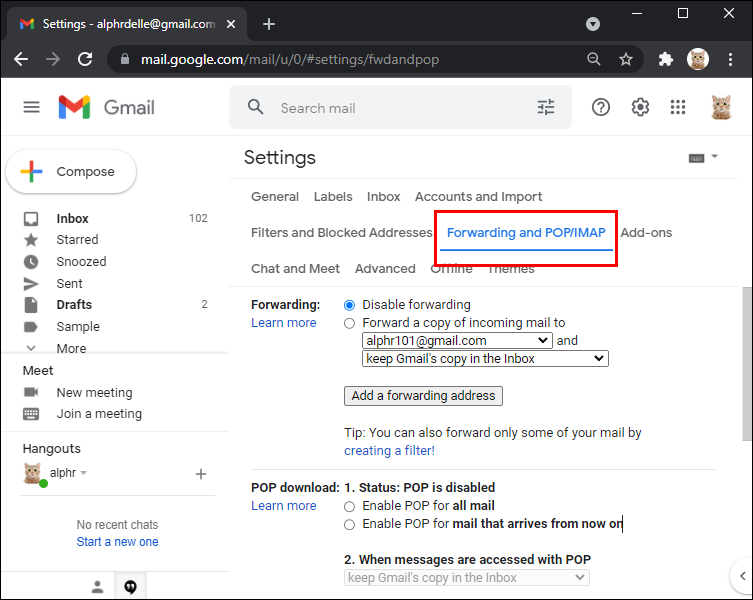
- Click on “Forwarding and POP/IMAP” again, and select “Forward a Copy of Incoming Emails To.”
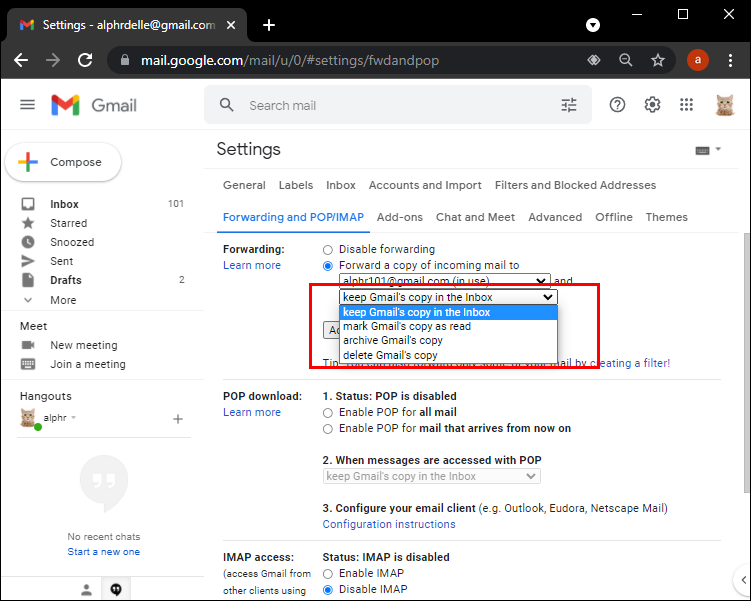
- Choose an option for the Gmail copy of your emails.
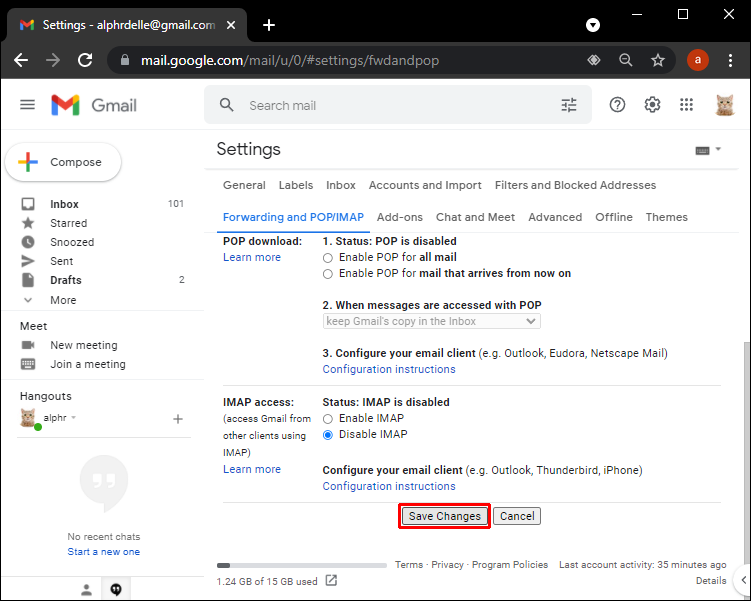
- Save changes.


Windows Mail:
- Open “Windows Live Mail.”
- Select the “Folders” tab, then click “Message Rules.”
- Go to “Email Rules” and select “New.”
- Under the “Select One or More Actions” window, mark “Forward It to People.”
- Where it says “To Edit This Condition,” click the “Underlined Words” option then “Contacts.”
- Find and select your other email address and hit “OK.”
Outlook:
- Sign in to your Outlook account on your PC.
- Select “Settings” located at the top of the page and then “View all Outlook Settings.”
- Press “Mail” then “Forwarding.”
- Click “Start Forwarding” and select “Save.”

How to Automatically Forward Emails From a Specific Sender in Outlook?
Outlook 2013 is perhaps the most popular free email service in use, especially for businesses.
To automatically forward emails from a specific sender, you’ll need to create some rules. The following method will guide you in this process:
- In “Mail,” click “Home,” then click “Rules.”
- Go to “Manage Rules and Alerts.”
- Select “New Rule” on the “Email Rules” tab, taking you to the “Rules Wizard.”
- Once you’re in the “Rules Wizard,” select “Apply Rule on Messages I Received” and click “Next.”
- Tick the “Forward to People or Public Group” option.
- In the “Rule Address” box, type the recipients’ email addresses.
- Click “OK” and then “Next.”
- Type a name for the new rule in the “Step 1” box and check “Turn on This Rule.”
- Click Finish.
How to Automatically Forward Emails in Gmail on a Mobile Device
Setting up automatic forwarding is a convenient way of passing on incoming messages from your Gmail account to a different address.
Unfortunately, you will only be able to switch on auto-forwarding via accessing Gmail on your desktop and not directly from your mobile device. However, once you’ve enabled the feature, it will automatically work on your mobile as well. You will receive a notice in your inbox for the first week after switching on automatic forwarding as a reminder that the function is switched on. Here’s how to do it:
- Open your Gmail account in a browser.
- Select the gear icon located in the top-right corner, then click “See All Settings.”
- Press the “Forwarding and POP/IMAP’ tab.
- Click “Add a Forwarding Address.”
- Enter the email address you wish to forward messages to, click “Enter,” then close “Settings.”
- Go to your “Inbox,” and confirm the action and return to your Gmail account.
- Go back to “See all Settings,” then select “Forwarding and Pop/IMAP.”
- Click “Forward a Copy of Incoming Mail To,” and select the outcome of your email in the drop-down menu.
- Save the changes you have made.


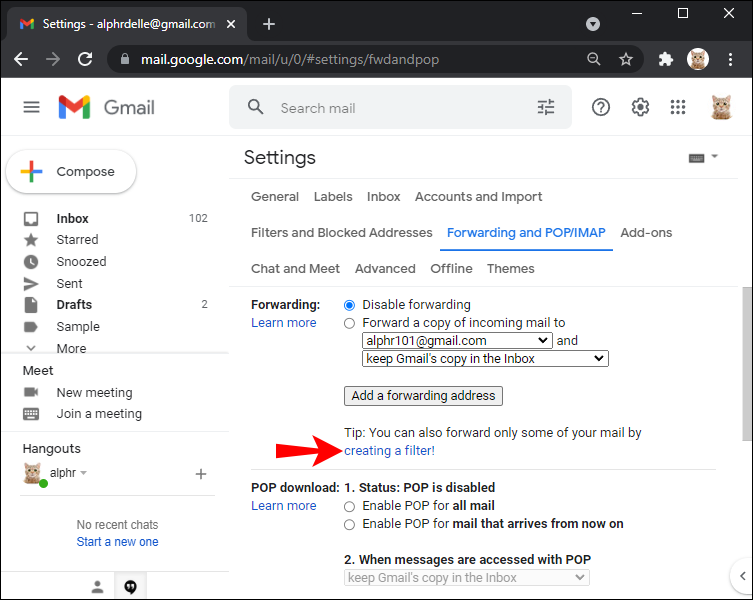
How to Automatically Forward Emails in Gmail on a PC
Here’s how to successfully set up the automatic forwarding function from your Gmail account on your PC:
- Login to your Gmail account.
- Click “Settings,” then, “Forwarding and POP/IMAP”.
- Select “Add a Forwarding Address,” then enter the address you wish to forward to.
- Review and accept the verification email in your inbox. Accept this and go back to “Settings.”
- Click on “Forwarding and POP/IMAP” again.
- In the “Forwarding” section, press “Forward a Copy of Incoming Mail To,” then select what you’d like to happen with the original copy.
- Select the “Save Changes” option.
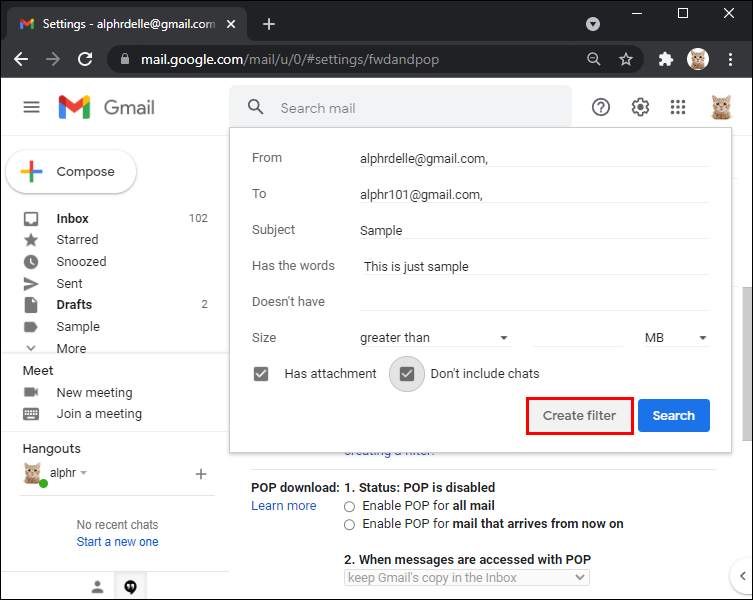
How to Automatically Forward Emails From a Specific Sender in Gmail
Let’s say you receive an email to pay your bills, and you wish to forward it to your spouse so they can deal with it. This scenario can be made easier by activating automated emails from a specific sender. Here’s how to do this through your Gmail account:
- Log in to your Gmail account on a web browser.
- Click the “Settings” option in the top right corner.
- From the available options, select “Forwarding and POP/IMAP.”
- Select “Add Forwarding Address” and proceed to type in the forwarding address.
- Select “Next.”
- You will receive a notice asking you to confirm the email you have typed in is correct. Select “Proceed.”
- Google will then send a confirmation message to the email address. Copy the confirmation code next to where it says “Verify” in “Forwarding and POP/IMAP.”
- Click “Create a Filter” and fill in the information box that appears.
- Select “Create Filter.” Your changes are automatically saved.


Additional FAQs
How Do I Remove Automatic Forwarding?
The automatic forwarding function is great, but sometimes you might just want to manually go through your emails so as not to miss anything. Here’s how to switch off the function depending on your email account.
Gmail:
1. Log in to the Gmail account with the forwarded messages on your computer.
2. In the right-hand corner, click on “Settings” and then “See All Settings.”
3. Select “Forwarding and POP/IMAP”.
4. Under “Forwarding,” click on “Disable Forwarding.”
5. Save your work by pressing “Save Changes.”
Outlook:
1. Open your Outlook account and select the “Tools” menu.
2. From the list, choose “Rules and Alerts.”
3. Untick the check box beside the rule you wish to disable (in this case, automatic email forwarding).
4. To delete the rule altogether, highlight it and then press “Delete” from available tabs.
iCloud Mail:
1. Log in to your “iCloud Mail” account and choose “Preferences” in the sidebar.
2. In the “General” pane, unselect “Forward My Email To.”
3. Click “Done.”
Is There Any Way to Set up Email Forwarding Using a Mobile Phone?
While popular email accounts such as Gmail, Outlook, and iCloud don’t allow you to activate automatic forwarding via your mobile device, there is an alternative option. You can download the YouMail app, which gives you the option to set up the automatic forwarding function on your smartphone.
The Innovation of Automation
In this digital age, the way we communicate is constantly evolving, and email forwarding plays a crucial role in staying connected.
With the innovative help of automatic forwarding, the whole procedure becomes even easier. No longer must you spend hours of your time sorting through bulk emails before you’ve even had a chance to have a cup of coffee.
Do you use automatic forwarding when sending emails? Has it made things easier? We’d love to hear your thoughts in the comments below.
Disclaimer: Some pages on this site may include an affiliate link. This does not effect our editorial in any way.