When it comes to saving the information and data on your device, it is better to be safe than sorry. Backing up your iPhone 6S is the single best way to ensure that you won’t lose everything you have worked long and hard to have on your phone. If you lose or damage your phone, having a backup is among the only ways to ensure that all of your information isn’t lost, and can be added back to a new phone.
Too frequently people think that they don’t need a backup and their phone won’t get lost or damaged. However, you will wish you have created one once you start to experience some issues with your device. It is better to have spent a few minutes to backup your device and not need it, than to not have done it and have disaster strike your device.
When it comes to backing up your iPhone 6S, you have a few different options. You can either choose to backup your device by using iCloud, or by doing it via iTunes on your computer. While using iCloud is the simplest and quickest way to backup your device, there are a few issues. For example, you only get 5 GB for free, which may not be enough for some people. Thankfully, there is the option to purchase as much as 2 TB of extra space, and it is more affordable than you would expect.
On the other hand, creating a backup on your computer with iTunes is a bit more of a tedious process. However, you can use as much space as your computer has for your backup, which will likely end up being a lot more than the 5 GB you get for free with iCloud. There is also a difference in how each method actually saves your device. Using iCloud saves your information and data in the cloud, while using iTunes will save it on your computer.
Now that you know about each option and the similarities and differences, let’s get to the steps to backup the iPhone 6S!
Backup Your Device Via iCloud Backup
Step 1: Open the Settings app on your device.
Step 2: Tap the user banner at the top of the menu. There used to be a specific button in the Settings app called iCloud, but now it is included within this banner menu.
Step 3: Once in that menu, you need to click on iCloud.
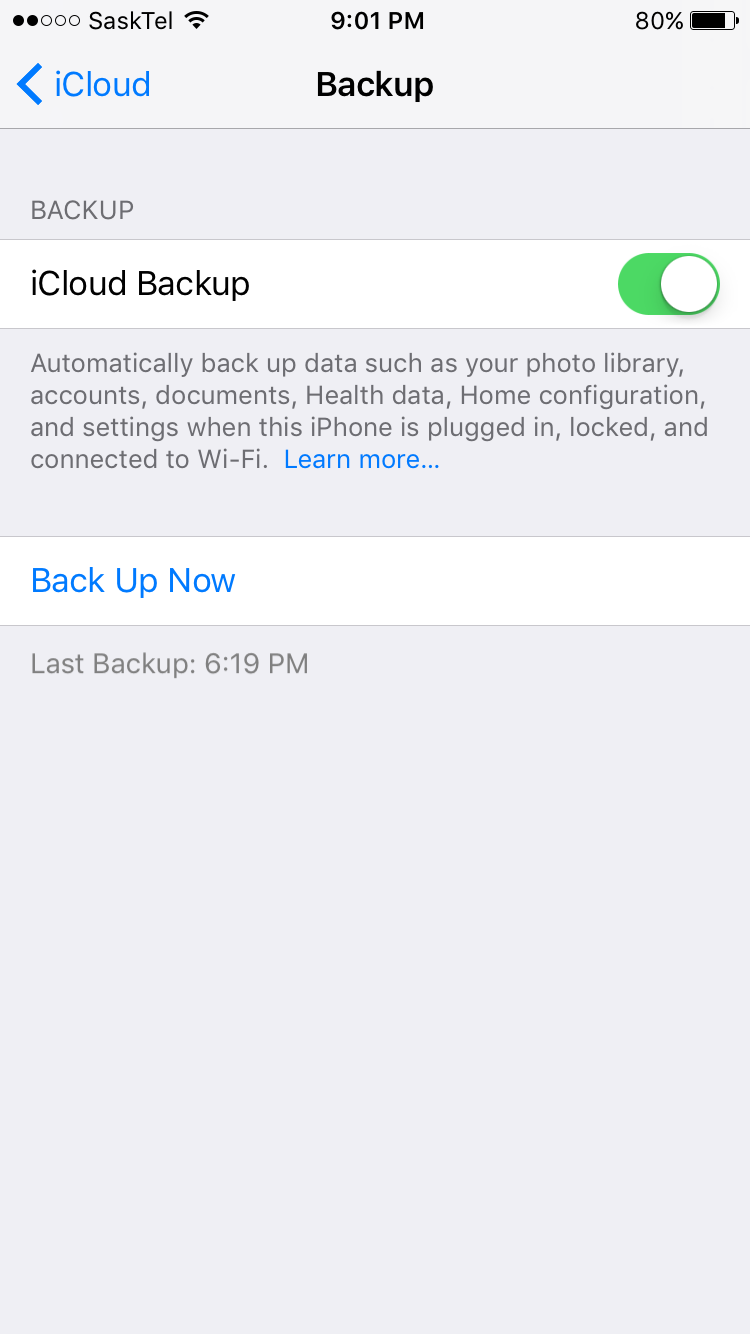
Step 4: From there, you need to locate the iCloud Backup button on the screen.
Step 5: Then simply flip the switch so it shows green, and then follow the prompt that comes up. That’s all there is to it!
As long as the toggle on the Backup menu page is in the green position, that means your phone should backup around once a day. The phone will often do this when you are in Wi-Fi and your phone is plugged in and this backup will often occur when you are sleeping at night.
However, if you ever just want to manually Backup your device for one reason or another, you can simply press the Back Up Now button on the screen, which will ensure you always have the most recent version of your phone backed up.
Backup Your Device Via iTunes
Step 1: Connect your iPhone 6S to your computer.
Step 2: Launch iTunes on your computer.
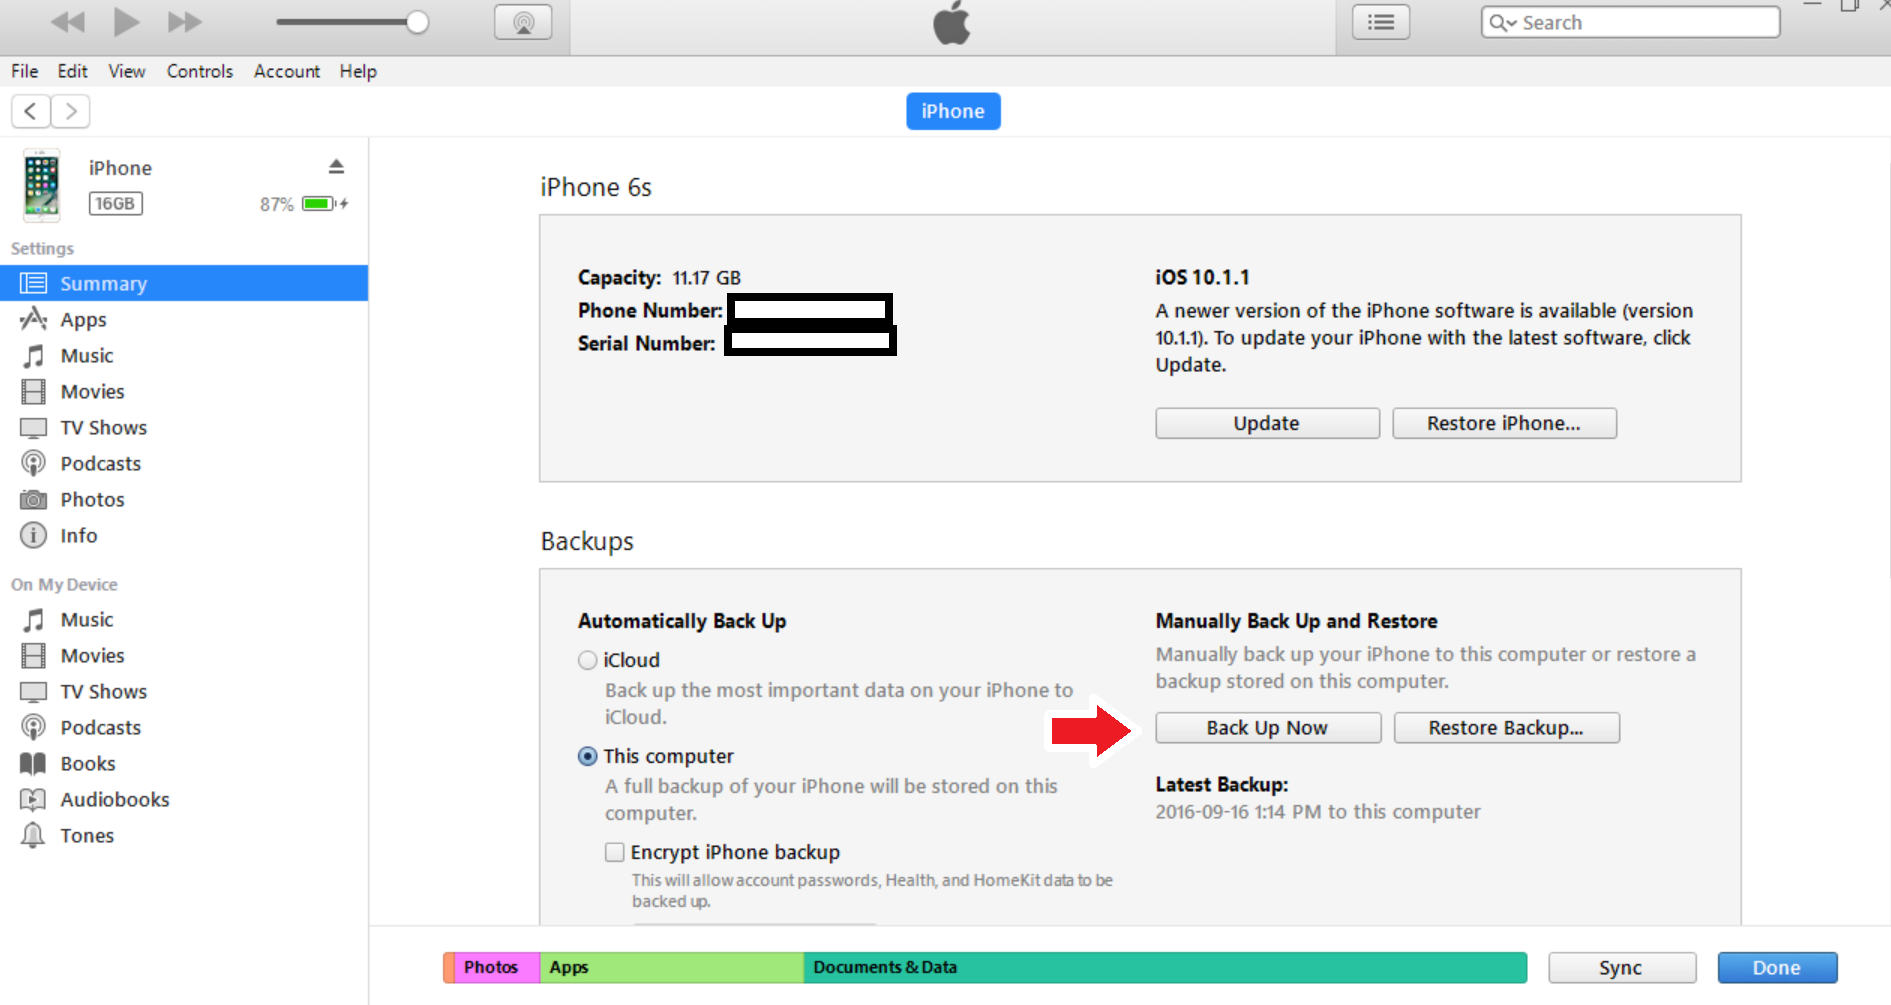
Step 3: Find your device in iTunes, and then hit the summary button.
Step 4: Then, select This Computer under Automatically Back Up (or Back Up Now, if you just want to manually backup instead of having them be automatic).
Step 5: Hit the Done button, and then after the process completes, you will have officially backed up your device.
If you have enabled the iTunes backups, your phone should backup every time you connect to your computer, so you will always have the most up to date version of your device backed up. While this might not be as quick or easy as just using iCloud to back up your device, it is still a great option. We recommend trying the iCloud method first as it is just easier, quicker and more convenient. But if you cannot use that method for one reason or another, doing it via iTunes is pretty straight forward and simple as well.
With how easy and helpful backing up your iPhone 6S is, there is no reason for you not to do it. It can save your information in case of a disaster, and can really save you from a ton of headaches that come along with all of your data, apps, and information being deleted. Also, with the availability of automatic backups, you only really have to do it once yourself and from there on out, your phone will be automatically backed up. It doesn’t get much simpler than that.
Disclaimer: Some pages on this site may include an affiliate link. This does not effect our editorial in any way.


