Photoshop is a leading photo editor, and for a good reason. It has sophisticated features that make editing photos a snap. But perhaps, one of its most intriguing features is the ability to edit a batch of photos at once. The feature comes in handy when you have multiple images that need similar edits. That way, you save time and effort that you would otherwise spend doing repetitive tasks that can easily be automated.
But how exactly do you batch edit in Photoshop? Keep reading to discover how to go about the whole process.
How to Batch Edit Photos in Photoshop
Batch editing allows you to apply the same effect or action across many photos simultaneously.
We highly recommend batch editing for photos with the same subject, setting, and lighting conditions. However, you can still batch-edit photos that don’t meet these requirements, especially if you have a set of actions that you usually apply to nearly all the images that you edit in Photoshop.
How the batch editing feature works in Photoshop is that you record a set of actions – think of this as the actual edits you’re making to a particular photo. Then, you can replicate these actions across all the other images in the batch. As a result, all the photos will share the same effect(s) with a single application.
Essentially, batch editing photos using Photoshop entails three main steps. Below we have discussed each of these steps in greater detail.
Step 1: Add the Photos to Edit to Your Photoshop Workspace
This step involves opening all the photos you want to batch edit in Photoshop. To do so, follow the steps below:
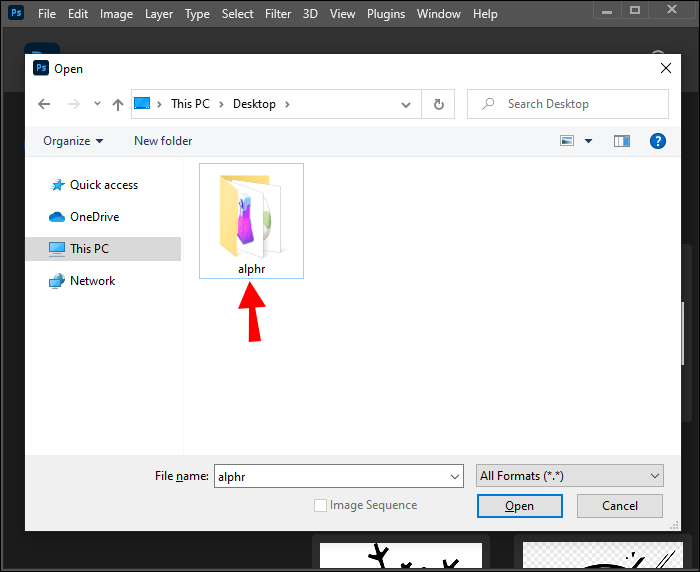
- Launch Photoshop and on the home screen, select the “Open” option from the sidebar.

- Navigate to the folder that contains the images you want to batch edit.

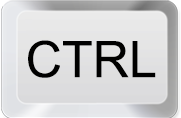
- Select all the images that you want to edit. To select multiple photos at once on a Windows PC, click the first image, then hold down the “Ctrl” button key. If you’re on a Mac, you can click the first image, press and hold the “Cmd” key, and finally click the rest of the photos to select them.
- Press the “Open” button once you have selected all the images you want to batch edit.
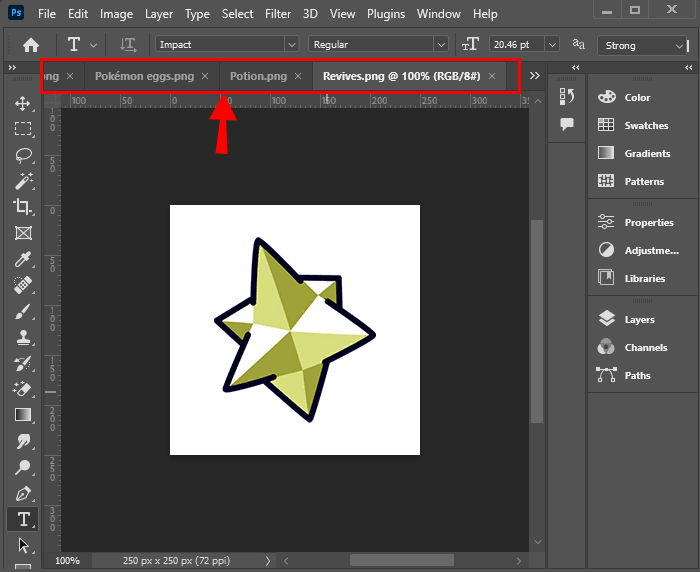
- The images you selected should open in Photoshop, each in its window.

It’s best to have a copy of the photos you’re going to batch edit in a different folder so that you have a backup in case the final edits don’t turn out the way you envisioned them. That way, you can always have something to return to just in case you have to redo them.
Instead of opening all the photos in Photoshop, you can simply create a dedicated folder on your computer and transfer the images you need to batch edit to that particular folder.
Step 2: Record the Actions Applied to the Current Photo
This step involves editing the photo you’re currently working on, then saving these edits as actions that you can apply to all the other images in the batch. Please note that any modifications you make to the current photo will affect all the other pictures in the set once you apply the action, so you must get it right.
Follow the steps below to create an action that can later be replicated to the other photos in the batch:
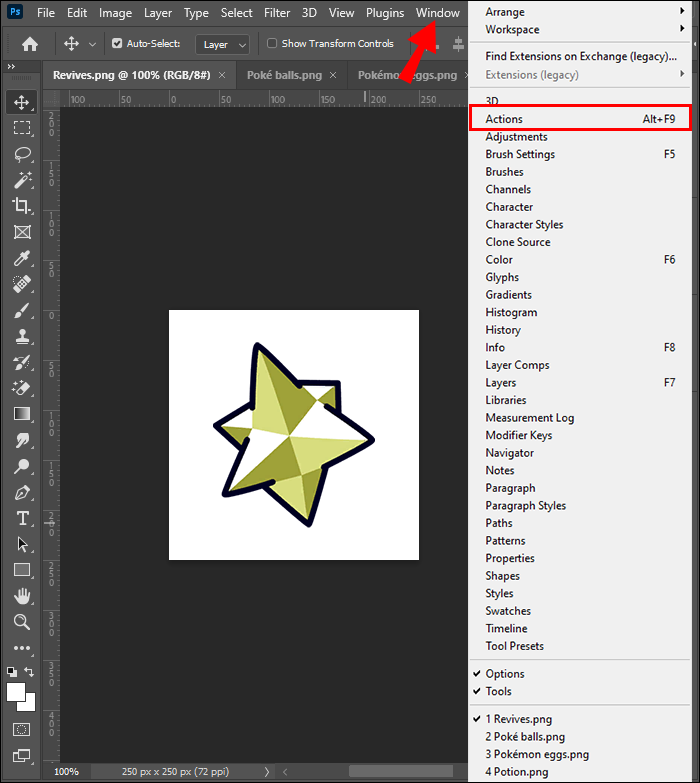
- Open the Action Panel by going to “Window” then “Actions.”
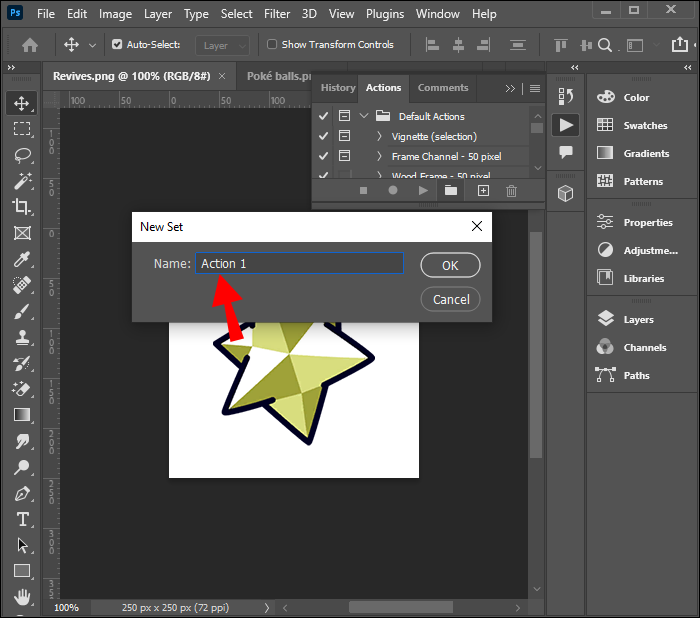
- Navigate to the bottom of the Action Panel and click the folder icon to create a new folder for your action.
- Specify the name of the folder and hit the “OK” button.
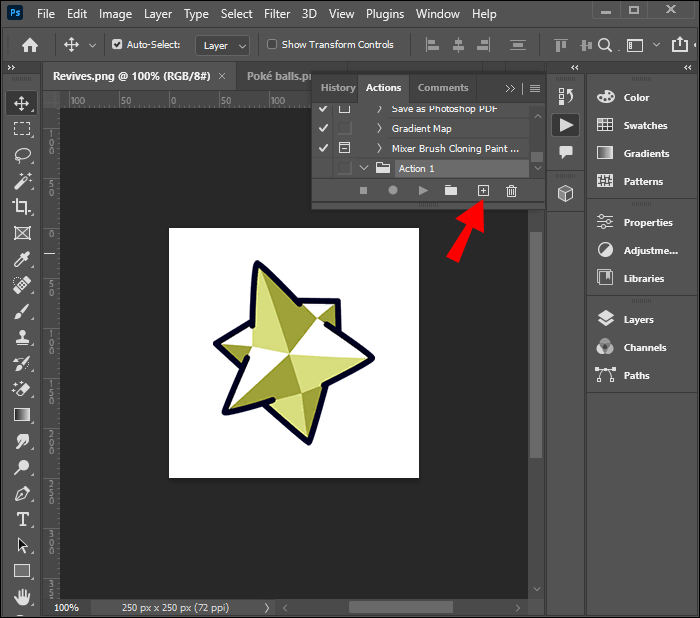
- Open the folder you have just created above and click the sheet of paper icon at the bottom of the Action Panel to create a new action. This icon is right next to the trash icon from the left.
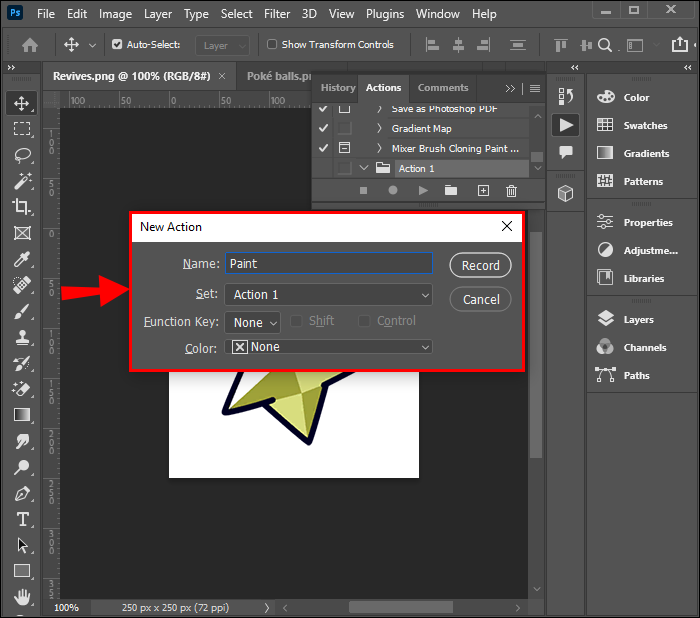
- Specify the name of the action. It’s best to go for a name that’s descriptive and easy to remember because you will be selecting it from a list of other actions. You can leave the “Function key” and “Color” options as “None.”
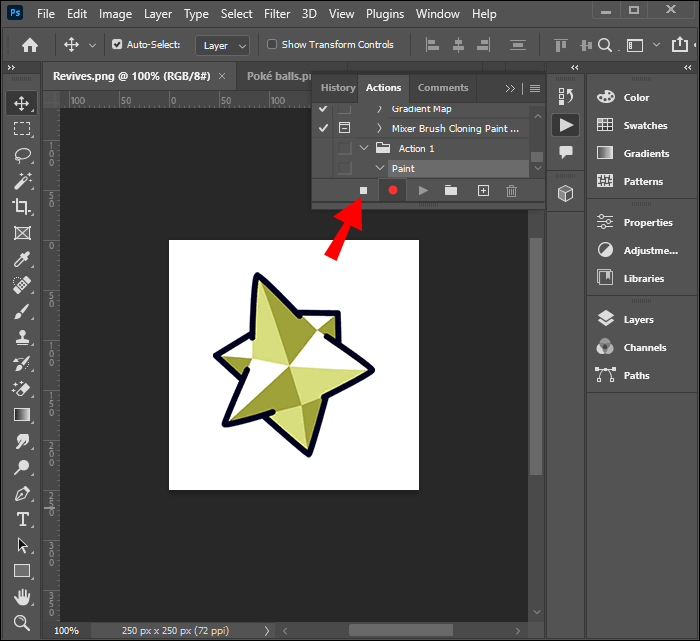
- Press the “Record” button and start editing the current photo. You can verify that the actions are being recorded by checking for a red circle at the bottom of the Action Panel.
- Any edits you make will be recorded as actions and can be applied to all the other photos in the batch.
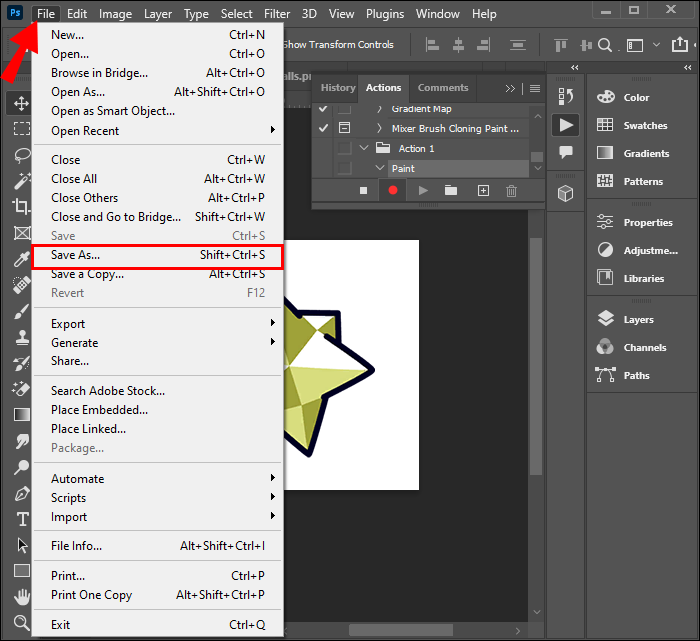
- Once you’re done, go to “File” and “Save as” to save the picture you’ve just finished editing.
- Go to the Actions panel and hit the “Stop recording” icon to stop recording the action.


Step 3: Apply the Recorded Action to the Rest of the Batch
Now that you have an action, it’s time to apply it to the rest of the photos in the batch. Think of it as using the effects of the edits you made in the first image to other images in the batch as well. Here’s how to go about the process:
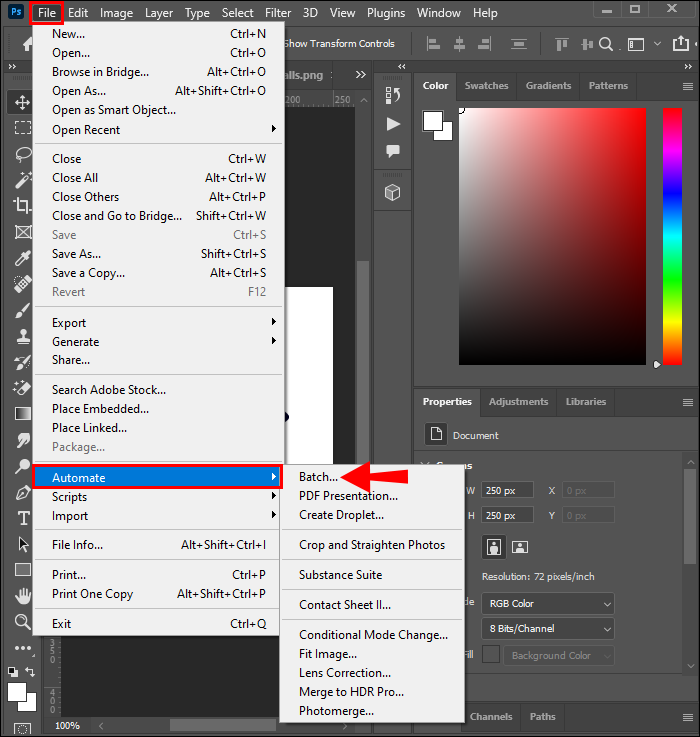
- Go to “File,” then “Automate,” and select “Batch.”
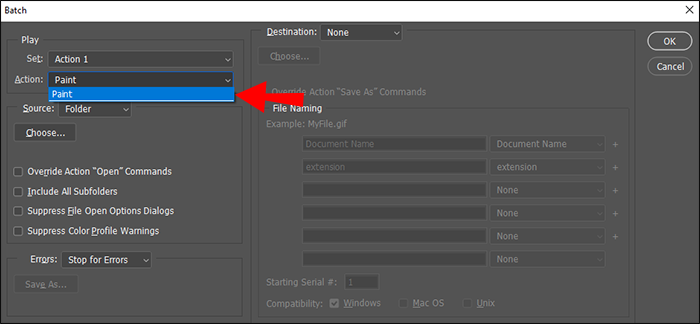
- In the widget that opens, go to the “Set” dropdown menu and choose the set that contains your action.
- Expand the “Action” dropdown menu and select the action you created in the above step.
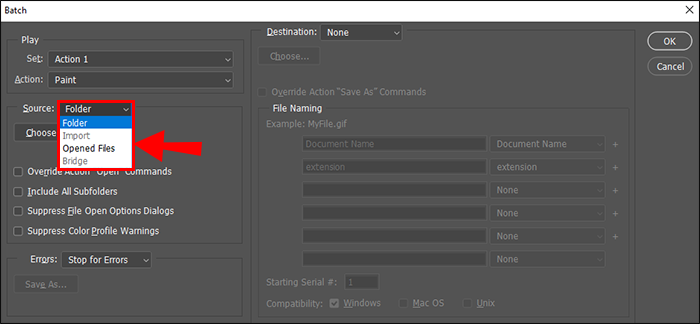
- Under “Source,” select “Opened files” if you opened all the photos you want to batch edit in Photoshop. Otherwise, select “Folder” if you have all the images you want to batch edit stored in a specific folder on your computer.
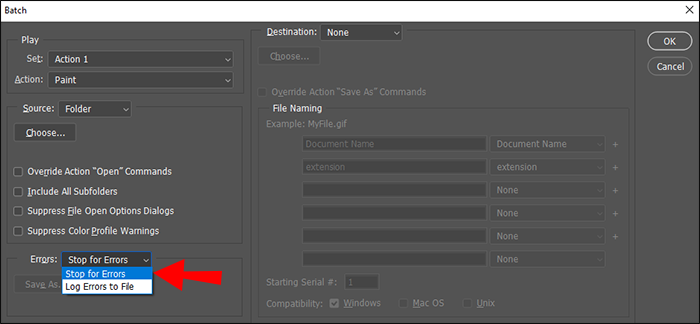
- Under the “Errors” dropdown menu, choose “Stop for errors.”
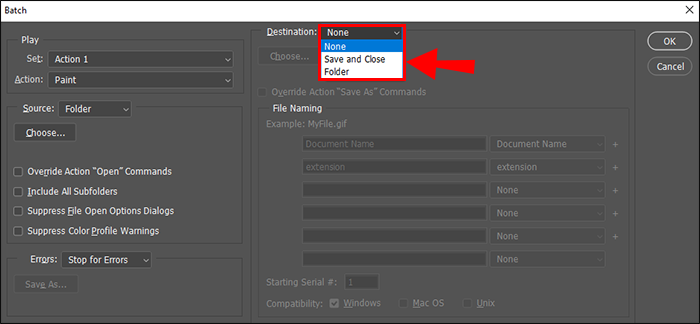
- Specify the destination of the final photos by opening the “Destination” dropdown menu, then choosing “Folder” and specify the folder where you want the final images saved. Alternatively, you can also select “Save and Close.” Photoshop will automatically save your photos when you close the app.
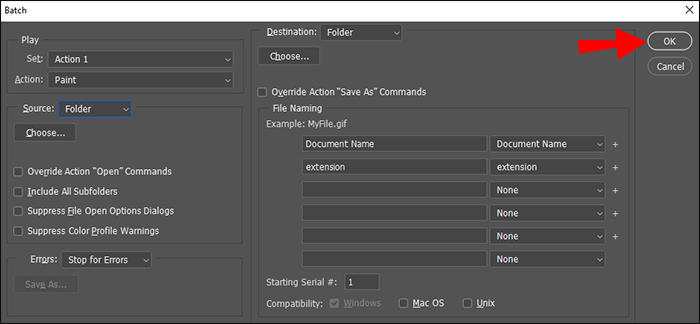
- Once you’re done, press the “OK” button.
- Wait a few minutes for the action to apply to the other images in the folder. This action might take longer depending on the speed of your computer and the number of images you’re editing.

If you want to continue editing a specific photo in the batch, you can proceed to do so. However, the batch edits are already applied to the image, so you don’t need to repeat them.
Additional FAQs
What’s the maximum number of photos I can batch edit at a time in Photoshop?
There is no maximum number of photos you can batch edit at once. However, suppose you have a computer with lesser hardware capabilities. In that case, you may be limited to just a few images in a single session; otherwise, the Photoshop program might start slowing down.
If editing too many photos at once slows down your Photoshop, then limit the batch to a few pictures.
How do I save the photos I have just edited as a JPG?
JPG is a preferred image format for many photographers because images saved in this are smaller in size yet don’t compromise the quality of a photo. To save the pictures you’ve edited as JPG, follow the steps below:
1. Select all the batch photos opened in Photoshop.
2. Click the “Save” icon in the top right corner of the screen.
3. Under the “Format” dropdown menu, choose “JPEG” then “Save.”
How do you remove the batch edits from a single photo in the batch?
To revert the edits made on a single photo in the batch, open that particular photo and click the “Reset” button in the bottom right corner of the window.
Batch Edit Photos in Photoshop Like a Pro
Batch editing images in Photoshop is a relatively easy task thanks to the ability to apply one action across multiple images. It is a great way to save time and automate repetitive tasks that may quickly become boring. However, using this feature on photos with the same subject and lighting conditions is best.
If the pictures do not meet these requirements, then batch editing them might not yield the best results. Consequently, you may spend even more time manually redoing the whole process one by one. So, be careful and a bit picky with the photos you want to batch edit.
Have you tried batch editing photos using Photoshop? Please share your experience with us in the comments section below.
Disclaimer: Some pages on this site may include an affiliate link. This does not effect our editorial in any way.


