Resizing files is an excellent hack for many reasons. The most common is reducing the file size by removing extra pixels and not losing image data. Large images take forever to transfer, which can take a toll on your patience if there’s a whole batch of pictures on the waiting list. Smaller images are also better for portfolios and blogs since templates often go crazy with large images.
If you have Photoshop on hand, batch resizing files is a quick task that you can do in several ways. Read this article to find out how to change the dimensions of multiple files in one take.
How to Batch Resize Files in Photoshop on a Mac
When working with a large number of image files, Photoshop is a very versatile editing program. It offers many features that make the lives of those who conduct visual edits easier than ever. The best thing is that most of its versions and updates are compatible with all major operating systems.
Batch resizing images in Photoshop is a pretty simple operation. The program offers two ways to change the dimensions of multiple photos in one take efficiently. One requires creating an action, which is practical since it’s reusable. The other includes using the Image Processor tool, the most common way to batch edit files in Photoshop.
Here’s how to batch-resize images in a macOS version of Photoshop.
Photoshop Image Processor
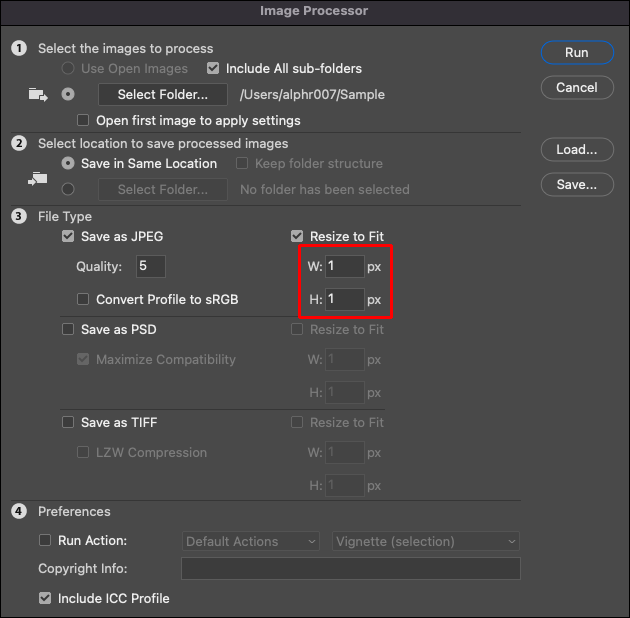
Photoshop has a great “Image processor” feature, which you can use for various edits, including batching changes. To begin, put all the images you need to resize in a single folder. That way, the image processor can access them all at once.
Once you have collected the files in one place and prepared them for an edit, do the following steps:
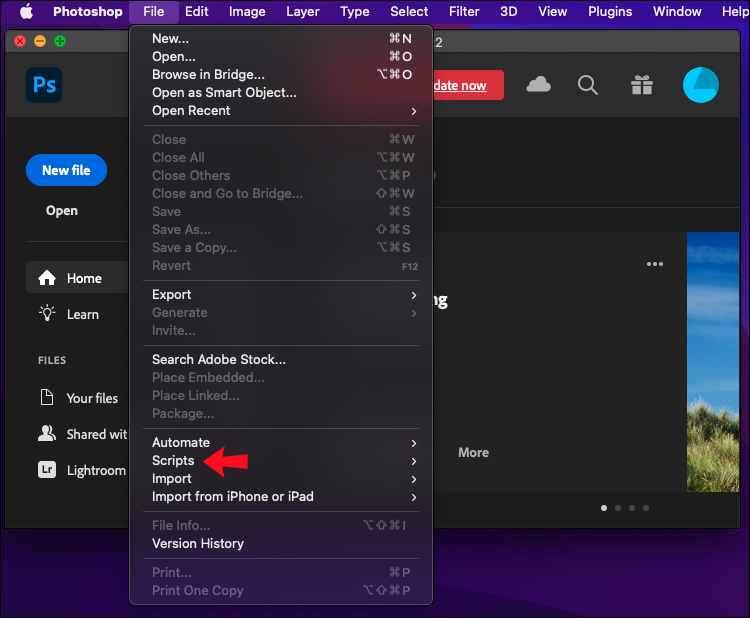
- Go to the top menu and select “File.”

- Go to “Scripts” and start the Image Processor from the submenu.

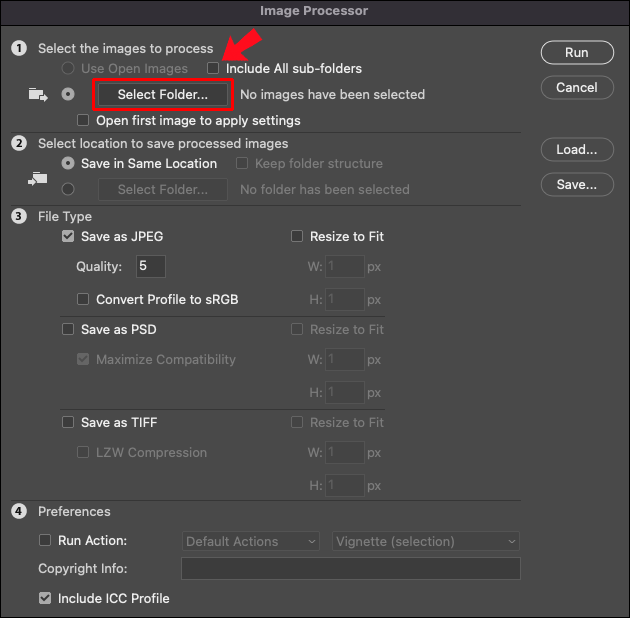
- Click “Select Folder” and choose the folder where you have collected the images you want to resize. If the folder contains sub-folders, check “Include All sub-folders.”
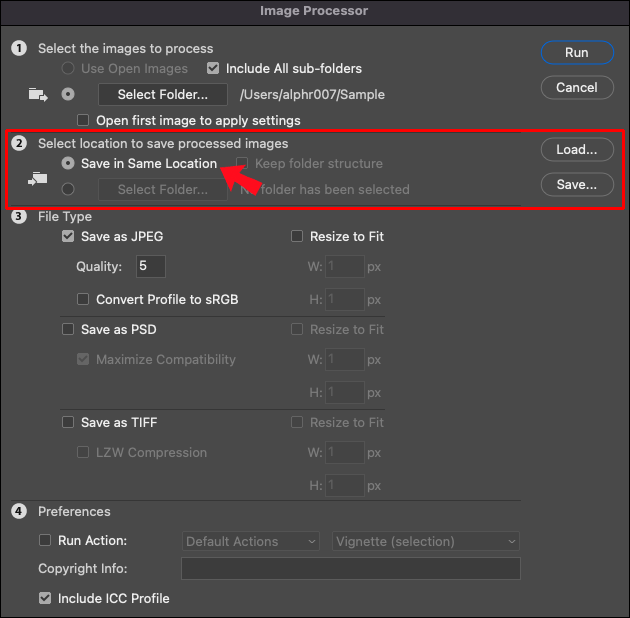
- Move over to the second section of the dialogue box and select the destination folder. Be careful not to choose the “Save in the same location” option, as that overwrites the original files.
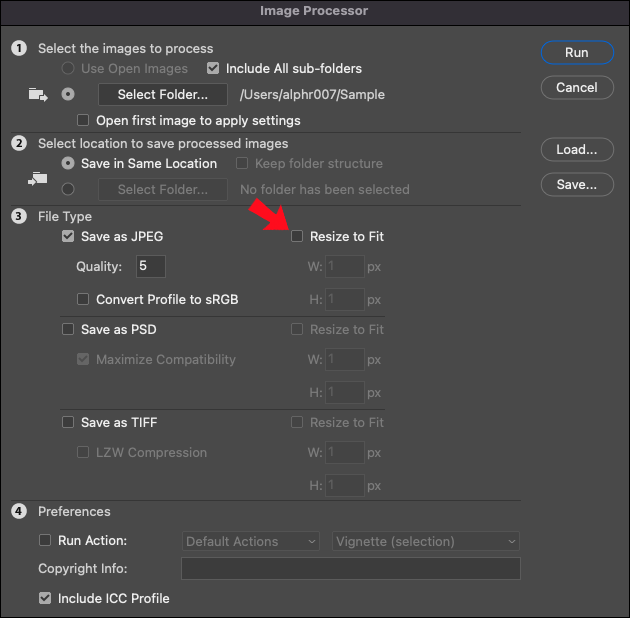
- Select the file type. JPEG is the recommended format, but you can alternatively opt for PSD and TIFF files.
- Check “Resize to fit” within the same section.
- Set the size parameters in the “Width” and “Height” boxes. The default value is written in pixels. Moreover, the feature keeps the original aspect ratio, so there’s no need for manual adjusting.
- Click “Run” to batch-resize the files in your selected folder.


If you edit RAW files, there are additional configurations you may need to conduct. You will need to edit a single image before batch-applying the edits to others. In the Image Processor dialogue box, select “Open the first image to apply settings,” and the Adobe Camera RAW will open. Once you’re there, resize images, and the edits will automatically apply to the other photos in the batch.
Create an Action
Recording a custom action requires a few more steps, but it’s a tested way of successfully resizing a batch of files. You can use the same method for other batch edits, which improves its flexibility. Similar steps can be used for other edits, which can be useful later. Additionally, you can save this action for later reuse.
Resizing a batch of files using action is done the following way:
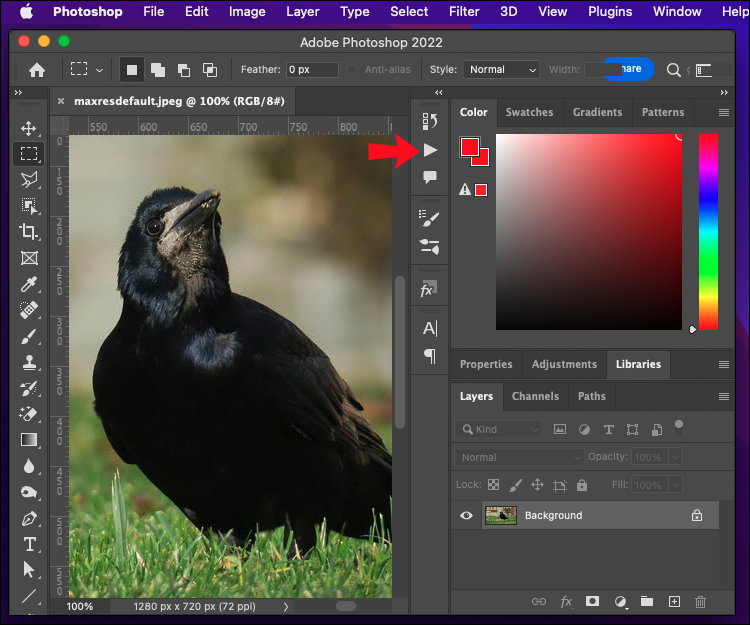
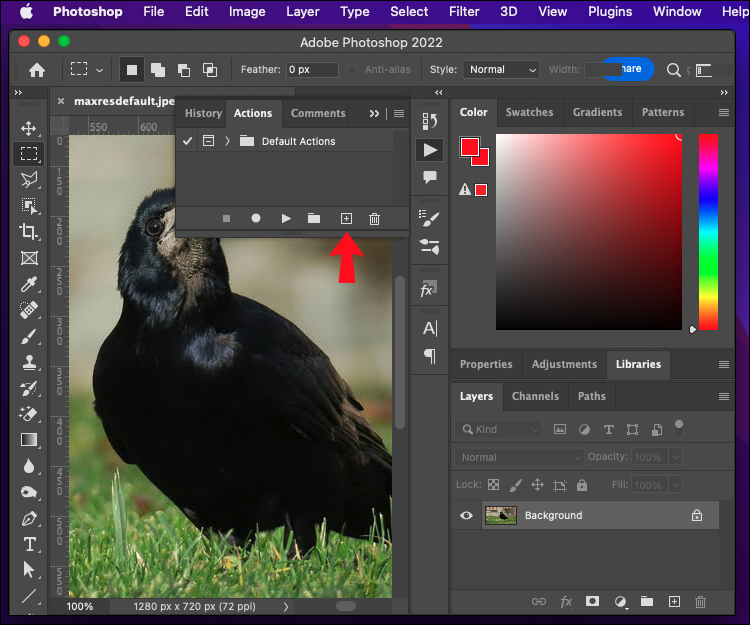
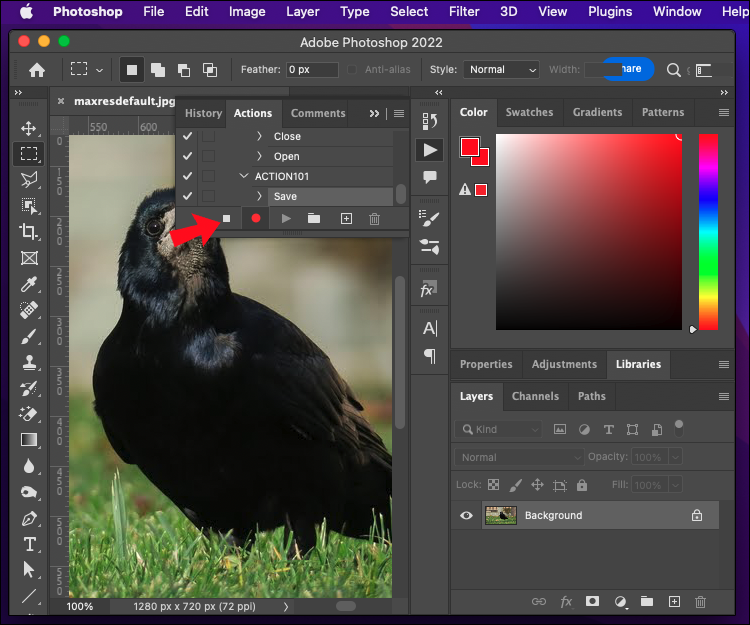
- Open the “Actions” panel.
- Click the square-shaped “New” icon to open the ‘New Action” window.
- Name your action and click the “Record” button to start recording.
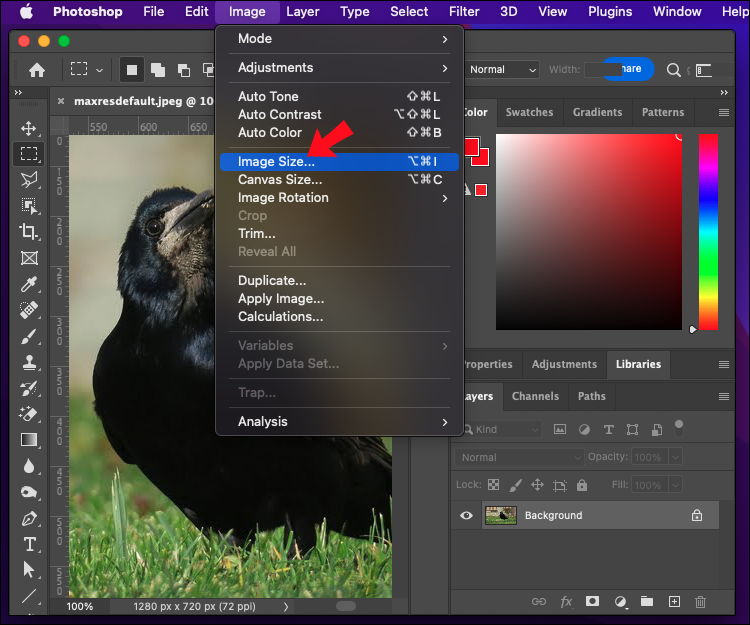
- Go to “Image,” then select “Image size.”
- Choose the new dimensions for your image and make additional adjustments. The dialogue box allows you to change the picture’s measurements, width, and resolution.
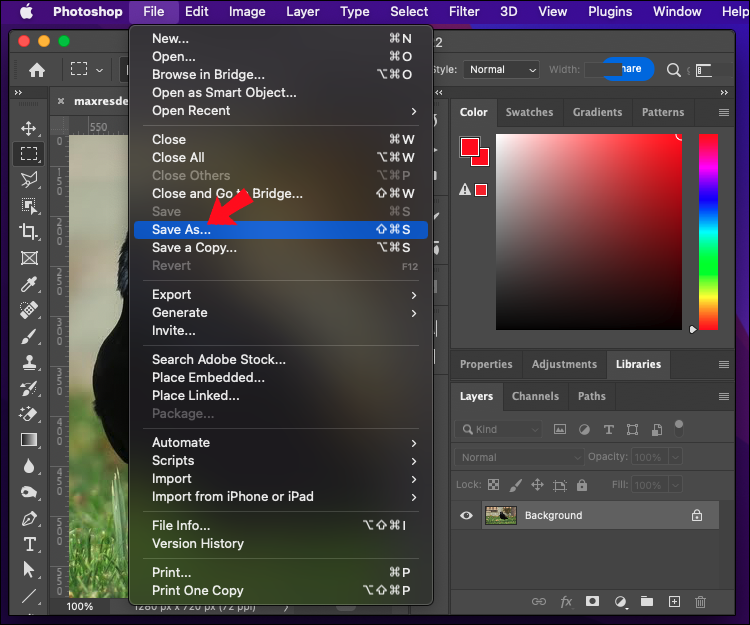
- Go to “File,” then “Save As.”
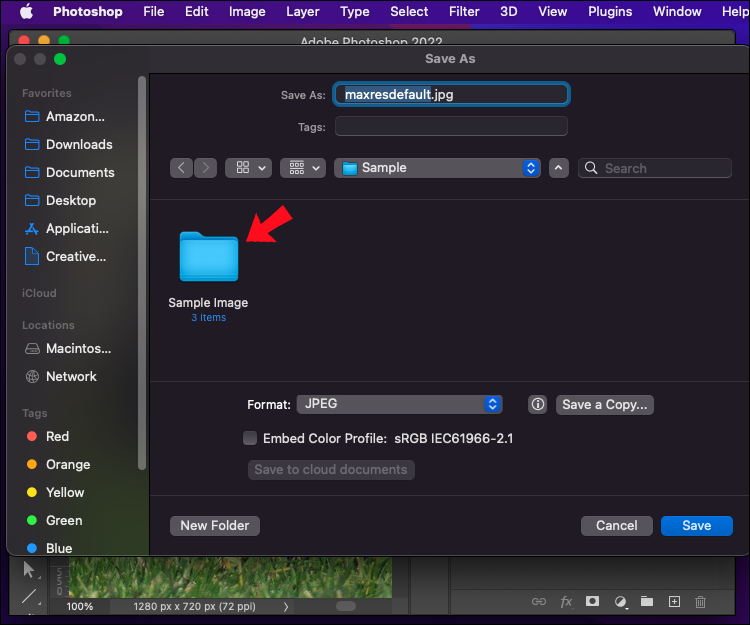
- Choose the folder meant for the resized images.
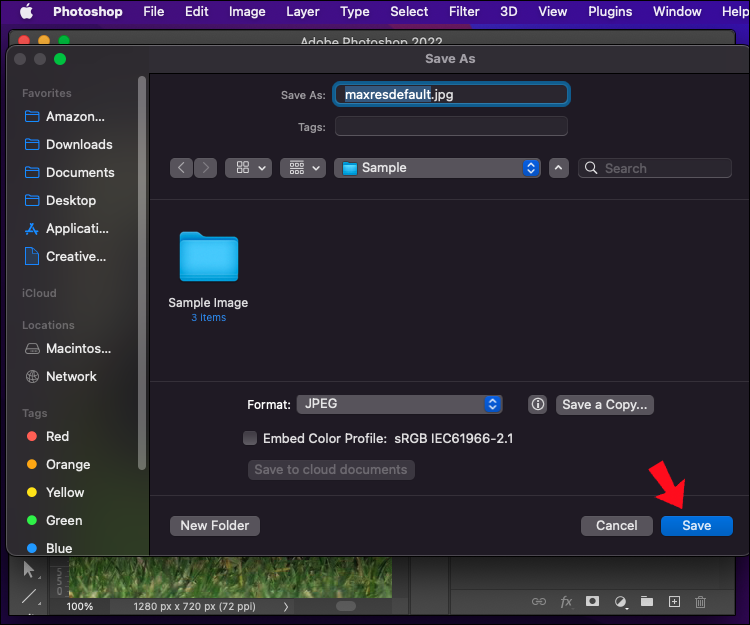
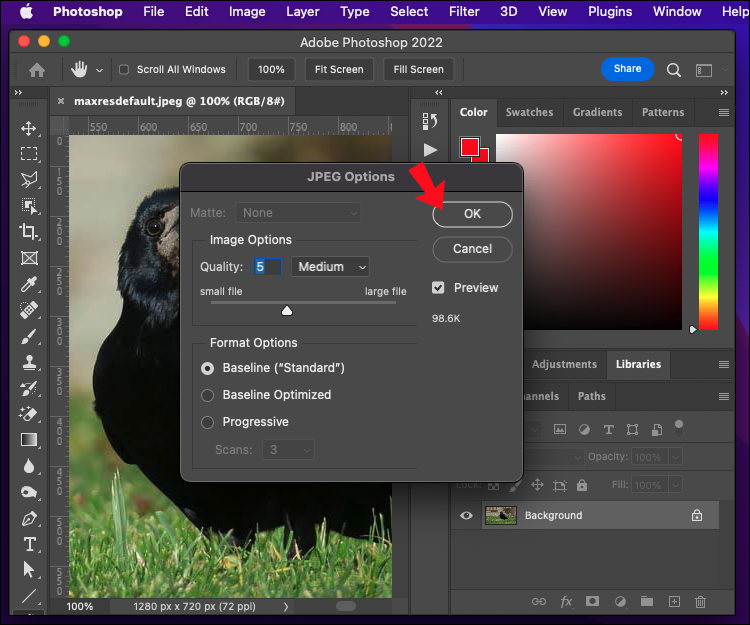
- Click “Save” and select the image options as previously mentioned.
- Click “OK.”
- Close the image and open the actions panel. Click the square icon to stop recording.


Optionally, you can create a shortcut for later use by choosing a function key while making the action. You are allowed to choose if you want to store your action among the “Default” set of pre-recorded actions. Alternatively, you can create a custom separate set of actions by clicking the folder icon in the bottom bar of the action box.
Now that you have created an action for resizing a single image, you can apply it to a batch. This step includes using Photoshop’s automatic batch editor. Do the following steps to conduct the action:
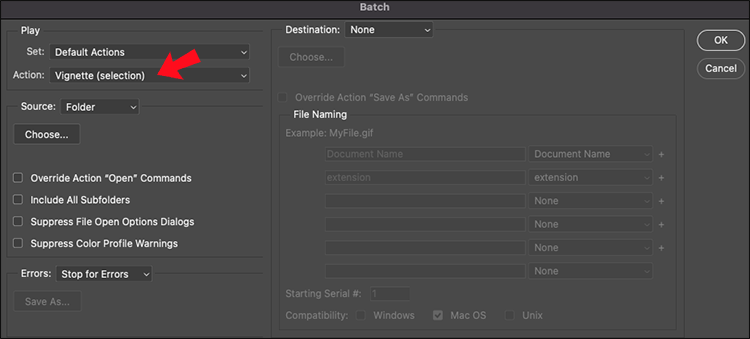
- Open the top menu and choose “File.”
- From the sub-menu, select “Automate” then “Batch.”
- Once the “Batch” window opens, choose the action you previously created.
- Under “Source,” select the folder where your unedited images are by clicking “Choose.” There’s no need to select the destination folder since it’s recorded in the action.
- Click “OK” and run the action.


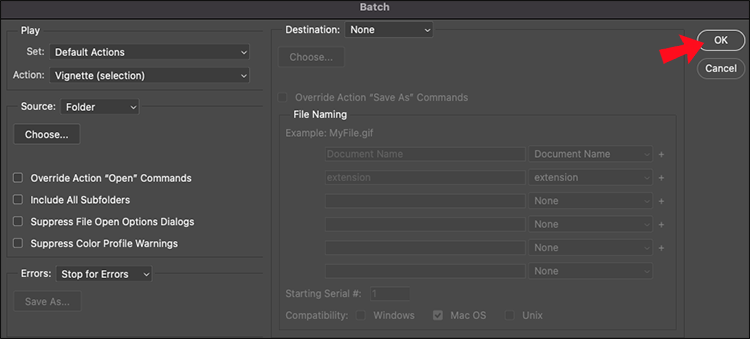
Once the program finishes with the batch, you will find the resized images in the destination folder you selected in the action-creating step.
How to Batch Resize Files in Photoshop on a Windows PC
The Photoshop app is coded largely the same for Windows and Mac and has no significant differences. Therefore, you can consult the Mac section above for a complete overview of your options.
How to Batch Resize Files in Photoshop on Mobile
A mobile version of Photoshop, named Photoshop Express, is a valuable tool for on-foot image editing. Besides other features for visual editing, it offers multiple ways to resize images with keeping the same quality levels. It allows you to resize pictures in predefined formats for Facebook, Instagram, Twitter, Pinterest, and many more apps.
Unfortunately, this app has no shortcut to batch resizing images, as it only allows editing for a single image. To batch-resize photos, you should opt for third-party apps like Batch resize. It’s a user-friendly tool for resizing multiple images at once. Alternatively, you can try browser-based tools for batch resizing, such as BulkResize or BIRME, as they have proven useful.
You can bulk resize images in Lightroom, another Adobe program, which is a commonly used alternative to Photoshop. Collect your images in one folder, import them into the editor, set the dimensions, and choose the location for exporting them.
Do It All in One Take
Knowing how to resize images is a practical skill to learn if you’re delving deep into social media or blogging and need a uniform look. Just like with editing, Photoshop will prove invaluable for resizing, and learning actions can streamline your editing process overall.
What’s your preferred way to quickly resize a batch of image files? Tell us in the comments section below.
Disclaimer: Some pages on this site may include an affiliate link. This does not effect our editorial in any way.


