CapCut has transformed the art of video editing, making it a fun and exciting activity. Whether you are a veteran or just starting out with video editing, CapCut has something for you. But, before getting started with this tool, you need to explore more details about the best CapCut editing pack.
The CapCut editing pack involves multiple features that help you enhance your video editing skills. The pack involves special effects, and filters that you can apply to your videos and transform them into something special. If you want to experience a new world of video, CapCut is worth giving a try.
This article offers further details about the CapCut editing pack you need to know.
CapCut Filters and Effects to Transform Your Videos
Content creators who love applying filters and effects in their video images have every reason to smile when using CapCut. The software offers different types of filters that let you tailor your content to a particular audience with just the right context.
Below are some of the best CapCut filters and video effects that you can try.
Dracula

This is a unique CapCut filter that brings a sense of ambiance to your video images. The filter adds a hazy mood and beauty to the video image. It works well when applied to videos taken in darkness or night scenes to give them a semblance of light.
In addition, when Dracula is applied to shots that have flower bouquets, the results are amazing. Note that you can go the extra mile and adjust the parameters of this filter, such as brightness levels, color temperature, and contrast, among other features.
Conifer Cone

Conifer Cone is a popular filter on CapCut that is applied to photos or videos that are taken casually, and do not require thorough editing. The filter gives you room to make adjustments to the light and shadow position of the entire image with just a single click.
It introduces a new dimension to the photo or video that makes sunlight appear to be coming down from the sky, penetrating the foliage, and hitting the ground. Conifer Cone can give a relaxing tone to your casual nature photos or videos.
Brown

When you want to express sadness or any form of negativity, the Brown filter can help you do that. This filter is used to add a dark contrast in your video, especially good for when you want to express any form of ennui.
Also, it can be used to suggest a dream or something unusual in a video image. The Brown filter is sometimes applied to movies to evoke a past era. The filter gives the viewers a clear idea of the suggested timeframe of the story set years ago.
Holiday

The Holiday filter is ideal for highlighting the bright colors of a vacation out in the sun. This is a nice option when shooting videos during a beach party or camping with friends and family. The filter will make the edges of your videos colorful and brighter to make them appear as vibrant as the sun.
When this filter is applied to the video, viewers can almost feel the bright and happy atmosphere that existed when the image was taken.
Transitions

CapCut offers you different types of transitions that add to your storytelling capabilities. You get access to a multitude of dynamic effects such as spins, zooms, flips, and many more. The transitions work as a bridge between different clips, especially when changing scenes.
Integrating these transitions into your videos gives them a professional polish, even if you are new to video editing.
Motion Tracking

Motion tracking refers to the technique of a camera following an object that is constantly on the move. This is also a cinematic feature that enables you to incorporate graphics into live graphic footage. Note that the graphics applied in this scenario should go hand in hand with the objects in the shot.
Keyframing

This feature enables you to add more complex movements and transformations to specific segments in the video. Keyframing gives you the freedom to take charge of the appearance, trajectory, and timing of your video.
It can help you quickly animate clips and generate captivating visuals and text using the keyframing feature.
Visual Effects

The visual effects in CapCut elevate your videos to the next level in terms of quality. CapCut gives you a comprehensive library of stickers, overlays, and filters that you can choose from to enhance the beauty of your videos.
You may also enjoy using the customization features that enable you to fine-tune your videos and blend the effects to come up with a quality output for your intended audience. In addition, you can animate specific attributes in your video to enhance the delivery of your message.
Chroma Key Effect

The chroma key is among the advanced effects offered by CapCut. Popularly known as the green screen effect, this feature allows you to remove a specific color, especially blue or green, from your video and replace it with a different image.
The Chroma key allows you to insert special characters or images into a separate video in a natural, interesting way to help you deliver a certain message.
How to Add Filters to a Video in CapCut
Once you have identified some of the best video filters in CapCut, you need to learn how to insert them. The good news is that it’s pretty simple to add filters to your videos in CapCut. Below are the steps that you can implement to get this done.
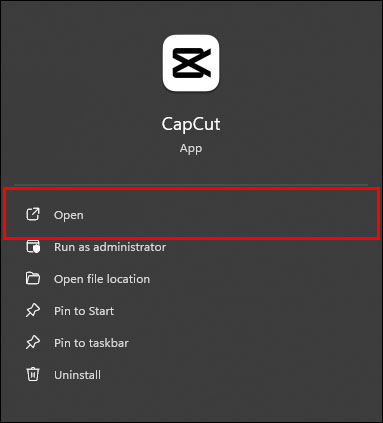
- Open CapCut on your computer and navigate to the startup interface.

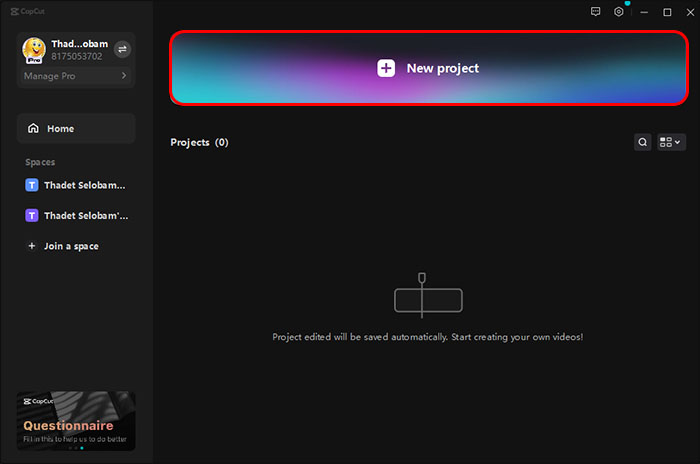
- Tap on the “New Project” button on the main menu to upload your video to CapCut.
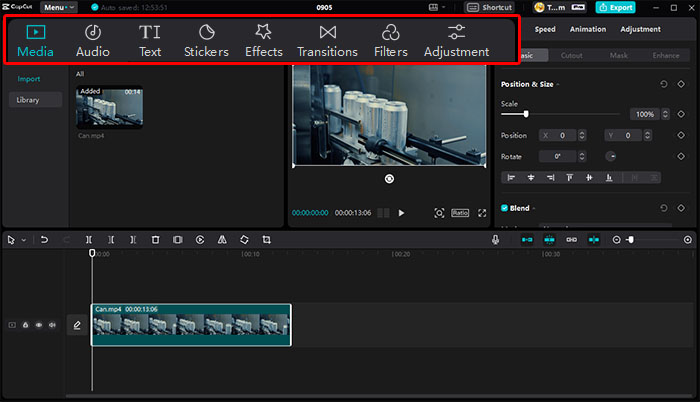
- After uploading your video from your device, click “Finish” place your mouse over the Function Navigation area to access all the filters available.
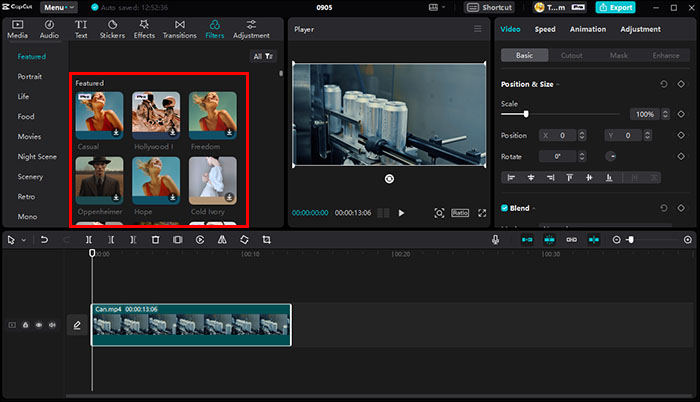
- Click on your preferred filter to apply it to the video.
If you decide that the filter does not fit well in the video image, you can simply delete it and replace it with another option. To delete a filter, simply select the filter axis and tap on the Delete button. Alternatively, you can drag the Filter button and shorten the application time of the filter.
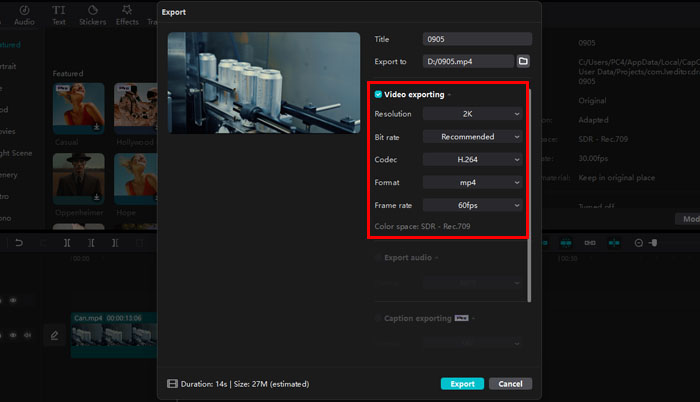
Remember that you need to set parameters on every filter you apply to your video. You can adjust the resolution and format of every filter to your desired specifications. Once you are done adding filters to your video, you can download it and share it via your desired outlet.
To download your video from CapCut after editing;
- Click on the “Export” button located in the upper right corner of your screen.
- Choose your preferred video resolution level and the frame rate that you intend to use.
- Click “Export.”
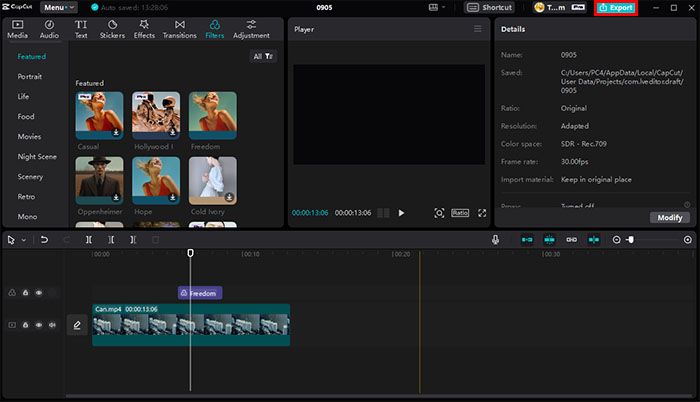

The video will take a few seconds to be exported and now you can access it in your video album.
Transform Your Video Skills Editing with CapCut Editing Pack
CapCut gives you access to a vast library of tools and features that make video editing an exciting activity. Feel free to play around to discover the best options for your video, you can easily experience a whole new world of video editing. Try it out today and transform your capabilities.
Have you tried a CapCut video editing pack? What filters do you use often and why? Let us know below.
Disclaimer: Some pages on this site may include an affiliate link. This does not effect our editorial in any way.