If you’re a regular user of Calendly, then you’ll certainly benefit from payment integration. You can charge people to meet with you in advance, diminishing the likelihood of no-shows, and easily collect payments in multiple currencies through credit or debit cards. Invitees have flexible payment options available to them. Calendly offers a win-win for those looking to receive and offer services with the payment integration function.
Read on to learn more about booking with payment on Calendly.
Calendly’s Payment with Booking
If you own a business where you’re consulting with others or doing anything that involves your time, then there are a few good reasons why this integration will help you.
The first is the convenience of automation. You can collect payments in one place. You don’t have to create invoices or provide a payment link. And you don’t have to deal with the hassle of asking customers repeatedly to pay invoices if they fail to do so.
Another reason is that you’re sure to reduce no-shows. People are unlikely to ghost you if they pay for the time in advance. You don’t have to deal with the aggravation of someone booking, not showing up, and wasting your time. Your time is money, after all.
You also have peace of mind. Knowing the payments are routed to the correct account takes the burden off you. Plus, you’ll receive confirmation that the meeting has been paid for. The receipt is sent to you by Stripe or PayPal, depending on the payment provider linked to the account.
When someone asks for a few minutes of your time, point them to your calendar and note that a payment will be required to book that time slot with you.
How It Works
After setting up the Calendly and Stripe or PayPal integration, you’ll add the payment and event information. The invitee will receive an email and make the payment to schedule a meeting with you. You’ll need to go through two sets of steps to make that happen. You can follow these steps whether you’re using an Android, iOS, or a PC.
- To get started, make sure you’re logged in and go to the Calendly integration page. You can find it by clicking the button on the top right-hand side.

- Then, you can connect your account to Stripe or PayPal by clicking on the “connect” button at the bottom of the page. You’ll be prompted to create one if you don’t have one.


Note that to link the account correctly, a business PayPal account must be set up to accept payments.
Booking with Payment
Now you’ve integrated your account, you can set up the payment for the meeting. Here’s how to do it:
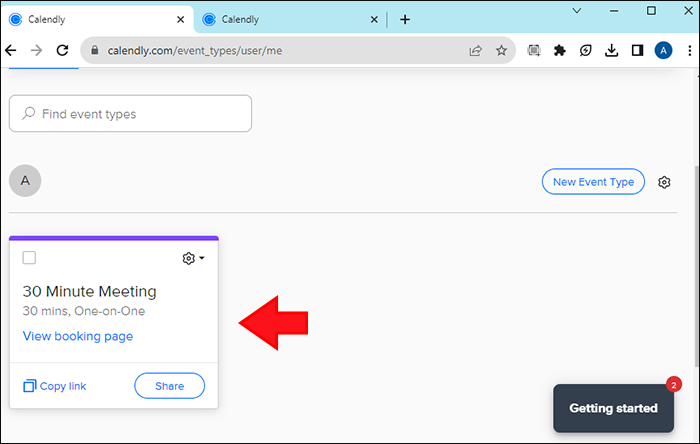
- Select the event type. It might be a 15-minute meeting or a 30-minute consultation.
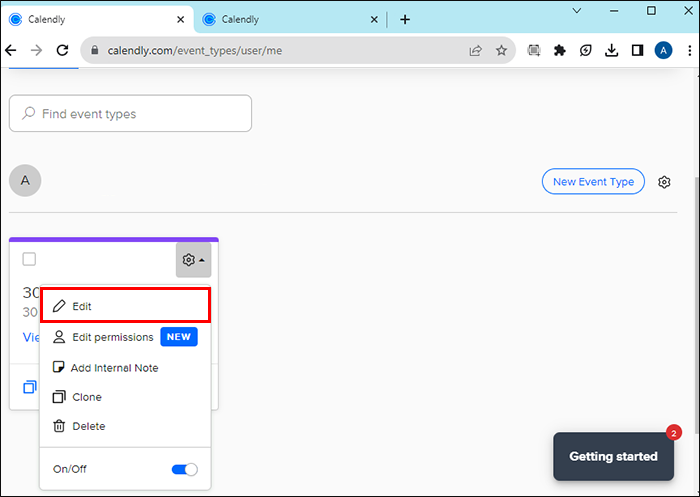
- Click or tap on the “edit” field of your chosen event.
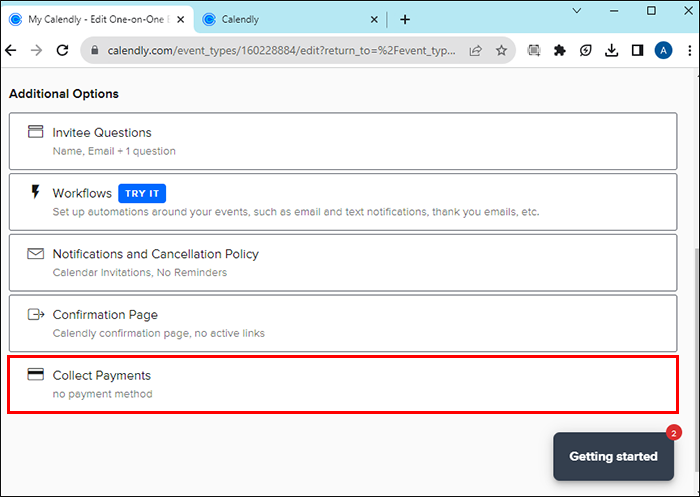
- Scroll down until you see “Collect Payments. “
- You’ll see different options: (1) do not collect payments or (2) accept payments with Stripe or PayPal.
- Choose Stripe or PayPal as your provider and enter the fields.
- You will need to enter two fields: (1) the amount to be collected and (2) the payment terms.
The box under “Payment Terms” allows you to write any exceptions related to the event. For instance, maybe you won’t issue a refund to the invitee if they cancel with less than 24 hours’ notice. Whatever your payment terms, feel free to write them there. The invitee will receive this information with the email. - When you’ve filled out all the information, click the blue button that says “save and choose.” It’s located at the top right-hand side of your screen.
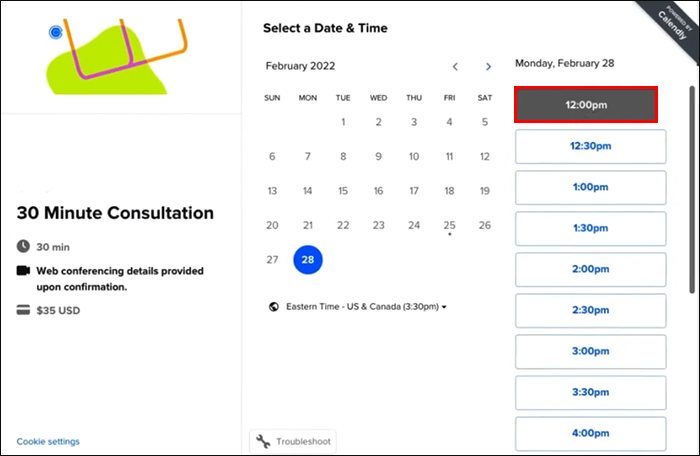
- Select a date and time from the calendar that opens on the next page for the meeting.
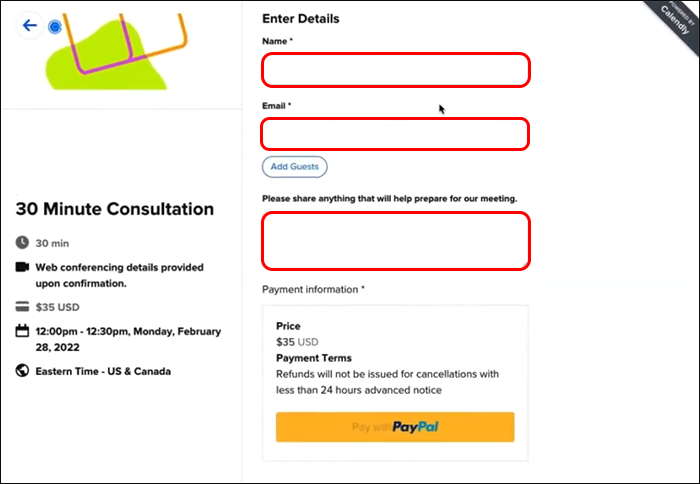
- Enter the details of the person you invite (name and email). When finished, click on the blue button at the bottom of the page that says “schedule event.”
Note there’s also a box directly underneath where you can share anything that will help prepare for the meeting with the invitee. - You’ll be directed to a confirmation page containing all the details about the meeting and the payment. The invitation will then be sent to your email address as well as the email address that you entered for the invitee.


The email the invitee receives contains information about the event and any purchase details that you entered. They’ll be asked for their credit or debit card after they confirm the event time. Once everything is completed, Stripe or PayPal will be automatically routed to your account.
And that’s it. You’ll be ready to start accepting payments.
FAQs
Is the payment integration available for free?
No, this service doesn’t come for free. You can only collect payments from invitees if you have a professional plan. The professional program has other options, including integration opportunities with HubSpot and multi-user functions like groups and event permissions.
Can I disconnect my PayPal from Calendly after adding it?
Yes, you can disconnect by going to the integrations page, and select the option for PayPal or Stripe, and click on the disconnect button. Event types that accept payments will be accessible after you disconnect the account.
Can I put in a discount code for the invitee?
No, there’s nowhere to put a discount code, but you can “clone” an event type that’s public and then enter a different account by classifying it as a “secret event.” Then, you can share the secret event with the unique discounted print with any invitee who receives it so they can access the discounted price. And don’t worry, the private events don’t appear on your landing page, so others can see or choose them.
Who can use the integration service?
Anyone who wants to generate additional revenue by giving advice or doing anything that involves their time. It’s a valuable resource, after all. This is also an excellent solution for freelancers or academics who might have expertise in niche subject areas and want to make money.
Calendly Booking with Payment
Calendly’s booking with payment option is a great way to charge in advance for meetings and ensure you save time and money. Granted, the process involves a few steps, but Calendly makes it simple: log in, connect the account, fill in the event and payment details, and that’s it. You’ll receive confirmation in no time, and the invitee will be able to review the event and payment information.
Have you ever used Calendly’s booking with a payment option? Did you use any tips and tricks featured in this article to set it up? Let us know in the comments section below.
Disclaimer: Some pages on this site may include an affiliate link. This does not effect our editorial in any way.