How to Change the iTunes Backup Location in Windows 10

Originally written September 27, 2020, by Robert Hayes.
Updated March 15, 2022, by Steve Larner to reflect current iTunes backup functionality.

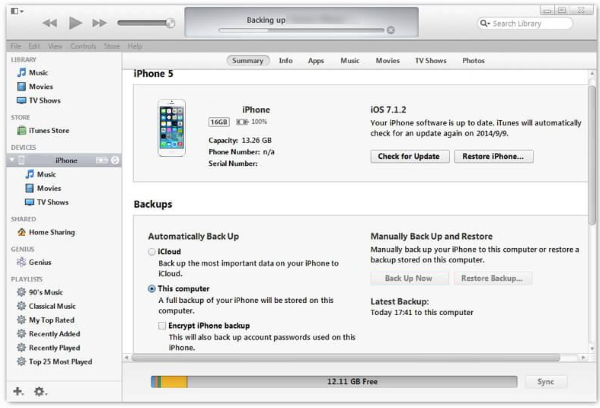
iTunes is Apple’s all-in-one media manager, storefront, and playback app for Mac and Windows. Although some areas of the app are customizable, Apple has a long record of just deciding how certain things will work.

One area where the company decided to rule with an iron fist was setting the backup location for iTunes in Windows 10.

The default iTunes backup folder location when downloaded from the Apple iTunes Download Page is: 
C:\Windows\Users\[username]\AppData\Roaming\Apple Computer\MobileSync\Backup\

However, the website now says to download iTunes from the Microsoft App Store, although they also have a link for downloading older versions of iTunes for Windows, up to version 12.10.11.

There is no setting within iTunes to change your backup location. That’s where iTunes is going to put your mobile syncs and backups, whether you like it or not. However, you can work around the problem by using a symlink.

Many users have a C: partition that includes only Windows and is very small, located on a solid-state drive (SSD) for optimum performance. They don’t want to have an ever-growing accumulation of phone backups clogging up that drive and using up its write cycles.

Regardless of the reasons why you might want to change the iTunes backup location in Windows 10, here is how to do it.

Change the iTunes Backup Location in Windows 10

The way to override iTunes’s backup location requires several steps, including making a symbolic link to fool the app and make it think it is writing to the required location.

In Windows 10, a symbolic link creates a connection between two folders. You create the link at the operating system level, and from then on, anything sent to the first directory in the link (in this case, the default backup location) is instead sent to the second directory (the directory you set up). Here’s how to do it.

Note: The iTunes app on the apple.com/itunes web page is now only for older versions (12.10.11 and below) since they tell you to use the Microsoft Store.

  1. Make a manual backup of the iTunes directory %APPDATA%\Apple Computer\MobileSync\Backup (Apple.com version) or %userprofile%\Apple\MobileSync\Backup (Windows 10 Store version).
  2. Create a new, empty directory such as C:\itunesbackup where you want future backups to go. You can use Windows Explorer or Command Prompt for this step.
  3. In the Command Prompt, change the current c:\ directory to the new iTunes backup one by typing cd [drive letter]\[folder1]\[folder2]\ and replacing the text in the brackets. This example uses cd c:\itunesbackup as the location.
  4. Open File Explorer and navigate to %APPDATA%\Apple Computer\MobileSync\Backup\ (Apple.com version) or %userprofile%\Apple\MobileSync\Backup (Windows 10 Store version). Delete the backup directory.
  5. For the Apple.com iTunes version, open Command Prompt and type mklink /J "%APPDATA%\Apple Computer\MobileSync\Backup" "c:\itunesbackup" with the quotes to make your symlink.
  6. For the Windows Store iTunes version, open Command Prompt and type mklink /J "%userprofile%\Apple\MobileSync\Backup\" "c:\itunesbackup" with the quotes.

You now have a link between the two directories (the untouchable iTunes backup folder and your new symlinked folder). Your iPhone backups will now go to C:\itunesbackup or whatever directory you have chosen.


In closing, if you have an Apple device or are switching over from Mac to Windows, backing up your iPhone is still possible using the suggestion above. Furthermore, it makes for an easy transition. If you don’t have an Apple device or any history with iTunes, there are better ways to manage your media.

Do you know of any ways other than symbolic links to change the iTunes backup location in Windows 10? Tell us about it below if you do!

30 thoughts on “How to Change the iTunes Backup Location in Windows 10”

Rod says:
Works great, first time, thanks!

Apple really should give users the advanced option of choosing their backup location. So many devices now have small fast SSD’s and larger, slower backup storage.

Muhammad Adnan Yaseen says:
Thanks it Worked for me easily, just need to understand the junction thing.
Dieter says:
worked well
guess one needs to type exactly what is written here, to the last ” or /
iTunes now sees the new location

thanks for your time and effort to document this

Al says:
Step #6 above is missing a matching first double quote
Steve Larner says:
Thank you.
Pat says:
Thanks Robert
That worked perfectly remembering to delete the original backup file as advised above.
I created the backup on my D: drive and that’s where the files are stored; however if you query the original backup folder on the C: drive you can see what appear to be duplicates. This is because the folders are linked; if you check the disk usage on the C: drive there is no additional space used for the backup.
DE says:
Thank you for the clarification here because I thought it wasn’t working right!!
Areeb says:
I have existing backups on my device. If I setup the link, will the existing backups be transferred?
Steve Larner says:
No, existing iTunes backup files do not transfer to the new location.
Anthony R Montoro says:
As of May 2022, following instructions exactly as they are written, this did not work correctly. The source directory is on drive C and the destination directory that it was linked to is on drive D. When files were copied into the source directory on drive C, the files wound up in both directories on the C and the D drive reducing the amount of space on both drives by the exact size of the files, 5 GB. Any suggestions?
Steve Larner says:
What do you mean? What didn’t work correctly? It took them and backed them up on D: drive, right?
Guest 47 says:
Anthony R Montoro, I do not experience what you have described. The default iTunes directory (%APPDATA%\Apple Computer\MobileSync\Backup) is symbolically linked to your target directory (e.g. d:\iTunesBackup). For all intents and purposes, the data looks as if it is in the default iTunes directory when it is in fact in the target directory. This is how iTunes is “tricked” into writing to the target directory. Is it possible that you are also “tricked” into thinking it is writing to the default directory when in fact it is not? What you should do is to monitor the free space in your C: drive as well as your target drive (e.g. D: drive). If it is working properly you should see the free space in C: drive remain unchanged, but the free space is decreased in your target drive.
Keaton says:
works 5/15/2022 with an iPad Air 2!
Annonymous says:
Hope we can restore it from newly chaged back up location…???plz answer
Nazmul Hoque says:
Very Useful and important info, I already try this works fine.
K. Lee says:
I have 2 identical backup files in the original iTunes backup folder & the new backup folder, anyone knows the reason?
Steve Larner says:
Perhaps one of your devices suffered from a glitch and it thought the files were different due to some slight glitched difference between them.
TreyStay says:
Hey guys,

This method still works 100% in November 2021. You just have to account for a couple of things like the new path of the Backups folder. Make sure to create the folder (right click > new folder) that you’re linking to. In my case, I was linking to a folder on my E drive and had to create this E drive folder manually.

The command I used was: mklink /J “%userprofile%\Apple\MobileSync\Backup” “e:itunesbackup”

Ash says:
I have had the exact same issue, it has recent mobil syncs in both my C and secondary drive.
Ryan says:
To anyone getting the error message, “Cannot create a folder where one already exists” (paraphrased, partially, you get it), make sure you have the deleted “Backup” folder in the path name when typing in the mklink command. Even though you’ve already deleted it, you still need to type it in the path as if you hadn’t deleted it. This was my problem; I had C:\Users\username\AppData\Roaming\Apple Computer\MobileSync typed in, when it should have been C:\Users\username\AppData\Roaming\Apple Computer\MobileSync\Backup. Once I realized this and did it that way, it worked, though overall this method still lacks because it still creates a new backup folder in its default directory when you start backing up. Hope this helps anyone who hasn’t figured it out yet.
Matt says:
Respect to the guy who made this. Still works in July 2021 with iPhone X. You just have to make sure you use the right directory for where itunes stores the back ups by default.
Jay says:
In regards to iTunes on the computer. There is two different ways to get iTunes on Windows 10 . One is to download the Windows Installer version from the web. The backup location mentioned above is correct. However the version installed from Microsoft App Store installs to the following location:
C:\Users\\Apple\MobileSync\Backup

Tip: Rename the backup folder to .old or -old or something different than backup.
When running the mklink command above, it will create the link name as backup.

I am running this on Windows 10 Pro 21H2 with no issues.

Leonard says:
Thanks a great deal Robert. Worked so well. Just 2 things to look out for:
1. When changing directory, in case you are switching to another drive like d, use:
cd /d d:\itunesbackup. The cd /d command ensures that you change directory drive.
2. Ensure you type the mklink /J command as it appears in the screenshot provided, not the text which omits some of the “\” characters e.g.
mklink /J “C:\Users\USERNAME\AppData\Roaming\Apple Computer\MobileSync\Backup” “E:\Mobile backup\iPhone Backup”
Kim Darrel Aguilar says:
Thanks! this works as of May 26, 2021
Tony Pam says:
Did all this. Now when I backup another iPhone it simply creates a new Backup folder at the original directory and put the backup there. This is so crappy even coming from Apple. By now I give up. I’m just gonna make the backup then move it to another directory for storage, and move it back whenever I need to restore. Apple is horrible.
Geoff says:
I followed all the correct steps carefully and the backup now goes to the new directory as required. HOWEVER, I still get a copy of the backup saved in the original location – so there’s no saving at all in disc space. Any ideas?
Eddy Frendowski says:
thanks dude..solution done.. now i can backup my data to pation “D”
i try your step almost 4 hours and is succesful.. xD
Adnan Amer says:
I tried the code but it gives me this error.
Cannot create a file when that file already exists.

Can somebody help me on this?

Truong Vu says:
Delete the original itunes backup folder or rename .old
Jhie Philips says:
Thanks Man! Will Backup my file Later! Get Frustrated how apple apps is very Non User Friendly. No Freedom at all. Just Buy iphone of my sister! REALLY HATE the PRODUCT! Well, Thanks again!
Wendy says:
I followed the instructions – but now I get this error:

C:\>mklink /J “c:Windows\users\wendy\appdata\roaming\apple computer\mobilesync\Backup” z:\MobileSync\Backup

Local volumes are required to complete the operation.

I did make sure the external hard drive appears under This PC. The external hard drive is mapped to my Z drive:

USB_Storage (\\readyshare) Z:

I’m on iTunes Version 12.11.0.26

Maximo says:
Hi wendy, did ypu find the way to solve this?
thank you
Andrew says:
I had to rename my original backup directory backup-old before this would work.
Then I had already created D:\ItuneBackups
In cmd window (I used administrator)
mklink /J “%APPDATA%\Apple Computer\MobileSync\Backup” “D:\iTuneBackups”
Faiiz says:
Try run admin the CMD
Liam says:
Has anyone found that this redirect is no longer working on a recent Itune update ?

I’m on Vers 12.10.8.5

Paul Becht says:
Hi Liam,
As mentioned in the posts below.
The default backup drectory in your iTunes version is ‘C:\Users\YourUserName\Apple\MobileSync\Backup’
Danny says:
Yes, I’m experiencing the same thing. It doesn’t work with new updated iTunes. Anyways to make it work on the new version of iTunes?
Harnoor says:
I Will Work On Latest iTunes I tried And Succed
Lio says:
they really did that pfff, I had already done this manip and it worked perfectly but then I’ve just done it again thanks to you (many thanks btw) and then I found the old location of backups in appdata and new in apple/mobilesync which are both not used anymore > 80 Go freed… Thank you apple -_-
LX says:
this was terrible. it did not work. how are you going to remove the apple itunes back up directory and then ask the system to link the directory you just deleted to one you just made?
i erased all my back ups. i should have read the comments. fsmh
Bryan Dawson says:
I followed instructions exactly, and the link was created, however, when I started my backup, nothing went to the new location or old location where the new link lives, but my C drive space is dwindling indicating that the backup is going somewhere on my C drive, which does not have the free space for my massive 3GB iPhone backup. Please help. I am a novice at all this so talk to me like im 3, lol.
Paul Becht says:
Hi Bryan,
I followed the instruction several weeks ago and it worked just fine.
Today I installed a new iTunes version (12.10.8.5) and the software reported it couldn’t find my backups.
My impression is that iTunes has changed its default diretory for backups. I expect that in a few days the new directory will be mentioned in one forum or another.
In
Bill says:
This doesn’t work if you are trying to use a separate drive (for example i currently have backups in C Drive and wanted to move to D drive. CD does not allow me to create the new location
robert says:
problem solved! thanks
Ryan says:
you have to put D/ before typing the new directory

example: cd /d D:\yournewbackupfoldernamehere

If I’m understanding your issue correctly

Art says:
The backup trick works like a miracle! Thank you so much!

PS: the only thing I needed to adjust is the location of itunes’ files as in my case in Win10 the path is different:
C:\Users\YourUserName\Apple\MobileSync\Backup

GABREL ROBERT says:
This works. Thanks Art.

tldr: What the author meant by “remove the Backup directory and its contents.” is just delete the damn “Backup” folder.

mklink /J “%APPDATA%\Apple Computer\MobileSync\Backup” “c:\itunesbackup”

The above command will create a new “Backup” and link it to your new preferred directory. Hence why u need to delete the folder first.

jobe1111 says:
SO, I am on Windows 10 v 1908 and iTunes Version 12.10.5.12 Installed via download from Apple. I used the mlink feature and have linked the backup drive on my small SSD C drive to a different folder on a larger internal D drive. Right now backups are MIRRORED, or at least appear to be. Either way, windows THINKS that the files are also on the C drive and is reporting that I am critically low on storage space. Is there a work around for this?
Fatih Anıl says:
Thank you, this hacking is right for me. i have just an addition about this issue is on Windows 10 version 1909 the directory which Itunes backup is different what you meant. The folder location on my computer is; “C:\Users\USERNAME\Apple\MobileSync\Backup”. My Itunes version is 12.10.5.12. Thank you very much.
Kevin D Kaufman says:
Thanks Robert! Recently I had to recover from a corrupted Windows 10 profile … searched for this topic … found your article — worked perfectly.
holly says:
I am getting error msg as follows:
“Cannot create a file when that file already exists.”
kk says:
you need to remove the original backup folder first.
gp says:
that was doing my head in but yes the backup folder thanks kk
Hicham says:
Working like a charm

Leave a Reply

Your email address will not be published. Required fields are marked *


Disclaimer: Some pages on this site may include an affiliate link. This does not effect our editorial in any way.

Todays Highlights
How to See Google Search History
how to download photos from google photos