If you spend a lot of time browsing online, you might be wondering why your Chrome tabs keep refreshing, and whether there’s anything you can do to stop it. That annoying flickering out of the corner of your eye does drive some people mad. You might not know it, but Chrome has its own memory management function, known as “Tab Discarding and Reloading,” that helps to pause inactive tabs so they don’t use up too many resources. This works alongside Chrome processes to try to reduce the significant overhead the browser brings with it. The idea is to save as many resources as possible for all types of devices. Chrome will load the page when you request it and keep it in memory. If you have lots of spare RAM, it will sit there until you need it. If you begin using up your RAM, the tab is put to ‘sleep’ and the memory released to be used elsewhere. Then, when you want to use that particular tab, Chrome requests a fresh page from the web rather than using the local one in memory. This is why if your internet goes out you can still se the last update of the page as long as you don’t manually refresh it.
By saving your RAM and decreasing your CPU load, you can stop your tabs from refreshing and help speed up your Chrome experience significantly. No matter whether you’re on a brand-new laptop or an older PC with limited RAM, memory can be a scarce resource that is always in demand. If you use lots of tabs and push your memory to its limits, this can result in a lot of data being requested over and over again. While most of the time this results in a minor annoyance, if you’re filling in an online form or using a shopping basket in an online store, this can really ruin your browsing experience. So, we’ll have to take a look at fixing our Tab Discarding and Reloading to solve this.

Tab Discarding With an Extension
Unfortunately, the chrome://flags/#automatic-tab-discarding option has been deprecated and removed from the current version of experimental features available to use in the browser. So, the only option is to download a Chrome extension to do the job for you.
- Open a new Chrome tab, type ‘chrome://extensions‘ into the Search bar and hit Enter.
- Now, click on the main menu in the extension’s page, it’s the three horizontal lines icon next to Extensions.

- Next, click on Open Chrome Web Store at the bottom of the side window that appears. You can also access the Google Chrome Store directly via the url, but it’s nice to have several options to choose from.

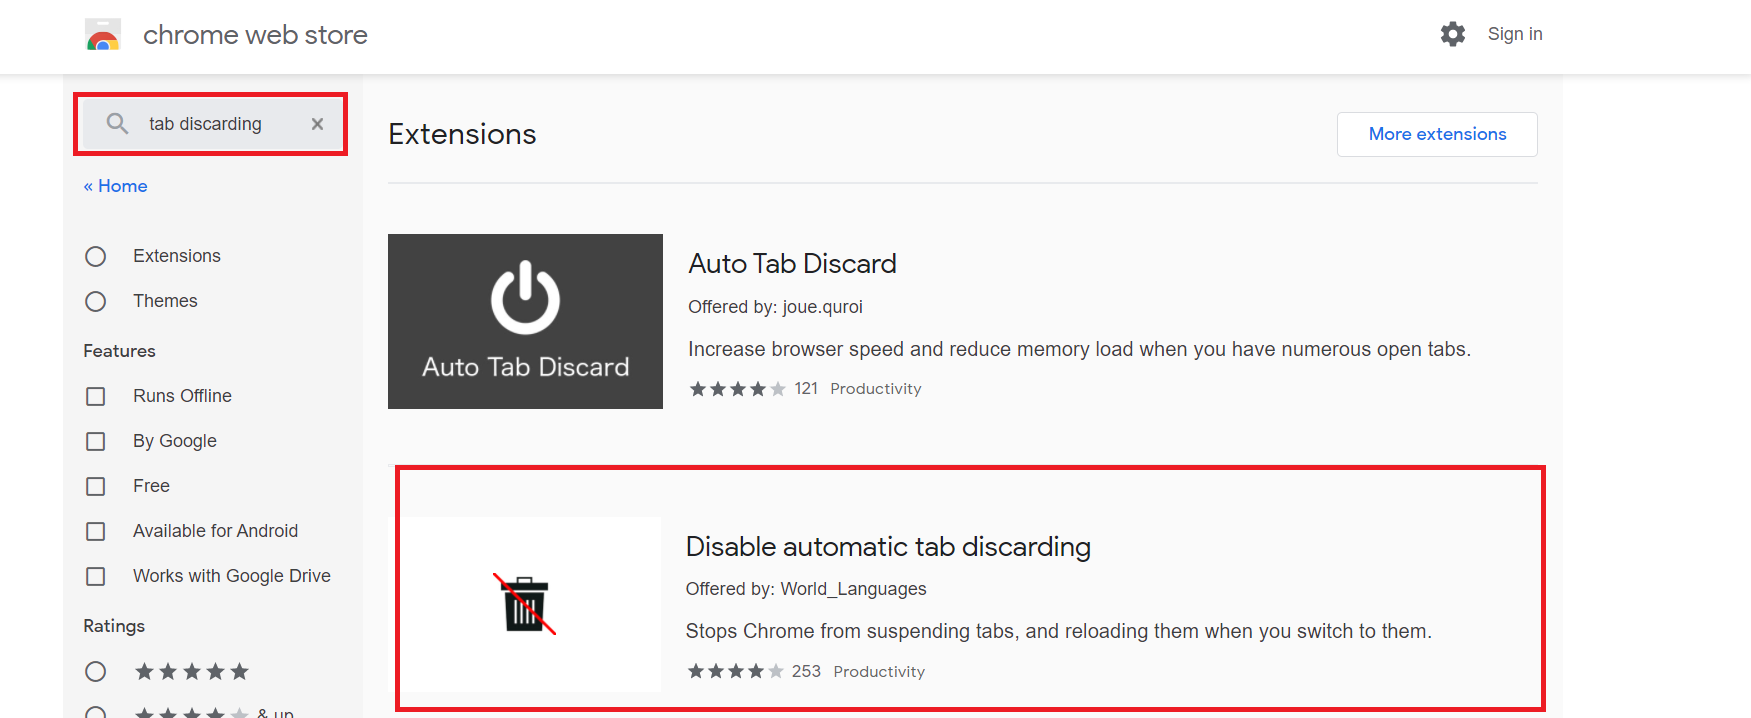
- Type ‘tab discarding‘ into the Search bar and then select Disable automatic tab discarding from the list of extensions.
- Click Add to Chrome to install the extension to your browser.

This extension will perform the process covered below every time a new browser is opened, but if you don’t like installing a bunch of third party apps to your browser, then continue reading to see how the process is done manually.
Turn off the Auto Discardable Feature on a Tab Manually
If you want to know more about Chrome and tab discarding, there is a neat page that tells you all about it within Chrome, and, also provides a way to turn off the auto refresh on inactive tabs in your browser.
- Open a new Chrome tab.
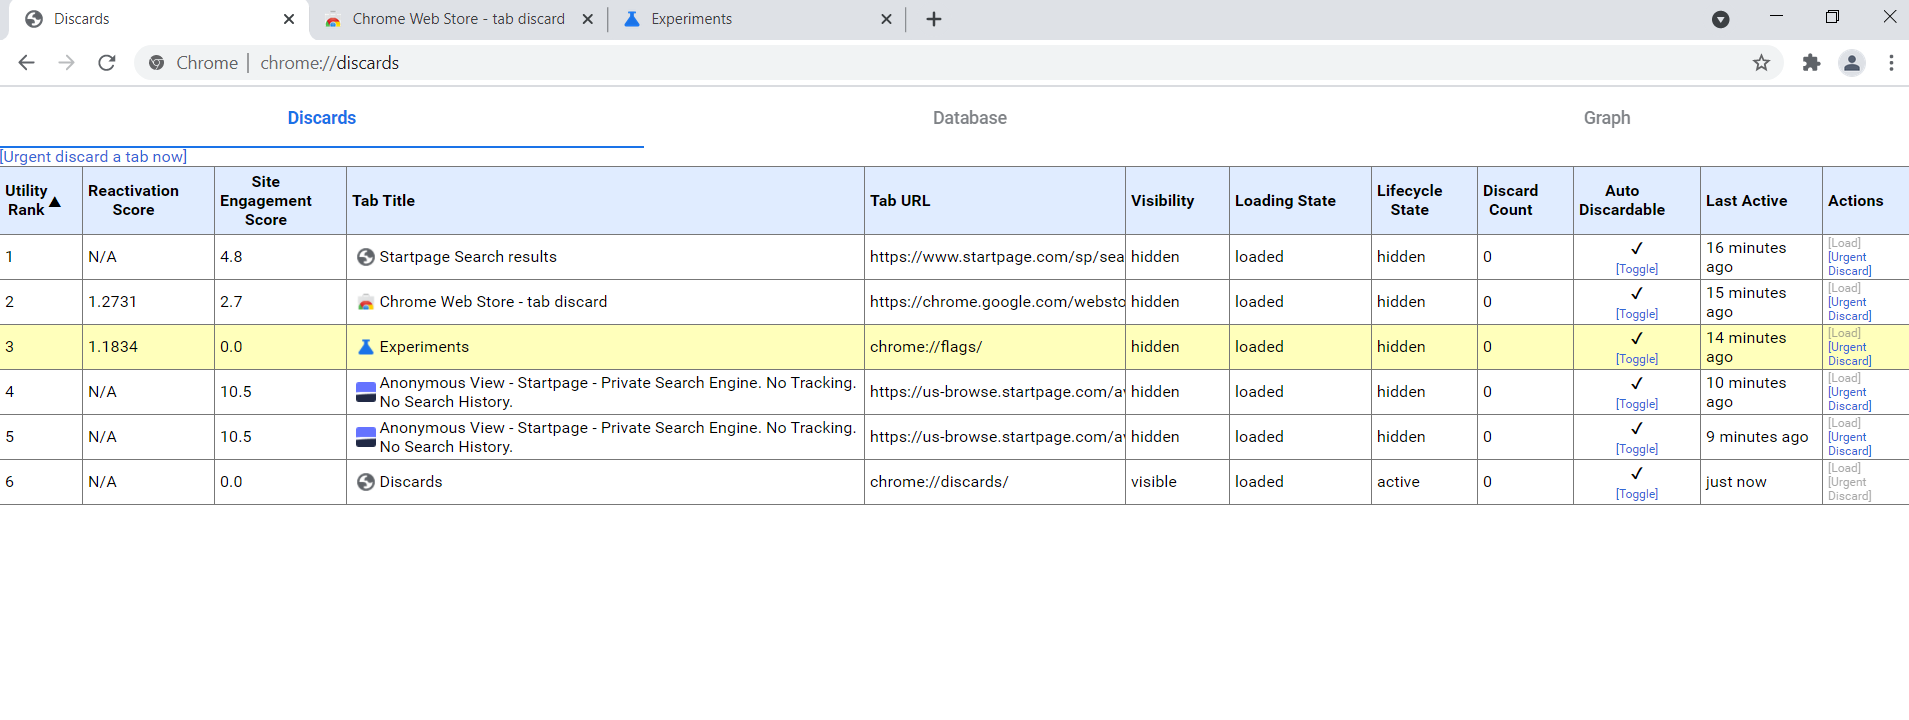
- Paste ‘chrome://discards’ into the Search bar and hit Enter.
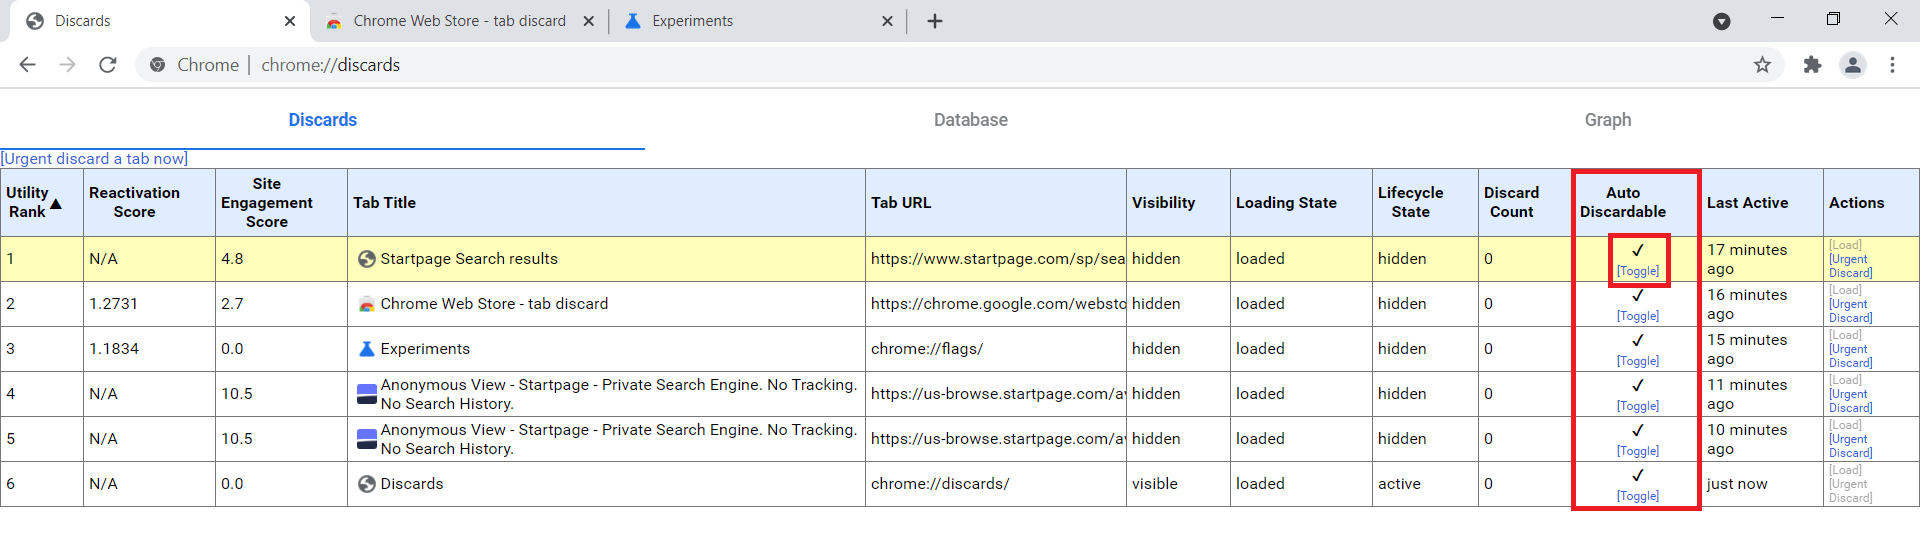
- Now, locate the Auto Discardable column and click on Toggle under the checkmark of the tab you want to disable it on.
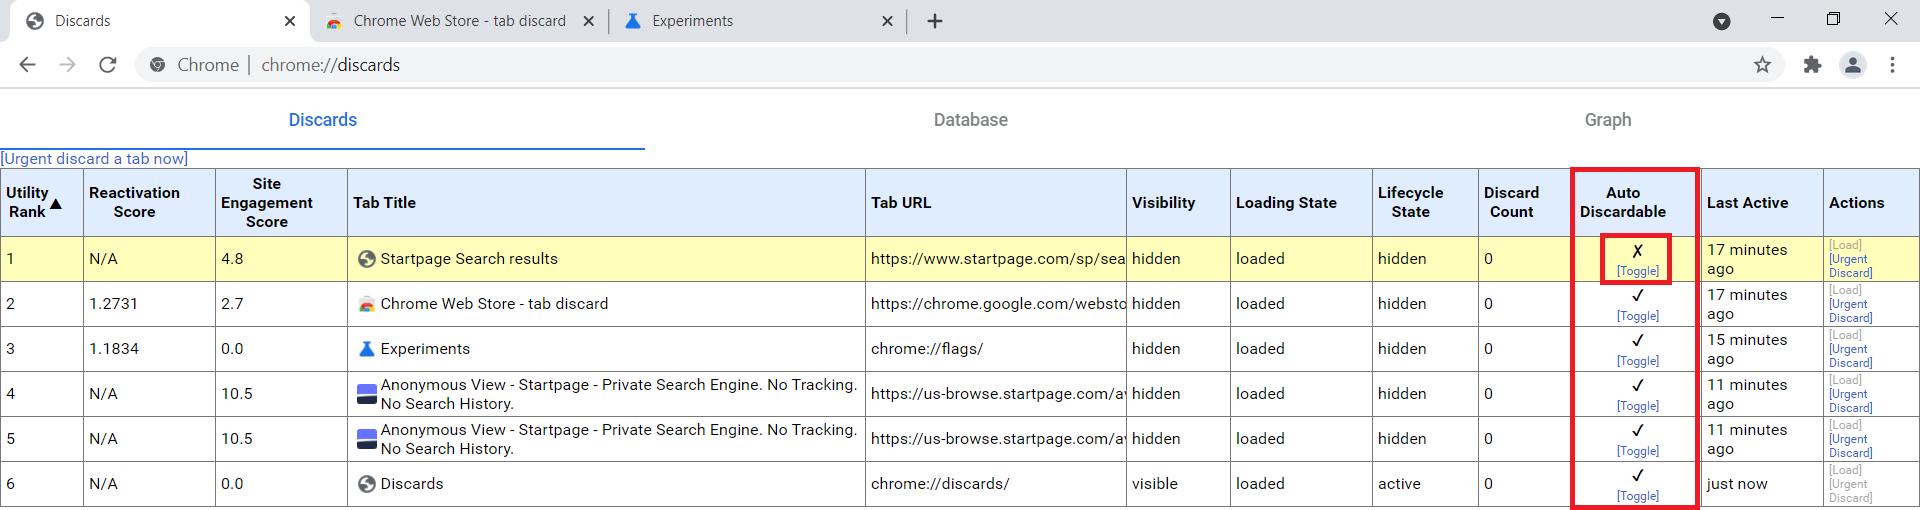
- You should now see an X above the Toggle option for the tab.
- Repeat this process for any other tabs you need to.
Note: This isn’t a permanent setting, you’ll need to repeat this process every time you open a new Chrome browser.
If you want to turn off automatic tab discarding and your PC begins slowing down, you can either shut down some tabs or check this page to see which tabs have been open for what amount of time. If you select the Database tab on the page, you can even see how much memory each tab is using. This could be useful if you need to free up some RAM.
Just identify a tab with the most memory footprint, go to Discards and select Urgently Discard for that tab. Check and see if this helped you. If not, rinse and repeat until your device returns to normal.
I will be honest and say that the vast majority of users should leave automatic tab discarding enabled on their devices. That is especially true if you’re on a mobile. Only if you find the refresh delay really annoying or are into shaving kilobytes from your data plan do you need to mess with this. Otherwise, this is one of those settings that is best left well alone.
Have you disabled automatic tab discarding? Does it make life better? Tell us your thoughts below!
Disclaimer: Some pages on this site may include an affiliate link. This does not effect our editorial in any way.