As smart technologies keep advancing, the visual entertainment spectrum also keeps broadening. Most people prefer enjoying content from larger displays. If you’re using your PC to watch live-streamed content and want to broadcast the content on your TV without the help of software applications such as Chromecast, an HDMI cable provides the perfect solution.
But, at times, the computer can fail to detect and connect to the TV over the HDMI cable. This connection failure can be frustrating and is bound to dampen your entertainment experience.
This article provides insightful information that will help you troubleshoot issues that may come up when you try to connect your computer to your TV using the HDMI cable without success.
Troubleshooting Guide
Sometimes issues occur when setting up your computer-to-TV connection using a HDMI cable. The issue often results from the computer failing to detect the TV because it can’t pick up your TV’s signal through the HDMI. Thankfully, there are tried and tested solutions to this problem. The troubleshooting options below can quickly help you resolve the issue.
Double-Check Your HDMI Connection and TV Input Settings
Your computer can detect your TV if your connection setup is correct. Checking your computer manual can assist you in modifying your computer settings if you’re new to this. Here’s how you can double-check your connections and settings:
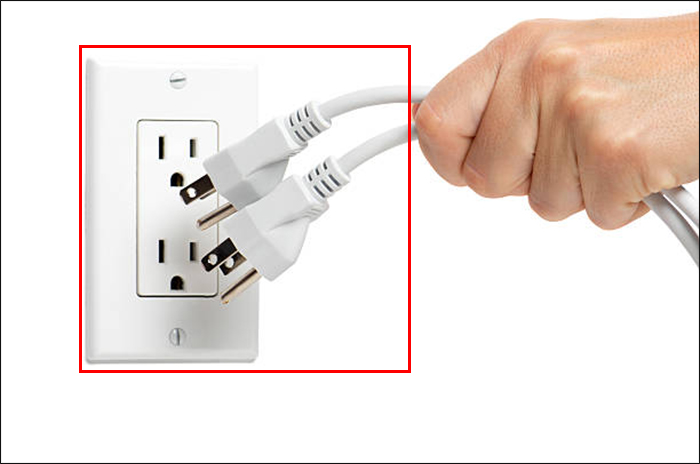
- Unplug both your TV and computer from the power source.
- Switch on your TV first, then your PC.

- Depending on your TV model, select “Input” or “Source” to browse through your input connection options.
- Ensure that you’ve selected the correct option. Locate the input ports on the side or back of your TV to ensure the input sources match the input selection on your TV.
- Detach your HDMI connection from your computer and TV and reconnect the plugs and ensure that the connections are secure.
- Check whether the issue is resolved.


If this fails, you can try a different HDMI cable or change the port setup.
Activate Your TV Input Signal Function
Enabling the input signal function on your TV will help your PC detect it faster by strengthening your HDMI signal connection. Follow the steps below to execute this task:
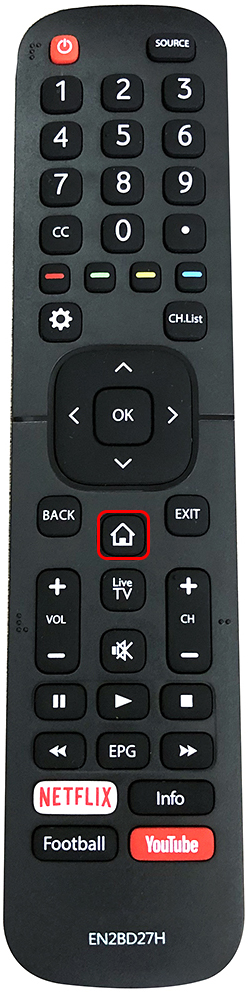
- Select the “Home” button using your TV remote.
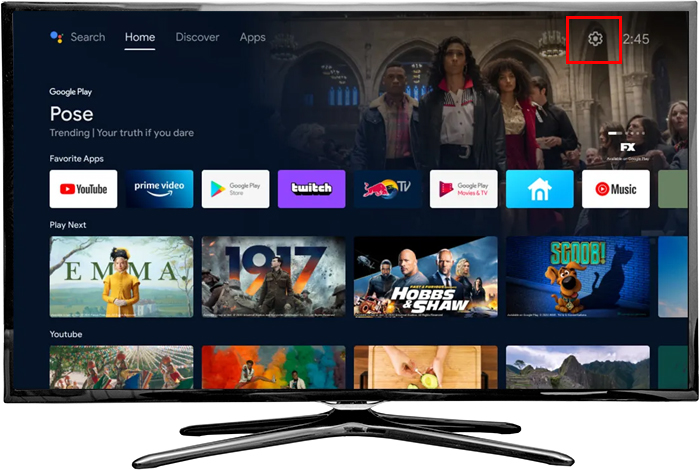
- Locate “Menu” under the “Home” options and choose “Settings.”
- Go to “All Settings.”
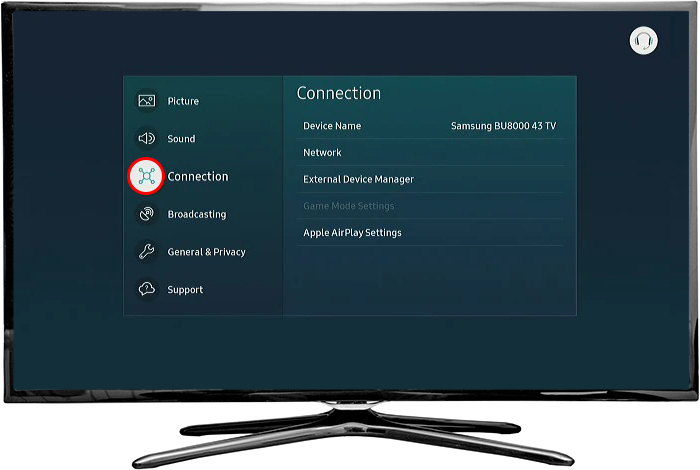
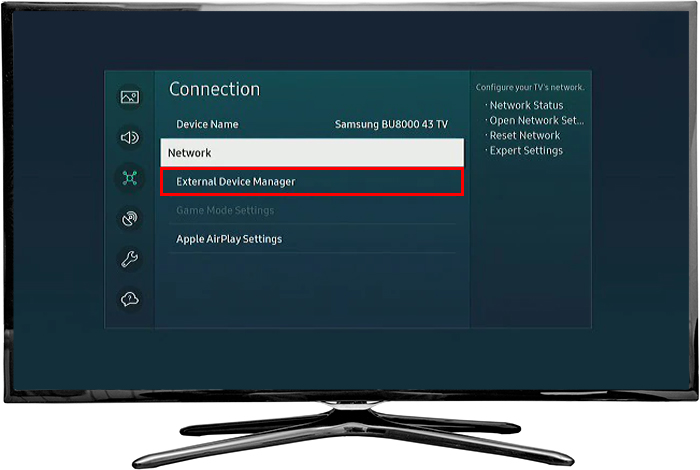
- Select “Connection.”
- Choose “External Device Manager” on the “Connection” menu.
- Select the “Input Signal Plus” option located on the right of the “Connection” window.

If the pre-check troubleshooting routines listed above fail, you will have to advance to more solid troubleshooting options, as highlighted below.
Restart Your Computer
Rebooting PCs is considered the easiest and most efficient way of resolving most temporary glitches affecting your computer’s connecting power. This method applies to your TV HDMI connections too. Here’s how you can restart your computer:
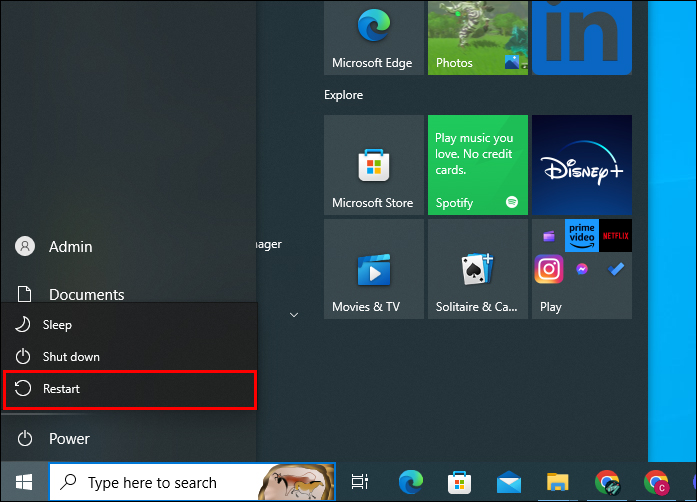
- Power on your TV.
- Set up all TV and HDMI connections correctly and select the “Restart” option on your PC located in the “Power” menu.
- Use your TV remote to double-check input settings and select HDMI as the default device on your computer.
Detect TV Display Manually
Your computer can fail to detect your TV through an HDMI connection if the TV display model is outdated. In these circumstances, you’ll have to detect the display manually. Here’s how you can achieve this using Windows 11:
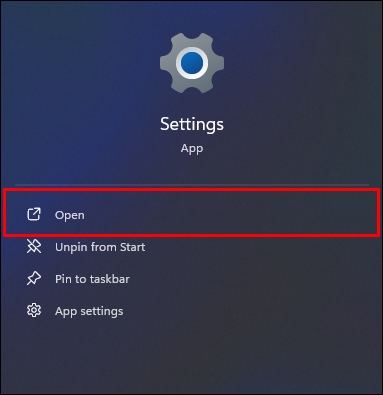
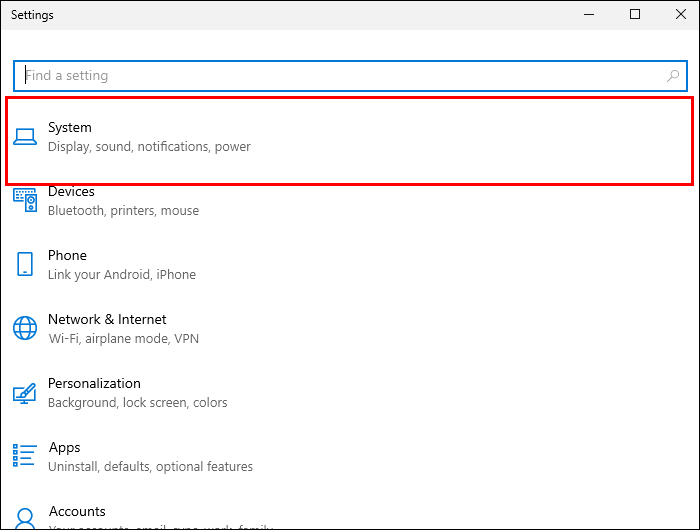
- Open “Settings.”
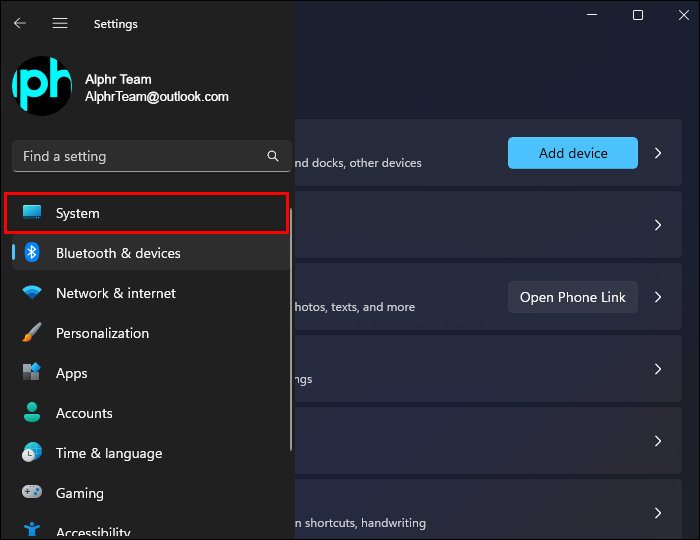
- Select “System.”
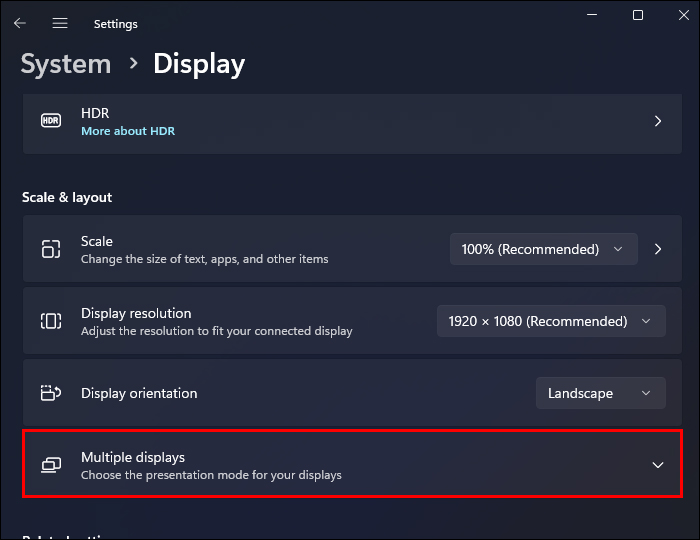
- Go to “Display.”
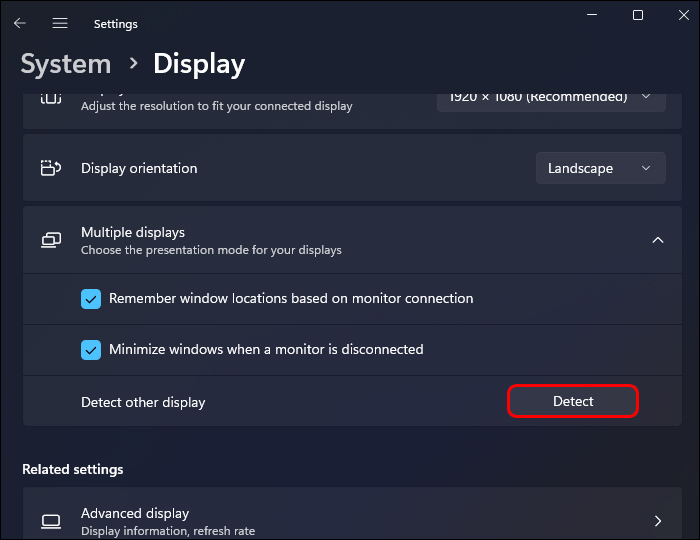
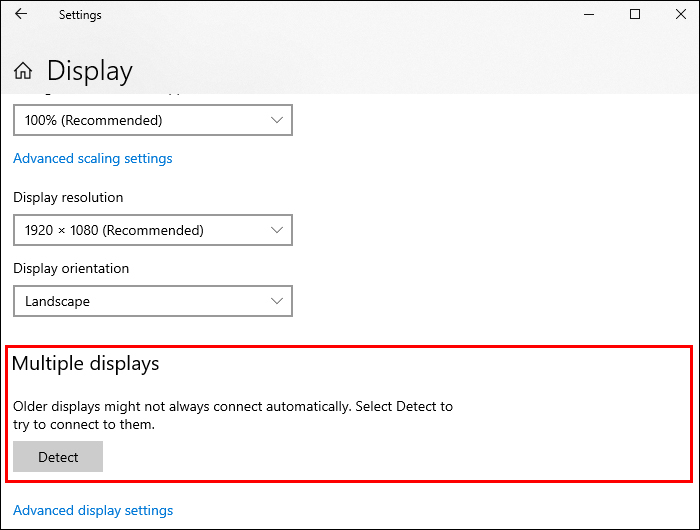
- Scroll down the pane to the right of the “System” window and select “Multiple displays.”
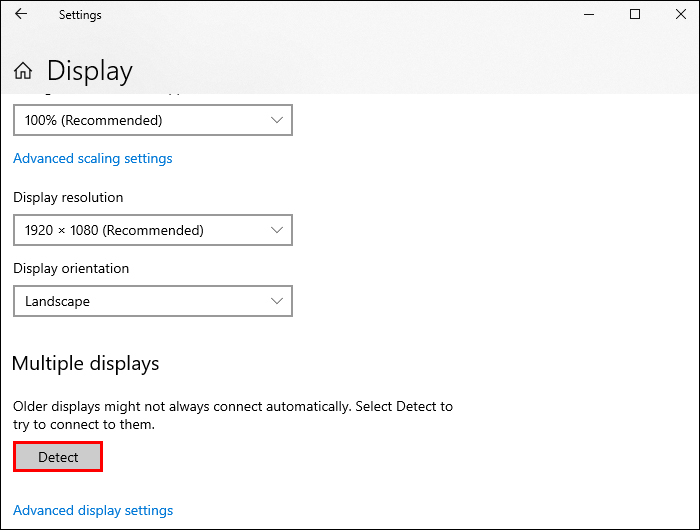
- Click the “Detect” button next to the “Detect other display” option.
- The setup is complete. Re-try the connection to check whether the issue is resolved.

If you are using a Windows 10 PC, you can follow the steps below to detect your TV display manually:
- Simultaneously press the “Windows” and “I” keys to open “Settings.”
- Go to “System.”
- Choose “Display.”
- Navigate to the “Multiple Display” button on the right pane.
- Click on the “Detect” button.
- Check whether your PC now detects your TV HDMI connection.


If the issue is unresolved, try out the next solution.
Inspect Your PC Projection Settings
Windows 10 and 11 users can select a projection setting from several options. When your computer isn’t able to detect your TV through an HDMI connection, the enabled settings may apply to “PC Screen Only.” The list below highlights all the projection modes you can choose from:
- PC Screen Only: This option is only ideal for users without a secondary display for their content. Your TV can’t display anything if this option is enabled.
- Extend: If you want your content displayed on multiple displays, this is the best option to activate. It’s ideal for party occasions where a large group is involved so that everyone can enjoy the big screen.
- Duplicate: This option allows you to project your PC screen on a secondary display unit.
- Second Screen Only: You can project your secondary TV or monitor only using this option.
Here’s how you can set up your preferred projection mode to fix the computer not detecting TV through HDMI issue:
- Simultaneously press “Windows + P” to open the projection settings menu.
- Select your preferred projection mode.

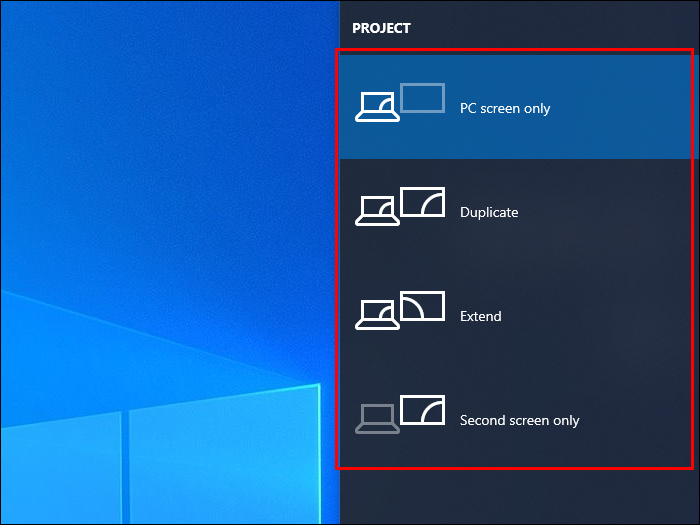
Remember that the “PC Screen Only” mode doesn’t support your computer-to-TV HDMI connection. The “Second Screen Only” is your best option. But, if it fails, you can try the “Extend” and “Duplicate” options.
Update Your Graphics Display Driver
If your computer’s graphic driver is outdated, it can fail to detect your TV through the HDMI connection. The steps below will help you make the necessary driver updates:
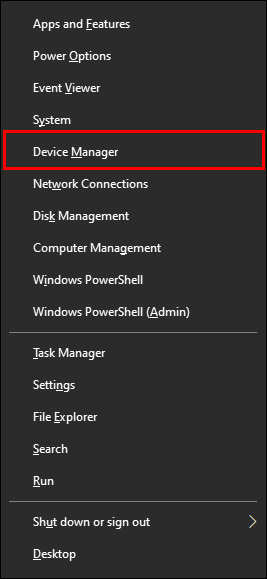
- Open the “Windows Quick Access Menu” by pressing the “Windows + X” keys simultaneously.
- Click on the “Device Manager” button.
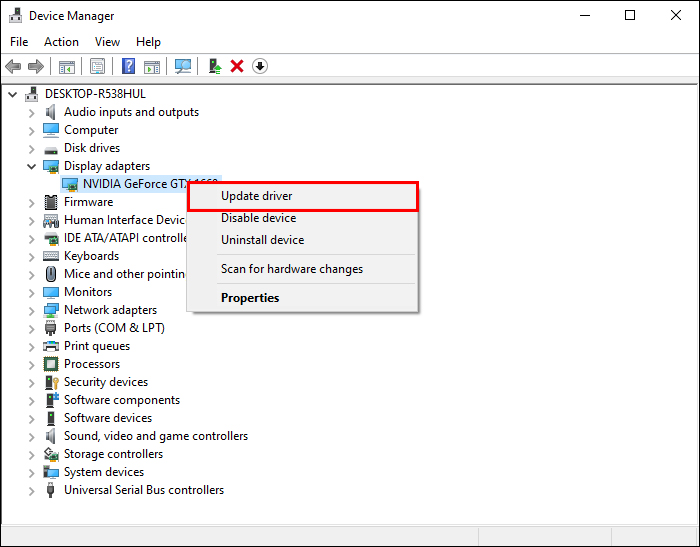
- Navigate to the “Display Adapters” and click on it to highlight the driver options on your PC.
- Select the graphic driver you want to update and click the “Update Driver” option.
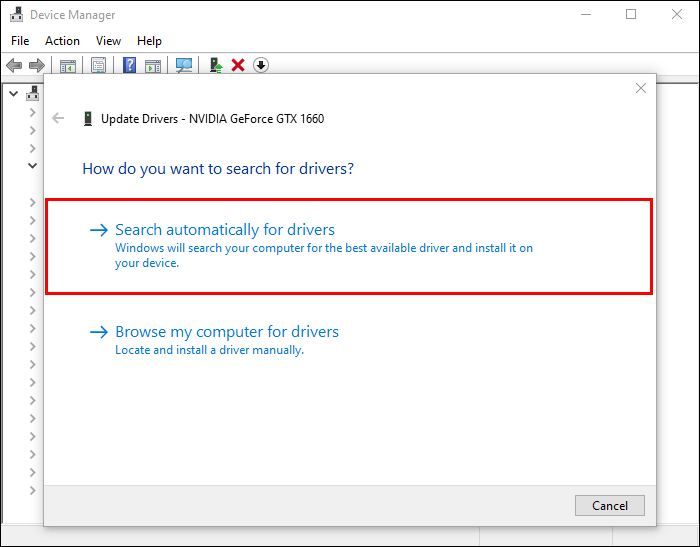
- If you’ve got internet access, click on the “Search automatically for drivers” option under the “Update Drivers” window.
- Select the “Browse my computer for drivers” option to locate and install the graphic driver software manually.


Check whether your PC can detect your TV over the HDMI connection again. If not, try out the next option.
Troubleshoot Hardware and Devices Setup
The “Hardware and Devices Troubleshooter” can help you rule out all issues you may suspect to be ailing your computer and fix any flaws in the hardware devices. Here’s how you can run the “Hardware and Devices Troubleshooter”:
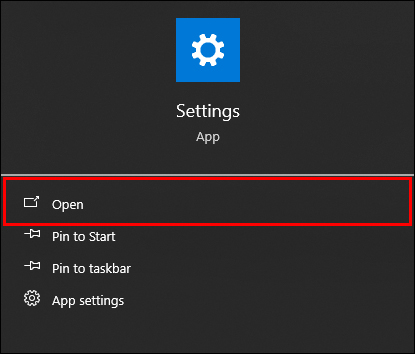
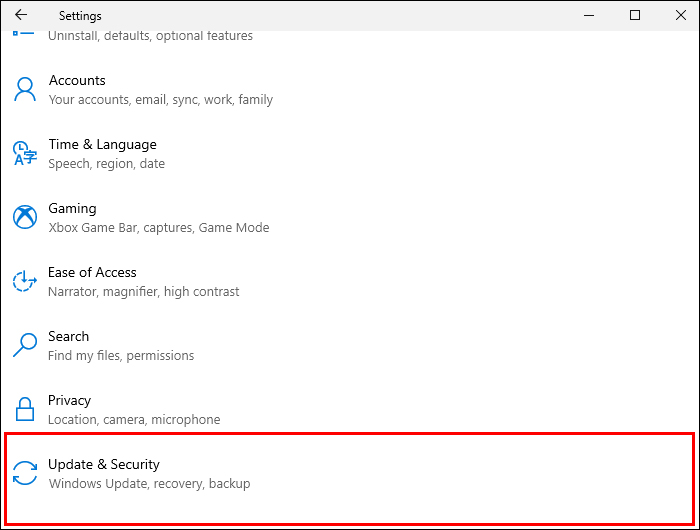
- Open “Settings.”
- Navigate to “Update & Security.”
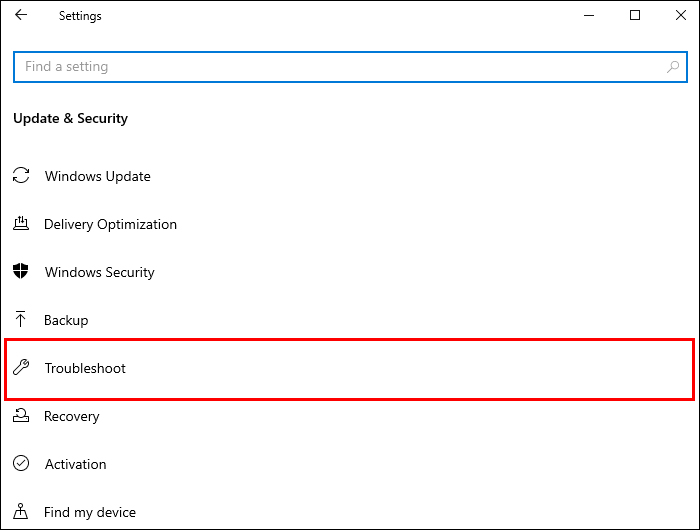
- Select “Troubleshoot” on the left pane of your “Settings” window.
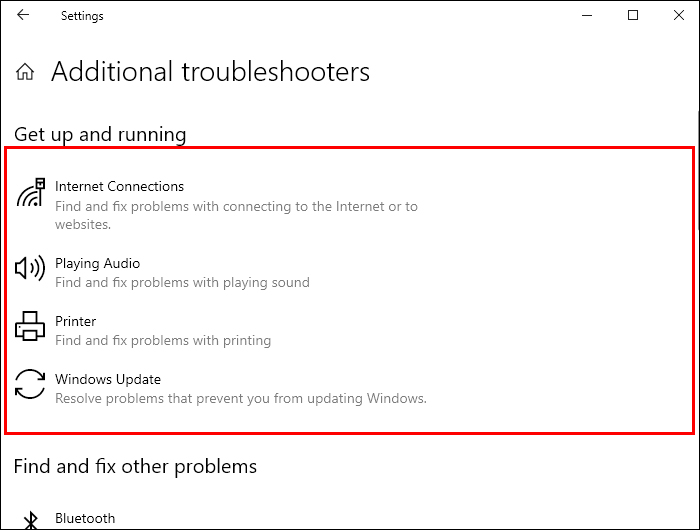
- Choose “Hardware and Devices” on the right pane to expand the window.
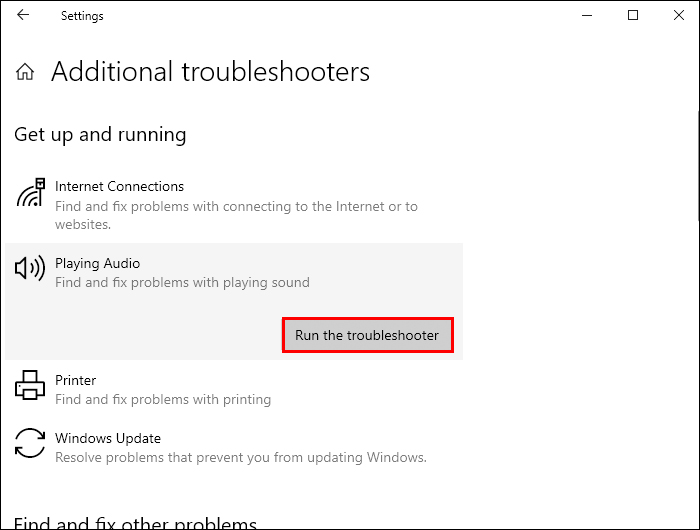
- Click on the “Run the troubleshooter” option.
Elevate Your Entertainment Experience
Larger displays make for a more entertaining experience for most people. An HDMI cable provides an excellent interface to watch content from your PC to your TV, but a failed connection between your PC and your TV can be pretty frustrating. The troubleshooting options listed in this article will help you to fix the glitch and elevate your entertainment experience. However, if these options fail to yield positive results, you may have to seek professional support.
Have you tried out any of the troubleshooting options listed in this article? Would you advise someone to use an HDMI cable to support computer-to-TV connectivity? Let us know in the comments section below.
Disclaimer: Some pages on this site may include an affiliate link. This does not effect our editorial in any way.